Tech
InTheGarageMedia.com
BY Ryan MansonPhotography BY THE AUTHOR
A Blue Oval, Abridged Title Typography
Part 1: A Kit Takes the Guesswork Out of Trimming a Longbed Effie
F

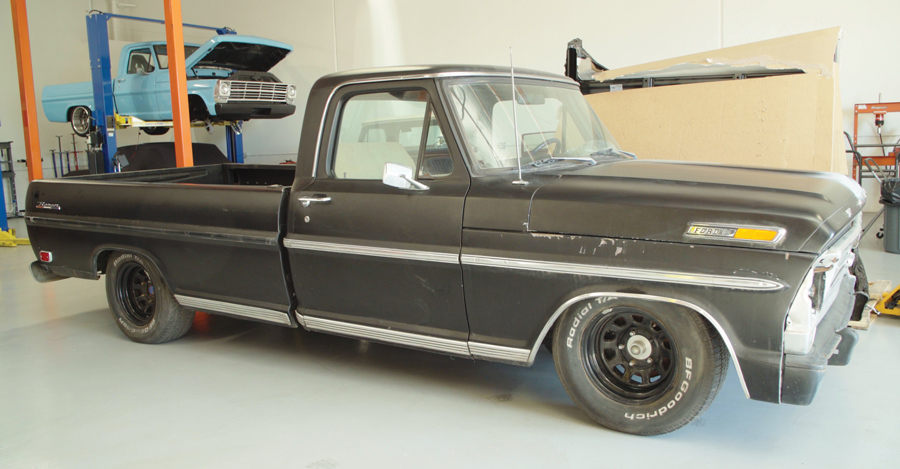
or those of us Ford fans, it seems to be getting harder and harder to find a good foundation on which to build a shortbed truck. Whether it’s a matter of production numbers or survivability, it seems that the longbed Fords far outnumber the shorties. That’s great if you need to haul a load of lumber, a motorcycle, or a camper shell, but if it’s a well-performing, healthy-handling pickup truck you’re after, an old longbed probably isn’t going to cut it. That is unless cutting it is the plan.

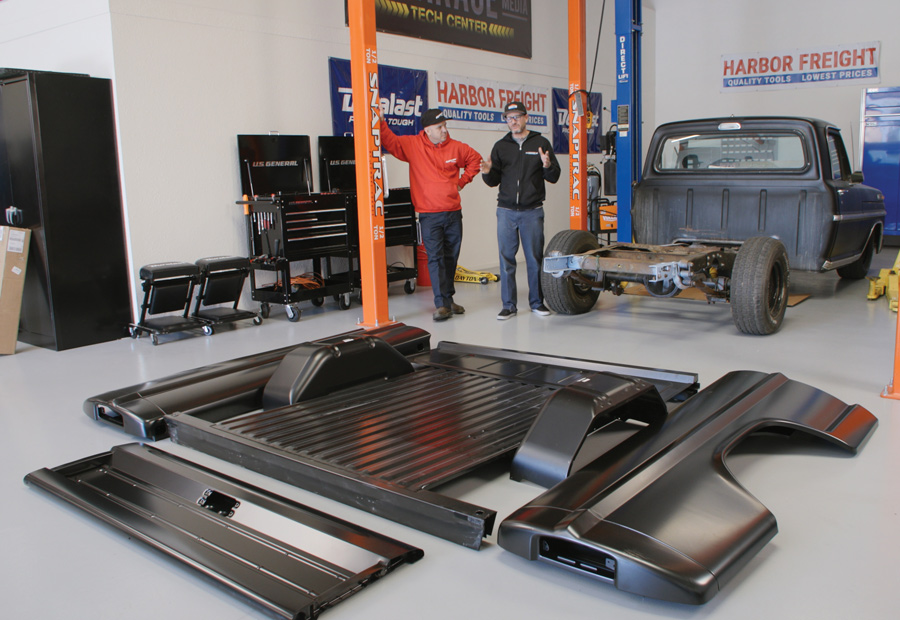
Always looking for the next great gap to fill in the market, the team at Golden Star Classic Auto Parts recently announced the release of their newly tooled short Fleetside bedsides for ’67-72 Ford pickups. This, in addition to also offering the front header panel, steel floor, wheelhouses, and tailgate, allows Golden Star to offer not only the components needed to repair or restore a classic Ford pickup, but also gives their customers the option to ditch the longbed setup for a brand-new shortbed box.

Cutting the frame with a saw
No small feat, however, when the crew at Classic Performance Products (CPP) heard about the new sheetmetal being offered, it seemed obvious that they needed to design a longbed to shortbed conversion kit to complement the new tin offerings. Thankfully, CPP has a few workhorse trucks on hand to aid in their daily R&D of new products, so the team wasted no time in getting a donor ’69 Ford F-100 in the shop and the frame section scanned.
The result is a new shortbed conversion kit (PN 6772LBFSK) that consists of two templates that contain all the holes that need to be located and drilled as well as cut lines to aid in trimming that chassis down. An assortment of hardware and a pair of beefy C-channel plates are provided and used to mate the two frame sections back together to ensure perfect symmetry before the chassis is welded back together. The resulting kit makes trimming a longbed ’67-72 Ford truck down to shortbed specs an afternoon’s work with little more than a drill, saw, and a welder.

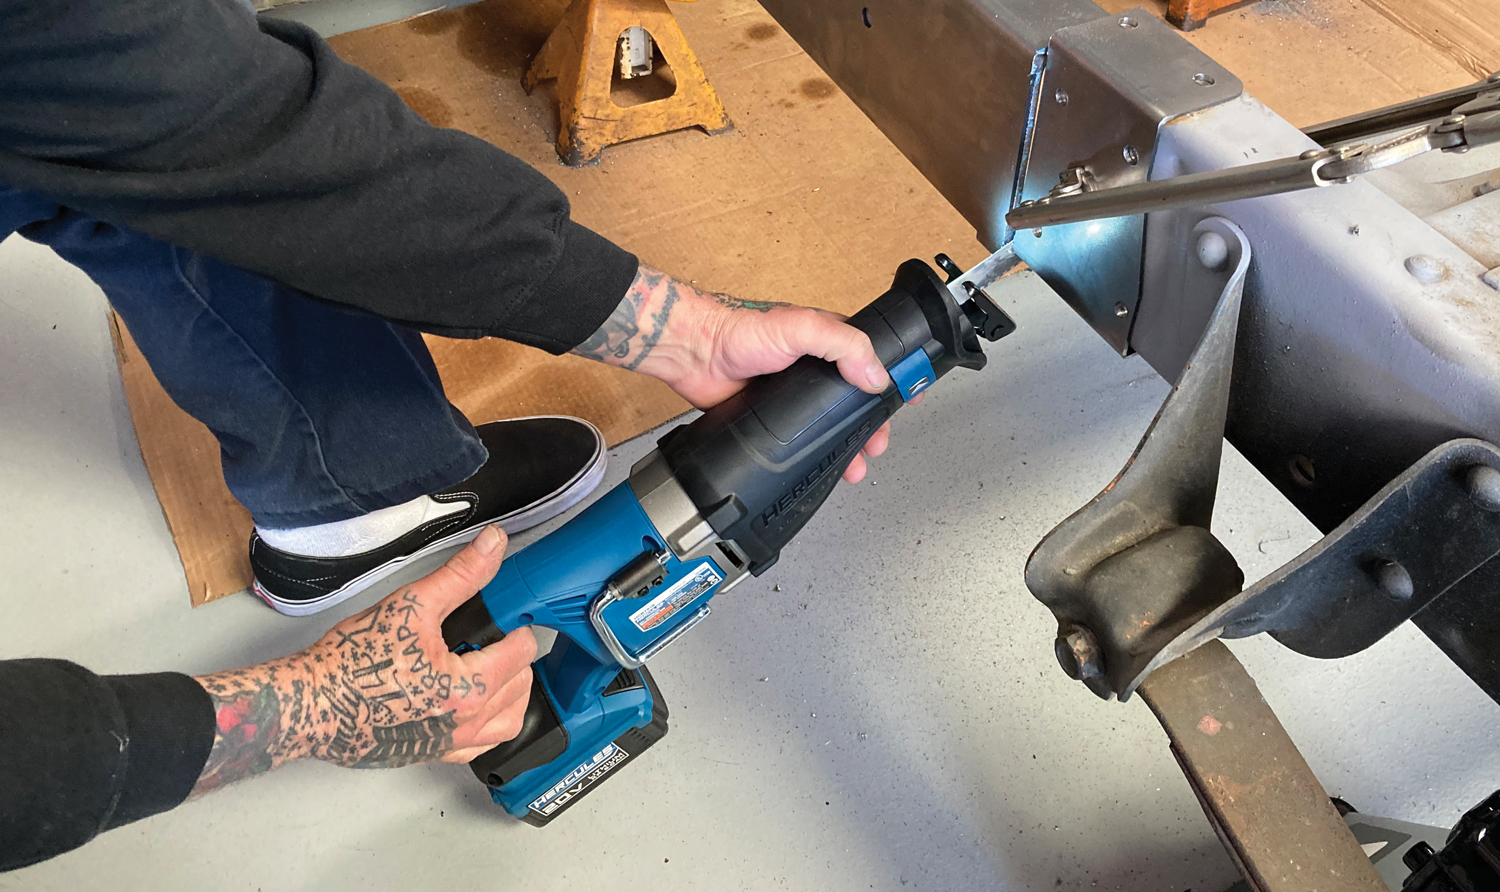
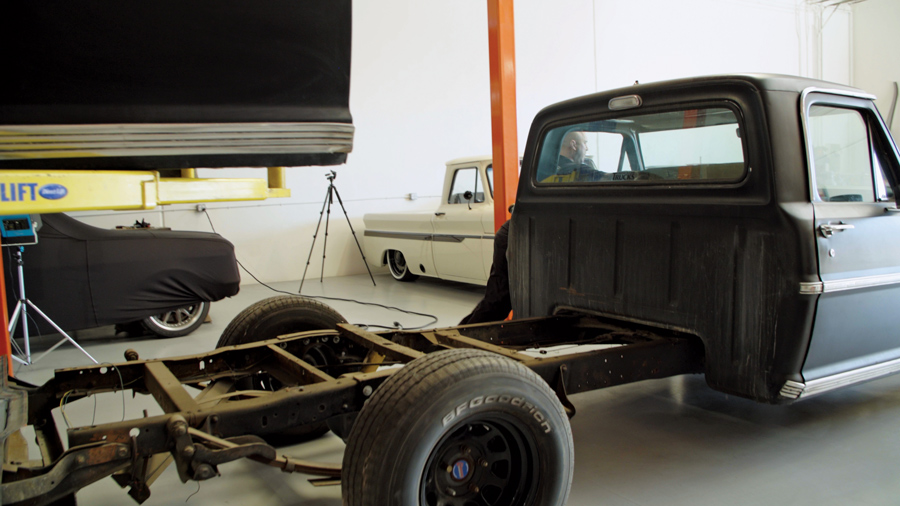
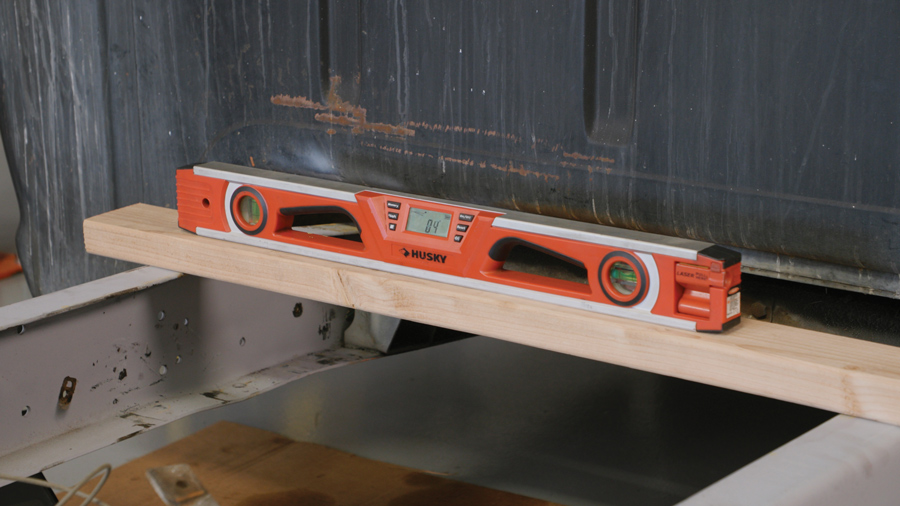
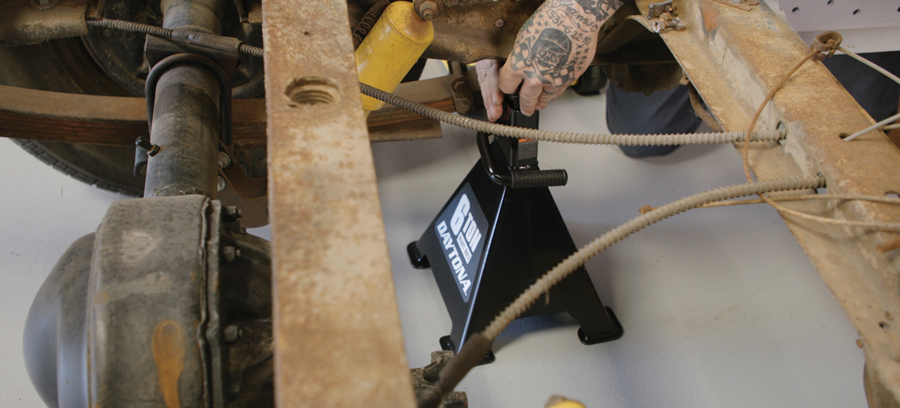
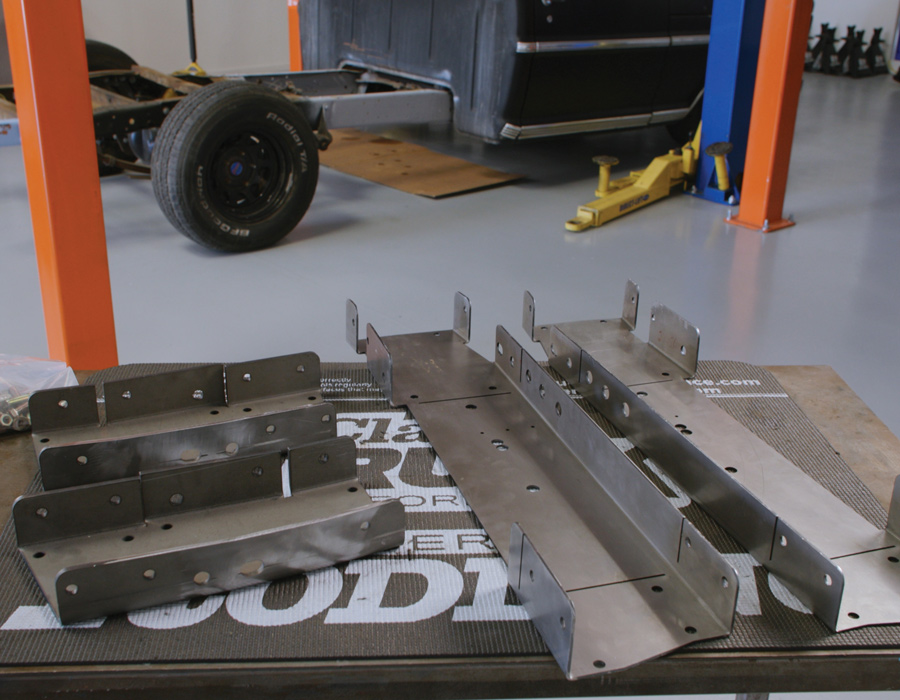
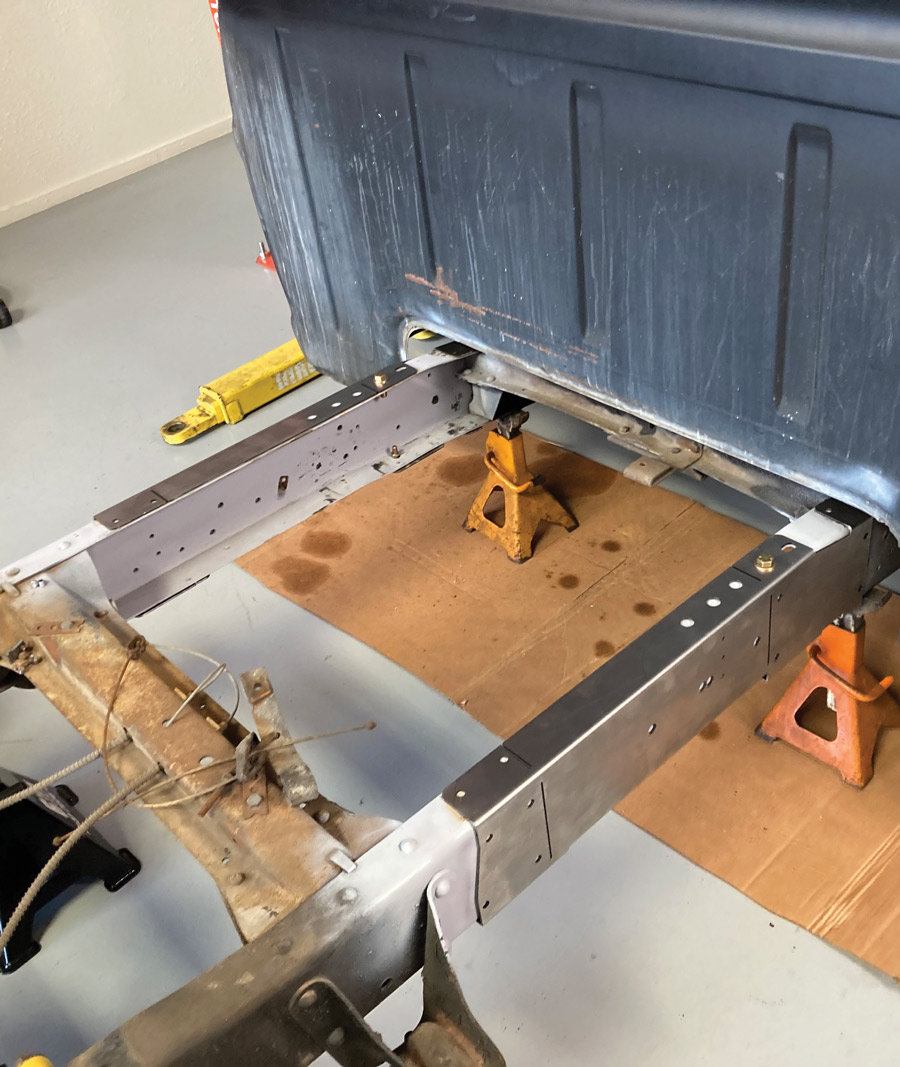
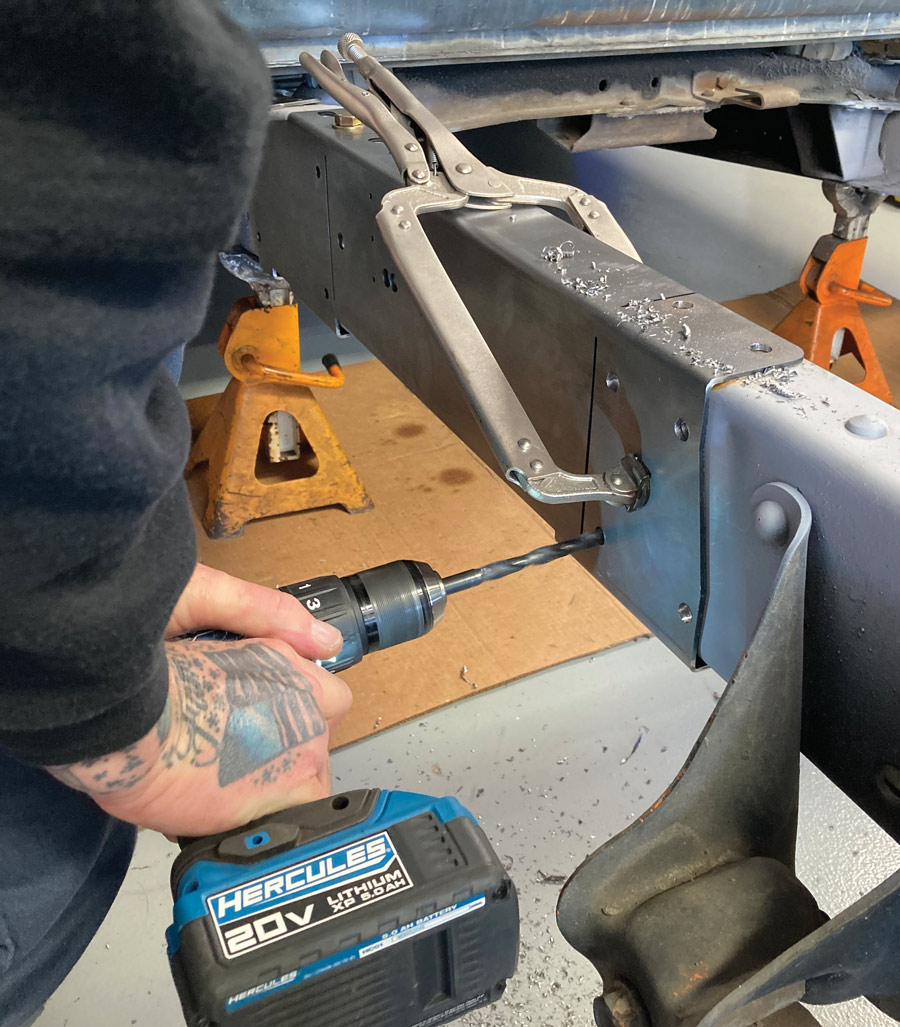
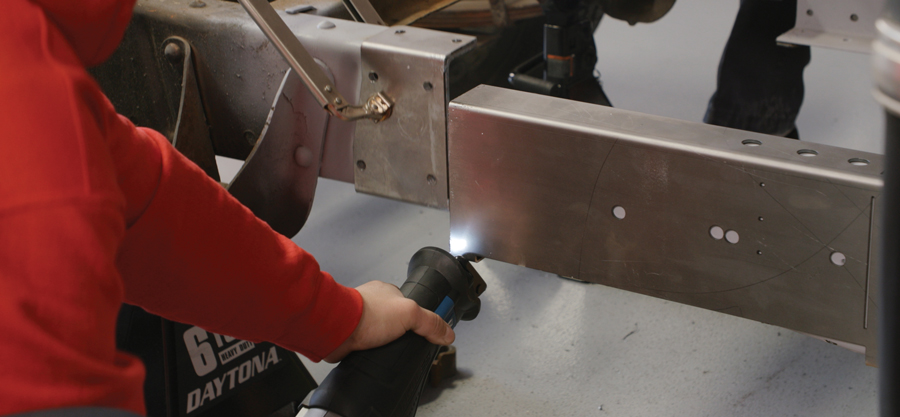
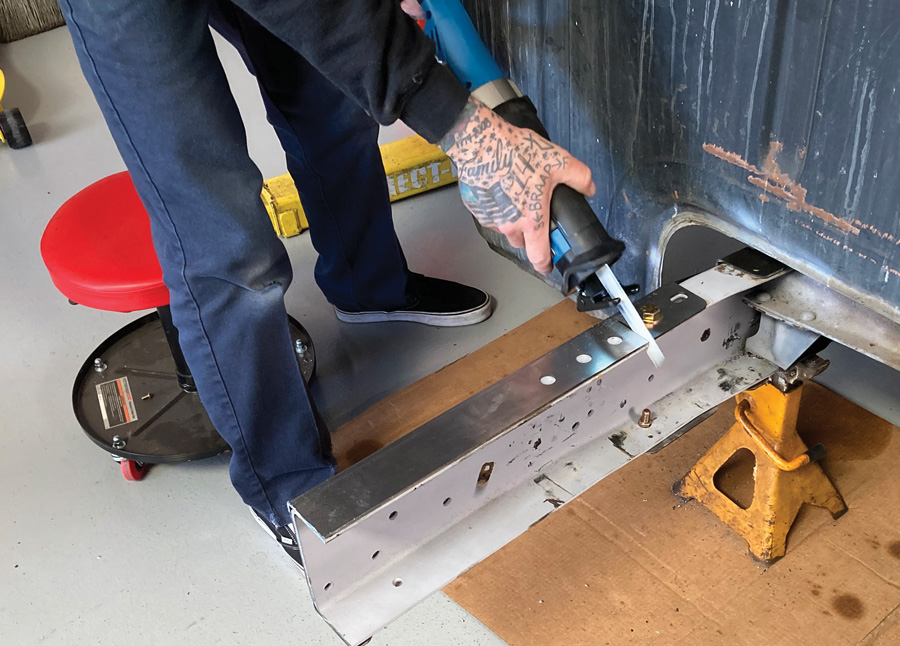
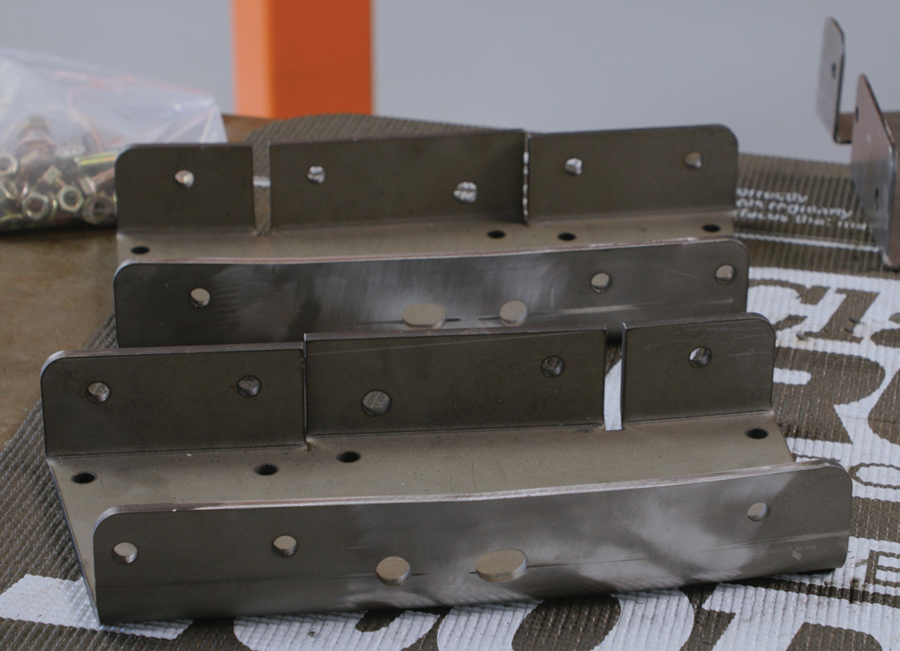
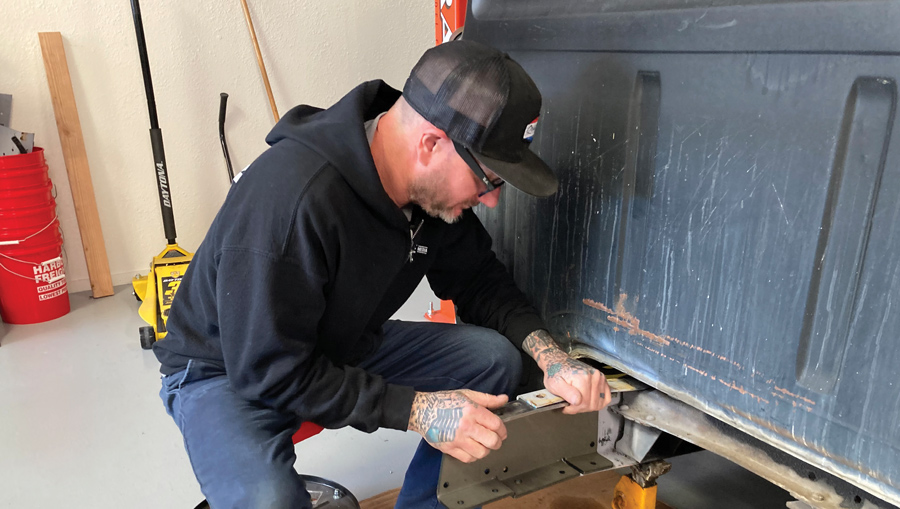
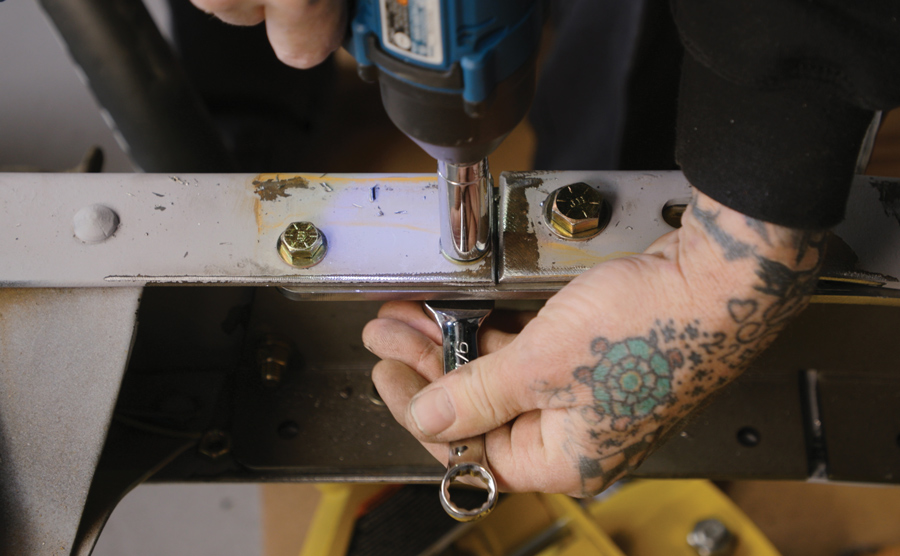
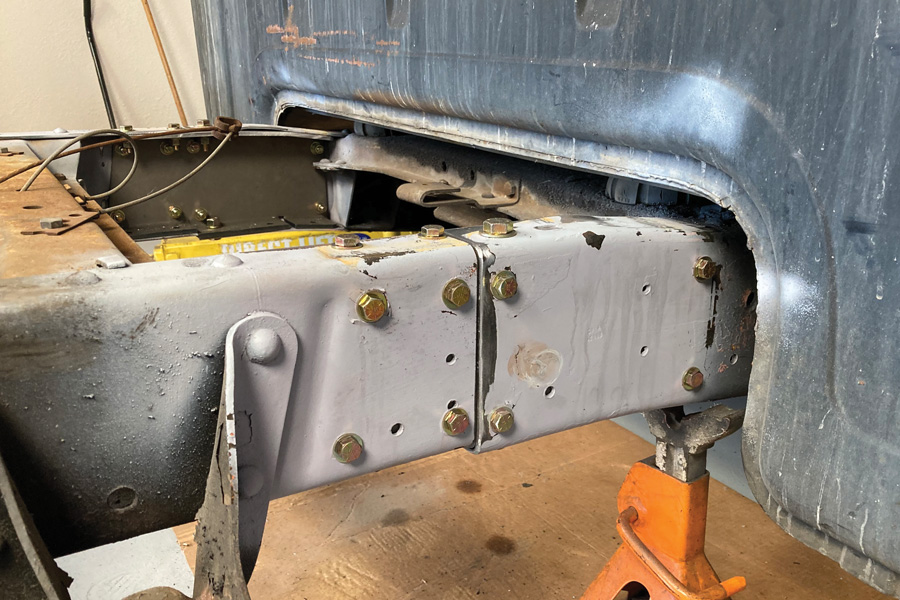
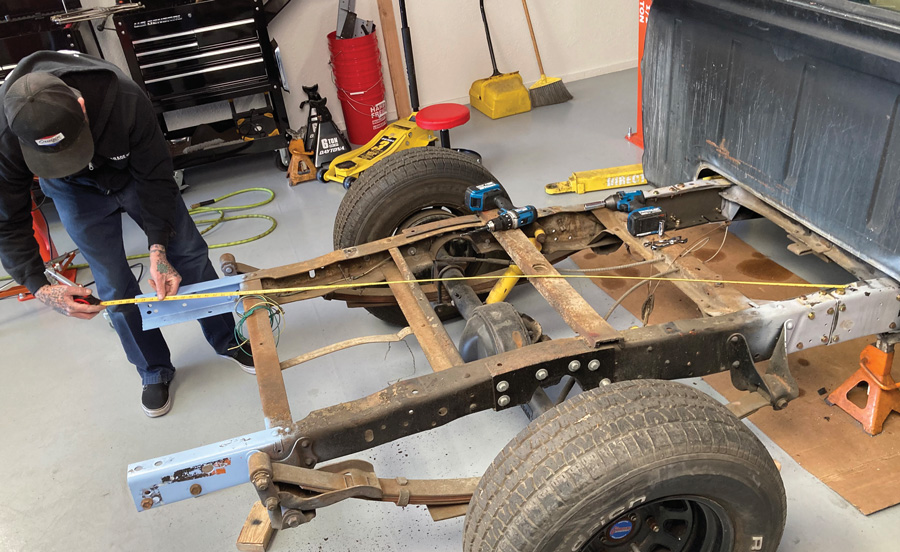
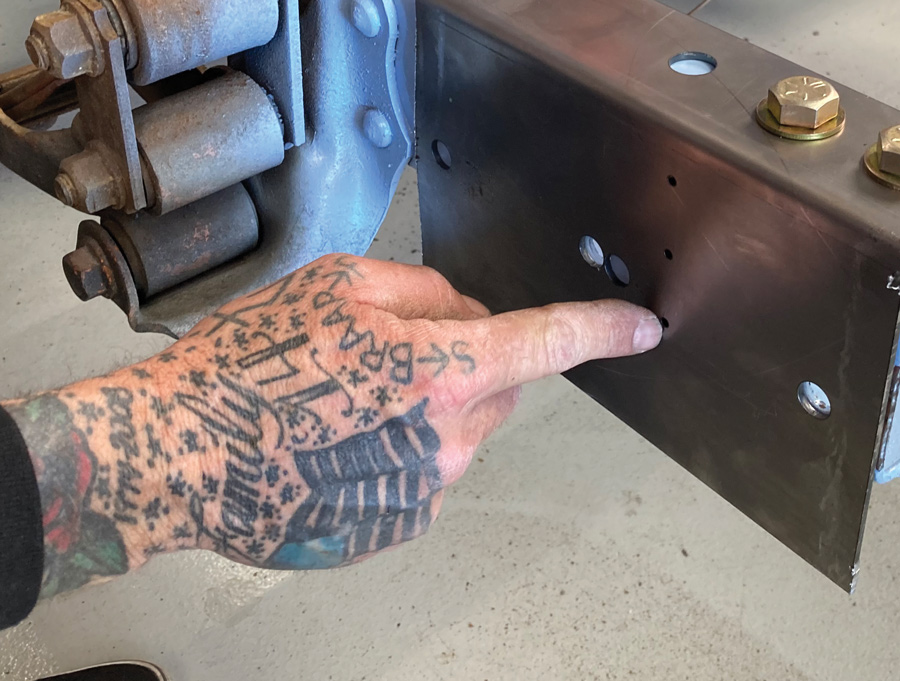
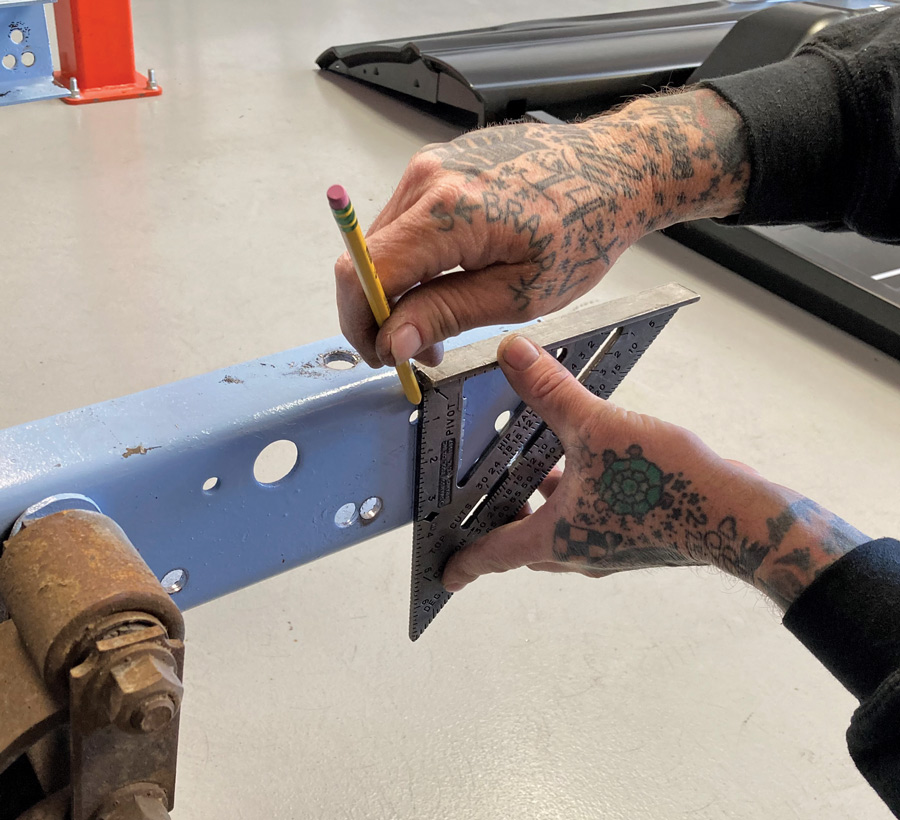
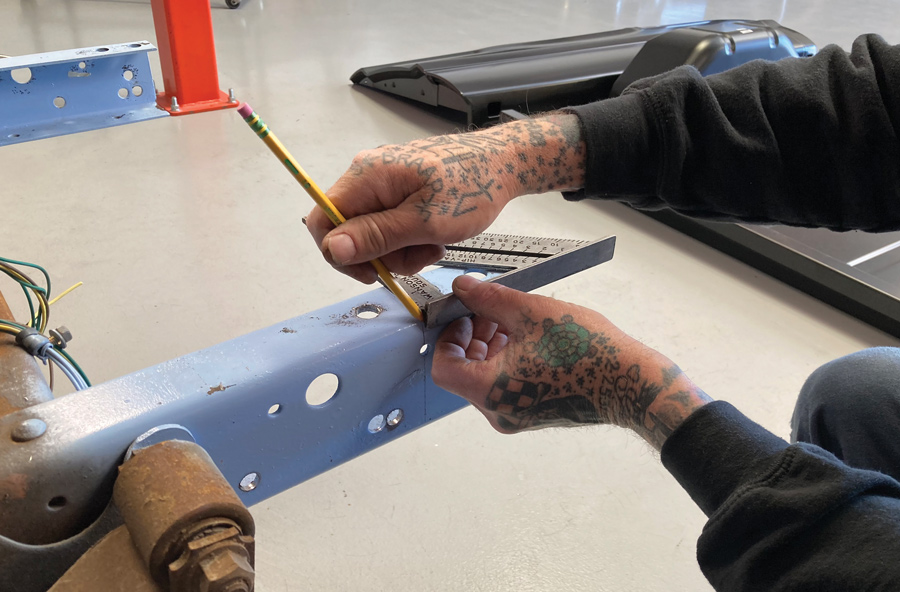
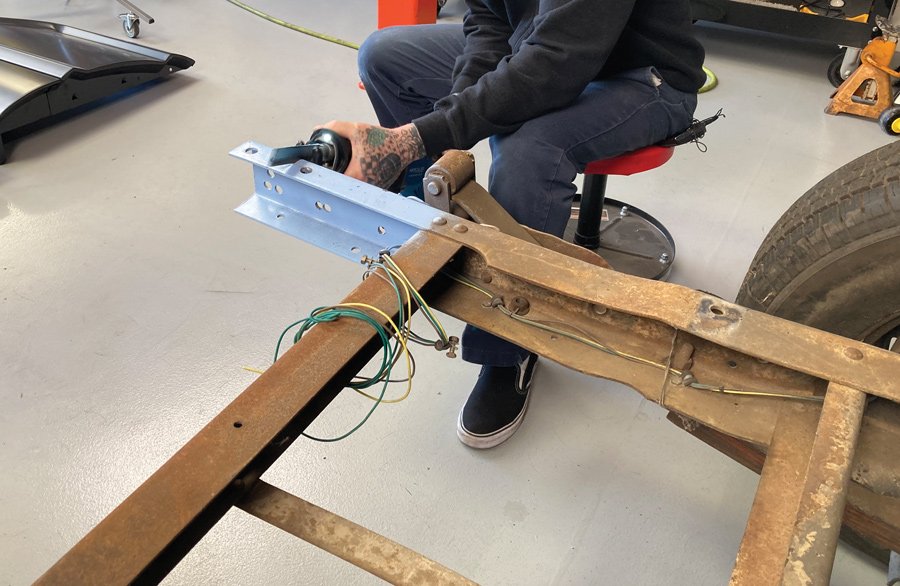
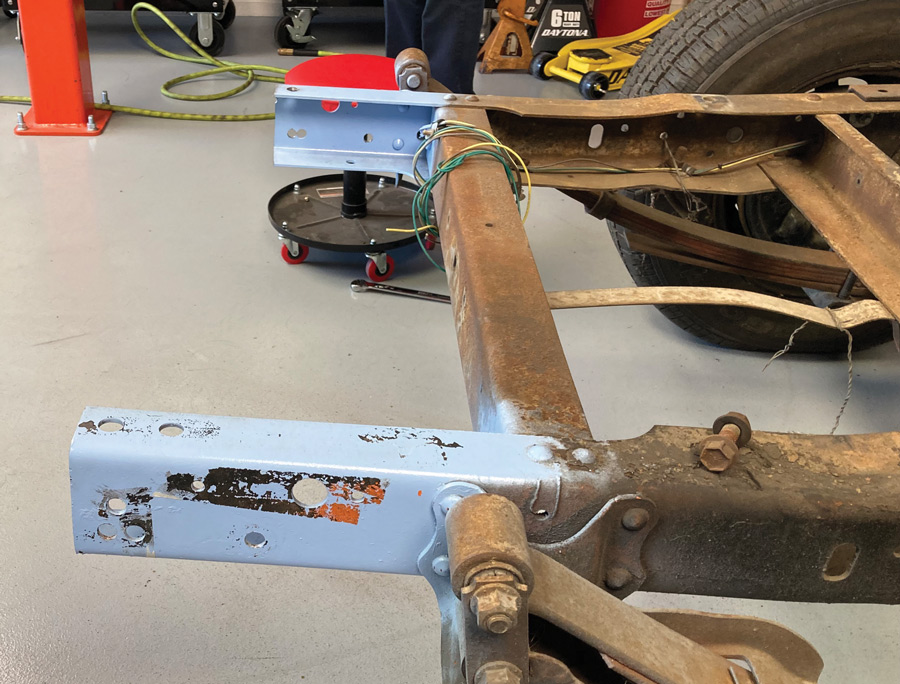
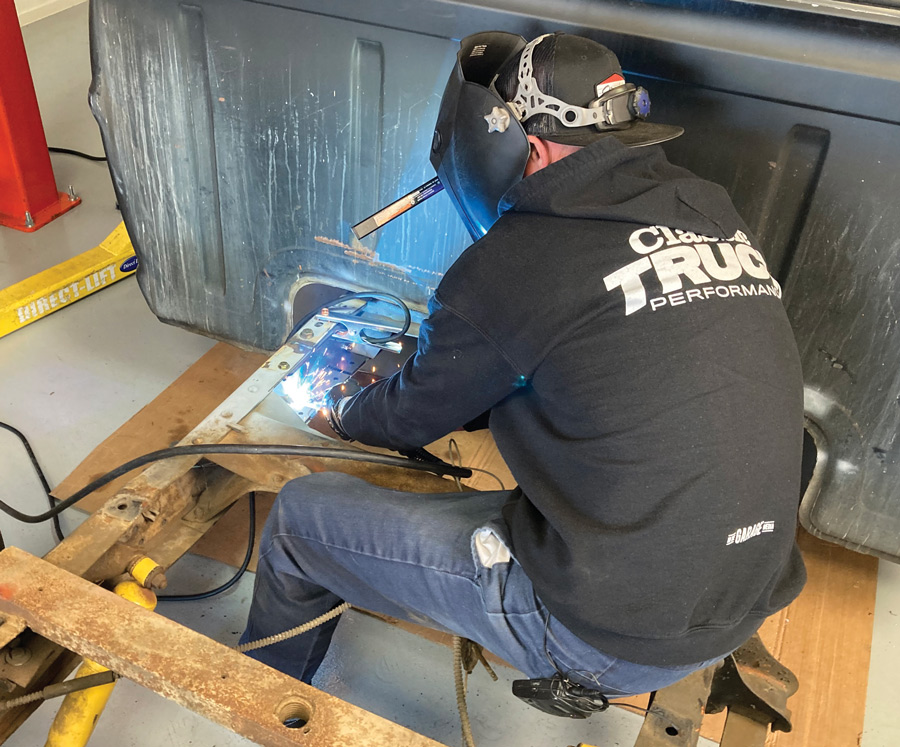
This month, follow along as we adjust the wheelbase on a ’69 Ford F-100 using CPP’s new shortbed conversion kit and be sure to check in next month when we assemble an all-new short box courtesy of Golden Star Classic Auto Parts.

'69 Ford side view
1. Our ’69 Ford was built to haul, unfortunately that’s about all it does well. A pair of dropped I-beam axles and a brake upgrade still left a bit to be desired when it came to handling and performance. An upgrade to an IFS setup helped, but the Effie’s long wheelbase prevented any serious performance results and the altitude adjustment further exaggerated its long looks.
Long bed removed from the truck
2. Removing the longbed is the first step in altering the truck’s wheelbase. We won’t be using the original bed, so it’s set aside while we address the frame.
a pair of jackstands is placed just behind this section while another pair is placed further forward under the cab to provide support
3. We’ll be removing 16 inches from the section of frame directly behind the cab, so a pair of jackstands is placed just behind this section while another pair is placed further forward under the cab to provide support.
jack-stand supporting the frame
4. It’s important that the jackstands simply support the truck at ride height and don’t actually lift it. Carefully shimming the jackstands where necessary results in a nice, level frame.
Classic Performance Products’ Short Bed Conversion Kit
5. To shorten our chassis efficiently and effortlessly we’ll be using Classic Performance Products’ Short Bed Conversion Kit (PN 6772LBFSK). The kit consists of two templates and two thick C-channel support plates that will aid in aligning the front and rear frame halves once the chassis has been cut.
bolting the template in place
6. To align the templates on the chassis, an existing oval and 3/8-inch hole on top of the framerails are used. An additional 3/8-inch hole on the lower framerail is also used to bolt the template in place.
drilling holes into the chassis
7. There are eight predrilled holes on either end of the template that need to be transferred and drilled in the chassis using a 3/8-inch drill bit. These holes will serve to align the frame halves once cut.
The rear cut is made first so that section of the frame can be rolled out of the way ...
8. The rear cut is made first so that section of the frame can be rolled out of the way …
while the front cut is made. Note that both cuts follow the cut lines in the template.
9. … while the front cut is made. Note that both cuts follow the cut lines in the template.
The 1/4-inch C-channel plates are designed to temporarily attach and support the chassis until final welding can be completed. These plates have matching holes that mirror the templates and now the chassis.
10. The 1/4-inch C-channel plates are designed to temporarily attach and support the chassis until final welding can be completed. These plates have matching holes that mirror the templates and now the chassis.
Here, the C-channel plates are being aligned with the front half of the frame and bolted in place using the previously drilled holes and the provided hardware.
11. Here, the C-channel plates are being aligned with the front half of the frame and bolted in place using the previously drilled holes and the provided hardware.
With the C-channel plates in place, the rear frame section is being prepared to slide into place.
12. With the C-channel plates in place, the rear frame section is being prepared to slide into place. A bevel on the seam between the two frame sections will allow for deeper penetration of the weld, resulting in a stronger joint.
The rear frame section has been slid in place and joined with the front half, temporarily completing the shortbed frame conversion.
13. The rear frame section has been slid in place and joined with the front half, temporarily completing the shortbed frame conversion.
The holes drilled using the template correspond to those in the C-channel plate perfectly and, when joined, result in a 115-inch wheelbase frame.
14. The holes drilled using the template correspond to those in the C-channel plate perfectly and, when joined, result in a 115-inch wheelbase frame.
A couple quick measurements verify the chassis is square and to spec!
15. A couple quick measurements verify the chassis is square and to spec!
another 4 inches needs to be hacked off the frame and a couple holes relocated and drilled
16. Out back, another 4 inches needs to be hacked off the frame and a couple holes relocated and drilled. These details are included in the center portion of the template that we cut up earlier. Using two top holes as reference, the template is fastened to the chassis and the holes in the template transferred to the frame.
 carpenter’s square is used to translate the small holes from the template to mark the cut line on all three sides of the frame
 carpenter’s square is used to translate the small holes from the template to mark the cut line on all three sides of the frame
17-18. A carpenter’s square is used to translate the small holes from the template to mark the cut line on all three sides of the frame.
Once again, a reciprocating saw and a sharp blade make quick work of trimming the frame.
19. Once again, a reciprocating saw and a sharp blade make quick work of trimming the frame.
The driver side of the frame has been modified while the passenger side has yet to be trimmed and drilled. Note the differences between the two.
20. The driver side of the frame has been modified while the passenger side has yet to be trimmed and drilled. Note the differences between the two.
Jason Scudellari puts the Harbor Freight Vulcan MIGMax 215 welder to work
21. Next, ITGM Tech Center manager Jason Scudellari puts the Harbor Freight Vulcan MIGMax 215 welder to work, burning the two sections of frame together for the final time. Scudellari opted to leave the C-channel plate in place, performing a series of Rossette welds to replace the fasteners in addition to a series of welds around the circumference of the plate.
With the shortbed conversion complete, a “meeting of the minds” is called to plan the next step, assembling the new short box components from Golden Star Classic Auto Parts. We’ll return next month for a deeper dive into the sheetmetal components and what it takes to assemble a brand-new shortbed box.
22. With the shortbed conversion complete, a “meeting of the minds” is called to plan the next step, assembling the new short box components from Golden Star Classic Auto Parts. We’ll return next month for a deeper dive into the sheetmetal components and what it takes to assemble a brand-new shortbed box.
Tech Center
Classic Performance Products
(800) 760-7438
classicperform.com
Golden Star Classic Auto Parts
(972) 315-3758
goldenstarauto.com
Harbor Freight
harborfreight.com