

CTP Tech
InTheGarageMedia.com
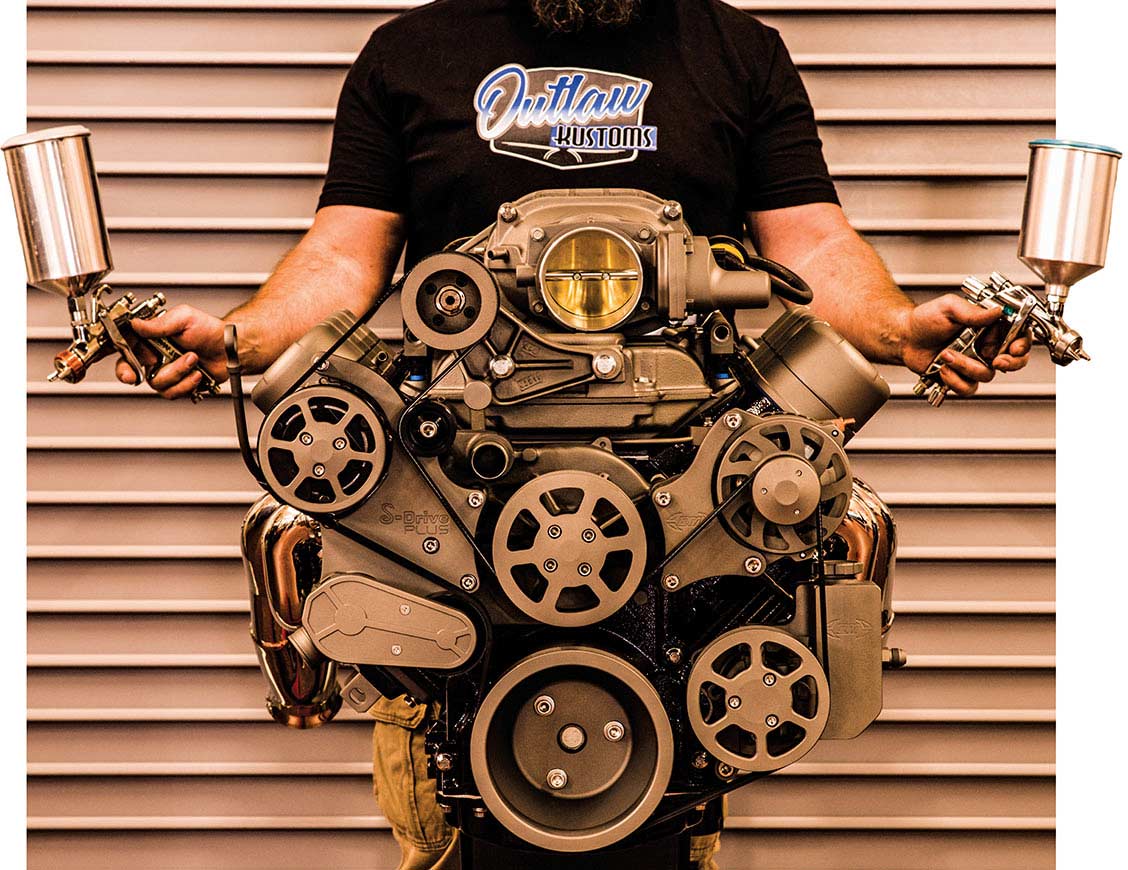
A custom engine with a person holding two spray paint guns.
Escape From Albuquerque
Painting An Engine—The Outlaw Kustoms Way
BY “ROTTEN” RODNEY BAUMAN IMAGES BY THE AUTHOR & DARYL SMENT
“If there’s anything an old painter can do around here, I’ll do it.” That was pretty much my pitch, and it paid off with a needed short-term job in Albuquerque, New Mexico, at Outlaw Kustoms.”
Backing up briefly, just to paint the picture, it was a wife’s-side family reunion that necessitated a road trip to Albuquerque. No offense intended toward New Mexicans, but I don’t much care for Albuquerque, its big balloon festival, or its big lavender festival for that matter. Rather than blather in dull detail, let me just say that I don’t get much out of family planned tourist activities—at all.

Knowing well ahead of time that I’d likely need an escape, I did a little Web search for hot rod shops in the area. When I came upon OutlawKustomsInc.com a mental note was taken. Upon arrival to Albuquerque, I took a chance, called the shop, and received an invitation to stop by and have a look around.

I went there the very next day, met proprietor Angelo Vigil, his wife (and business partner) Crystal, and the multi-talented head fabricator (and more), Daryl Sment. They didn’t seem to mind me hanging around, but like I told ’em: “I’m not used to doing nothing!” Sure, I’m always sniffing around for a tech story, but I’ll put my painterly paws on a project, too.

To help me have a purpose in Albuquerque, Angelo and Sment kindly thought it over. Undercover, on a stand near the wall sat a freshly rebuilt 6.0L LS still in need of a fine finish. I could do that. “It’s right up my alley” I told ’em, but I wasn’t yet fully aware of Outlaw Kustoms’ sky-high standards.

As I discovered on the fly, Outlaw Kustoms is responsible for some truly noteworthy classic truck builds. Most recently, 2024 Builder’s Choice, presented by Hot Rods by Dean, and 2025 Truck of the Year Late Finalist, presented by Dakota Digital. Never mind I’m an experienced painter. Never mind I’ll only be painting an engine. Instinct now suggests that I’ll need to rise to this occasion.

Through the years I’ve painted many engines, but this’ll be my first LS. Initial inspection reveals some rather difficult shapes. The engine block’s casting has ribs, and other crooks and nannies that’ll call for some pretty sharp shooting. Casting numbers were already ground away before I’d arrived, but there’ll be more work required to achieve a uniform texture for block and heads. At Outlaw Kustoms, we call that “stippling.”

Since I didn’t pack my own spray equipment, I’ll be working with what’s here. As it turns out, Outlaw Kustoms uses Iwata-brand spray guns, so this’ll be my opportunity to assess what’s widely considered the best. Back at our own shop, I’ll stick with my trusty mid-’90s ’guns, but if I thought I’d stay in the game much longer I’d call Summit and step up for Iwata-brand replacements.

When we’re eventually satisfied that our subject engine is surgically clean, abraded, and properly masked, we’ll apply epoxy primer to start. Afterward we’ll clearly see any minor surface imperfections and correct as necessary.

Providing things go according to plan, next-day action will be standard procedure. It’ll be basecoat and urethane clear, but materials in stock are foreign to me. It’s not what we’d use in Montana. It might not be what you’d use where you are, so for the how-to portion of our story let’s focus on technique, not so much on brands.

In the past there have been times when it’s done me good to work in other shops with other craftspersons. Lately, I’m a dinosaur, still doing things as I have for eons. If I’m not real careful here, I just might learn something new. If I have my own way, you just might gain from this experience, too.

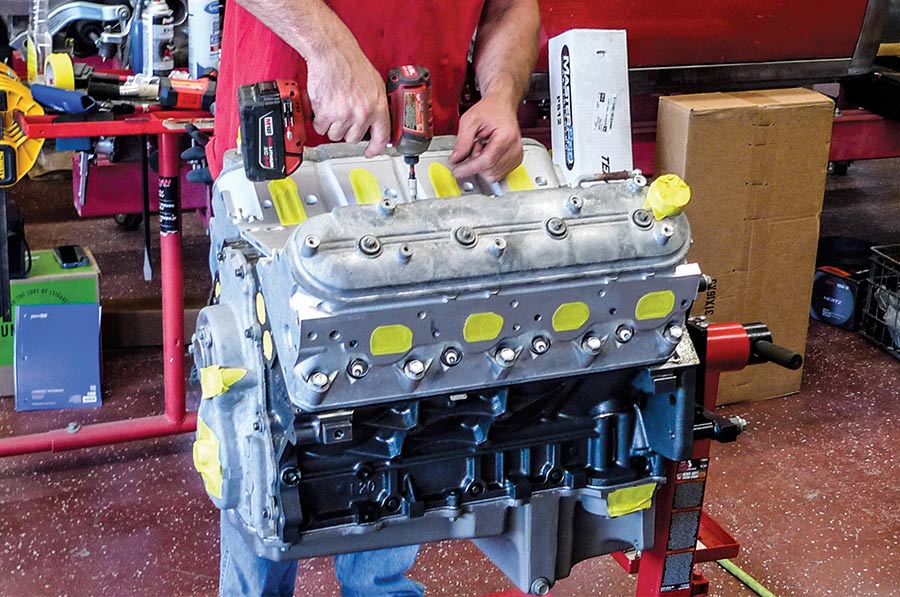
Man prepping an engine on a red stand
1. As I’m arriving late to my first day at my new job, head fabricator (and more) Daryl Sment is already deep into this engine’s paint prep.
Using a needle scaler on an engine block
2. Freshly rebuilt, this engine’s exterior might be a little oily. Here the needle scaler isn’t used so much for cleanup, it’s used to create that uniform stippled effect.
Removing the engine's valley cover with a tool
3. Righty-tighty, lefty-loosy, but I didn’t audibly say that to Sment. Anyway, at this point with the stippling all done, it’s an OK time to pull this valley cover.
Lifting the valley cover from the engine block
4. The valve covers will remain in place for the time being. They’re only there for masking purposes. They won’t be used for anything else.
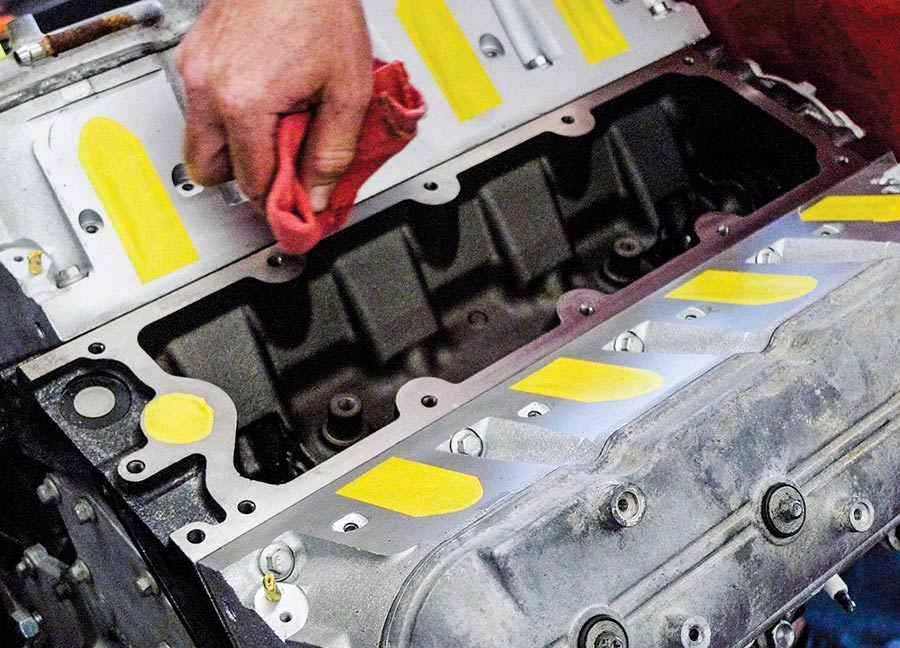
Wiping down engine surfaces with a red rag
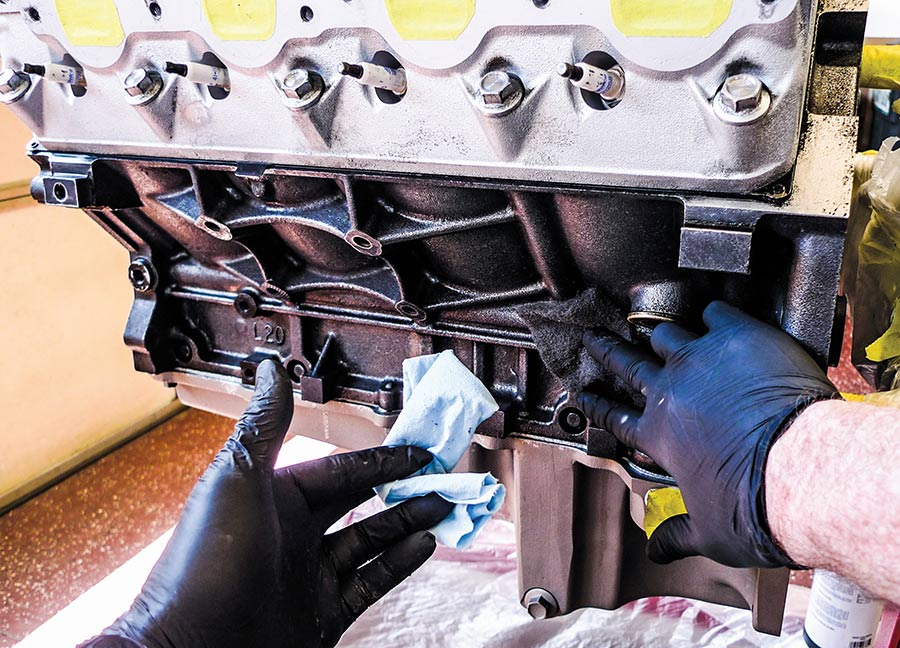
5. And speaking of masking, we’ll have a good deal of that to do. First things first, let’s make sure that surfaces to be masked are surgically clean and dry.
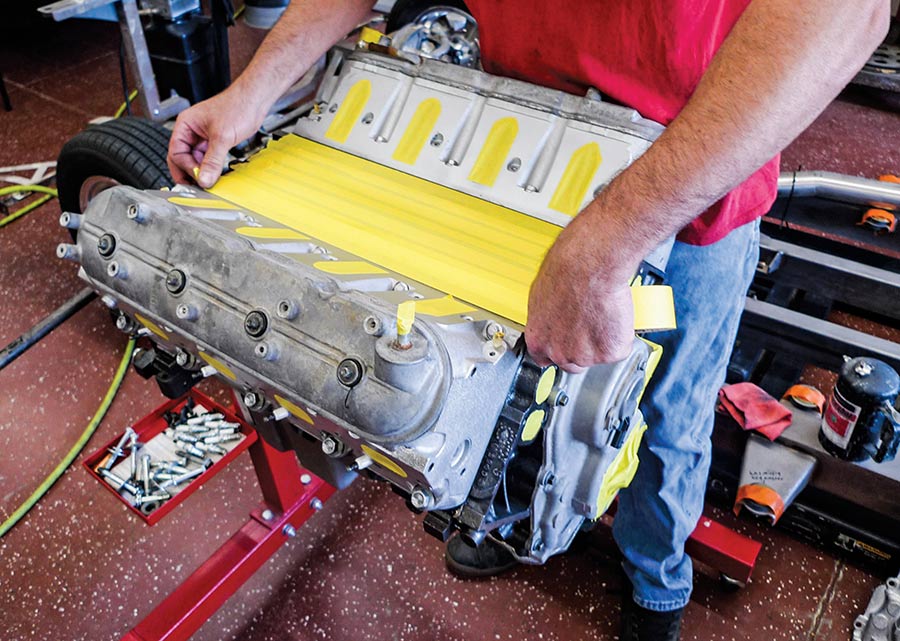
Applying yellow masking tape to engine surfaces
6. In situations such as this, cheap masking tape would likely let us down. The yellow tape used here is leading-brand (3M). Back at our own shop, we get ours through Summit.
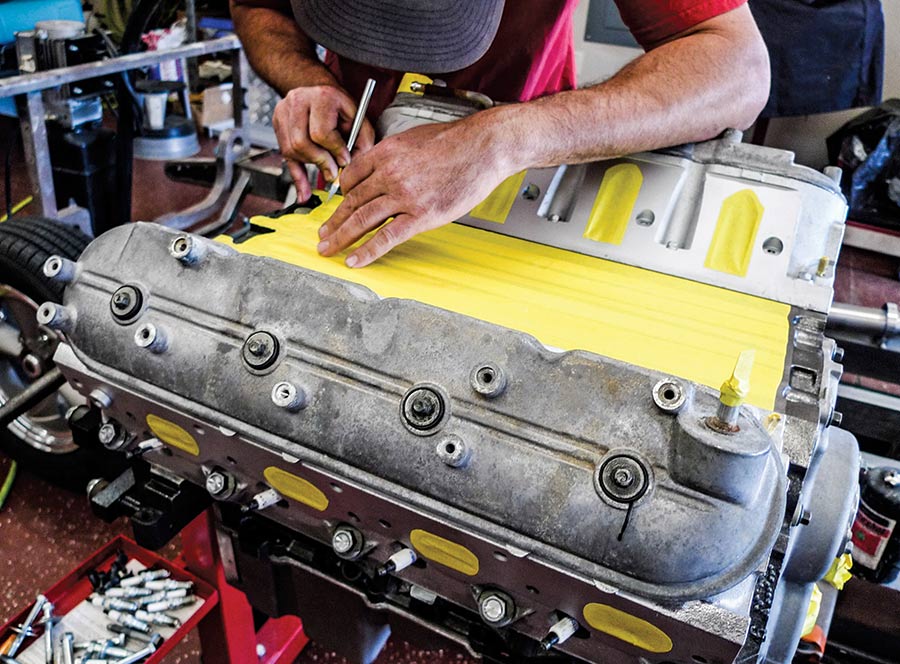
Trimming masking tape with a precision knife
7. If masking isn’t rocket surgery, let’s see a rocket surgeon do this. While I’m fumbling with a single-edge razor blade, Sment is dead-on accurate with an X-Acto knife.
Prepping the engine block inside the paint booth
8. In conjunction with waterborne and solvent-borne grease and wax removers, we’ll be using other Summit staples to prep this engine for paint.
Using a scuff pad to prep engine surfaces
9. For example, leading-brand (3M) scuff pads and clean disposable toweling come into play here. While we’re at it, let’s have a close-up look at the block’s crooks and nannies.
Applying an acetone bath as final paint prep
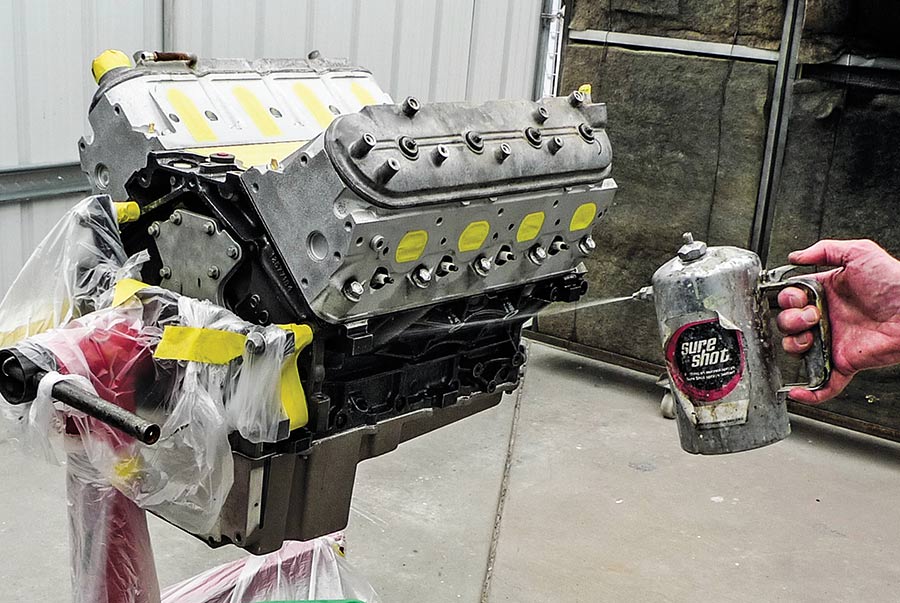
10. At this point we’ve got a pretty full day’s worth of paint prep done. Now in the booth, an acetone bath is our final prep step. In the morning, the sharp shooting shall begin.
Paint booth exhaust wall with intake filters
11. Before we exit the booth tonight, this invention deserves a mention. It’s like an exhaust wall that captures overspray within standard-size paint booth exhaust filters.
Electric fans located behind the exhaust wall
12. Here on the B-side, what makes it tick? How about 12 individual electric fans? How many to run is the painter’s call. There’s also a waterfall feature to arrest aroma.
Mixing a can of epoxy primer for painting
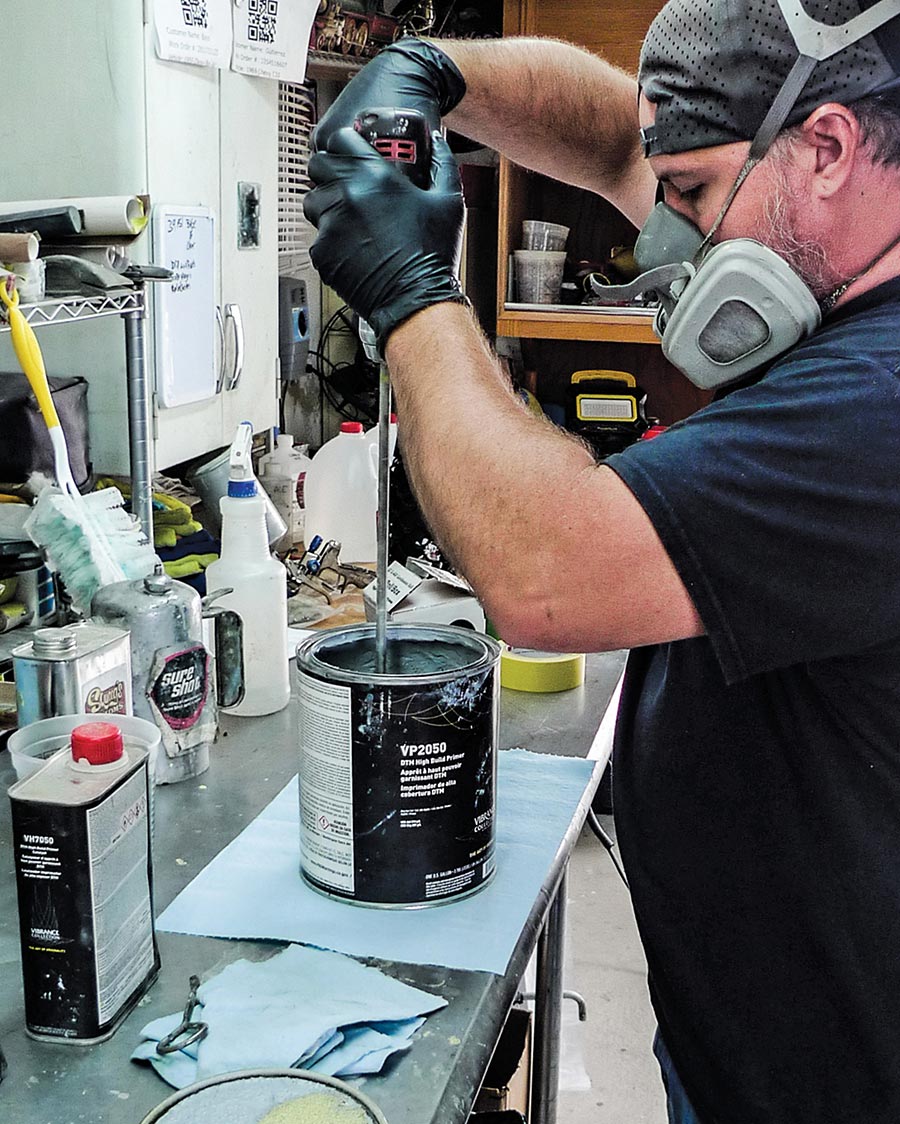
13. As I’m arriving late for my second day, in-house painter Josh Ramacciotti is already mixing epoxy primer. This brand flows best in mild temperatures, so it’s a morning job.
Pouring paint from a can with a tape spout
14. Now here’s an old painter’s trick that I’d actually forgotten about. V-shape some tape and you’ll gain a handy pour spout for better control and far less mess.
Spraying epoxy primer onto the engine block
15. If you hear a sigh of relief, that’s me. Ramacciotti will do today’s shooting. Since I don’t work so well on my worn-out knees, I’ll just stand around and shoot photos.
Detailed spraying of engine nooks and crannies
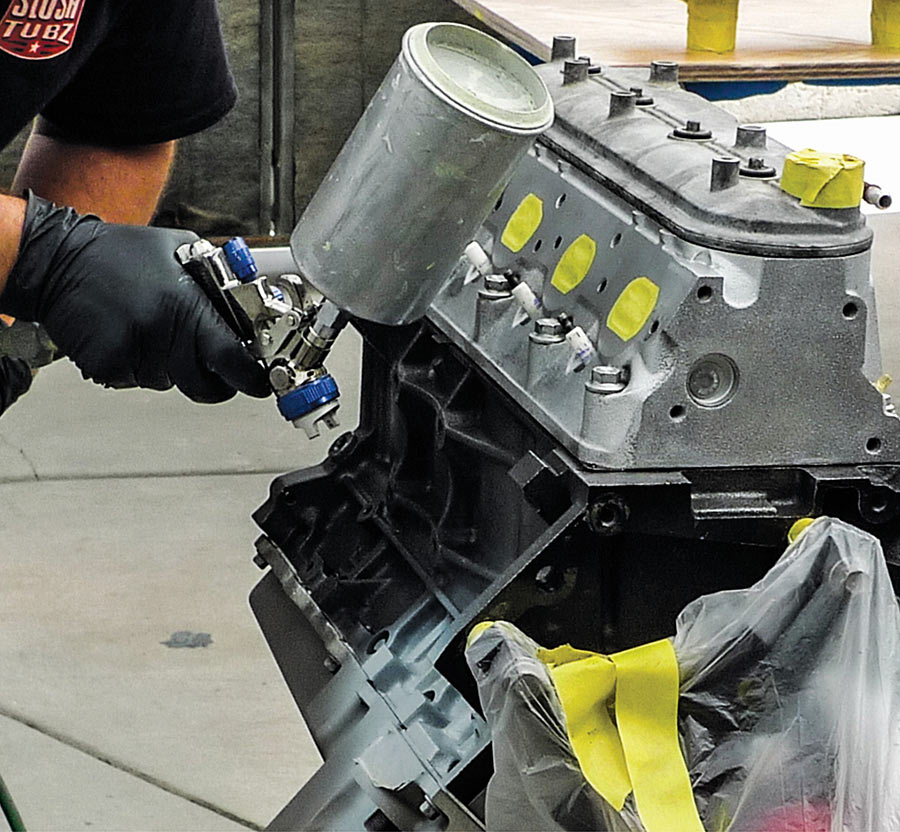
16. Logically choosing to begin with the block’s tougher crooks and nannies, Ramacciotti has his Iwata gun’s material knob dialed down and he’s shooting at fairly low pressure.
Applying a uniform coat of epoxy primer
17. Up top, he opens the material knob as necessary for a uniform wet coat. The engine will receive two coats of epoxy primer, then we’ll scrutinize our work.
Inspecting the primed engine for surface imperfections
18. Did anybody bring a magnifying glass? I’d need one, but Angelo Vigil won’t. If there’s an imperfection in need of correction, the boss will find it.
Abrading pinholes in the engine's epoxy coating
19. And sure enough, we have a few tiny pinholes. Ordinarily those are easily fixed, but since we’ve exceeded our chemical bond window, the epoxy coating must be abraded.
Applying the basecoat color to the engine
20. A few days later, the shooting resumes as a tag team effort. Here Daryl Sment applies the basecoat color. By this time heads have been removed for an ARP bolt upgrade.
Wiping the engine surface with a tack rag
21. Older painters may recall those tacky orange tack rags we sometimes had to use. Today we have less-tacky basecoat tack rags. Used properly, these won’t leave a tacky mess behind.
Spraying acrylic urethane clear coat on the engine
22. Basecoat tacked off, we’re confident that no fuzzy dry overspray remains. Taking the next step, Sment applies acrylic urethane clear.
Finished and assembled painted supercharged engine
23. With a Magnuson supercharger, Eddie Motorsports pulley kit, Ultimate Headers, and ARP hardware (coincidentally all Summit staples), this well-dressed LS deserves its fine finish.
Man sweeping the automotive shop floor
24. Things to do in Albuquerque: Big balloon festival, big lavender festival, shopping in Old Town, hiking up a hill to see a lizard, and so on. Thank you, Outlaw Kustoms!
In The Garage Media
OUTLAW KUSTOMS

Summit Racing Equipment logo
SUMMIT RACING EQUIPMENT

(800) 230-3030
summitracing.com