CTP Tech
InTheGarageMedia.com
It's All in The Details
1. This completely handmade DIVCO delivery truck was an enormous project, completed by SaltWorks Fab with stunning attention to detail.
It's All in The Details
The SaltWorks DIVCO
Part 2
BY Ron Covell
I

n the last article on the custom-built DIVCO truck being built at SaltWorks Fab, we looked at the early stages of the body fabrication. This time we’ll take a close look at several important details. SaltWorks specializes in metalshaping at the highest level, and you’ll see that reflected in every component they make, coupled with excellent design.

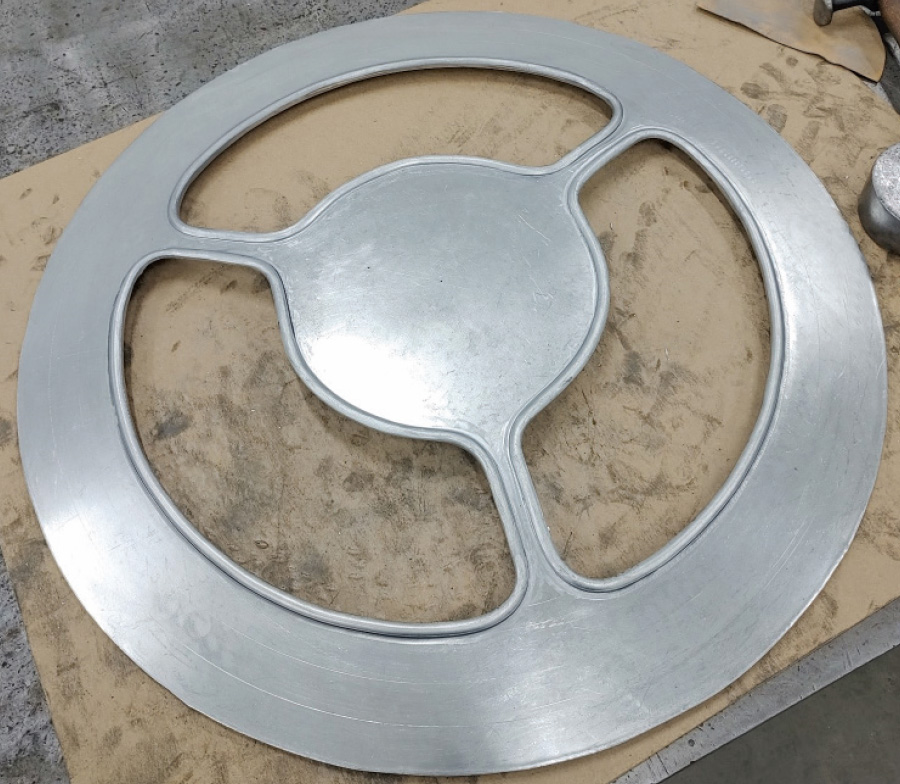
The shroud for the radiator fan is a perfect example. Even though it fits in the cramped area between the radiator and the engine, the details were handled in an exceptional manner. The supports for the fan motor are very slender to maximize airflow but are reinforced with wired edges to give them extra strength. All the edges and corners have been gracefully rounded, making it an elegant piece of metal fabrication.

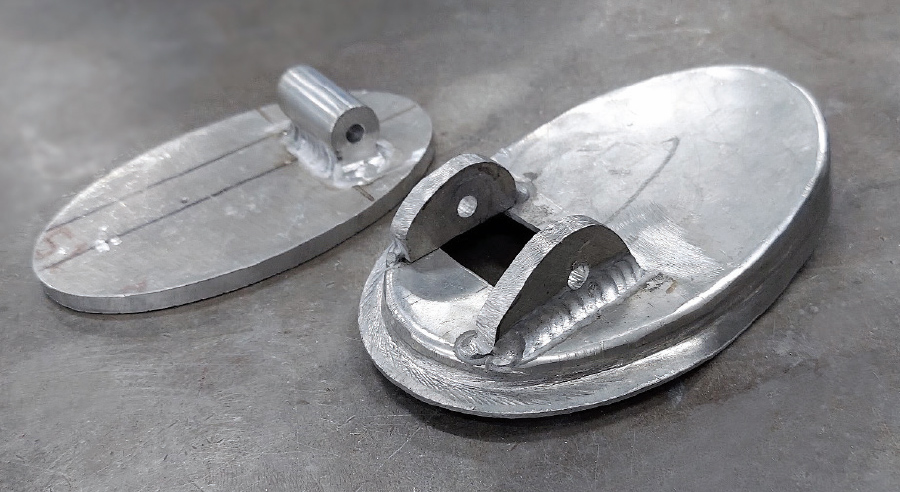
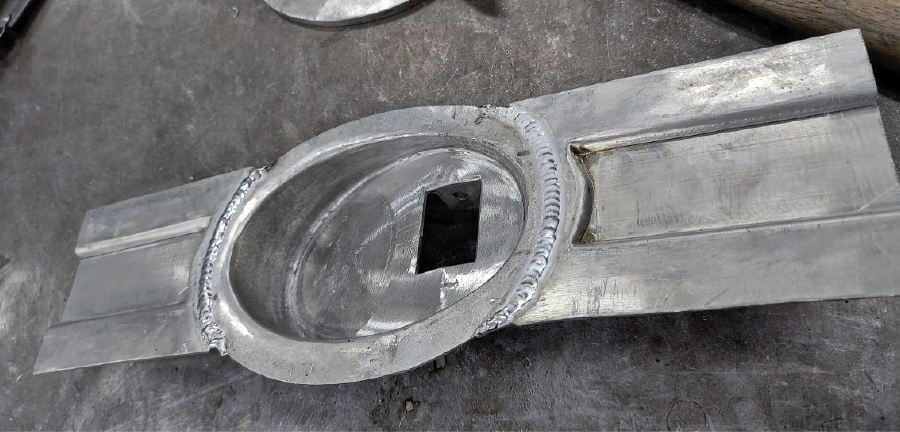
The hinges and latches for the rear doors were completely handmade; the handle for the latch features the DIVCO logo. A pocket was made allowing the handle to fit flush, centered on the gap between the rear doors. Although everything looks seamless in the end, the construction process involved many challenging details.

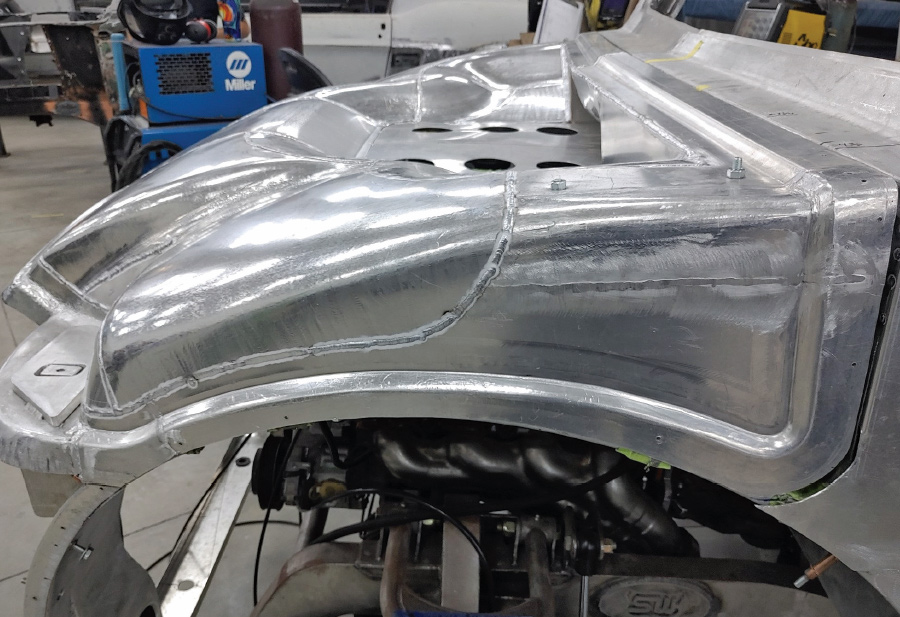
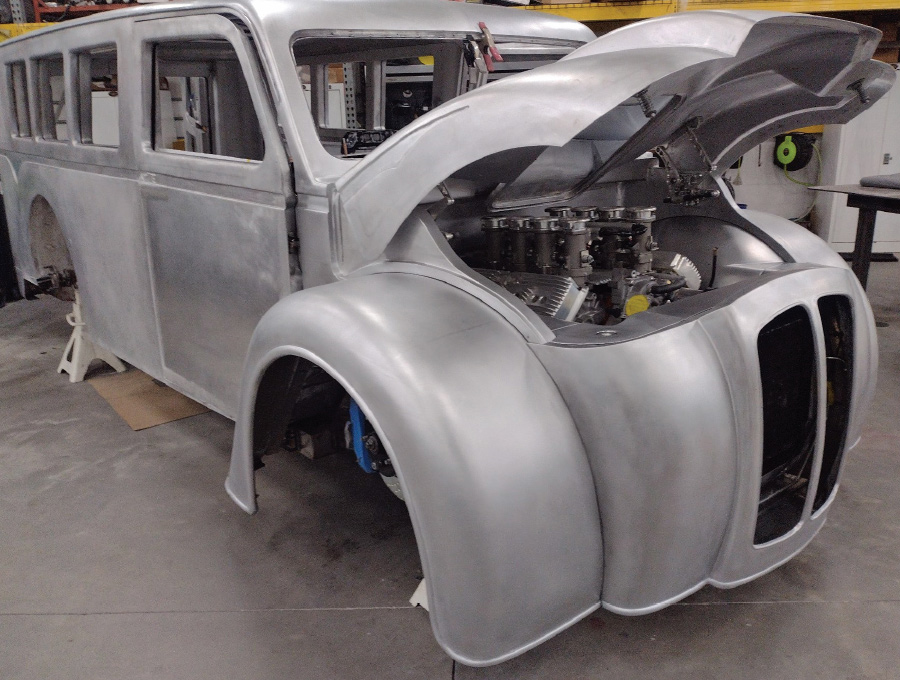
The hood is one of the largest removable panels on the truck and has both an inner structure and an outer skin. The inner skin forms a plenum, which ducts fresh air from intakes placed just in front of the windshield to the injector throttle bodies. Forming the panels for this elaborate construction was a huge job; all the surfaces and joints were smoothed to perfection.

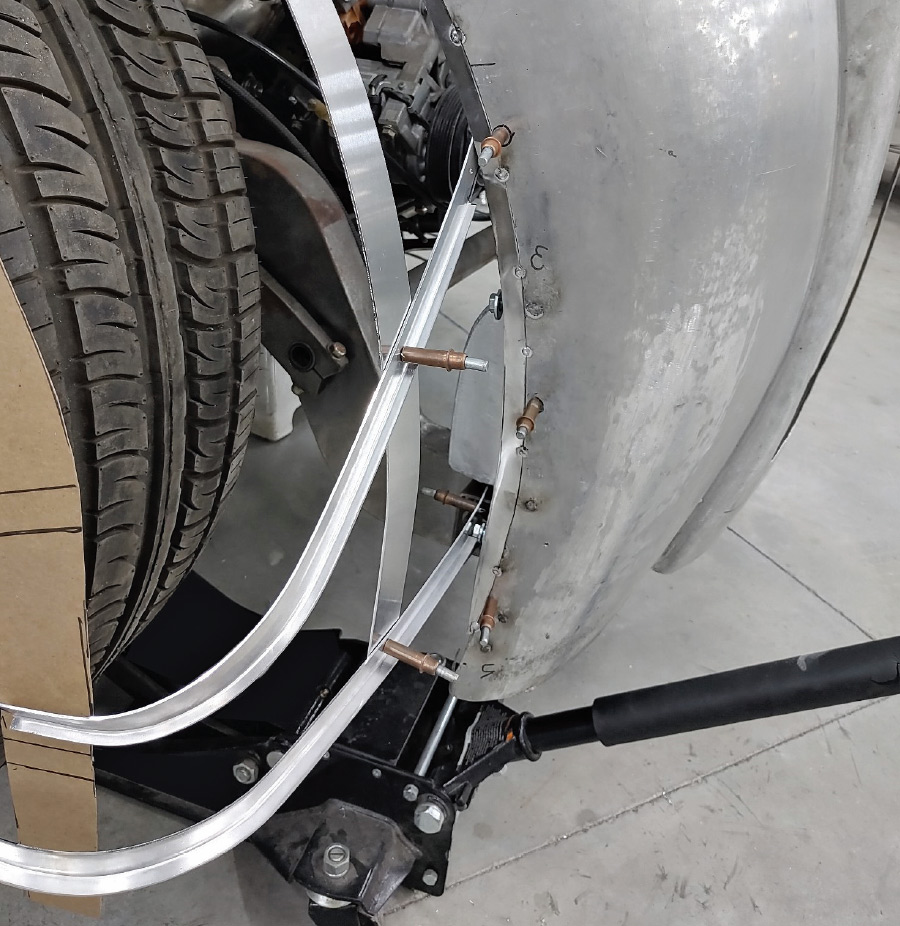
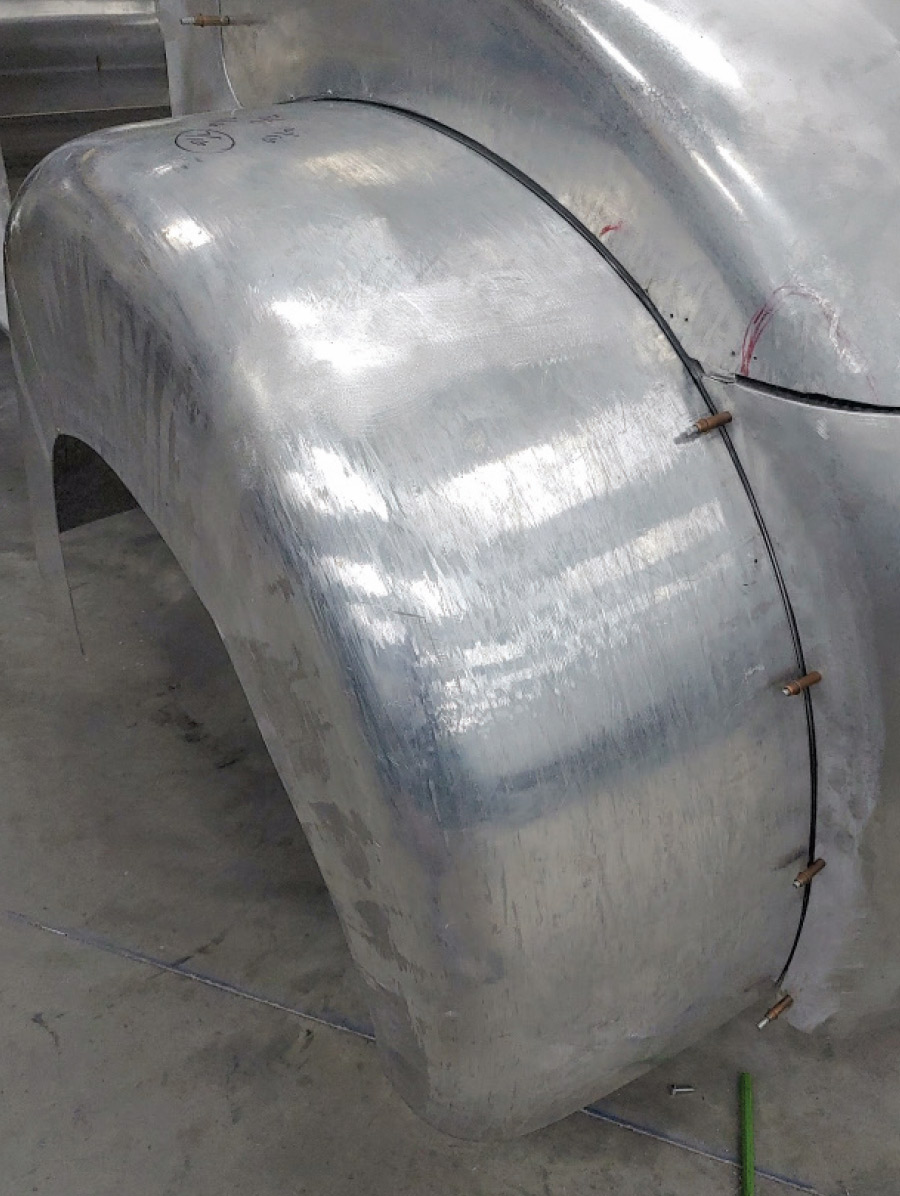
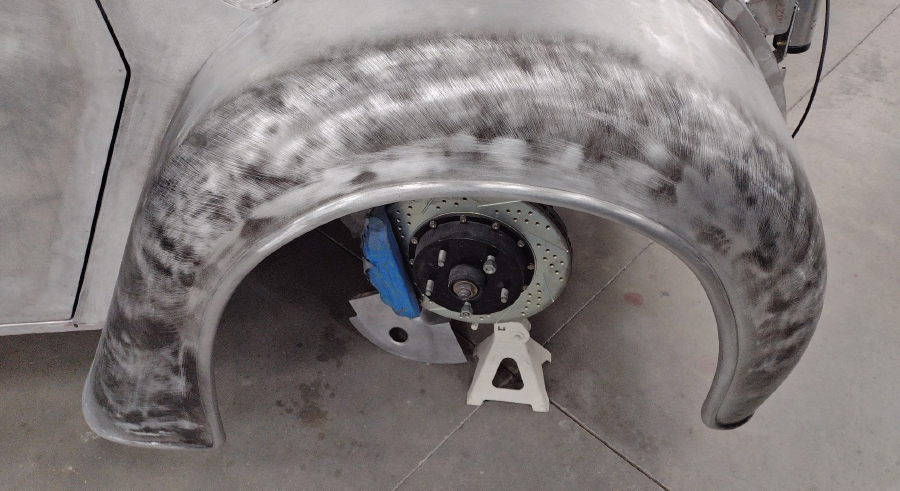
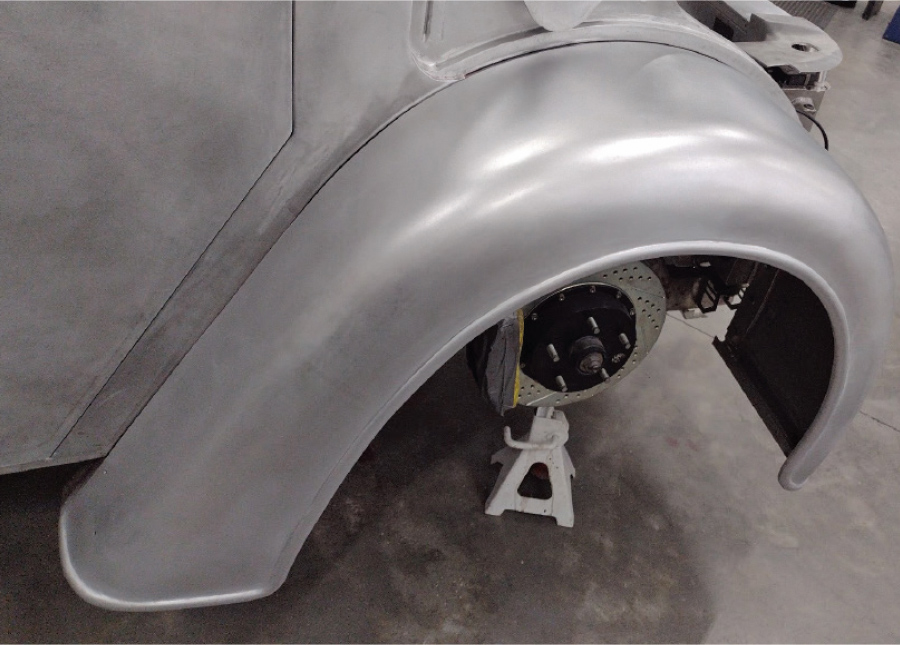
All the fenders on the truck are formed by hand, and we’ll take a close look at the construction details on one front fender. As always, this requires a lot of planning, coupled with taking great care when shaping the panels, then joining them together in a smooth, flowing manner before adding the final edging and detailing. The results speak for themselves.

The photos will give you a lot of insight into what it takes to build a high-level truck like this. We hope it inspires you to be adventurous with your own projects.

start of a custom shroud for the radiator fan
2. Here’s the start of a custom shroud for the radiator fan. A piece of flat sheetmetal was domed and 1/4-inch tape is used to lay out the openings.
cut out openings in the shroud
3. The openings in the shroud have been cut out, beaded, and a wire has been rolled inside each bead for added strength.
band of metal at the center portion of the shroud
4. A band of metal has been added to the center portion of the shroud, and the welded joint has been planished smooth.
finished shroud with the fan installed
5. Here’s the finished shroud with the fan installed, ready to be installed on the radiator. A piece of perforated metal was used to cover the fan motor.
accurately sized oval being used to make the baseplate for the handle
6. The rear door latches of the truck were entirely handmade and an oval DIVCO emblem will serve as the handle to open the doors. Here an accurately sized oval is used to make the baseplate for the handle; a pocket is shaped to match.
view of handle’s pivots fabricated and welded to both parts
7. The handle’s pivots have been fabricated and are welded to both parts.
return spring added on the back side of the handle
8. A return spring has been added on the back side of the handle, which will hold it flush with the body.
sections of metal with the beltline reveal added to the handle pocket
9. Sections of metal with the beltline reveal have been added to the handle pocket.
receiver split in half, welded into the doors, and metalfinished
10. With the receiver split in half, welded into the doors, and metalfinished, you can see how perfectly the handle fits in the opening.
close up of logo on custom door handle
11. With the logo in place, the custom door handle looks like a factory-designed feature.
inner panel of the hood
12. The inner panel of the hood was a huge project in itself. It is made from many pieces of metal and provides the structure for the hood while also ducting air to the induction system.
top view of the construction
13. A top view shows the complexity of the construction. All the surfaces will be smoothed to perfection before the skin panels are attached.
one of the sides being test-fitted
14. The center portion of the hood has been roughed-out here and one of the sides is being test-fitted.
reveal being placed on the hood side and an additional strip of metal being added to the bottom edge
15. The reveal has been placed on the hood side and an additional strip of metal is being added to the bottom edge.
hood and engine air intake grilles
16. All the panels are assembled here, and the metalfinishing process has begun. You can see the recesses for the engine air intake grilles just in front of the windshield.
small pieces of angle contoured to make forms for shaping the front fenders
17. Small pieces of angle were contoured to make forms for shaping the front fenders.
fender panels being fitted and smoothed
18. The fender panels were shaped on a power hammer and are being fitted and smoothed here.
metalfinishing nearly completed on the top of the fender
19. The metalfinishing is nearly completed on the top of the fender.
tape being used to lay out the trim line for the bottom edge of the fender
20. Tape is used to lay out the trim line for the bottom edge of the fender.
Pullmax machine being used to put the bead on the fender edge
21. A Pullmax machine was used to put the bead on the fender edge. Black dye has been spread on the fender to help identify the last few low spots, which will be meticulously smoothed to perfection.
fender looking like it was die-stamped
22. With the final smoothing completed, the fender looks like it was die-stamped.
gaps around the hood precisely fitted
23. All the gaps around the hood, fenders, and doors have been precisely fitted.
hood opened
24. With the hood opened, you can see the gorgeous metalwork that extends to every visible surface.
close-up of one hood latch showing the precise fit of each panel
25. A close-up of one hood latch shows the precise fit of each panel.
inner hood panel
26. Here you can see how the inner hood panel directs air to the injector throttle bodies. The clean design is eye-catching, and the fit and finish on all the components is superb.
SOURCE