CTP Tech
InTheGarageMedia.com
A Classic Truck Tale typography
The “Family” F-100
A close-up of a red 1956 Ford F-100 classic pickup truck parked in front of a garage.
By Kevin TetzImages By THE AUTHOR
I

’ve been a professional repair and refinish technician for over half my life. I love my career, and how cars and what they represent are intertwined with family memories from a very early age. My family is from western Canada, south-central British Columbia to be exact, and we grew up around cars. My uncle Herb Pinske’s antique auto wreckers, A&H Used Auto Parts, sold cars and parts from the 1920s up to the 1970s, with a vast array of makes and models. My brother, Blaine Tetz, and I grew up around these cars and learned life lessons along the way.

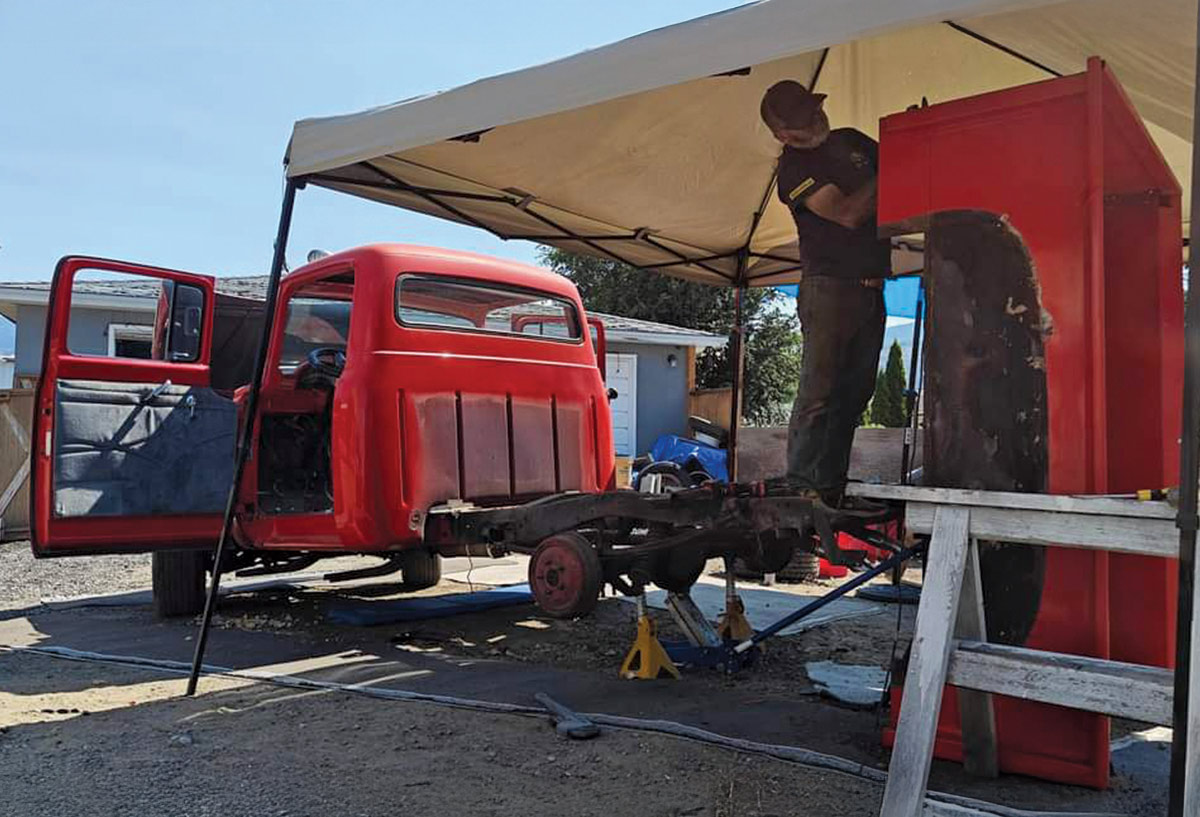
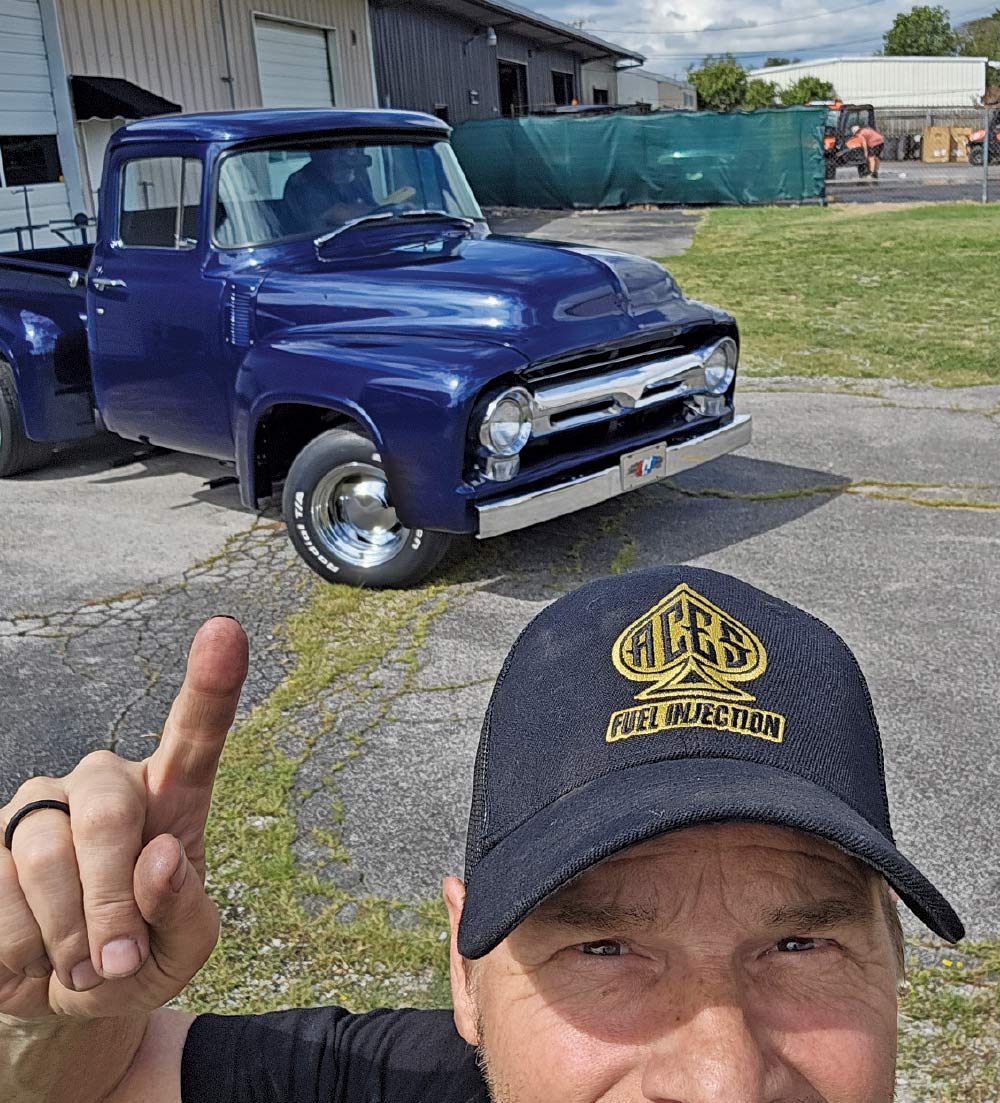
My Cousin Wayne Pinske was here in Tennessee for a visit earlier in the year and we were reminiscing about childhood memories, cars, tall tales, and family get-togethers. We (possibly over adult beverages …) hatched a crazy plan to drag my youngest cousin Allan’s truck (that he got from his dad) down to my shop to throw a quick paintjob on it and have a family get-together. Ultimately, that plan escalated over the summer and ended up in a weeklong event that started with Cousin Allan’s ’56 F-100 making the 2,400-mile/36-hour journey on an open car hauler with his brother, Wayne, their nephew, Brandon, and Shane Dacosta (Brandon’s brother-in-law) on board.

My brother, Blaine, and Wayne’s son Steve flew in and met us in Nashville just in time to attend the Triple Crown of Rodding, which is an amazing car show! Once we saw the sights, had a nice visit, and got reacquainted, we got down to business.

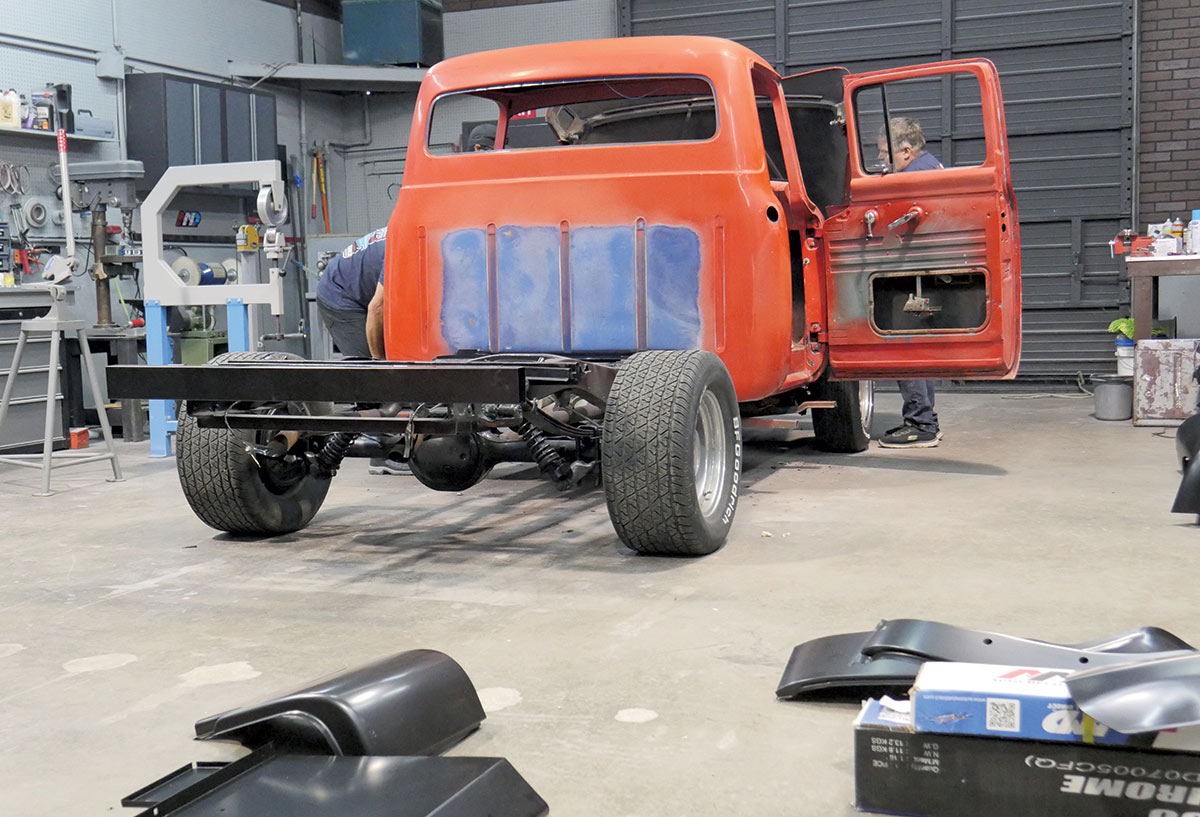
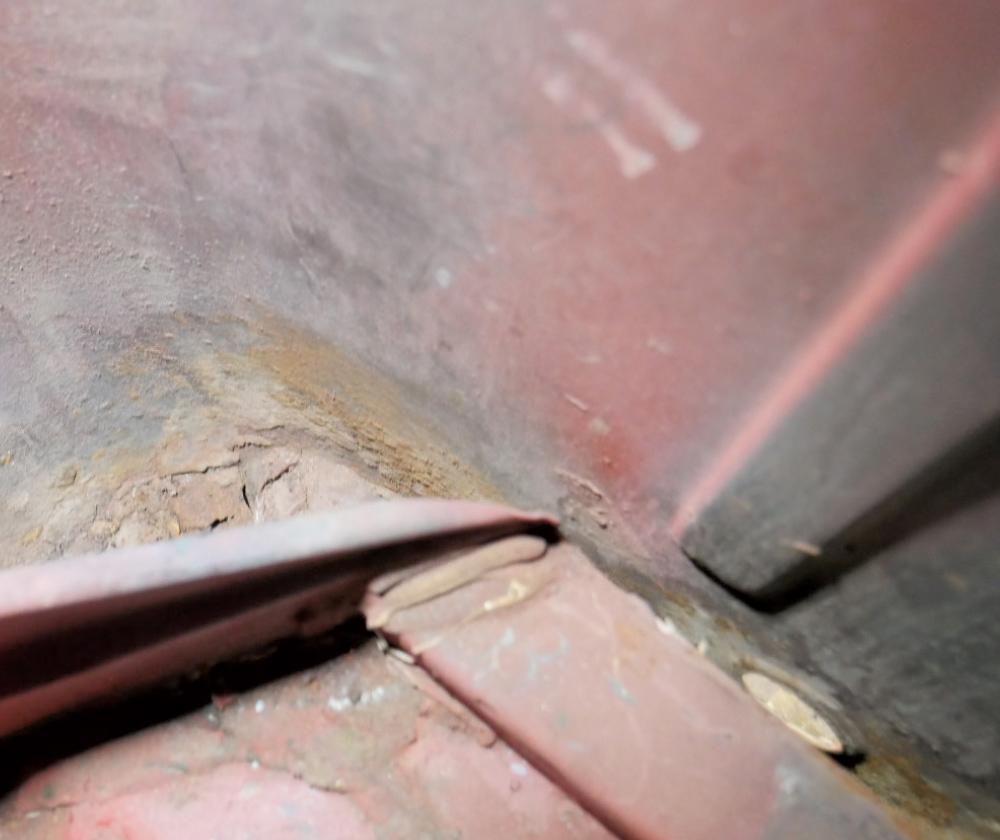
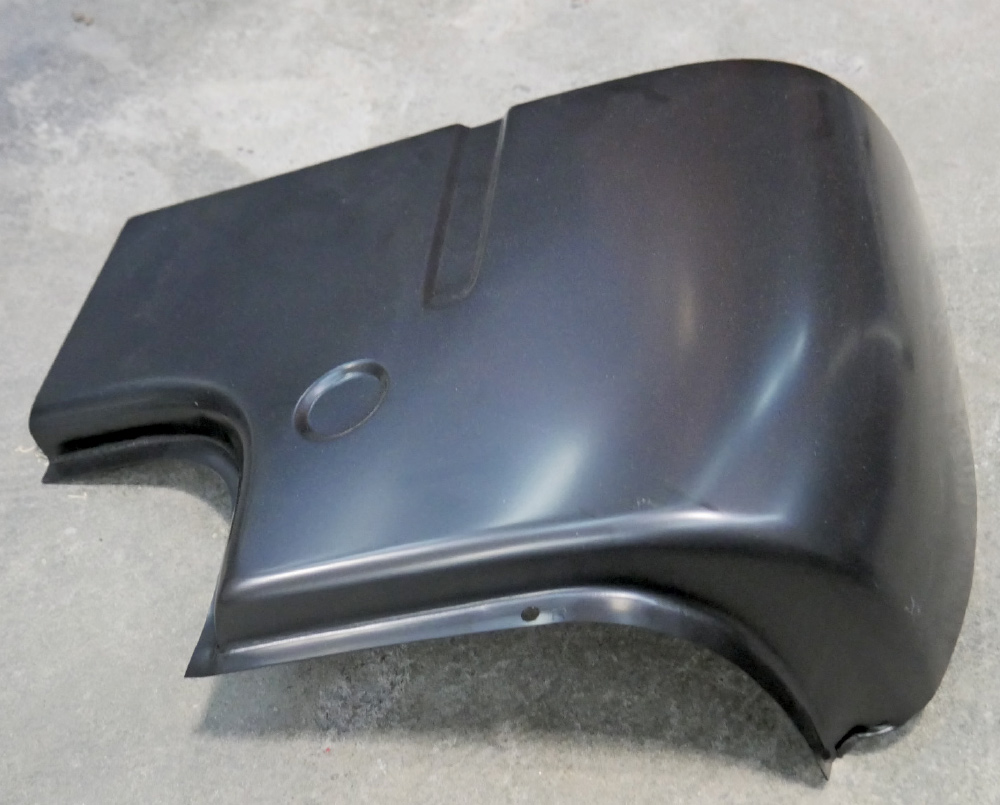
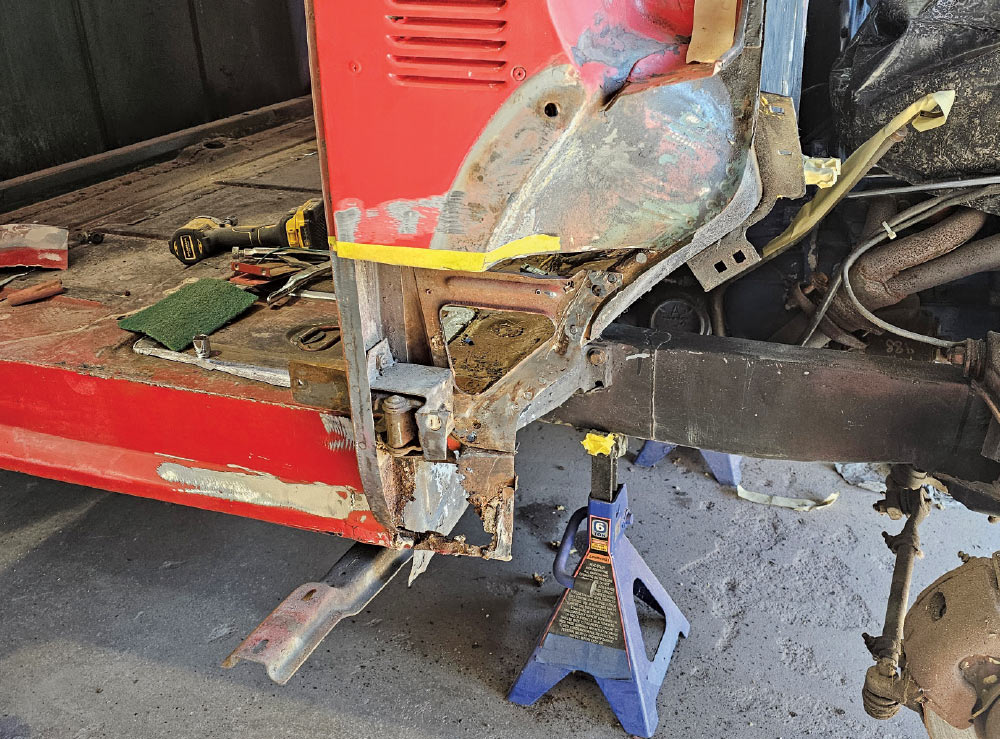
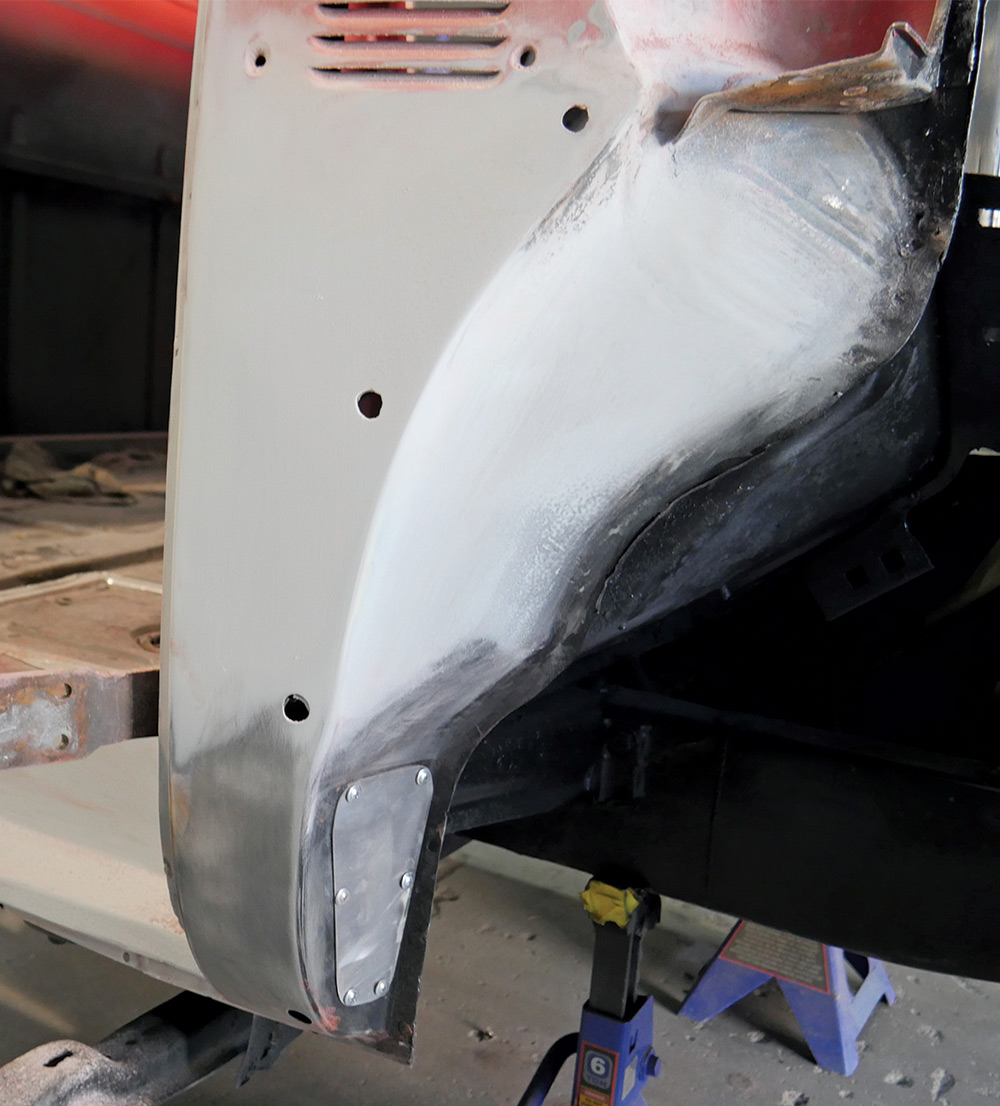
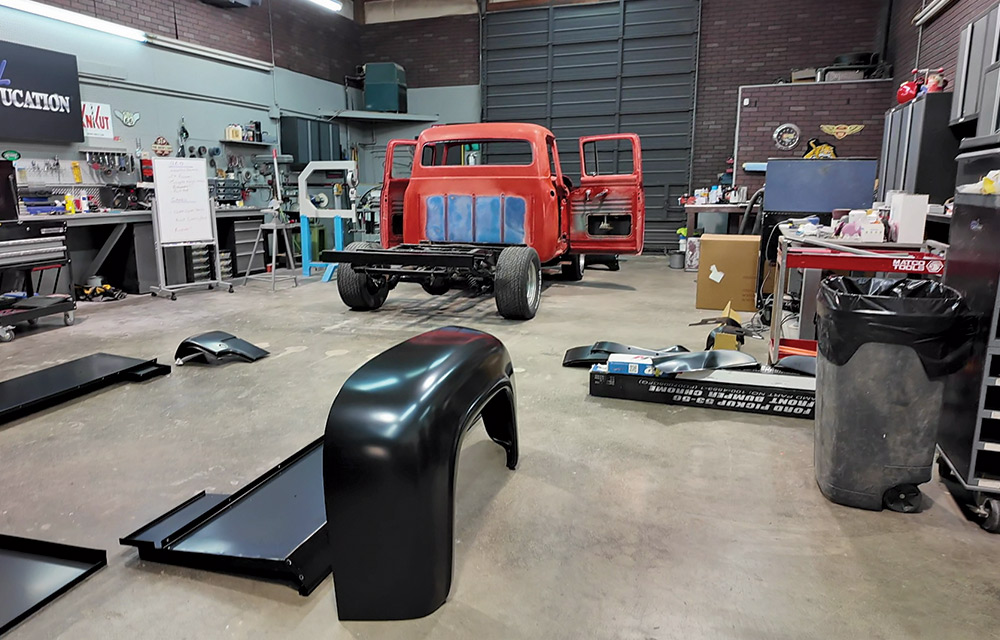
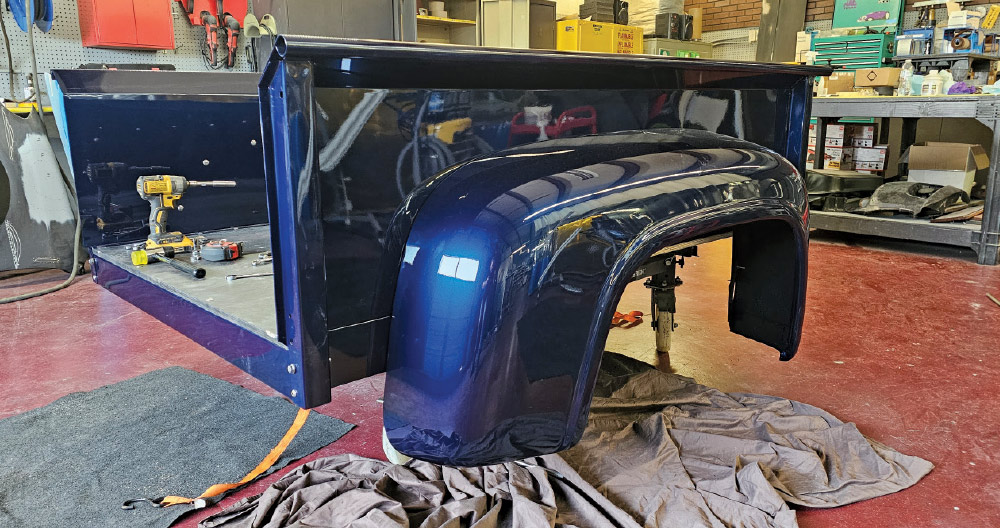
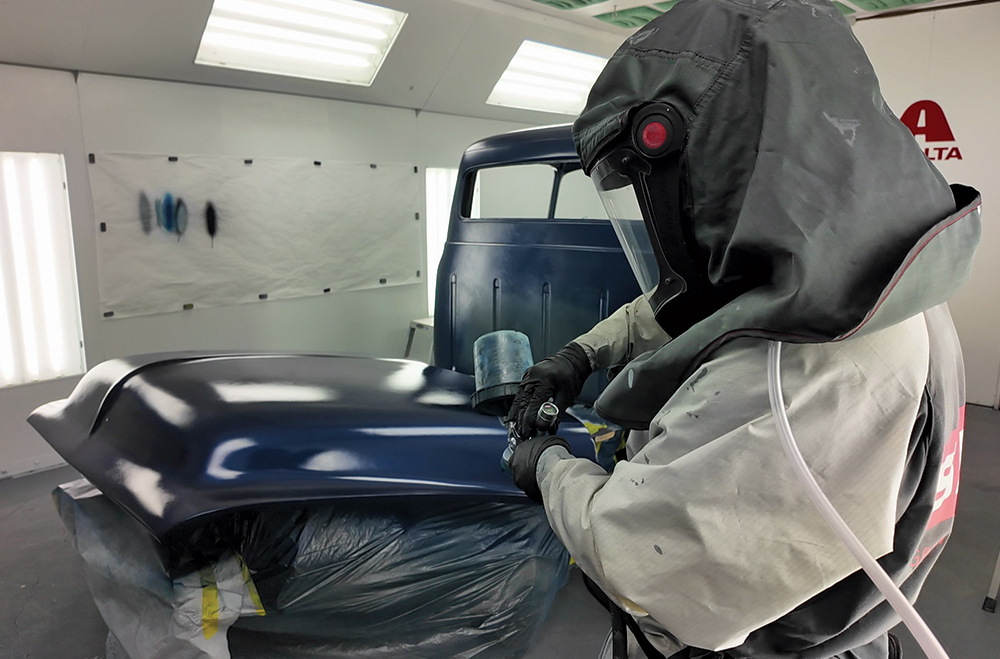
We had a six-day deadline, so it was GO-TIME! What makes it a little easier is that we used all-new Auto Metal Direct (AMD) fenders, bedsides, braces, and patch panels to complete the repairs and get us beautiful parts that, aside from cab corners and rust repairs, only needed to be scuffed and painted for installation on the truck. This is a snapshot of a once-in-a-lifetime build thrash. It was an adventure that got our family back together again after decades apart and kicked out an outstanding F-100 refurb at the end of a six-day/500-hour week!

A close-up, low-angle shot of a classic dark blue Ford F-100 pickup truck.
1. Here’s our subject, 30 years ago right after a full restoration. Period-correct sawblade chrome wheels, Volare front subframe, 302 Ford engine, and shiny single-stage paint make it a great-looking and handling show driver! But time always takes its toll on a vehicle, and this one needed going through.
A red classic Ford pickup truck, partially disassembled and undergoing restoration.
2. Before the trip, Wayne Pinske spearheaded a teardown of the bed and front fenders, since they were getting replaced anyway, which allowed them to get a good look at the cab structure.
A wide-angle interior shot of a workshop, showing the rear of a red classic Ford pickup truck in the midst of restoration.
3. After the 2,400-mile/36-hour trip, we unloaded the truck into the Paintucation shop and made a game plan and playbook … a goal like this won’t be achieved without a solid plan.
A close-up shot of the rear cab corner and the front of the truck bed on a classic Ford pickup truck.
4. The first of many projects are cab corners; they look fine from 10 feet away, but there are clues when you get closer.
A close-up, low-angle shot of a rusted and damaged section of a red vehicle's metal paneling.
5. A look at the inner cab shows oozing filler and lots of crud … not a good sign! We have an opportunity here to correct the prior repair with a new AMD panel.
A medium, slightly elevated shot of a new, unpainted, black metal rear cab corner patch panel for a classic Ford F-100 truck.
6. With the AMD (PN 481-4553, left and right) cab corners ready to go, we were ready for whatever we found at the rear corners.
A person wearing a face shield and ear protection kneels on the floor, using a grinder to work on the metal body of a red classic Ford pickup truck.
7. Using a cutoff wheel, the cloud of filler dust was a clue as to how much bog was used to make the corner. When this truck was last finished, there were no AMD re-pops for the cab corners.
A close-up action shot of a person using a grinder to cut into the metal body of a red classic Ford pickup truck.
8. We cut well above the rust and filler and exposed the (also rusty) inner corner, which was promptly removed in favor of new metal.
A close-up shot of a person's gloved hand holding a C-clamp, using it to hold a new black metal patch panel in place on a red classic pickup truck.
9. The new inner supports (PN 480-4548 L&R) are E-coated and ready to be installed. The fit was excellent, so we used the stamped shapes to locate the inner panel properly.
A man wearing a welding helmet and protective gloves is welding a new metal patch panel onto a red classic pickup truck.
10. After a test with the outer and a mockup, Allan’s nephew Brandon Pinske welds in the new lower cab corner.
A close-up action shot of a person using an air-powered tool to grind or cut a section of a red classic pickup truck's body panel.
11. Brandon grinds any excessive weld pool off the surfaces before moving forward with the outer. Even though we have a deadline, there are no shortcuts taken.
A close-up shot of a person's hands wearing black gloves, spraying a zinc primer from a spray can onto a newly installed metal patch panel on a red classic pickup truck.
12. We use a high-quality zinc weld-through primer for all metal repairs where there could be a corrosion opportunity. Zinc is a sacrificial coating that draws corrosion away from carbon steel.
A person wearing a backward-facing cap and safety glasses kneels on the floor, using a tool to work on the newly installed patch panel on a red classic pickup truck.
13. Brandon uses an ink marker to draw a cutline on the cab for the new outer panel.
A medium, wide-angle shot of a person sitting on the floor in a workshop, using a grinder to cut into the lower section of a red classic pickup truck's body panel.
14. The cut is made with a 1/16 cutoff wheel just ahead of the drawn line. This gives some adjustment room for a final fit.
A close-up action shot of a person welding on a red classic pickup truck.
15. After trimming and grinding for a butt-joint, Brandon uses a MIG welder with 0.030 wire to weld in the new AMD panel. Even though this is a stamped curve and a complex shape, he takes his time and blows the tacks cool before each new weld to avoid warpage.
A medium shot of a person wearing a backward-facing cap, using a tool to smooth out a newly welded patch panel on a red classic pickup truck.
16. Steve Paul (Wayne Pinske’s son) steps in to finish the bodywork on the cab corner while Brandon jumps on another patch. This was a coordinated project, with many workstations simultaneously moving forward, so we all took on many jobs to move the project ahead.
A close-up shot of a person's gloved hand using a sanding block to smooth the surface of a newly installed and welded patch panel on a red classic pickup truck.
17. After grinding with 40-grit to smooth the welds level, Steve uses 80-grit, then follows with 180 to blend the metal repair and feather it into the truck cab. This sets it up for filler.
A close-up side view of a red classic pickup truck's cab corner after bodywork has been completed.
18. After using Evercoat OPTEX filler and OPTEX 4 to 1 polyester primer-filler, the cab corner is ready for final paint prep!
A low-angle close-up shot of the front-left section of a red classic pickup truck's cab, showing extensive disassembly and rust damage.
19. The front corners were suffering as well! We replaced left and right with AMD cowl repair panels (PN 376-4553-2 left to right) to fix the front corners. Some of the inner structure had to be replaced, and we used scrap flat-stock 18-gauge to repair the inner structure.
A close-up side view of the repaired front cab corner of a red classic pickup truck.
20. The finished result looks factory fresh! Since the inner cab mounts were still very solid, this repair took only three hours per corner.
A side-view close-up shot of the front cab section of a red classic pickup truck under restoration.
21. With all four corners now rejuvenated and ready for another 70 years of service, Allan made new pressure relief covers out of aluminum for each side. AMD, here’s an idea for a new product? Let’s discuss!
A wide-angle interior shot of a workshop, with the rear of a red classic pickup truck under restoration in the center.
22. Much care was taken to keep from damaging the new AMD parts. They looked great and were damage-free right out of the boxes. My strategy was to be able to scuff & shoot most of the new panels without bodywork, depending on how well mockups went.
A wide-angle interior shot of a workshop, with two men standing on either side of a classic red pickup truck.
23. The bed assembly took about six hours total to get an accurate fit. This involved cross-sills (PN 716-4553-3), bedsides (PN 721-4553), new front panel (PN 715-4551), and fenders (PN 80-4553), while integrating the original (custom) tailgate. We had to slot a few holes and make minor adjustments along the way to the bedsides, but nothing unexpected. We also used a complete fender bolt set (PN 15783).
A wide-angle interior shot of a workshop or paint booth, showing two men working on classic truck fenders.
24. With mockups complete, we had parts in the booth by day two! The rear fenders were lined with U-POL Raptor bedliner (PN UPO KIT-0822-4-GUN) in black for impact protection inside the fenders. We sanded them with 320, which gets them ready for a Nason XL sealer to spray the color onto.
A close-up interior shot of two men in a workshop, working together on a red metal panel.
25. While we were prepping body parts in the booth, Wayne and Steve worked on the doors, repairing some small rust-through at the bottoms of the panels with 20-gauge.
A wide-angle interior shot of a paint booth, showing a person wearing a full protective suit and respirator, using a spray gun to paint a classic truck fender dark blue.
26. The color Allan chose was a mid-’90s GM truck color named Indigo Blue (code WA9792), which looks great on the fat-fendered body of this truck!
A medium interior shot of a workshop, with two men working on a newly painted dark blue truck bed.
27. Day three and another several sessions of painting, priming, and blocking, the bed was assembled for the last time. Spending time on mockups made this much easier and saved us from scratching paint while adjusting for panel fit. It’s prudent to put in the time prior to painting and pre-fit things together! Even great aftermarket parts need finessing to integrate into a 70-year-old body.
A low-angle interior shot of a workshop, showcasing a newly painted dark blue classic truck bed and fender.
28. The bed assembly looks like a million bucks! We could have bodyworked and rust-repaired the originals, but these stampings were amazing. We saved dozens of hours by spending a little money on new AMD panels here.
A wide-angle interior shot of a paint booth, showing a person wearing a full protective suit and respirator, using a spray gun to paint a classic truck's cab and front end.
29. On day four, I finally had the cab assembly and other miscellaneous parts in the booth for coatings! It was an obstacle course between the hang and stacked parts, my fresh air supply hose, and the gun air hose, but it all worked! Painting in the cab saves us from having to mask everything twice but it’s quite a challenge to spray it all at once!!
A medium interior shot of a paint booth, showing a person in a full protective suit and respirator using a spray gun to apply a glossy, dark blue coat of paint to a classic truck's hood.
30. The Nason XL base color covered in three coats, and we used a SATA 5000B 1.3 HVLP gun, and a total of 5 quarts to spray the entire job. Once you add the (2 to 1 ratio) reducer, that makes 240 ounces (1.75 gallons) of sprayable color. That also left Allan almost a full quart of color to spray the running boards (that we forgot to order from AMD) once he got back to British Columbia, Canada.
A wide-angle, low-angle shot of three men pushing a dark blue classic pickup truck's cab and chassis out of a garage.
31. Days five and six were mostly paint and reassembly, and we used Nason XL 438-40 Overall Clearcoat, which is affordable and beautiful! I’m using SATA spray equipment these days, and my 5500X with a 1.2 fluid tip lays down the clearcoat like glass.
A man wearing safety glasses is using a polisher on a dark blue truck hood, which is propped up on a stand.
32. It’s inevitable that there’s a little dust that falls into the paint, so we nibbed with 2,000-grit paper and used my Griot’s Garage BOSS polishing system to repair any surface defects.
A wide-angle interior shot of a workshop, with three men working on a newly restored dark blue classic pickup truck.

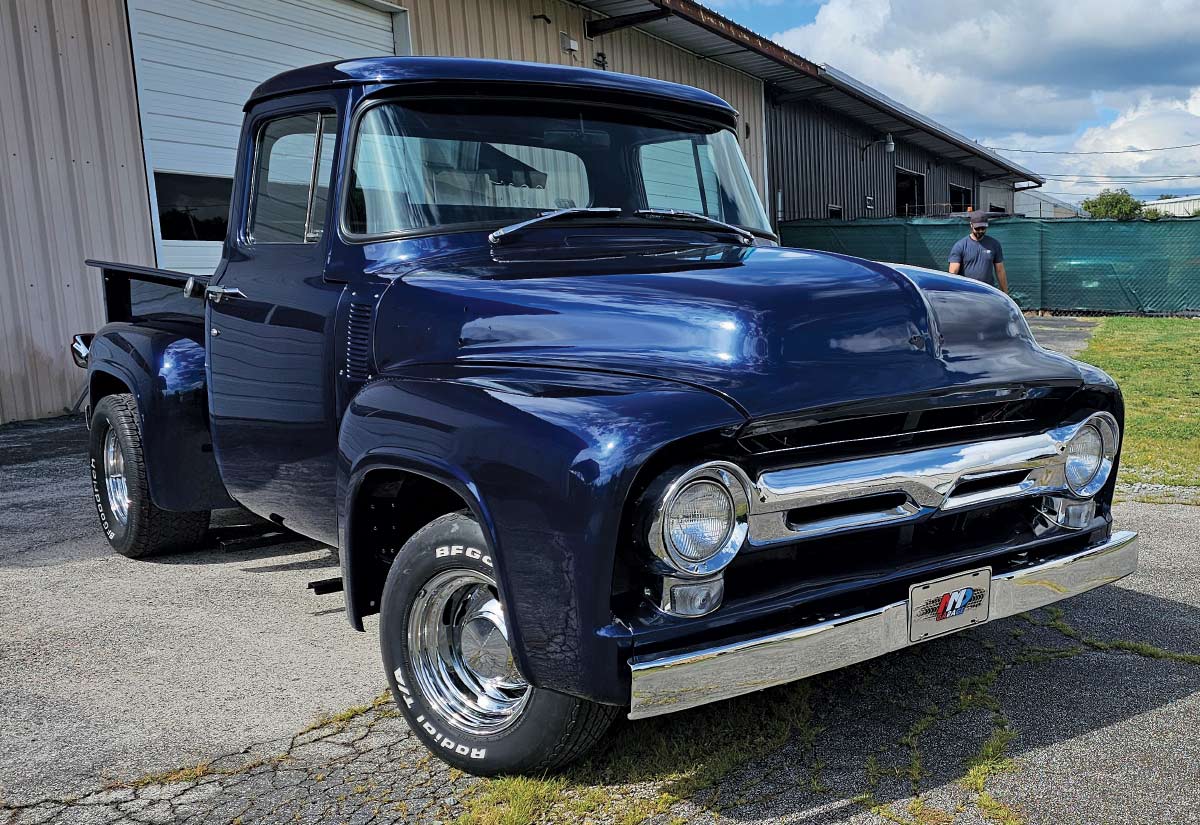
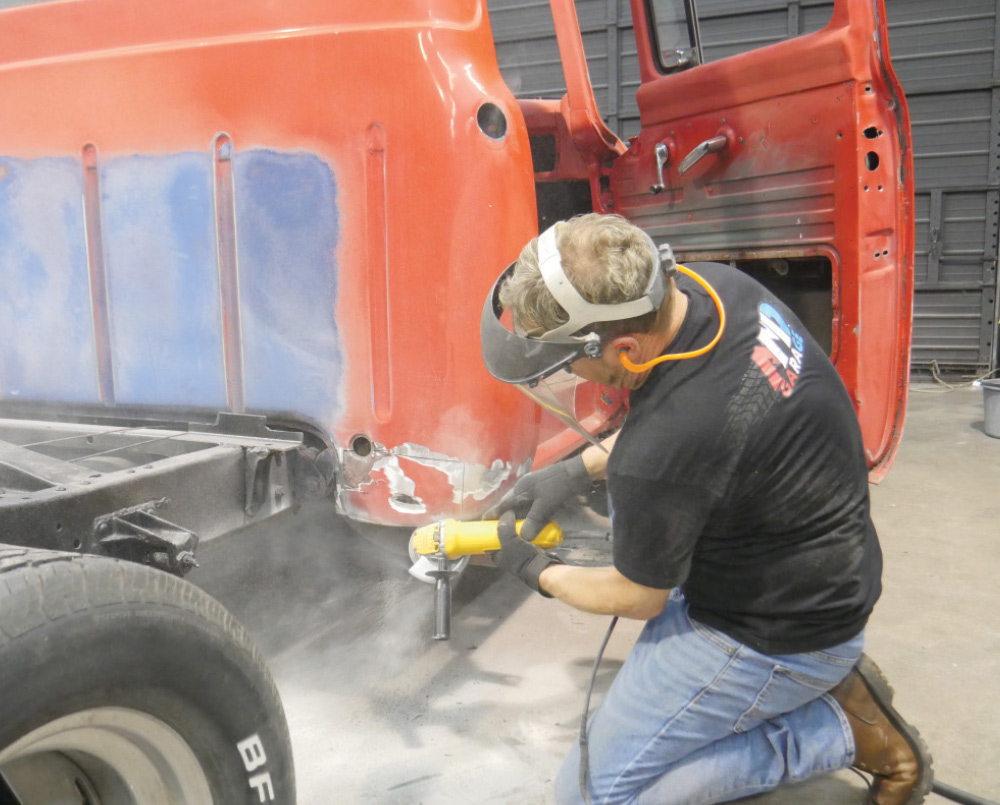
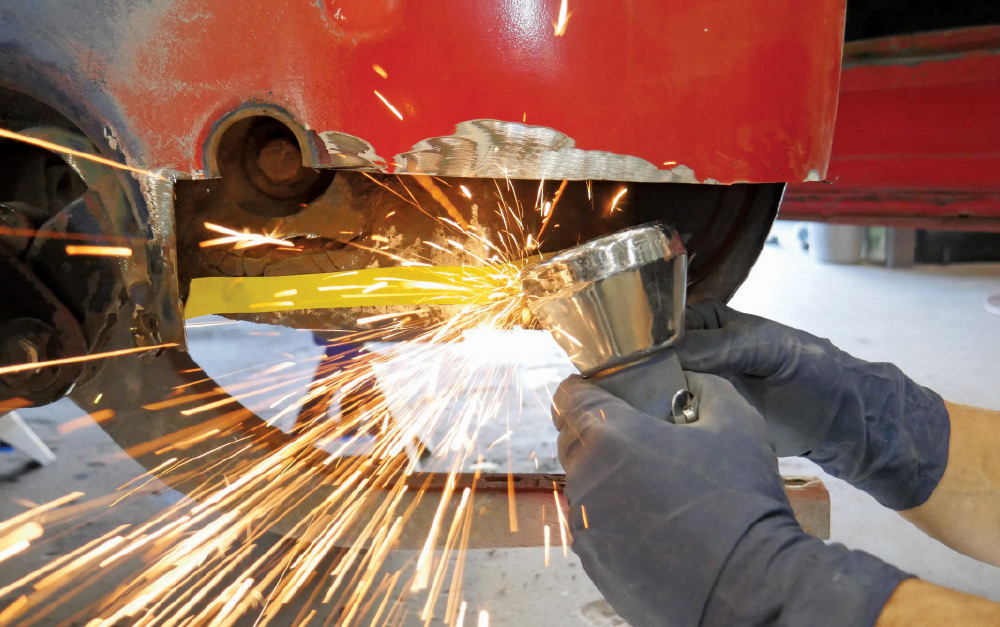
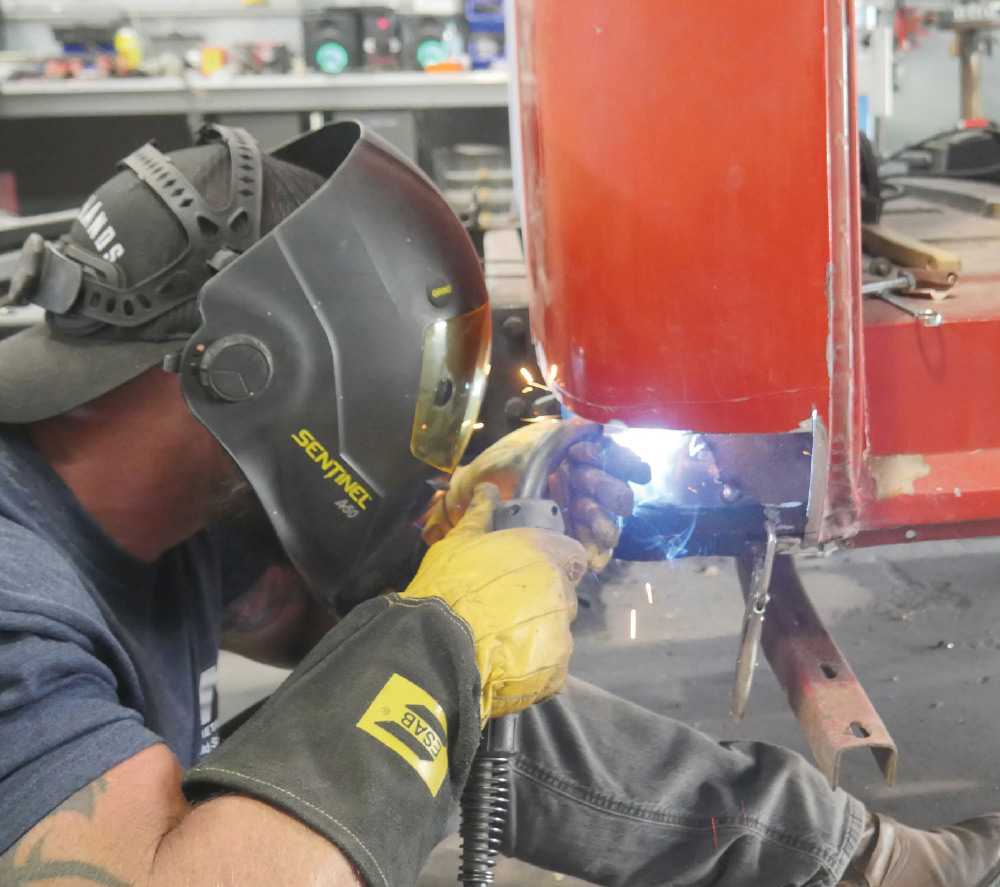
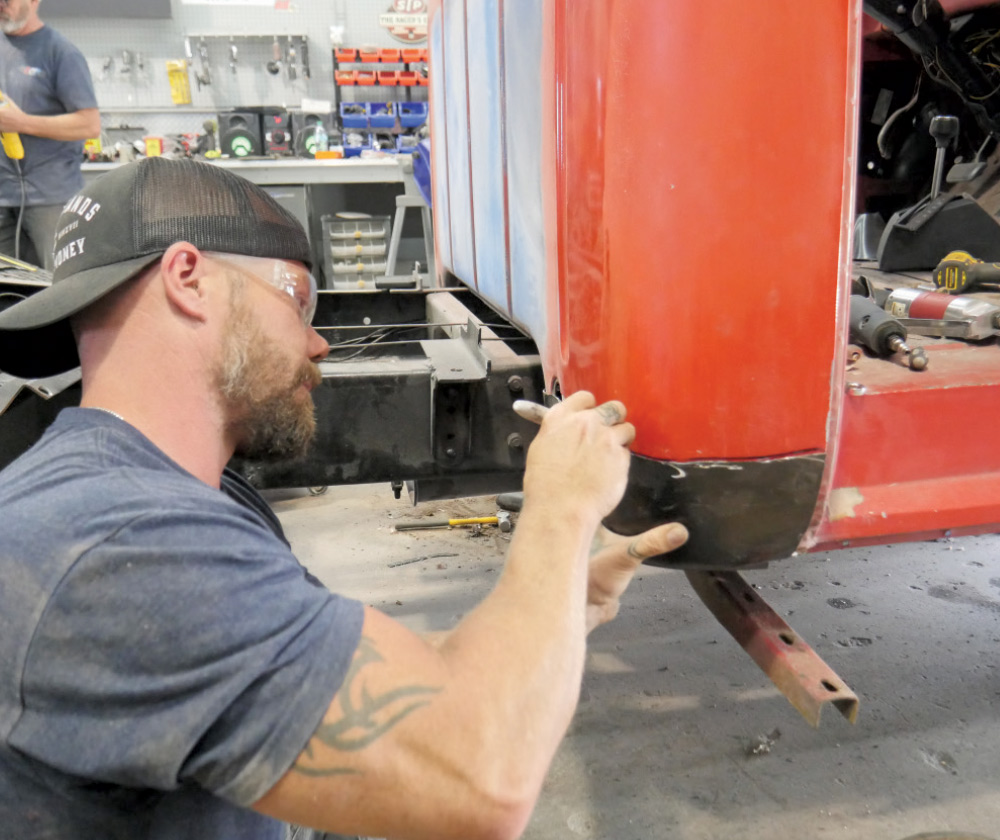
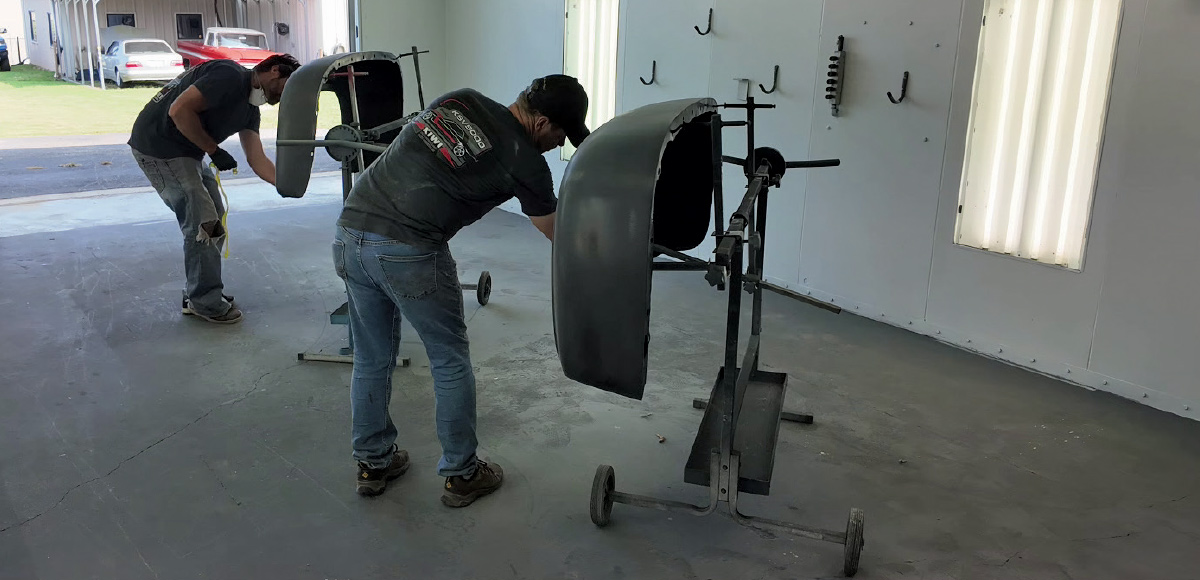
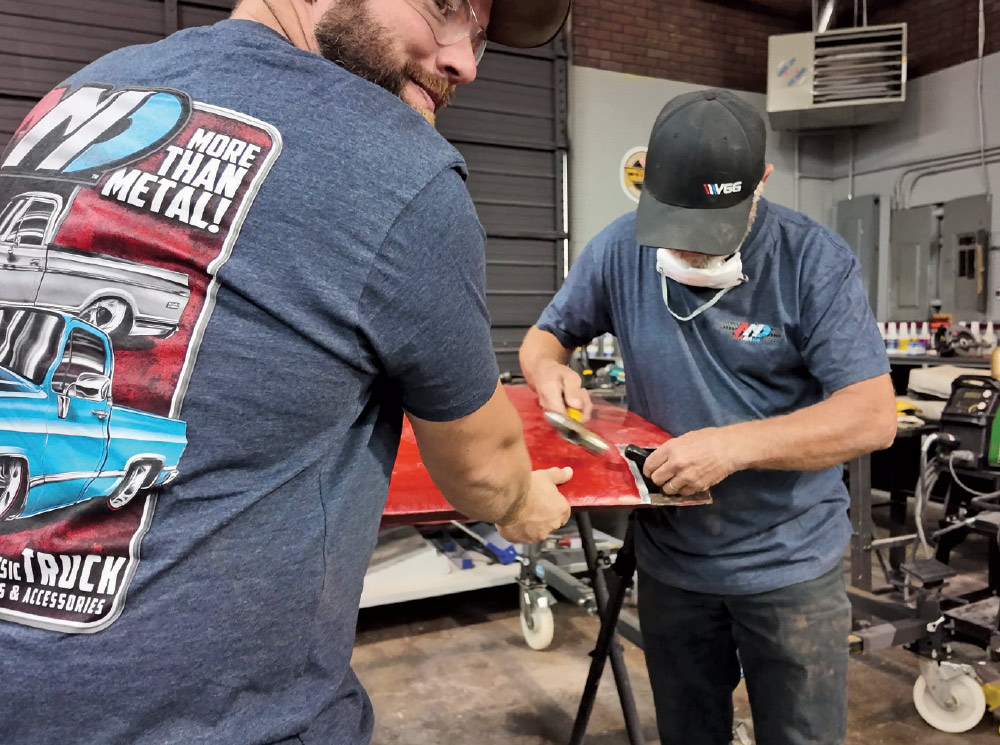
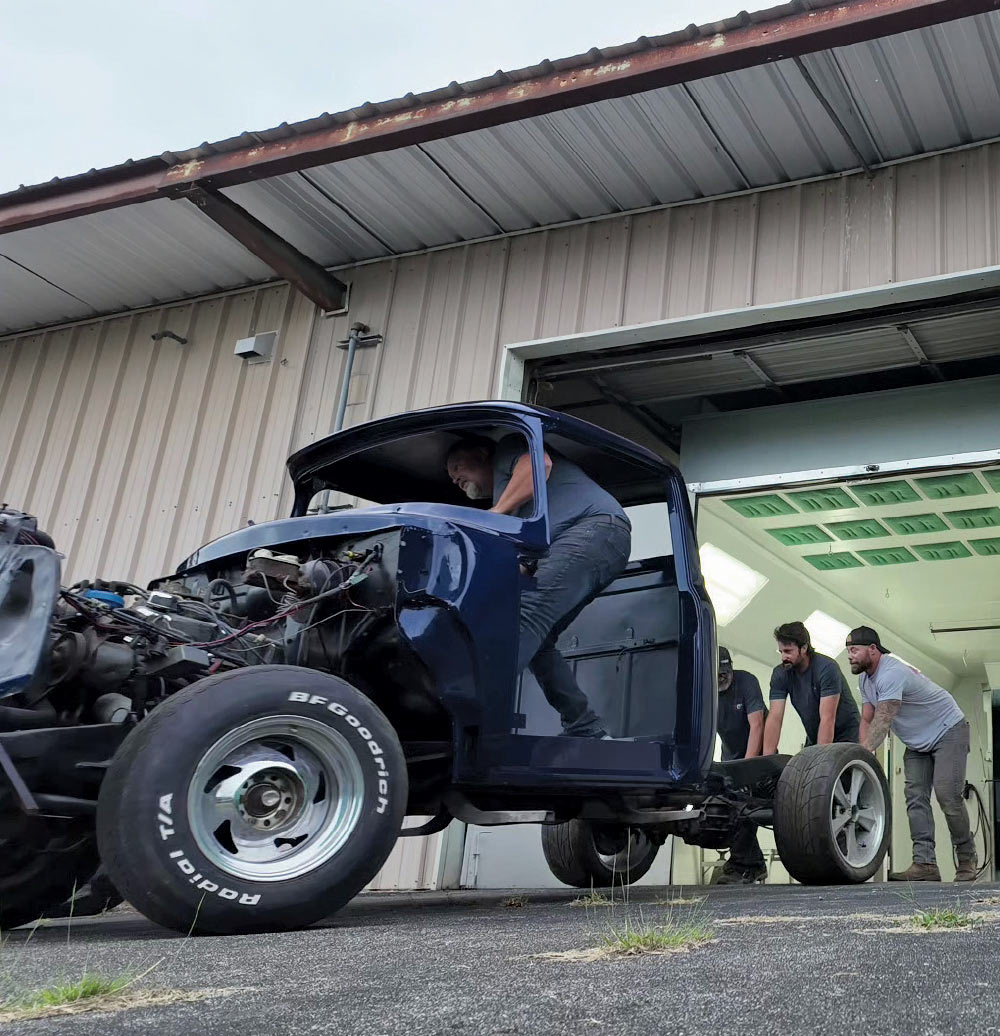
33. Everyone was a little shell-shocked and exhausted for reassembly … we still put in 12- to 14-hour days with seven bodies, which makes a total of just under 500 labor hours all accumulated. We installed a new rear glass, new weather-seals (PN X580-4556-1), and a few other chrome goodies to freshen things up.

A side and rear view of a finished dark blue Ford F-100 classic pickup truck.
34. Seeing this truck come back to life was an amazing thing to be a part of, but it’s so much deeper than that. The last time we were all in one place we were kids, and some of us hadn’t even been born yet. This family reunion was long overdue, and such a wonderful way to catch up, get reacquainted and bond again over what we all share deep down: a love of classic cars. The cars we love are amazing, but even more beautiful are the memories we associate with them.
A low-angle selfie of a man pointing at a blue, classic Ford F-100 pickup truck parked behind him.
SOURCES