CTP Tech

InTheGarageMedia.com

1. To update this Chevy C10 pickup, Jason Scudellari installed a Classic Performance Products Classic Fit Shortened Column Shift Deluxe Tilt Column (PN DC-6772-SB1.5). We followed along to document the process.
Size Matters
Less is More With CPP’s Classic Fit Shortened Tilt Column
By Ron CeridonoImages By CPP Staff
A

tilt steering column is an accessory that once you’ve had one it’s hard to imagine living without it. Being able to adjust the position of the steering wheel when driving, not to mention the convenience of moving the wheel out of the way to exit and enter the vehicle, is obvious. What’s not always so obvious until it’s too late is that retrofitting a tilt steering column often moves the steering wheel far too close to the driver due to the added length of the tilt mechanism. This problem is particularly true when dealing with the less than commodious cabin of a 1967-72 Chevy or GMC pickup. Fortunately, for every problem there is a solution and in this case the solution is a shortened tilt steering column from Classic Performance Products (CPP).

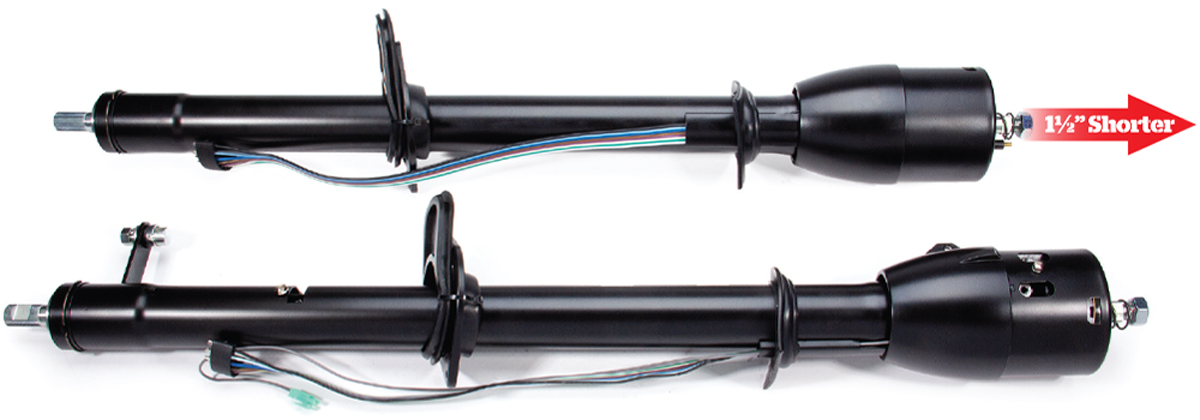
CPP’s Classic Fit Shortened steering columns for 1967-72 GM trucks are made from stainless steel that will never rust. They are available in chrome or satin black powdercoat (which can be painted) with or without a column shifter. They feature a five-way tilt mechanism and are 1-1/2 inches shorter than typical tilt columns from the dashboard to the tip of the steering shaft, moving the steering wheel away from the driver for much-needed cab space.

Installing a CPP shortened tilt column is basically a remove-and-replace operation. These columns attach to the truck via all the stock brackets for a solid, stable installation. They come with GM electrical connectors and accept the original neutral safety/reverse light switch and accommodate both the GM OE-style and all billet aftermarket steering wheels.

Replacing the stock, fixed position steering column couldn’t be easier or more affordable. CPP’s steering columns are not only competitively priced they come with a lifetime guarantee. With the new column’s reduction in length, none of the valuable interior space is sacrificed when adding the tilt feature—proving yet again that less really can be more.

Comparison of a shortened premium steering column and a standard OE-style steering column.
2. Comparison shows the difference between the shifted and non-shifted steering columns offered as well as the length difference between the OE-style and the shortened premium steering column.
Shortened steering column kit with billet turn signal and tilt lever, installation hardware, and gaskets.
3. Delivered in a protective plastic case, CPP’s shortened columns come with a billet turn signal, tilt lever, and hazard button, as well as dashboard seal, floor gasket, and plate. Automatic applications also include billet chrome shift handle, neutral safety/backup light switch, and gear indicators for three- and four-speed. OE-style levers are also available, as shown.
Installation of the neutral safety/backup light switch onto the steering column's shifter tube.
4. The lever on the neutral safety/backup light switch fits over a tab on the shifter tube inside the steering column. The switch must be adjusted so the truck only starts in Park and Neutral (easy-to-follow instructions are included).
Close-up of the installed neutral safety/backup light switch on the steering column.
5. With the switch installed and adjusted it plugs into the stock wiring harness.
Installing the detent spring into the steering column.
6. The first step to installing the included shift lever is to drop this detent spring in place.
Driving a knurled pin to secure the shift lever, with the shift indicator light bulb visible.
7. With the spring installed, the lever is next. It’s held in place by driving in a knurled pin. Note the light bulb that illuminates the shift indicator.
Installing the shift indicator pointer on the steering column.
8. This is the pointer for the shift indicator; it moves in and out as the wheel tilts.
Steering column with three-speed and four-speed automatic shift position indicators.
9. CPP provides two shift position indicators, one for three-speed automatics and the other for four-speed overdrives.
Attaching the gear indicator and bezel to the steering column with a screw.
10. The gear indicator and bezel attach to the column with the supplied screws.
Installing the hazard light button on the right side of the steering column.
11. On the right side of the steering column the button to activate the hazard lights is installed.
Securing the steering column to the dashboard with the factory clamp and fasteners.
12. The CPP steering column is secured to the dash with the factory clamp and fasteners.
Securing the bottom of the steering column to the firewall with the original clamp and hardware.
13. On the engine bay side of the firewall the bottom of the column is again secured with the original clamp and hardware.
Installing the factory steering column bezel around the base of the column.
14. With the column in place the factory steering column bezel is installed. It fits around the bottom of the column and on the outside of the instrument panel, retaining the dash grommet on the steering column.
Steering column showing the 3/4-inch, 36-spline steering shaft and stock-style shift rod linkage pivot.

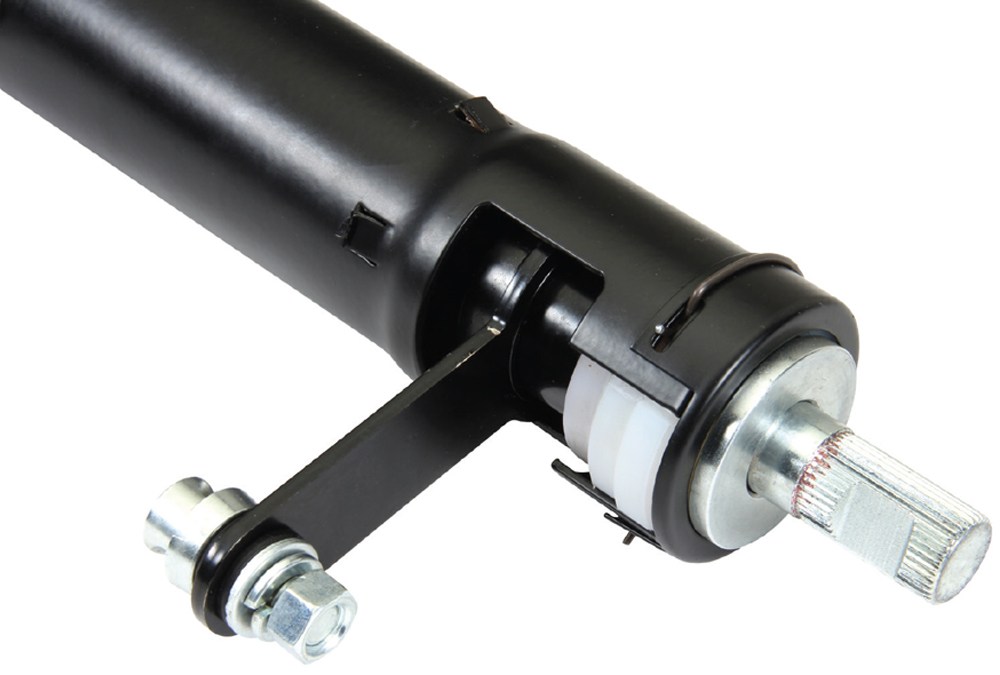
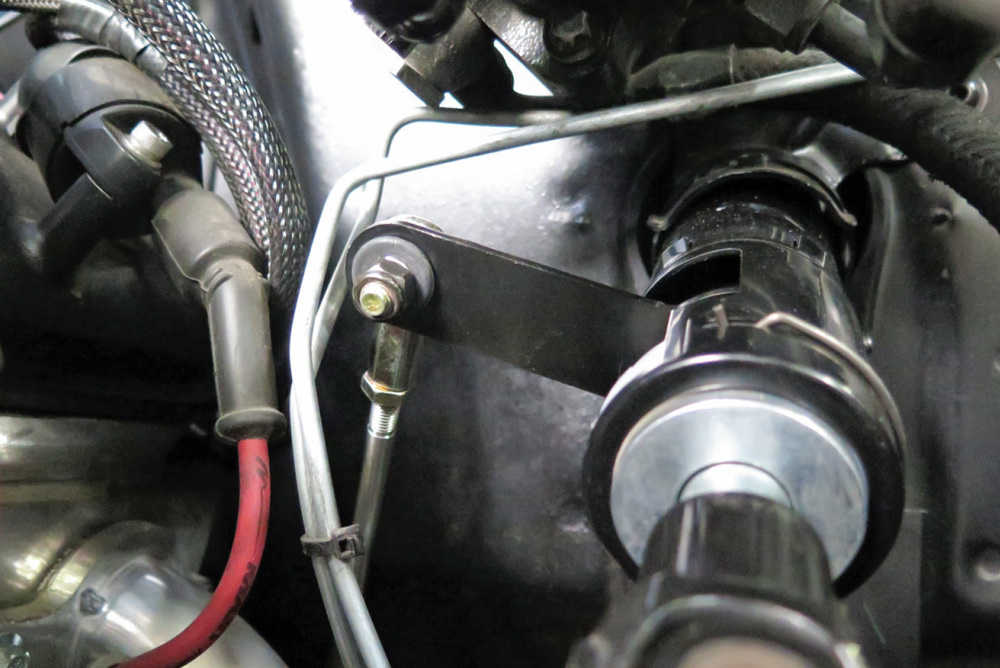
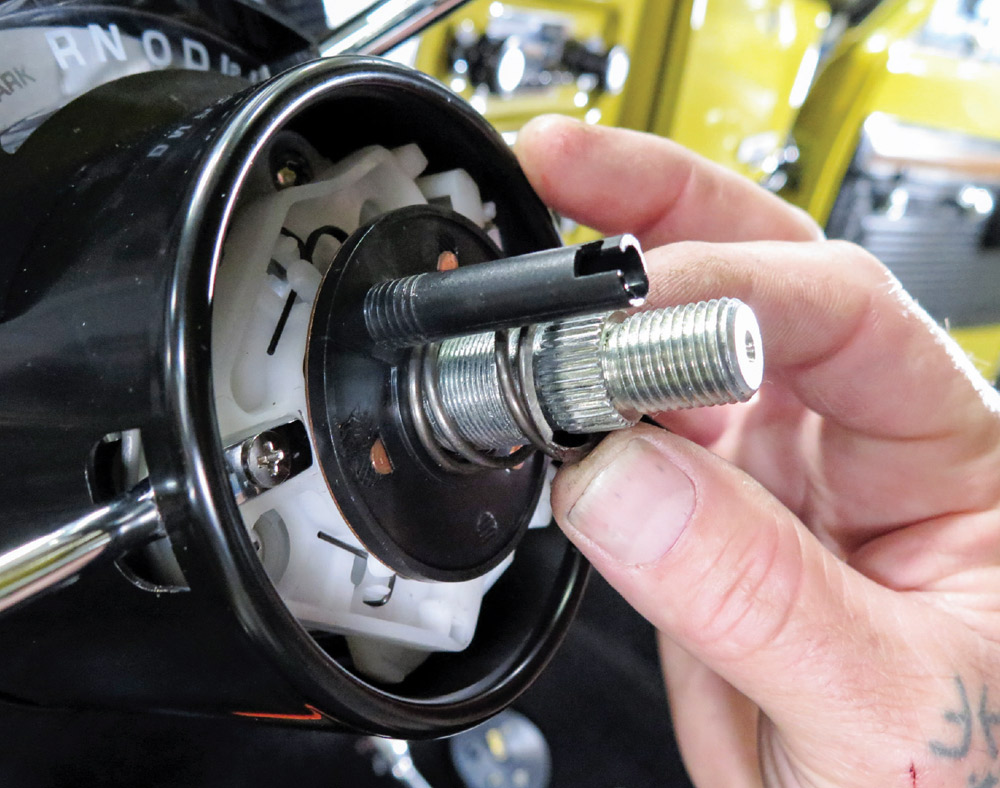
15. The CPP 3/4-inch, 36-spline steering shaft accepts the stock GM steering shaft. The CPP steering column also includes a stock-style shift rod linkage pivot to allow for use of OE shift rods.

Upgraded U-joint and collapsible steering shaft assembly installed in the engine bay.
16. CPP also offers an upgraded U-joint and collapsible shaft assembly that is a direct replacement for the factory components.
Steering column with the new turn signal and tilt levers installed.

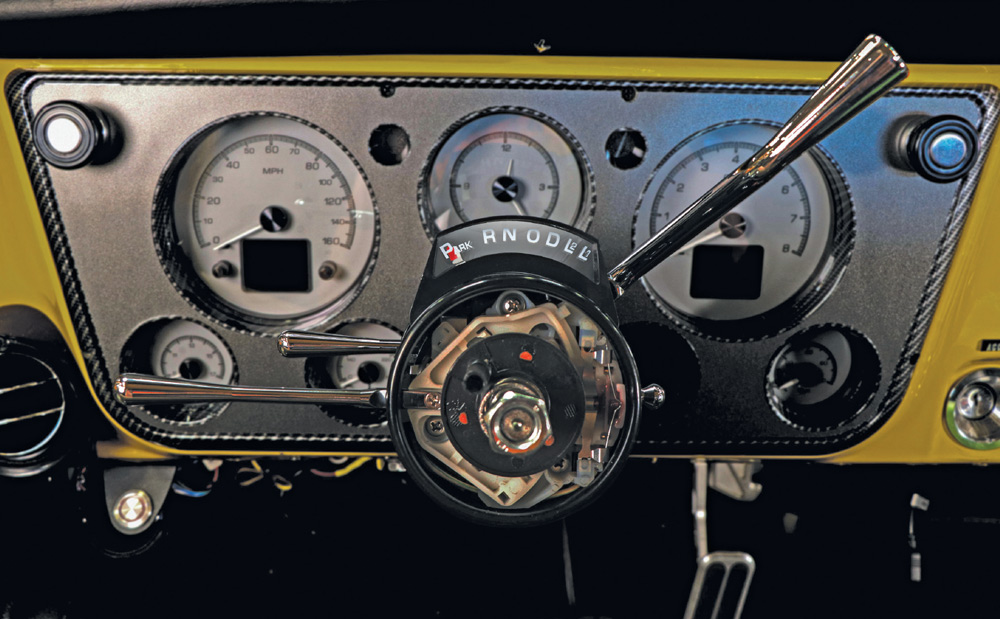
17. Included with the column are new turn signal and tilt levers.

CPP automatic shift linkage kit with rods, levers, and hardware.
18. To simplify connecting the steering column’s shift lever to the transmission, CPP offers their shift linkage kit (PN CPTSL).
Adjustable rod end of the shift linkage attached to the steering column's shift arm.
19. At the top end of the CPP shift linkage is an adjustable rod end that attaches to the shift arm on the column.
Slotted linkage lever installed on the transmission for throw adjustment.
20. At the transmission end the CPP linkage kit has a slotted lever that makes it easy to adjust the shifter’s throw; particularly useful when four-speed overdrive automatics are used.
Factory-style eight-pin electrical connector for a 1967-72 GM truck harness.
21. The CPP steering column includes a factory-style eight-pin connector to plug into the original 1967-72 GM truck harness. If using an aftermarket harness, this connector will need to be cut off and terminated with the connector supplied with your wiring kit or an adapter harness; PN 510800 can be purchased separately.
Steering shaft with the horn button connector positioned for proper turn signal cancellation.
22. There are a variety of steering wheels and adapters available from CPP. For the turn signals to cancel properly the horn button connector should be between the 10 and 11 o’clock positions, with the front wheels pointing straight ahead.
Dashboard with an installed steering column and illuminated gear position indicator.
23. For convenience the gear position indicator is illuminated. It can be connected to turn on with the dash lights or with a keyed source with the ignition switch in the “on” position.
SOURCE