CTP logo Tech

InTheGarageMedia.com

Smooth C10 Shifting & Steering
Ididit steering column assembly in front of a classic Chevrolet truck grille
Updating a 1971 Suburban With a Lokar Floor Shifter and Ididit Tilt Column
BY TODD RYDEN IMAGES BY THE AUTHOR
A

fter upgrading our 1971 Chevy Suburban with an electronic four-speed automatic transmission we’ve never been happy with the column shift linkage. The original three-speed detents were already a bit worn down, then things really got off-kilt when controlling the extra gear of the 4L60E. Couple that with a few creaks and rattles and it was finally time to address the issues at hand.

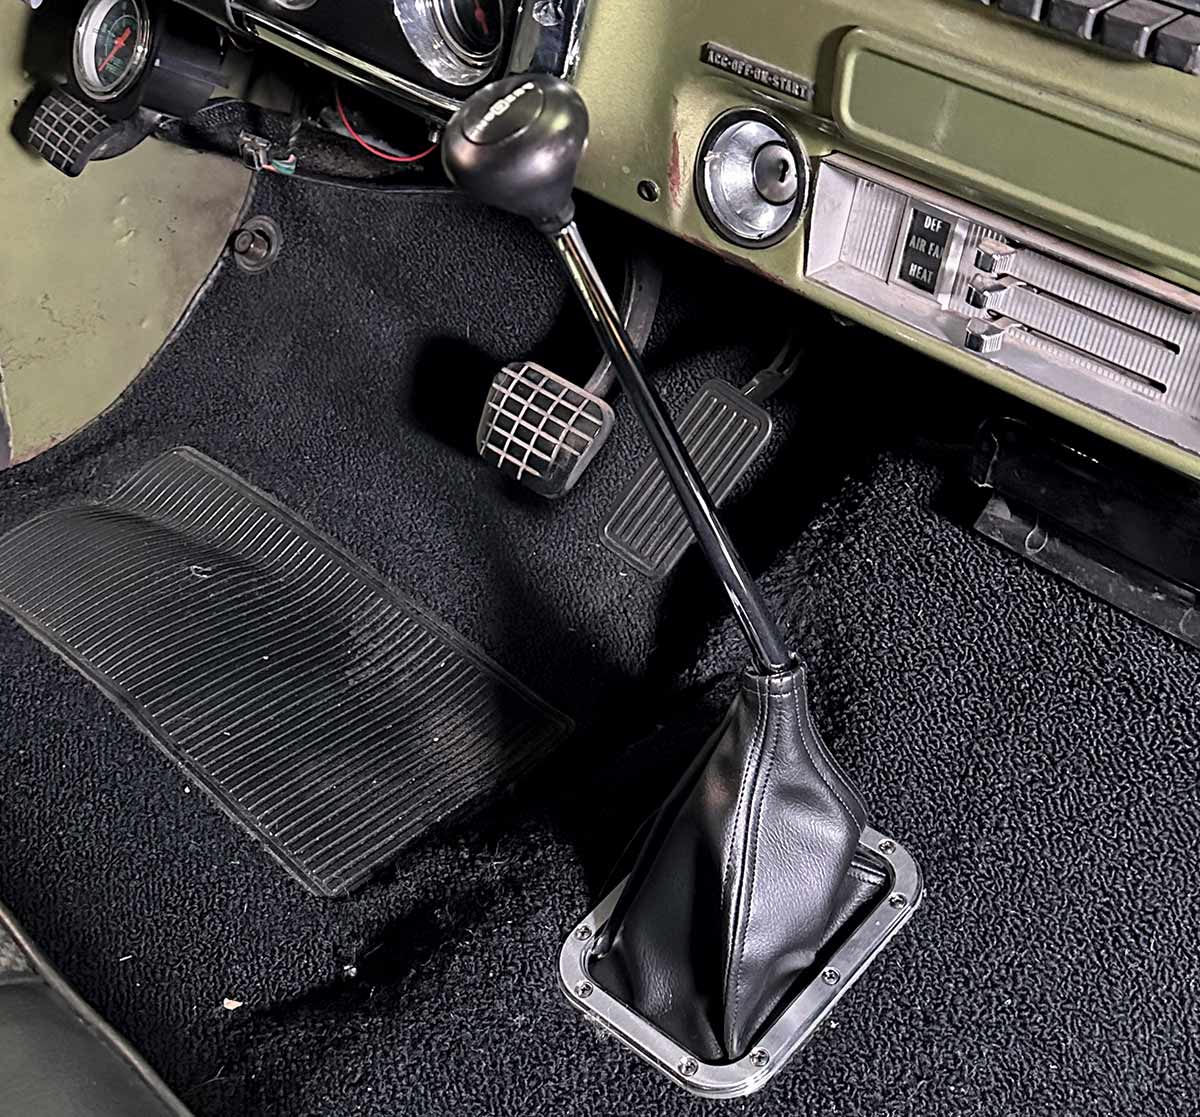
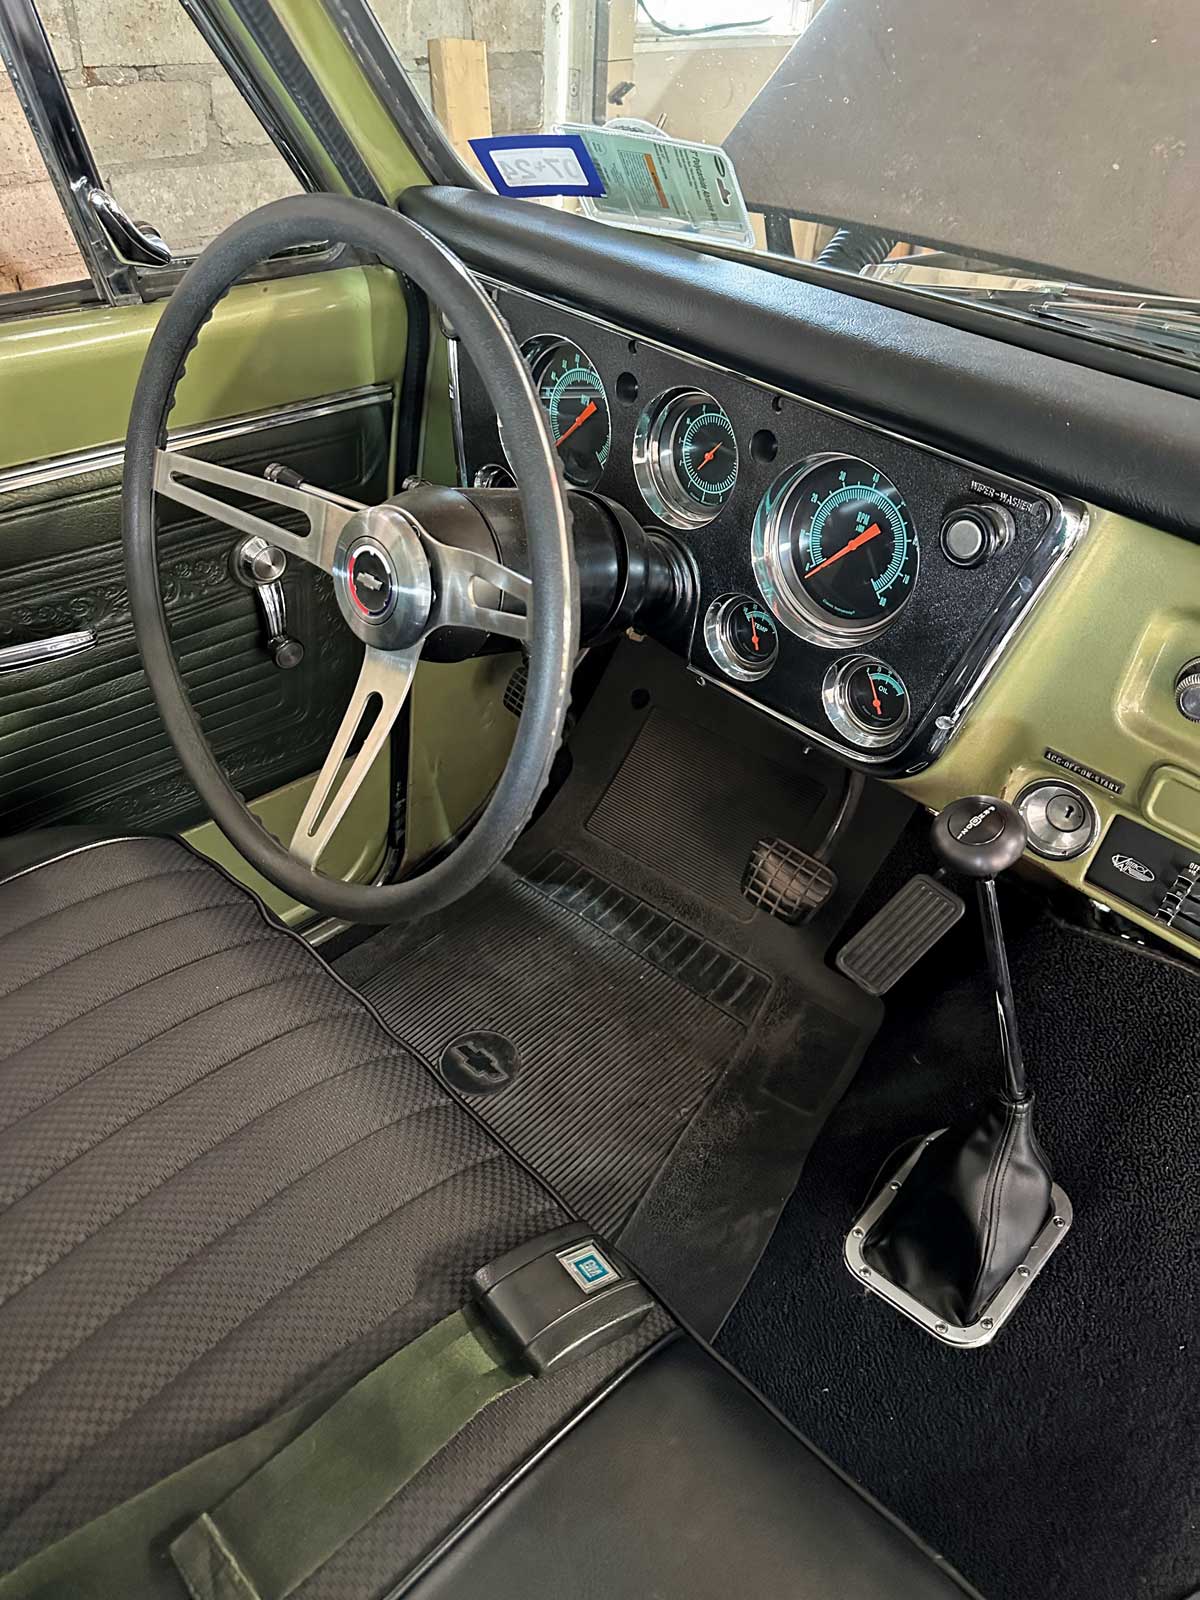
As fans of floor shifters, we started looking for a prospective shifter that had the taste of an original four-speed stick shift and would still fit well with a bench seat. The answer came up while surfing through Lokar.com where you can basically build a shifter through a click of options.

The simple procedure starts with selecting the mount of the shifter; a case mount, tail mount, or a floor mount model and if the shifter will have shift linkage, a cable, gated, or an electronic mode. Obviously, you need to know what trans you’re using but Lokar can help identify the trans pan if needed. Next will be selecting a shift lever, its length, and finish, followed by a shift knob. There are plenty of options, but it’s an easy process to get through.

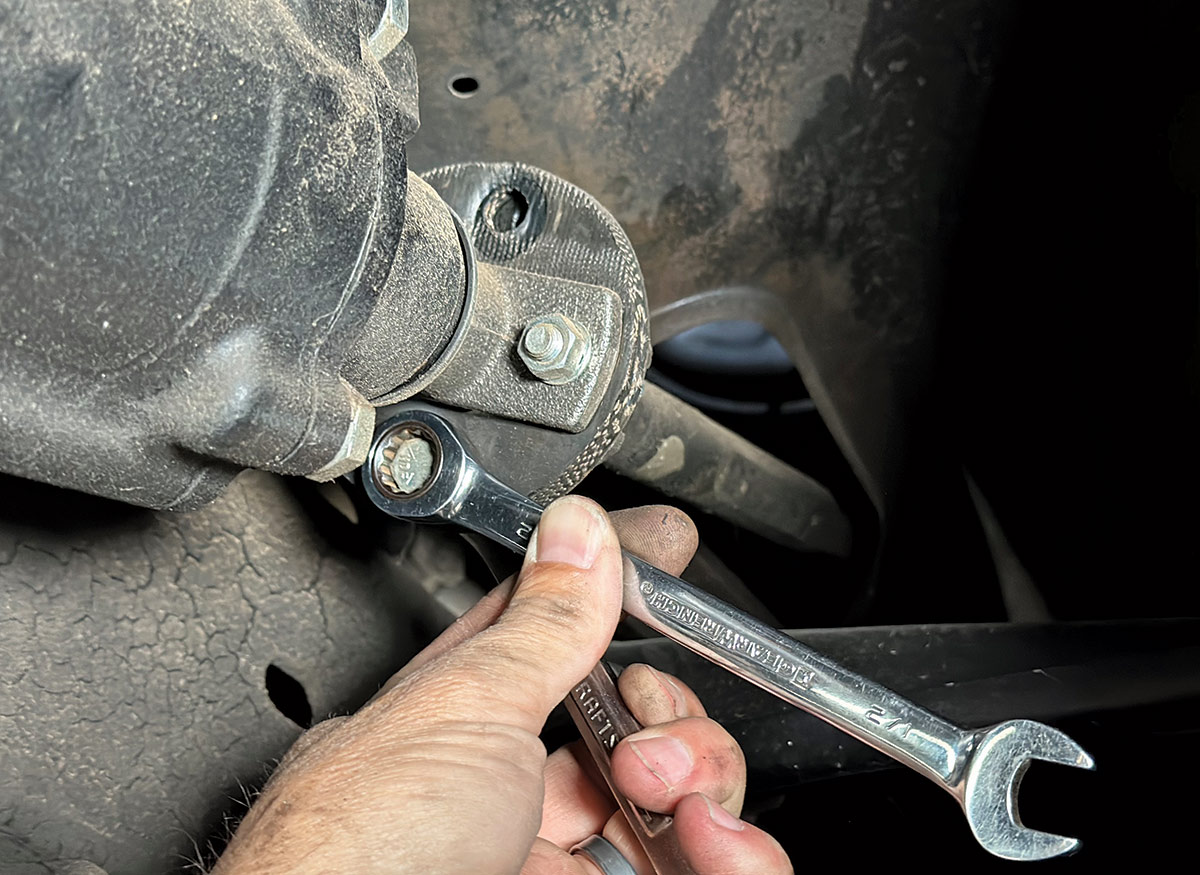
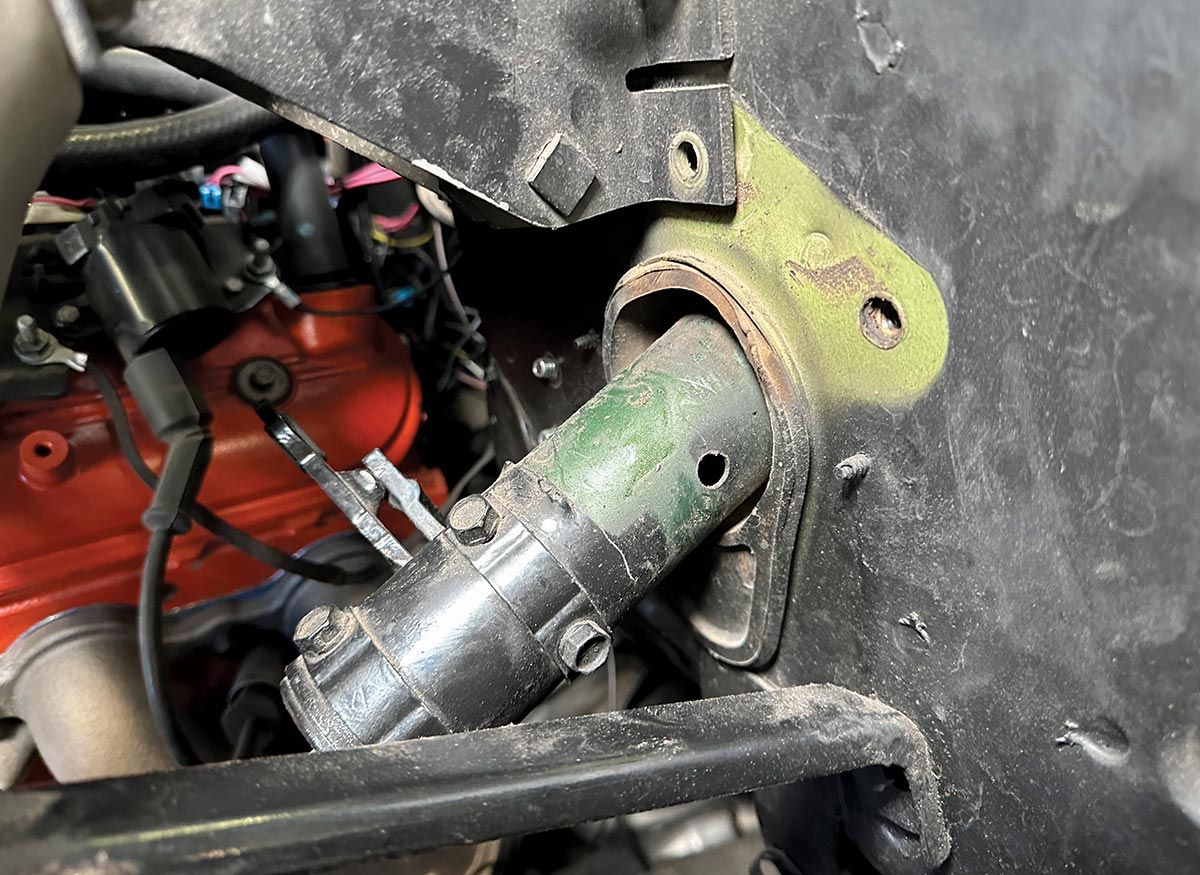
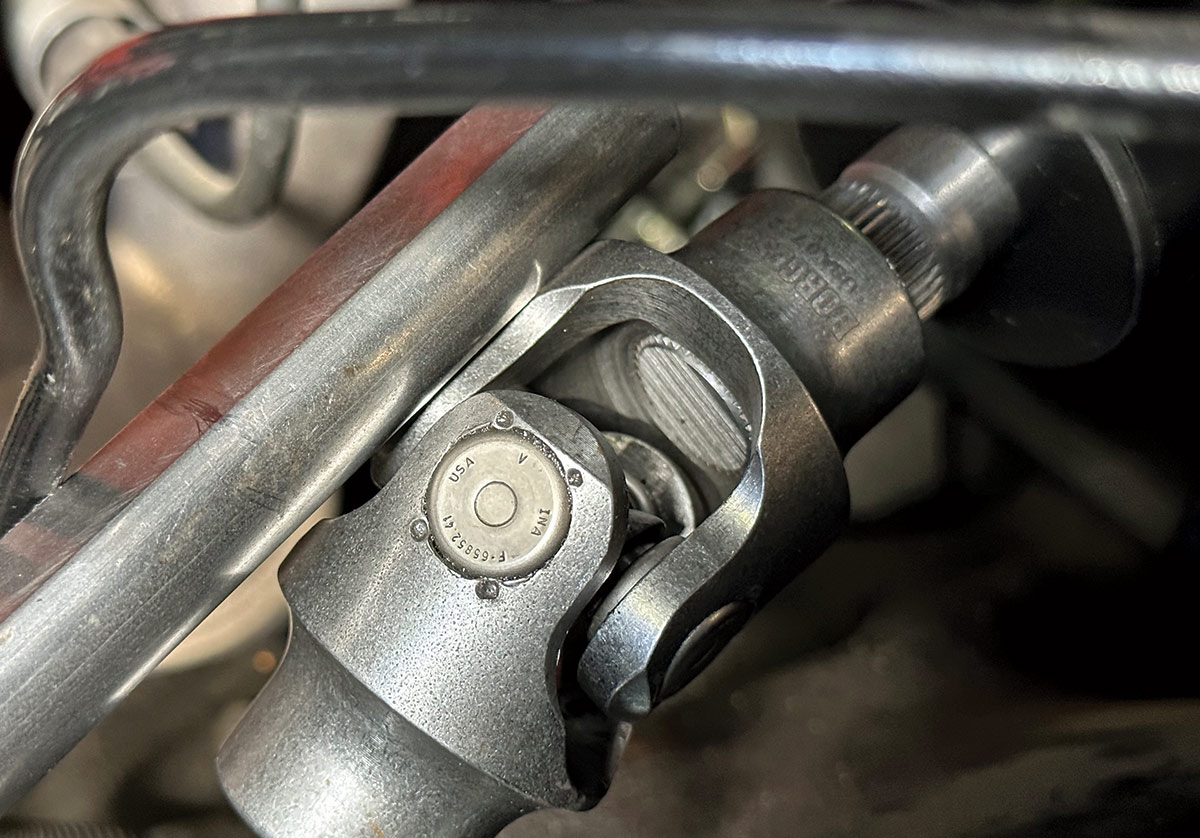
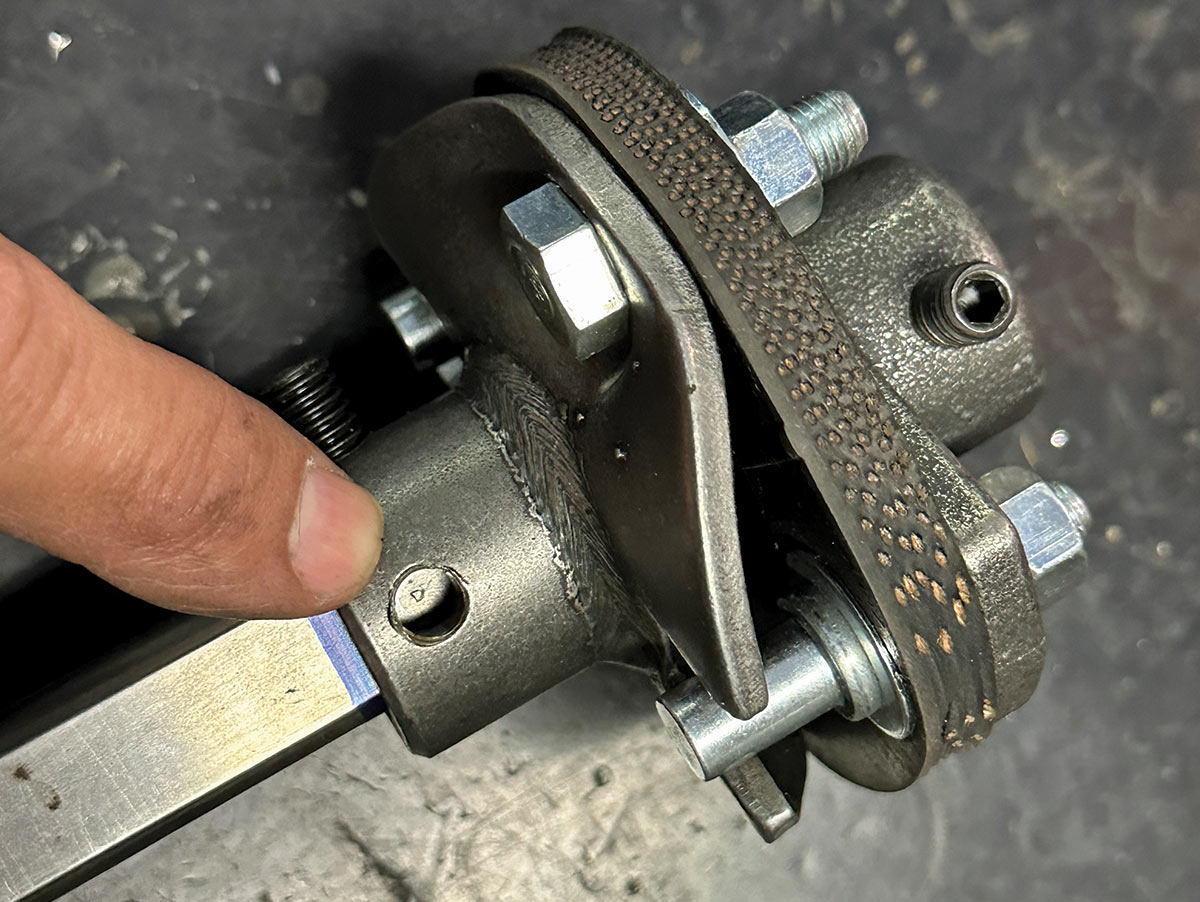
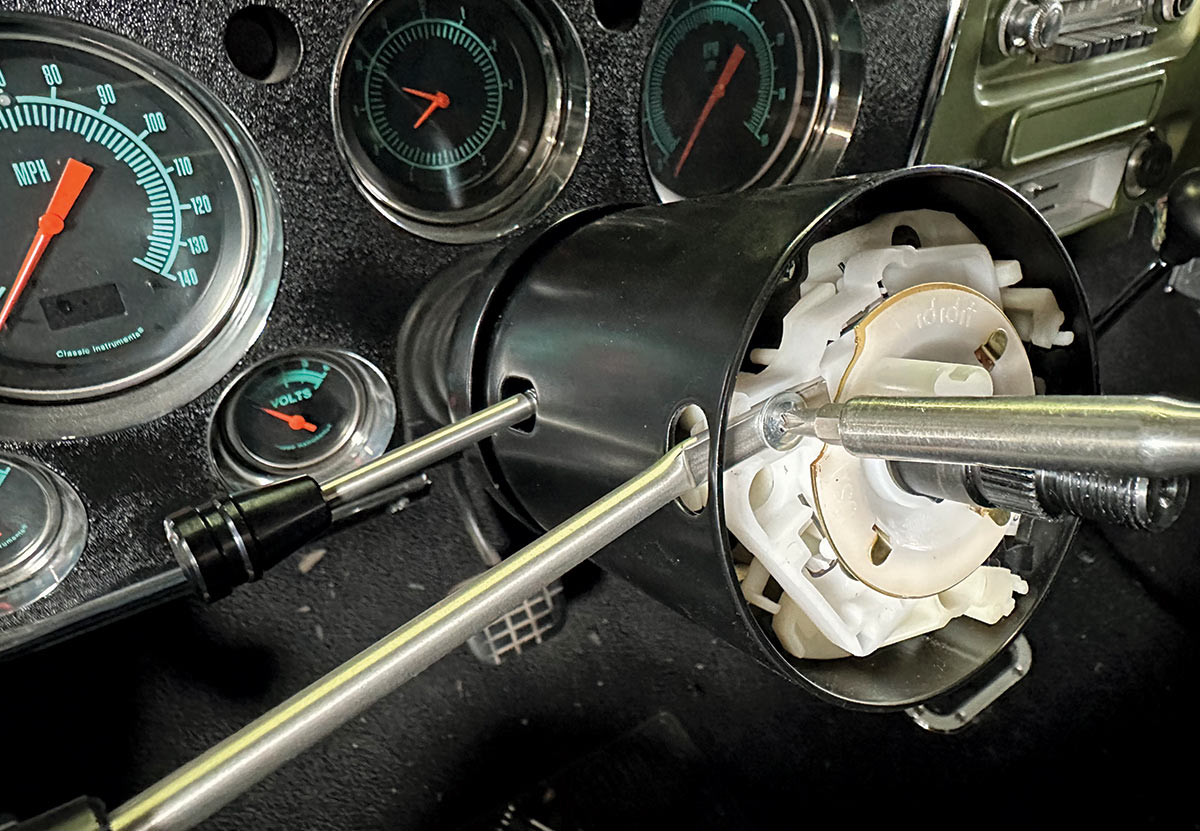
With a floor shifter coming soon, we opted to upgrade the original column to a smooth operating and comfortable tilt model from Ididit. They offer direct bolt-in columns for several classic trucks (and cars of course) that feature all new internals and wiring. For our three-door Sub, Ididit was able to recommend the right U-joints to use between the steering box and column shaft, plus the right size double-D shaft to get everything connected.

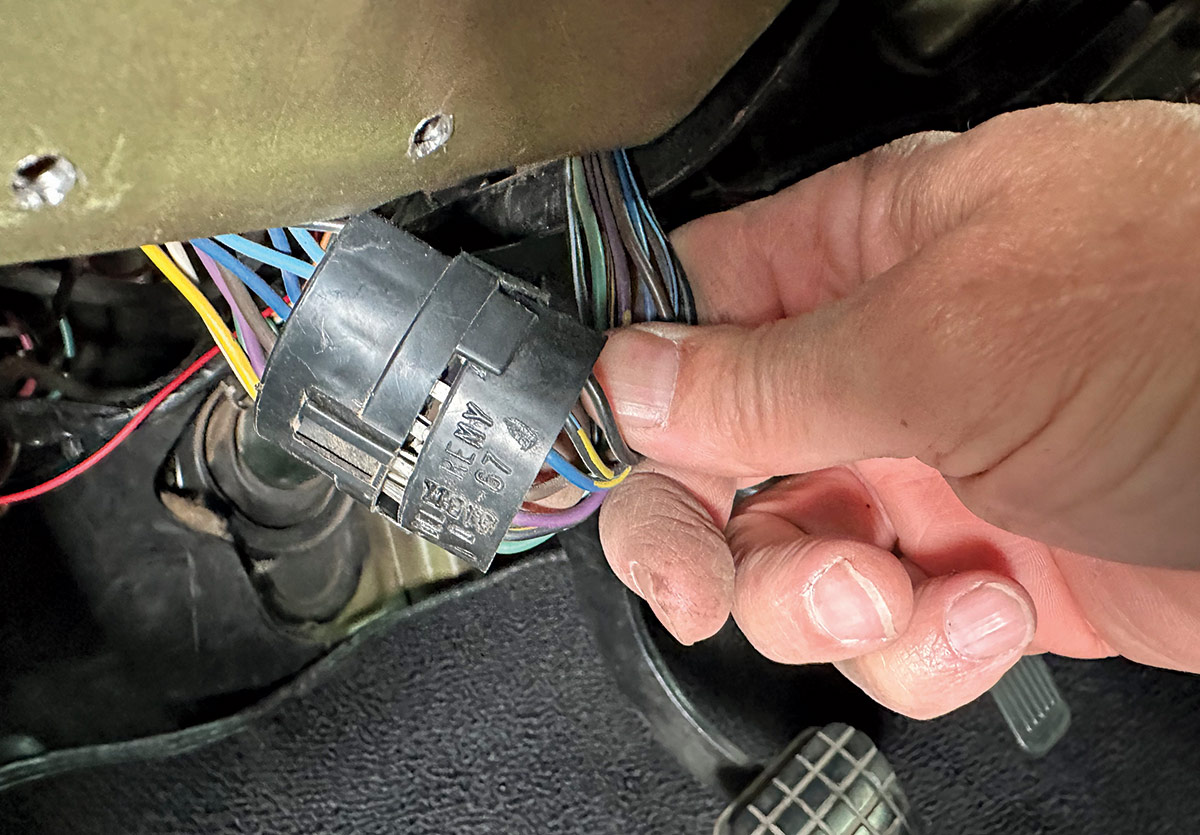
We had already planned on updating the steering wheel from the large-diameter factory wheel to a 15-inch muscle car wheel, which will now be a bolt-on affair with the new column. As for turn signal, horn, and flasher wiring, Ididit supplied a connector that plugged into the factory harness right to their column connector.

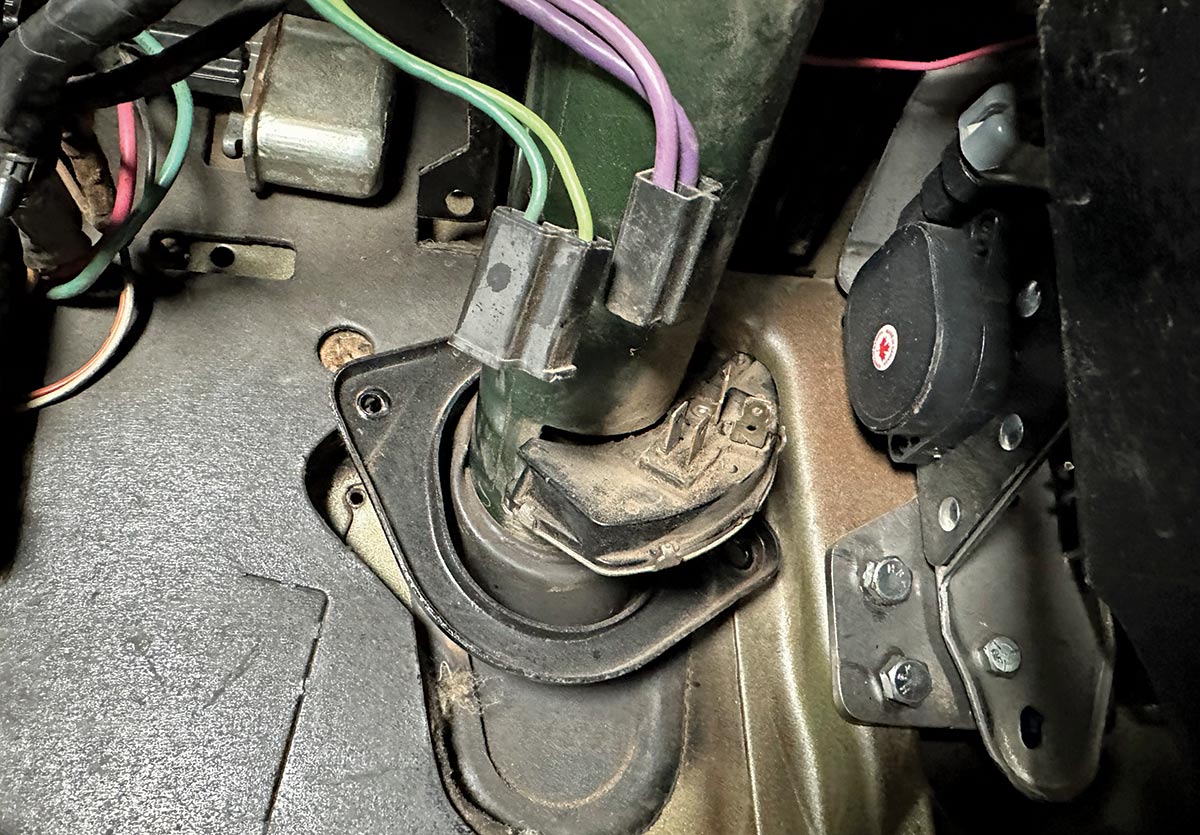
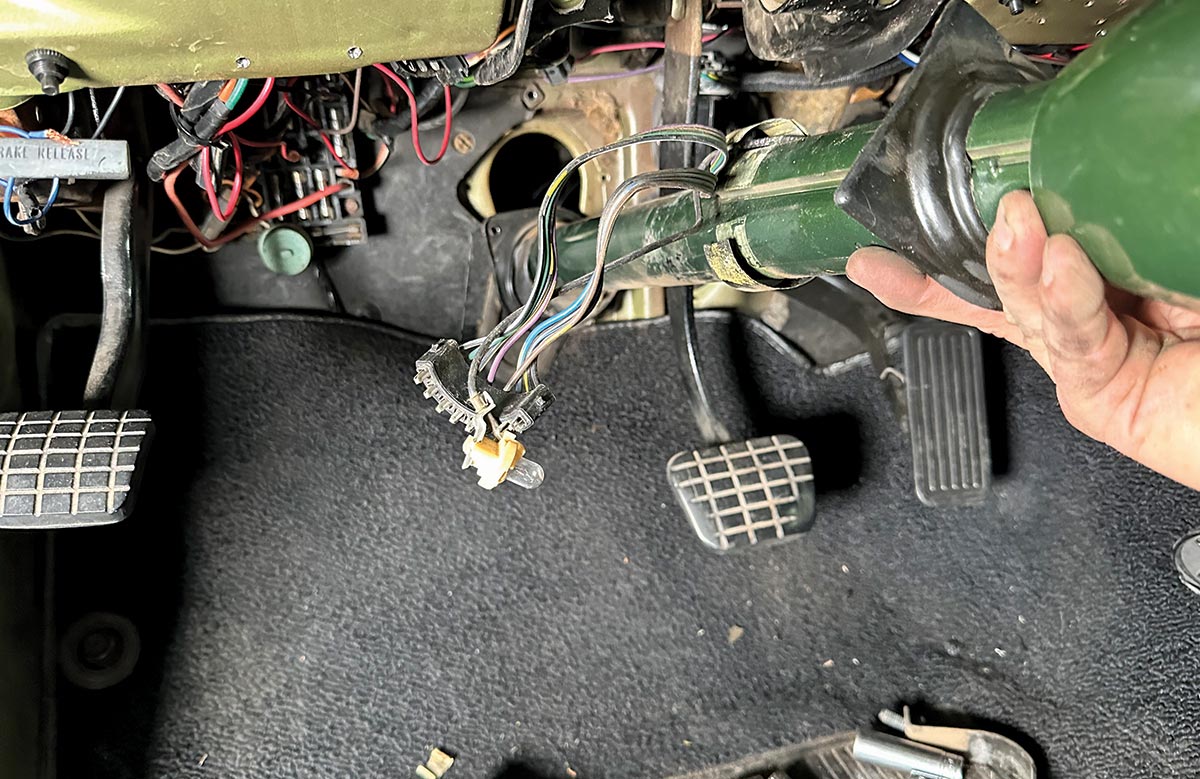
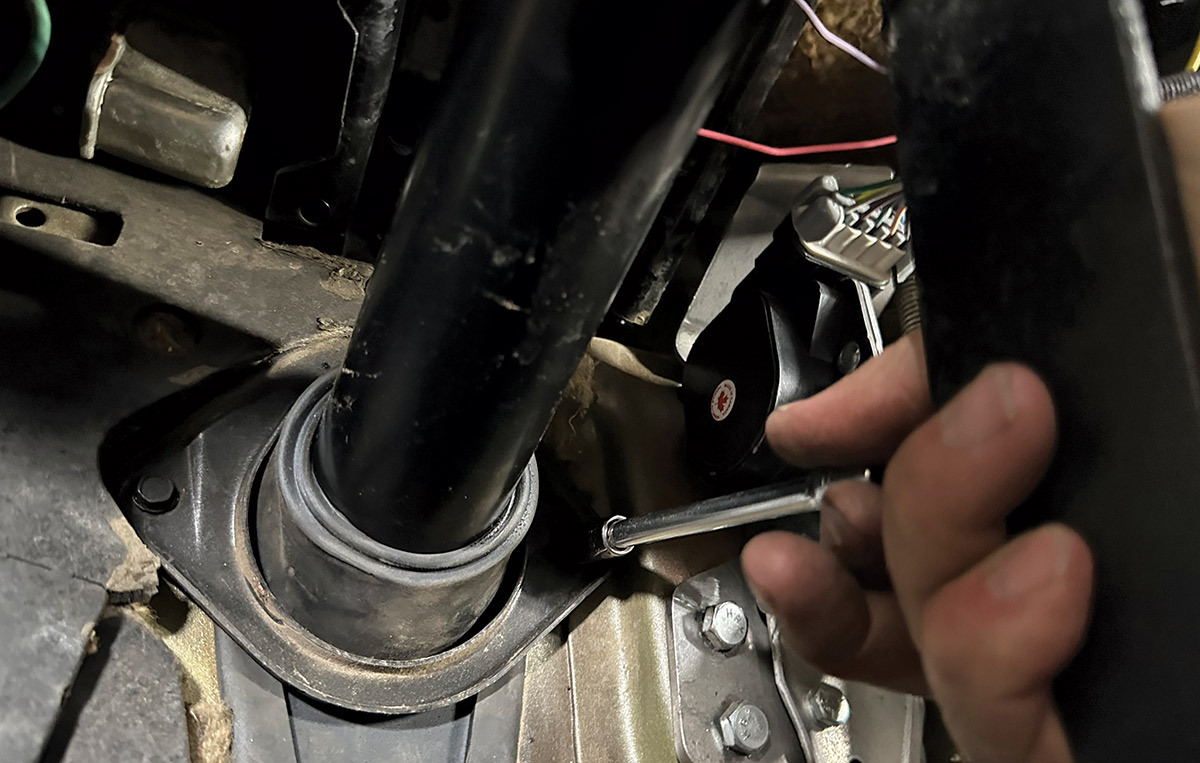
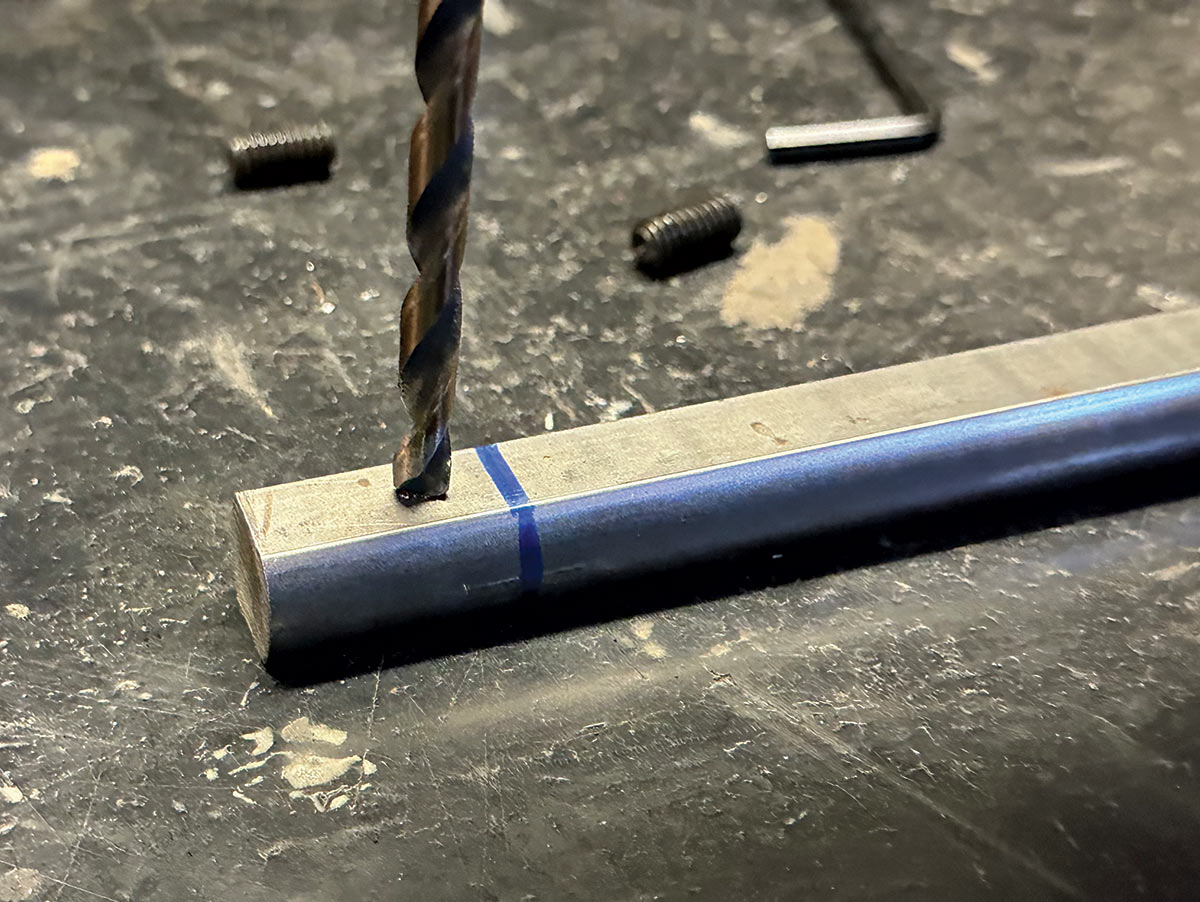
The Ididit column bolts right in under the dash and you’ll need to do some more careful measuring and pay attention while installing the new U-joints to the shafts for proper engagement. Ididit has done their homework to guide you through the installation process from start to finish so you can complete the job safely and correctly—as we achieved and detail on the following pages.

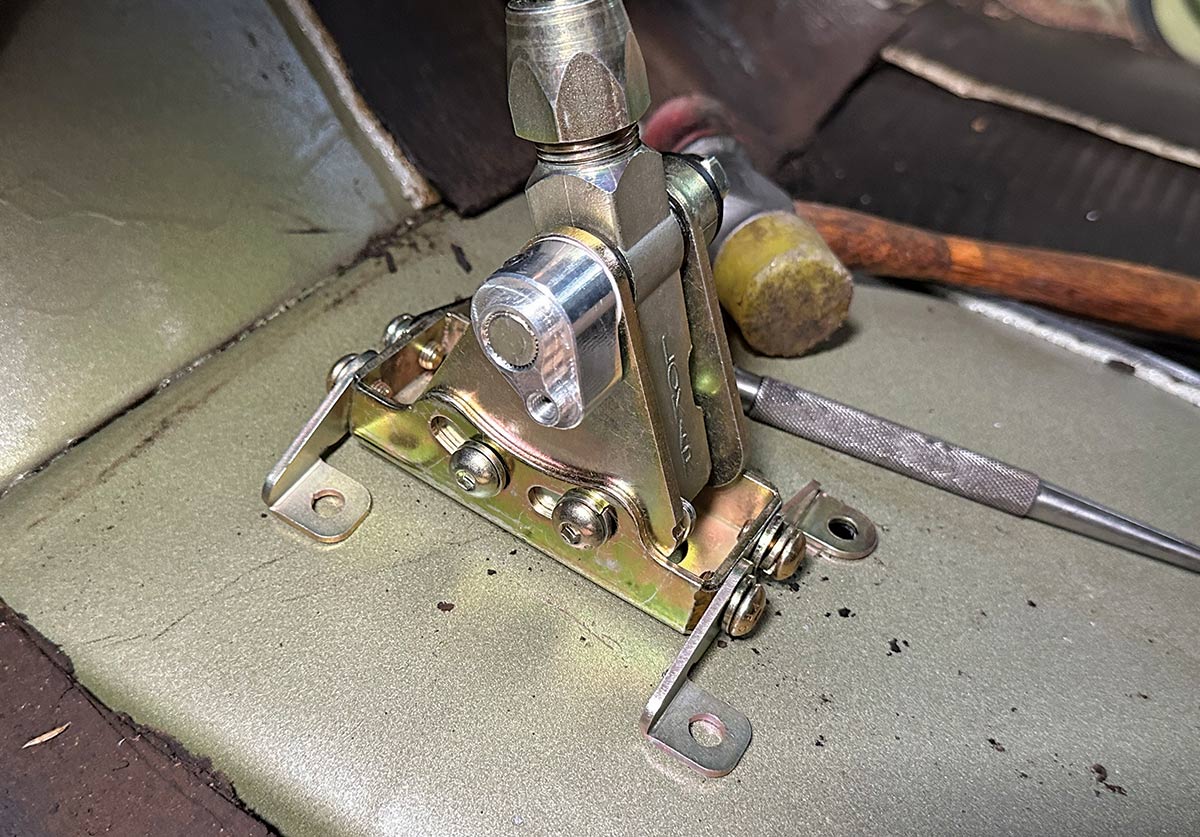
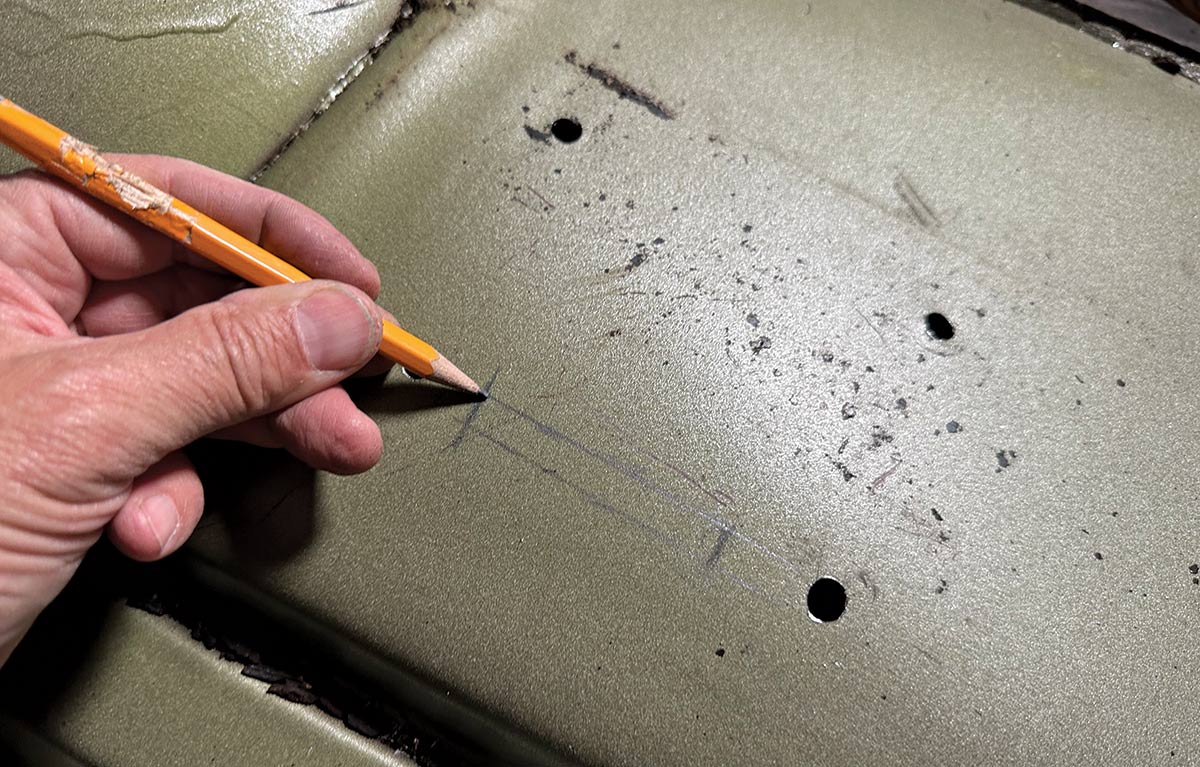
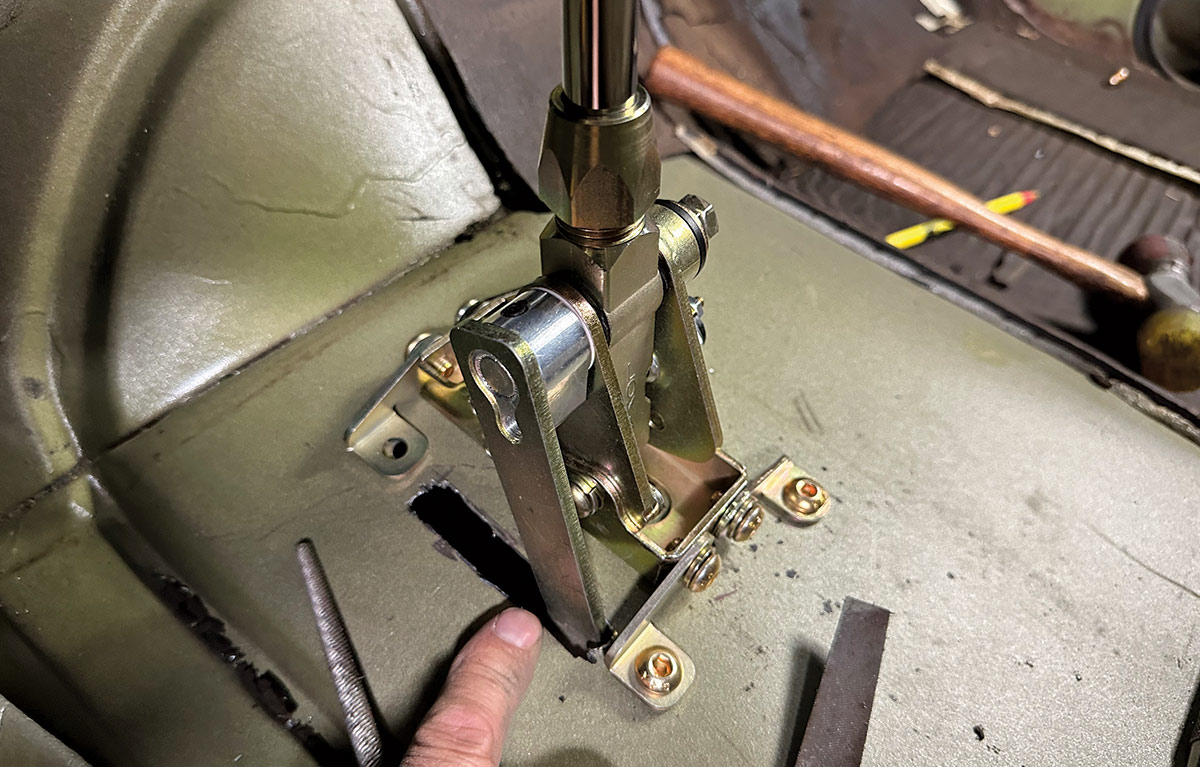
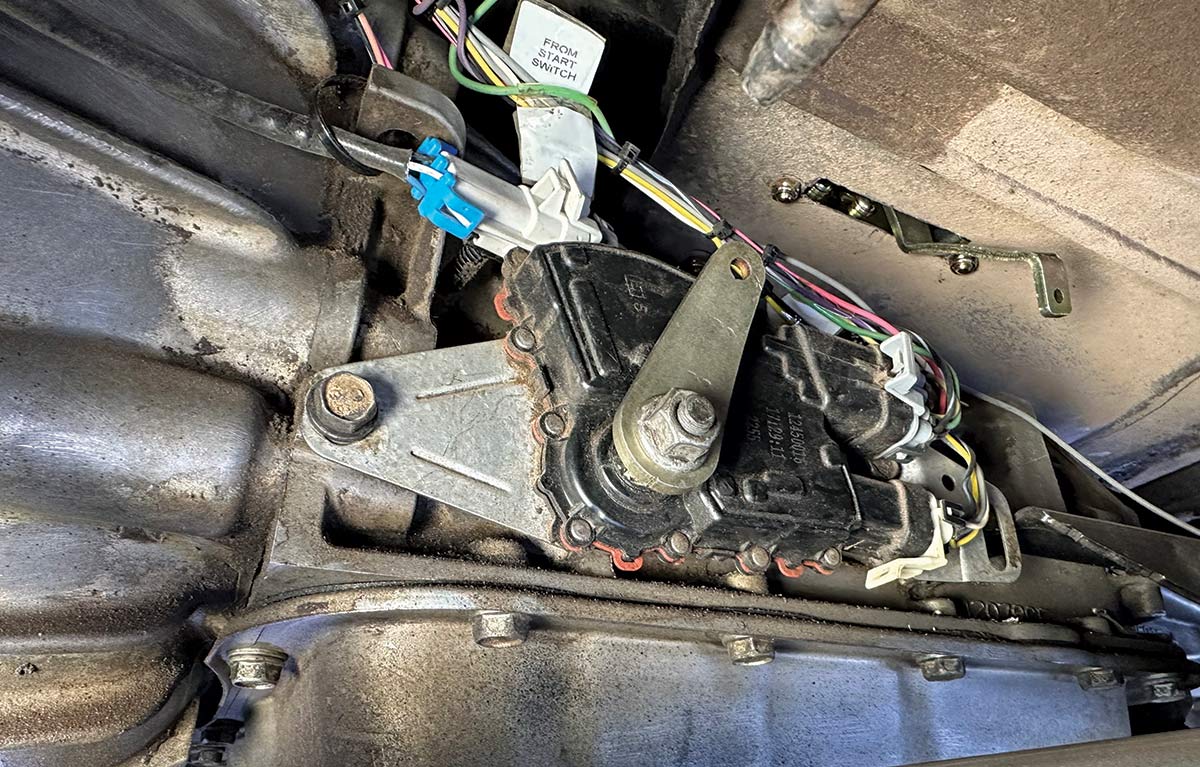
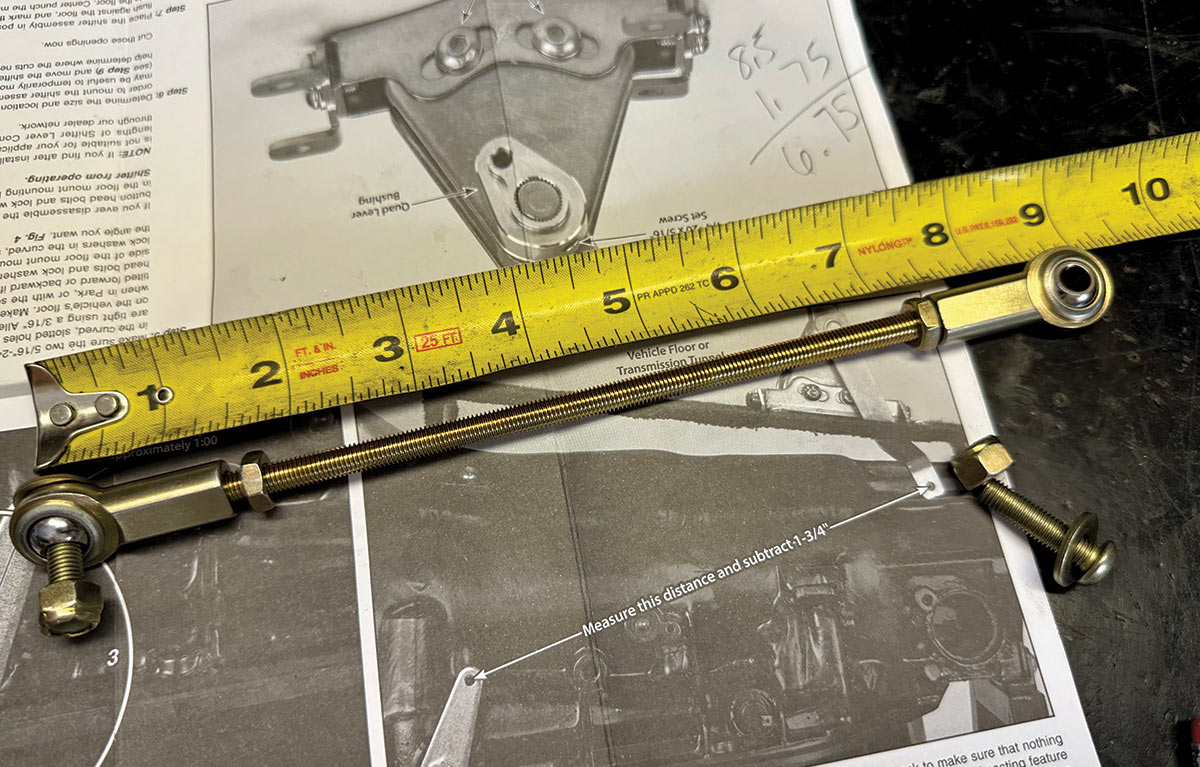
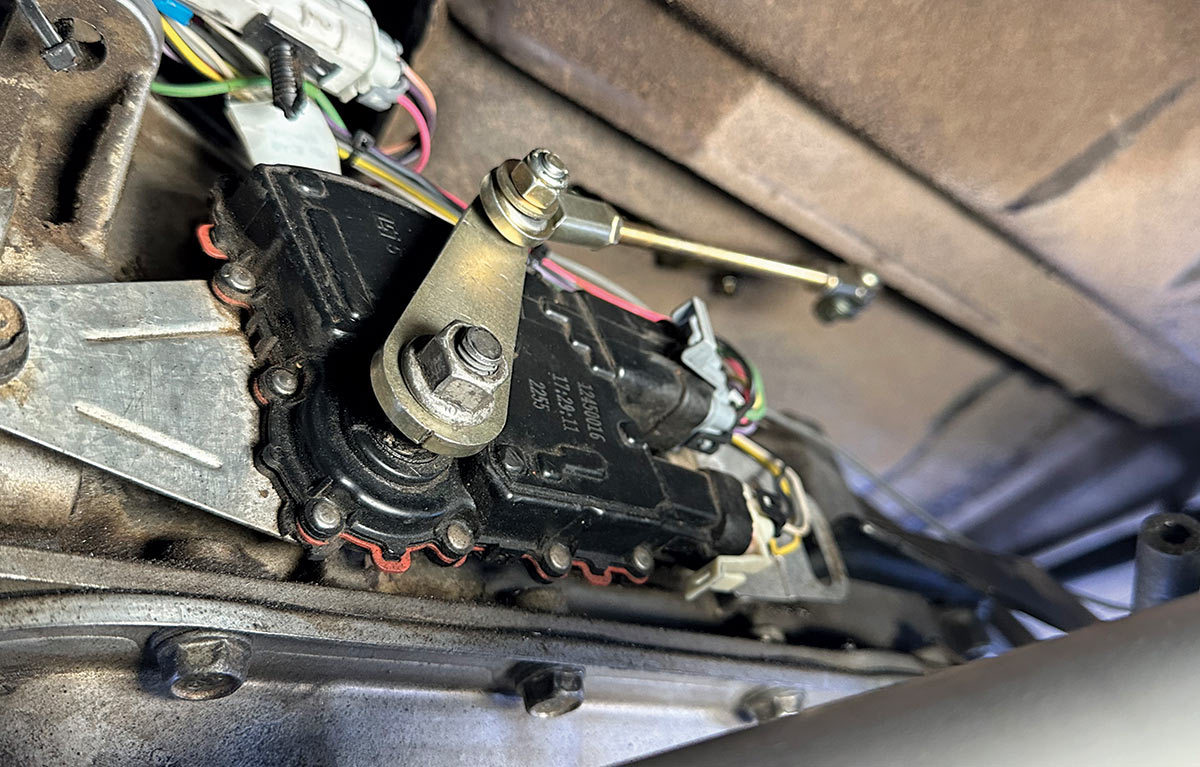
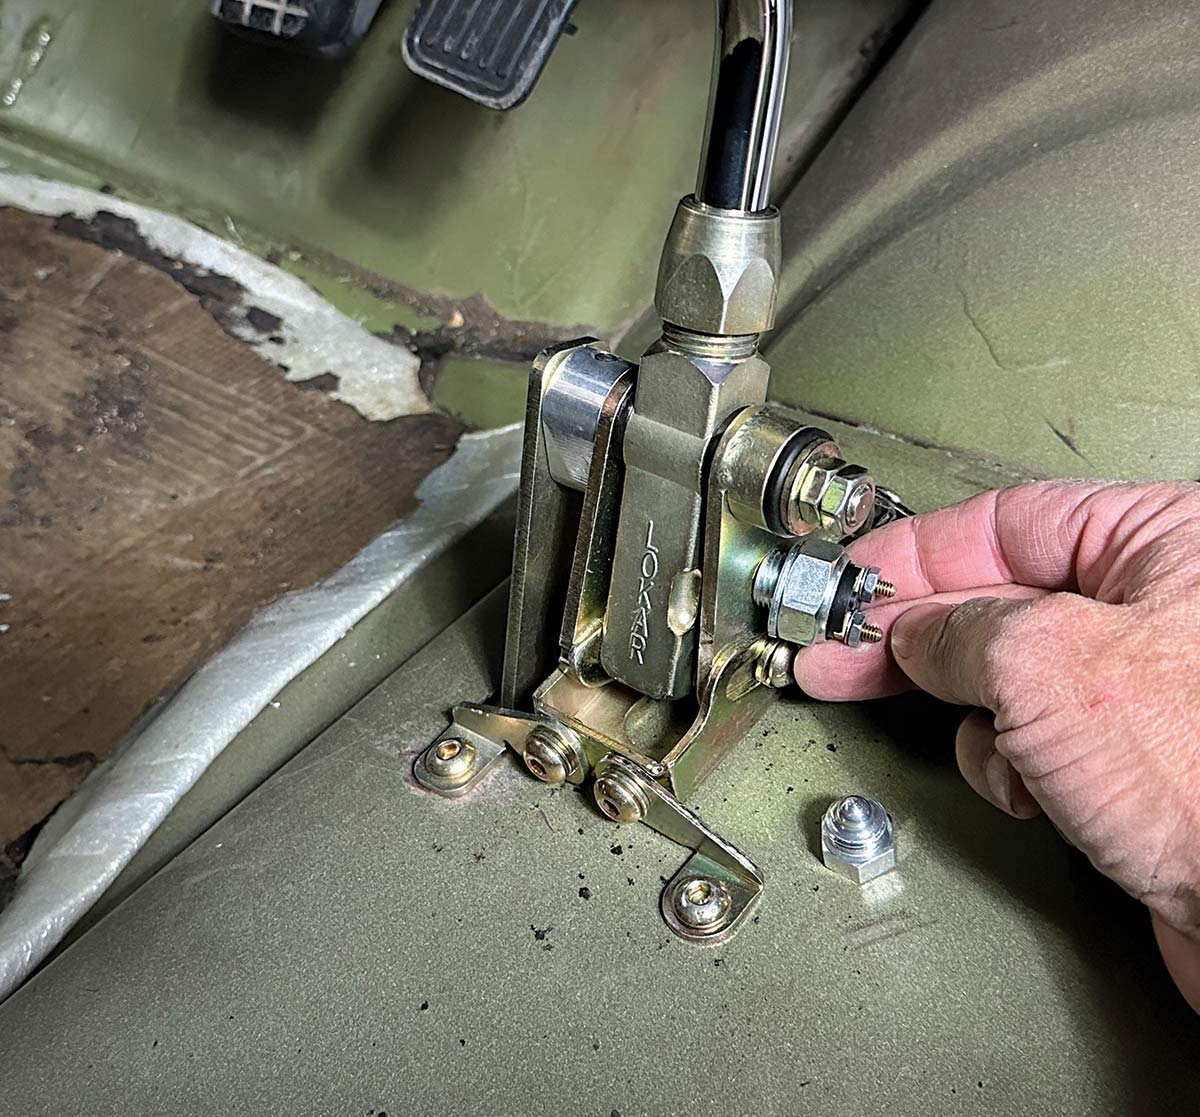
The Lokar shifter installation process requires removing the carpet to mount the shifter, a bit of measuring and assembly for the linkage, and a couple wires to route through the neutral safety switch; nothing that can’t be handled with hand tools and also following instructions closely.

In the end, it is so nice to finally have a firm gear selector position, perfect for pulling the shifter down into First for a quick 1-2 out of the driveway. The steering is quiet, concise, and we’re even surprised at how nice it is to have eight tilt positions to choose. There were two great upgrades that most enthusiasts can handle and that really makes a difference in the driving experience!

Unpacking and organizing a Lokar GM floor mount shifter kit with installation
1. A new Lokar shifter requires some assembly, mostly due to the different mounting options. Their detailed instructions make it a breeze.
Assembling the Lokar shifter mechanism, preparing it for installation
2. After verifying that the shift arm length is correct for your application, install the floor mount bracket using the supplied button head bolts and lock washers. Note the slots for later adjustment.
Close-up of the assembled Lokar shifter ready for installation
3. Pay attention to the orientation of the floor mount tabs as they can be positioned for above the floor or below the floor mounting. Also note their direction, pointing to the rear of the vehicle, in order to clear the shifter boot ring.
Lokar shifter mechanism being installed into the trucks floor
4. With the shifter assembled, it’s time to figure out where to mount it on the tunnel. Be sure to sit in the seat and position yourself how you drive and where the shifter clears the seat and dash when in First and Park positions. Mark and drill holes for the supplied 5/16-inch bolts.
Preparing to measure and align the shifter installation location on the truck's floor
5. With the mounting holes in place, a slot must be made for the quad shift lever assembly to pass through the floor. Lokar supplies a 2.5-inch offset lever and offers a straight or 1.25-inch offset separately. For our C10, the supplied shift lever worked just right.
Completed Lokar shifter installation in the truck's floor
6. It took a few adjustments to get the proper clearance for the shift lever. Make sure to operate the shifter from Park through First gear.
Lokar shifter installation in a 1967-1972 Chevrolet C10 pickup
Inspecting and measuring the transmission linkage setup for proper fitment
7-8. With the shifter mounted it was time to head below to connect the linkage. Lokar supplies a new shift lever to install on the trans selector shaft. Position it so the top is at about 1:00 o’clock. Grab a ruler and measure center-to-center between the quad lever linkage hole to the shift lever hole. Be sure to measure it a couple times and confirm there is nothing that will interfere with the shift rod.
Adjusting the linkage rod for the Lokar shifter to ensure accurate transmission gear shifts
9. No one said there would be math involved! Take your measurement, in our case 8.5 inches, then subtract 1.75 inches to obtain the length that the shift rod needs to be for your application. (For ours, that came out 6.75 inches.) Install the 1/4-inch jam nuts and endlinks onto the threaded rod.
View of steering column wiring on a 1967-1972 Chevrolet C10
10. The rod ends can be mounted to either side of the shift levers, but make sure they are sandwiched between a flat washer and the lever to ensure smooth movement and use the supplied Nylock nuts. Once the gear positions are confirmed, tighten the jam nuts.
Steering column assembly being tightened in a 1967-1972 Chevrolet C10
11. The final step, and one of the most important, is to adjust the neutral safety switch. This is a simple procedure that involves removing the switch, moving the passenger side switch plate, and installing the adjuster plug. Once set properly and the starter wiring is connected, your truck will only start when it is in Park or Neutral. Very Important!
Interior view showing manual gear shifter and dash of a 1967-1972 Chevrolet C10
12. Lokar offers different shift boots and rings to finish the job correctly. We’re quite pleased with the look and feel of our floor-mounted shifter.
Steering Wheel Bolt being torqued out of a 1967-1972 C10
13. With the shifter officially shifting, we set our sights on updating the steering column, starting with removal of the wheel.
Lokar transmission linkage setup on a 1967-1972 Chevrolet C10
Steering column boot installation in a 1967-1972 Chevrolet C10
14-15. The turn signal wiring connector was unplugged and the wiring was removed from the OEM Park/Neutral switch (which was rerouted to the new Lokar shifter).
Rear differential yoke being torqued in a 1967-1972 Chevrolet C10
Steering column wiring and ignition switch on a 1967-1972 Chevrolet C10
16-17. The steering shaft was unbolted from the Borgeson steering box that was installed a couple years ago, then the column shifter assembly was taken apart so the column could be removed.
Tightening steering column bolt in a 1967-1972 Chevrolet C10
18. With everything disconnected, including the firewall mounting plate and column dash bracket, the factory column slid right out after 50-plus years of service.
Lokar shift linkage adjustment in a 1967-1972 Chevrolet C10
19. Before mounting the Ididit column, the original mounting flange was installed along with a fresh seal from Steele Rubber.
Steering column boot installation on a 1967-1972 Chevrolet C10
20. The Ididit column mounted right in place and we snugged the flange and dash brackets just enough so the column could be adjusted before tightening everything for good.
Ididit steering column turn signal assembly in a 1967-1972 Chevrolet C10
21. The column must be oriented in the position shown and the horn cam needs to be positioned so the horn connector hole is at the 10:30 position.
Borgeson steering U-joint installation in a 1967-1972 Chevrolet C10
22. With the new U-joints installed on the steering box and the column we measured the length of double-D shaft needed. Note that Borgeson recommends 7/8 to 1 inch of engagement on the splines. Make sure to have the shaft about flush with the U-joint–too far in can cause interference and too far out may lead to failure.
Drilling through a steering shaft for U-joint installation in a 1967-1972 Chevrolet C10
23-24. Once everything is at the ideal length it is recommended to mark the location of each setscrew hole and use a 1/4-inch drill bit to spot the shaft where the setscrew will seat.
Tightening Borgeson U-joint bolts in a 1967-1972 Chevrolet C10
25. With everything connected and aligned properly, it is recommended to use a thread locking compound on the U-joint setscrews and nuts for final assembly.
Attaching steering column cover in a 1967-1972 Chevrolet C10
26. Back inside we installed the new tilt and turn signal levers. Ididit offers a few different models.
Main wiring harness inspection in a 1967-1972 Chevrolet C10
27. The Ididit column is equipped with a straight 3-7/8-inch connector and they offer an adapter to plug into the older, horseshoe-type connector to make things easy.
Installing turn signal cam in a 1967-1972 Chevrolet C10
Steering wheel torque adjustment on a 1967-1972 Chevrolet C10
28-29. New horn wiring is supplied, and once the turn signals, flashers, and horn were deemed operational, the steering wheel was torqued to the new column followed by a new horn button.
Steering System Replacement Complete 1967-1972 Chevy C10
SOURCES