CTP Tech
InTheGarageMedia.com
Custom Autosound Slidebar
Custom Autosound’s 1967-1972 Slidebar Radio Install
BY ROB FORTIERIMAGES BY THE AUTHOR
I

remember like it was yesterday (plus a few decades or so), installing my first twin-knob aftermarket radio—a Kraco hand-me-down from Radio Shack, if I recall correctly—in my 1976 Datsun 620 pickup back in the summer of 1984. (Crazy to think that, at the time, the truck was only 8 years old and set me back a measly $1,500!) I “boosted” that head unit with the addition of a 15-inch subwoofer stolen from my parents’ old Zenith console TV unit, which ultimately did nothing more than rattle!

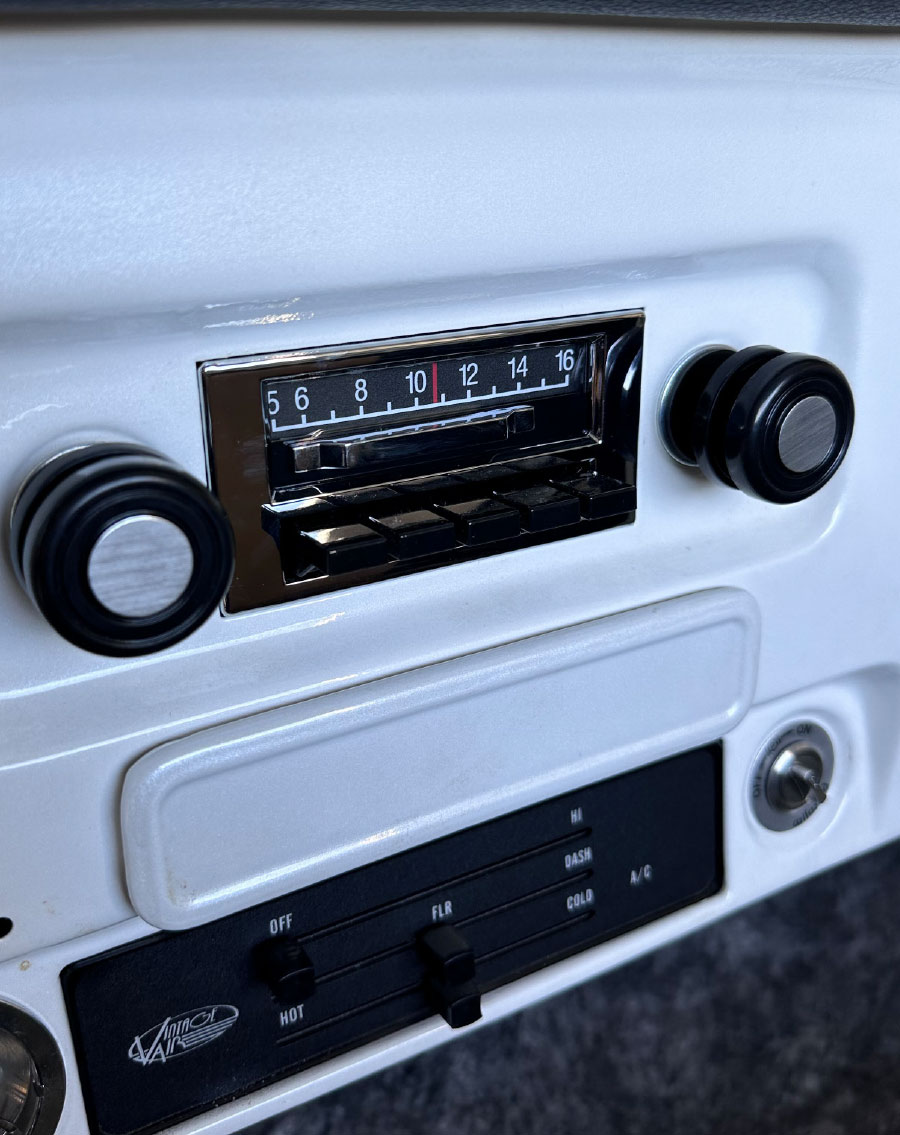
Since then, I’ve progressed quite well with the car audio equipment in my various vehicles over the years, from an Alpine 7909 single-DIN (which I still have, believe it or not) to a more recent Kenwood DMX series double-DIN with all the fancy bells and whistles. But, ironically enough, when it came time to outfit my 1969 C10 with a head unit, guess what I went right back to? Yep, a good-old twin-knob AM-FM unit … but no ordinary radio, mind you.

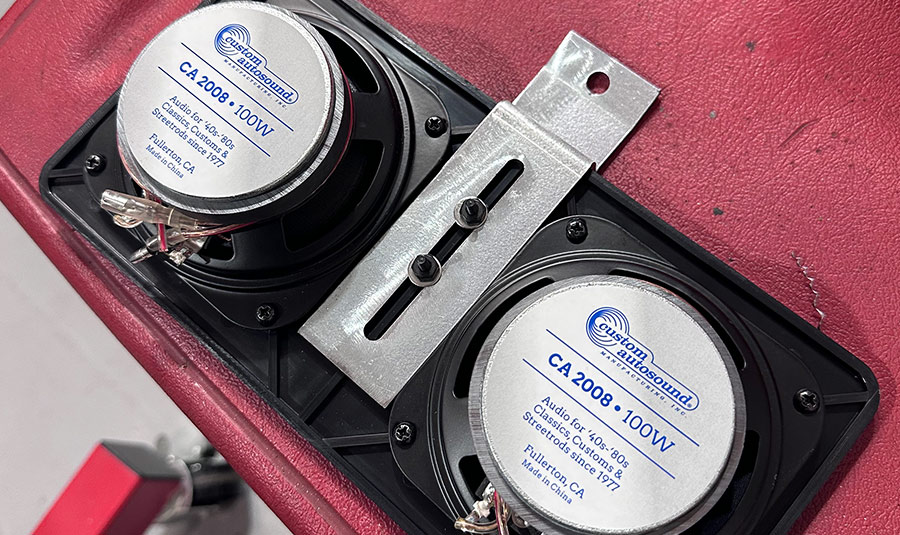
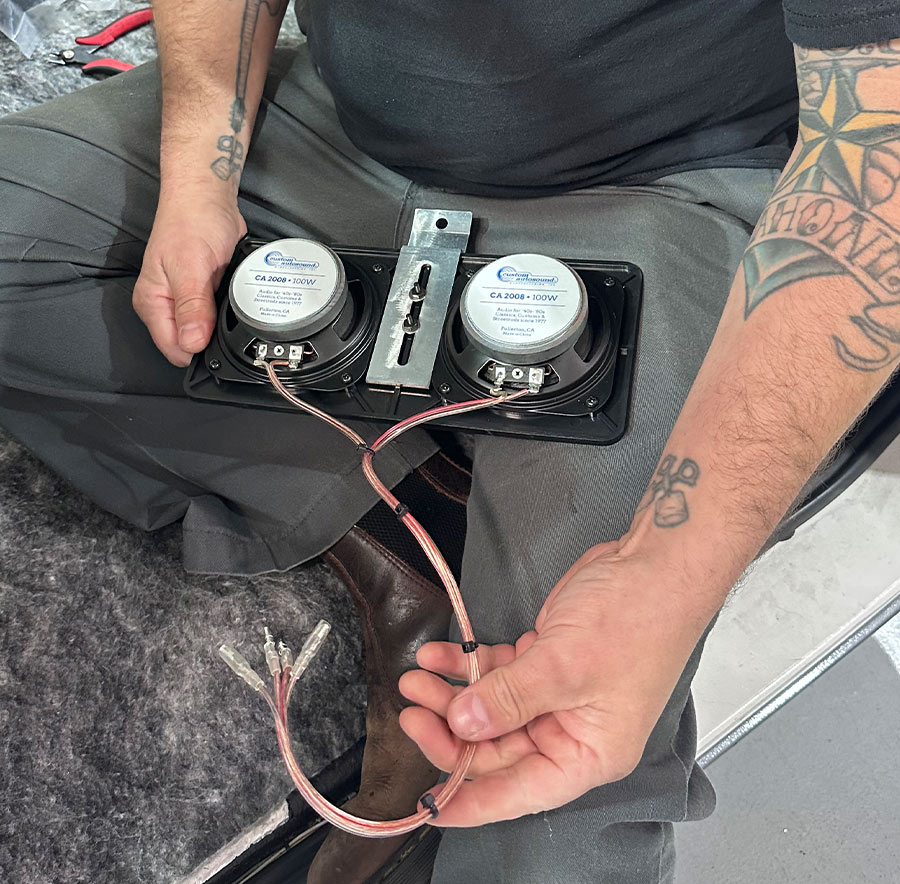
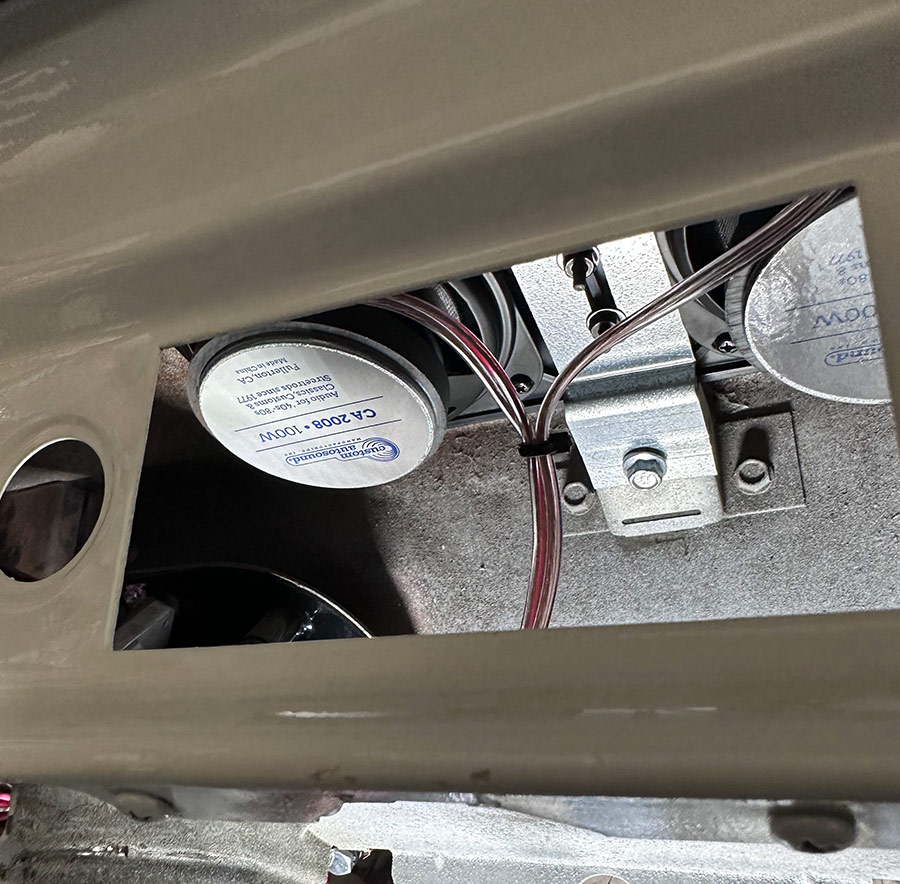
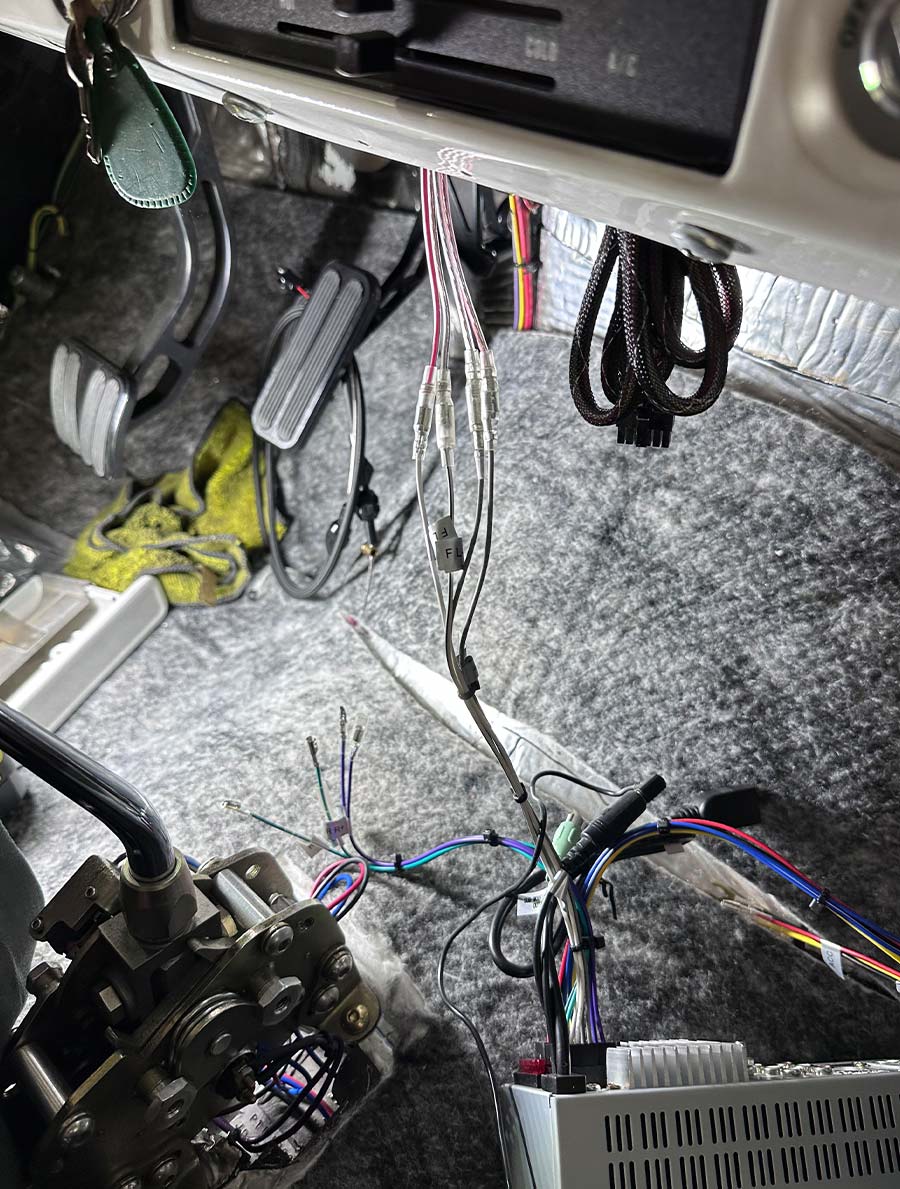
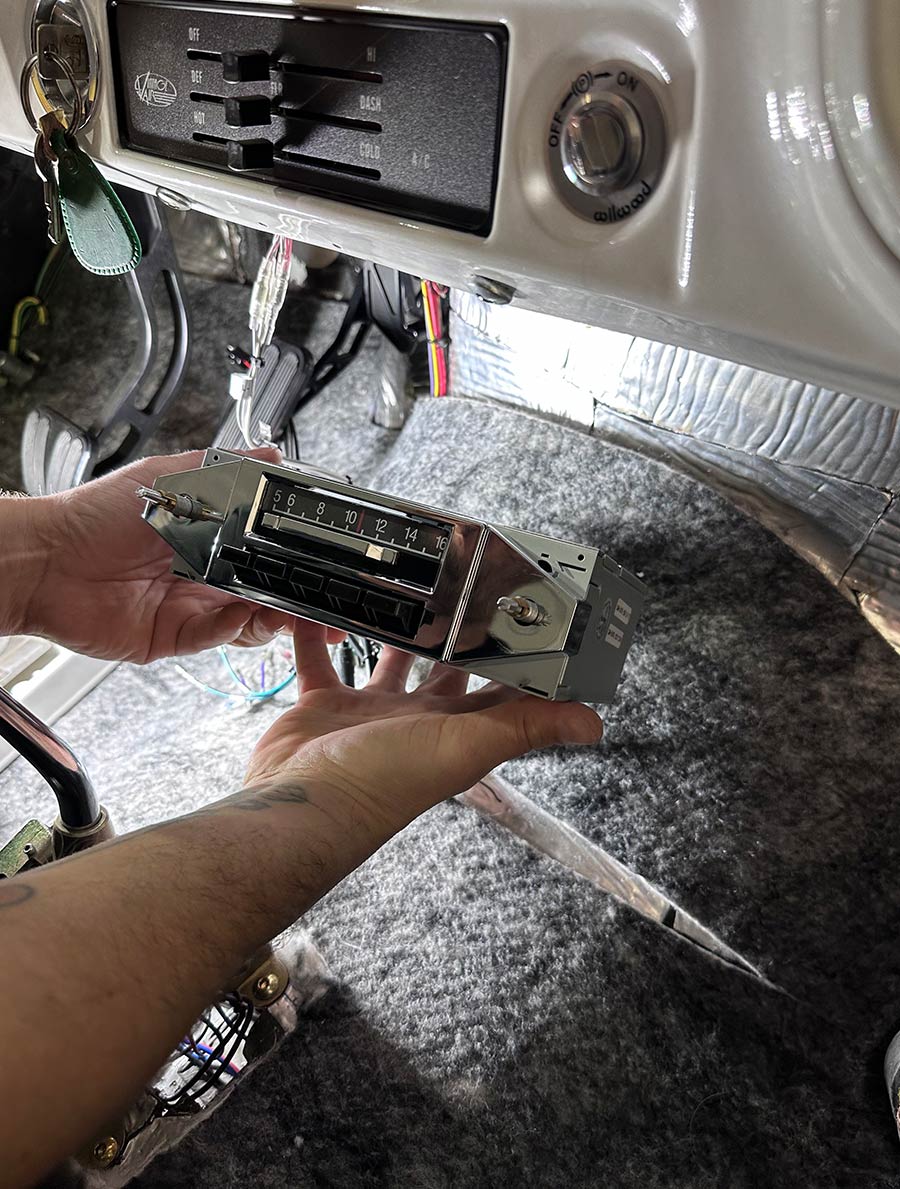
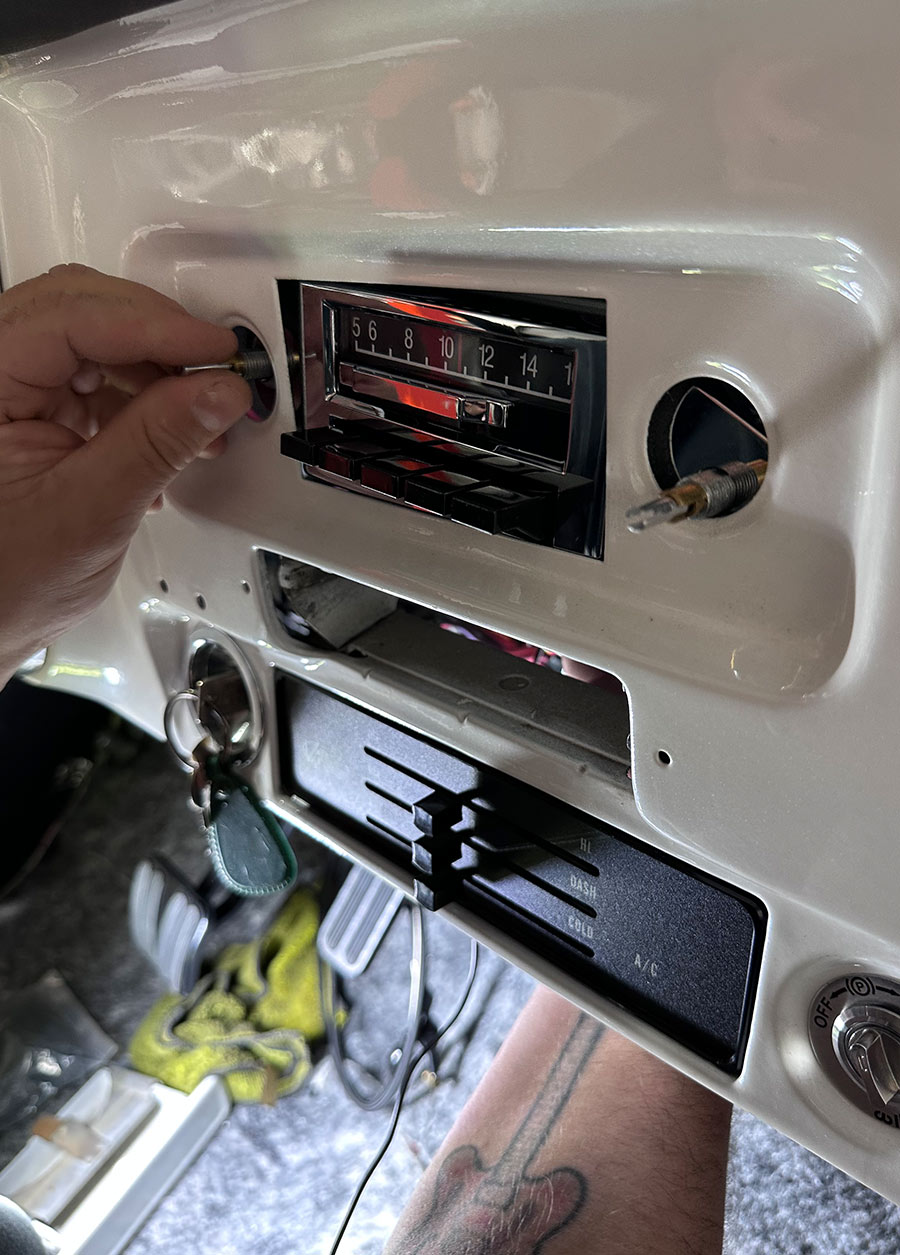
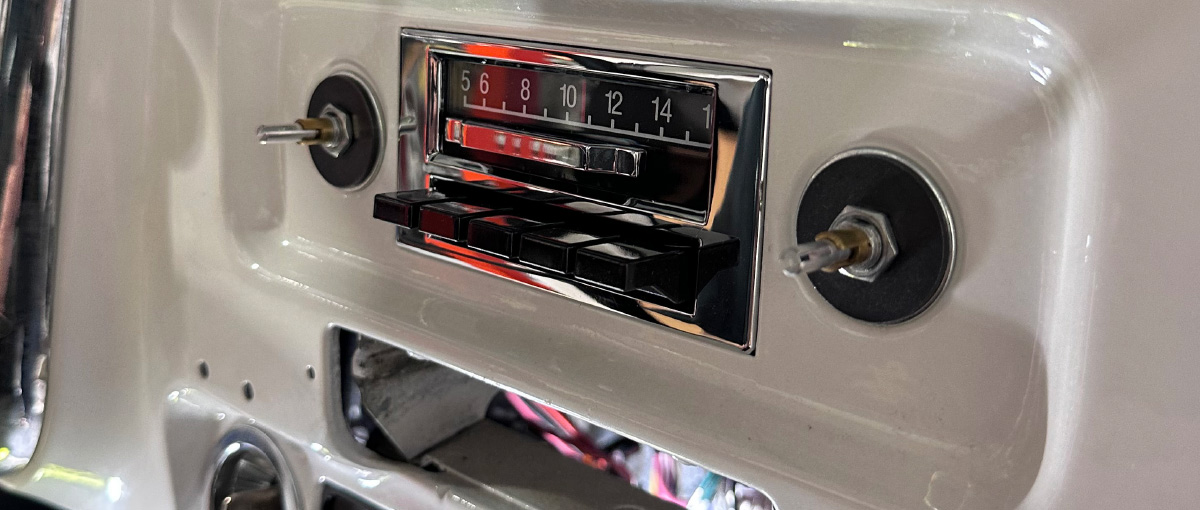
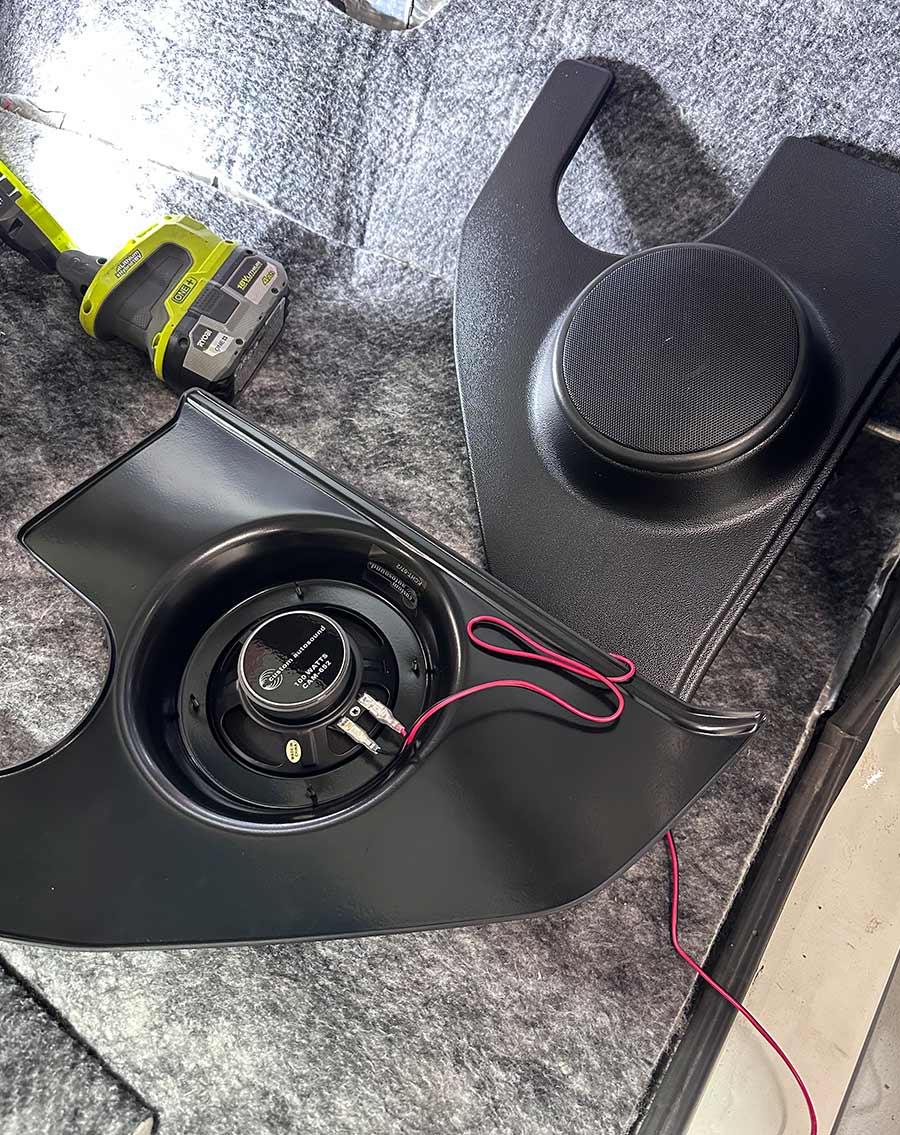
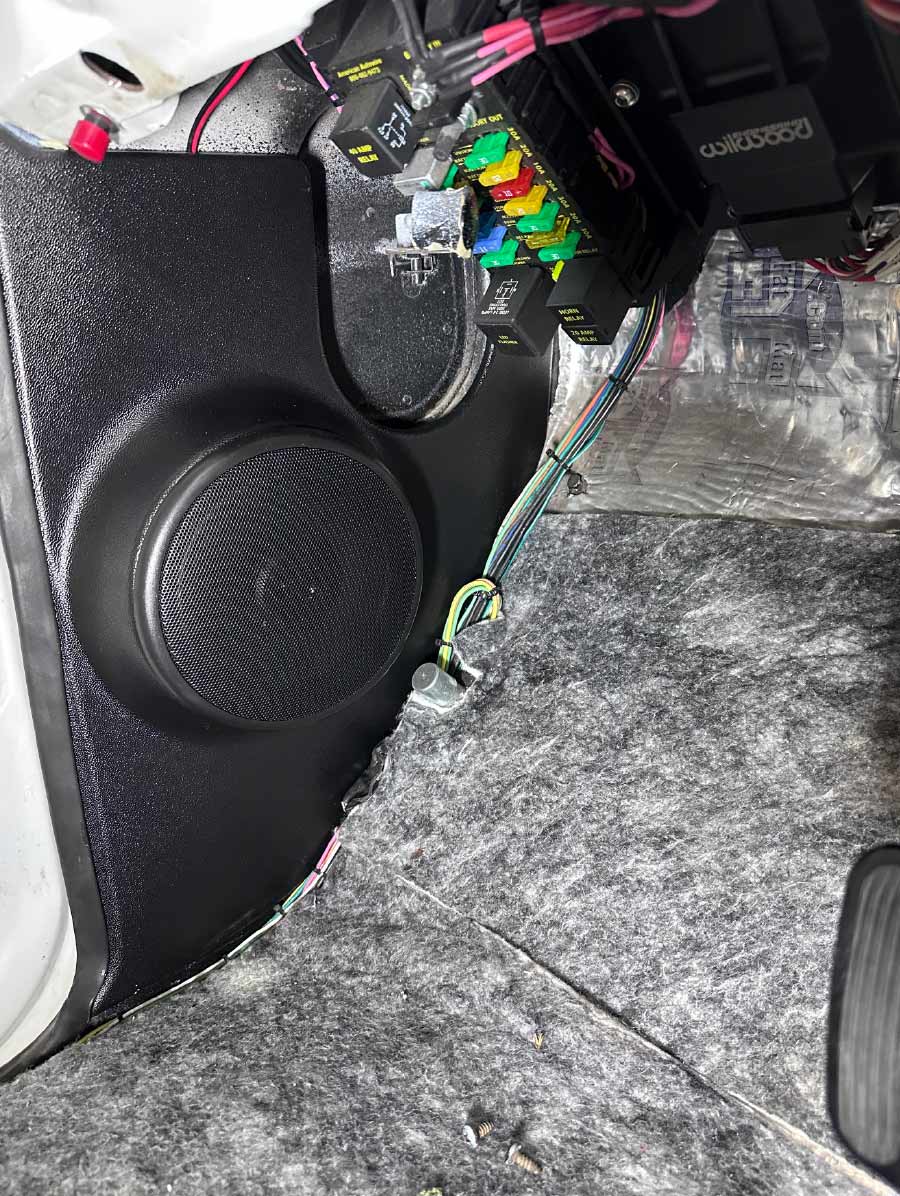
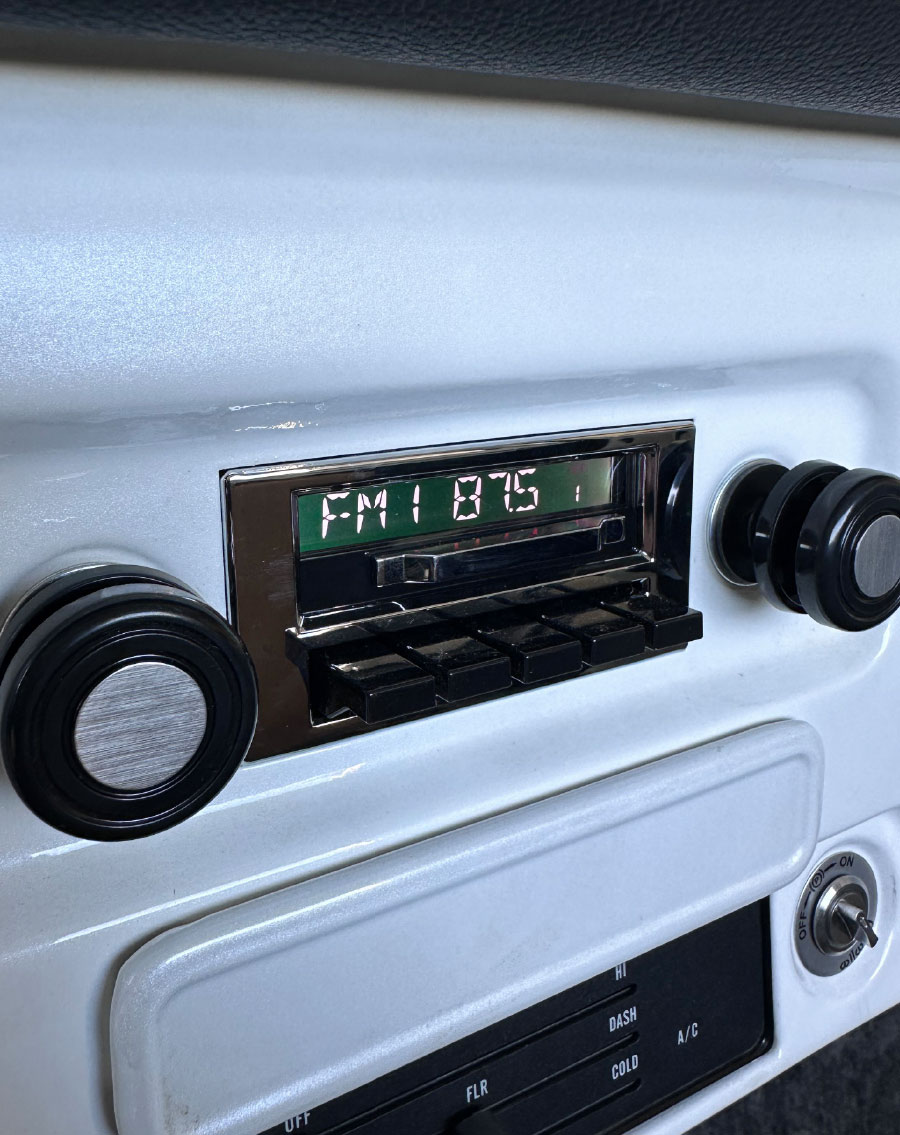
In order to preserve the look and feel of the C10’s dash, I opted to go with Custom Autosound’s latest Slidebar Radio (PN CAM-CHTKL-SBR) along with a pair of pre-molded kick panels (PN KCHT-67-72) with 6-1/2-inch 100-watt speakers (PN CAM-652) and factory-replacement 2000-Series 100-watt dual-dash speakers (PN CA-2008). As supplied, the system will integrate with iPhone via Bluetooth (AD2P), an iPod or similar device via USB and/or dock, and will accept an external CD/DVD player (the same AUX input will allow Satellite radio, too), which Custom Autosound also offers. The Slidebar Radio features a built-in 300-watt peak power, but with the addition of four pre-outs (as well as a single sub pre-out) it can also be used as a main control unit for high-wattage system.

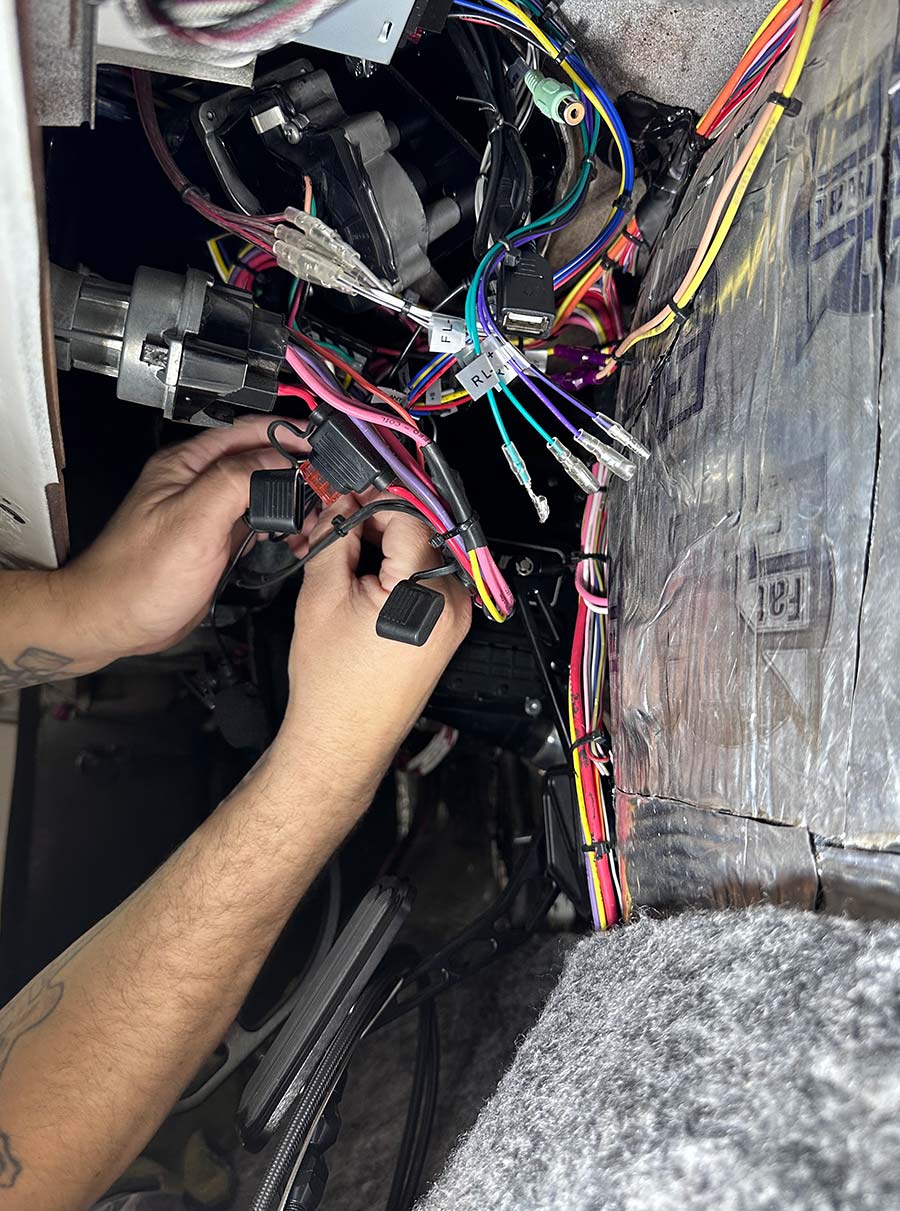
As far as the actual installation goes, no previous car audio experience is required—literally, it’s a couple-hour job, tops. I enlisted the help of my buddy, Clampdown Competition’s Ryan Manson, so I could, well, take better photos of the process!

The 1969 C10 project is getting outfitted with Custom Autosound’s latest Slidebar Radio
1. The 1969 C10 project is getting outfitted with Custom Autosound’s latest Slidebar Radio (PN CAM-CHTKL-SBR) along with a pair of pre-molded kick panels (PN KCHT-67-72) with 6-1/2-inch 100-watt speakers (PN CAM-652), and factory-replacement 2000-Series 100-watt dual-dash speakers (PN CA-2008).
Before installing the head unit, we’ll take advantage of the underdash access and swap out the dash speakers first
Custom Autosound speaker bracket appears to be shaped differently
2-3. Before installing the head unit, we’ll take advantage of the underdash access and swap out the dash speakers first. Though the new Custom Autosound speaker bracket appears to be shaped differently than the one on the old speaker cluster, it bolted right in place without any manual coercion.
bundled and zip-tied the pre-soldered speaker leads
Like the original bracket, the new one is slotted to allow for adjustment
4-5. Ryan Manson bundled and zip-tied the pre-soldered speaker leads nicely before squeezing up under the dash and mounting the cluster. Like the original bracket, the new one is slotted to allow for adjustment.
the head unit mounts in from behind
connecting the supplied harness and connecting the speaker leads first
6-7. Since the head unit mounts in from behind we could connect the supplied harness and connect the speaker leads first.
other dual-knob radios that use two sets of post nuts to mount in the dash
the Custom Autosound Slidebar only uses one
8-9. Unlike some other dual-knob radios that use two sets of post nuts to mount in the dash, the Custom Autosound Slidebar only uses one: the chrome fascia/bezel sandwiches between the unit and the backside of the dash.
the remainder of the wiring was tended to with user-supplied crimp-on connectors
The rear speaker leads hanging by their lonesome on the right will be mated with the kick panel speakers
10-11. Once the radio unit was securely mounted, the remainder of the wiring (power/ground, and so on) was tended to with user-supplied crimp-on connectors. The rear speaker leads hanging by their lonesome on the right will be mated with the kick panel speakers next … well, after they’ve been installed, which Manson’s about to do now!
The direct-fit 1967-1972 C10 kick panels come pre-assembled and ready to install
12. The direct-fit 1967-1972 C10 kick panels come pre-assembled and ready to install—you just have to connect the leads as shown, and …
the wiring is routed up toward the dash in the process
13. … slip in place, securing them by means of the door’s weatherstrip seal, as such. Make sure the wiring is routed up toward the dash in the process—and for a more permanent fit, you can use interior self-tapping screws on the uppermost front edge if necessary.
Finished in textured ABS plastic, the kick panels can be run as-is
having them wrapped in interior-matching material
14-15. Finished in textured ABS plastic, the kick panels can be run as-is, or as I will be doing here shortly, have them wrapped in interior-matching material (which TMI is working on at this very moment!). Also note that the fresh air vent levers will have to be removed and remounted if you plan to reuse them.
working Slidebar radio in the C10 after final steps
The slide function will alternate the display between standard (OG) analog and full-feature digital display
16-17. And, before our lunch arrived, we had a working Slidebar radio in the C10! The slide function will alternate the display between standard (OG) analog and full-feature digital display (which has seven backlit color options you can select) that will show you what’s playing from your remote device when enabled.
SOURCE
16-17. And, before our lunch arrived, we had a working Slidebar radio in the C10! The slide function will alternate the display between standard (OG) analog and full-feature digital display (which has seven backlit color options you can select) that will show you what’s playing from your remote device when enabled.