CTP Tech
InTheGarageMedia.com
’63 C1100 International Harvester standard-wheelbase Stepside pickup
1. Some folks consider the ’60s-era International Harvester pickups pretty goofy looking and that they have a whole host of questionable design choices, including the general shape of the roof.
Put a (New) Lid on It!
Old Anvil Redesigns an International Harvester Roof
BY Eric Geisert
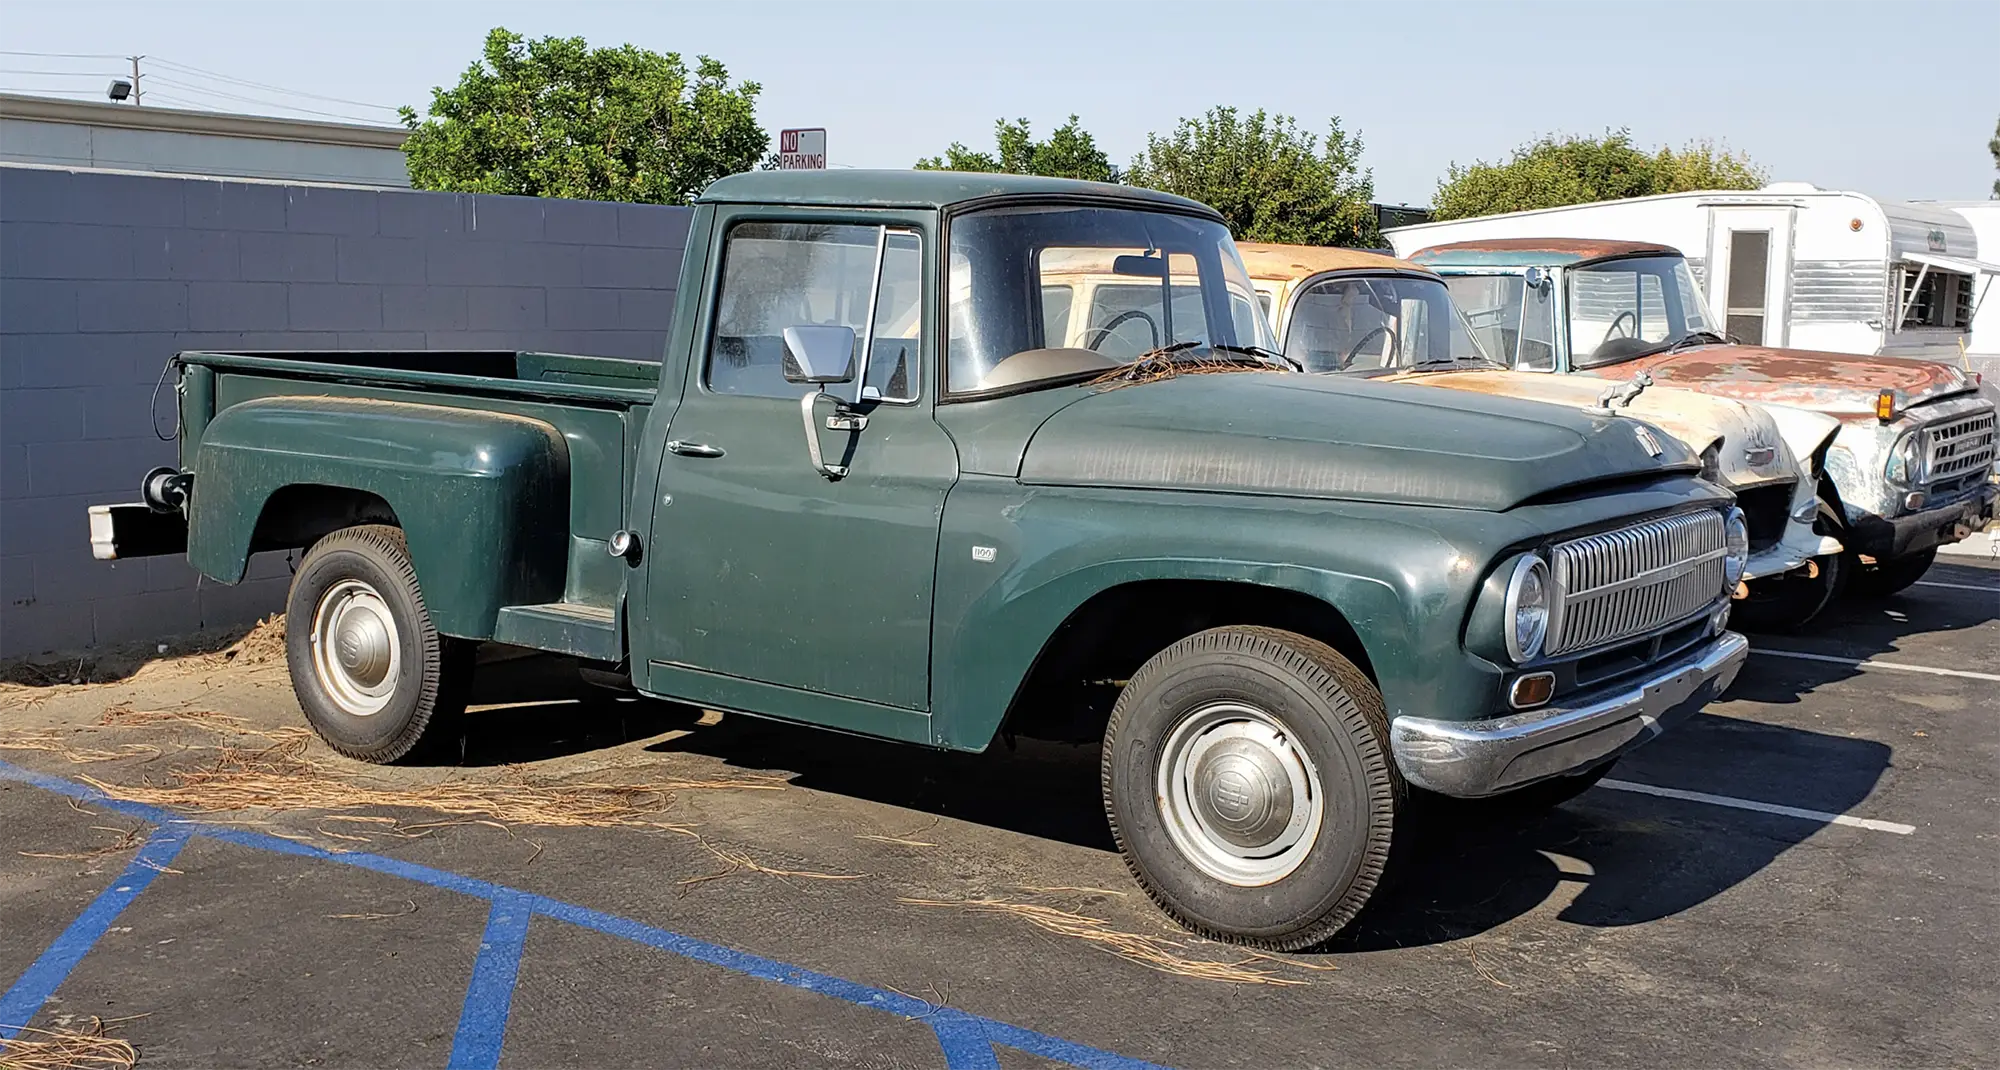
Photography BY THE AUTHOR
S

ome of the best bodywork ever done on a vehicle never gets noticed because the work needed to achieve that new look was done with such subtlety and expertise your brain just sees the properly proportioned finished product, not a jumbled collection of ideas haphazardly thrown together.

At Old Anvil Speed Shop (Orange, California) every project gets conceptual illustrations done by in-house graphic artist Jeff Allison. Every aspect of the exterior and interior is discussed with the client and, with every facet of every area, Allison can offer several different designs to the customer, all depending on the theme of the project.

This project, a ’63 C1100 International Harvester standard-wheelbase Stepside pickup, already had some drawings done when it arrived at Old Anvil but, after some discussions with their client, the visions Old Anvil came up with took the pickup in a whole new direction.

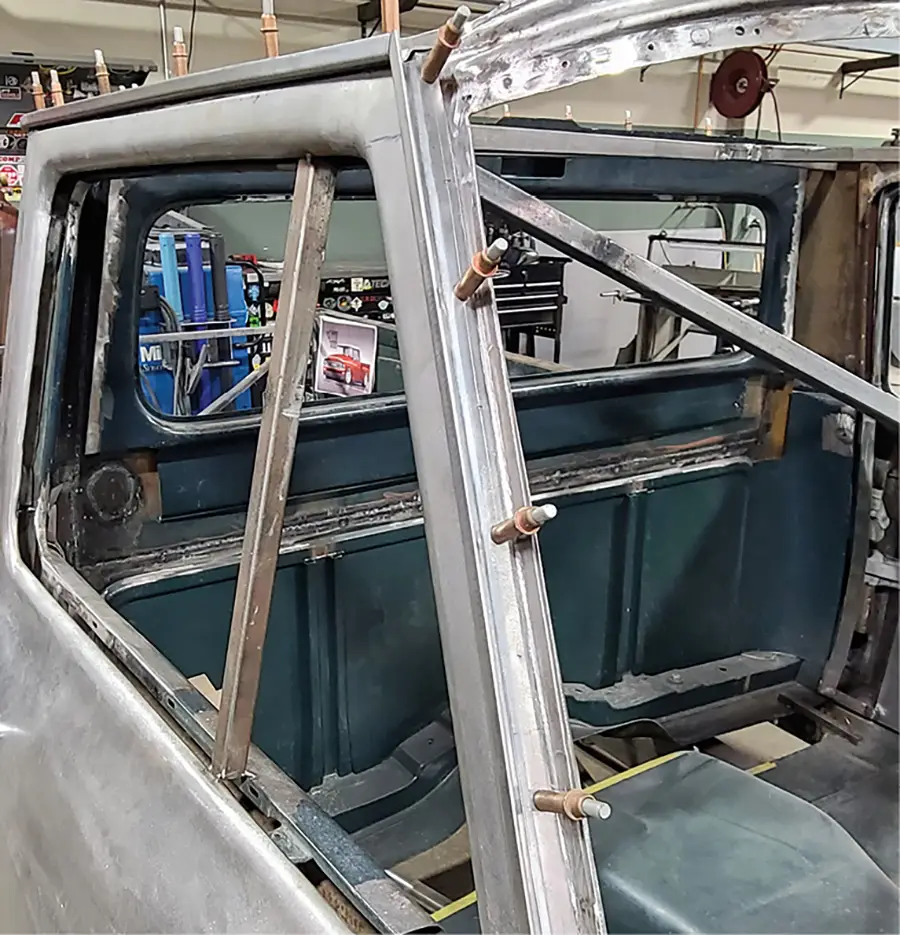
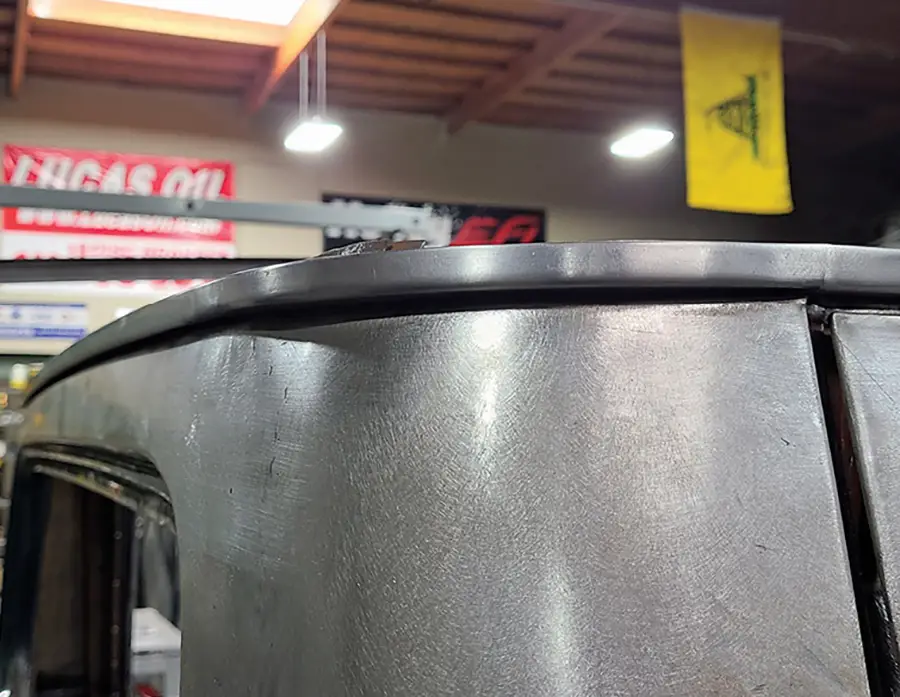
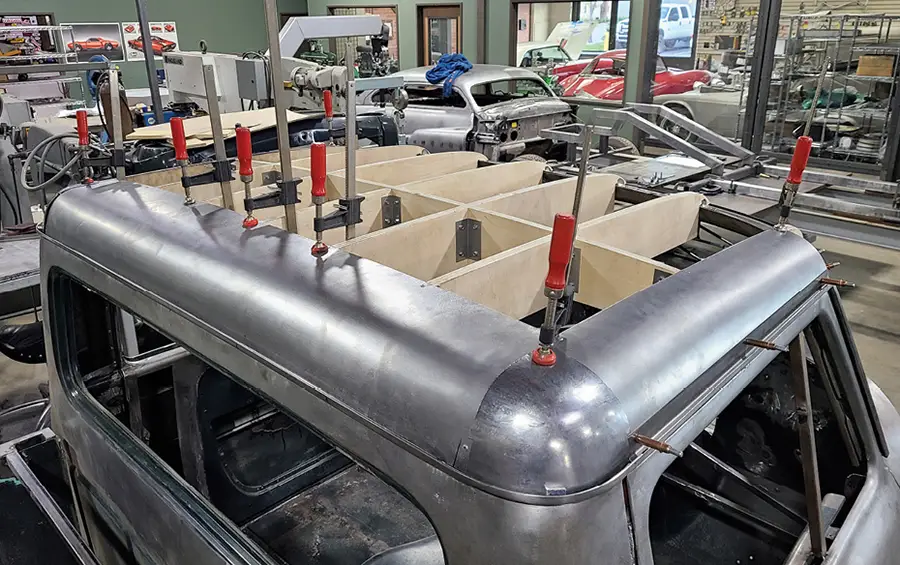
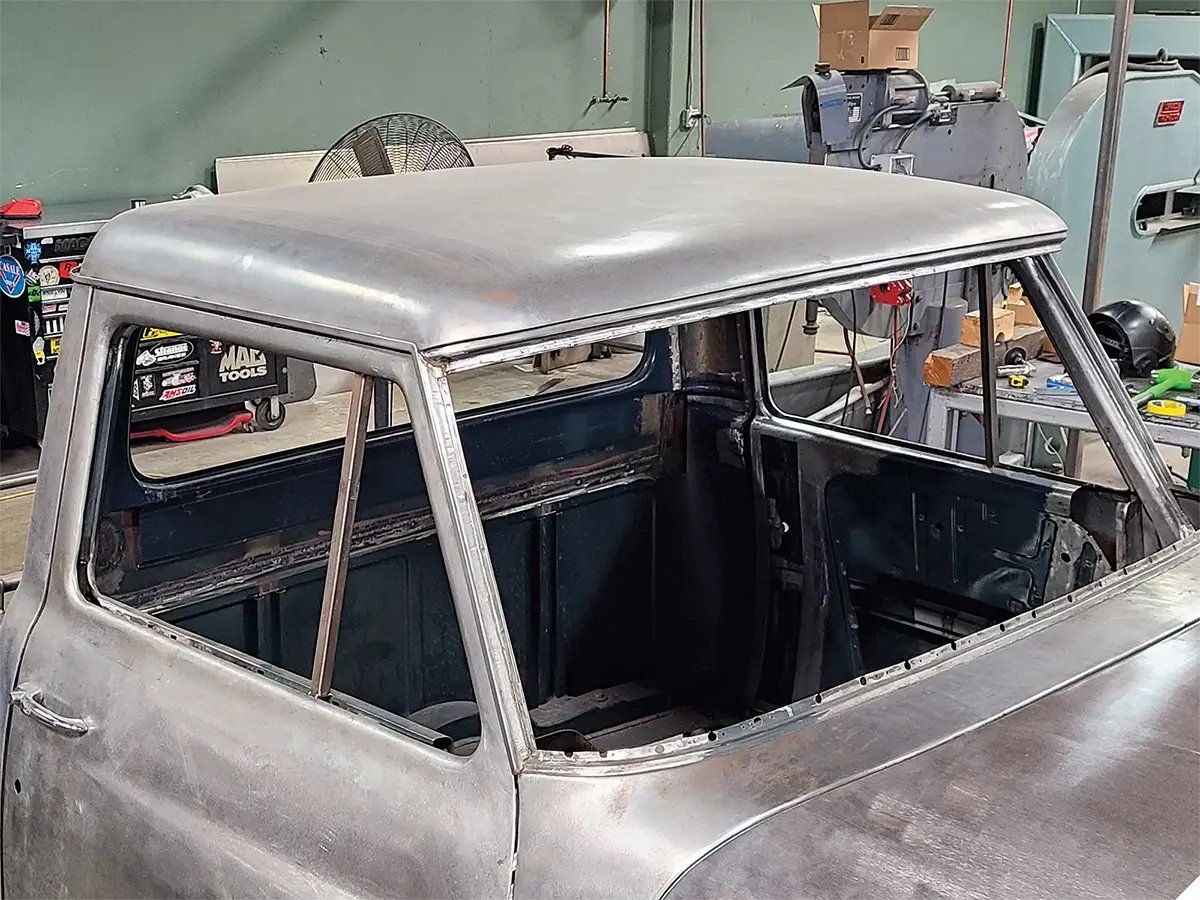
One aspect of the new design was a major one: getting rid of the original, boxy, out-of-proportion, squarish fishbowl appearance the factory shape had offered for many, many years and replacing it with one that is sleek and contemporary.

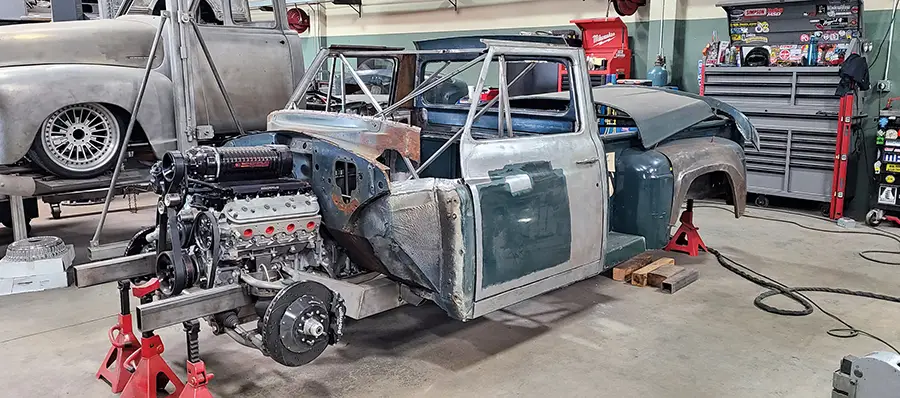
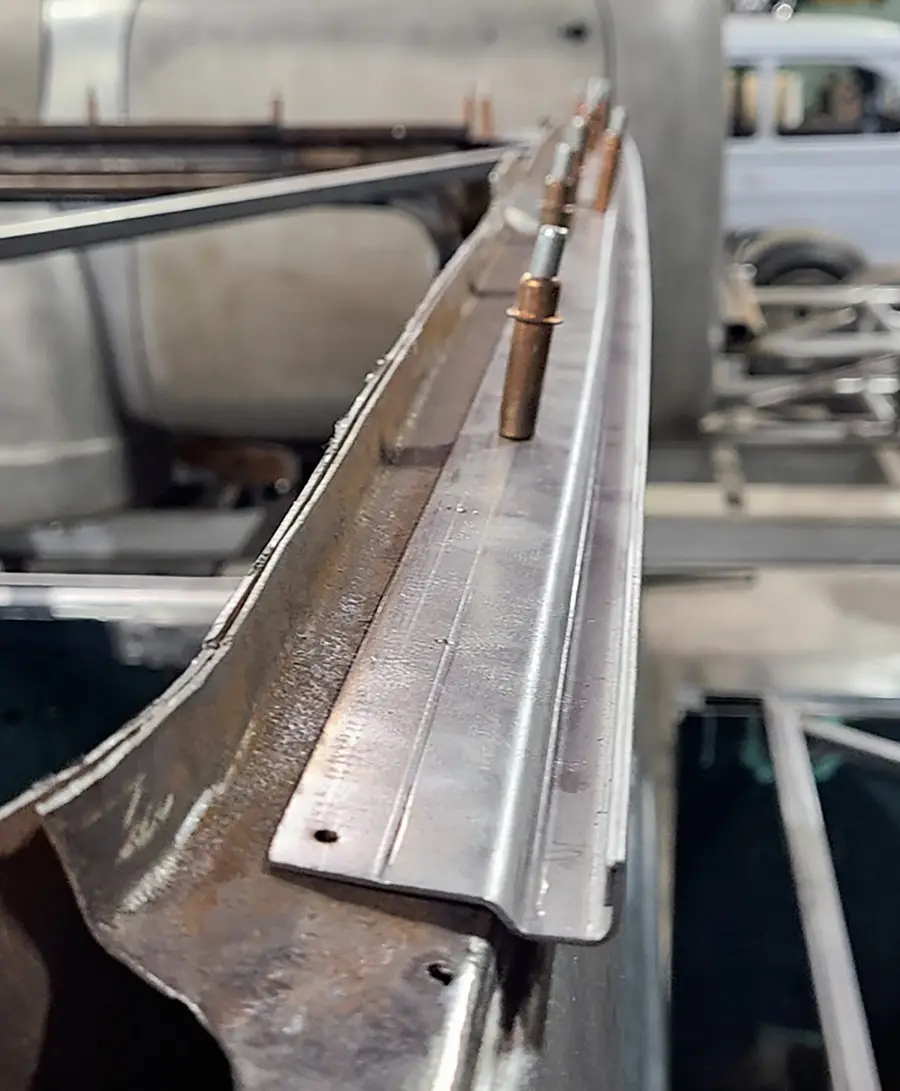
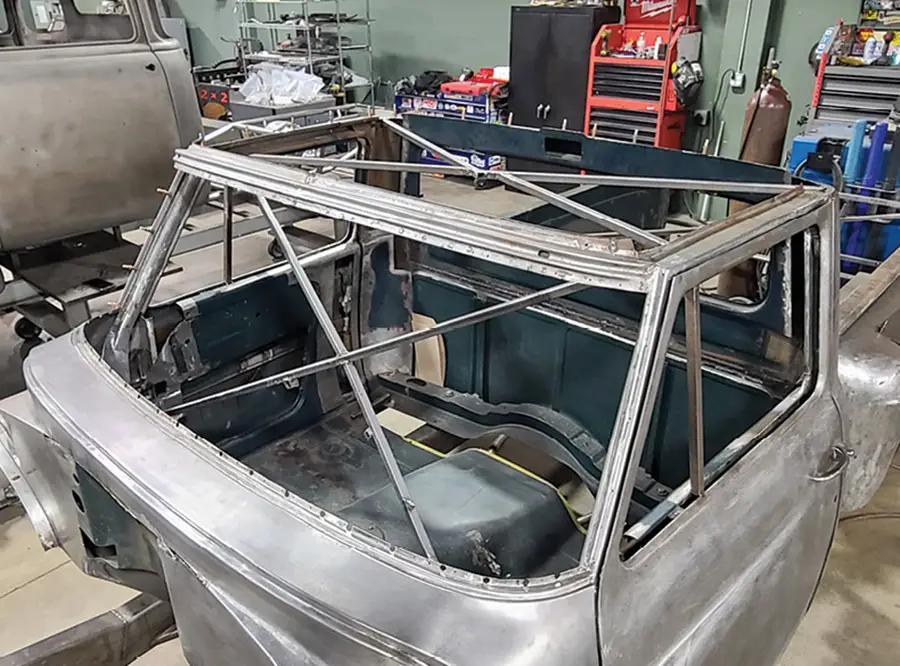
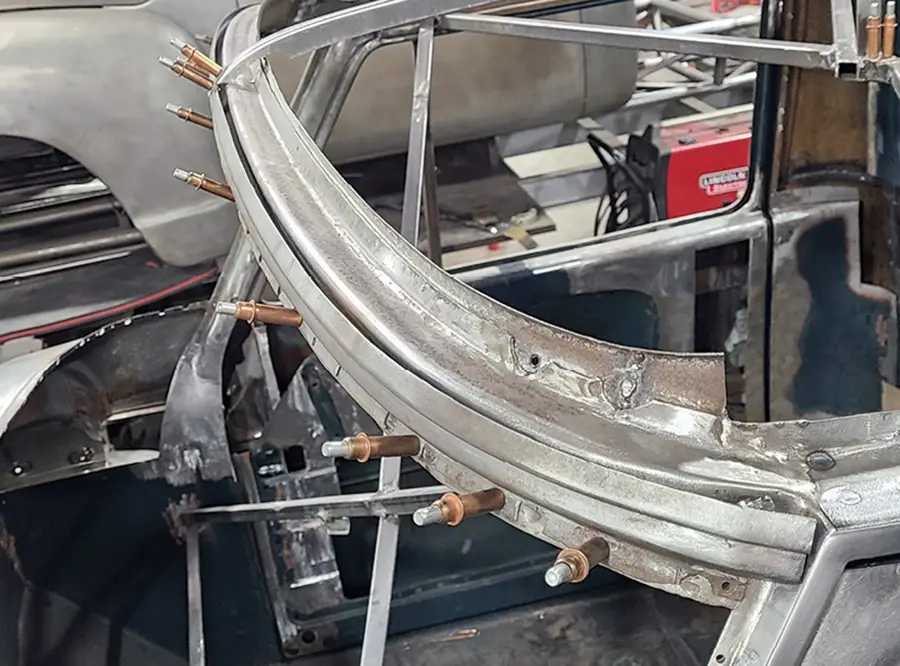
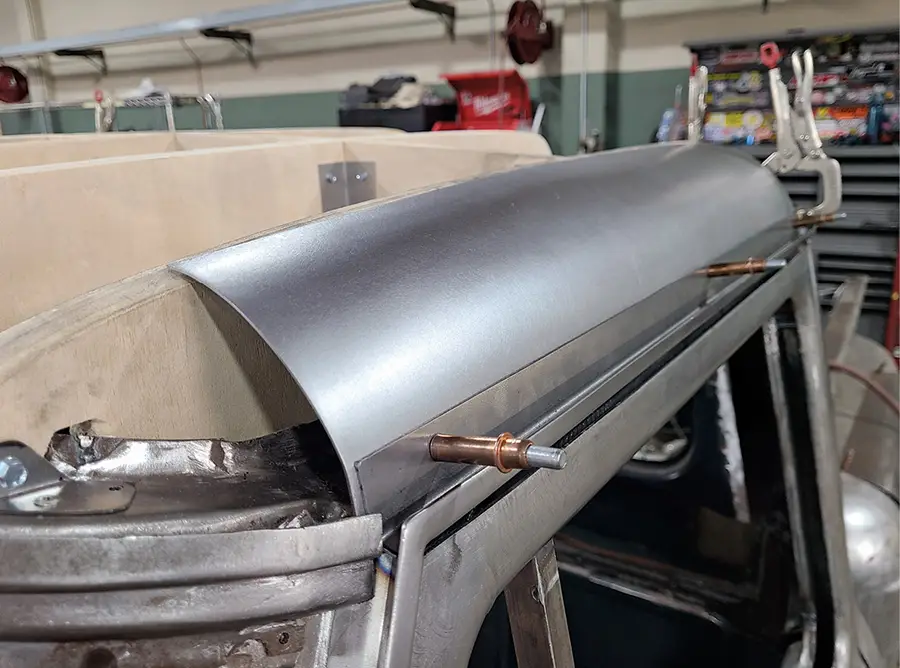
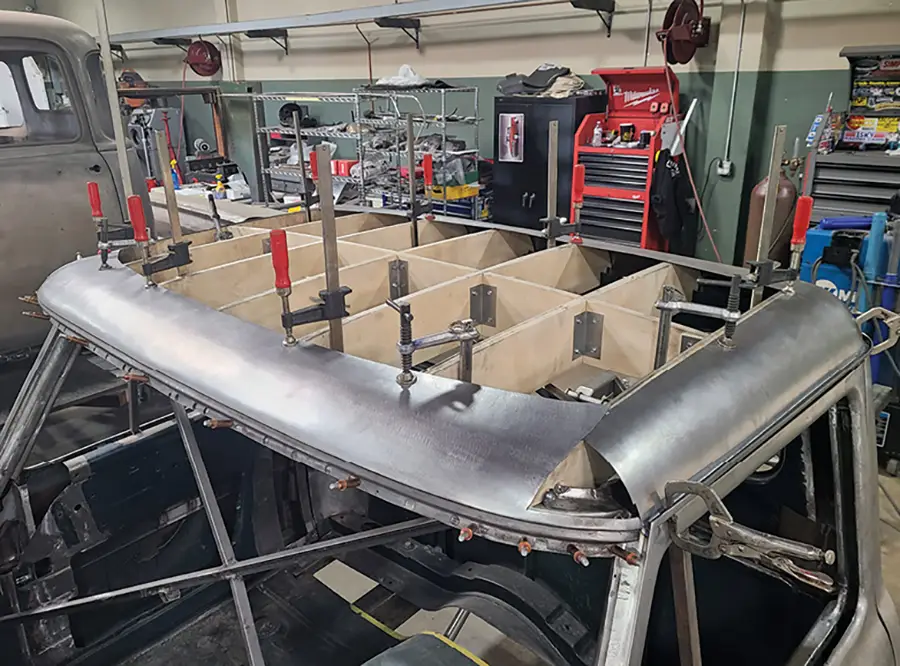
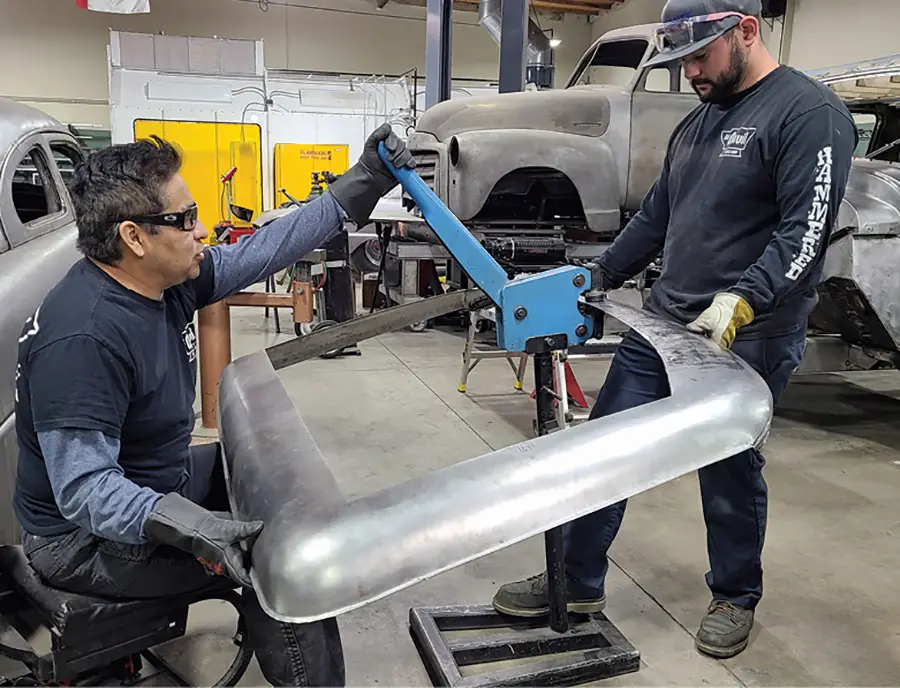
To achieve the new look several custom-fabrication styling cues were used, including chopping the top 2 1/2 inches, leaning the A-posts back, lengthening the doors 4 inches, and removing the dogleg shape from the leading top edge of each door. To tie all that work together a new roof was needed—itself a custom one-off endeavor.

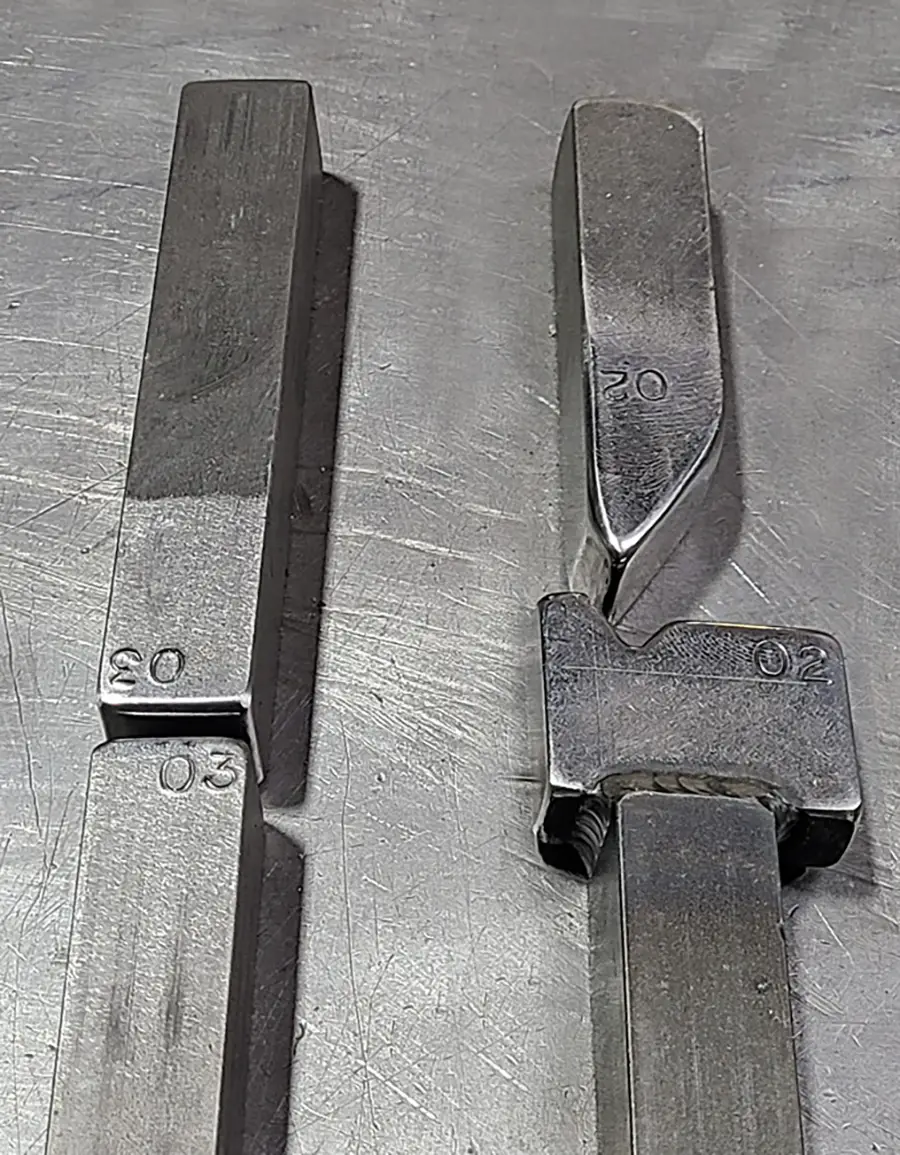
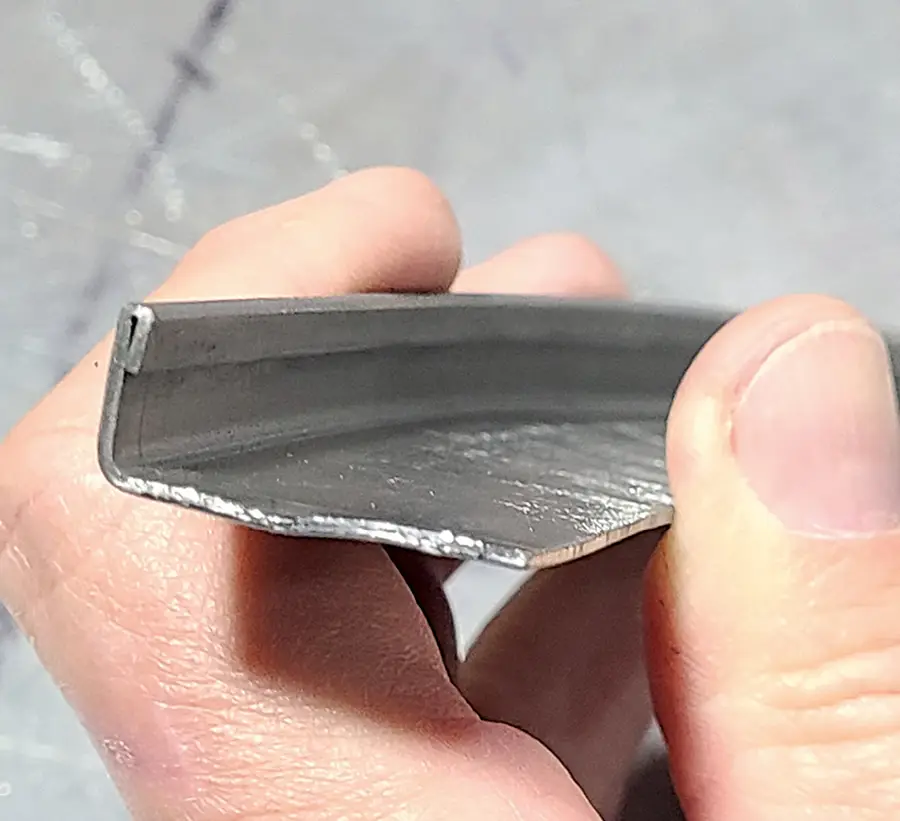
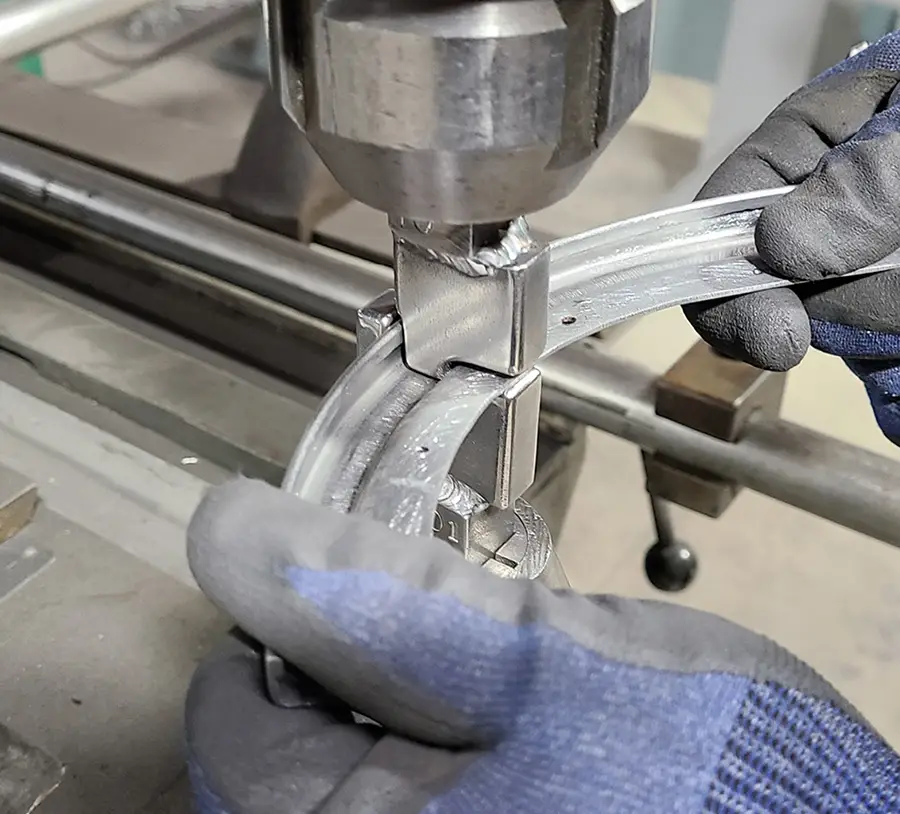
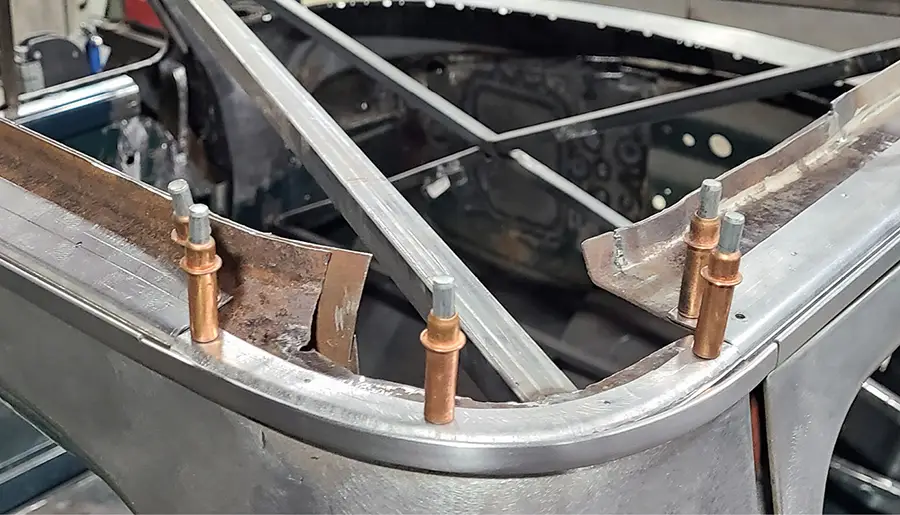
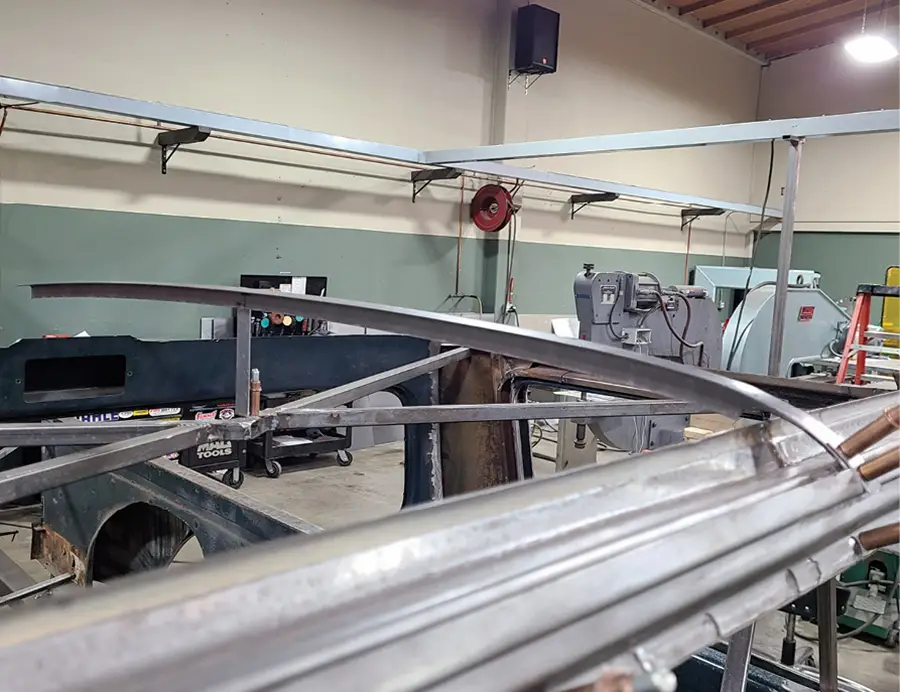
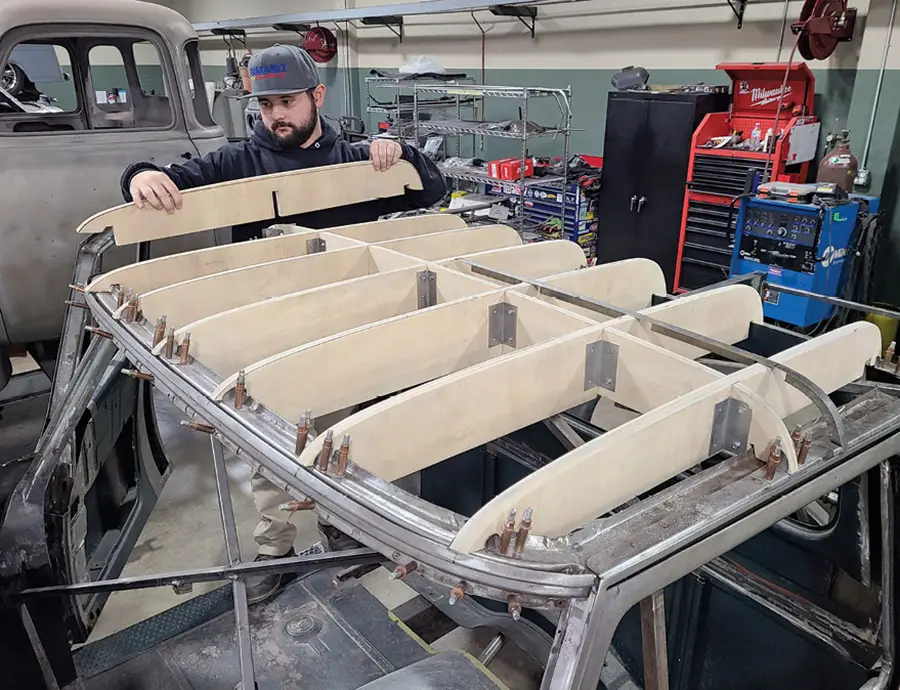
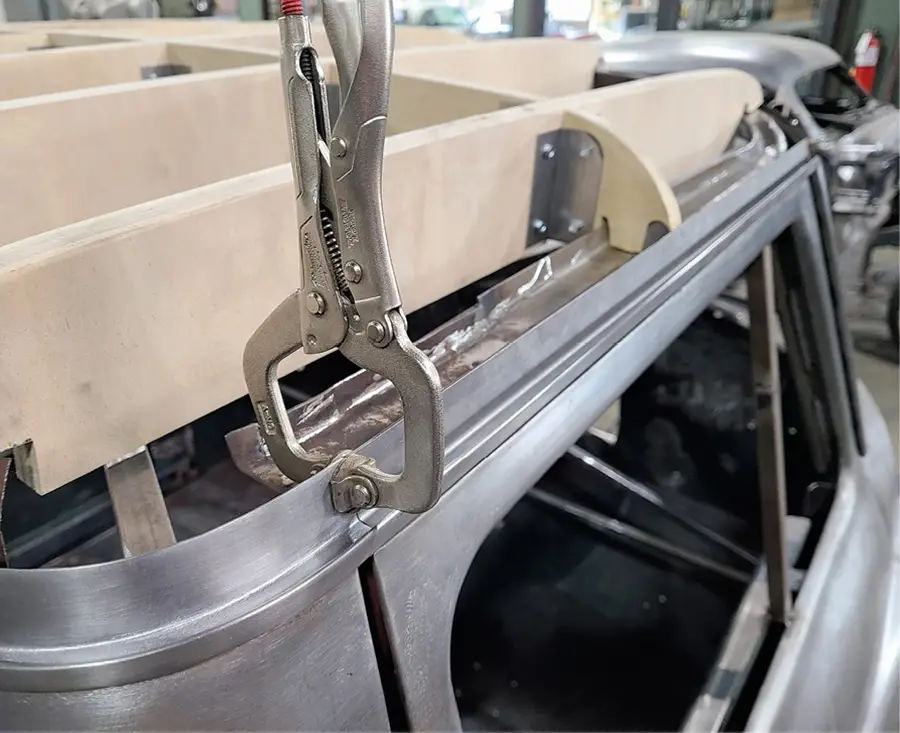
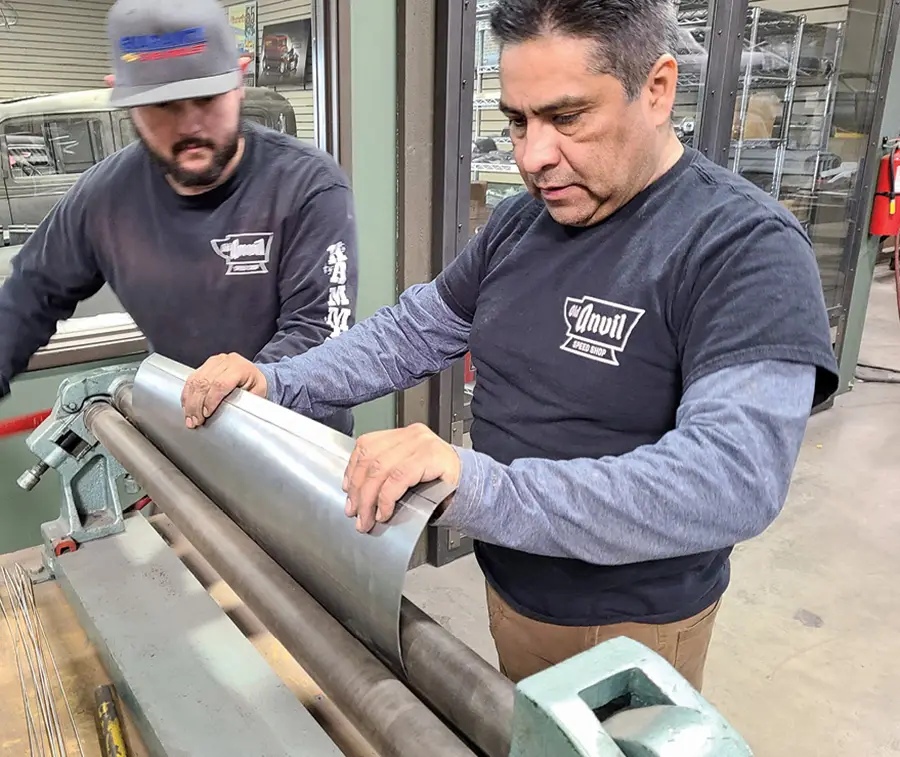
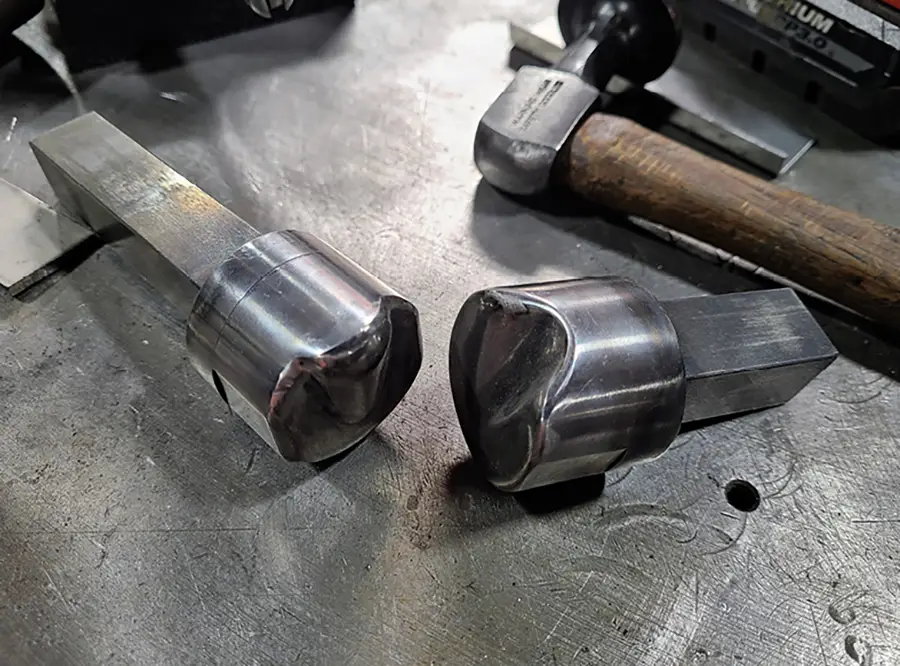
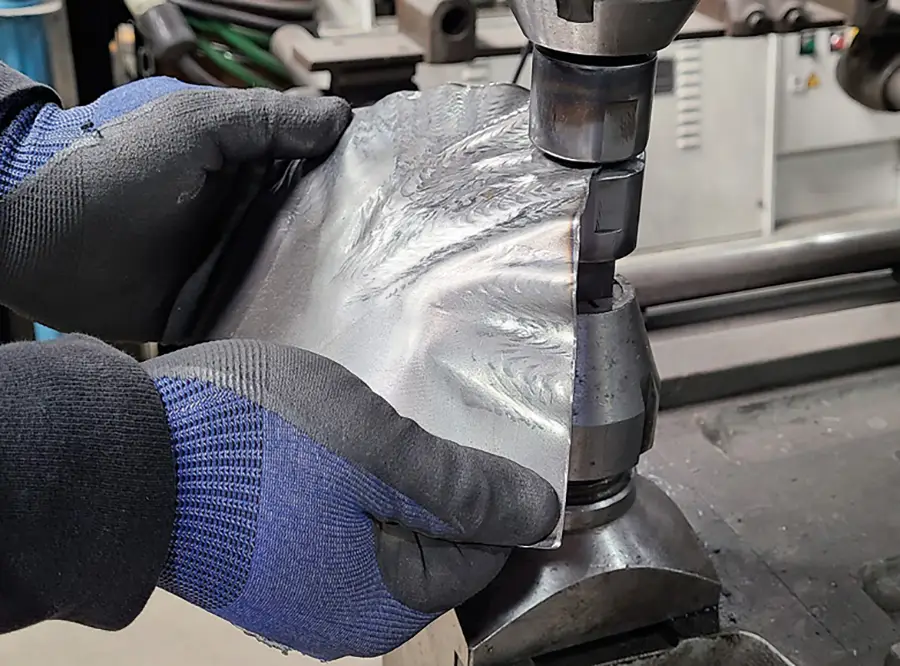
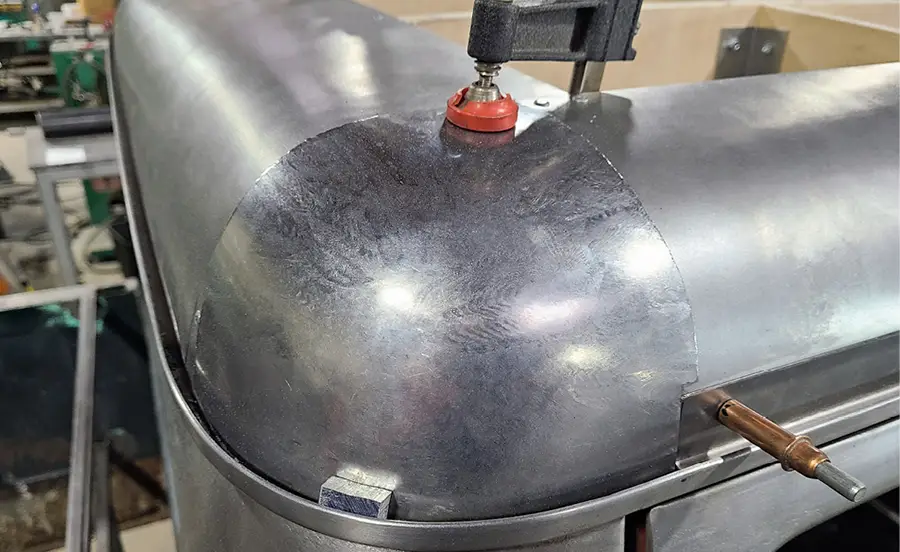
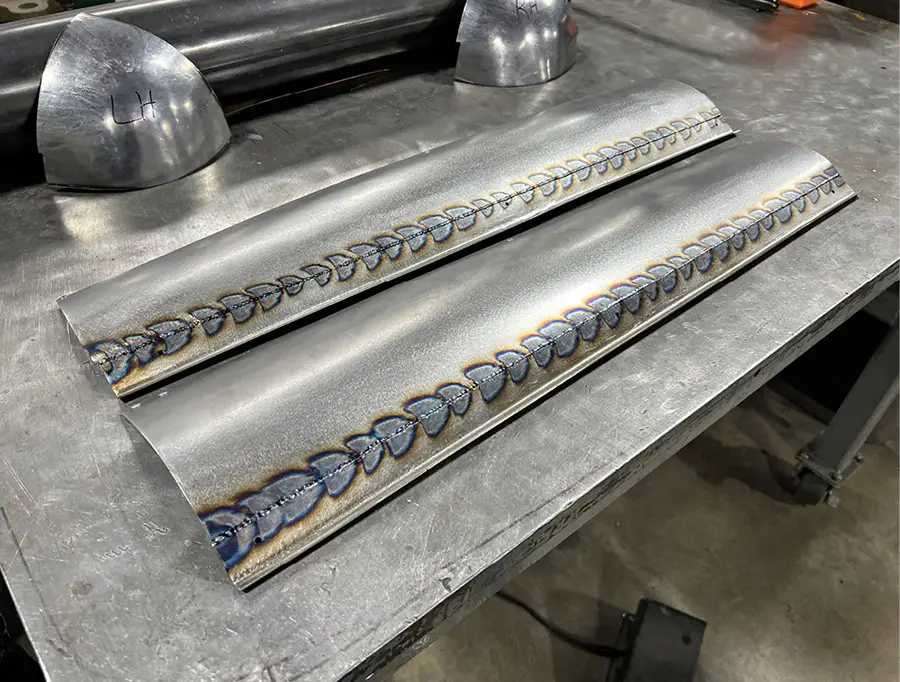
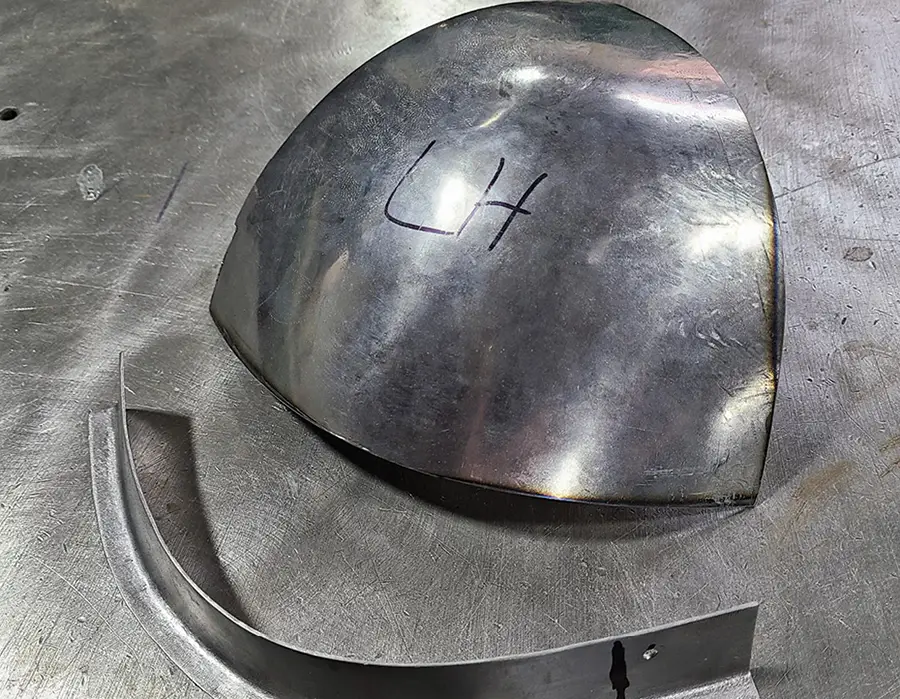
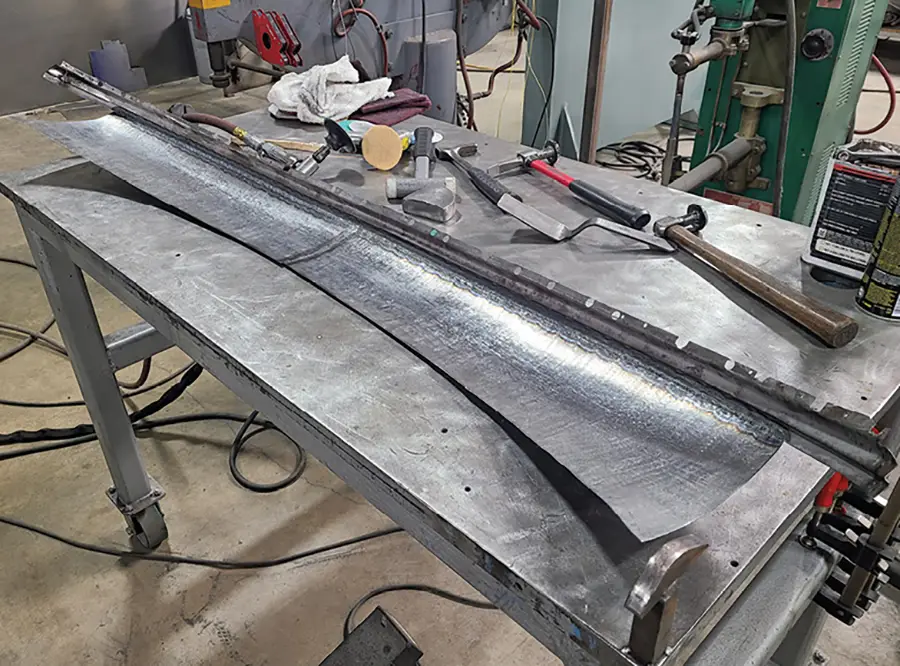
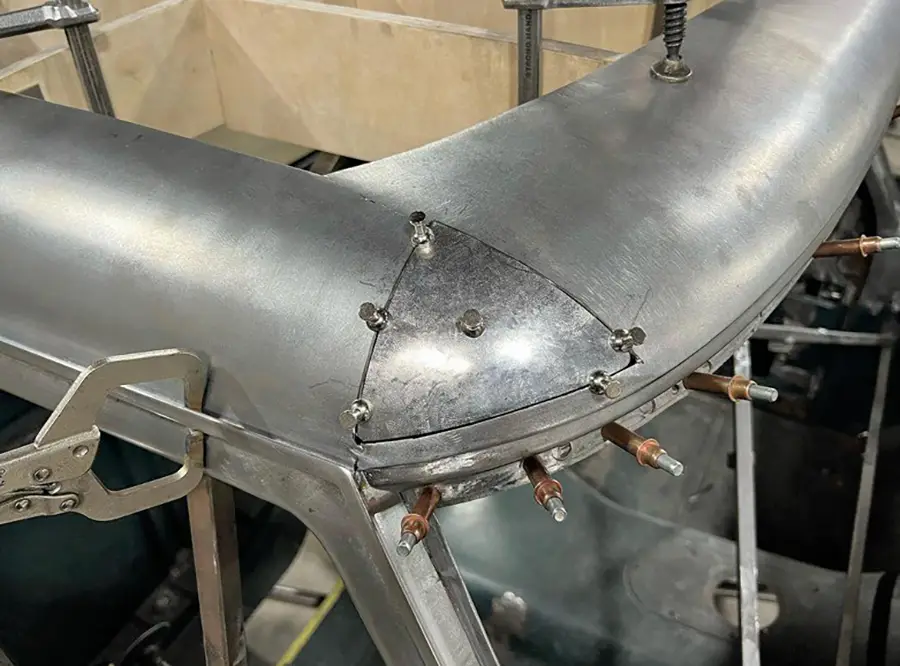
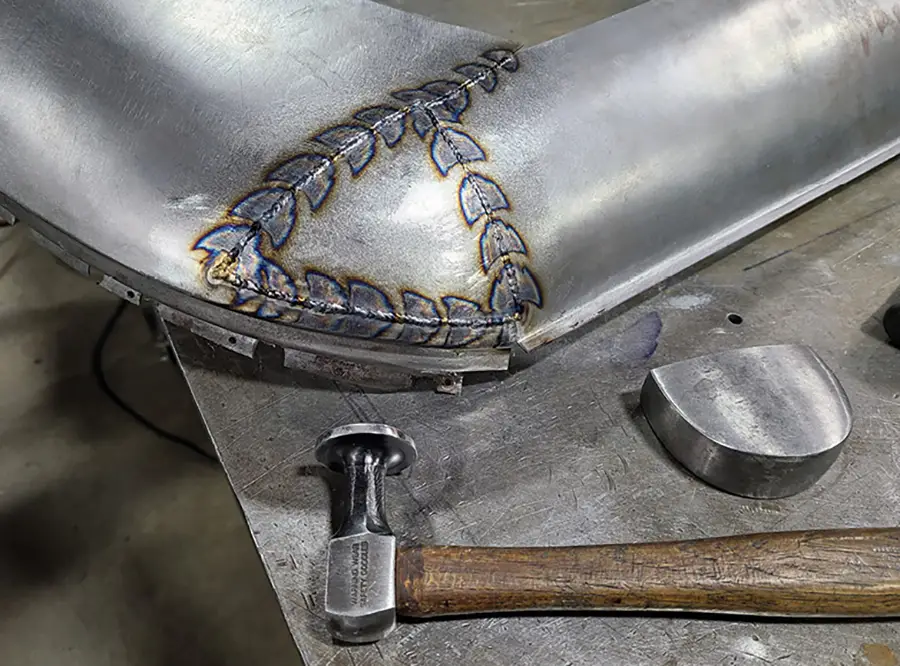
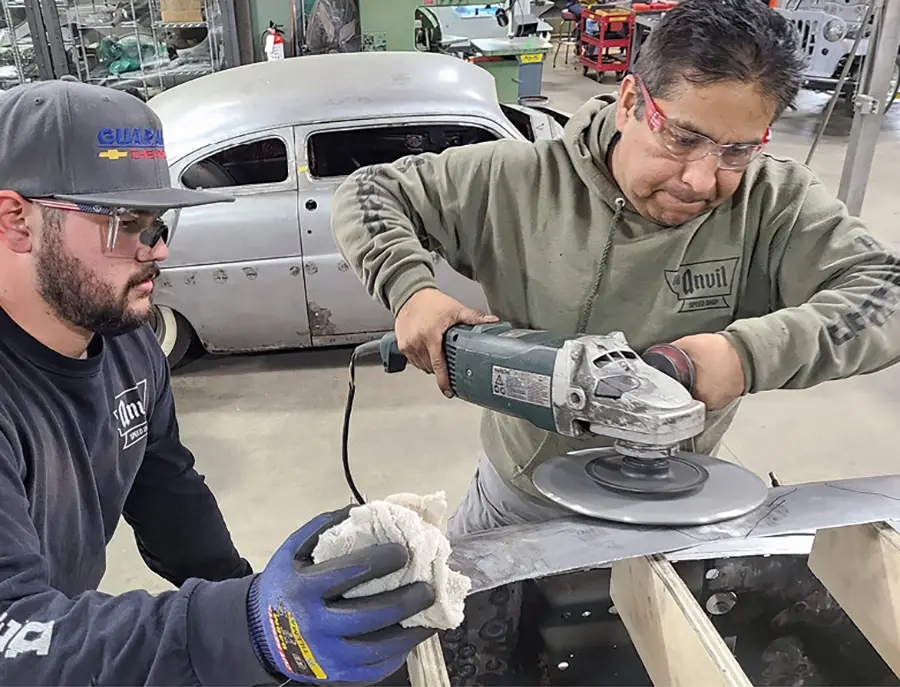
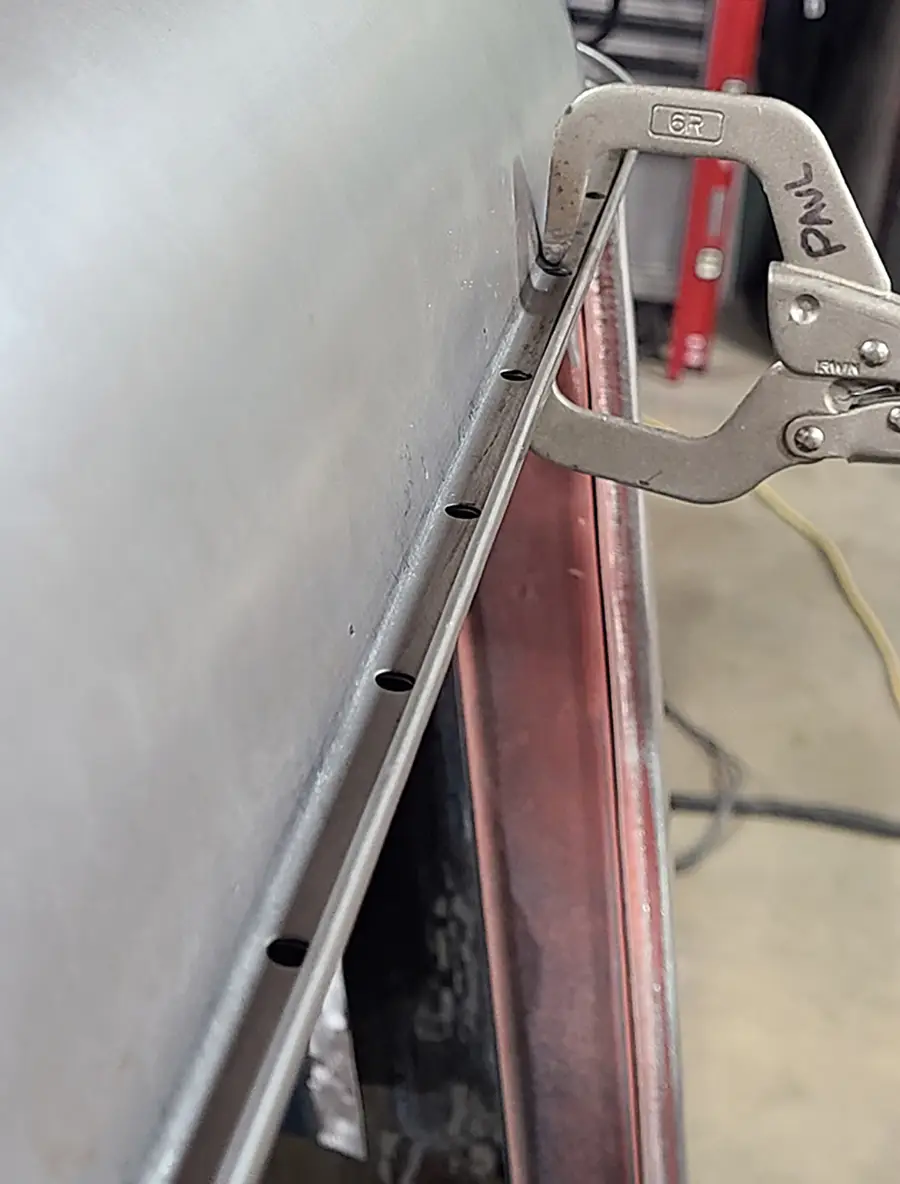
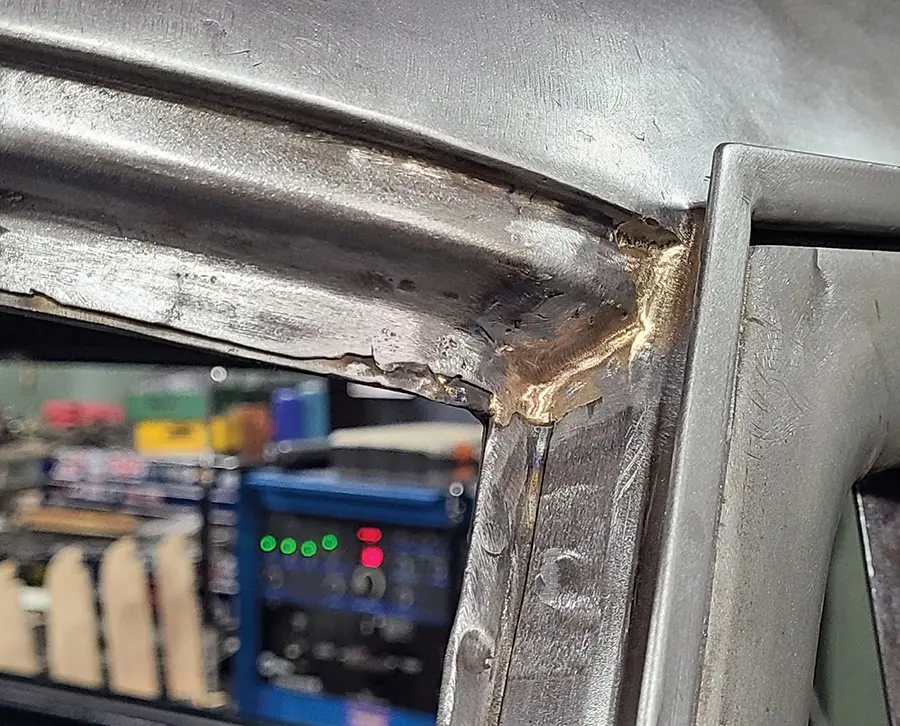
Old Anvil handed the project to one of their handful of talented fabricators: 23-year-old Brandon Gerringer. He approached the project like a big 18-gauge steel puzzle: first the four edges needed to be made, then the corners, then the roof top. But there were several ways this roof could have gone together because every metalshaper will approach the same project differently based on their past experiences and whatever the new design elements require, so the following is how Old Anvil took this pickup from their drawing board to a reality.

Besides setting the body on a new Old Anvil chassis, the cab has already seen some work started (lengthening the doors 4 inches, leaning the A-posts back roughly 3-1/2 inches, chopping the roof 2 inches, and removing the dogleg section on the forward section of the doorskin) but now it was time to create a new, scratchbuilt roof.
2. Besides setting the body on a new Old Anvil chassis, the cab has already seen some work started (lengthening the doors 4 inches, leaning the A-posts back roughly 3-1/2 inches, chopping the roof 2 inches, and removing the dogleg section on the forward section of the doorskin) but now it was time to create a new, scratchbuilt roof.
sets of driprail
driprail
3-4. The first of the three sets of driprail dies Brandon Gerringer made for the Pullmax hemmed the outside edge of the ’rail back onto itself.
driprail pieces
driprail pieces together
5-6. The second set of dies stamps the channel into the piece. The first driprail piece made was for the back of the cab, which also had a small bow in it at the center of the cab.
For the driprail’s corner the hemmed edge on a 90-degree bend was formed first then run through a shrinker to create a 90-degree turn then run back through the Pullmax with the channel dies.
7. For the driprail’s corner the hemmed edge on a 90-degree bend was formed first then run through a shrinker to create a 90-degree turn then run back through the Pullmax with the channel dies.
As each piece is made Gerringer begins to Cleco them in place.
8. As each piece is made Gerringer begins to Cleco them in place.
Straight driprail pieces were also made to run around each edge of the door top and the A-post.
9. Straight driprail pieces were also made to run around each edge of the door top and the A-post.
The windshield header section was next, with it consisting of both newly fabricated pieces and part of the factory pieces, too.
10. The windshield header section was next, with it consisting of both newly fabricated pieces and part of the factory pieces, too.
The new roof design required the width of the windshield header to be increased (in the middle), and the ends modified to flow into the A-posts.
11. The new roof design required the width of the windshield header to be increased (in the middle), and the ends modified to flow into the A-posts.
Once Gerringer is sure how things are fitting together, he drilled out the flat section of his driprails and spot-welded the entire perimeter in place.
12. Once Gerringer is sure how things are fitting together, he drilled out the flat section of his driprails and spot-welded the entire perimeter in place.
The next step was to start imagining what the roof profile was going to look like that would feature both a side-to-side and front-to-rear crown in the shape.
13. The next step was to start imagining what the roof profile was going to look like that would feature both a side-to-side and front-to-rear crown in the shape.
Once a general shape was agreed upon, Gerringer then used wood to make a station buck as a reference point to build from.
14. Once a general shape was agreed upon, Gerringer then used wood to make a station buck as a reference point to build from.
To save time (money) and effort, Gerringer decided to flange a base piece that the roofskin will be welded to rather than hoping the entire roofskin will meet the driprail in a uniform manner.
15. To save time (money) and effort, Gerringer decided to flange a base piece that the roofskin will be welded to rather than hoping the entire roofskin will meet the driprail in a uniform manner.
The parts of the roof with the most shape to them is where the roofskin meets the driprail, and a length needed to be made for each of the four roof sides. Gerringer enlists Sergio Saucedo for some help shaping the pieces on a slip roller.
16. The parts of the roof with the most shape to them is where the roofskin meets the driprail, and a length needed to be made for each of the four roof sides. Gerringer enlists Sergio Saucedo for some help shaping the pieces on a slip roller.
Gerringer also used an English wheel on the roof side piece to attain the needed bow in the middle of the part and then used the shrinker to pull the top edge closer to the buck. Once all four pieces are made they are Cleco’d in place.
17. Gerringer also used an English wheel on the roof side piece to attain the needed bow in the middle of the part and then used the shrinker to pull the top edge closer to the buck. Once all four pieces are made they are Cleco’d in place.
Once the side pieces were in place, all four corners needed to be fab’d, which started by running some 18-gauge through the slip roller.
18. Once the side pieces were in place, all four corners needed to be fab’d, which started by running some 18-gauge through the slip roller.
These are the thumbnail dies Old Anvil’s Paul Bosserman made that will really move some metal around on the Pullmax.
19. These are the thumbnail dies Old Anvil’s Paul Bosserman made that will really move some metal around on the Pullmax.
After being sent through the slip roller a triangular piece is cut out and then forming begins by shrinking the edges.
20. After being sent through the slip roller a triangular piece is cut out and then forming begins by shrinking the edges.
Once a rough shape is made it’s then run through the planishing hammer to smooth out the bumps. Multiple fitment checks are made all through this process, too.
21. Once a rough shape is made it’s then run through the planishing hammer to smooth out the bumps. Multiple fitment checks are made all through this process, too.
The corner is now the right shape, without being too flat or having too much of a dome.
22. The corner is now the right shape, without being too flat or having too much of a dome.
With three of the four sides done, you can stand back and begin to see what the shape of the roof will look like.
23. With three of the four sides done, you can stand back and begin to see what the shape of the roof will look like.
The next step is to weld the flanges to the rolled roof pieces.
24. The next step is to weld the flanges to the rolled roof pieces.
After the lower flange was first made on a brake and then stretched into a 90-degree, the corners could now be welded to the flanges, too.
25. After the lower flange was first made on a brake and then stretched into a 90-degree, the corners could now be welded to the flanges, too.
The inside of the rear and side pieces show how Gerringer works both sides of the weld to get it as flat as possible.
26. The inside of the rear and side pieces show how Gerringer works both sides of the weld to get it as flat as possible.
Here are the two shaped pieces of the front section welded together with the edge of the widened windshield lip added.
27. Here are the two shaped pieces of the front section welded together with the edge of the widened windshield lip added.
Once laid out on the form the existing corner holes will be next, made in the same way as the rear corners.
28. Once laid out on the form the existing corner holes will be next, made in the same way as the rear corners.
Initially, the front corner pieces were made oversized so Gerringer could trim them to fit the opening.
29. Initially, the front corner pieces were made oversized so Gerringer could trim them to fit the opening.
After welding was done the welds were ground smooth (both the inside and outside areas) and then perfected with a hammer and dolly.
30. After welding was done the welds were ground smooth (both the inside and outside areas) and then perfected with a hammer and dolly.
Once all perimeter pieces had been welded together and welds ground smooth, Saucedo shows Gerringer how quenching an area he’s working on with a shrinking disc will help the process move faster.
31. Once all perimeter pieces had been welded together and welds ground smooth, Saucedo shows Gerringer how quenching an area he’s working on with a shrinking disc will help the process move faster.
To get other areas of the perimeter piece to lie flat on the form, the pair also use a shrinker to help pull the inner edge down to fit against the buck.
32. To get other areas of the perimeter piece to lie flat on the form, the pair also use a shrinker to help pull the inner edge down to fit against the buck.
Though the thought had been to scratch build a new roofskin, to everyone’s surprise the original roofskin laid out perfectly, so a couple days of extra fab’ing was saved.
33. Though the thought had been to scratch build a new roofskin, to everyone’s surprise the original roofskin laid out perfectly, so a couple days of extra fab’ing was saved.
After making sure everything fit the way it should, Gerringer then drilled out the new driprail and proceeded to Rosette weld the whole roof down to the rest of the cab.
34. After making sure everything fit the way it should, Gerringer then drilled out the new driprail and proceeded to Rosette weld the whole roof down to the rest of the cab.
Just like the factory did, Gerringer also silicone-brazed the corners where the roof’s windshield edge meets the truck’s A-post.
35. Just like the factory did, Gerringer also silicone-brazed the corners where the roof’s windshield edge meets the truck’s A-post.
The International Harvester’s roofline now has a simple and contemporary design—something no one has ever said about an International Harvester roof!
36. The International Harvester’s roofline now has a simple and contemporary design—something no one has ever said about an International Harvester roof!
 SOURCE
OLD ANVIL SPEED SHOP
(657) 223-9889
oldanvilspeedshop.com