CTP  Tech

InTheGarageMedia.com

Evacuate Big V-8 In Style
Tips and Tricks for Building a Granatelli Motor Sports 3-Inch Stainless Steel Oval Tubing Exhaust
BY Ryan MansonPhotography BY Rob Fortier
T

he use of stainless steel components on high-end truck builds covers a myriad of parts, from suspension components to fasteners. Its aversion to rust and corrosion makes it a perfect material for such use. Stainless steel is one of the only materials that can be polished to perfection or left in a raw state with little change in appearance over time. What makes this possible is the addition of at least 10.5 percent Chromium in the base metal that, when combined with oxygen, forms a thin, transparent boundary layer of chromium oxide, effectively protecting the material. Both stable and self-renewing, this layer or film makes the corrosion resistance a permanent feature. In addition to its attractive appearance, stainless steel also tends to retain its mechanical characteristics at high temperatures. This makes the material a great candidate for use in an exhaust system.

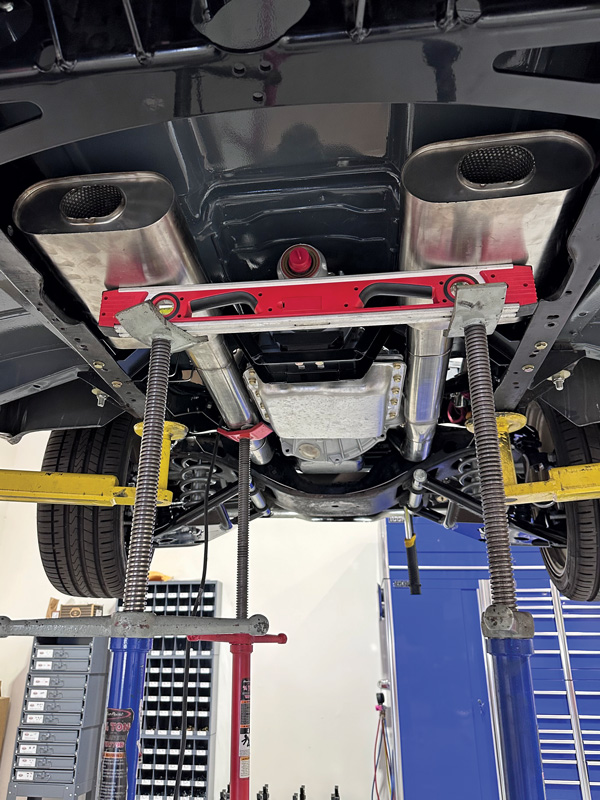
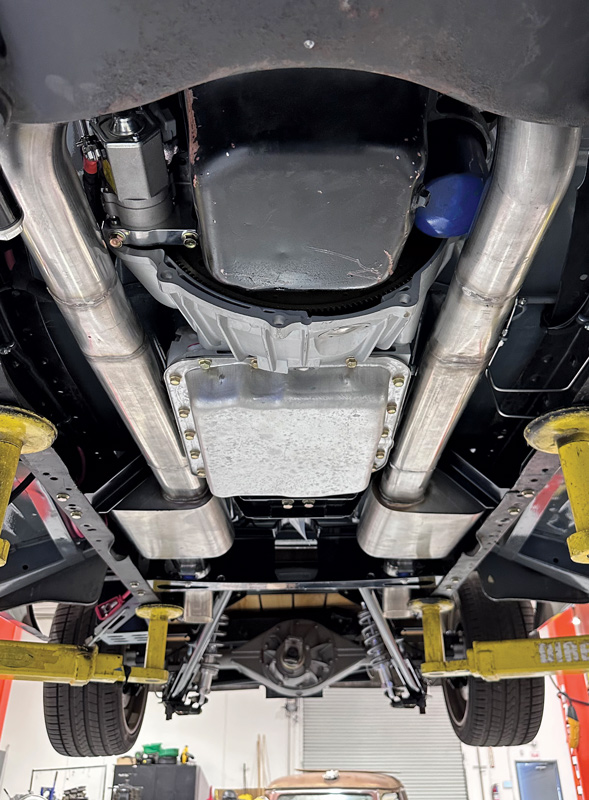
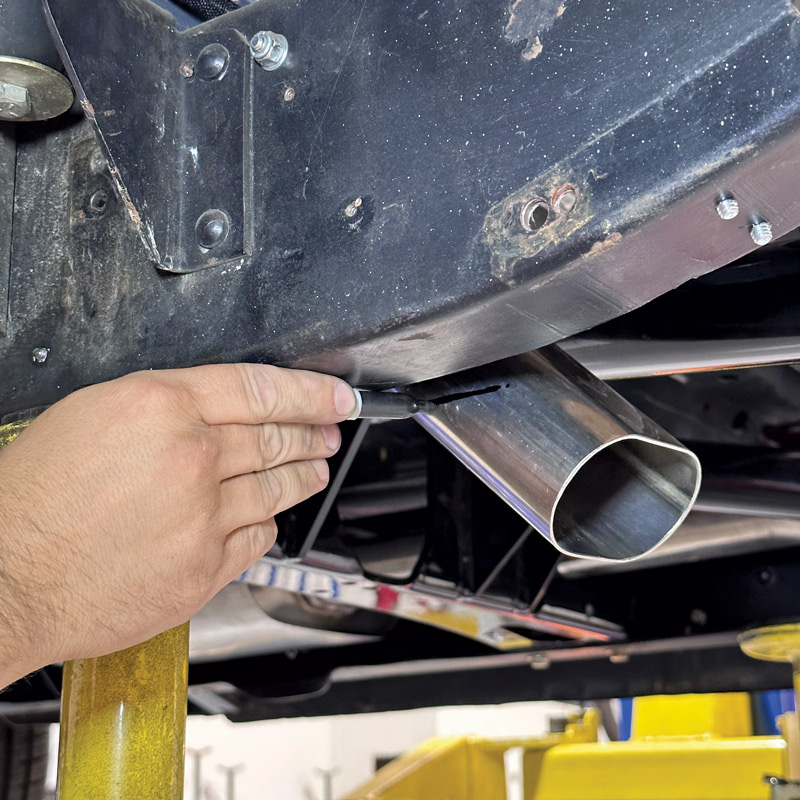
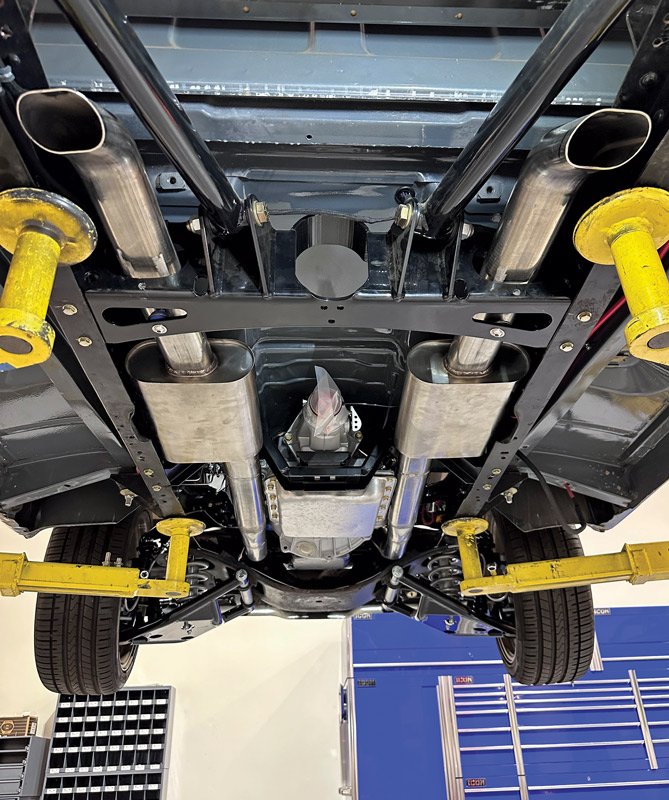
Editor Fortier’s own C10 project is nearing completion and when it came time to fabricate the exhaust system, there was no question as to what material would be used. Yet while stainless was the hands-down option, traditional round tubing wasn’t going to cut it. The big-block Chevy installed underhood necessitated a well-breathing exhaust system, preferably with a large, 3-inch diameter. But with the C10’s altered height (low!), Rob had legitimate concerns when it came to dragging the exhaust across every speed bump and manhole cover across town.

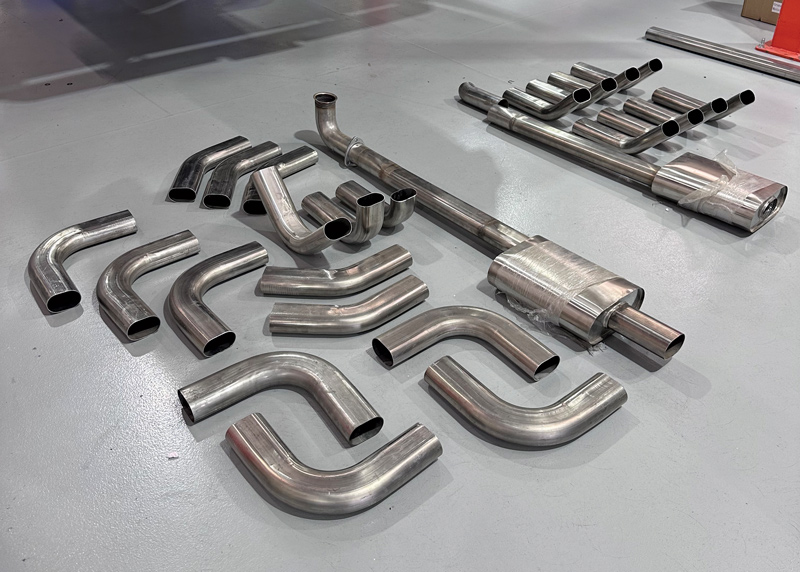
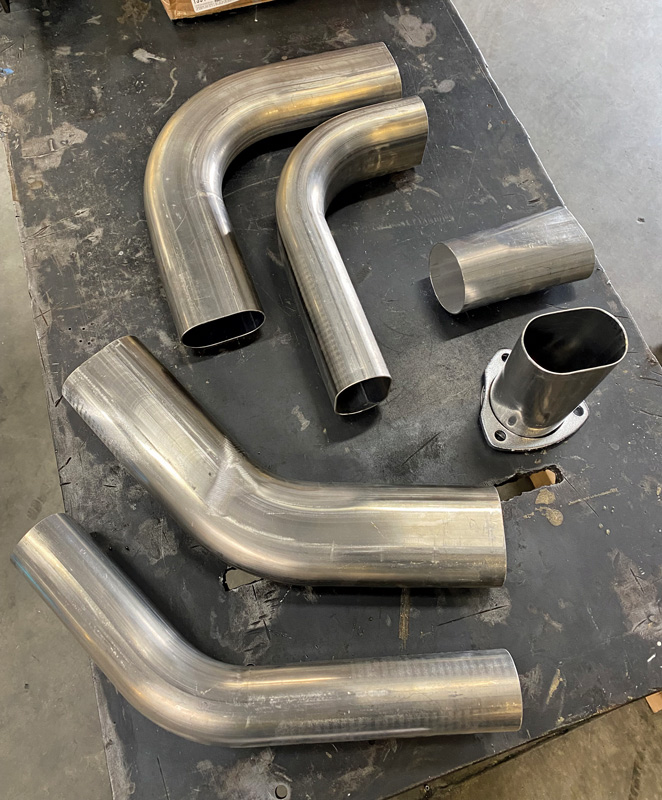
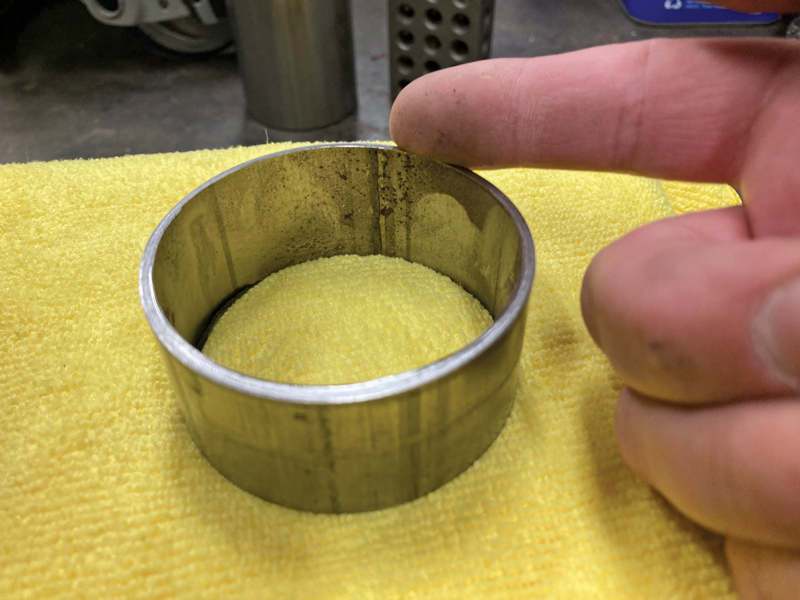
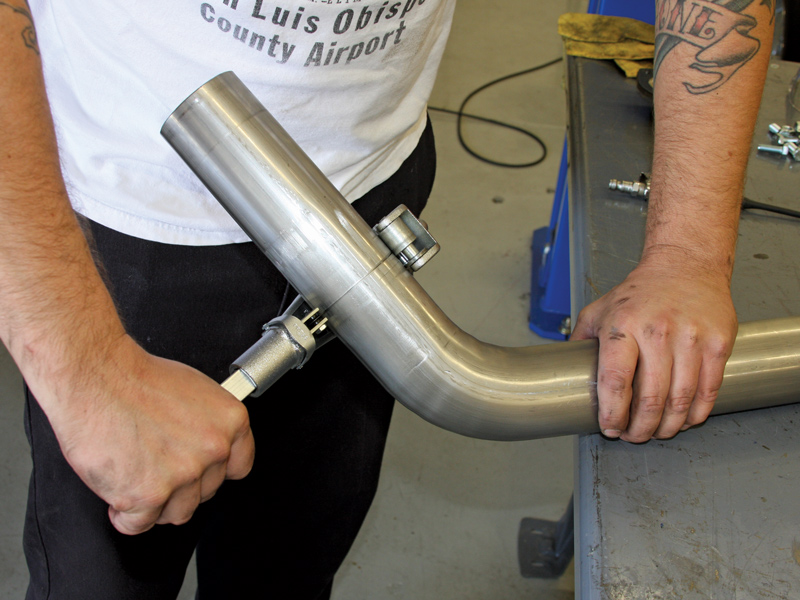
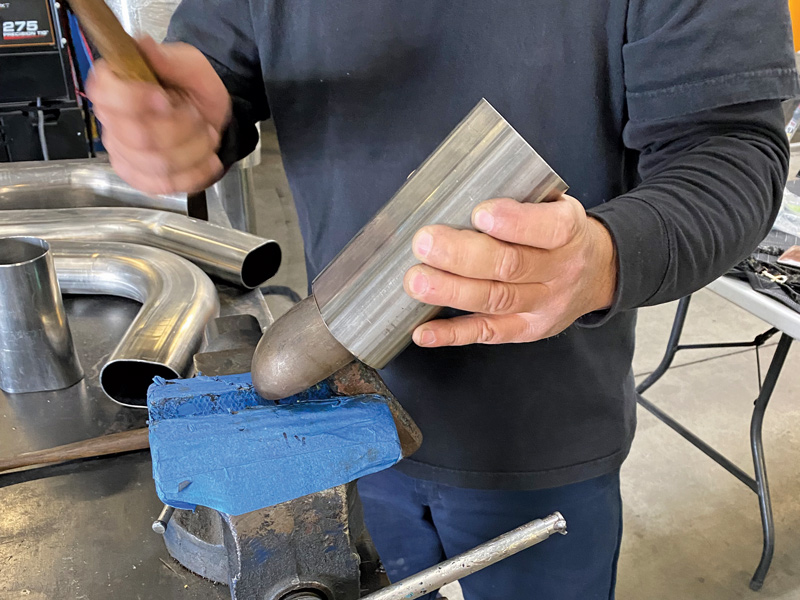
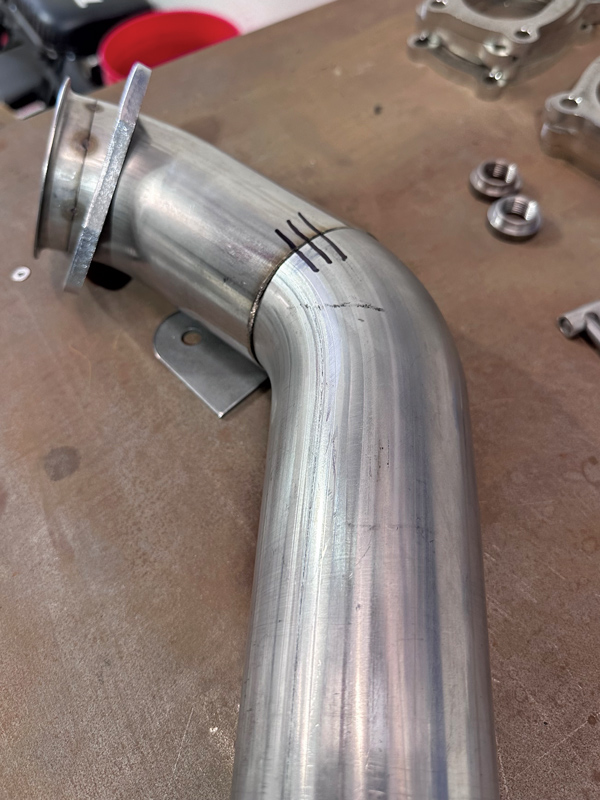
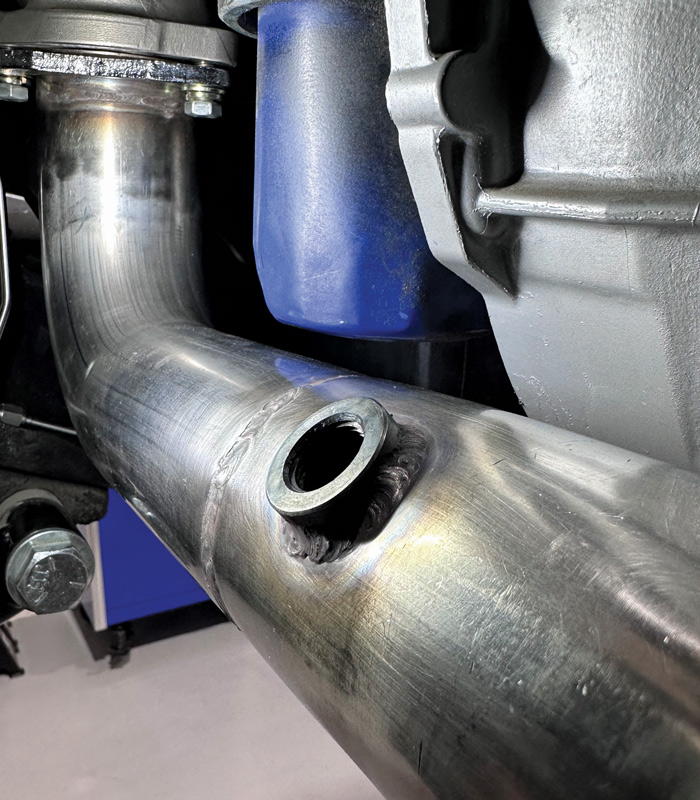
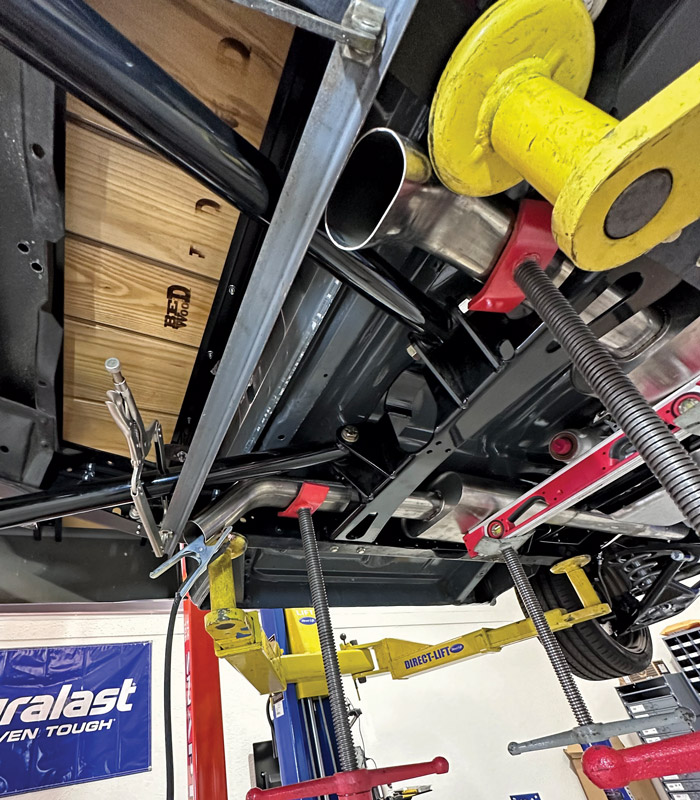
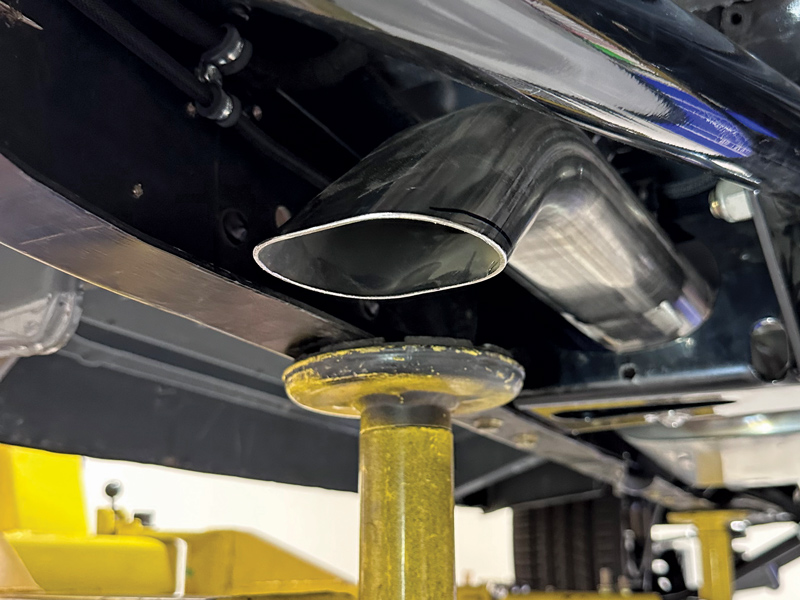
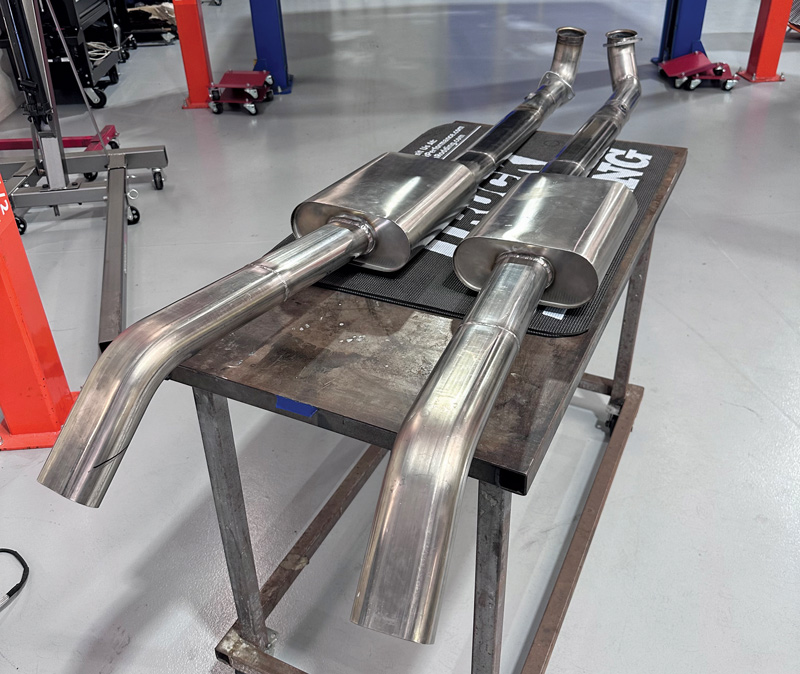
To thwart this issue, and to allow Eddie Legliu of All American Metal Shaping and myself (Ryan Manson of Clampdown Competition) craft an exhaust system that tucked up nicely into the Chevy’s chassis, Rob elected to use stainless steel exhaust components from Granatelli Motor Sports. Measuring 2.40×3.45 inches, their 3-inch stainless oval tubing is the perfect solution for those low trucks that want to run a true, 3-inch ID exhaust system with increased ground clearance. Available in straight sections as well as both vertical and horizontal, 45- and 90-degree mandrel bends with a 4.50-inch bend radius, mufflers, and an assortment of various adapters, a laundry list of needed components was put together and sent over to the folks at Granatelli Motor Sports.

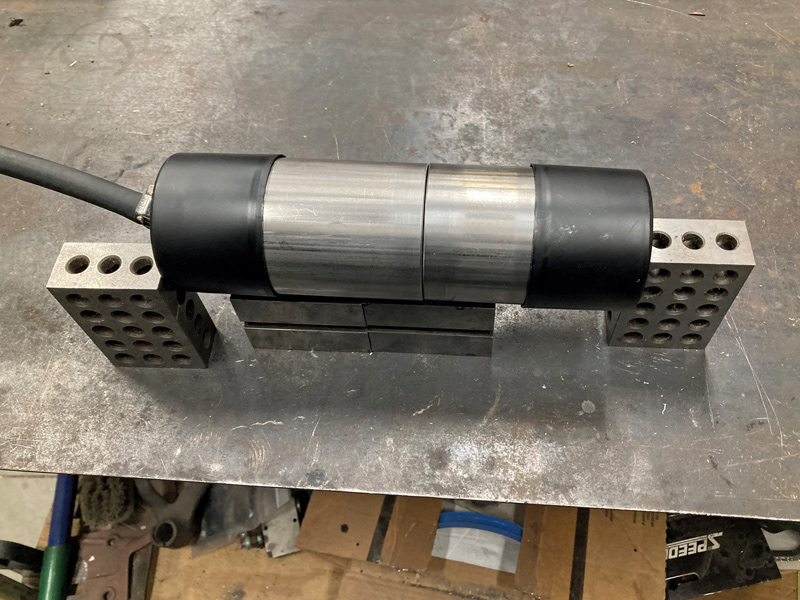
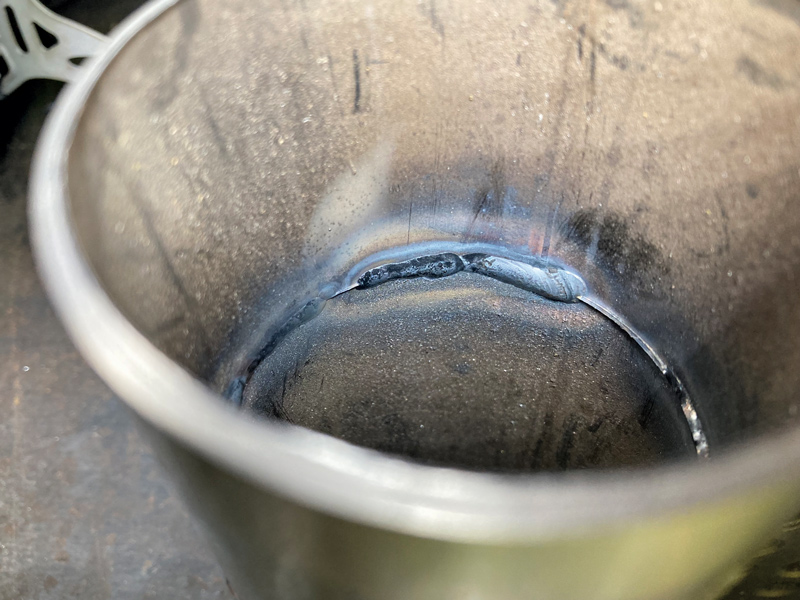
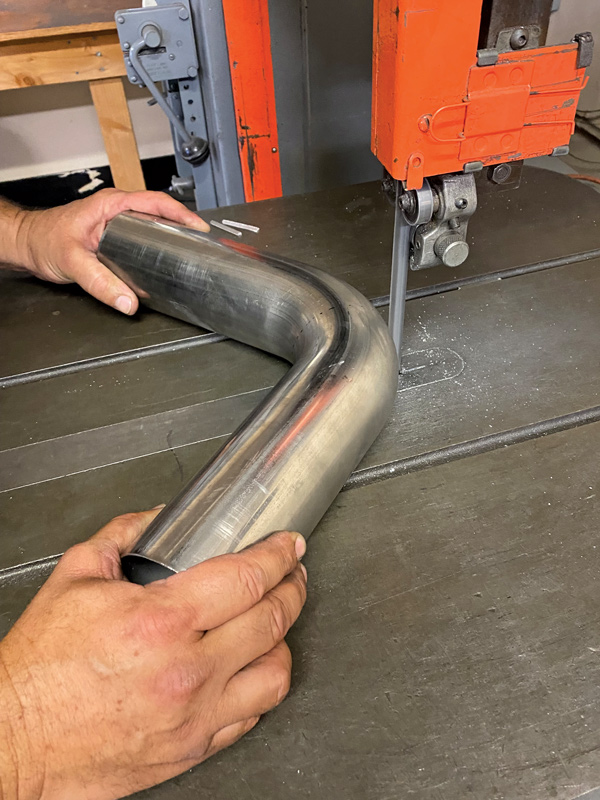
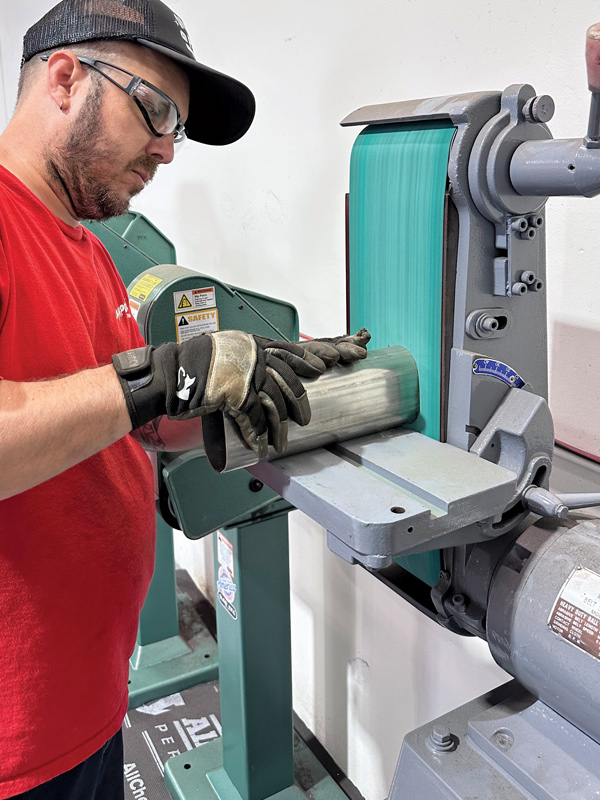
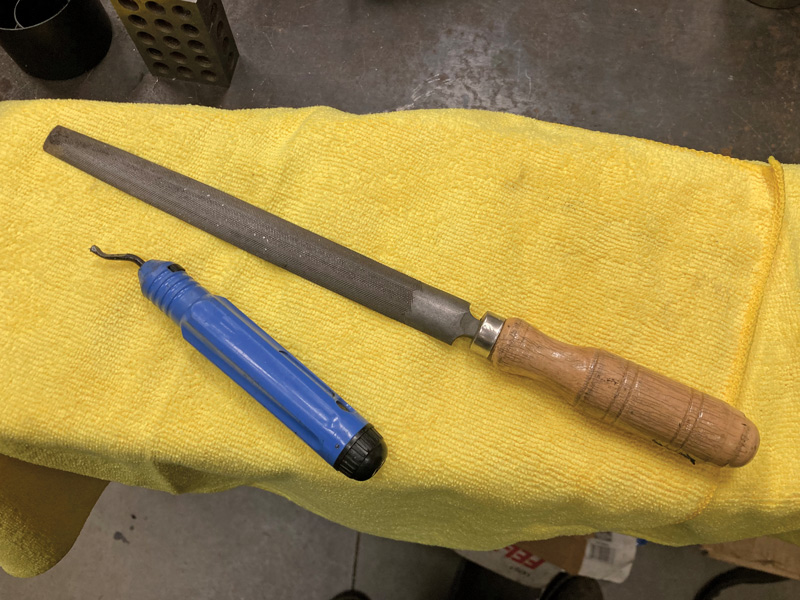
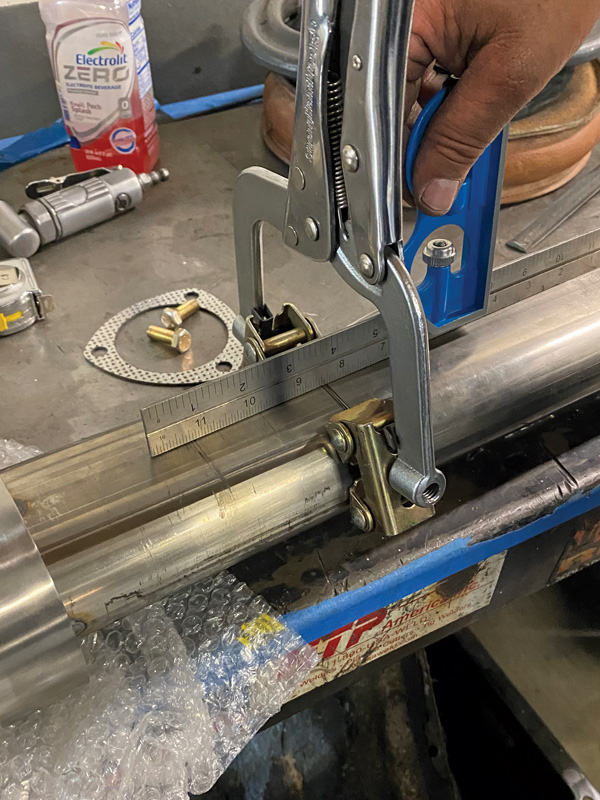
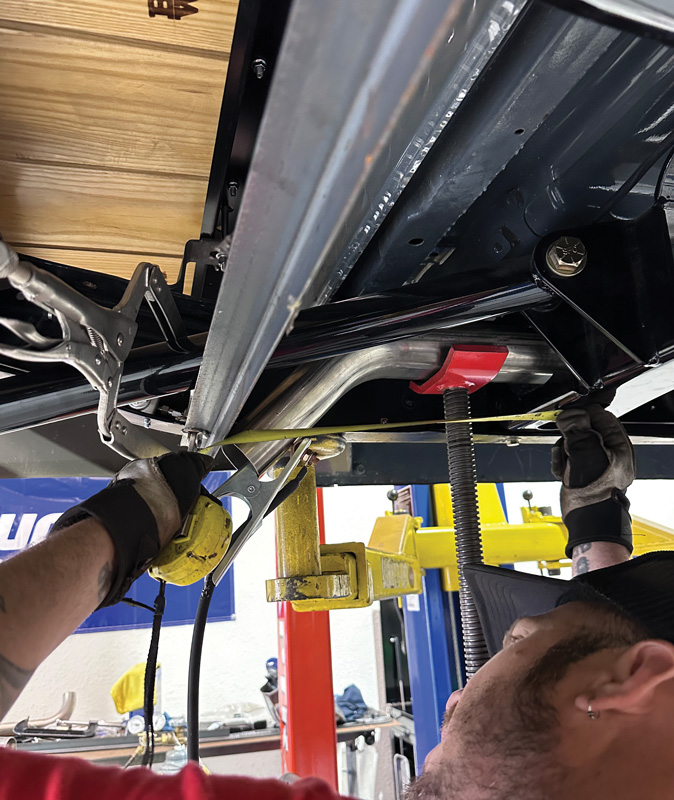
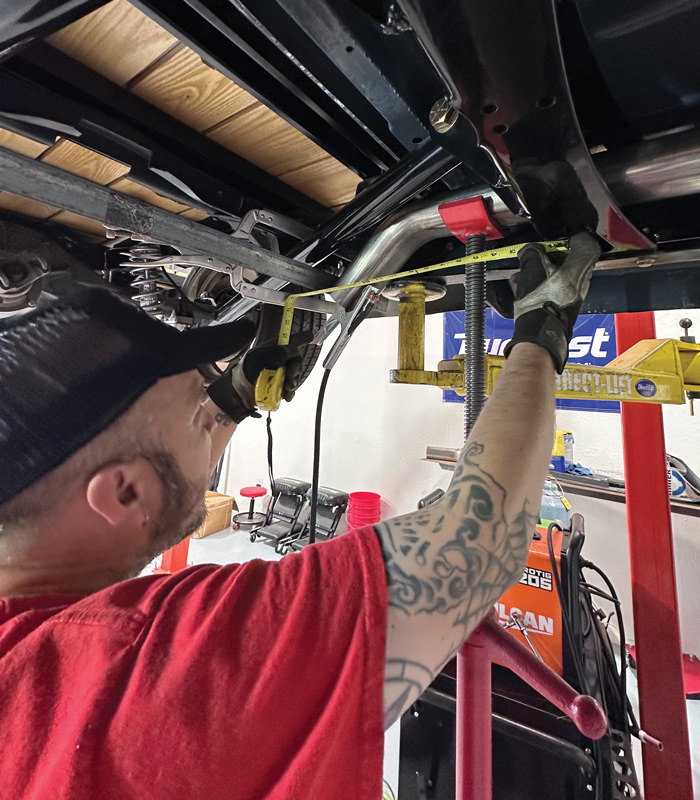
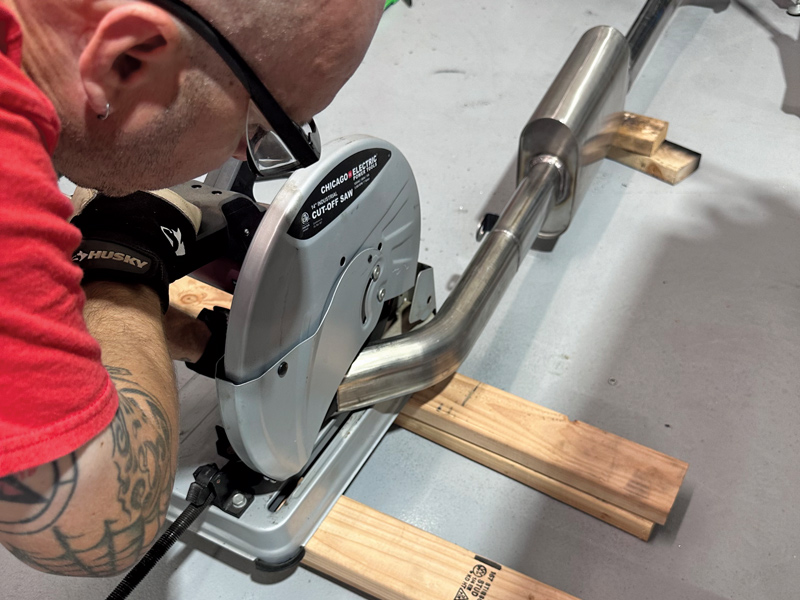
Fabricating a stainless steel exhaust system does take a fair bit of skill (TIG welding is a plus), but it isn’t beyond the scope of the homebuilder. A handful of various tools is necessary, but nothing one might consider exotic. A lift is definitely helpful, but the same results can be achieved fabricating a system on an assembled bare chassis.

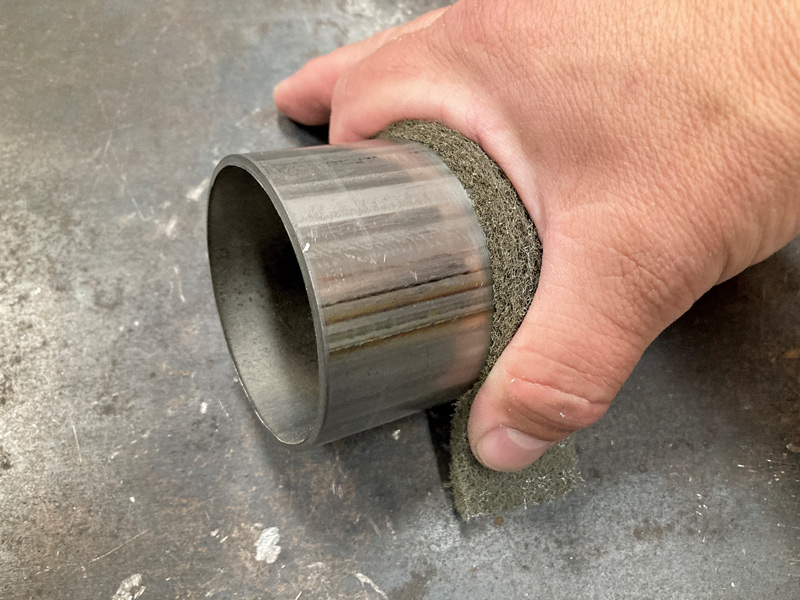
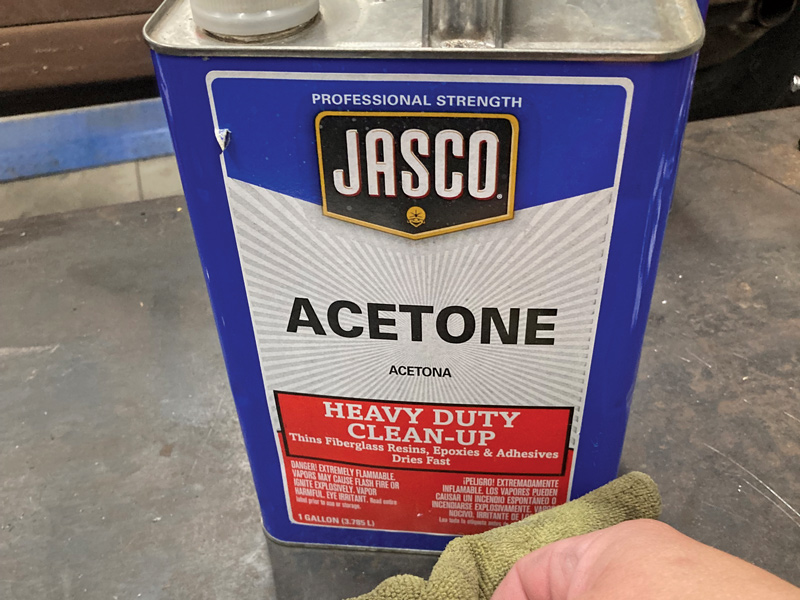
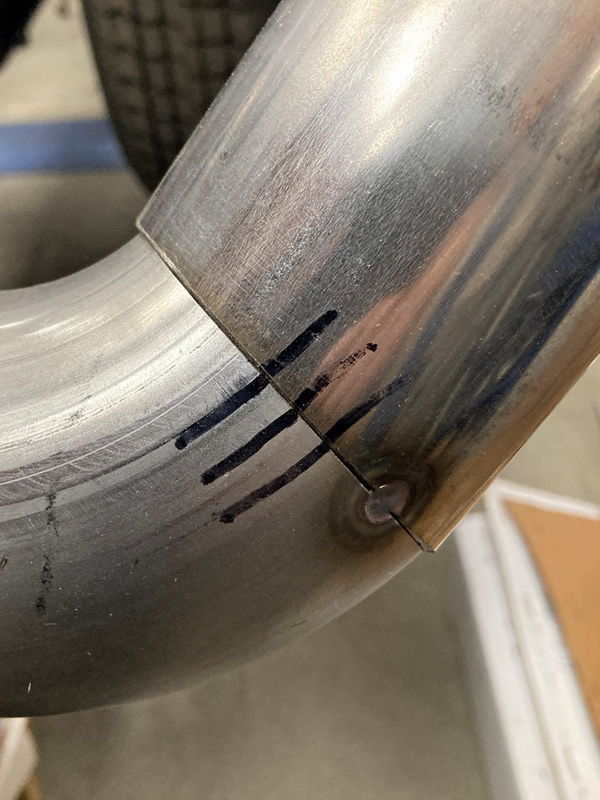
While crafting the exhaust on Rob’s C10, we decided to pick out a couple tips and tricks for working with stainless tubing in the hopes that it might help out those hobbyists trying to improve their fabrication game!

While it’s possible to put together a fairly accurate list of what might be needed to navigate the exhaust from the headers back, truth be told, it’s better to order more than you might need, lest you find yourself short a bend or two. Here, we’ve laid out a variety of straight and bent sections from Granatelli Motor Sports for easier preview.
1. While it’s possible to put together a fairly accurate list of what might be needed to navigate the exhaust from the headers back, truth be told, it’s better to order more than you might need, lest you find yourself short a bend or two. Here, we’ve laid out a variety of straight and bent sections from Granatelli Motor Sports for easier preview.
When working with oval tubing, bends exist on two different planes, horizontal and vertical, so close attention must be made as the initial materials list is created. The upper left 90-degree mandrel bend is bent in the horizontal plane, while the bend next to it is considered a vertical bend. A pair of 45-degree bends at lower left illustrates the same.
2. When working with oval tubing, bends exist on two different planes, horizontal and vertical, so close attention must be made as the initial materials list is created. The upper left 90-degree mandrel bend is bent in the horizontal plane, while the bend next to it is considered a vertical bend. A pair of 45-degree bends at lower left illustrates the same.
TIG welding stainless steel can be a soothing experience as it tends to weld very nicely. Like all metals, however, it needs to be cleaned and prepped properly for the best results. I like to hit all the joints with a Scotch-Brite pad in order to scuff the surface and clean any impurities that might be present.
3. TIG welding stainless steel can be a soothing experience as it tends to weld very nicely. Like all metals, however, it needs to be cleaned and prepped properly for the best results. I like to hit all the joints with a Scotch-Brite pad in order to scuff the surface and clean any impurities that might be present.
Next, the same section is cleaned using Acetone, both inside and out.
4. Next, the same section is cleaned using Acetone, both inside and out.
A quick inspection of the inside of this section of tubing reveals the grime that can reside inside. When welded, these impurities will work their way to the surface, contaminating the weld bead and making a mess of things.
5. A quick inspection of the inside of this section of tubing reveals the grime that can reside inside. When welded, these impurities will work their way to the surface, contaminating the weld bead and making a mess of things.
Speaking of the inside of the tubing, here’s a shot that shows a weld that has been made without the use of a back purge setup. Commonly called “sugaring,” this is the result of the weld bead oxidizing on the back side due to the lack of an inert gas shield. In the food and medical field, this crystallized section of weld is a breeding ground for bacteria and contaminants. In the automotive world, this oxidized area results in a weaker joint, with undesirable penetration characteristics that can lead to cracking and failure.
6. Speaking of the inside of the tubing, here’s a shot that shows a weld that has been made without the use of a back purge setup. Commonly called “sugaring,” this is the result of the weld bead oxidizing on the back side due to the lack of an inert gas shield. In the food and medical field, this crystallized section of weld is a breeding ground for bacteria and contaminants. In the automotive world, this oxidized area results in a weaker joint, with undesirable penetration characteristics that can lead to cracking and failure.
To prevent this issue, we need to introduce a noble gas inside the section of tubing to be welded to purge the oxygen from said area. This is usually accomplished by using a dual-output flow regulator on an Argon bottle with one output going to the TIG welder as standard and the other attached to a hose that can be inserted into the material to be welded.
7. To prevent this issue, we need to introduce a noble gas inside the section of tubing to be welded to purge the oxygen from said area. This is usually accomplished by using a dual-output flow regulator on an Argon bottle with one output going to the TIG welder as standard and the other attached to a hose that can be inserted into the material to be welded.
Here’s a simple back-purge setup showing the second line coming in from the left. A few CFHs of Argon is all that’s needed to back fill the section. The incoming Argon, being heavier than air, purges the oxygen from the internal space, pushing it up and out through the gap in the tubing. Leaving the right-side endcap off for a minute or so as the purge begins can help further evacuate the space.
8. Here’s a simple back-purge setup showing the second line coming in from the left. A few CFHs of Argon is all that’s needed to back fill the section. The incoming Argon, being heavier than air, purges the oxygen from the internal space, pushing it up and out through the gap in the tubing. Leaving the right-side endcap off for a minute or so as the purge begins can help further evacuate the space.
Note the difference between this weld that has been performed using the back-purge technique versus the previous image of the sugared weld. Proper penetration has been made, thanks in part to the Argon inside the tubing aiding in “pulling” the weld into the seam.
9. Note the difference between this weld that has been performed using the back-purge technique versus the previous image of the sugared weld. Proper penetration has been made, thanks in part to the Argon inside the tubing aiding in “pulling” the weld into the seam.
Stainless steel likes a fair amount of gas coverage and these massive #10 and #12 cups, combined with a gas lens diffuser, not only provide great gas coverage of the welded area, they also allow for some pretty massive tungsten stick out as well.

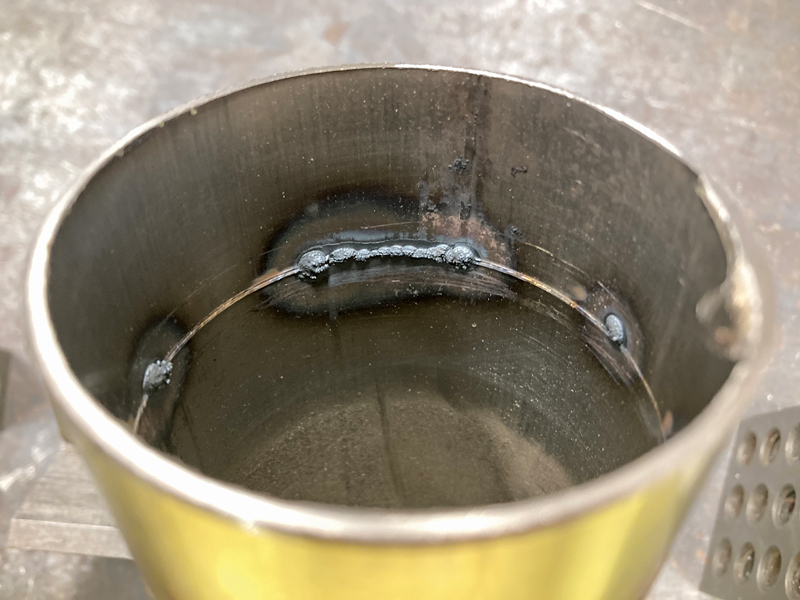
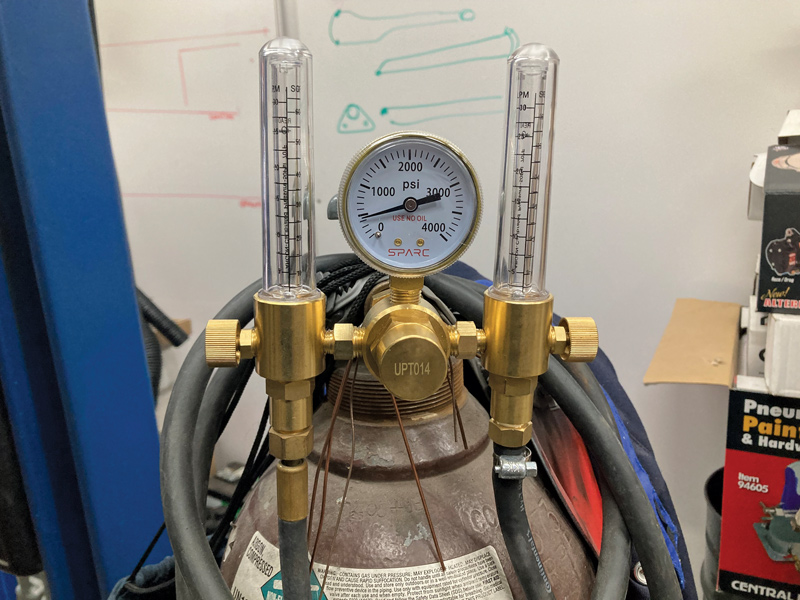
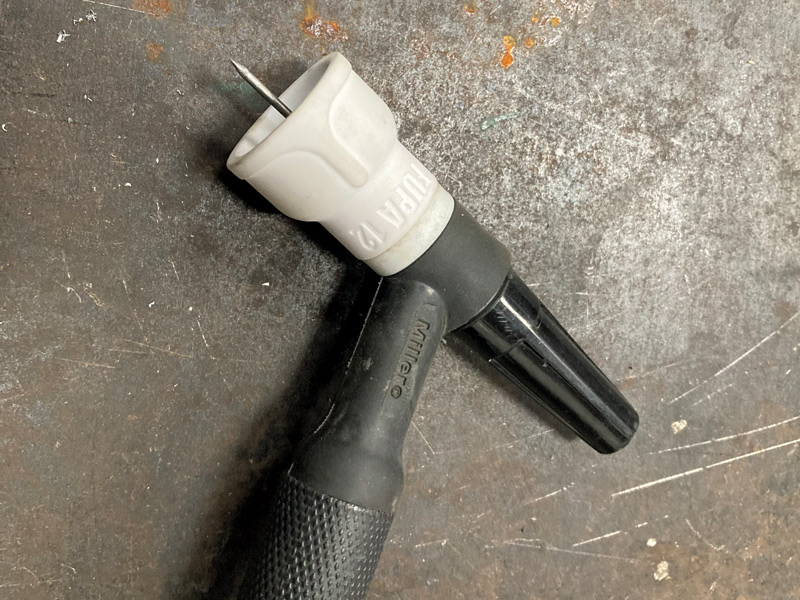
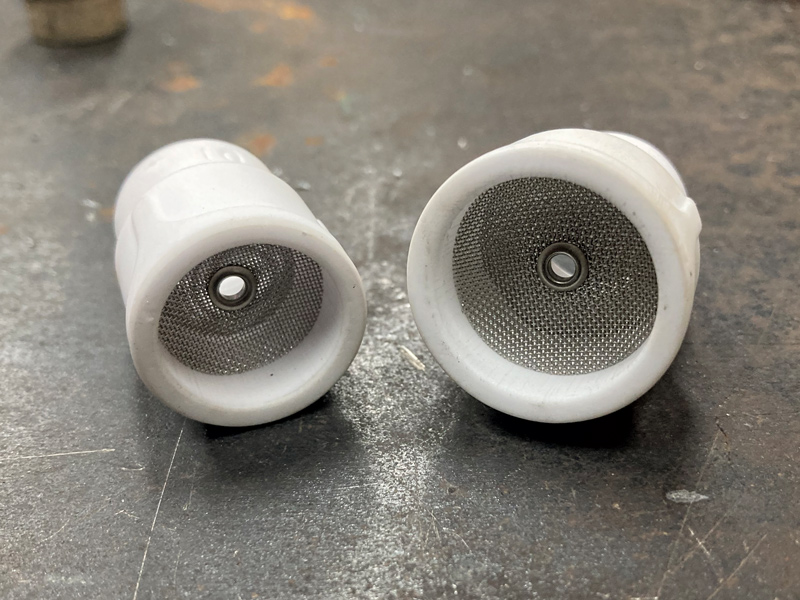
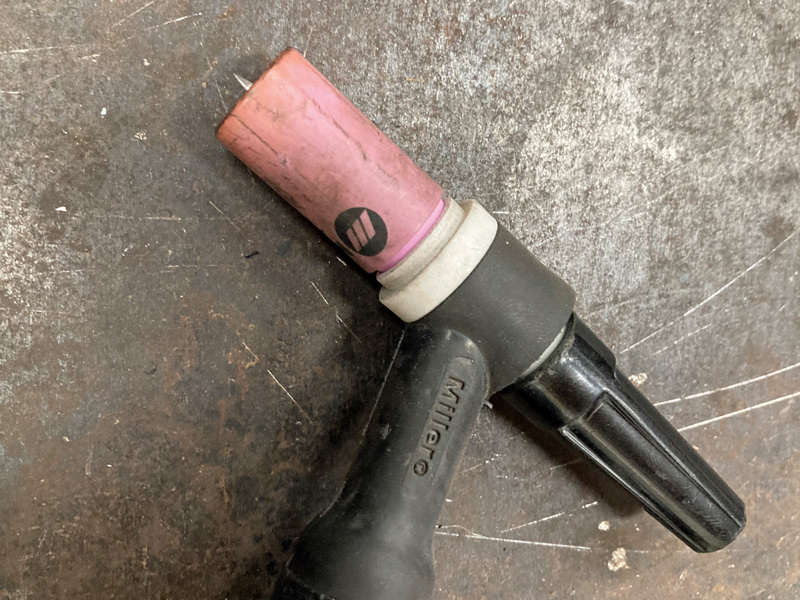
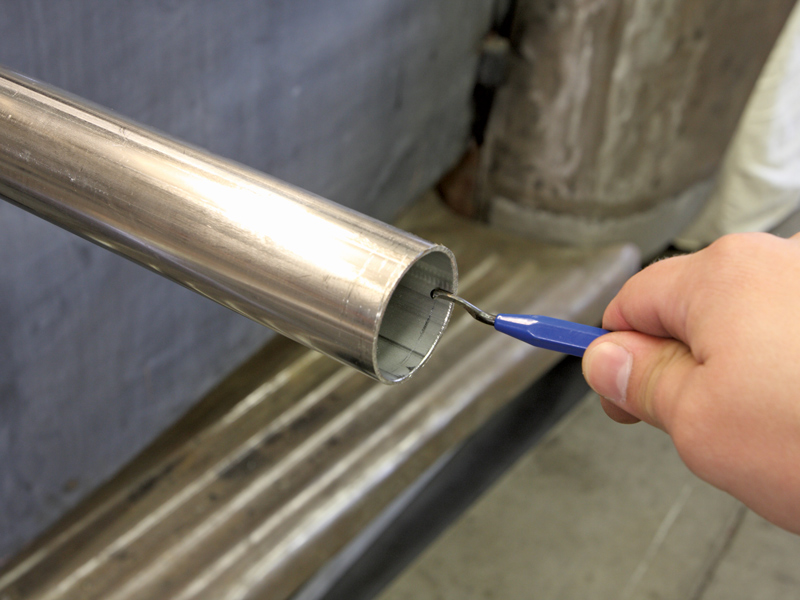
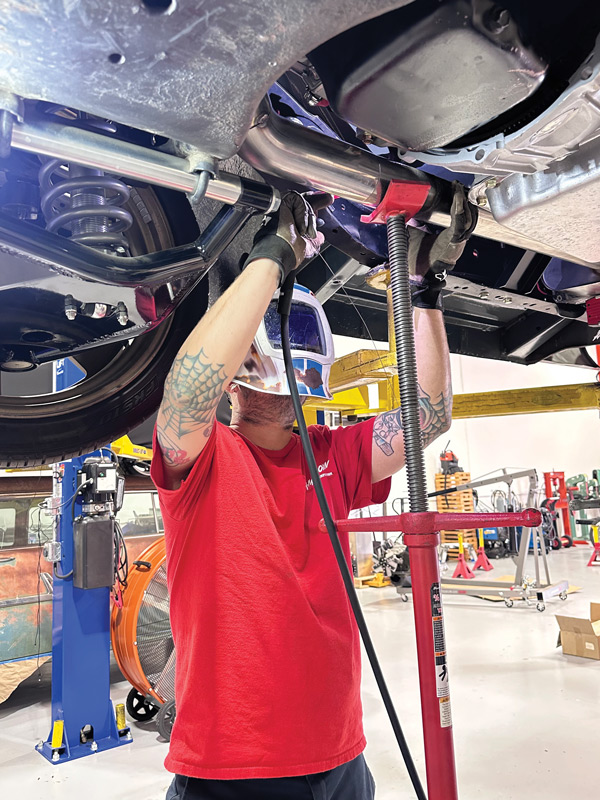
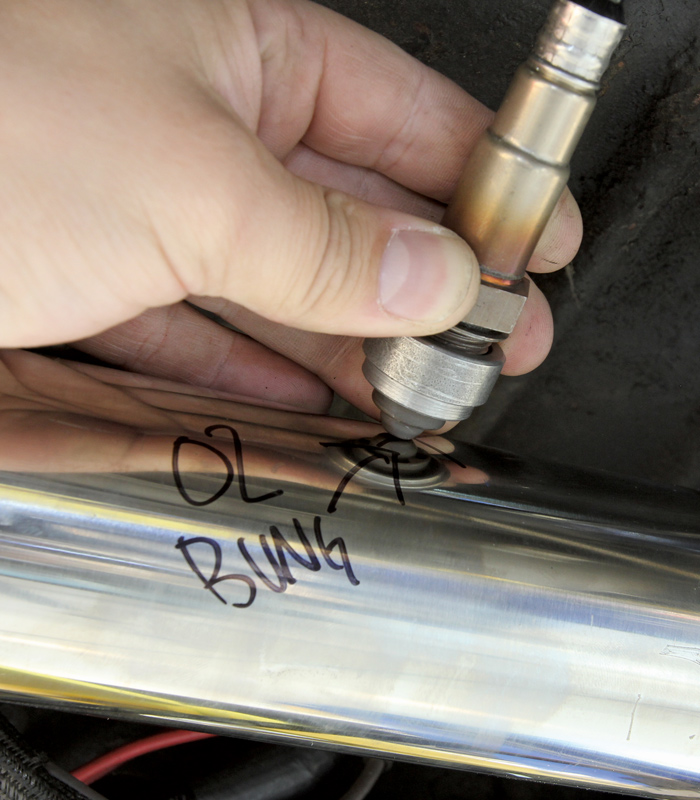
10-11. Stainless steel likes a fair amount of gas coverage and these massive #10 and #12 cups, combined with a gas lens diffuser, not only provide great gas coverage of the welded area, they also allow for some pretty massive tungsten stick out as well.

When compared to the typical #7 cup, the difference in not only the gas coverage but the ability to get the tungsten into tight confines show the benefits of the use of the larger cups when welding stainless and even mild steel. The larger gas coverage area results in less contamination of the weld puddle and also helps cool the weld, resulting in a smaller heat-affected zone.
12. When compared to the typical #7 cup, the difference in not only the gas coverage but the ability to get the tungsten into tight confines show the benefits of the use of the larger cups when welding stainless and even mild steel. The larger gas coverage area results in less contamination of the weld puddle and also helps cool the weld, resulting in a smaller heat-affected zone.
The wall size of the Granatelli tubing is 0.060 inch, so we’ll be using between 60-80 amps on our TIG machine and 0.045-inch ER308L welding rod. Butt-welding tubing can be tricky to avoid blowouts and such, so it takes a bit of trial and error to find the perfect amperage setting and torch speed to achieve that perfect weld. A little more amperage combined with an increase in torch speed can yield a good penetrating weld while also reducing the heat-affected zone.
13. The wall size of the Granatelli tubing is 0.060 inch, so we’ll be using between 60-80 amps on our TIG machine and 0.045-inch ER308L welding rod. Butt-welding tubing can be tricky to avoid blowouts and such, so it takes a bit of trial and error to find the perfect amperage setting and torch speed to achieve that perfect weld. A little more amperage combined with an increase in torch speed can yield a good penetrating weld while also reducing the heat-affected zone.
Cutting round stainless tubing can be achieved via a number of methods, from the traditional chop saw to a tubing cutter ...
14. Cutting round stainless tubing can be achieved via a number of methods, from the traditional chop saw to a tubing cutter …
... however, oval tubing can be slightly more challenging. A band saw works great for both types to make angled cuts.
15. … however, oval tubing can be slightly more challenging. A band saw works great for both types to make angled cuts.
Even the best method can still benefit from a little squaring up on a belt sander. We want the tightest fit-up we can get when it comes to butt-welding stainless tubing.
16. Even the best method can still benefit from a little squaring up on a belt sander. We want the tightest fit-up we can get when it comes to butt-welding stainless tubing.
Deburring the inside and outside of each joint goes a long way toward the perfect weld. A simple file and deburring tool works great.
17-18. Deburring the inside and outside of each joint goes a long way toward the perfect weld. A simple file and deburring tool works great.
Getting that perfect fitment sometimes requires a little hammer and dolly work, as evidenced by Eddie Legliu of All American Metal Shaping.
19. Getting that perfect fitment sometimes requires a little hammer and dolly work, as evidenced by Eddie Legliu of All American Metal Shaping.
Tack welding each exhaust section in place is the best method, but many times is not possible.
20. Tack welding each exhaust section in place is the best method, but many times is not possible.
When tacking in place is not possible, this little trick can be used in order to prevent the two sections of tubing from being clocked incorrectly. Marked in place, the two sections can then be transferred to the welding table for tacking.
21-22. When tacking in place is not possible, this little trick can be used in order to prevent the two sections of tubing from being clocked incorrectly. Marked in place, the two sections can then be transferred to the welding table for tacking.
A flat, metal workbench makes for a great surface to weld tubing together, combined with a couple clamps. A straightedge is used to ensure the two sections of tubing are parallel and straight.
23. A flat, metal workbench makes for a great surface to weld tubing together, combined with a couple clamps. A straightedge is used to ensure the two sections of tubing are parallel and straight.
Granatelli Motor Sports offers 3-inch round to 3-inch oval tubing adapters, which we used between the collector/header turndowns and the mufflers. Note the numerous use of tack welds to prevent the exhaust from moving or becoming misaligned during assembly.
24. Granatelli Motor Sports offers 3-inch round to 3-inch oval tubing adapters, which we used between the collector/header turndowns and the mufflers. Note the numerous use of tack welds to prevent the exhaust from moving or becoming misaligned during assembly.
Attention to detail during the fabrication process ensures both sides of the exhaust are even, level, and in line with one another.
25. Attention to detail during the fabrication process ensures both sides of the exhaust are even, level, and in line with one another.
Bungs for O2 sensors are a necessity when an EFI system is being used and these can be tricky to install with everything in place. Best practices tells us to install the bung at the top section of the exhaust within 6-8 inches of the collector. Installing the bung at the top of the exhaust prevents moisture buildup from collecting on the sensor.
26-27. Bungs for O2 sensors are a necessity when an EFI system is being used and these can be tricky to install with everything in place. Best practices tells us to install the bung at the top section of the exhaust within 6-8 inches of the collector. Installing the bung at the top of the exhaust prevents moisture buildup from collecting on the sensor.
Properly supporting the exhaust is a must and is the job of the exhaust hanger.
28. Properly supporting the exhaust is a must and is the job of the exhaust hanger.
Though not all installations are of the “hanging” variety!
29. Though not all installations are of the “hanging” variety!
The first side of the exhaust is the easy side, while the second needs to mirror it, making for a compounded situation. When it comes to going up, down, or around, an angle finder can help match one side to the other and keep things consistent.
30. The first side of the exhaust is the easy side, while the second needs to mirror it, making for a compounded situation. When it comes to going up, down, or around, an angle finder can help match one side to the other and keep things consistent.
As we make our way rearward, Rob’s Granatelli exhaust system is nice and tight between the framerails with nothing hanging out in the breeze, not an easy feat when using traditional 3-inch tubing.
31. As we make our way rearward, Rob’s Granatelli exhaust system is nice and tight between the framerails with nothing hanging out in the breeze, not an easy feat when using traditional 3-inch tubing.
This exhaust is going to lean toward the rowdy side of the audible spectrum, turning down just in front of the rearend. A pair of vertical 45-degree bends from Granatelli, cut at an angle, will serve to provide as exhaust tips.
32. This exhaust is going to lean toward the rowdy side of the audible spectrum, turning down just in front of the rearend. A pair of vertical 45-degree bends from Granatelli, cut at an angle, will serve to provide as exhaust tips.
In order to ensure the tips are even in their length and location, a section of angle iron is clamped in place an even distance from the rear crossmember to serve as a reference point.
33. In order to ensure the tips are even in their length and location, a section of angle iron is clamped in place an even distance from the rear crossmember to serve as a reference point.
The tips are then adjusted until they’re both even, square, and level with each other.
34. The tips are then adjusted until they’re both even, square, and level with each other.
We’re going to cut each tip even with the bottom of the framerail to ensure nothings hangs below.
35. We’re going to cut each tip even with the bottom of the framerail to ensure nothings hangs below.
We saved cutting the angles on the tips for the very end, which required some creative use of a chopsaw and some 2x4s to get the angle right.
36. We saved cutting the angles on the tips for the very end, which required some creative use of a chopsaw and some 2x4s to get the angle right.
A little bit of finish work and we’re happy with the exhaust tip treatment, it’s square with the bottom of the frame and will direct the exhaust toward the ground as opposed to up under the bed.
37. A little bit of finish work and we’re happy with the exhaust tip treatment, it’s square with the bottom of the frame and will direct the exhaust toward the ground as opposed to up under the bed.
Our simple treatment of the exhaust allowed us to build each side in one single length, negating the use of a flanged connector.
38. Our simple treatment of the exhaust allowed us to build each side in one single length, negating the use of a flanged connector.
The finished exhaust looks great and will continue to do so for years, thanks to the use of stainless steel components throughout. Note how well the entire system tucks into the frame without the use of tricky bends or unnecessary complications.
39. The finished exhaust looks great and will continue to do so for years, thanks to the use of stainless steel components throughout. Note how well the entire system tucks into the frame without the use of tricky bends or unnecessary complications.
Frontier Shop Supplies Ad
 SOURCES
Clampdown Competition
clampdowncomp.com
Granatelli Motor Sports
(805) 486-6644
granatellimotorsports.com