CTP logoFeature star Tech
InTheGarageMedia.com
power window conversion for ’73-79 Ford pickups simply bolt in place of the original manual regulators
1. Electric-Life’s power window conversion for ’73-79 Ford pickups simply bolt in place of the original manual regulators.
An Open-and-Shut Case
Power Windows for ’73-79 Ford Pickups
BY Ron Ceridono
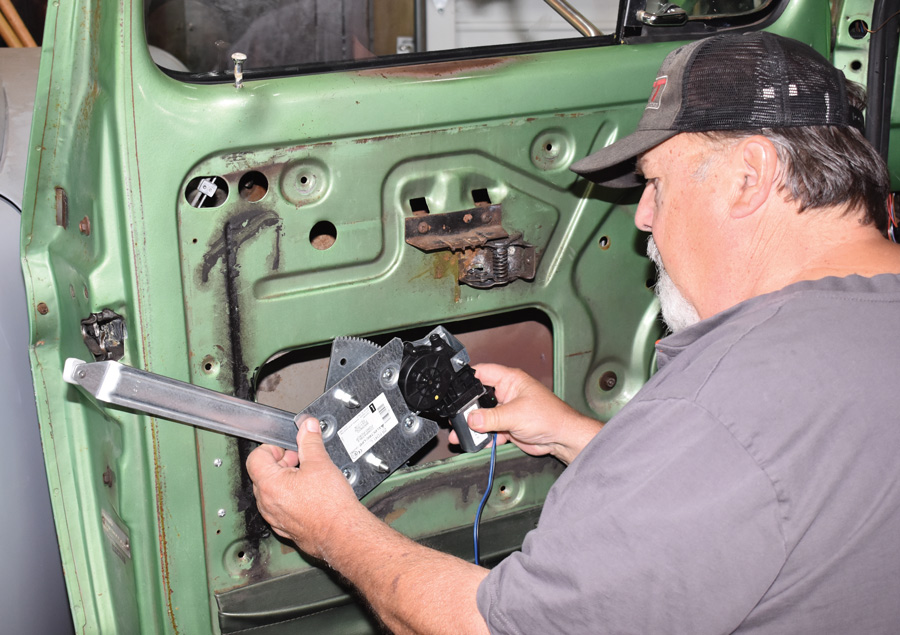
Photography BY The Author
U

sing a classic pickup for transportation on a regular basis has its ups and downs. On the plus side is the satisfaction that comes from driving something that is personalized and therefore unique. On the minus side is often the lack of convenience items we’ve all become accustomed to.

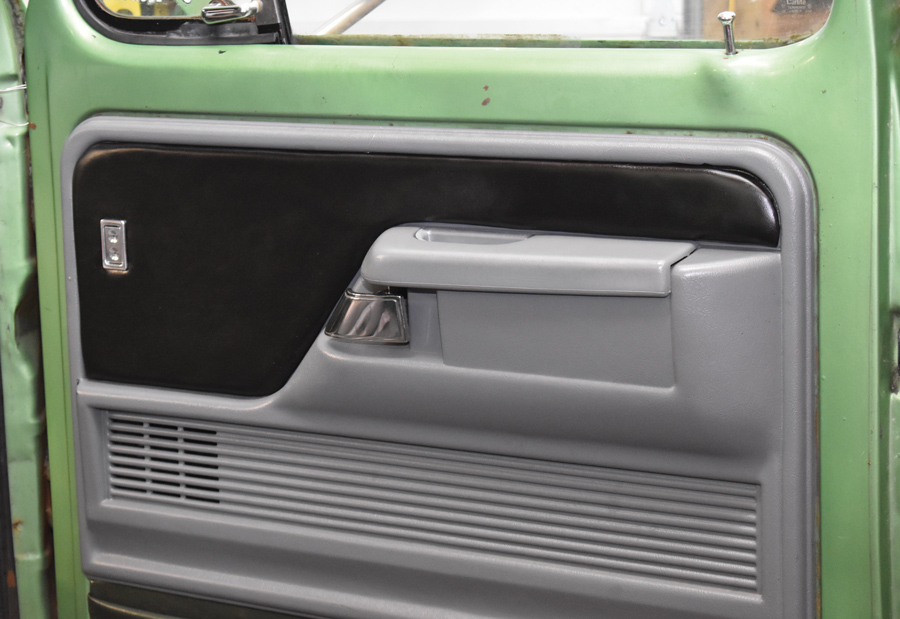
While our ’73 Ford Ranger XLT pickup was considered to be well equipped in its day, the option list wasn’t very long. About all the interior featured was some extra trim, fake wood inlays, and air conditioning. Over the years we’ve made a number of updates to make the truck more user friendly—we’ve updated instruments, replaced the original A/C with a Vintage Air system, installed electric door locks, and even added a killer stereo. The only other enhancement we were missing was power windows.

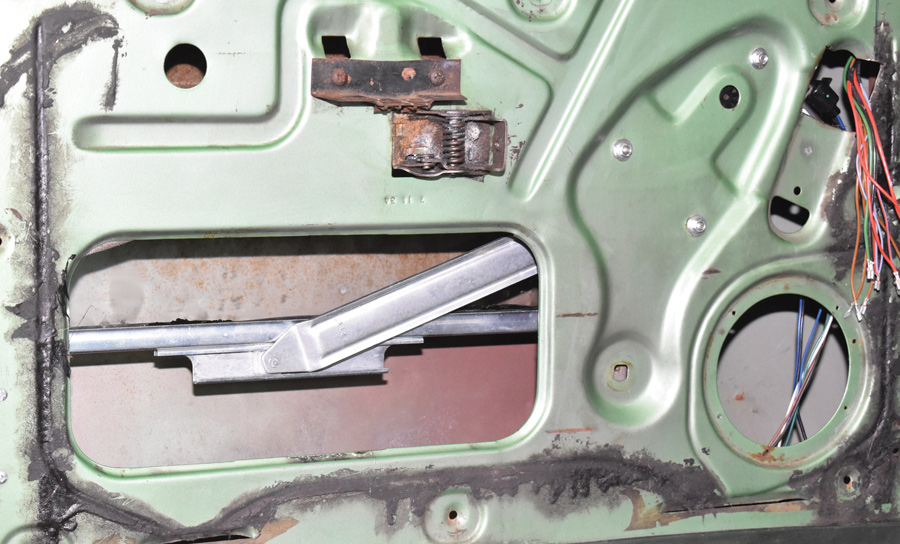
Power windows were not available on the sixth generation of Ford’s F-Series trucks (’73-79), so when the driver side window regulator of our beloved Blue Oval pickup cranked up the glass for the last time we had a choice to make. Replace the worn-out manual regulators or install a retrofit power system, which is what we elected to do.

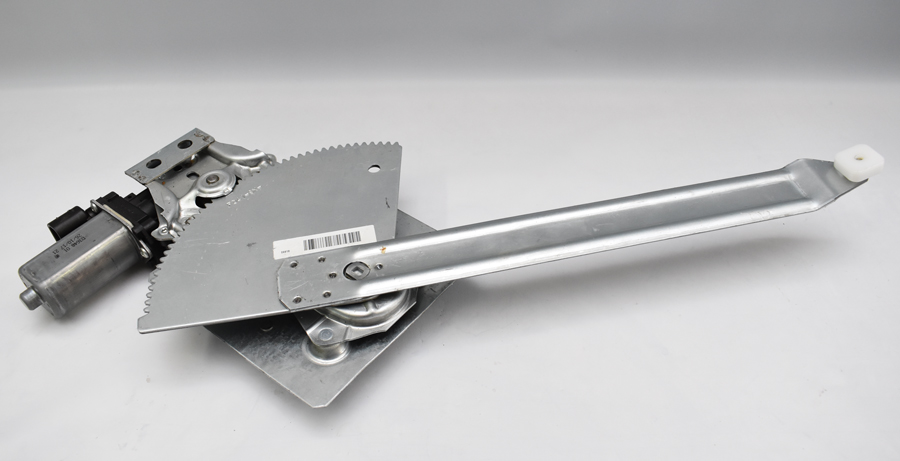
There are a number of concerns when converting to power windows with an aftermarket kit, for us the most important were ease of installation and the power of the motor. While the first requirement seems obvious, the second one maybe not so much. However, our concern comes from experience with underpowered power window kits in other projects that struggled raising the door glass, particularly after installing new window channels.

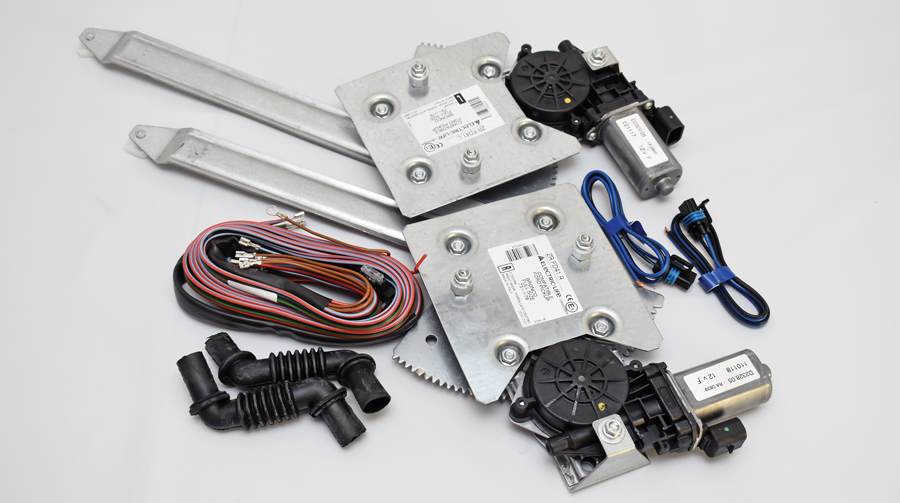
For our installation we turned to Electric-Life, a company that has been in business for 35 years. Starting out with power window kits for early Mustangs, Electric-Life now has over 1,000 part numbers. Recently they added kits for ’73-79 Ford trucks, exactly what we were looking for.

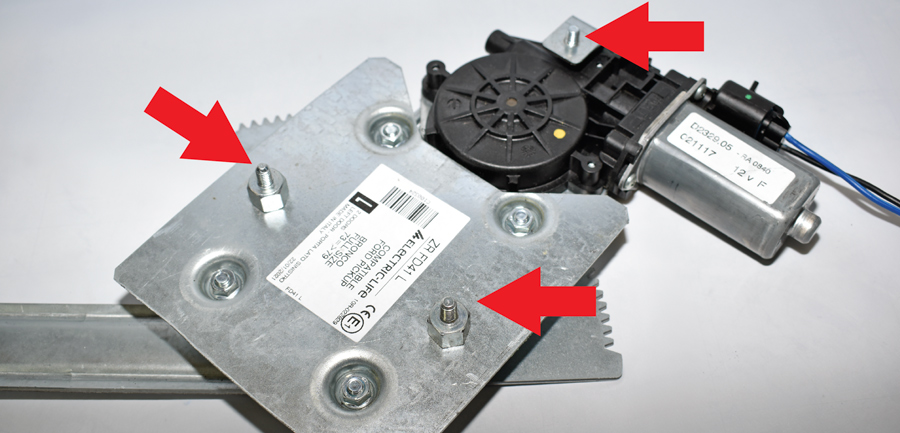
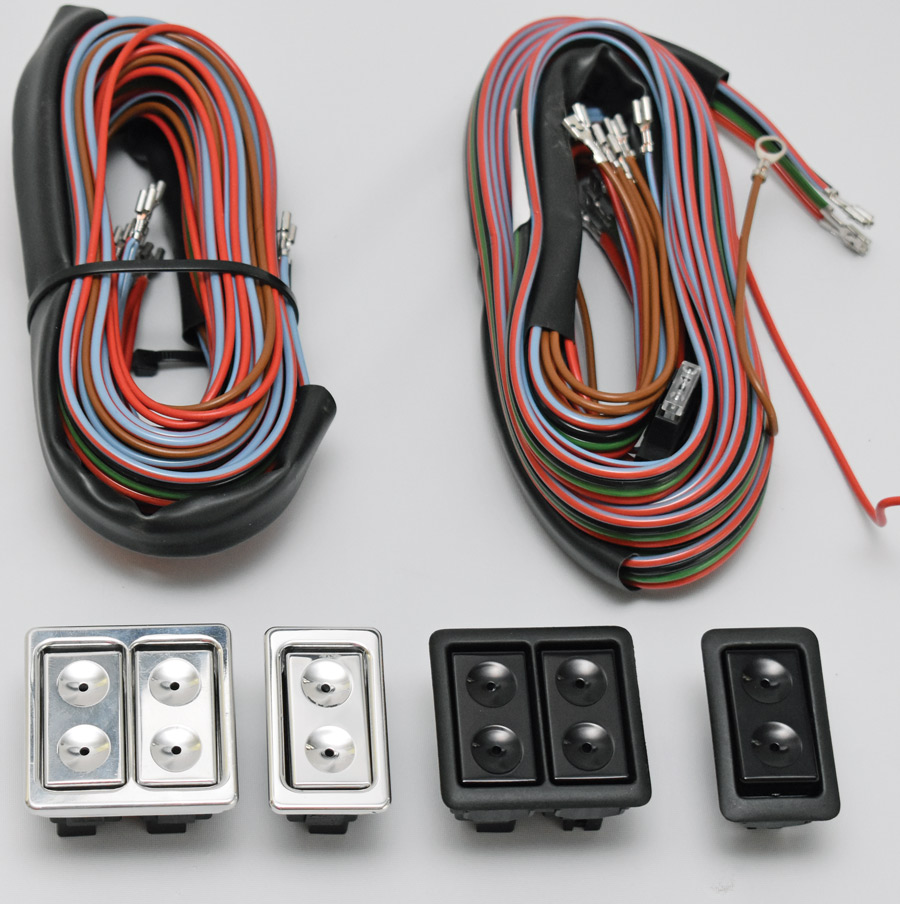
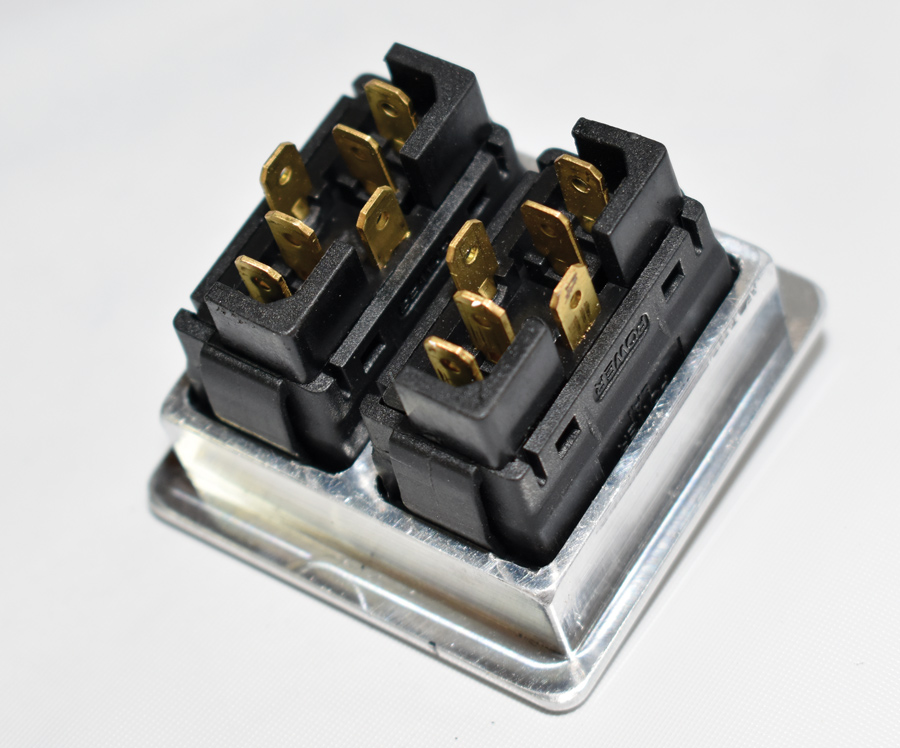
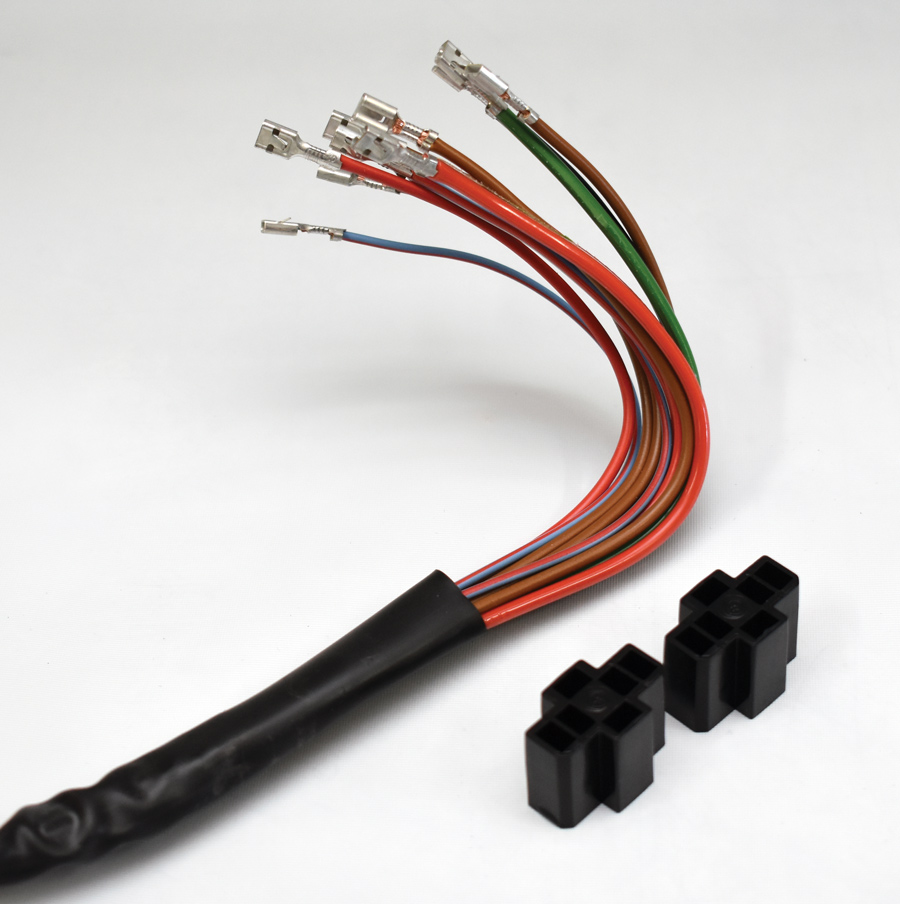
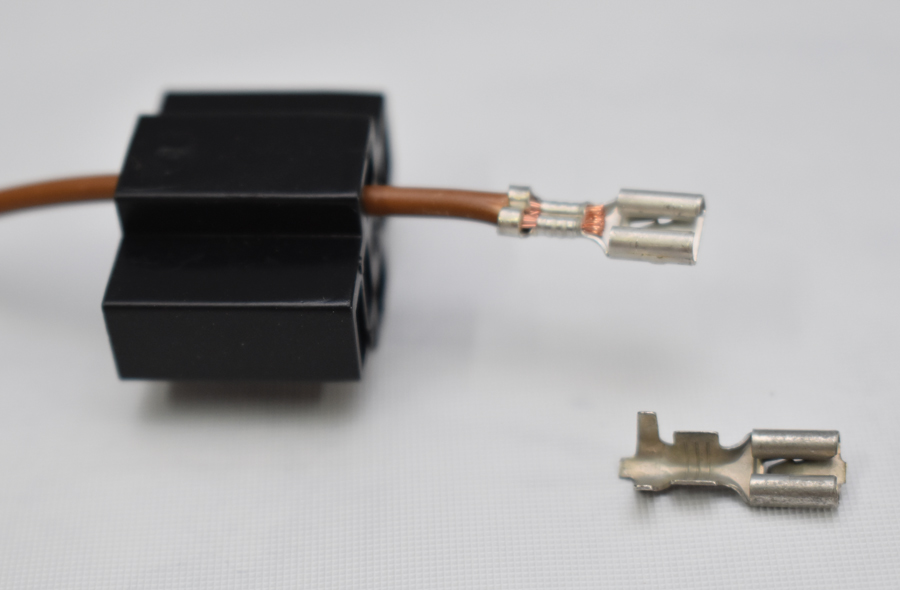
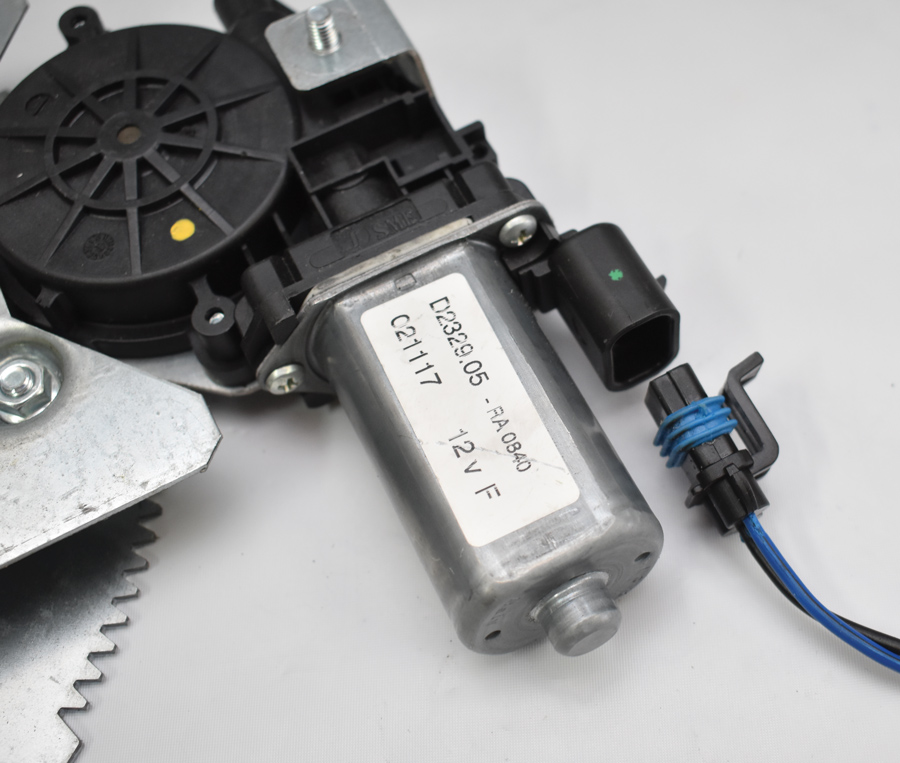
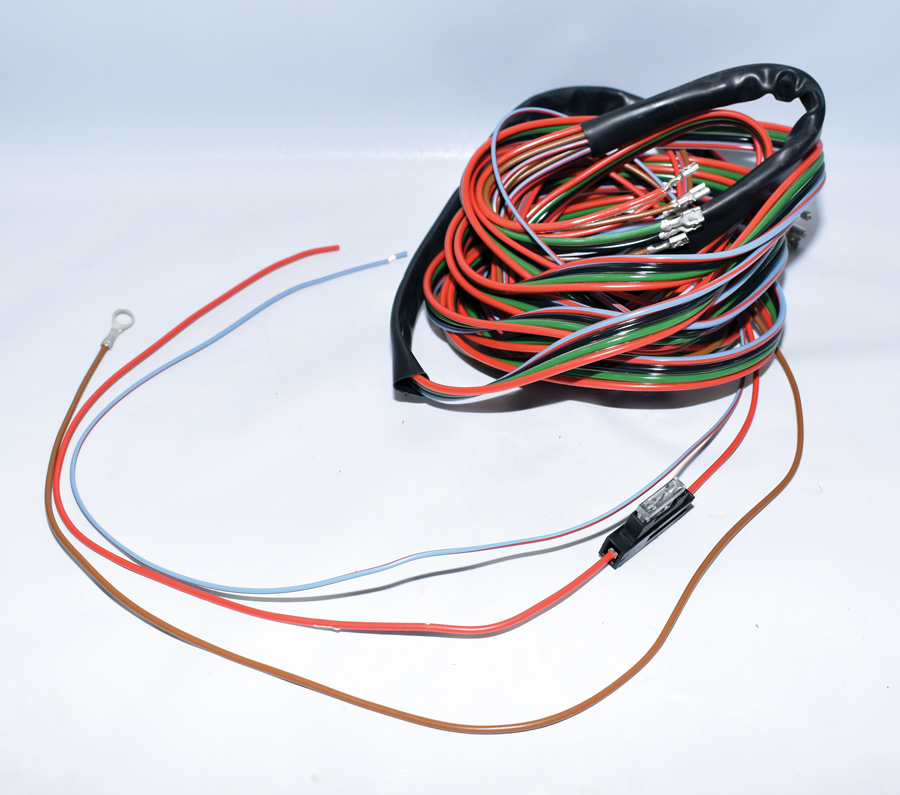
Installing the new regulator/motor assemblies was as simple as removing the original manual regulators and bolting the Electric-Life units in place. No modifications are necessary as the replacement assemblies use the existing mounting holes in the door. Of course adding power windows does require some wiring, Electric-Life includes a harness that powers the two switches on the driver side that control the left and right windows and a single switch on the passenger side controls the glass on that side.

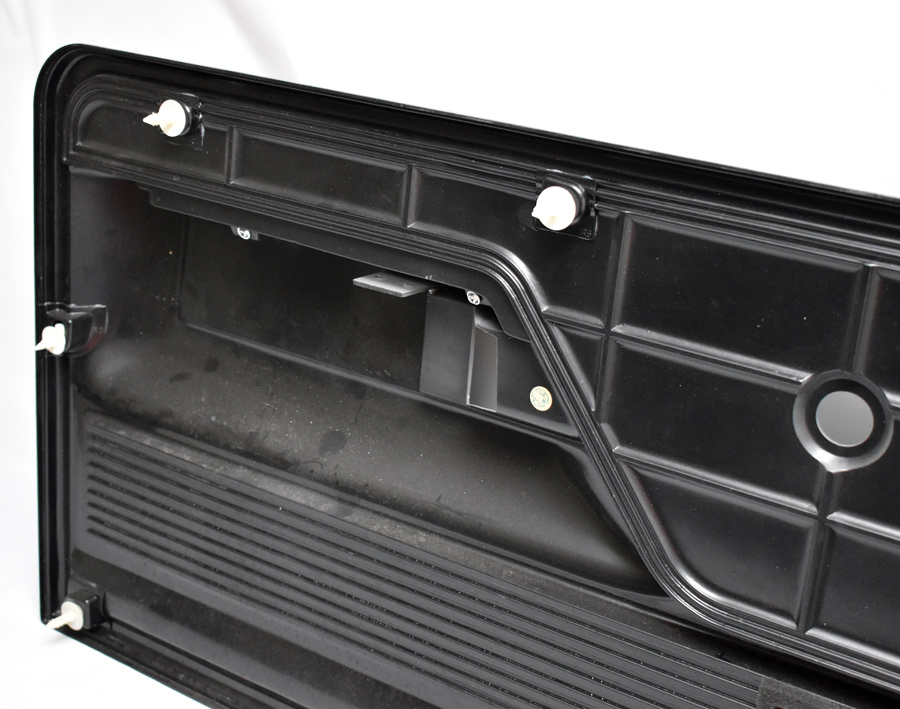
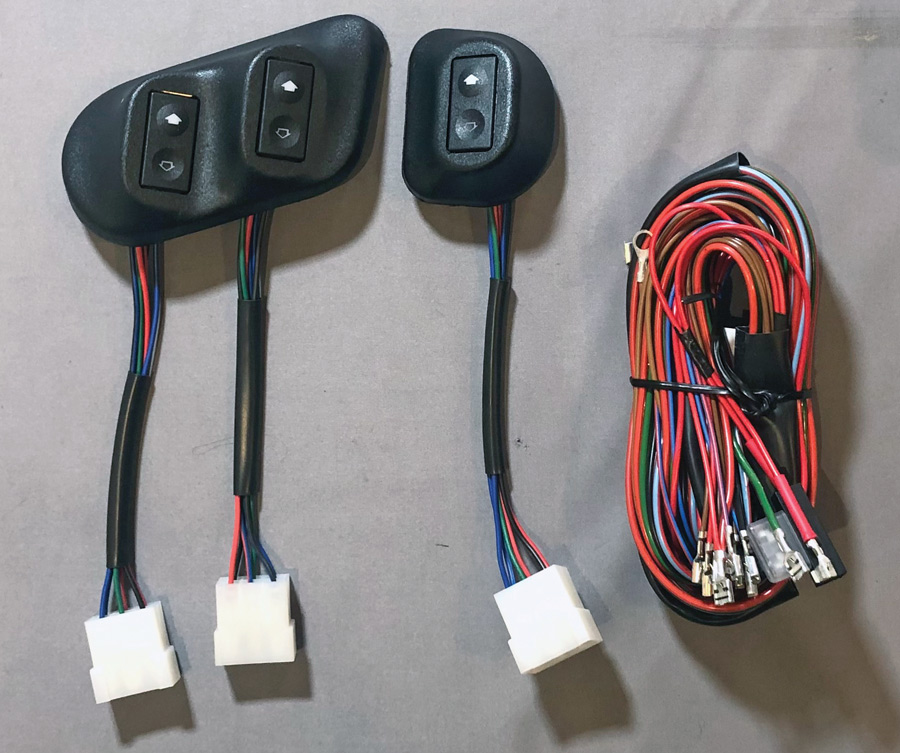
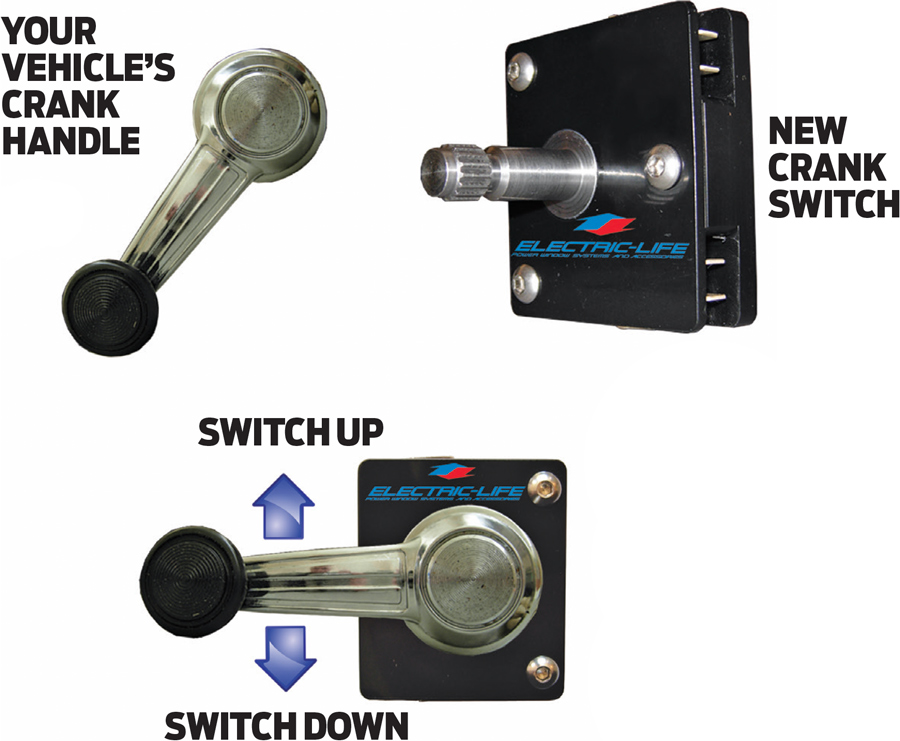
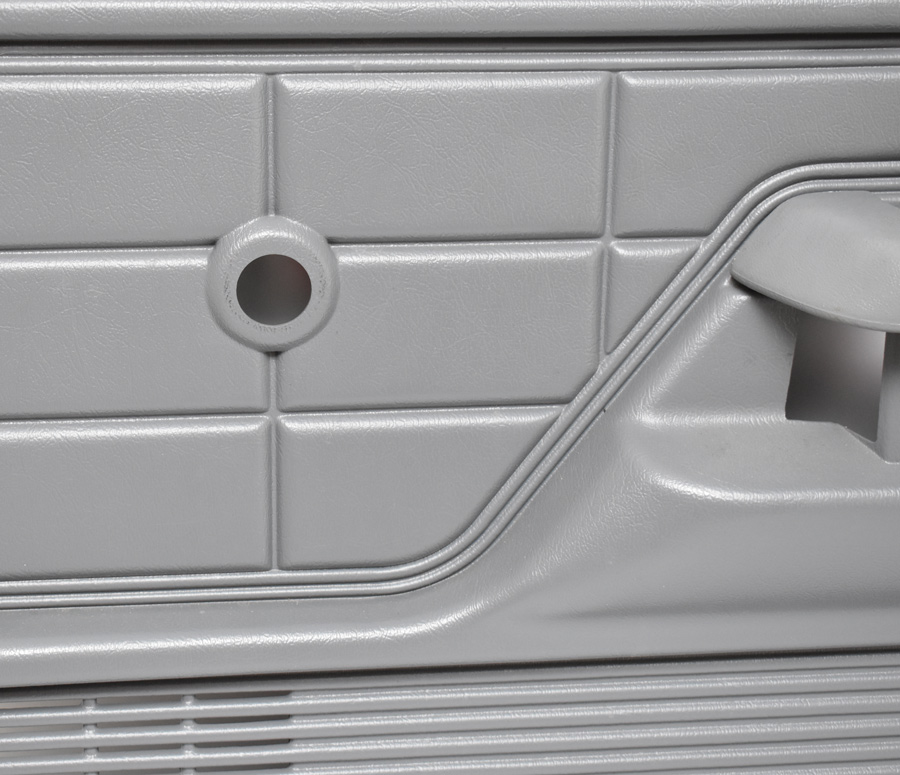
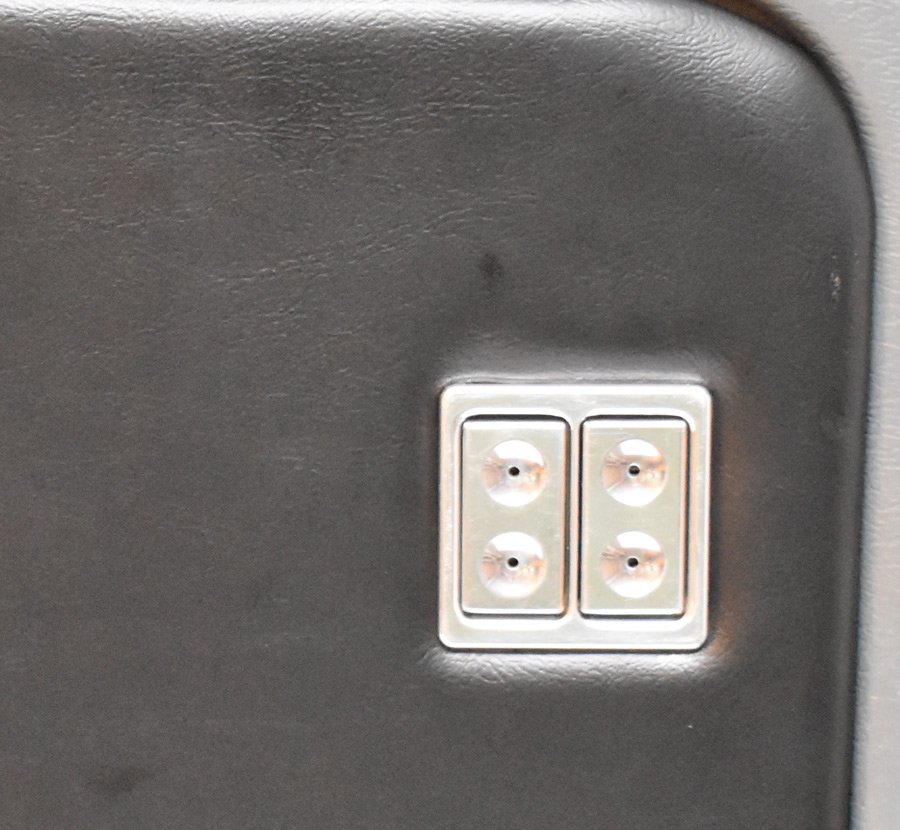
To operate the windows Electric-Life offers a variety of switches, including the polished, lighted switches with aluminum bezels we chose. Due to the design of the Ford’s door panels we had to modify them to accept these switches. We could have used different switches or even mounted these somewhere else (we even considered putting them in the dash) but since we were intending to redo the interior anyway, we decided to go for it. Yeah, so much for simplicity, but the results were worth it. Now we can roll down the driver window without fighting a worn-out manual regulator and lower the passenger side glass from the driver seat, thanks to Electric-Life.

Electric-Life window kit features extremely powerful motors and smooth-running
2. The Electric-Life window kit features extremely powerful motors and smooth-running, precision regulator gears.
stock Ford door panel
3. Removing the stock Ford door panels takes care. They’re held in place with plastic retainers that can be a challenge to remove without causing damage.
A great investment is this door panel tool we picked up years ago. It goes between the panel and door while straddling the retainers, making them easy to remove.
4. A great investment is this door panel tool we picked up years ago. It goes between the panel and door while straddling the retainers, making them easy to remove.
This is the worn-out stock Ford regulator.
5. This is the worn-out stock Ford regulator. Typically the shaft that mounts the handle wobbles in the housing. In this case the wear caused the regulator to bind in operation.
Electric-Life’s regulator mounts directly to the inner door panel with three studs
6. Electric-Life’s regulator mounts directly to the inner door panel with three studs (arrows).
Before installation we lubricated the regulator’s gears with waterproof silicone paste. The square pad on the regulator arm fits into the channel on the bottom of the glass.
7. Before installation we lubricated the regulator’s gears with waterproof silicone paste. The square pad on the regulator arm fits into the channel on the bottom of the glass.
The trick to installing the regulator is to slip the arm into the channel on the glass first and then attach the regulator to the door.
8. The trick to installing the regulator is to slip the arm into the channel on the glass first and then attach the regulator to the door.
Here are two of the switches Electric-Life offers. On the left are the switches with polished aluminum bezels that we used, on the right are black versions. Both illuminate with the dash lights.
9. Here are two of the switches Electric-Life offers. On the left are the switches with polished aluminum bezels that we used, on the right are black versions. Both illuminate with the dash lights.
To simplify installation of the switches plugs for the original crank holes in the door panels are available.
10. To simplify installation of the switches plugs for the original crank holes in the door panels are available.
Also available are these switches with bezels that space them away from the door panels. These mount the switches at an angle.
11. Also available are these switches with bezels that space them away from the door panels. These mount the switches at an angle.
Another option are these switches that come with bezels, plugs for the crank holes, and straight rubber tubes to protect the wires leading from the door to the body.
12. Another option are these switches that come with bezels, plugs for the crank holes, and straight rubber tubes to protect the wires leading from the door to the body.
For those wanting to retain their truck’s vintage appearance, Electric-Life offers switches that mount the original crank handles.
13. For those wanting to retain their truck’s vintage appearance, Electric-Life offers switches that mount the original crank handles.
One of the complications with Ford installations is the raised portion on the door panels that accommodate the window cranks.
14. One of the complications with Ford installations is the raised portion on the door panels that accommodate the window cranks.
We were intent on using the billet switches
15. We were intent on using the billet switches, however cutting the door panels to mount them resulted in the bezels not fitting flush due to interference with the inner door panel. We could have used different switches, but our mind was made up.
upholstered inserts for the door panels
16. As we will be redoing the truck’s interior we made upholstered inserts for the door panels and moved the switches so they cleared in inner door panels. This is the driver side with twin switches.
On the driver side there are a total of 12 terminals, on the right there are six (including terminals that light the buttons).
17. On the driver side there are a total of 12 terminals, on the right there are six (including terminals that light the buttons).
The wiring harness for the billet switches come with the terminals installed (this is the harness for the driver side). They must be removed to install the female plastic plug.
18. The wiring harness for the billet switches come with the terminals installed (this is the harness for the driver side). They must be removed to install the female plastic plug.
Installing plugs into the terminal
19. To install the plugs the terminals are removed, the wires are inserted in the plug according to the wiring diagram, and the included wire ends installed. Note the small crimp goes around the insulation with the larger crimp around the conductor.
wiring harness
20. The wiring harness for the motors includes weather-tight plugs. Be aware the left and right motor plugs have different color wires that match the included wiring diagram.
Many wires wrapped together
21. The wiring harness for the switches runs from one door to the other. There are also three wires to connect to the truck: a switched hot, a ground, and a lead that attaches to the dash lights (if needed).
Included in the kit are a pair of angled flexible tubes to route the wiring from the doors to the A-pillar.
22. Included in the kit are a pair of angled flexible tubes to route the wiring from the doors to the A-pillar.
The passenger door panel uses a single switch. When we redo the interior we’ll make new inserts with pleats.
23. The passenger door panel uses a single switch. When we redo the interior we’ll make new inserts with pleats.
Electric-Life
(773) 467-0200
electric-life.com