CTP Tech
InTheGarageMedia.com
duralast brake drum

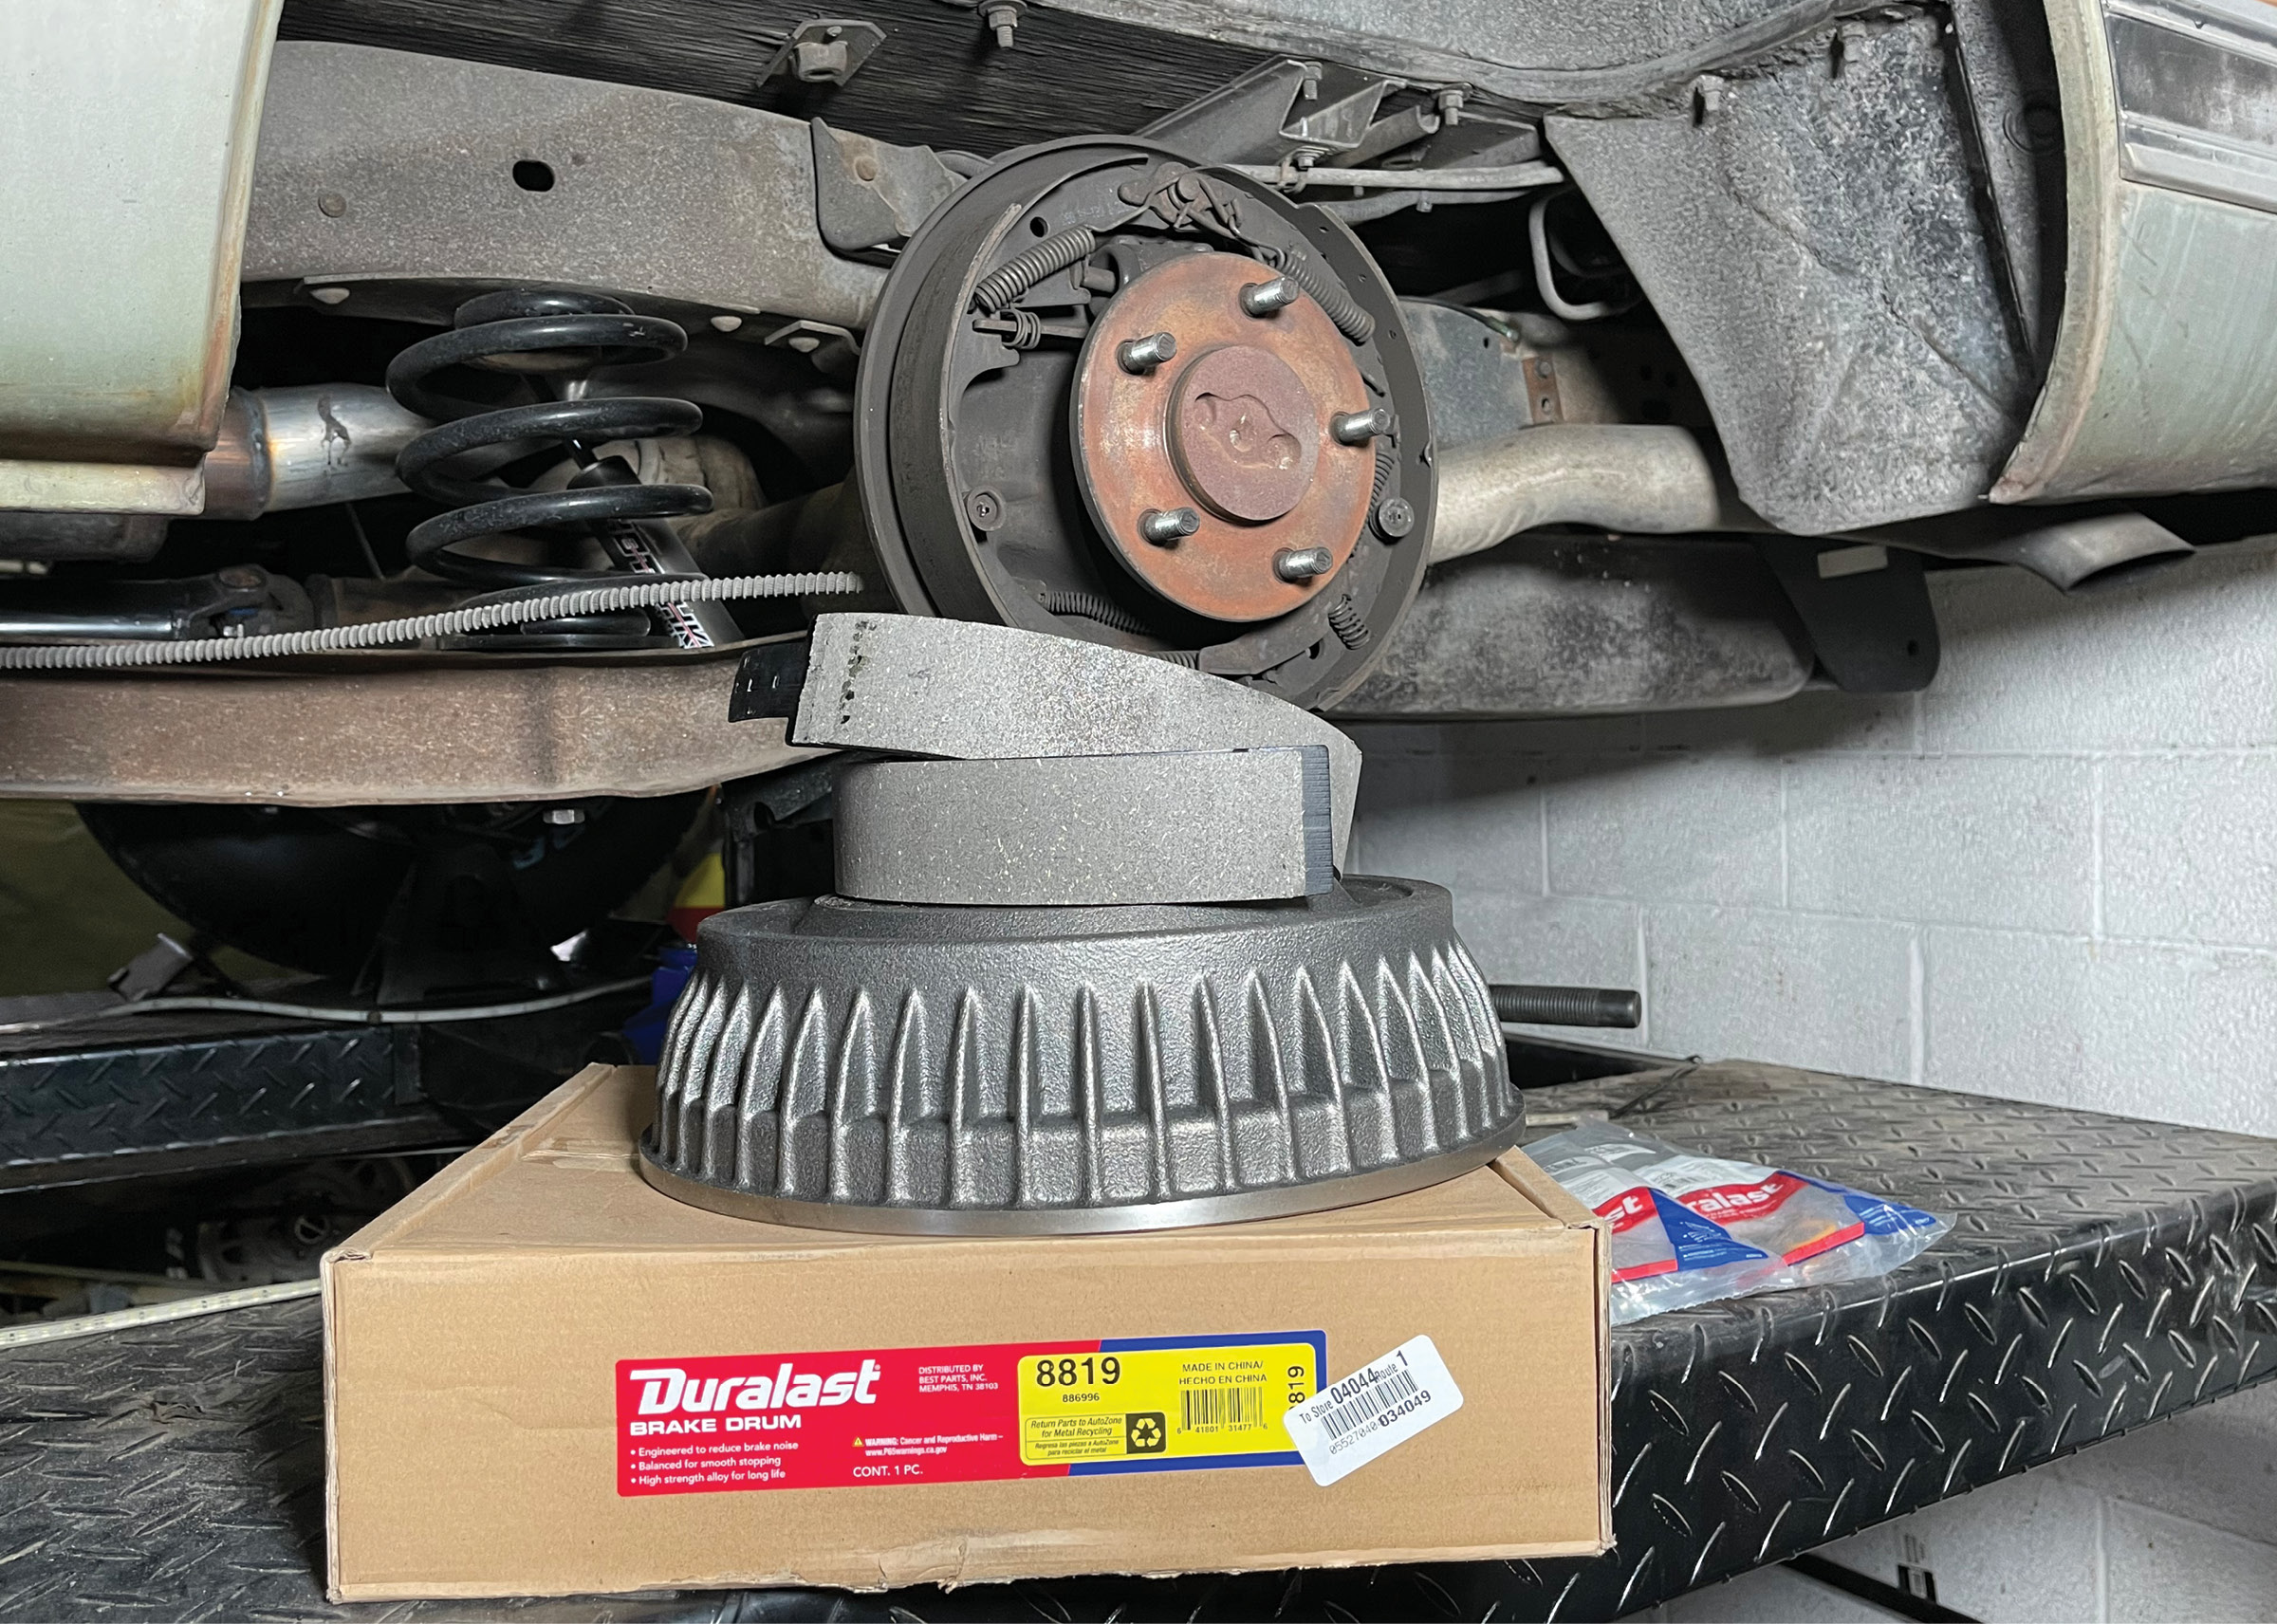
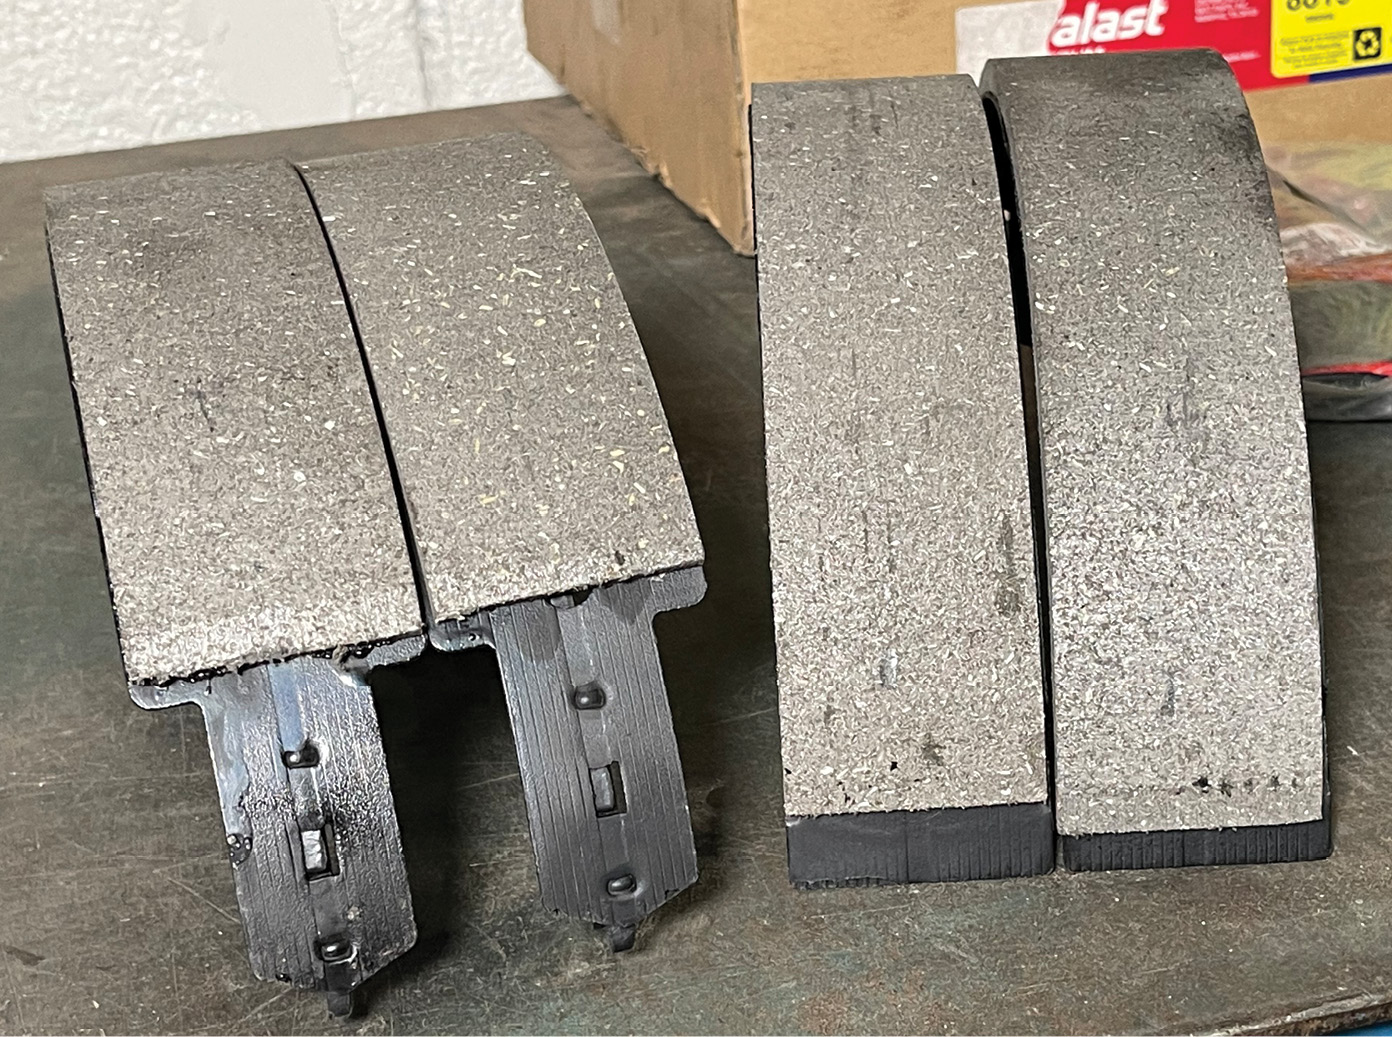
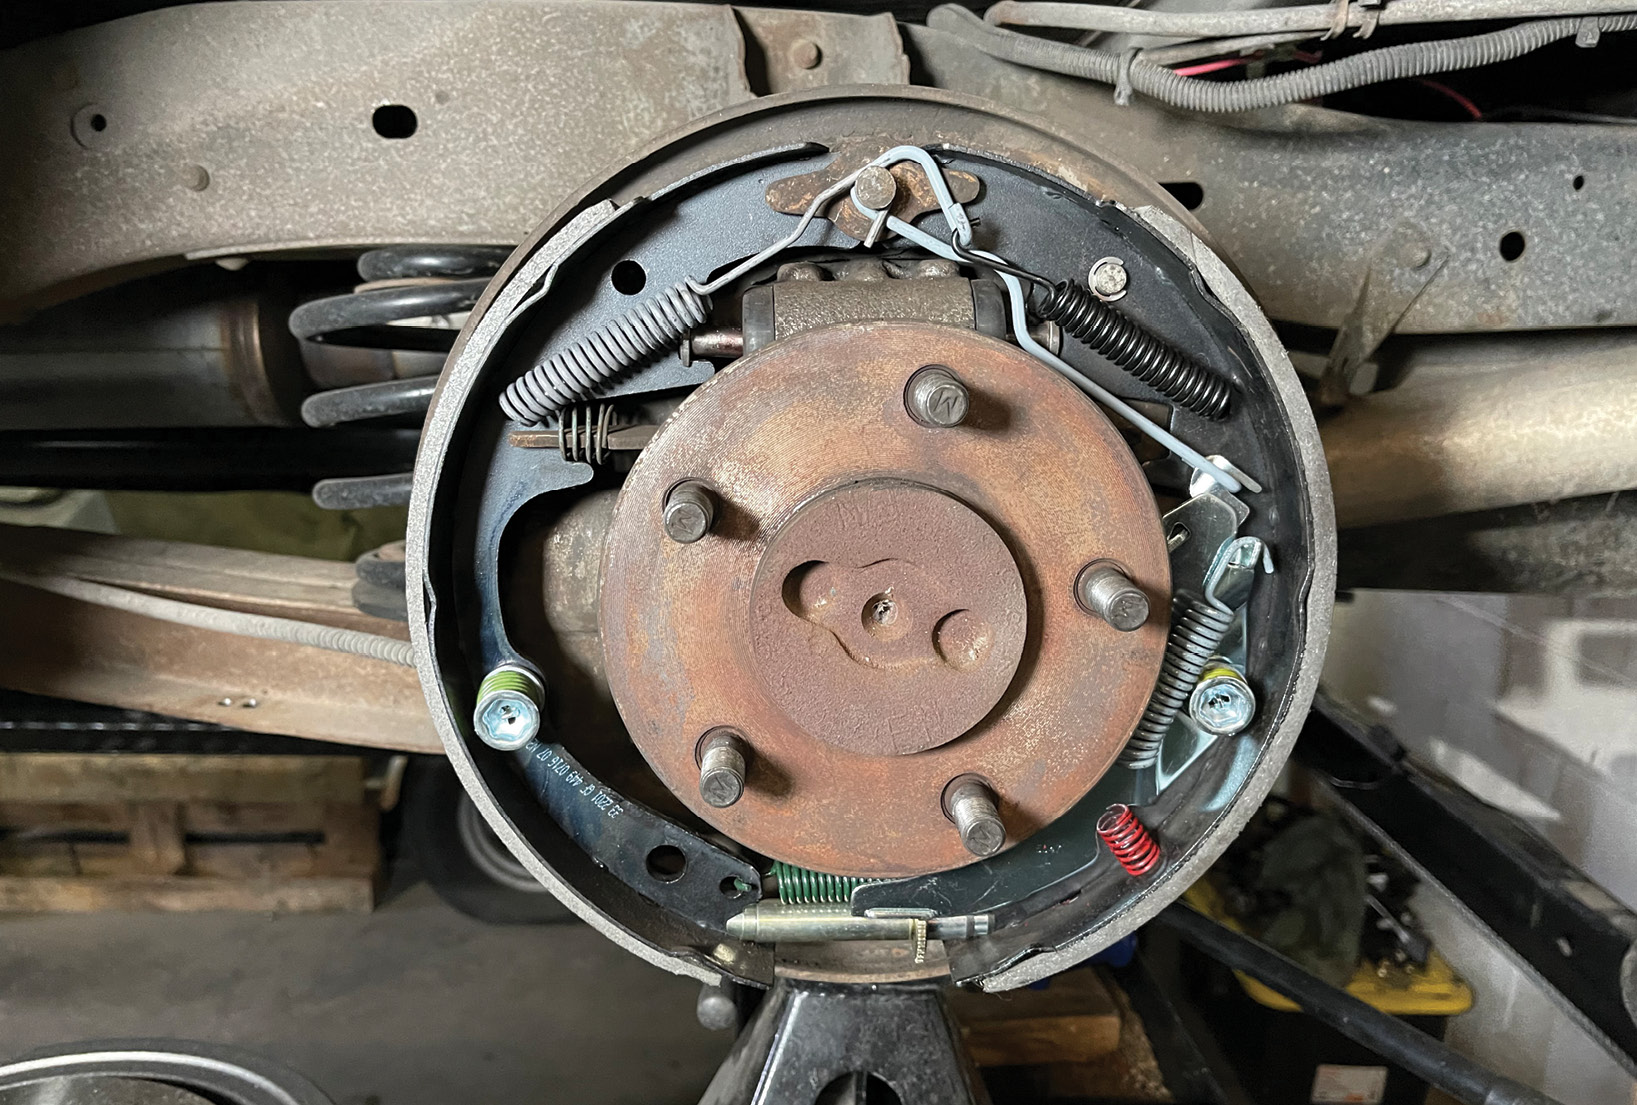
1. Not every truck needs four-wheel disc brakes, but every truck does need a well-maintained and functional brake system. With the help of Duralast replacement parts, we were able to update the stock rear drum system with new drums, shoes, and hardware to produce a factory-fresh braking action.

Time For New Shoes
Updating Factory Drum Brakes

BY TODD RYDENPhotography by THE AUTHOR

T

rucks have been stopping proficiently with rear drum brakes for decades. Perhaps not the most effective form of braking available these days, but for many classics out just cruising the road, a pair of discs up front combined with a well-maintained set of drums in the rear will perform safely and just fine.

Don’t get us wrong, when it comes to quickly bringing our trucks to a slow or stop, you can’t go wrong with disc brakes on all four corners. The clamping action of calipers and rotors are far more effective and consistent, while having fewer moving parts. If we were working on a great-handling, big-powered truck, four-wheel discs would be our only choice.

However, for this family hauler ’71 Suburban with a high-mile 5.3L LS, the factory rear drums will suffice. Actually, we’re lucky to be working on a ’71 as it was the first year Chevy put disc brakes on the front of their five-lug–equipped C10s, so for this old cruiser, the factory disc/drum setup provides plenty of braking action. (If this rig had four drums, we would have been doing a story about front disc brake swaps!)

We used Duralast because they have a wide variety of classic truck and muscle car parts with updated technology from the 50-year-old original equipment. We found new Duralast brake shoes along with 11-inch replacement drums. Our experience using Duralast has proven that their products will perform as good or better than the originals.

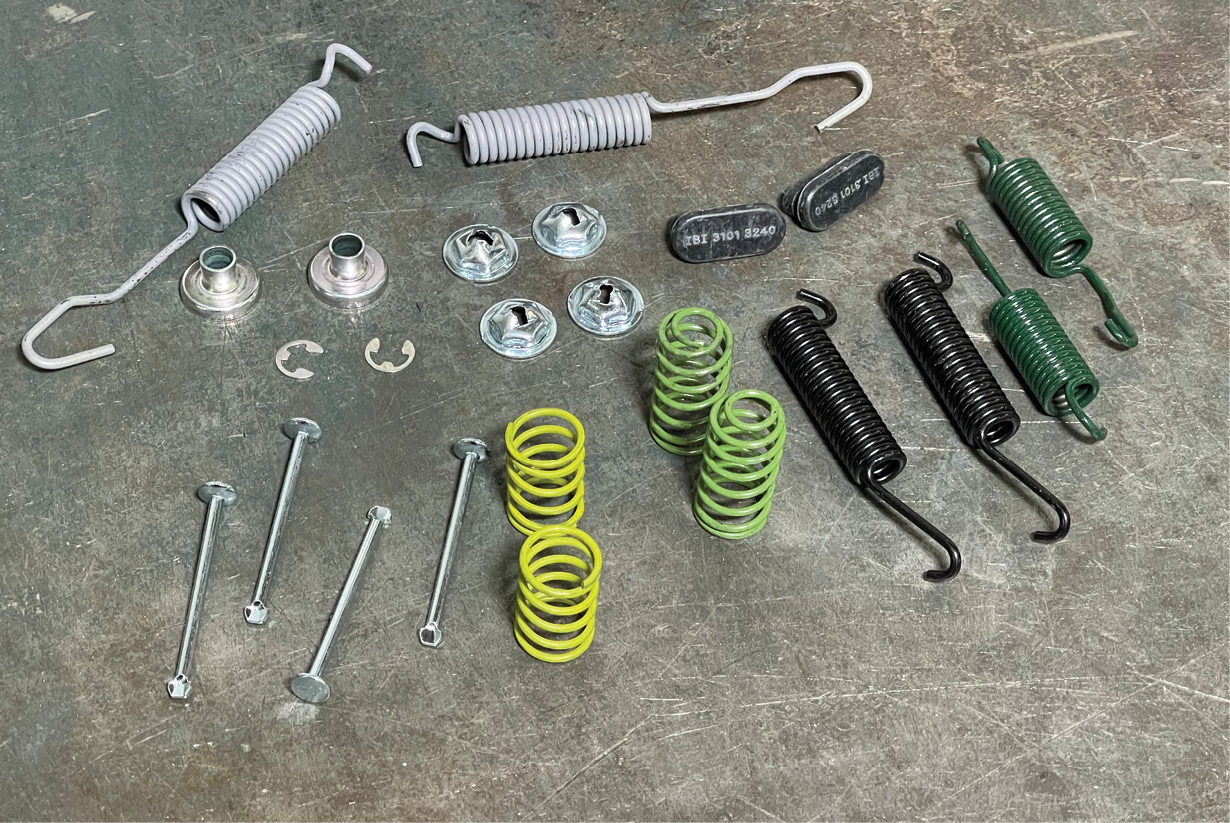
We were also pleased to find that Duralast offers a complete hardware kit (PN H7018) to replace all the return springs, retainers, and clips. They also had kits to update the self-adjusting mechanism, including the star-wheel assembly to replace our worn-down adjusters. Note that there are two kits: H2508 for the driver side and H2509 for the passenger. Wheel cylinders were also available but ours had been changed a few years ago.

With all the parts in hand, it was time to get busy. Working on drum brakes can seem a little overwhelming with the number of different springs, levers, and retainers. One important part to remember is never take both sides apart at the same time! That way you always have a reference to go back to. It’s also good practice to take a picture of the setup before pulling it apart. It’s also a good idea to buy a drum brake tool kit; they’re inexpensive and will save you time and probably keep your knuckles from bleeding.

The Duralast parts fit just like the factory components, making the replacement of the shoes a breeze and the new hardware was a nice update to the 52-year-old parts. The braking action was definitely improved and we now have confidence in our braking system as we roll into the road trip and cruise season.

With all of their springs, levers, and associated parts, drum brakes can be a little daunting at first look. The most important tip we can offer is to never take both sides apart at the same time!  Note the rear shoe (on the passenger side) and how thin the brake lining is worn down. This baby needs some new shoes!

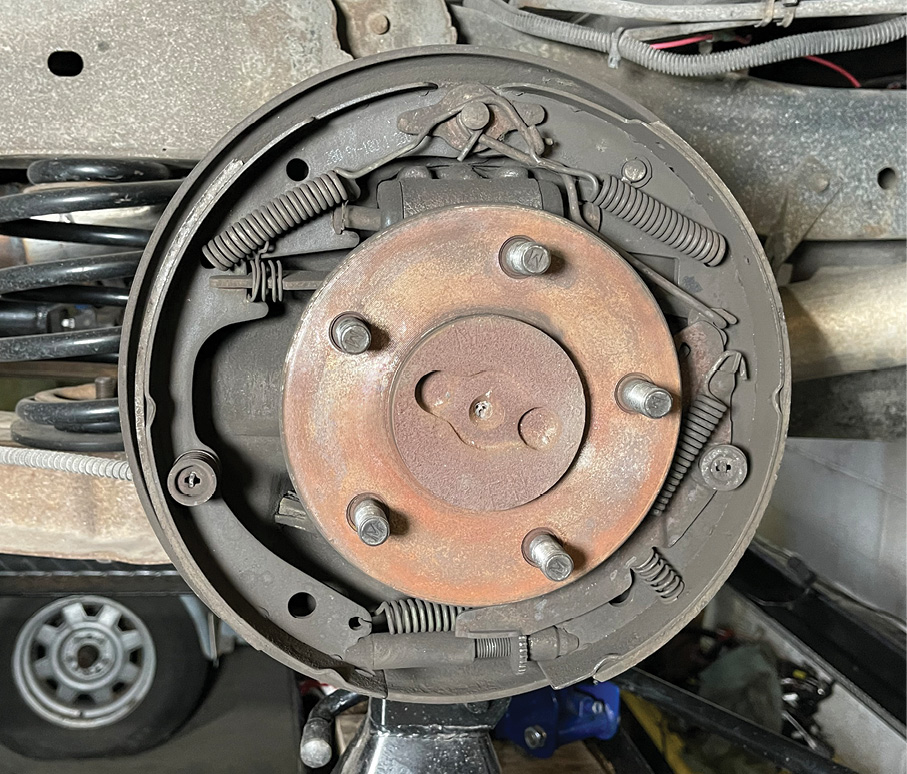
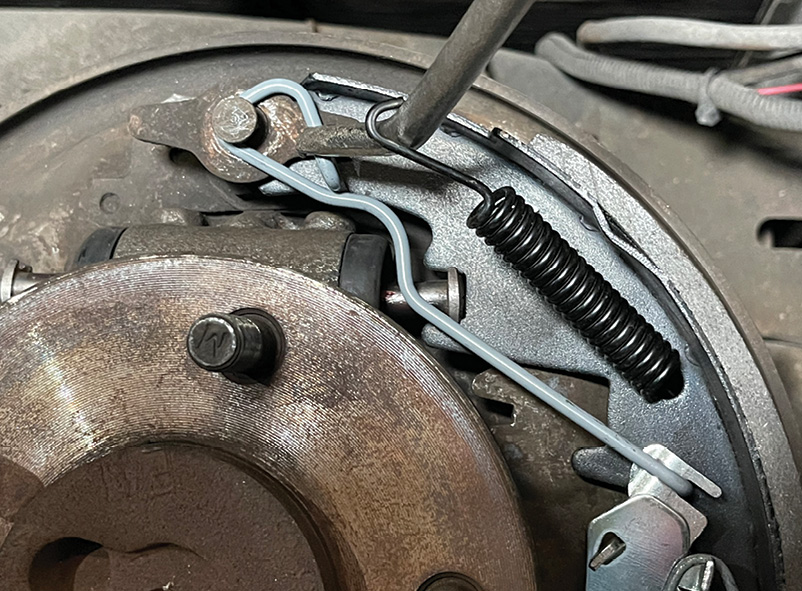
2. With all of their springs, levers, and associated parts, drum brakes can be a little daunting at first look. The most important tip we can offer is to never take both sides apart at the same time! Note the rear shoe (on the passenger side) and how thin the brake lining is worn down. This baby needs some new shoes!

Drum brakes are self-adjusting, thanks to this little star wheel screw adjusting mechanism and lever. In short, when you back up and apply the brakes, the star wheel unscrews to push the shoes out and closer to the drum. In this case, the adjuster has done its job and has “unscrewed” as the linings have worn over time. Note the worn-down teeth; time for a replacement.

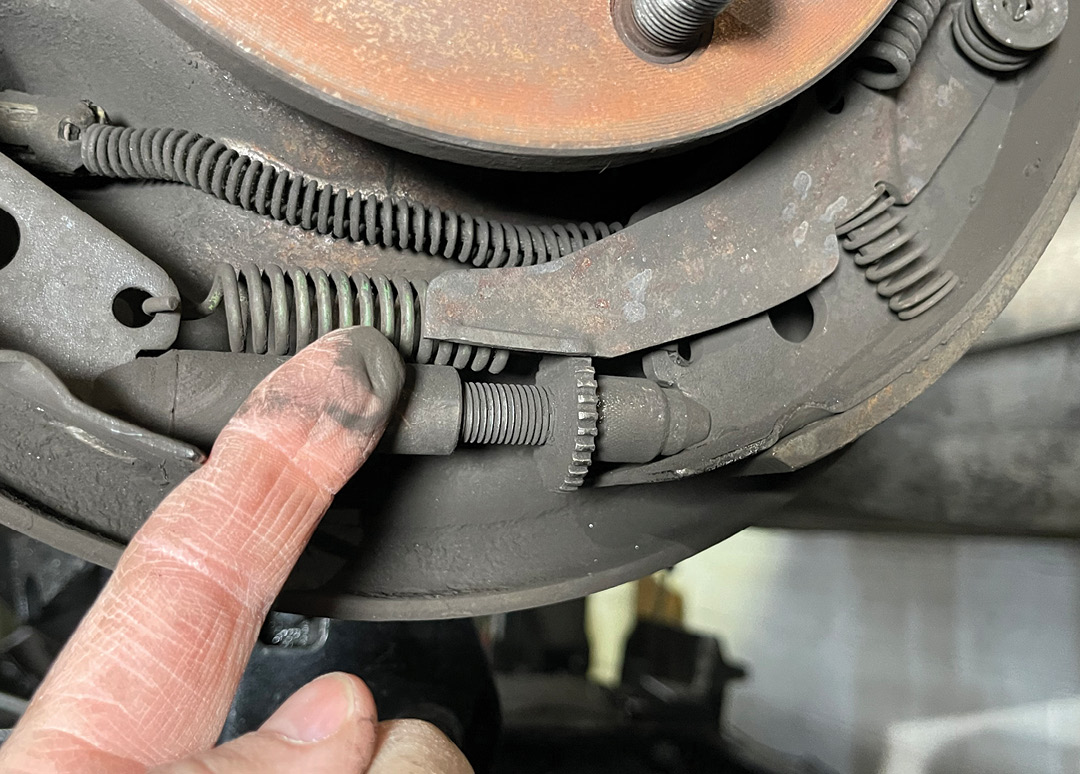
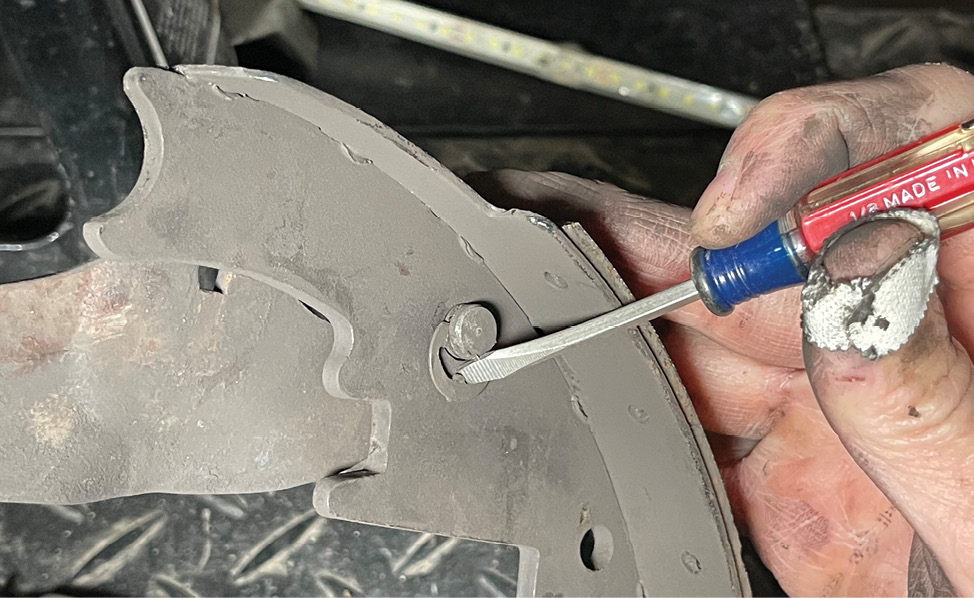
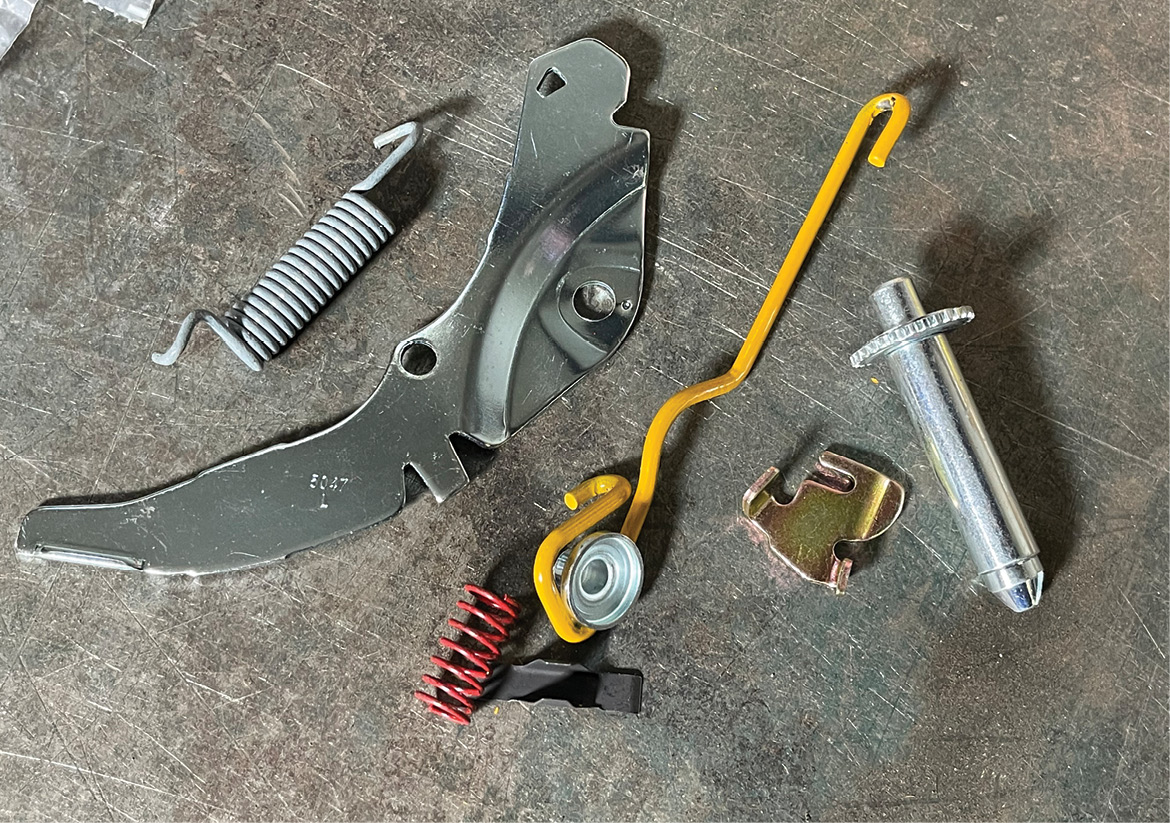
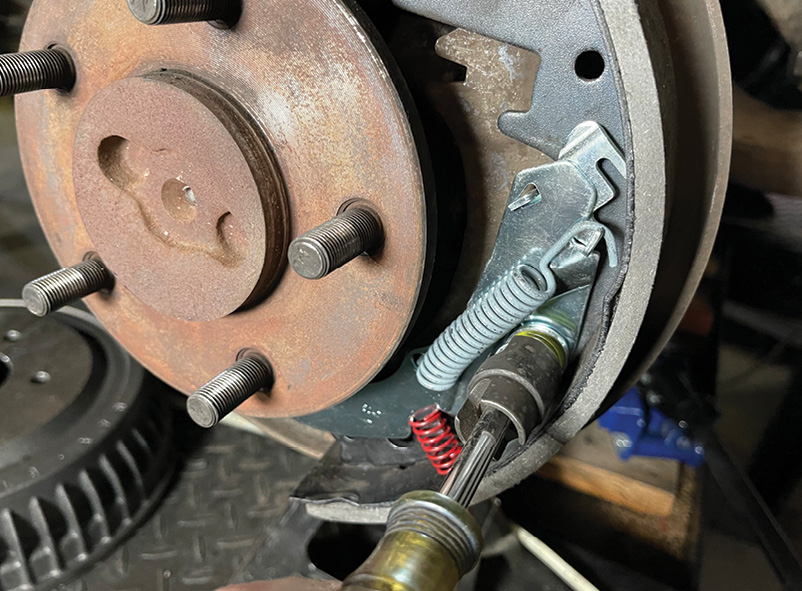
3. Drum brakes are self-adjusting, thanks to this little star wheel screw adjusting mechanism and lever. In short, when you back up and apply the brakes, the star wheel unscrews to push the shoes out and closer to the drum. In this case, the adjuster has done its job and has “unscrewed” as the linings have worn over time. Note the worn-down teeth; time for a replacement.

These two tools will make life a lot easier when replacing the shoes. The nutdriver has a special socket designed to remove the shoe hold-down retainers while the other tool will easily remove and help install the different springs.

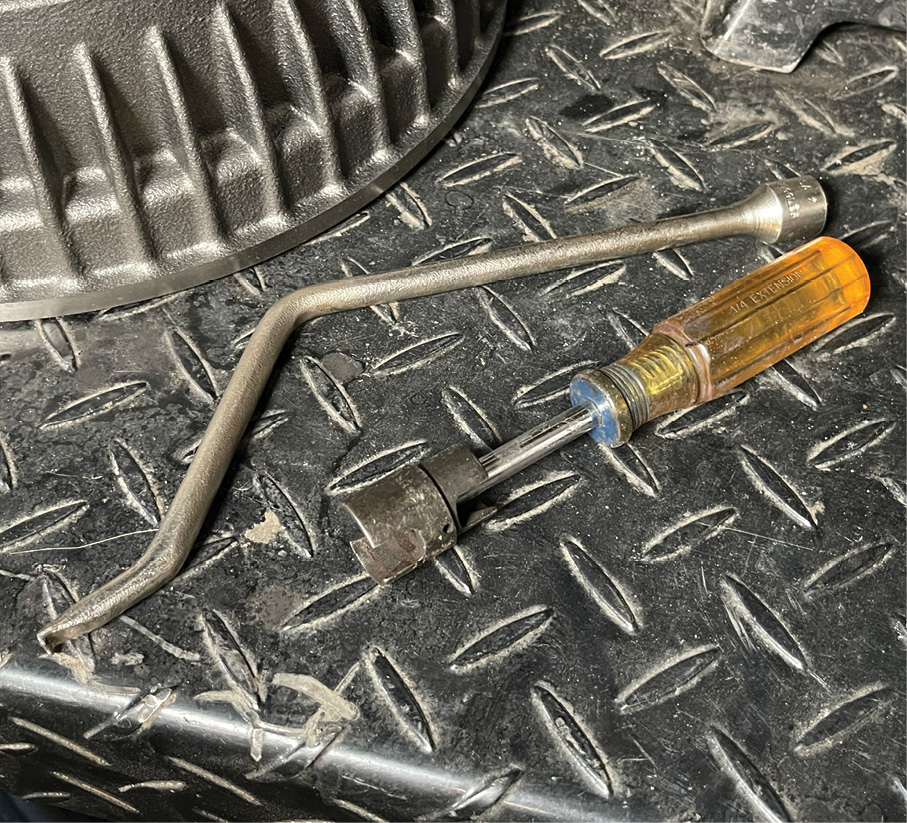
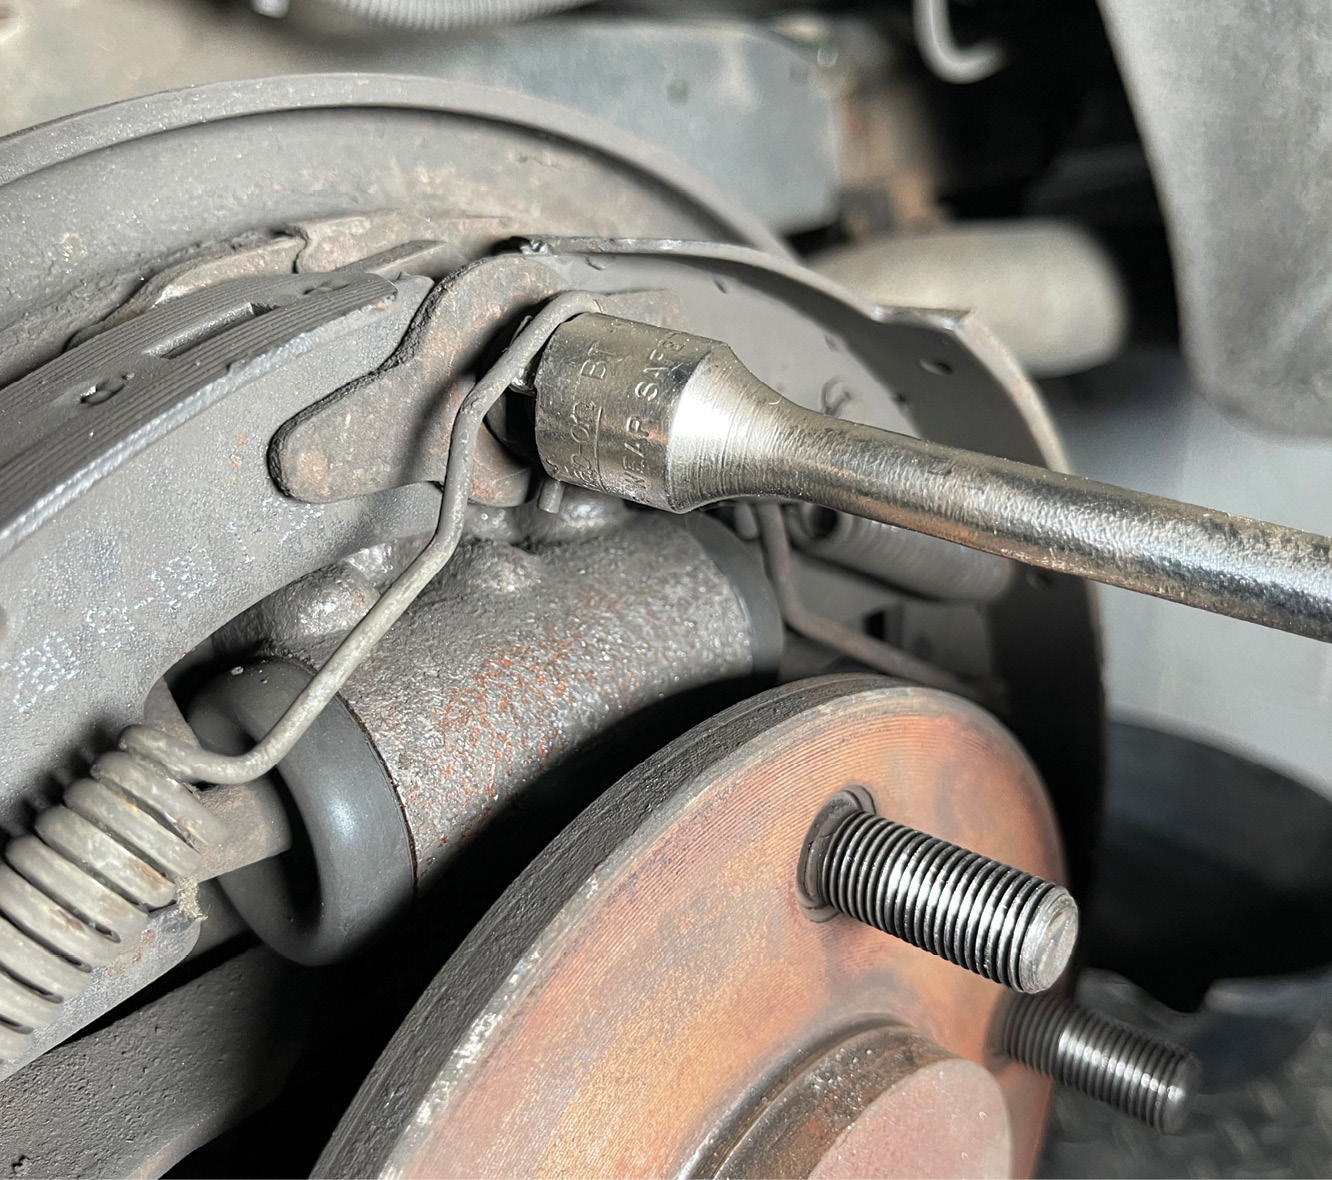
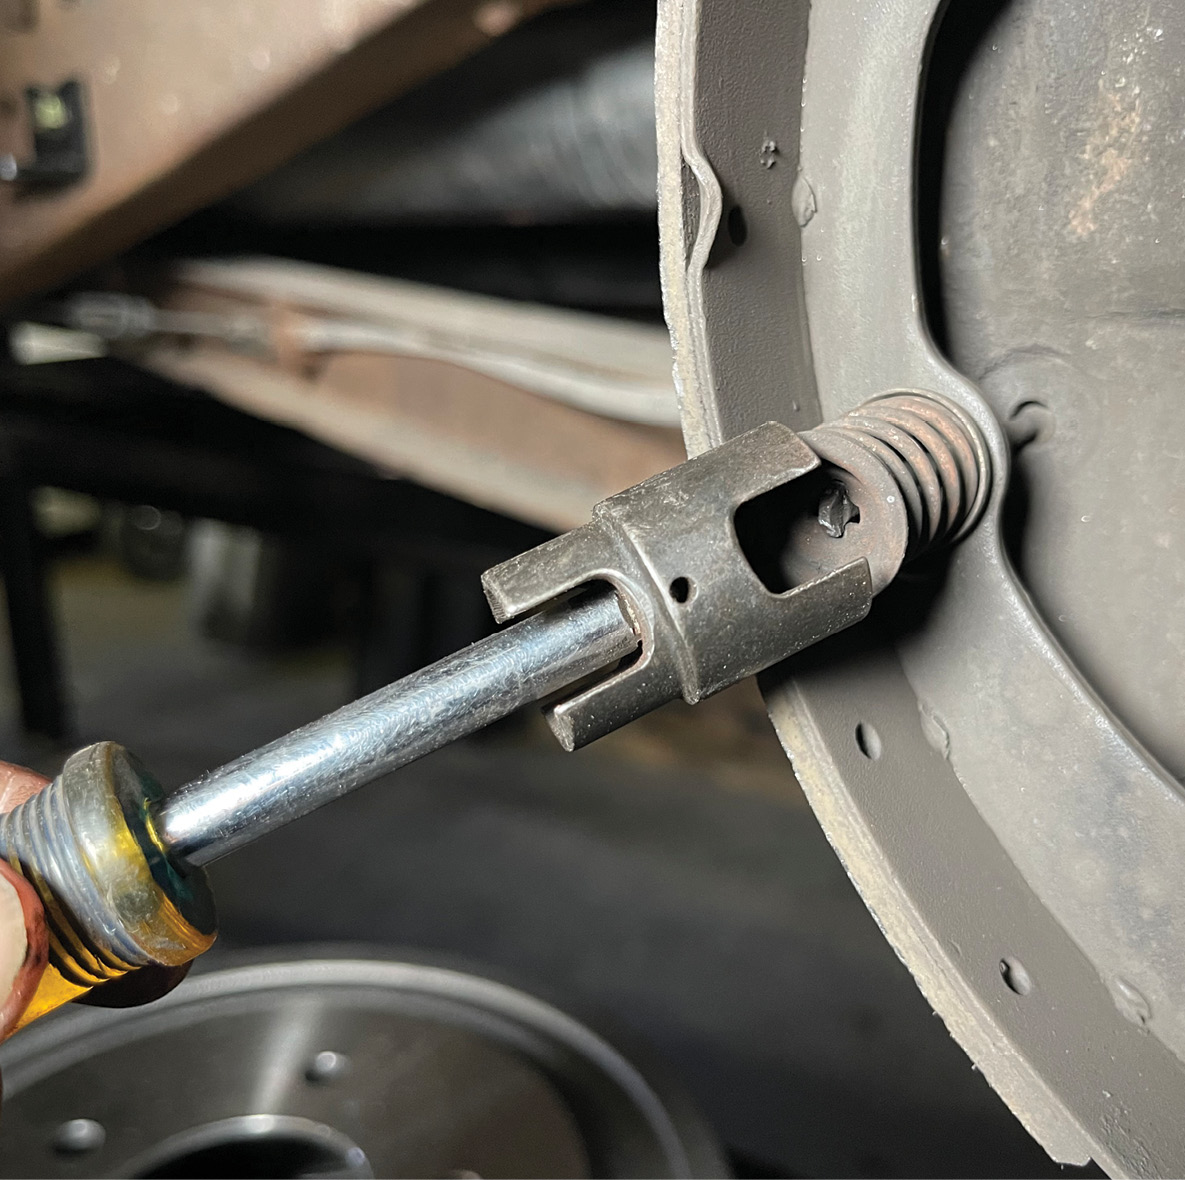
4. These two tools will make life a lot easier when replacing the shoes. The nutdriver has a special socket designed to remove the shoe hold-down retainers while the other tool will easily remove and help install the different springs.

Start with a good bath with a quality brake cleaner. This will get rid of all the lining dust that will instantly turn your hands black. The cool thing about brake cleaner is that it dries within minutes and leaves no film.

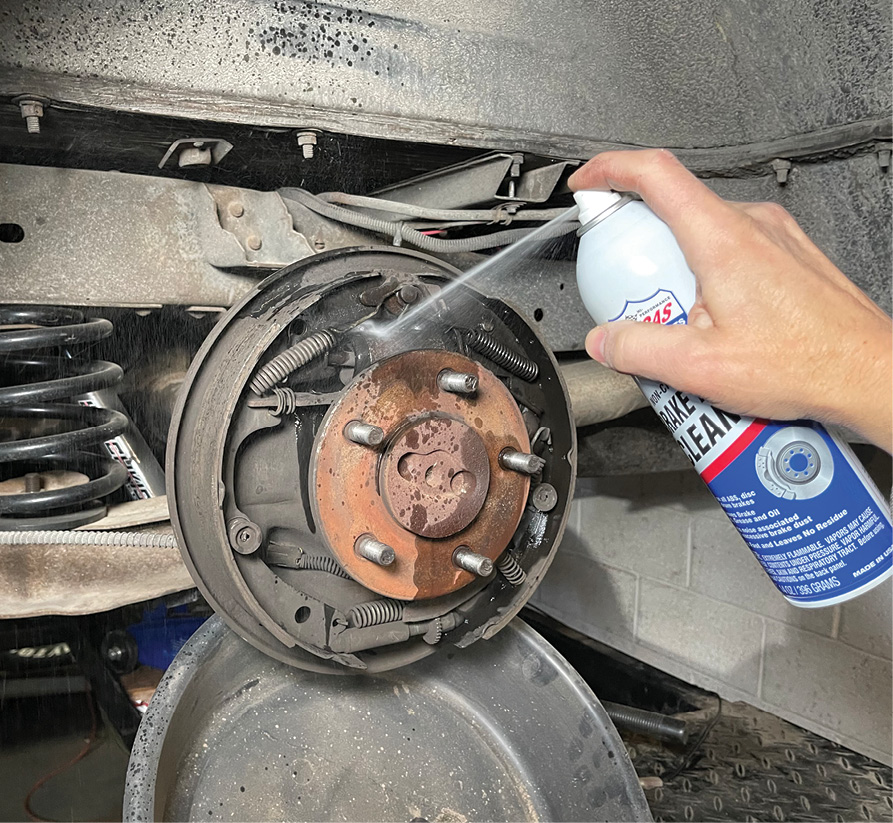
5. Start with a good bath with a quality brake cleaner. This will get rid of all the lining dust that will instantly turn your hands black. The cool thing about brake cleaner is that it dries within minutes and leaves no film.

We started by removing the leading shoe (front) return spring from the anchor at the top of the backing plate followed by its retaining spring.
As the spring comes off you’ll want to rotate it around to disengage the adjuster screw assembly and its spring.
6-7. We started by removing the leading shoe (front) return spring from the anchor at the top of the backing plate followed by its retaining spring. As the spring comes off you’ll want to rotate it around to disengage the adjuster screw assembly and its spring.
After removing the trailing shoe (rear) springs and retainers, the parking brake lever will need to be removed by carefully flinging this little e-clip across the garage. (Good news is that we have new ones.)
8. After removing the trailing shoe (rear) springs and retainers, the parking brake lever will need to be removed by carefully flinging this little e-clip across the garage. (Good news is that we have new ones.)
The shoes on the right show the minor difference between the leading and trailing shoes; the trailing shoe (far right) has more lining because this shoe does more of the braking. In this case, the friction material is even on both shoes on top, but on the bottom there’s just a slight difference. The shoe with the longer lining is always the trailing shoe and should be installed in the rear position.
9. The shoes on the right show the minor difference between the leading and trailing shoes; the trailing shoe (far right) has more lining because this shoe does more of the braking. In this case, the friction material is even on both shoes on top, but on the bottom there’s just a slight difference. The shoe with the longer lining is always the trailing shoe and should be installed in the rear position.
Duralast offers a kit of all new springs and retainers and after 50 years we figured it was time for new ones.
They also offer new adjuster kits, which was great news as our passenger side was not self-adjusting any more.
10-11. Duralast offers a kit of all new springs and retainers and after 50 years we figured it was time for new ones. They also offer new adjuster kits, which was great news as our passenger side was not self-adjusting any more.
There were no signs of seepage or leaks around the wheel cylinders so we cleaned the wheel cylinder pins with a wire wheel and applied a thin coat of grease before poking them back in the seals.
12. There were no signs of seepage or leaks around the wheel cylinders so we cleaned the wheel cylinder pins with a wire wheel and applied a thin coat of grease before poking them back in the seals.
We started the assembly process with the trailing shoe and connected the parking brake lever with a new e-clip.
13. We started the assembly process with the trailing shoe and connected the parking brake lever with a new e-clip.
After assembling the new adjusting actuator assembly, it was installed onto the trailing shoe with the assembly held in place on the backing plate with the new retaining nail/spring.
The actuator link (gray) connects the adjuster assembly to the anchor on top of the backing plate followed by return spring (black)
14-15. After assembling the new adjusting actuator assembly, it was installed onto the trailing shoe with the assembly held in place on the backing plate with the new retaining nail/spring. (Note the correct position of the wheel cylinder pins into the shoes.) The actuator link (gray) connects the adjuster assembly to the anchor on top of the backing plate followed by return spring (black).
The adjusting screw assembly and green adjuster spring can be installed to the trailing shoe then connected to the leading show with a little angling and muscle.
Once in place, position the shoe to the backing plate with the retaining nail/spring.
16-17. The adjusting screw assembly and green adjuster spring can be installed to the trailing shoe then connected to the leading show with a little angling and muscle. Once in place, position the shoe to the backing plate with the retaining nail/spring. Make sure the parking brake strut and spring are aligned properly into the shoe before installing the final leading shoe return spring to the anchor.
With everything installed properly, it’s time to adjust the brakes. Slide the drum in place and spin it around. If there is no resistance, pull the drum off and manually move the star screw out to push the shoes toward the drum a little. Install the drum and spin it again. There should be a little resistance and slight rubbing noise. Once assembled, you can also manually adjust the shoes through the access slot in the back of the backing plate.
18. With everything installed properly, it’s time to adjust the brakes. Slide the drum in place and spin it around. If there is no resistance, pull the drum off and manually move the star screw out to push the shoes toward the drum a little. Install the drum and spin it again. There should be a little resistance and slight rubbing noise. Once assembled, you can also manually adjust the shoes through the access slot in the back of the backing plate.
 SOURCE