Tech
InTheGarageMedia.com
Making The Bed ... Twice title
Auto Metal Direct to the Rescue: Building a Better (Squarebody) Bed Box!
BY ROB FORTIERPHOTOGRAPHY BY THE AUTHOR
O

ne of the greatest aspects of the classic truck hobby is the act of completely un-utilizing the characteristics of the trucks we drive! Whether it’s massacring the suspension or, as a result of that, obliterating the bed floor beyond the point of usability, we’re professionals at ruining old trucks, aren’t we?!

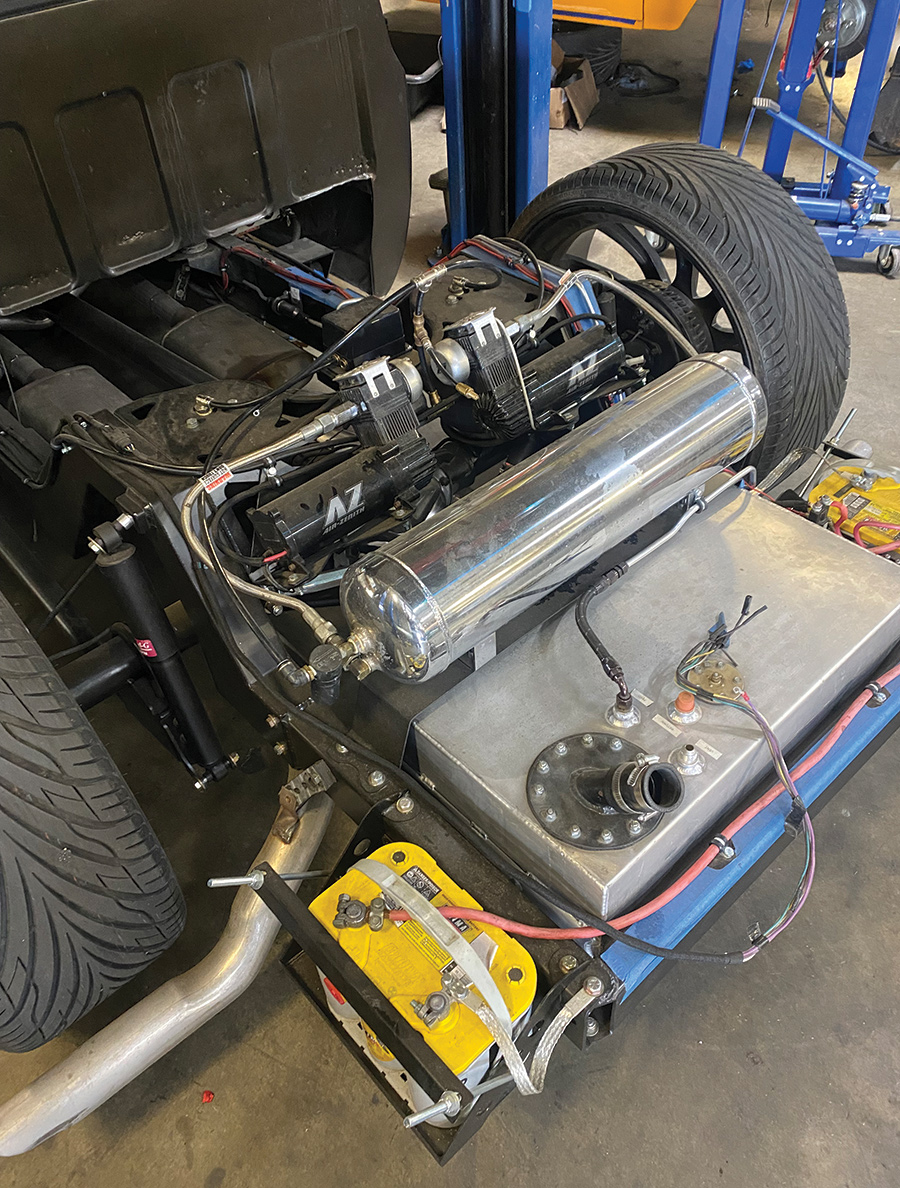
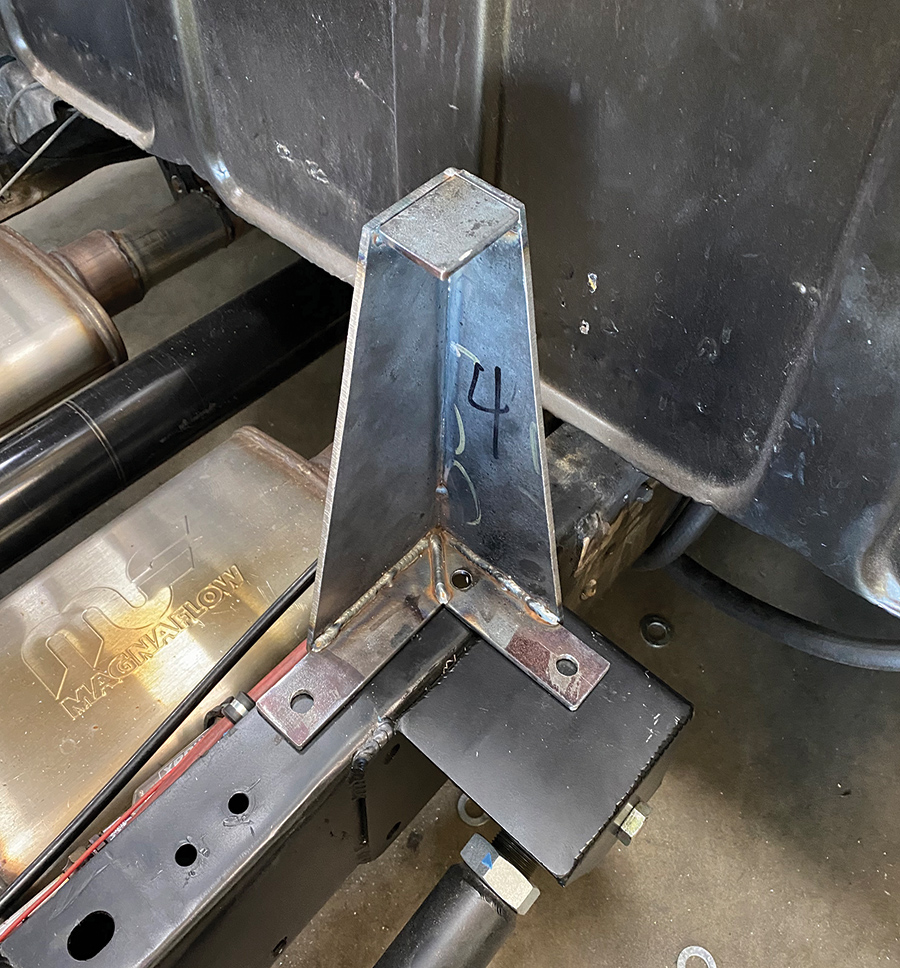
All kidding aside (for the most part), the more we lower our trucks, the more we have to deal with collateral damage, as it were—be it removing/severely modifying the inner front wheelhouses or, in this case, adapting a Fleetside bed floor and inner bedside panels to a recently installed, airbagged rear frame section with a huge kick-up/notch. The latter scenario is something we recently encountered at Jimenez Bros., and as it would turn out, I was able to do more than just observe.

Early last year, a customer brought his Silverado in for a Rydman Ranch rear notch install. At the time, the bed had already been completely modified (elevated bed floor, widened/sectioned wheeltubs, and so on) for a similar suspension job, so it was assumed the “molded” box would bolt back on with minor adjustments. Well … you know what they say about assuming.

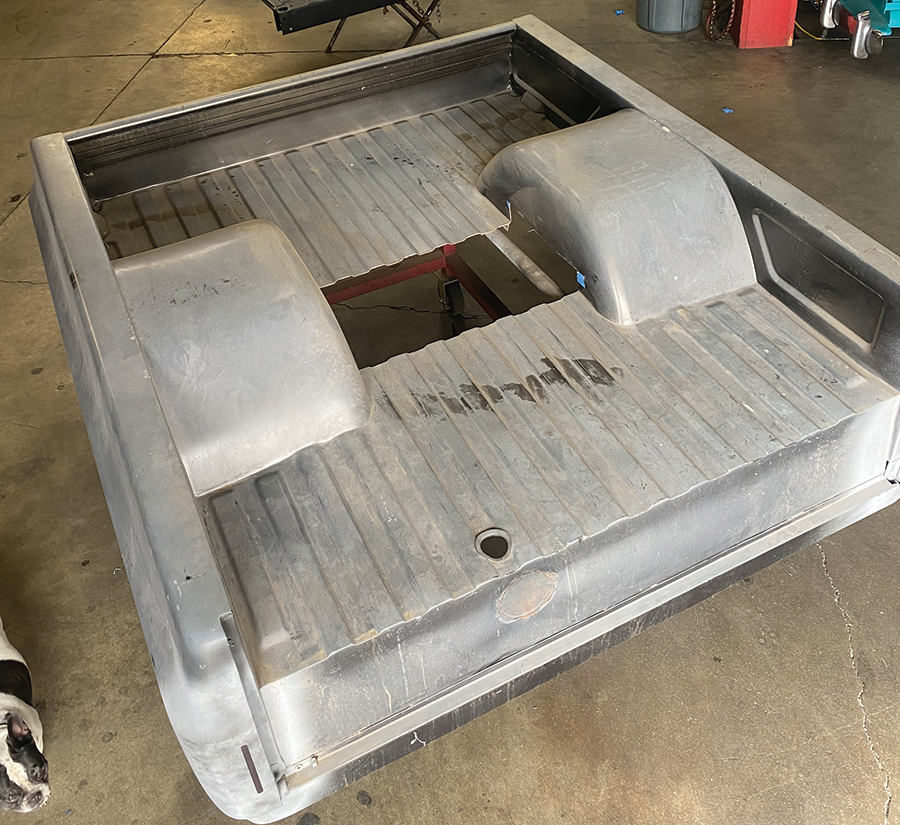
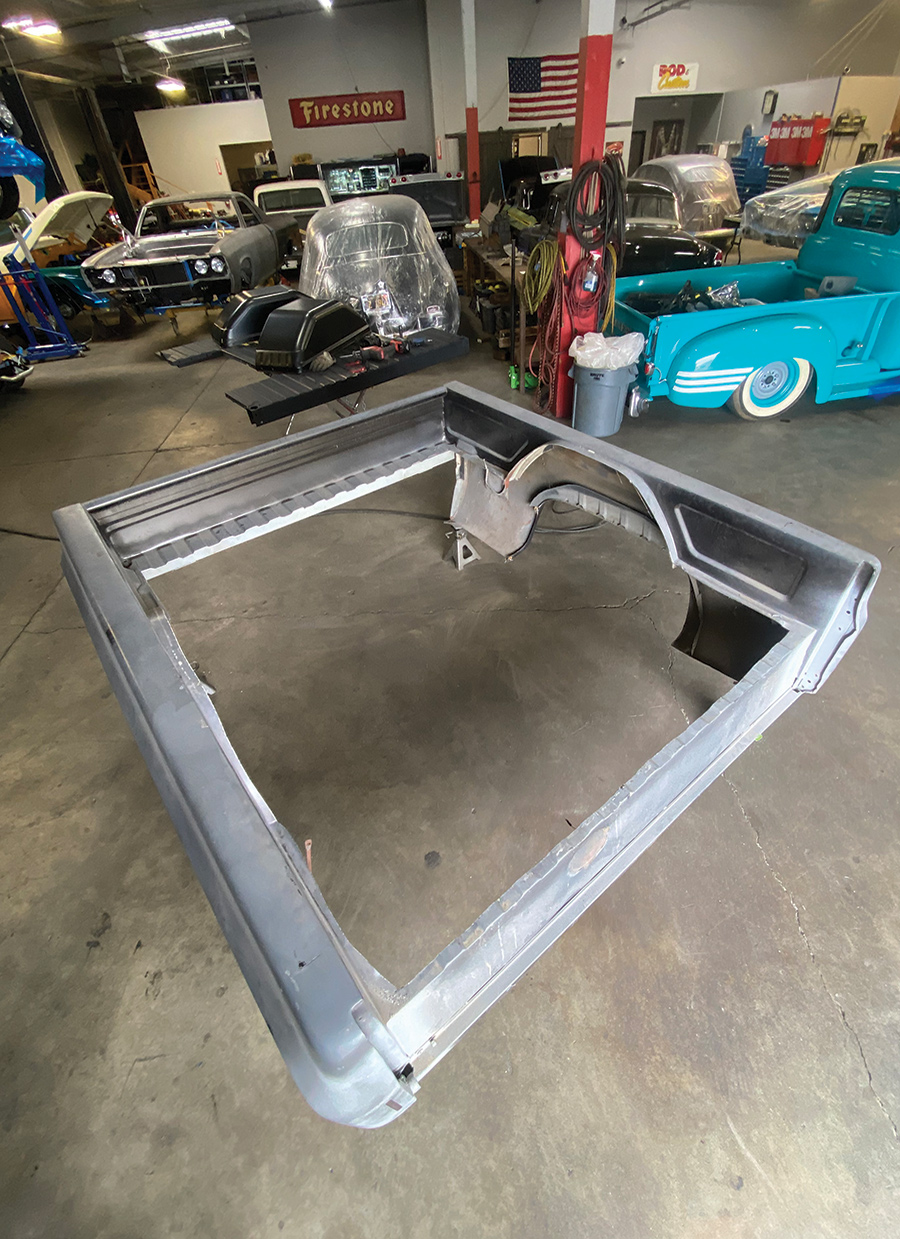
Upon attempting to reunite said bed with said back-halfed C10, it was discovered that not only was there no way the bed was going to fit without major surgery, the manner in which the previous work had been done was, well, let’s just say “hack job” would be an extremely polite way of putting it. All toll, the existing bed was junk, and the amount of time and labor to rectify that would be insurmountable, to say the least.

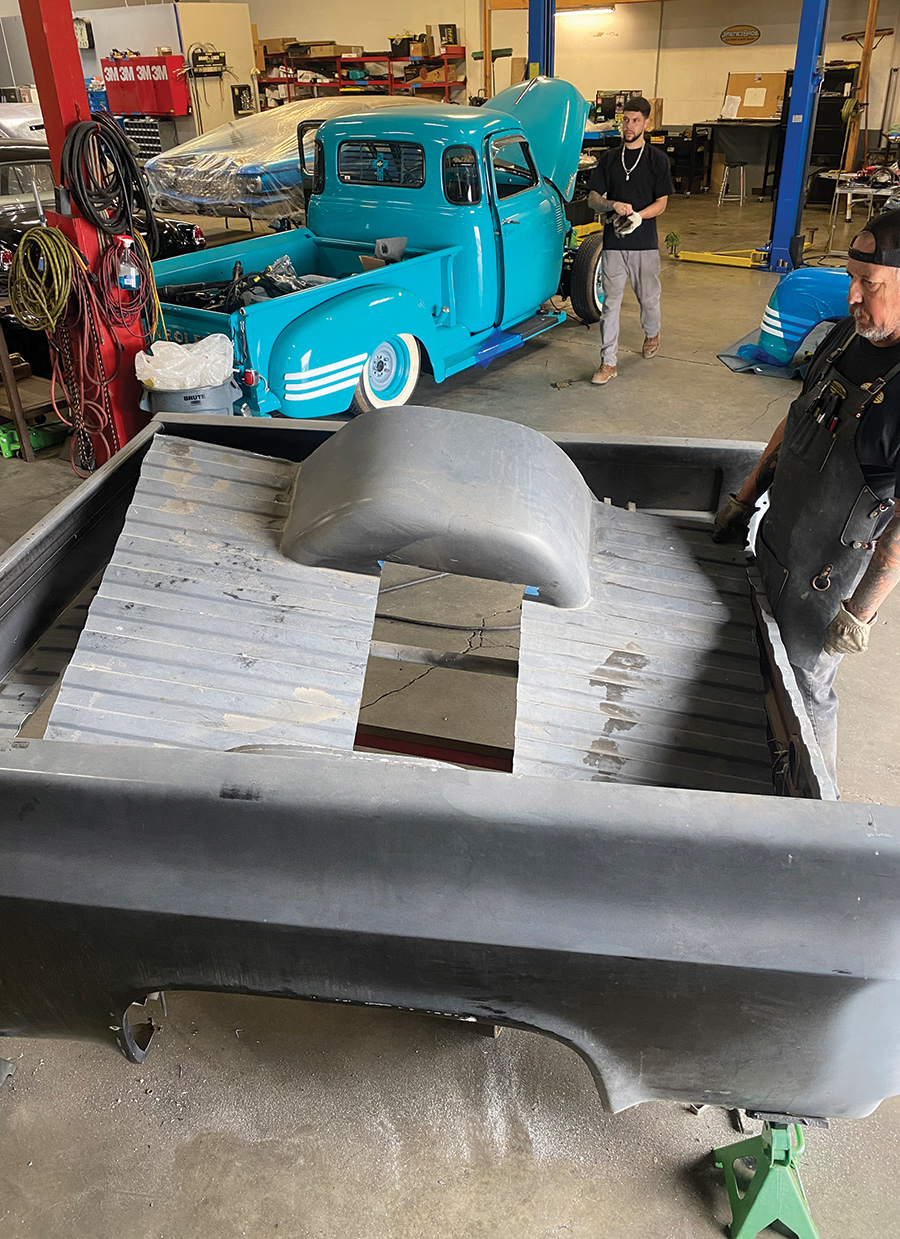
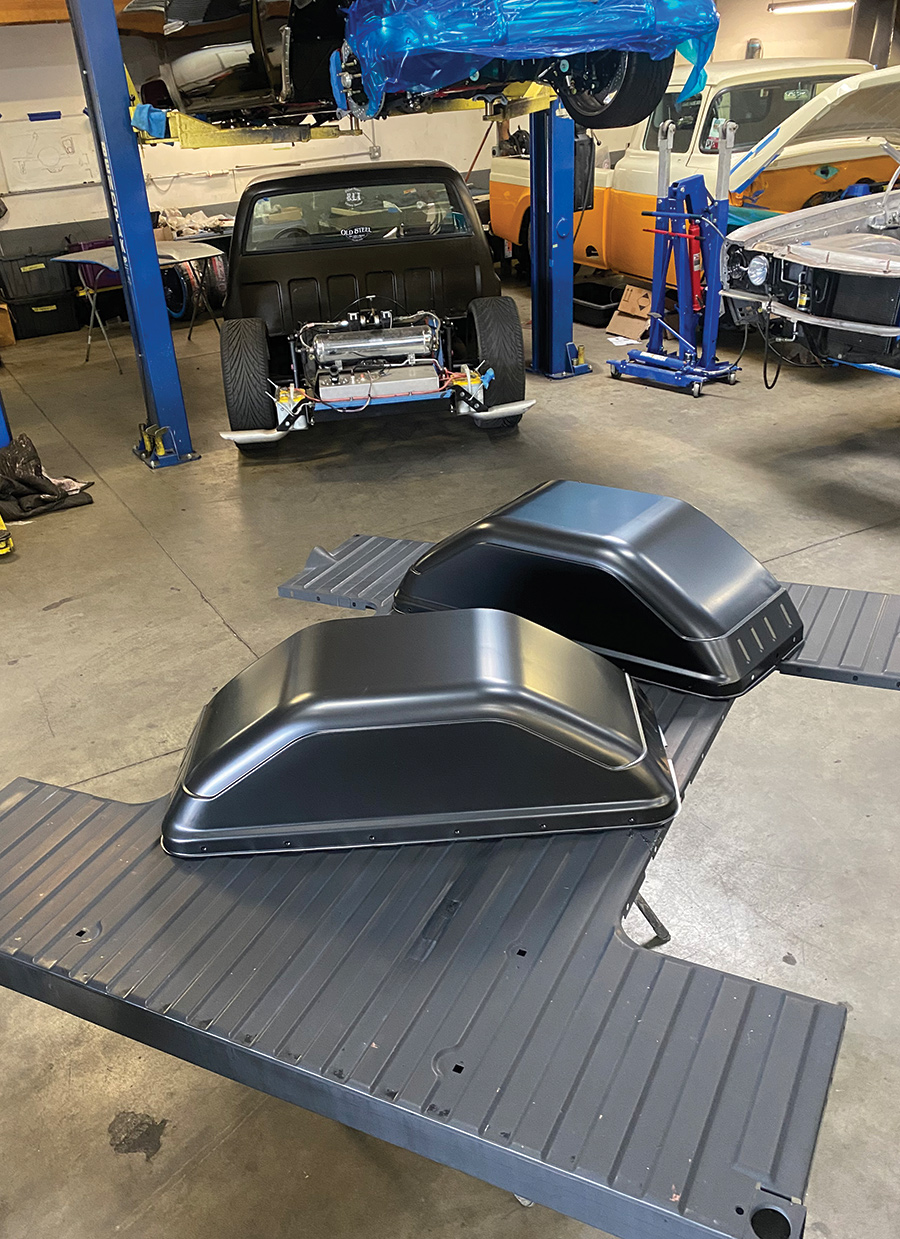
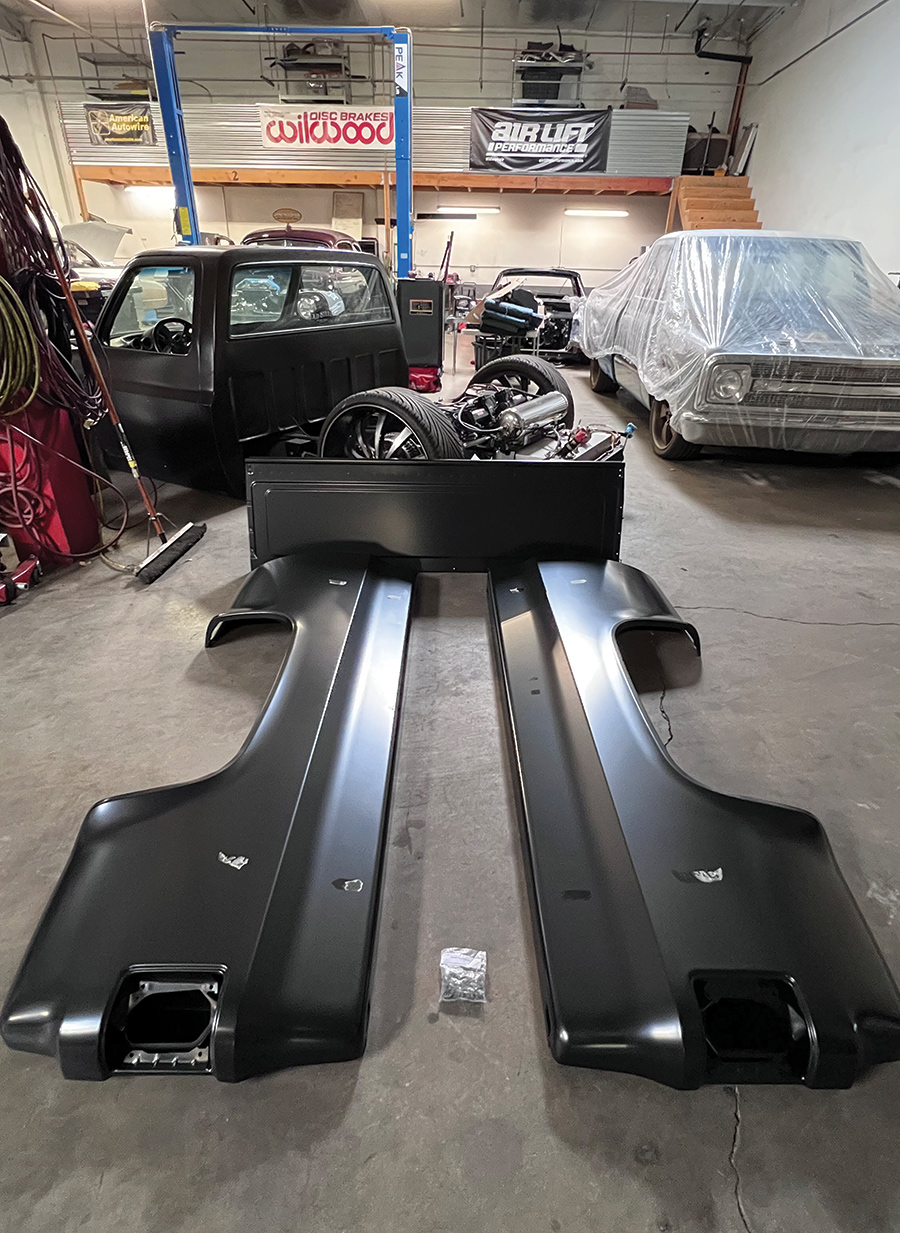
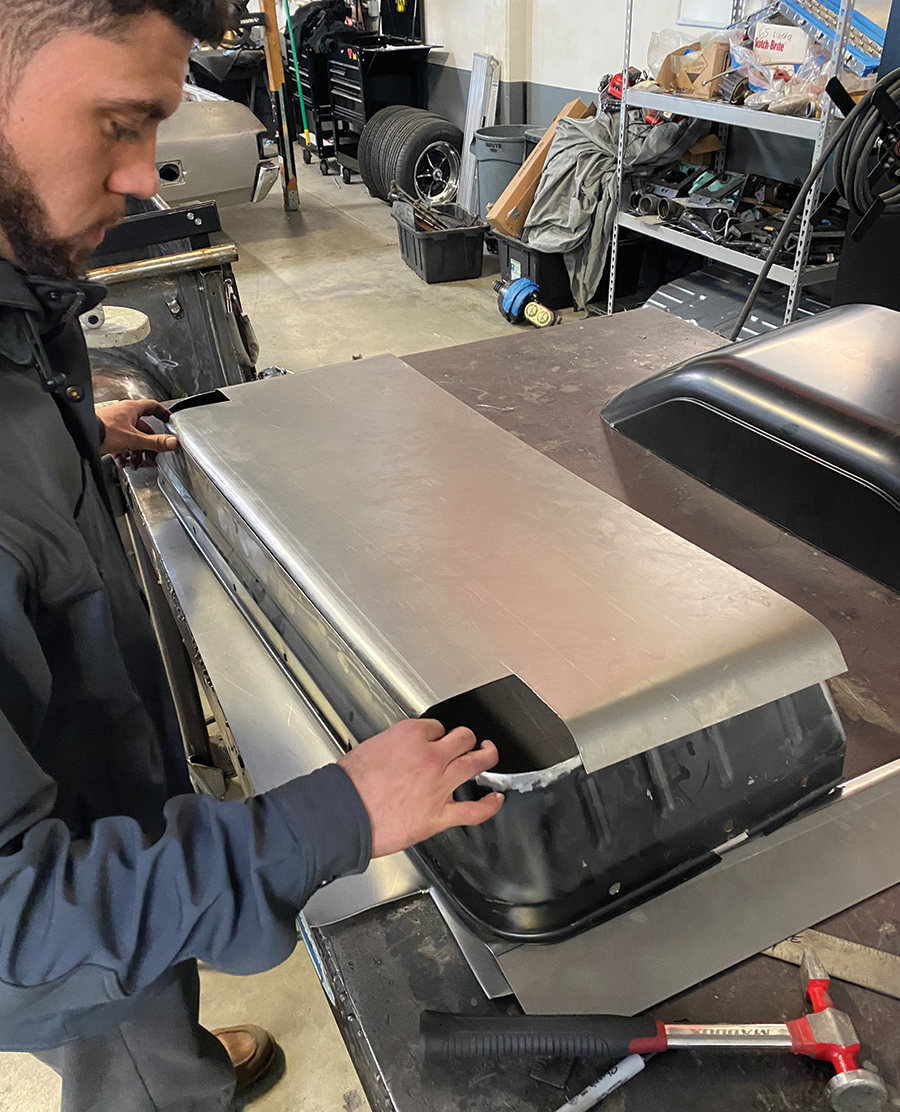
Here’s where I come in. Ironically enough, my pals at Auto Metal Direct (AMD) had just released their all-new 4-inch-wider wheeltubs and an accommodating bed floor for the ’73-78 GM shorties—and I’d just run a release on it, so it was rather fresh in the memory banks. Of course I suggested scrapping the efforts on the stock bed and, along with AMD’s new Squarebody Fleetside bedsides and front panel, build a bed the better way. Jimenez Bros. agreed, and the rest is this story!

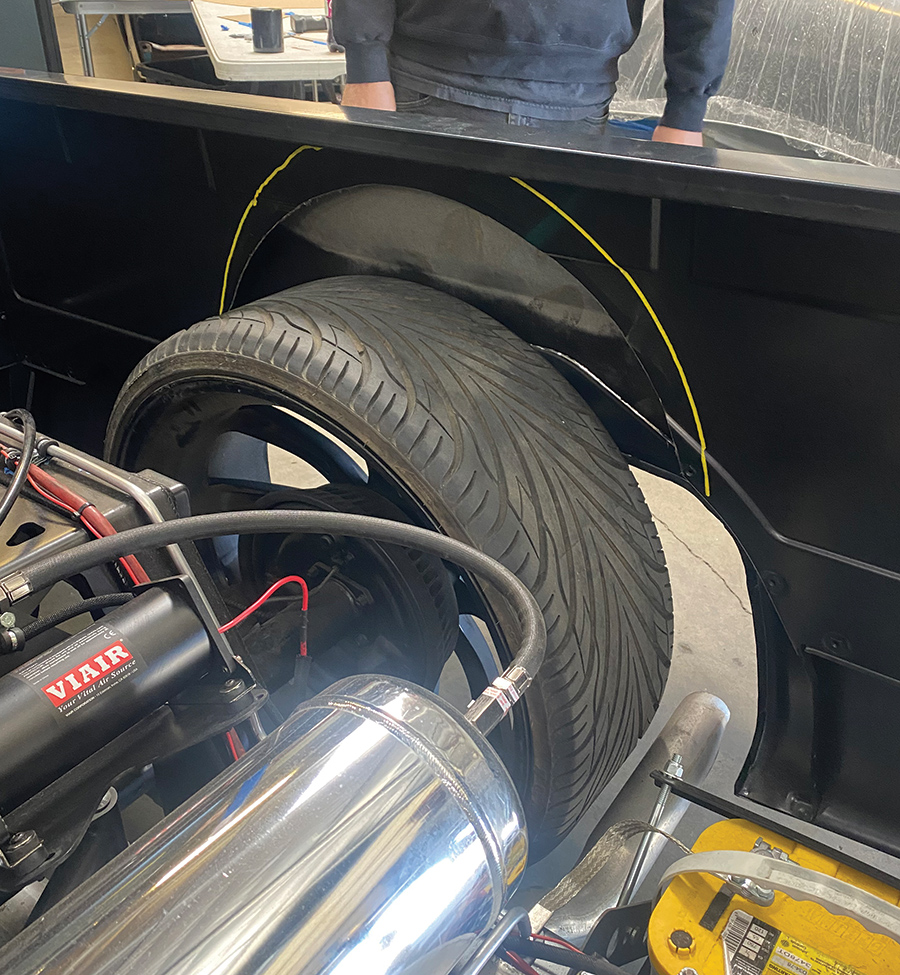
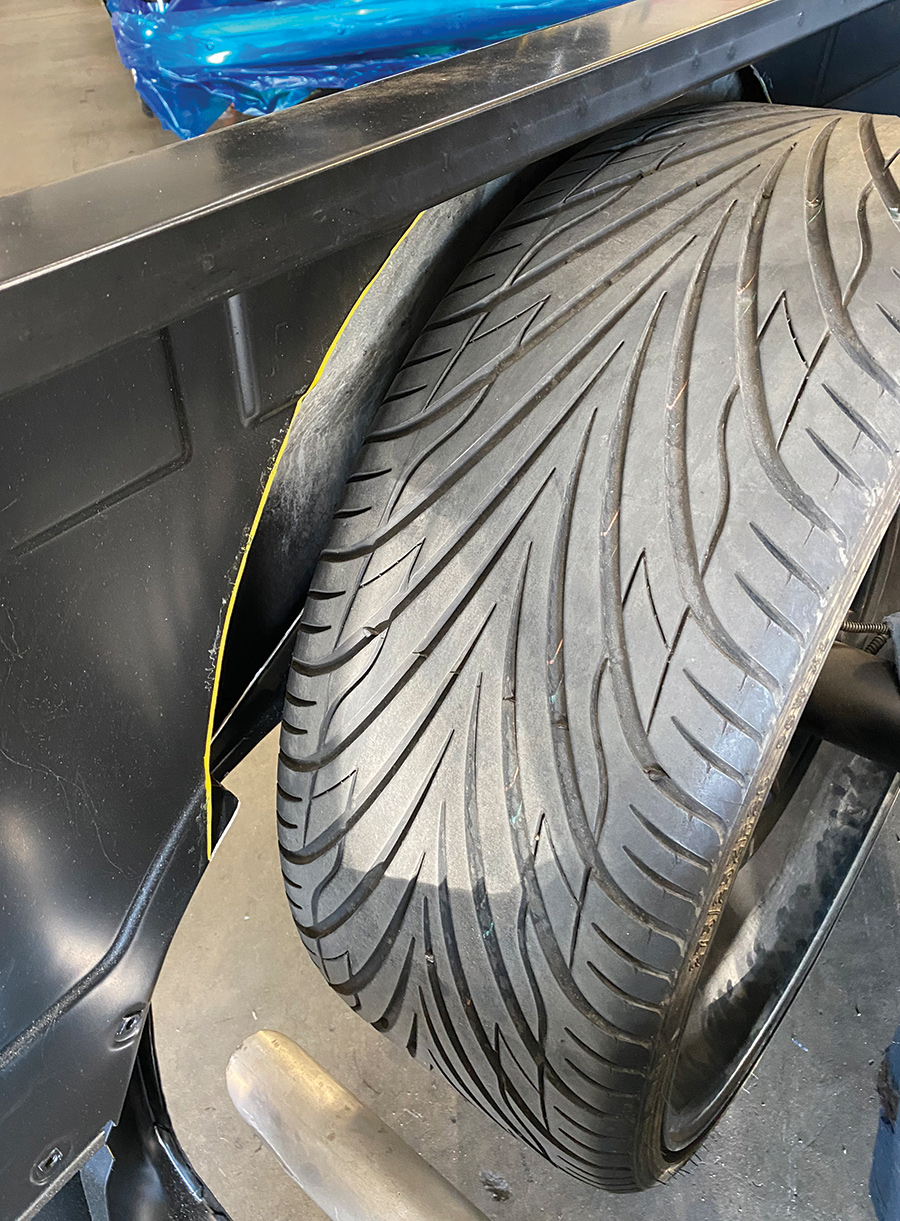
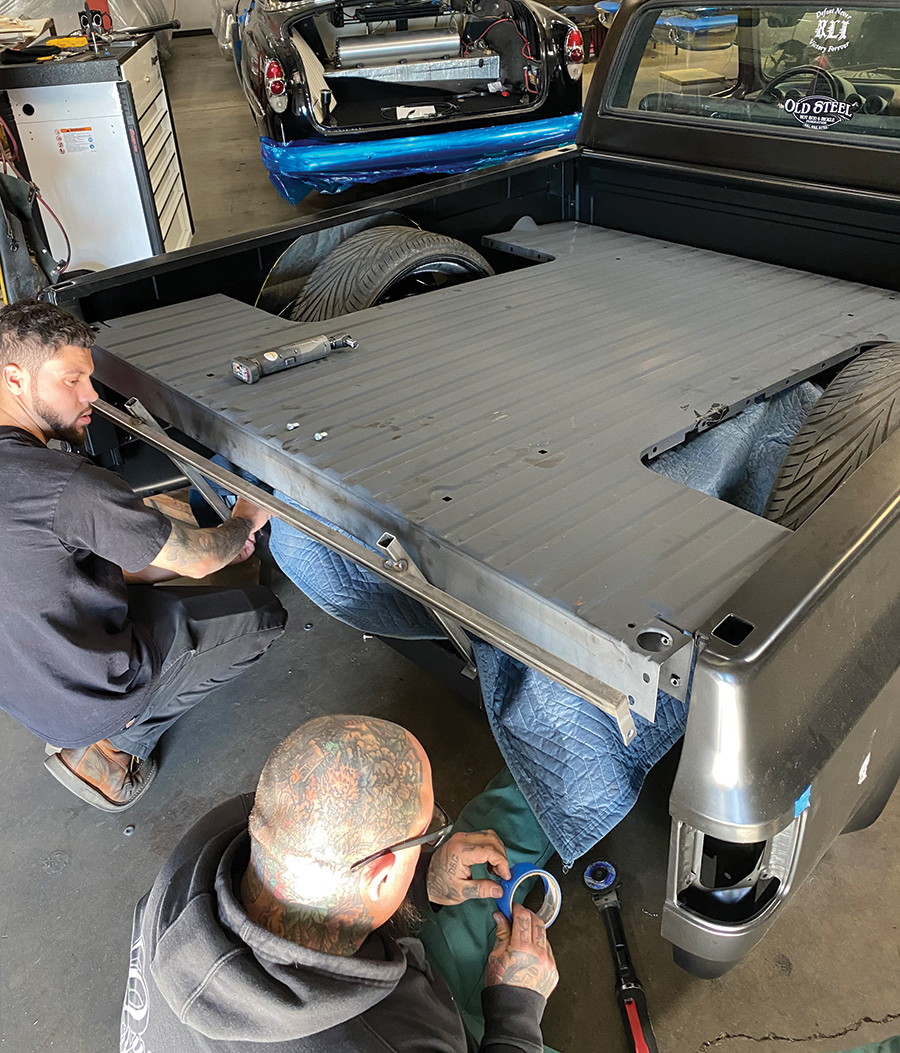
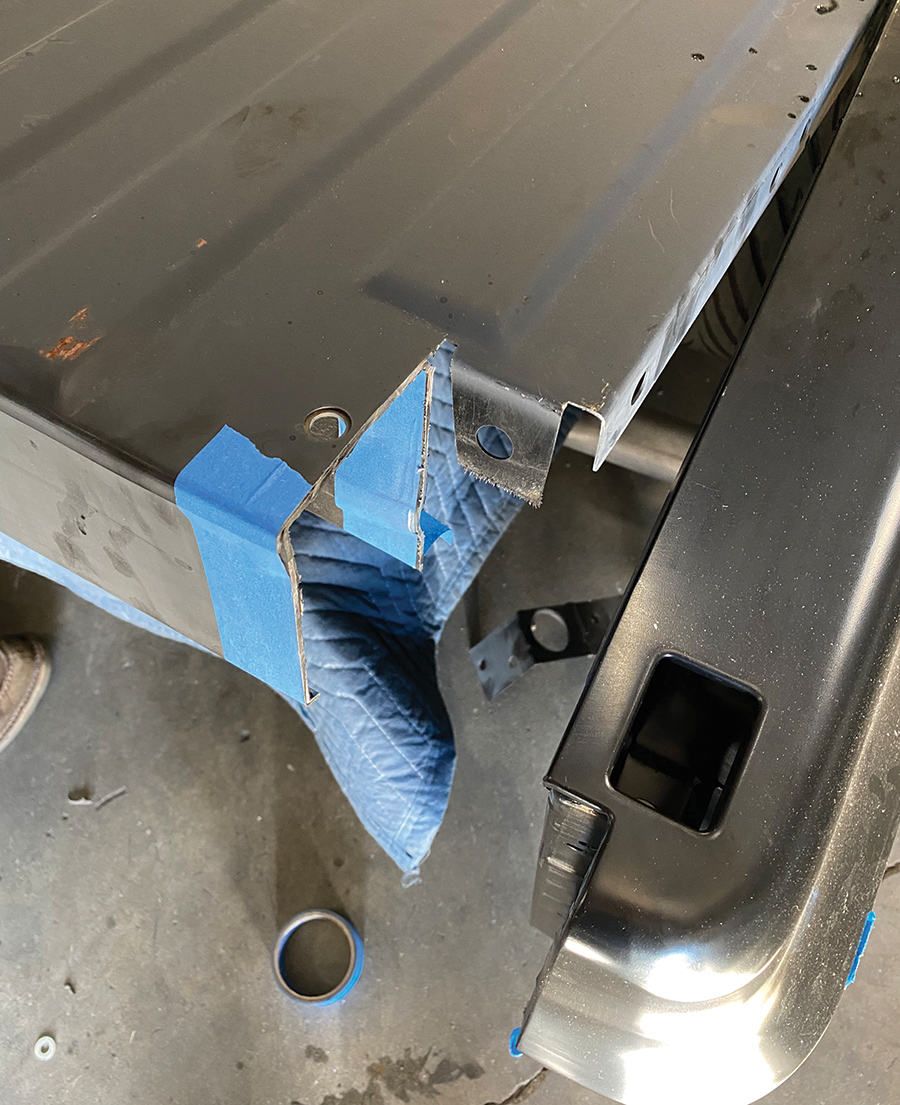
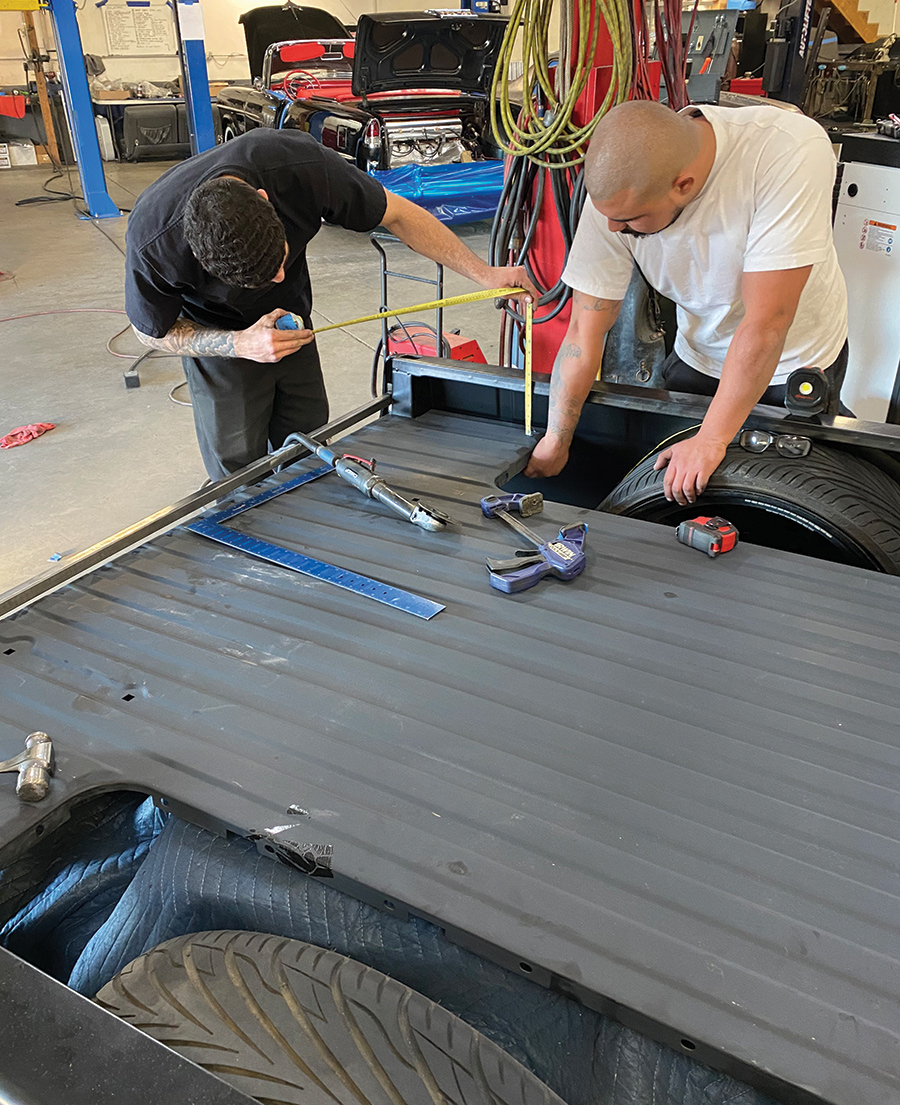
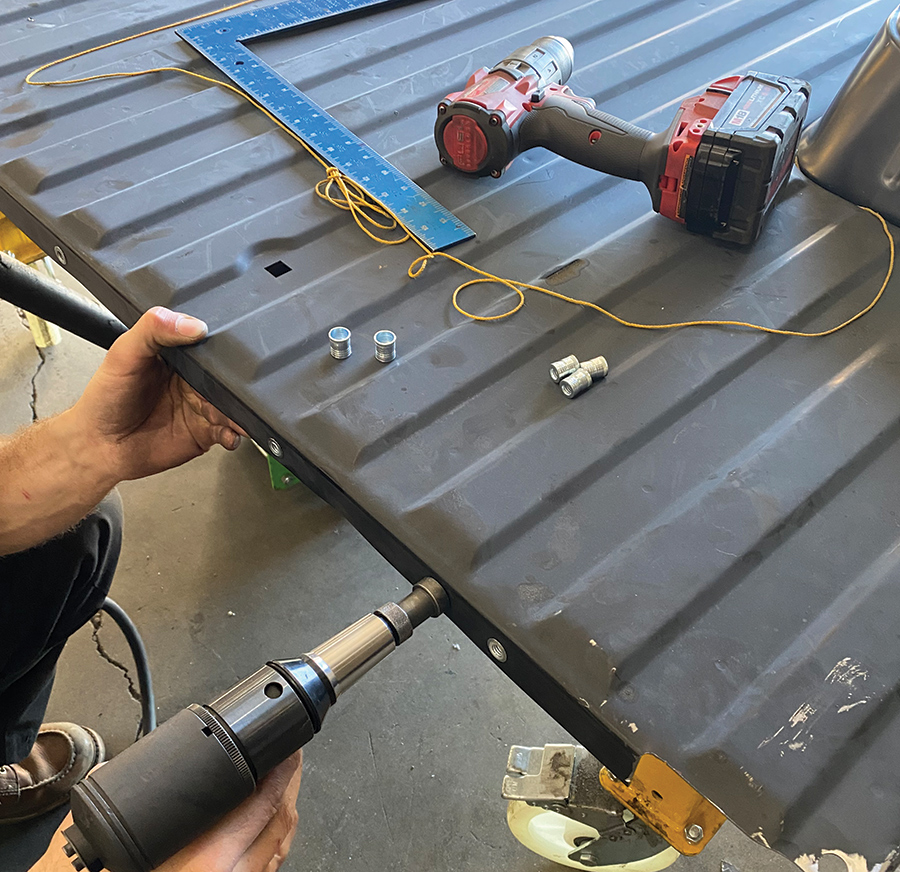
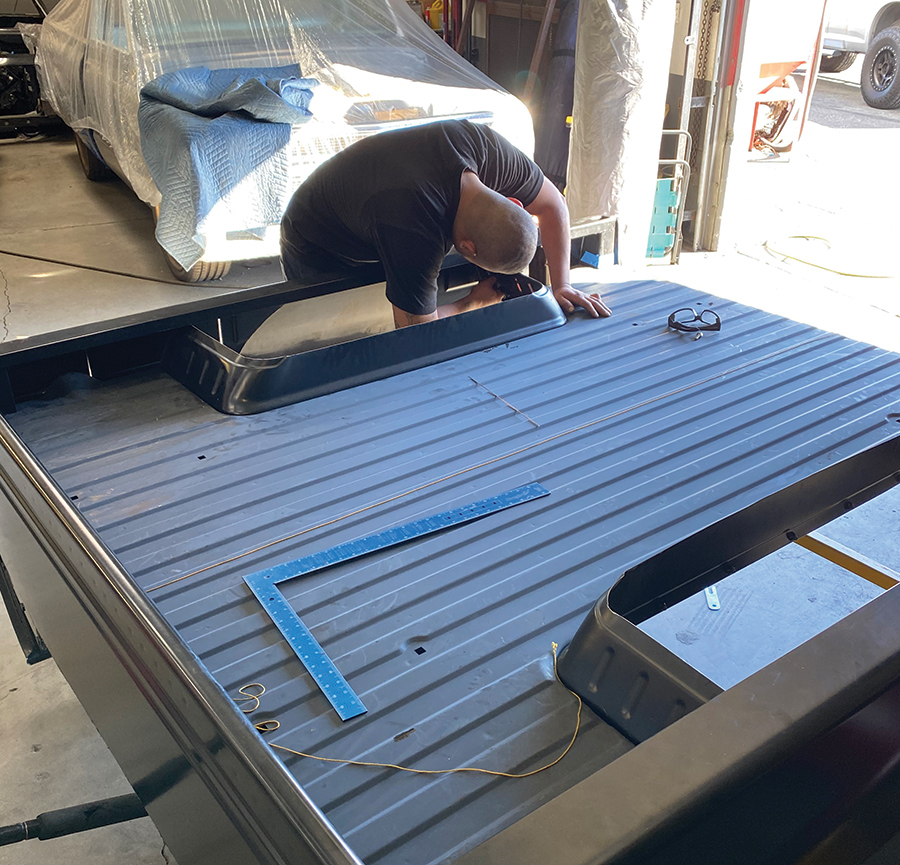
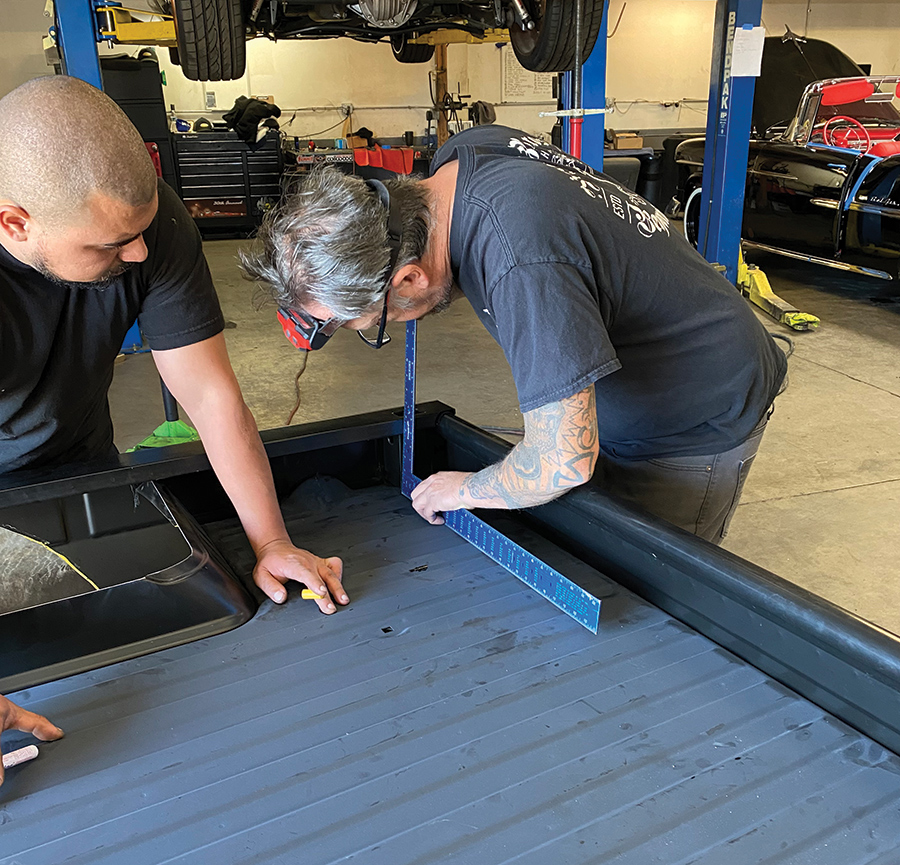
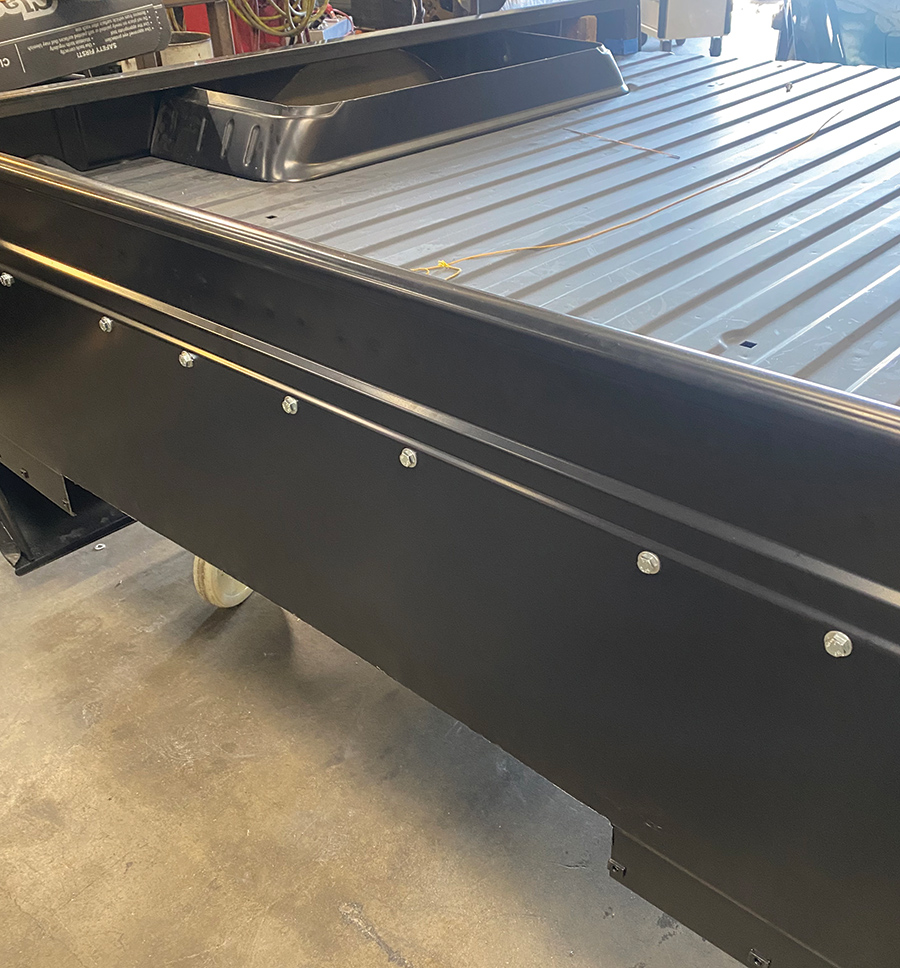
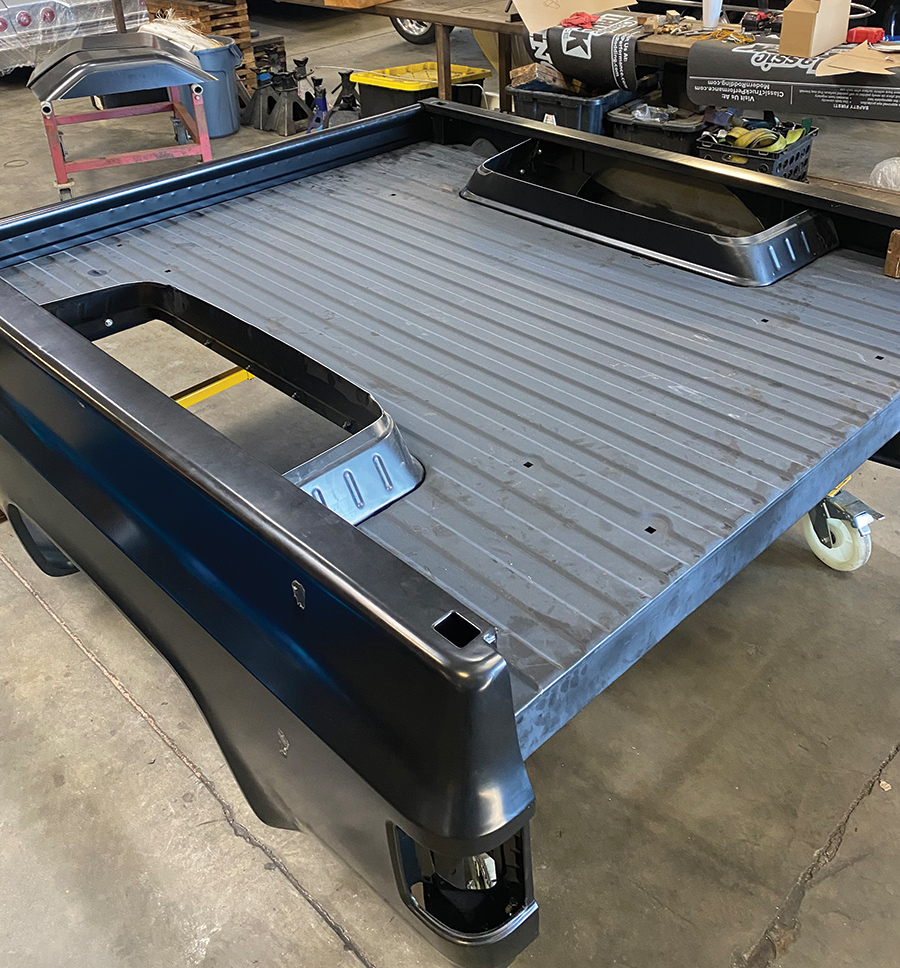
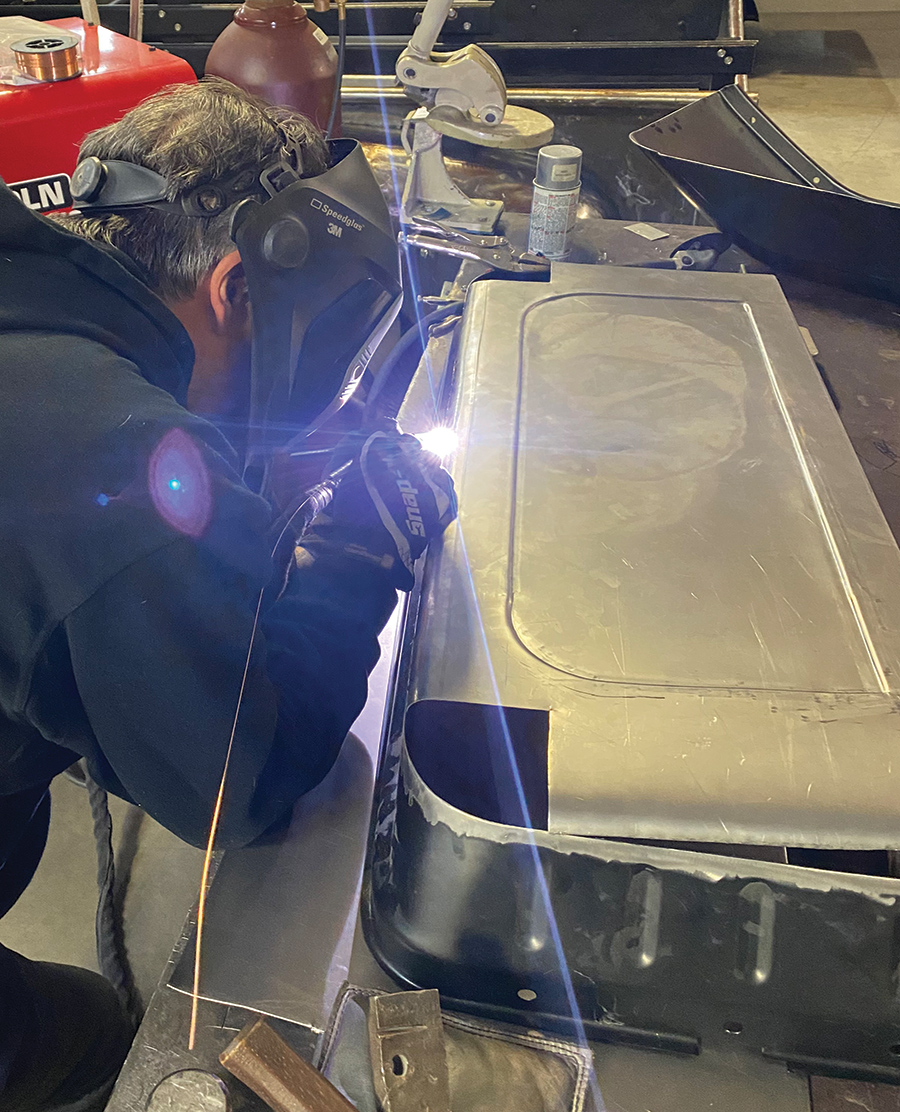
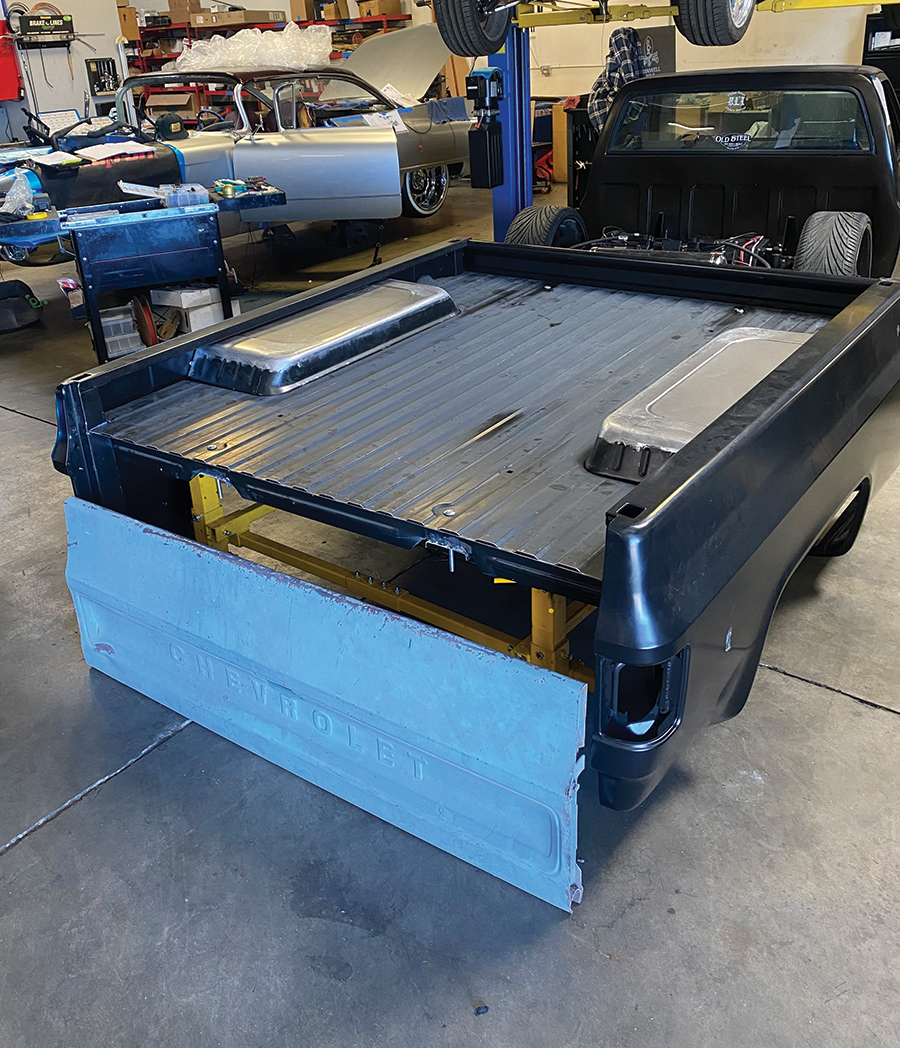
The first order of business once the new sheetmetal had arrived was to build the outer box and square it up on the Silverado’s modified chassis in relation to the (body-dropped) cab. Though not easy by definition, with all things considered that was the easy part; plotting and locating the raised bed floor and then surgically fitting the widened wheeltubs took a bit more mental—and physical—time to accomplish. But as the accompanying photos should help attest to, it was a task Jimenez Bros. was able to achieve, save for the custom rear panel!

A recent installation of a Rydman Ranch ’73-87 C10 rear notch subframe at Jimenez Bros.
1. A recent installation of a Rydman Ranch ’73-87 C10 rear notch subframe at Jimenez Bros. went smooth as silk, until …
Reinstalling the existing—and highly modified/molded—Fleetside bed didn’t come close to fitting.
2. … they went to reinstall the existing—and highly modified/molded—Fleetside bed. It didn’t come close to fitting.
Plan B was to dissect the entire floor and wheeltubs and utilize Auto Metal Direct’s all-new Squarebody bed floor assembly with 4-inch-wider wheeltubs (PN 790-4073-64S) with AMD’s accompanying 4-inch-wider wheelhouses (PN 760-4073-4).
3-4. So, Plan B was to dissect the entire floor and wheeltubs and utilize Auto Metal Direct’s all-new Squarebody bed floor assembly with 4-inch-wider wheeltubs (PN 790-4073-64S) with AMD’s accompanying 4-inch-wider wheelhouses (PN 760-4073-4). Sounded simple enough at the time …
The molded-together Fleetside bed that came off the Silverado. Let’s just say it was not usable for how Jimenez Bros. wanted to proceed.
5. … until we got down to the nitty-gritty (that’s not the actual word I wanted to use, but it rhymes with gritty!) of the molded-together Fleetside bed that came off the Silverado. Let’s just say it was not usable for how Jimenez Bros. wanted to proceed, so …
A pair of AMD’s smooth 1/2-ton short bedsides (’76-80 LH/’81-87 RH; smooth, no gas filler holes) and front bed panel.
6. … we ordered up a pair of AMD’s smooth 1/2-ton short bedsides (’76-80 LH/’81-87 RH; smooth, no gas filler holes) and front bed panel.
With the original plan—and bed—literally scrapped, the first step in Plan B: build the better (new) box!
7-8. With the original plan—and bed—literally scrapped, the first step in Plan B: build the better (new) box!
The Silverado cab had been channeled onto the frame (believe the kids call that “body-dropped”!) and, as such, some modifications had to be made to initially set and square up the box.
9-10. Now, as mentioned in the story, the Silverado cab had been channeled onto the frame (believe the kids call that “body-dropped”!) and, as such, some modifications had to be made to initially set and square up the box.
Since the floor will be “highly” elevated, the bed floor’s integrated rear crossmember will not locate and mount the rear of the bed as it normally would; for now, a temporary square-tube brace was used.
11. Since the floor will be “highly” elevated, the bed floor’s integrated rear crossmember will not locate and mount the rear of the bed as it normally would; for now, a temporary square-tube brace was used.
Using a chalk string, the bed was positioned and squared up in reference to the cab as it’s currently mounted.
12. Using a chalk string, the bed was positioned and squared up in reference to the cab as it’s currently mounted.
During this process, the rear suspension was articulated, which revealed that the inner bed side panel at the wheel opening needed to be relieved in order to fit the 26-inch wheels (anything below 22 inches would not have required this!).
13-14. During this process, the rear suspension was articulated, which revealed that the inner bed side panel at the wheel opening needed to be relieved in order to fit the 26-inch wheels (anything below 22 inches would not have required this!).
With the bed situated where it needed to be, the new AMD floor was dropped in place and preparations made to locate it “above” the Rydman Ranch frame section.
15. With the bed situated where it needed to be, the new AMD floor was dropped in place and preparations made to locate it “above” the Rydman Ranch frame section.
Right off the bat the rear corners of the bed floor would have to be clearanced to fit “around” the rear stake pockets, while the front stake pockets would have to be sectioned upward.
16. Right off the bat we knew the rear corners of the bed floor would have to be clearanced to fit “around” the rear stake pockets, while the front stake pockets would have to be sectioned upward.
Now, with the initial clearancing done, it was just a matter of fine-tuning the exact elevated placement of the bed floor within the box.
17-18. Now, with the initial clearancing done, it was just a matter of fine-tuning the exact elevated placement of the bed floor within the box.
As that was being done, a suggested possibility was floated around of using Rivnuts to not only secure the bed floor to the front panel in its new location, but also along the bedsides, too, as the original mounting holes/locations would no longer apply.
19. As that was being done, I suggested the possibility of using Rivnuts to not only secure the bed floor to the front panel in its new location, but also along the bedsides, too, as the original mounting holes/locations would no longer apply.
The fortunate part about the 4-inch-wider tubs—they’re 4 inches wider and, along with the bed floor, more than adequately accommodate the larger-than-necessary rear wheels/tires.
20. The fortunate part about the 4-inch-wider tubs—they’re 4 inches wider and, along with the bed floor, more than adequately accommodate the larger-than-necessary rear wheels/tires. The unfortunate part …
The unfortunate part ... was to section them to accommodate the elevated bed floor! Guess that’s not as bad as having to widen them AND the wheel openings in the bed floor, which is why AMD was called in the first place.
21. … we had to section them to accommodate the elevated bed floor! Guess that’s not as bad as having to widen them AND the wheel openings in the bed floor, which is why we called on AMD in the first place.
Now that the tubs were trimmed and fitted, one last squaring up on the bed floor came was achievable
22. Now that the tubs were trimmed and fitted, we could do one last squaring up on the bed floor before …
Before finally mounting it to the bed itself using the installed Rivnuts, now a solid box can be worked with moving forward.
23-24. … finally mounting it to the bed itself using the installed Rivnuts. Now we’ve got a solid box to work with moving forward.
With the floor secured that allowed to make measurements and fab up the bed mounting pedestals, as such, resulted in two main up front with two main rears and two smaller support brackets off the frame notch.
25. With the floor secured that allowed us to make measurements and fab up the bed mounting pedestals, as such. Two main up front with two main rears and two smaller support brackets off the frame notch.
Throughout the process, utilizing (relying on) a body dolly from Jeg’s resulted in having a means in which to support and mobilize the bed made a huge difference.
26. Throughout the process, we’d be utilizing (relying on) a body dolly from Jeg’s. Having a means in which to support and mobilize the bed made a huge difference.
OK, bed floor and box mounted onto the frame via custom-fabbed pedestals—now all that’s left is to finish the rest!
27. OK, bed floor and box mounted onto the frame via custom-fabbed pedestals—now all that’s left is to finish the rest!
The major part of “the rest” was to fill the holes atop the wheelhouses. Rather than attempt to slice up and widen the old upper pieces, it was decided that making all-new lids would be the method.
28. The major part of “the rest” was to fill the holes atop the wheelhouses. Rather than attempt to slice up and widen the old upper pieces, it was decided that making all-new lids would be the method.
The new upper wheelhouse sections were made from one piece of 18-gauge cold roll, the same material the tubs are stamped out of. As seen, the front/rear and side edges were formed into the main piece.
29-30. The new upper wheelhouse sections were made from one piece of 18-gauge cold roll, the same material the tubs are stamped out of. As you can see, the front/rear and side edges were formed into the main piece.
The corners, on the other hand, were formed individually and grafted in place. A bead roll was added to the top for strength as well as appearance’s sake.
31. The corners, on the other hand, were formed individually and grafted in place. A bead roll was added to the top for strength as well as appearance’s sake.
Reinstalling the existing—and highly modified/molded—Fleetside bed didn’t come close to fitting.
32. There’s still some finishing metalwork to be done, but for now you get the idea! Also note that the rear bed floor crossmember has been removed.
This was done to allow the tailgate to fit/close, but before that Jimenez Bros. needs to fabricate the custom rear filler panel, which will include gas filler and battery jumper provisions. For the intents and purposes, the Better Bed Box is good to go.
33. This was done to allow the tailgate to fit/close, but before that Jimenez Bros. needs to fabricate the custom rear filler panel, which will include gas filler and battery jumper provisions. For our intents and purposes, the Better Bed Box is good to go.
 SOURCES
AUTO METAL DIRECT
(888) 255-3485
autometaldirect.com

JIMENEZ BROS.
(951) 992-2335