TECH
InTheGarageMedia.com
BY Rob FortierPhotography By THE AUTHOR
RADIO UN-DELETED
Brothers Trucks’ 1964-1966 Dash Patch
I

t won’t be long before the word “radio” will have no relevance whatsoever with late-model trucks—if that’s not already the case. But when it comes to the classics we deal with—at least those manufactured from the late ’40s on up—it’s almost uncommon not to find one with a factory radio … or at least the carnage of what was once accommodations for a radio in the dash!

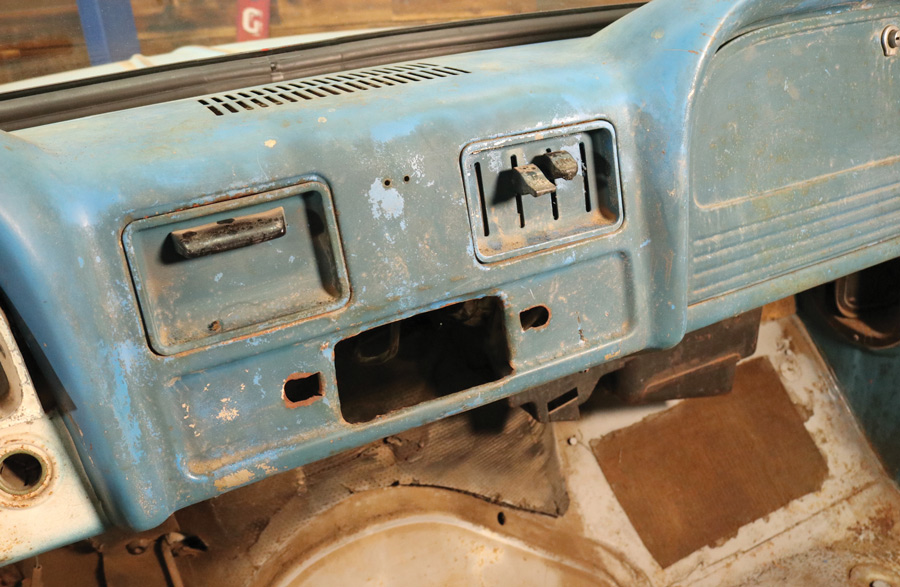
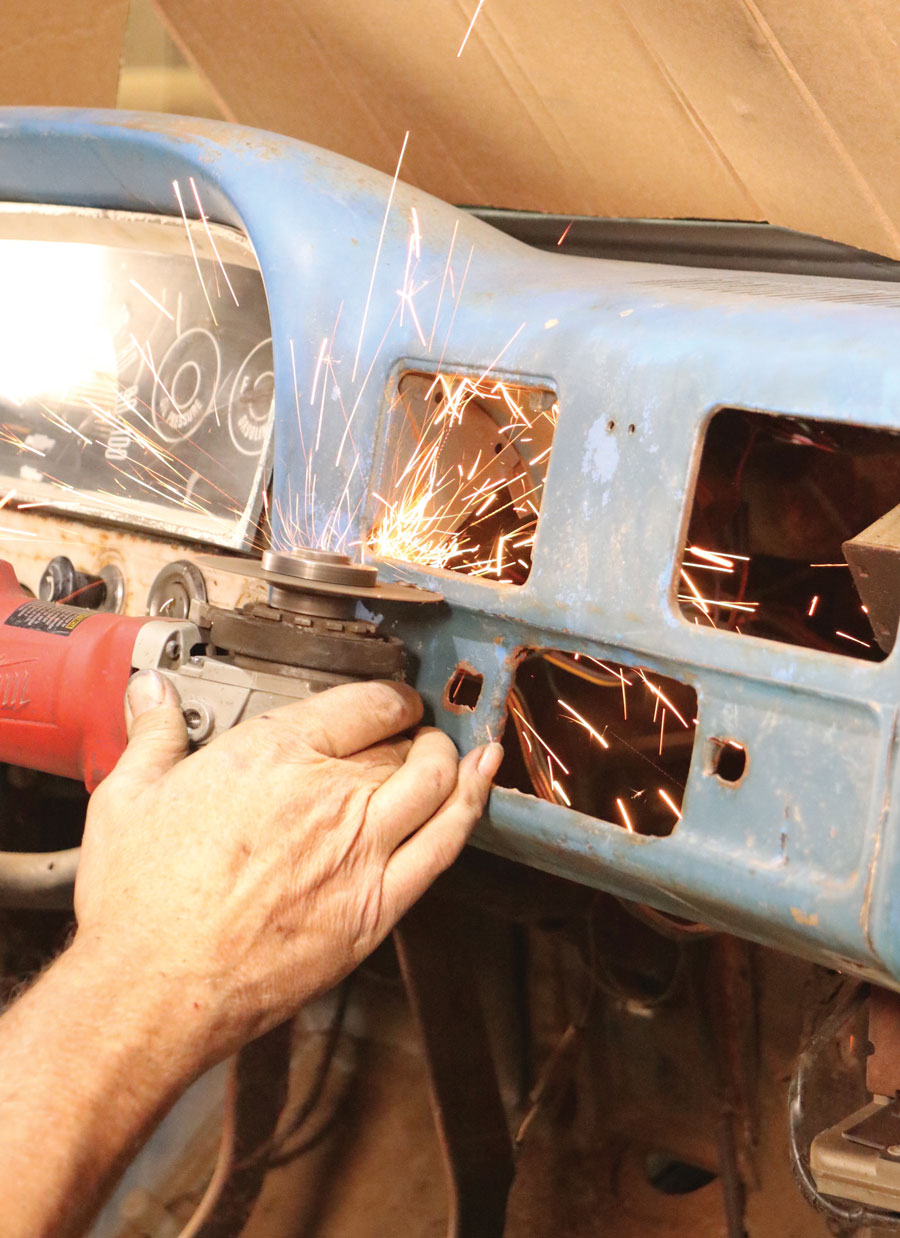
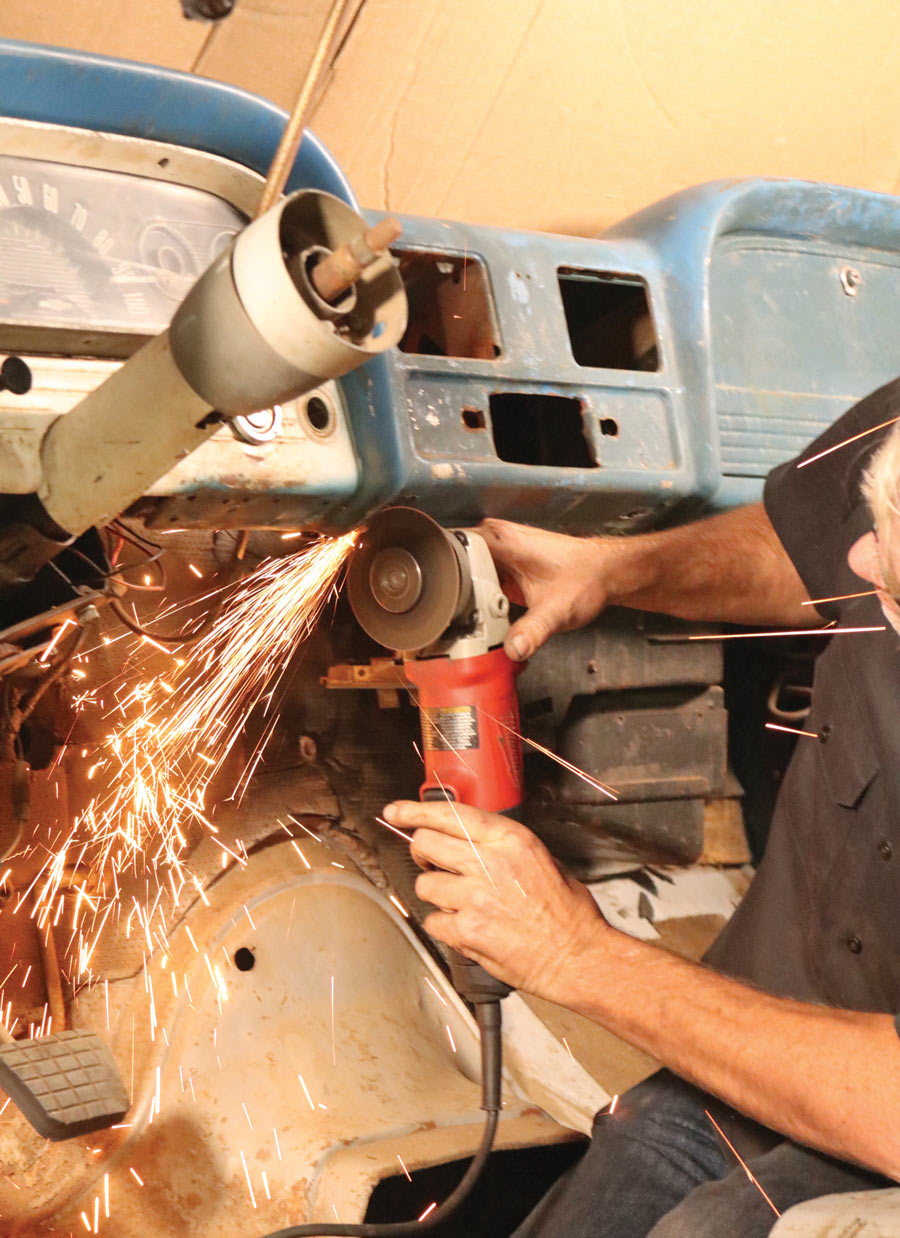
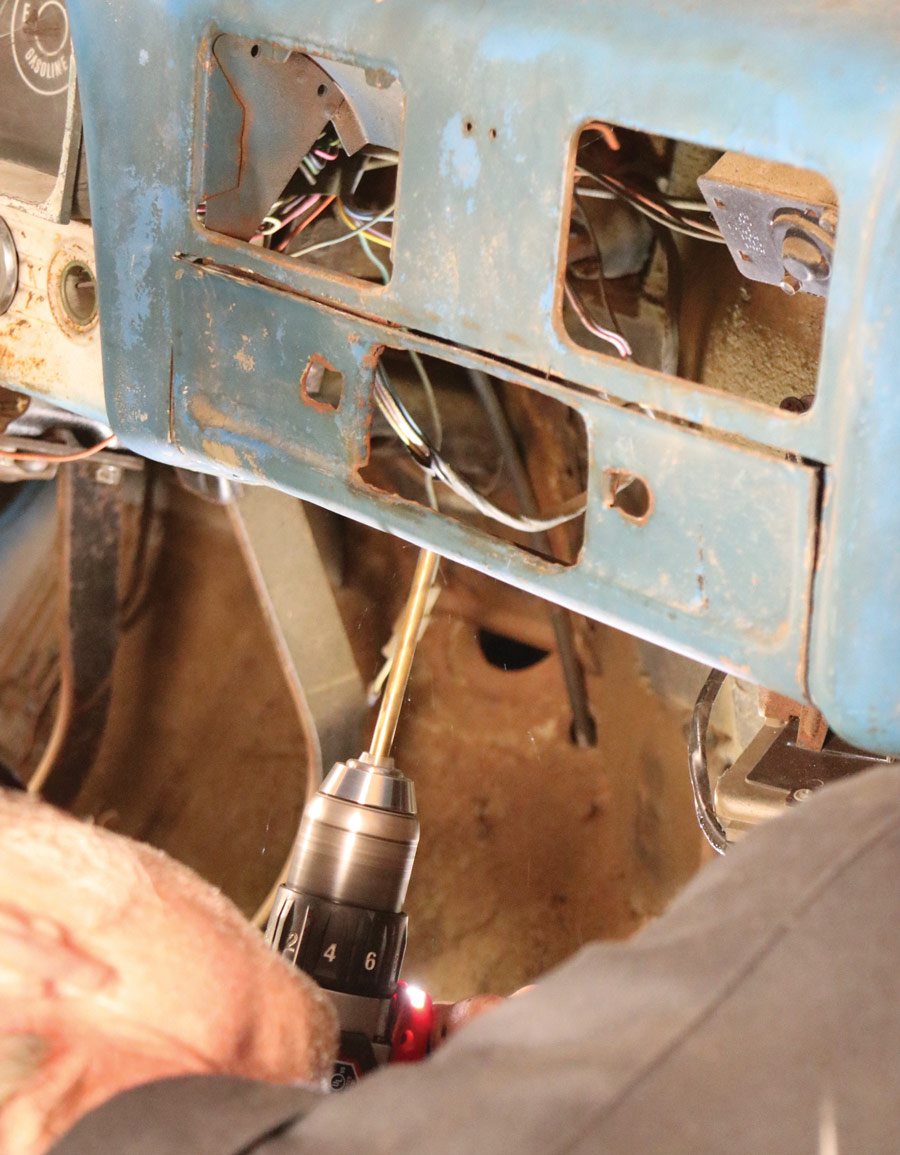
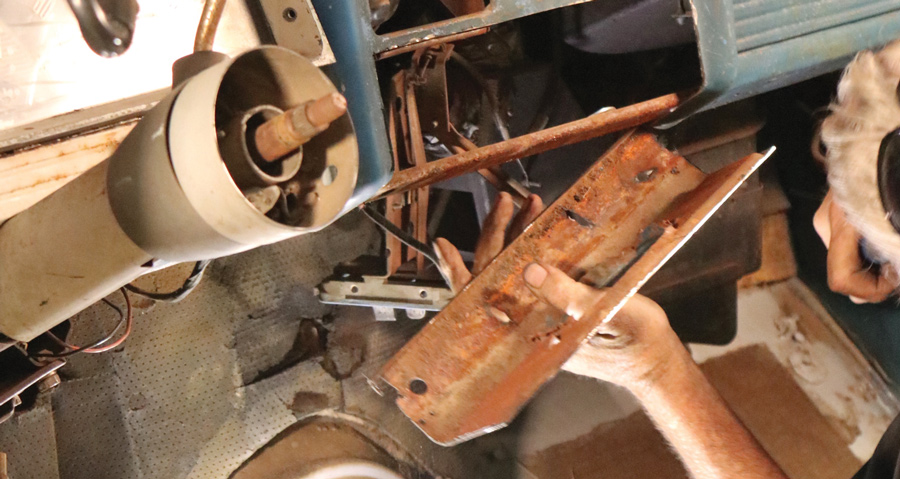
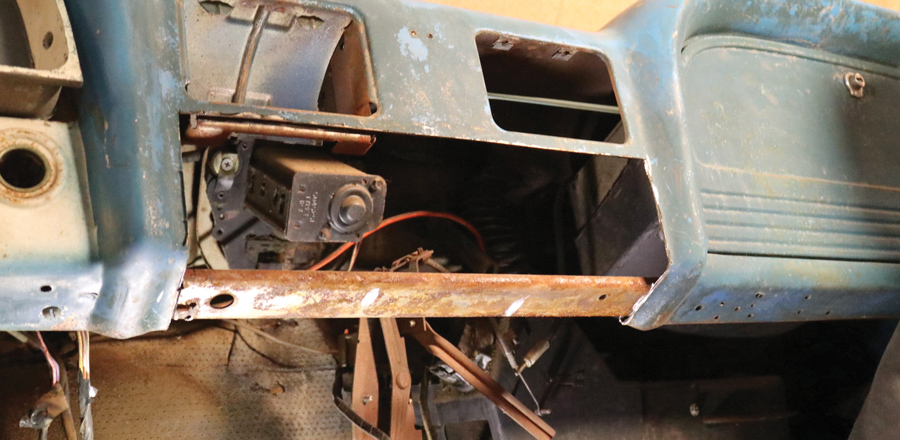
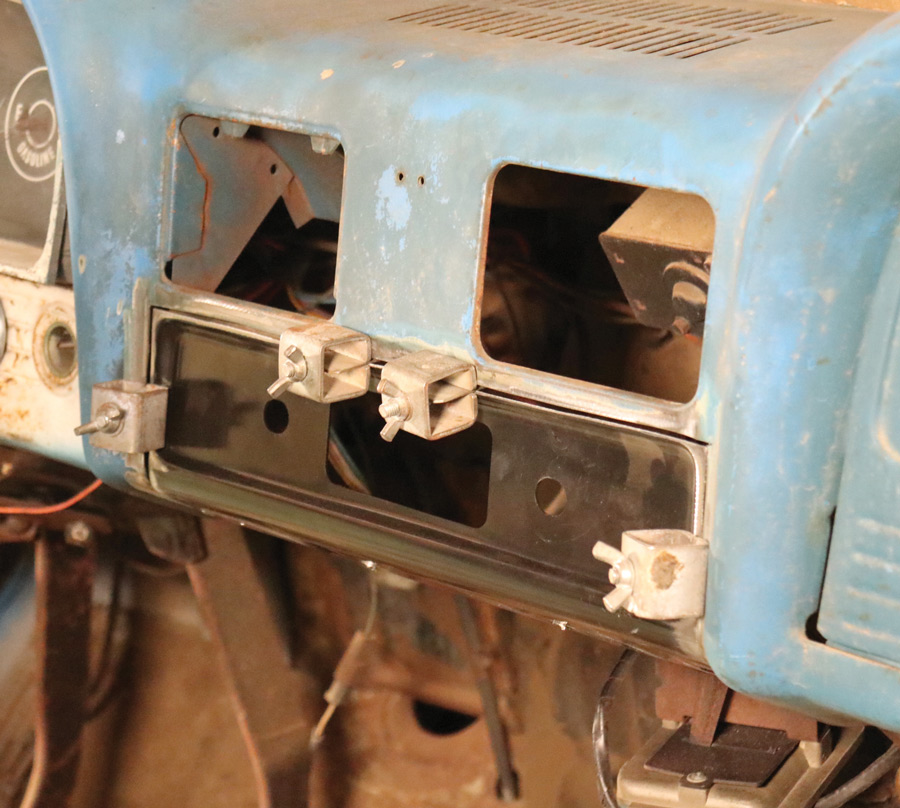
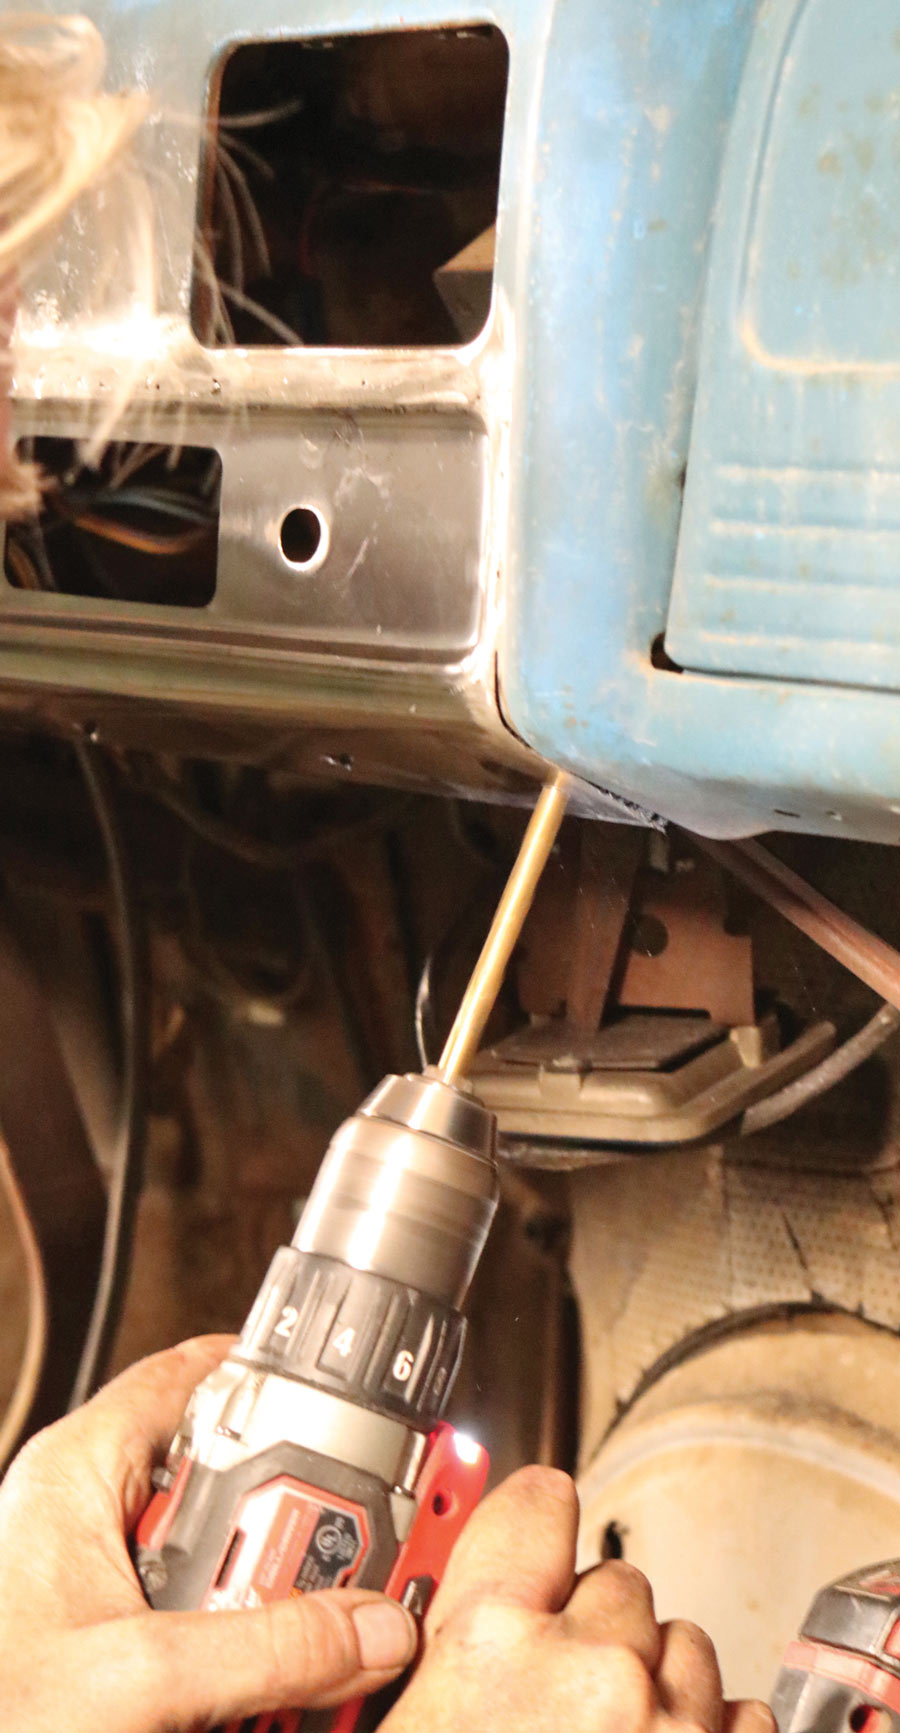
It’s the last statement that many of us find ourselves dealing with—that being a dash butchered up at some point or another in an effort to fit a “non-stock” radio—and oftentimes in a not-so-pleasant manner if the end result is to ultimately put a stock-type radio back in service.

While the majority of early automotive radios ranged dramatically in size up through the ’50s, most standard two-knob radios found in trucks manufactured in the ’60s through the ’80s all had basically the same size fascia features, which meant (most standard) aftermarket radios were direct bolt-ins. Factor in the fancy media options, such as 8-track and cassette tape features, and the size ranges were anything but common. And making things worse, by 1984, Germany came up with the DIN (Deutsches Institut für Normung) size radio, which literally changed the face of car audio for the next couple decades. Now, what does all of that have to do with classic trucks? Simple: Chances are someone at some point has attempted to install one of said non-stock radios and, in the process, made a mess of your dash.

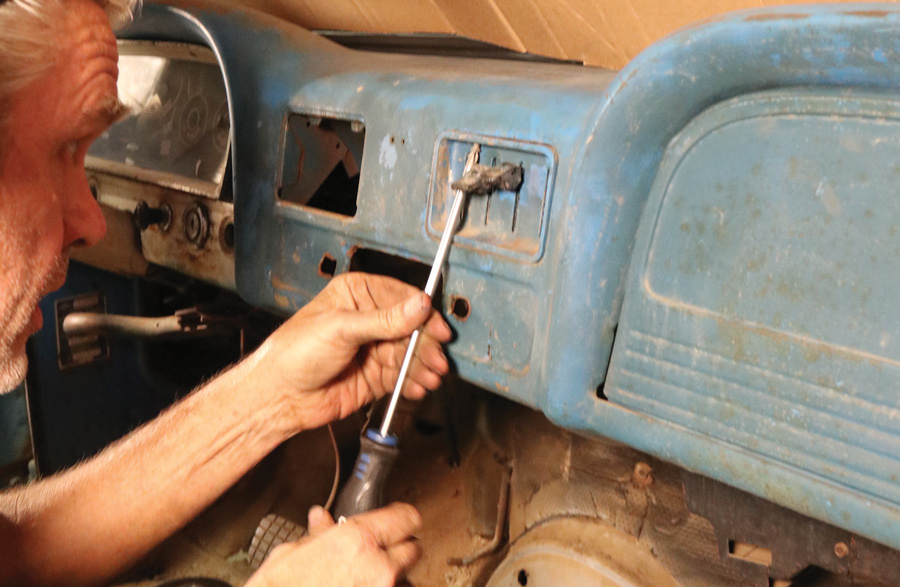
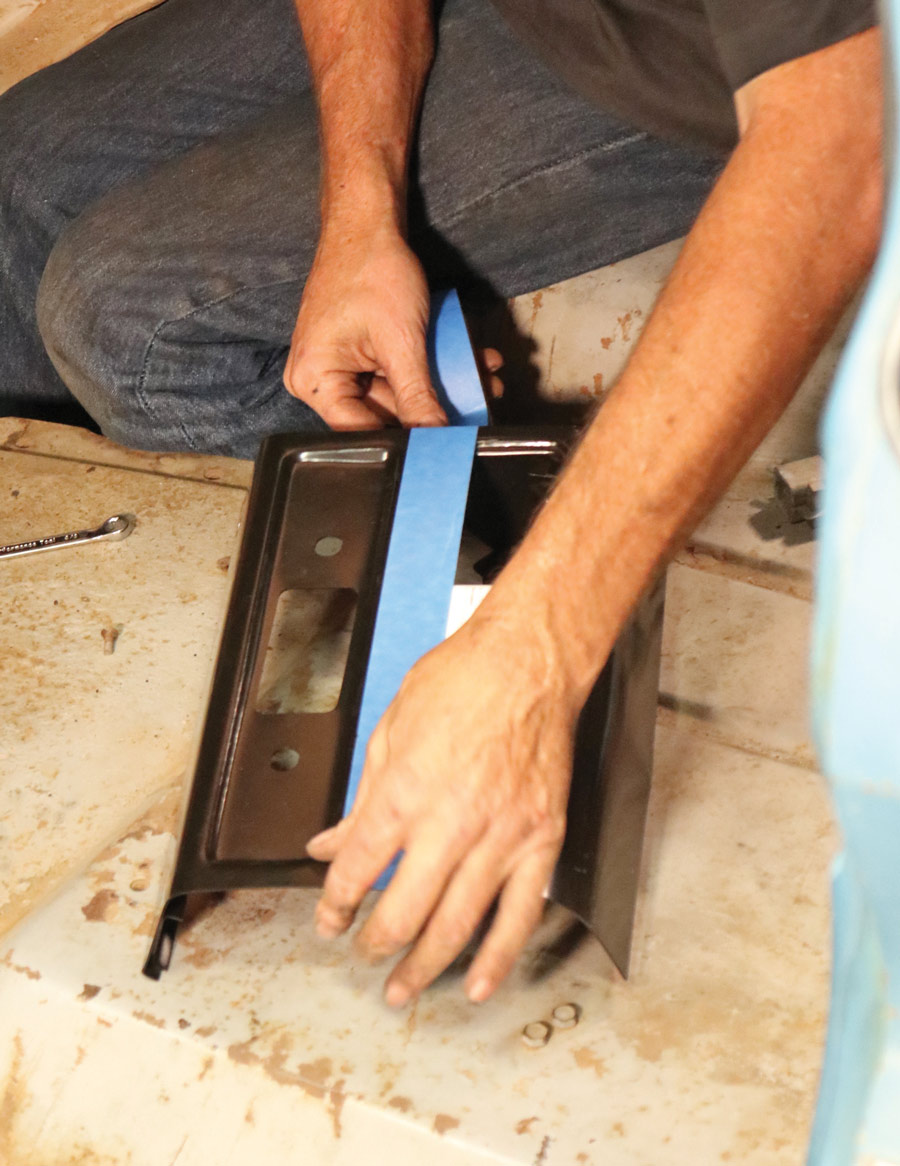
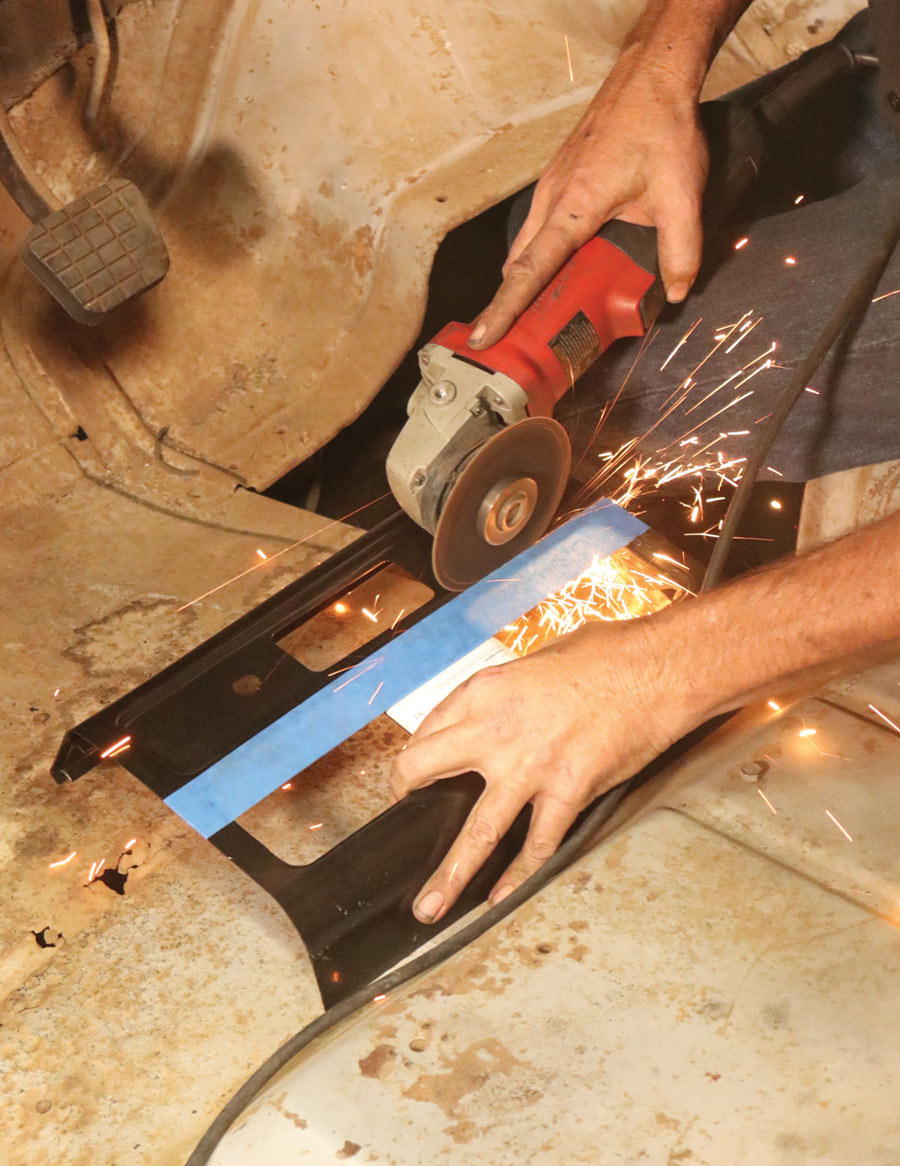
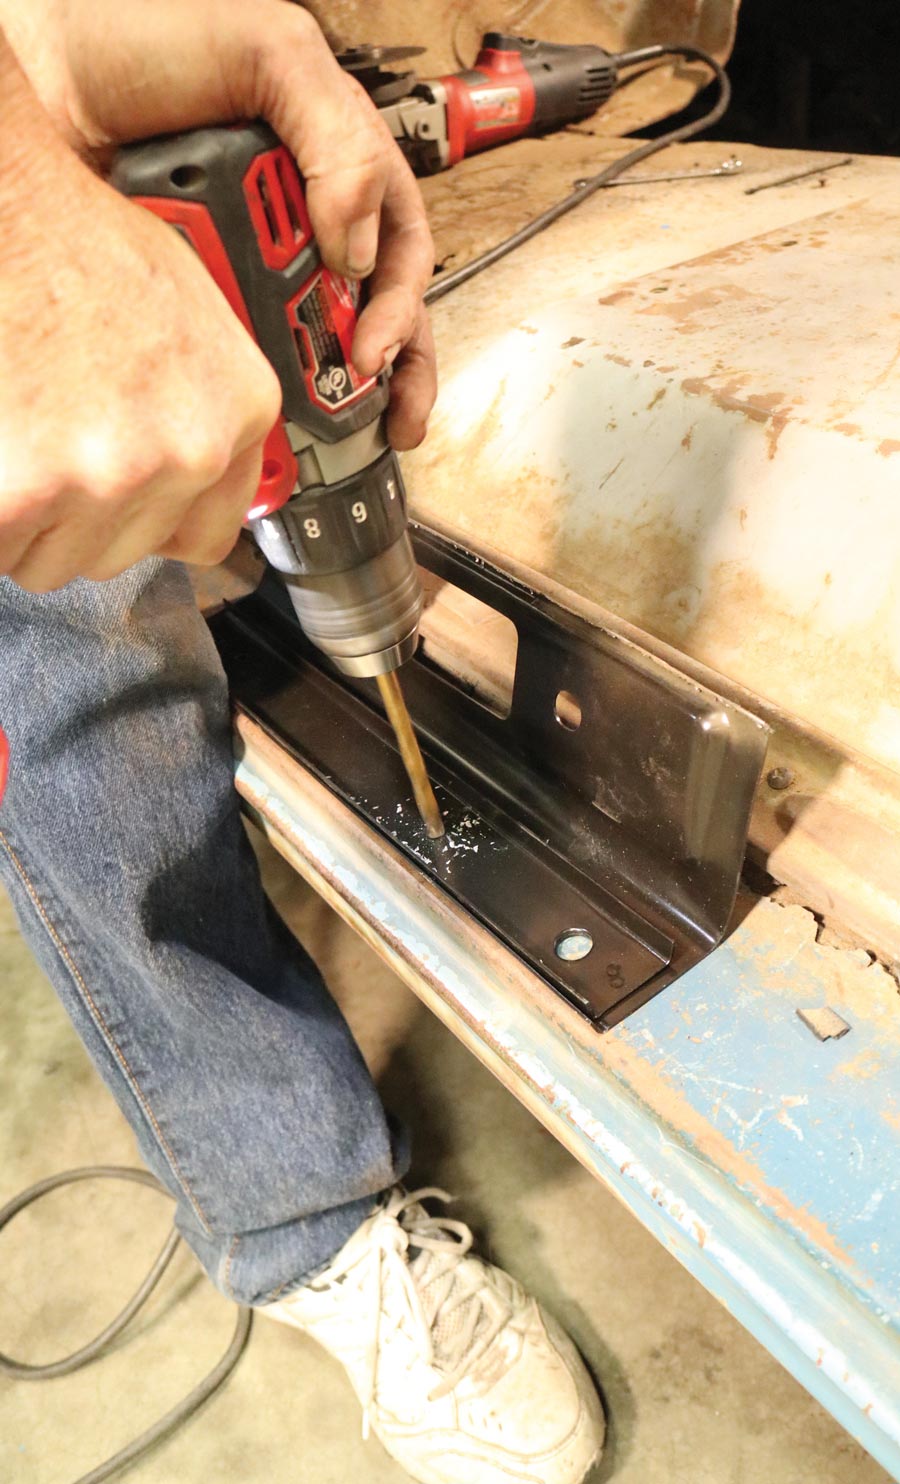
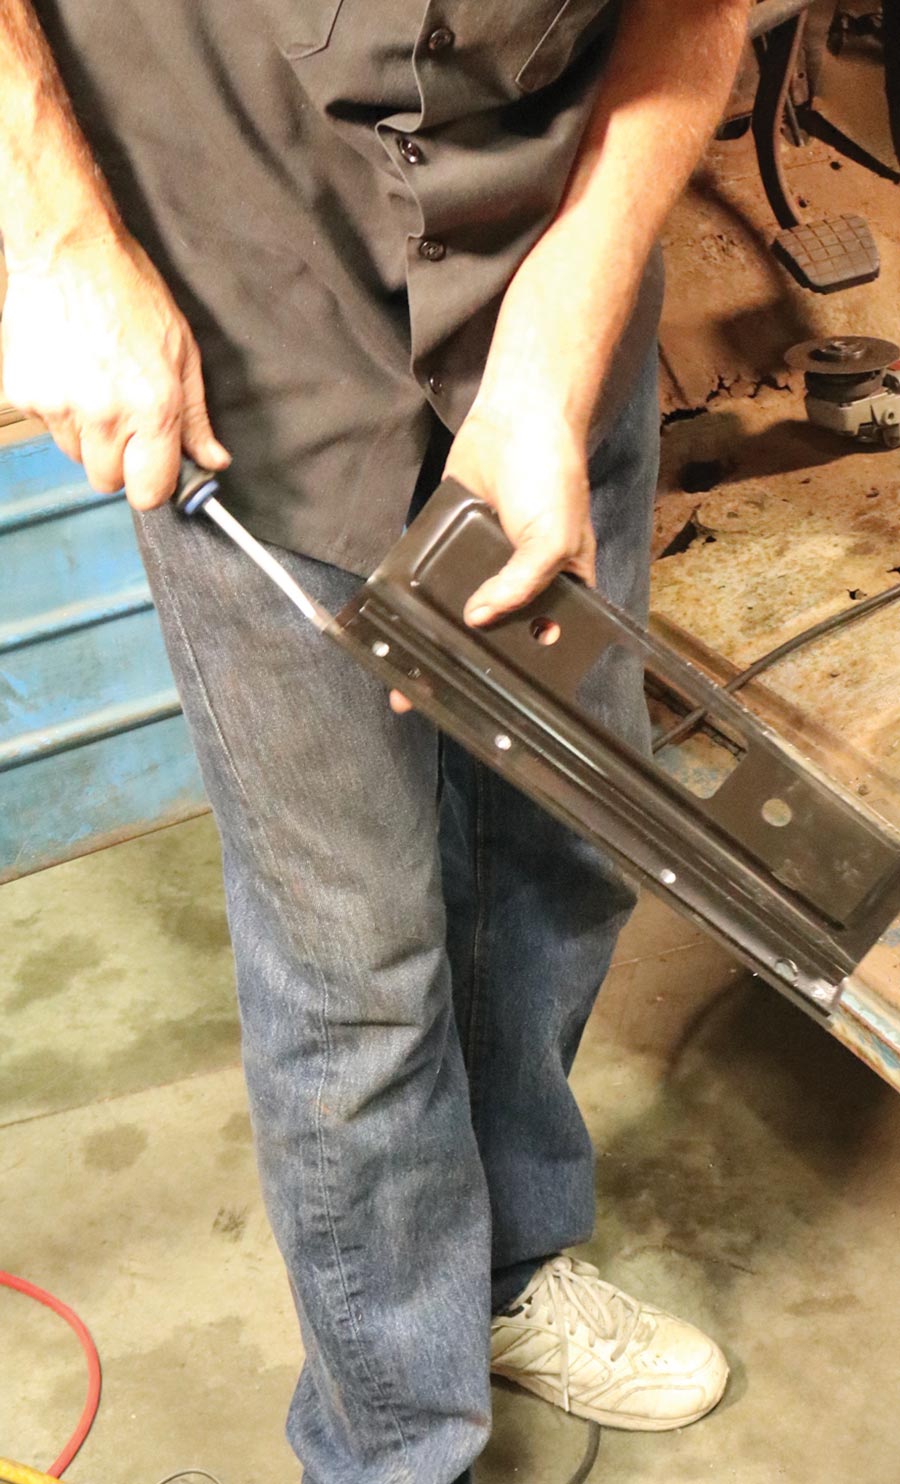
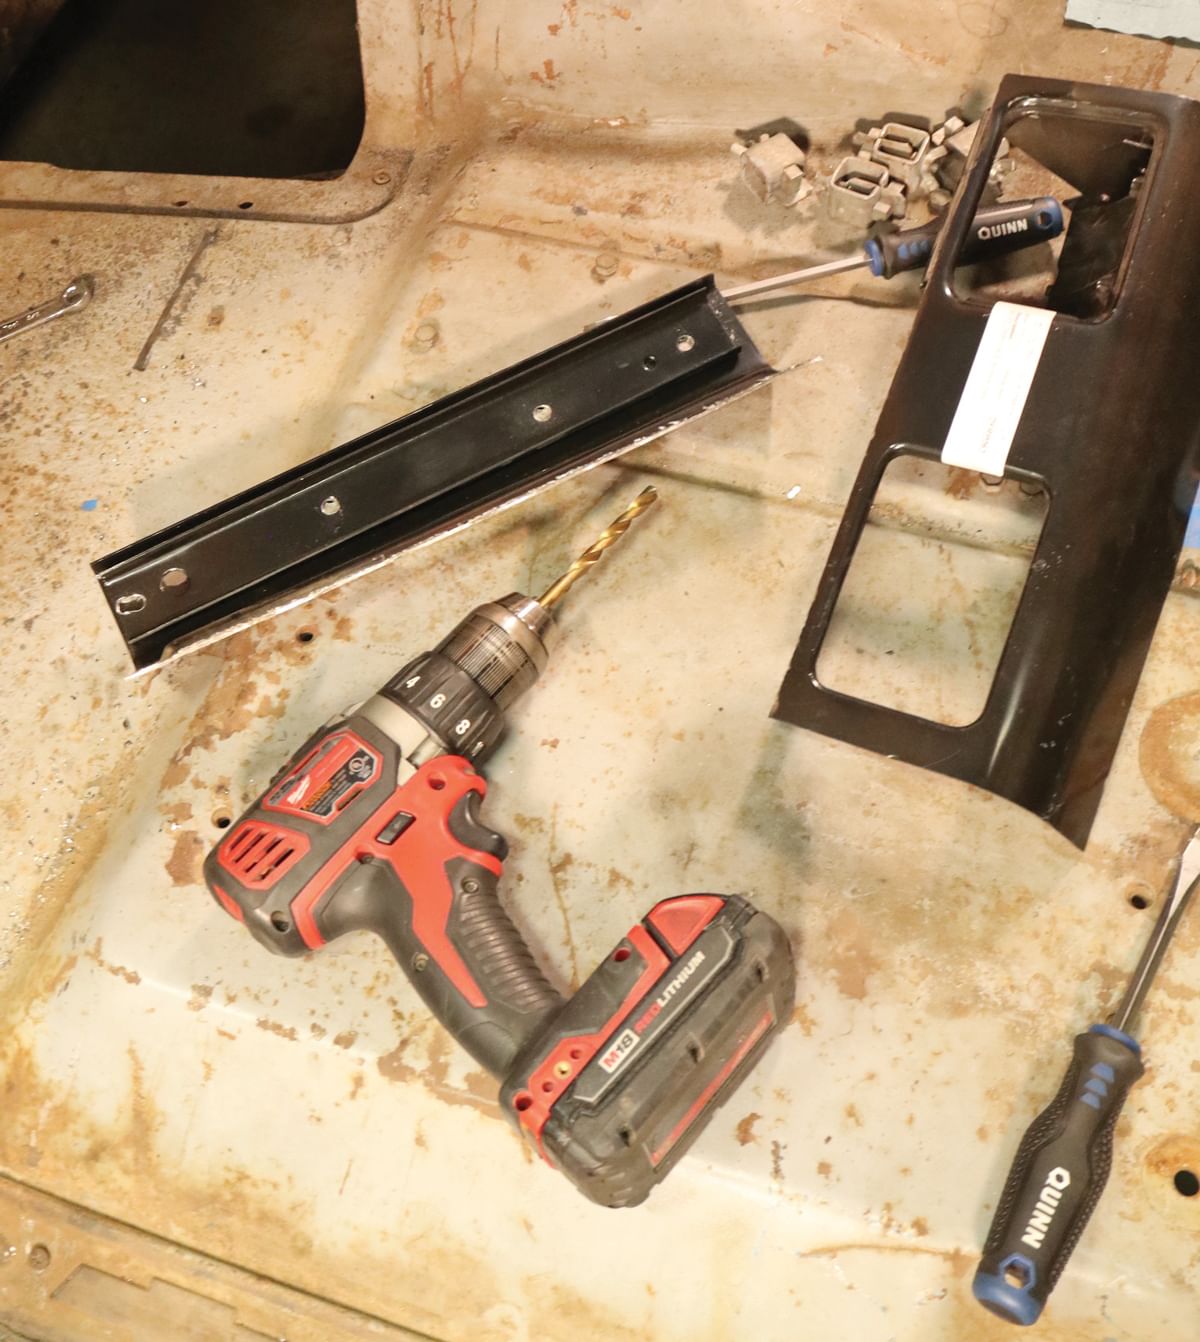
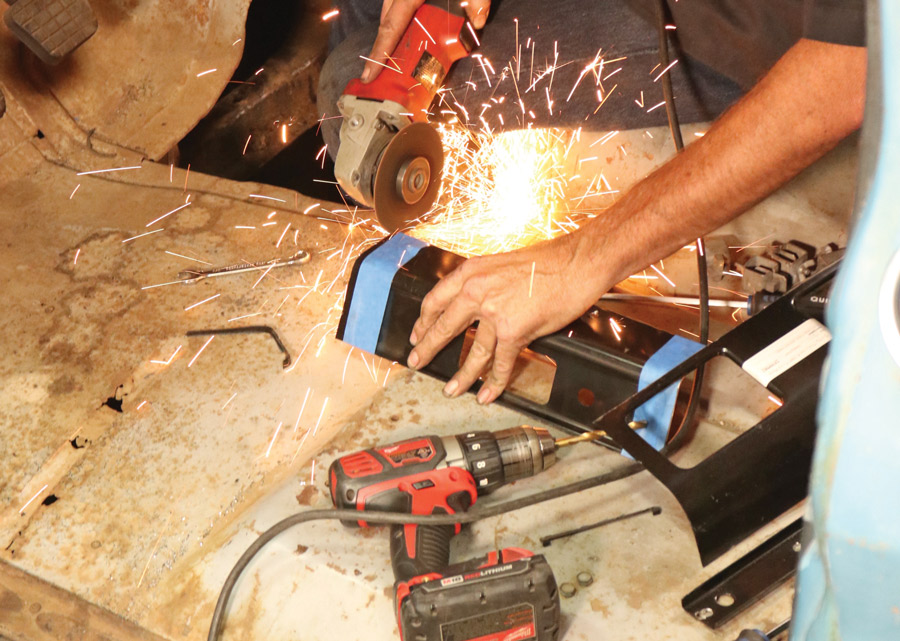
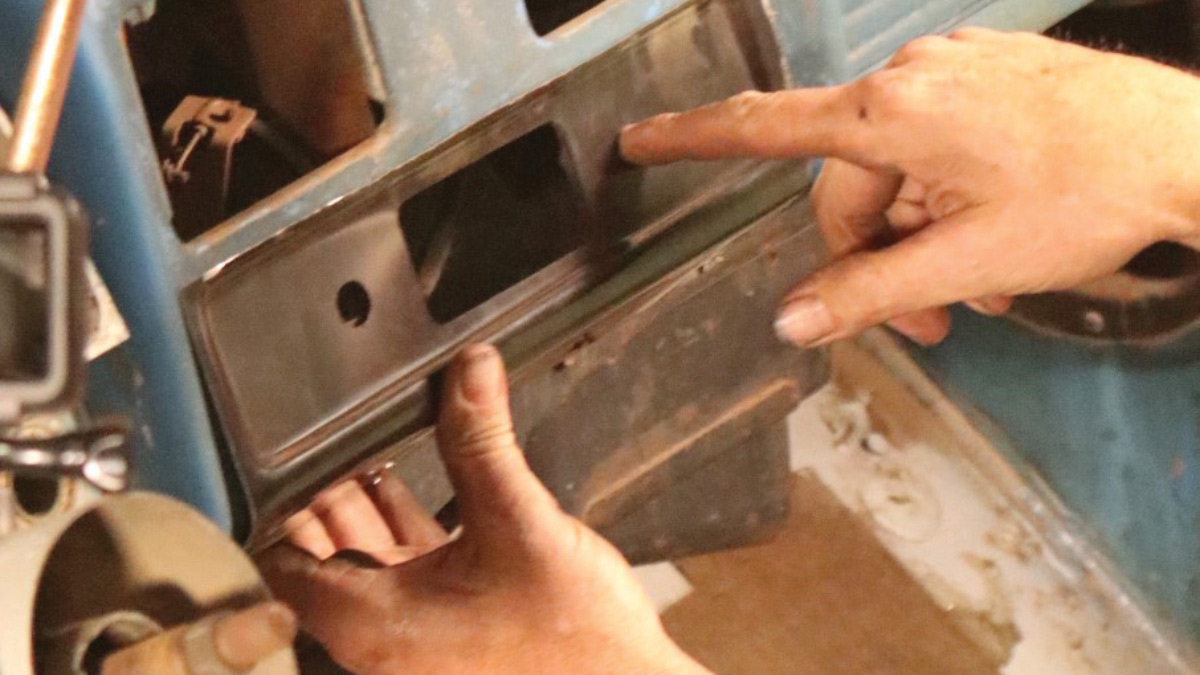
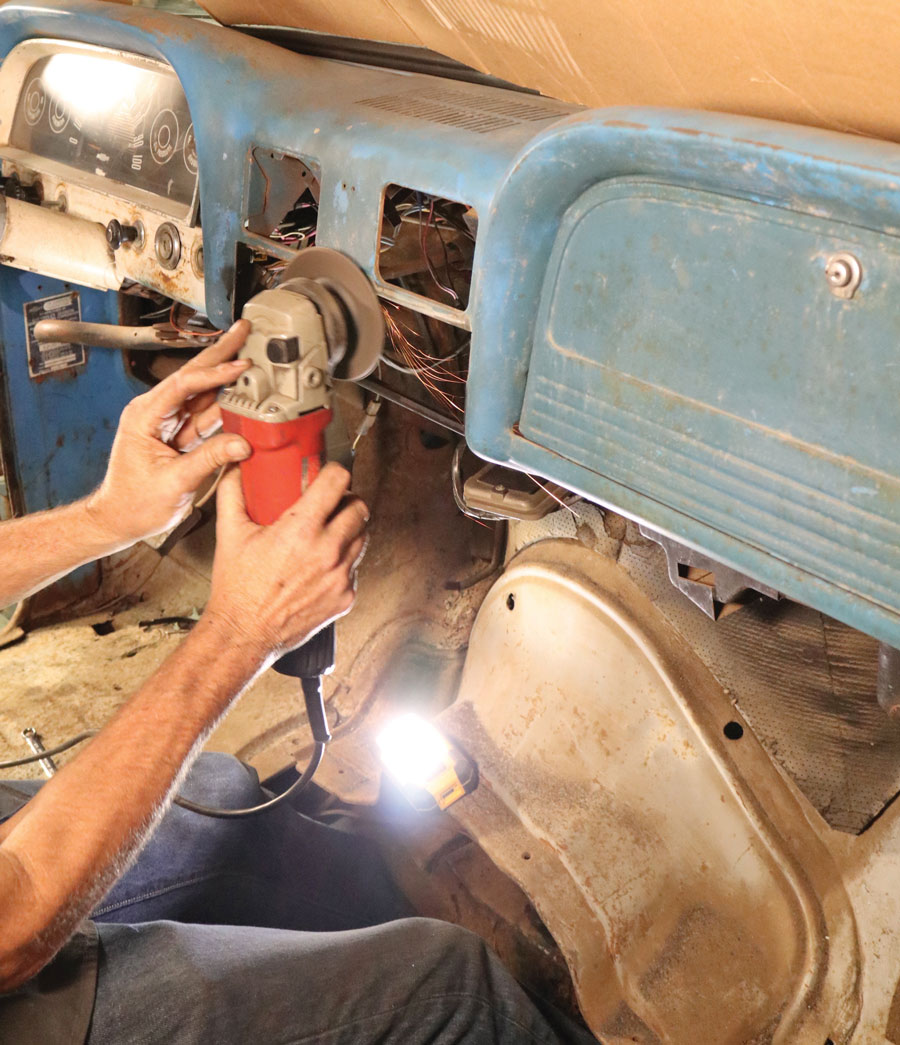
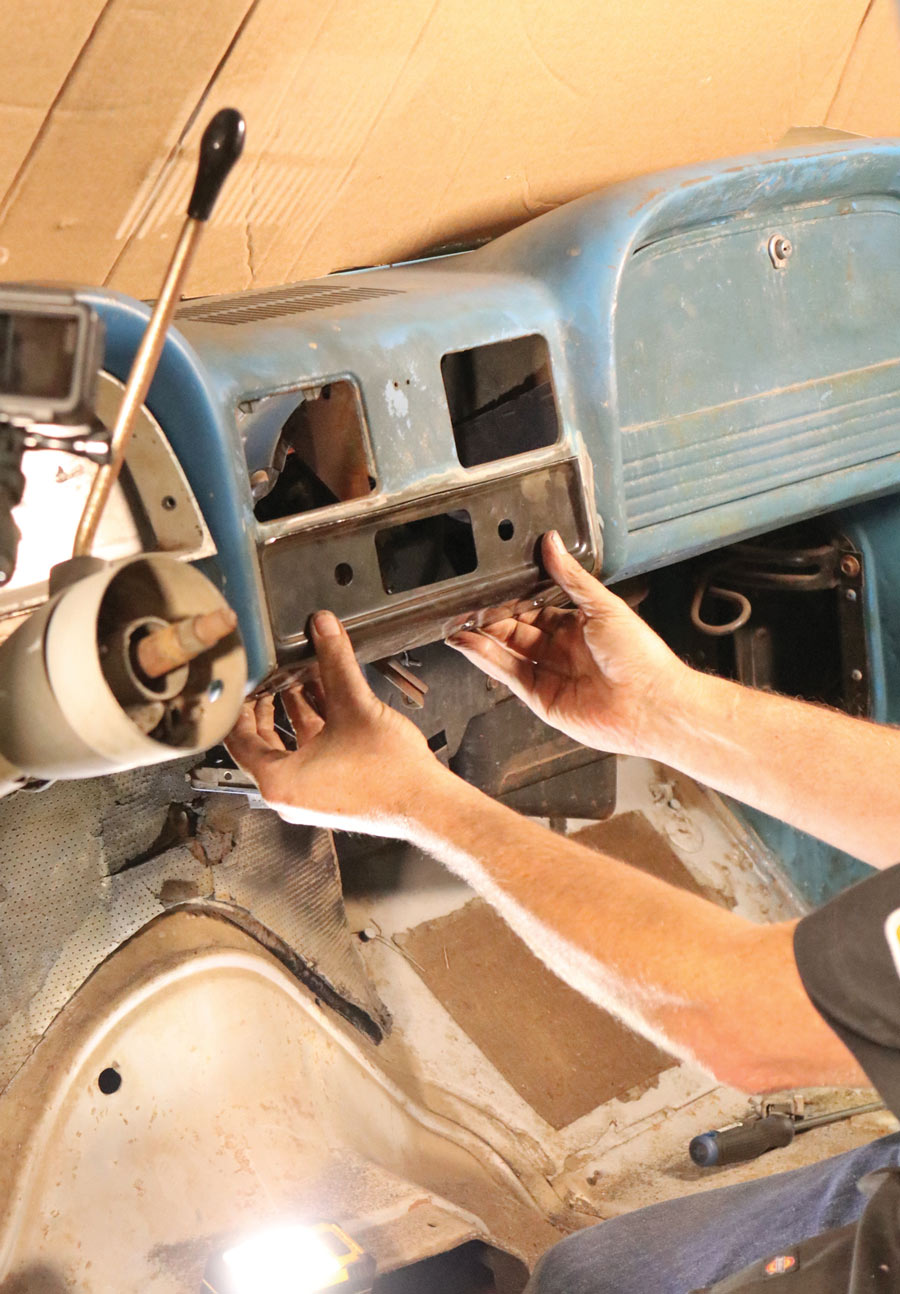
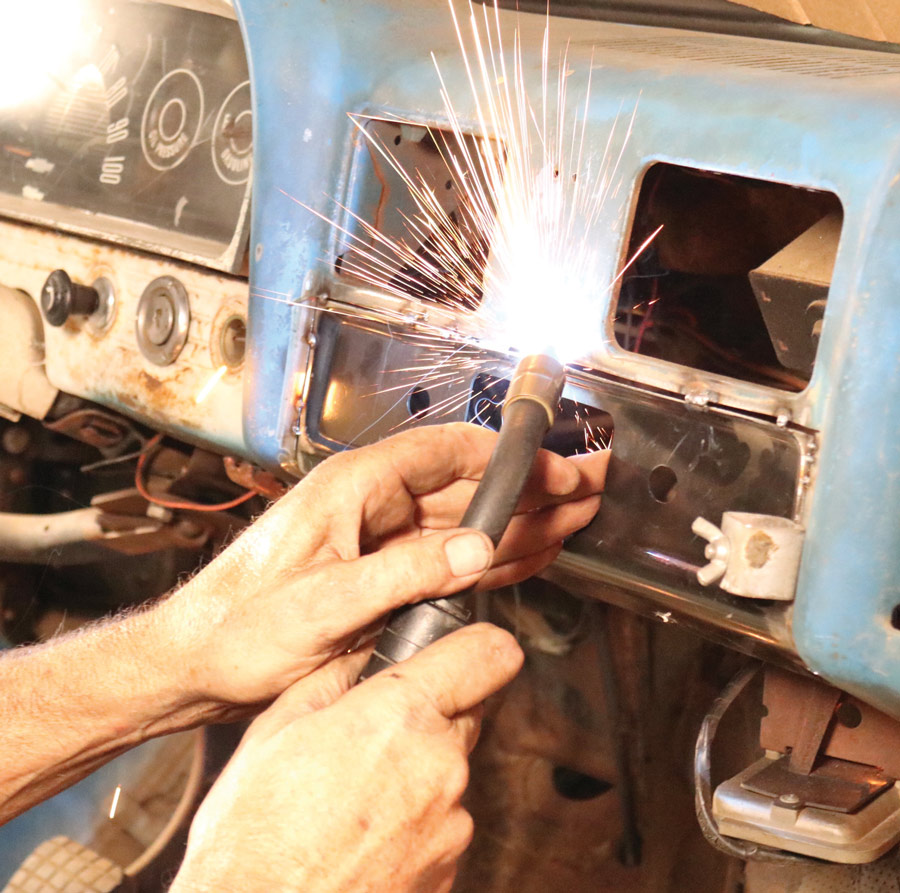
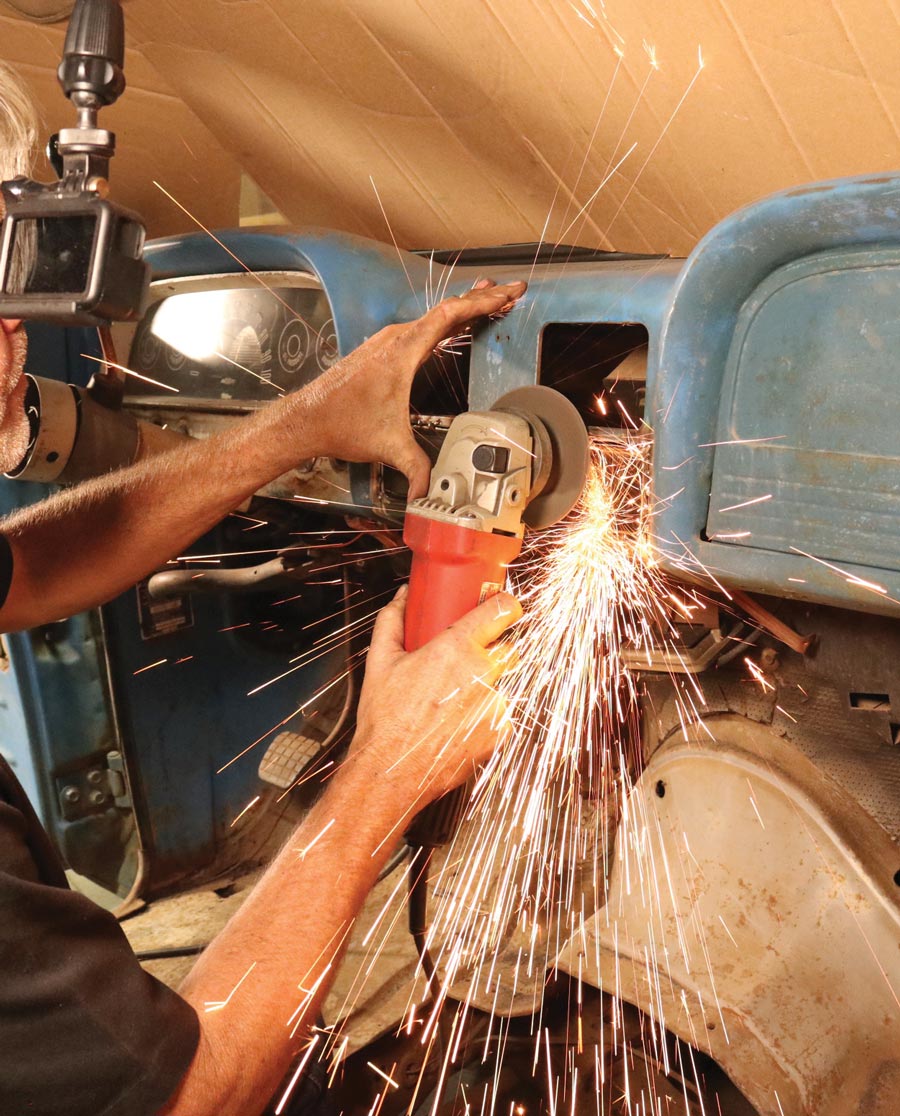
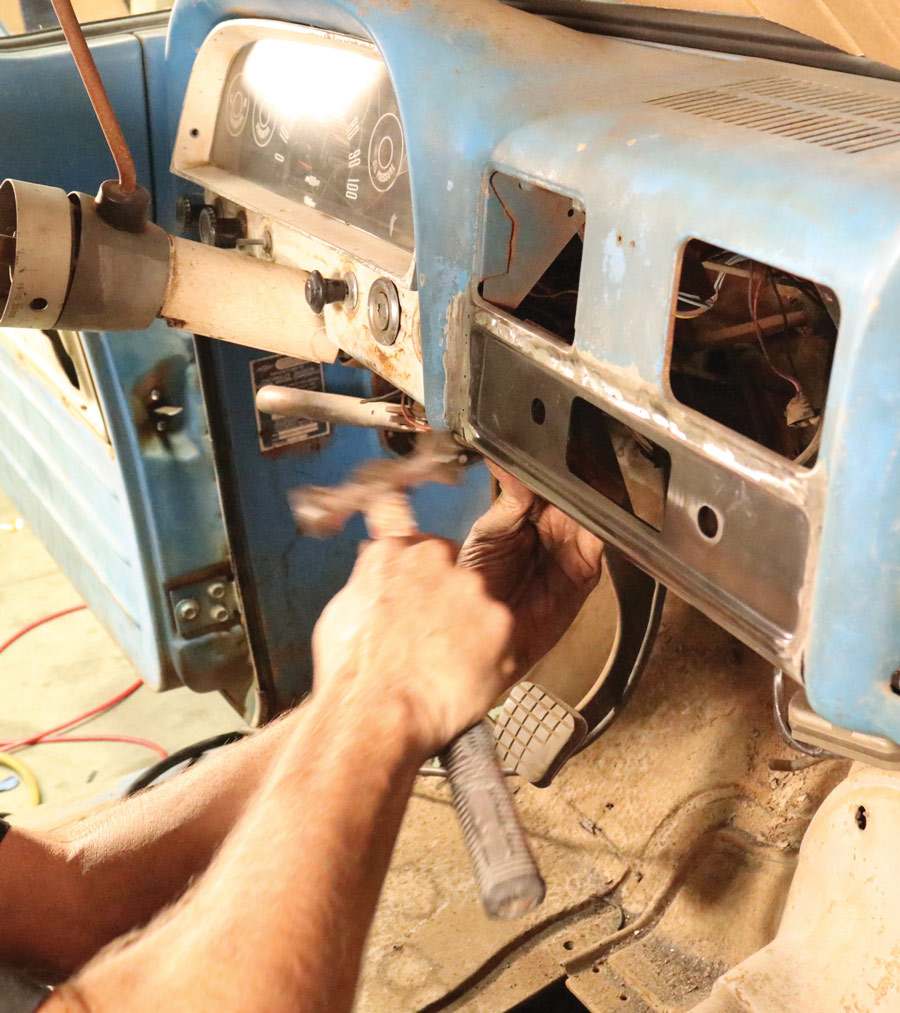
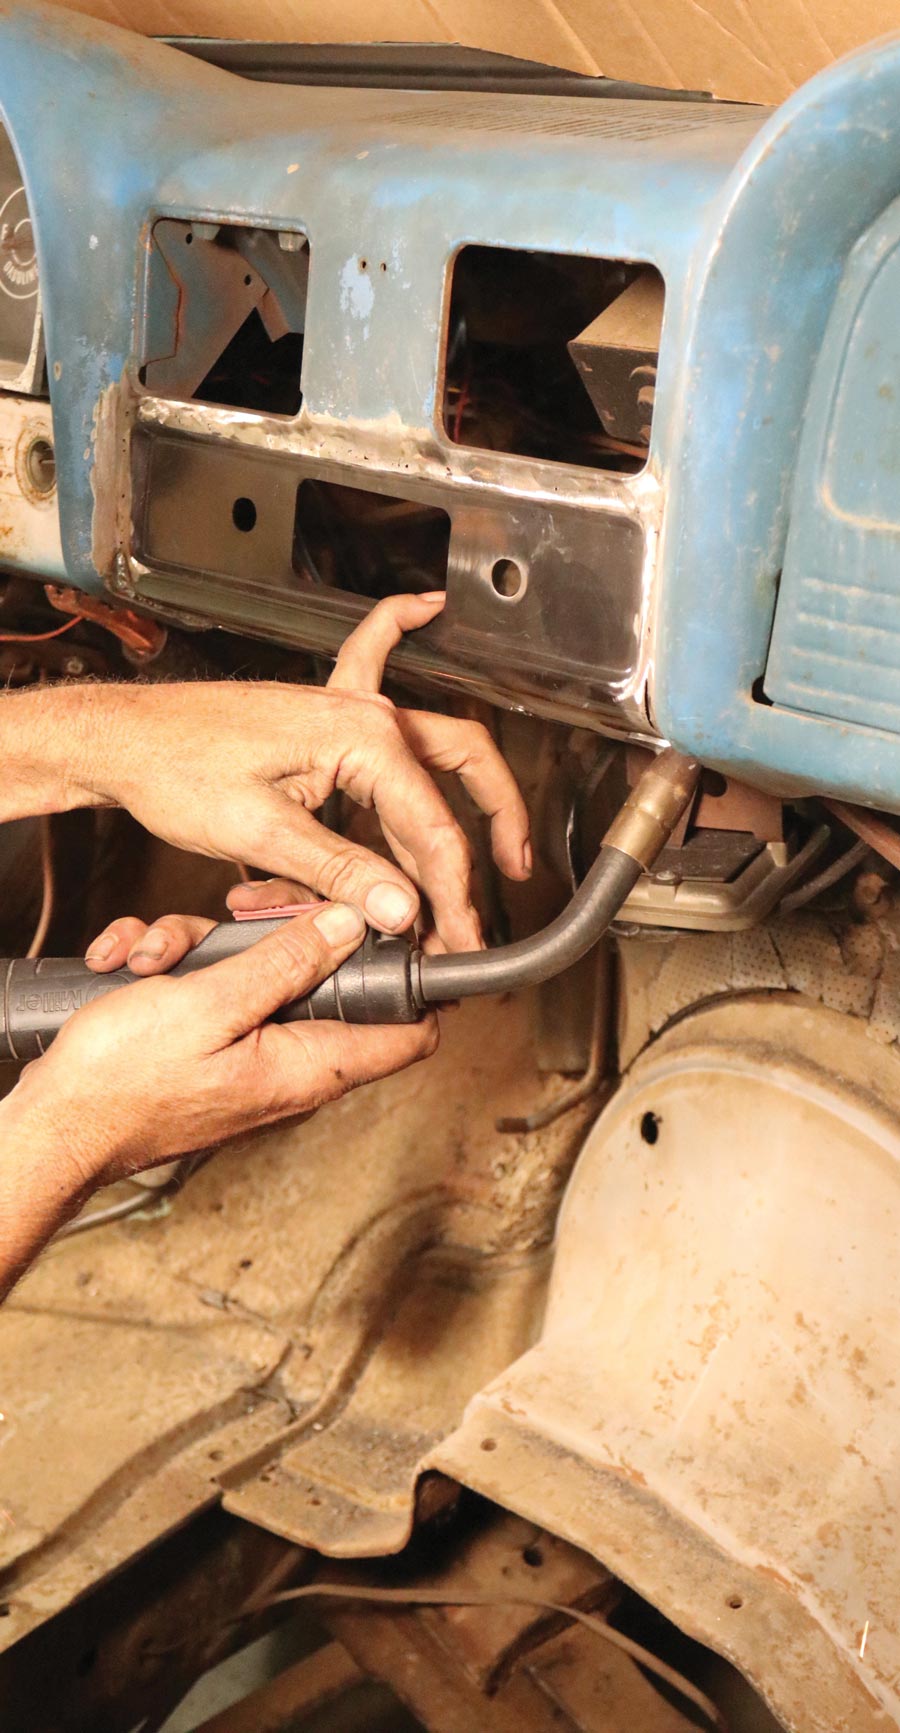
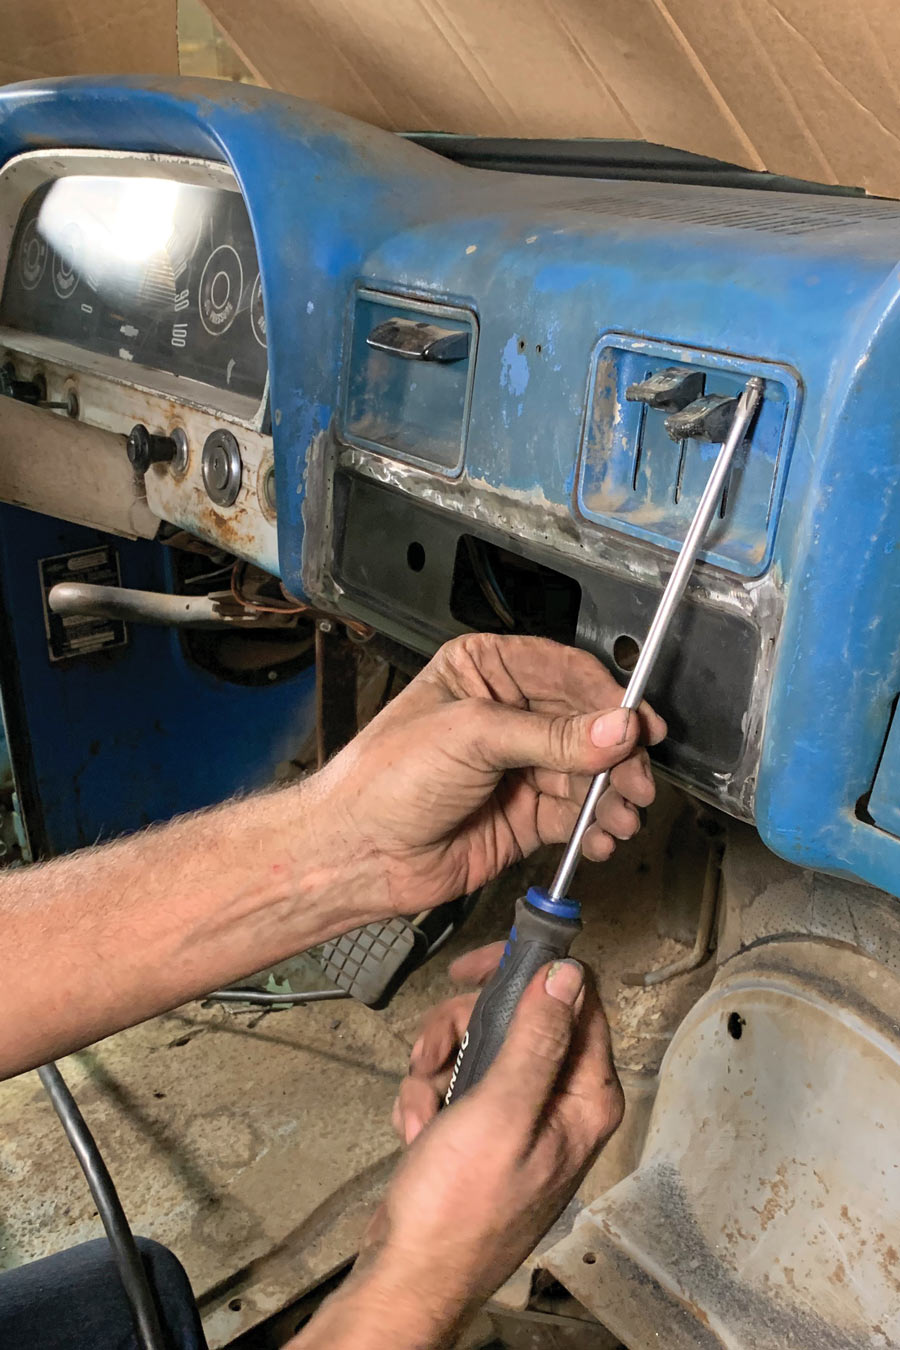
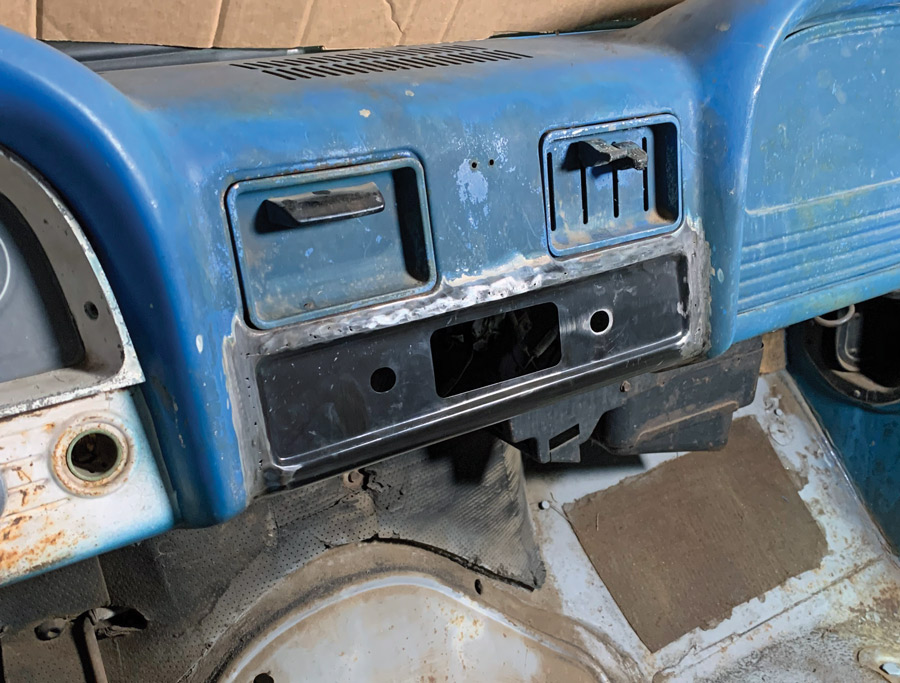
If your goal is to remedy that metal massacre, Brothers Trucks has the answer—and it’s not as painstaking or time-consuming as you might think. For the 1964-1966 Chevy C10s in particular (available for all early C10s), they offer an OE-exact full (top to bottom) center dash patch panel that can be used in its entirety, or, as we’re about to show you, just the lower radio portion to repair and replace a stock-type radio.

What you’ll need to accomplish this radio “un-delete” task: basic metalworking and welding tools/skills … and of course, the affordable dash face repair panel from Brothers!

Corroding interior of Brother's Truck
1. We’ve all seen worse, there’s no question, but since this truck is to receive a factory-stock radio, the oversized display hole just won’t cut it … no pun intended. Fortunately, once the lower radio area is cut out, Brothers’ 1964-1966 dash face repair panel will properly accommodate, as you’re about to see.
Removing the heater controls and ashtray
2. First, to gain full access to the back side of the dash panel, the heater controls and ashtray need to be removed. Notice too that we’ve covered the inside of the windshield with masking paper to prevent any damage caused by flying sparks/weld slag.
Duct taping panel frame
Angle grinding frame along duct tape edge
3-4. Since we’re only going to be patching the lower radio section, we’ll start by eliminating the upper portion, as shown (oversize for the area that will ultimately be replaced).
Drilling into the OE inner dash brace
Removing the brace spot weld with a flathead screw driver
5-6. Here’s the somewhat-tricky part: We’re going to retain the OE inner dash brace (in order to retain the shape and structure of the dash), so we need to eliminate the brace spot welded into the dash face repair panel … without damaging the exterior of the replacement panel.
Drill and brace on the floor
7. Carefully drill out the spot welds and then carefully pry the brace off, as so.
Lining up panel to cut out
Trimming the panel on its sides
8-9. Next, we mocked up the patch panel and then trimmed it down to better fit between the right and left sides of the dash, as well as to give us the best surface area in which to weld.
Setting panel in place
10. Once cut to the desired size, the panel was set in place and its outer perimeter scribed to the dash to reference the area to be cut out.
Stock radio portion of the dash being cut out
Underside of dash being cut
11-12. With a thin-bladed cutoff wheel, the stock radio portion was carefully cut out of the dash—paying extra attention to the lowermost edge to only cut through the outer portion of the dash, leaving the inner brace completely intact.
Drilling through factory spot welds
Old portion of dash being removed
13-14. The factory spot welds were drilled through in order to remove the old portion of the dash—like so.
Inner brace installed into dash
15. Keeping the inner brace intact, as such, not only retains the dash’s shape and integrity, it also aids in installing the new panel.
Removing paint from edges
16. The freshly trimmed edges got a quick once-over to remove any paint/primer in preparation for welding the new panel in.
Panel being put into place
17. The repair panel was double-checked for fitment and consistent weld gap—having the original inner brace to use as a guide definitely helps.
Panel being held in place with masking tape
Panel being held in place with butt-weld clamps
18-19. It also helps when it comes time to set the panel in place for welding—we used masking tape and butt-weld clamps to get the piece positioned perfectly.
Tack welding the repair panel
20. We first tack-welded the repair panel in with a MIG to minimize warpage before fully welding it in place.
Grinding the welds down
Hammering the seams of the panel
21-22. All welds were taken down (at the bead) with the grinder before a quick hammer-and-dolly session with the seam to fully flatten out our playing field. (Since the dash as a whole will require some minor bodywork before paint, the weld area was not completely metal finished.)
Drilling lower edge of the repair panel
attaching spot welds to the remaining inner brace
23-24. Next, the lower edge of the repair panel was drilled for the attaching spot welds to the remaining inner brace (which had been fully cleaned up prior).
Reinstalling heater controls
25. Now all that’s left is to reinstall the heater controls and ashtray …
Finished radio dash
26. … and she’s good for a new-old radio, just like she used to be!
SOURCE

BROTHERS TRUCKS
(800) 977-2767
brotherstrucks.com