CTP TECH
InTheGarageMedia.com
1956 Ford F100 custom truck raw metal body SEMA
The Souza F-100 typography
Custom-Fabbing Running Boards … to Fit the Custom-Fabbed Truck!
By Ron Covell Images by Gary’s Rods & Restorations
C

lassic trucks were designed to be used and abused; some of the details of construction can be a bit crude. When it came to the running boards on the Souza F-100 project, a lot of work was required by the crew at Gary’s Rods & Restorations to make them fit the cab, bed, and fenders in a way that is smooth and refined.

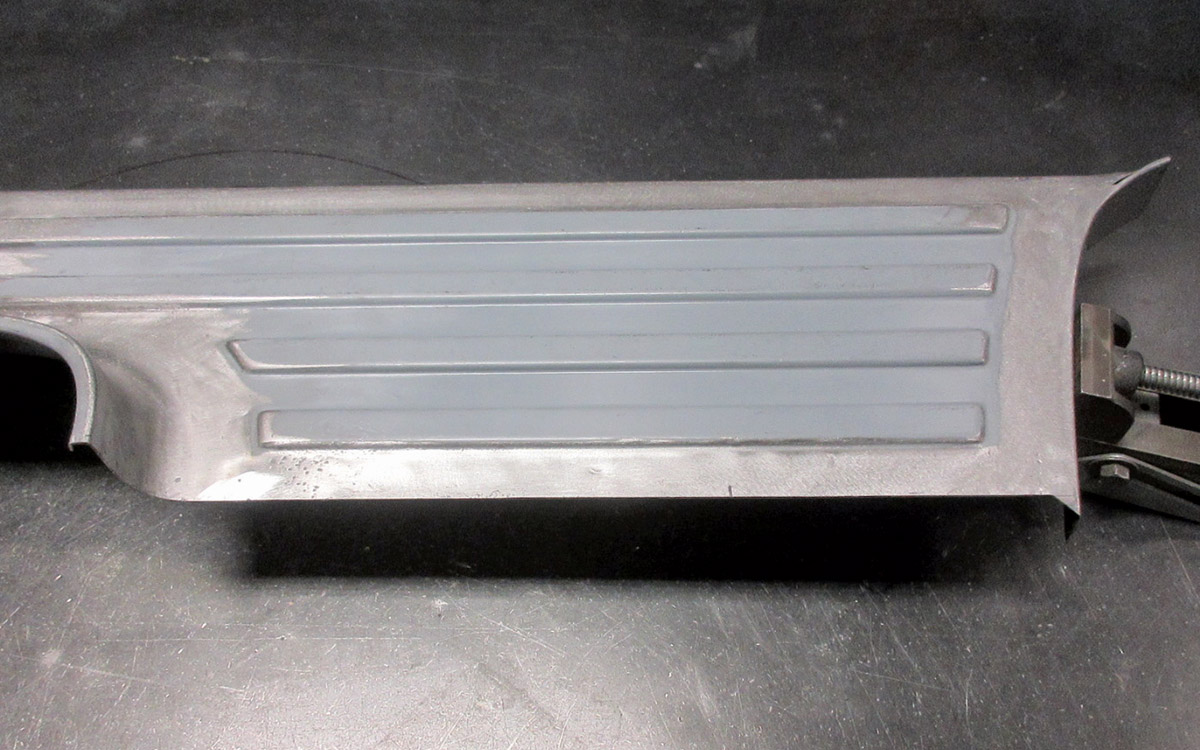
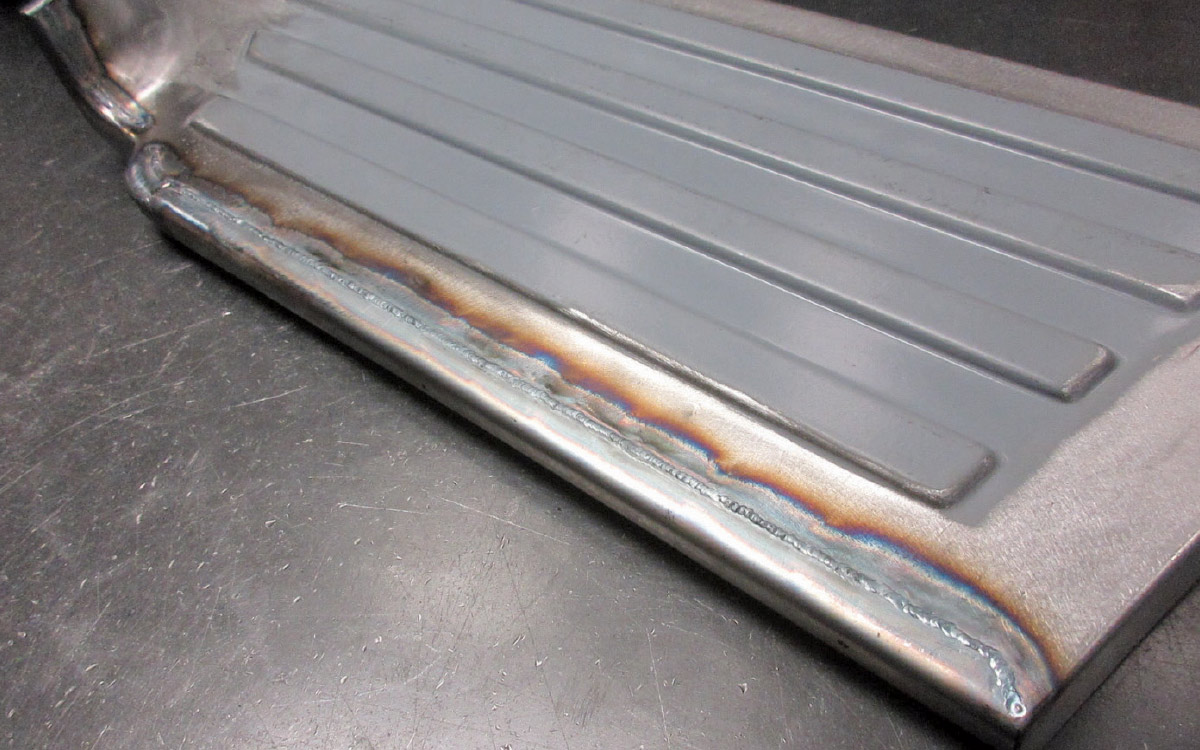
The original running boards jutted out from the fenders in an odd way, so the first step to enhance them was to remove some excess width. The boards were made with three full-length ribs plus two shorter ones placed behind the cab. One long rib was removed from the outer edge, which narrowed the running board about 2 inches.

There is a vertical flange on the running board that follows the perimeter of the cab, and to ease the manufacturing of this challenging detail, a C-shaped stamping was spot welded to the original boards. This was OK for a work truck, but it wasn’t in keeping for this project. The spot welds were drilled out to remove the flange, and the parts were reshaped so they could be butt-welded together. The photos show what a huge difference this seemingly small detail makes. In one more step of refinement, a wedge of metal was removed from the front of the running board, allowing the edge to be pulled in about 1/2 inch to better follow the shape of the cab.

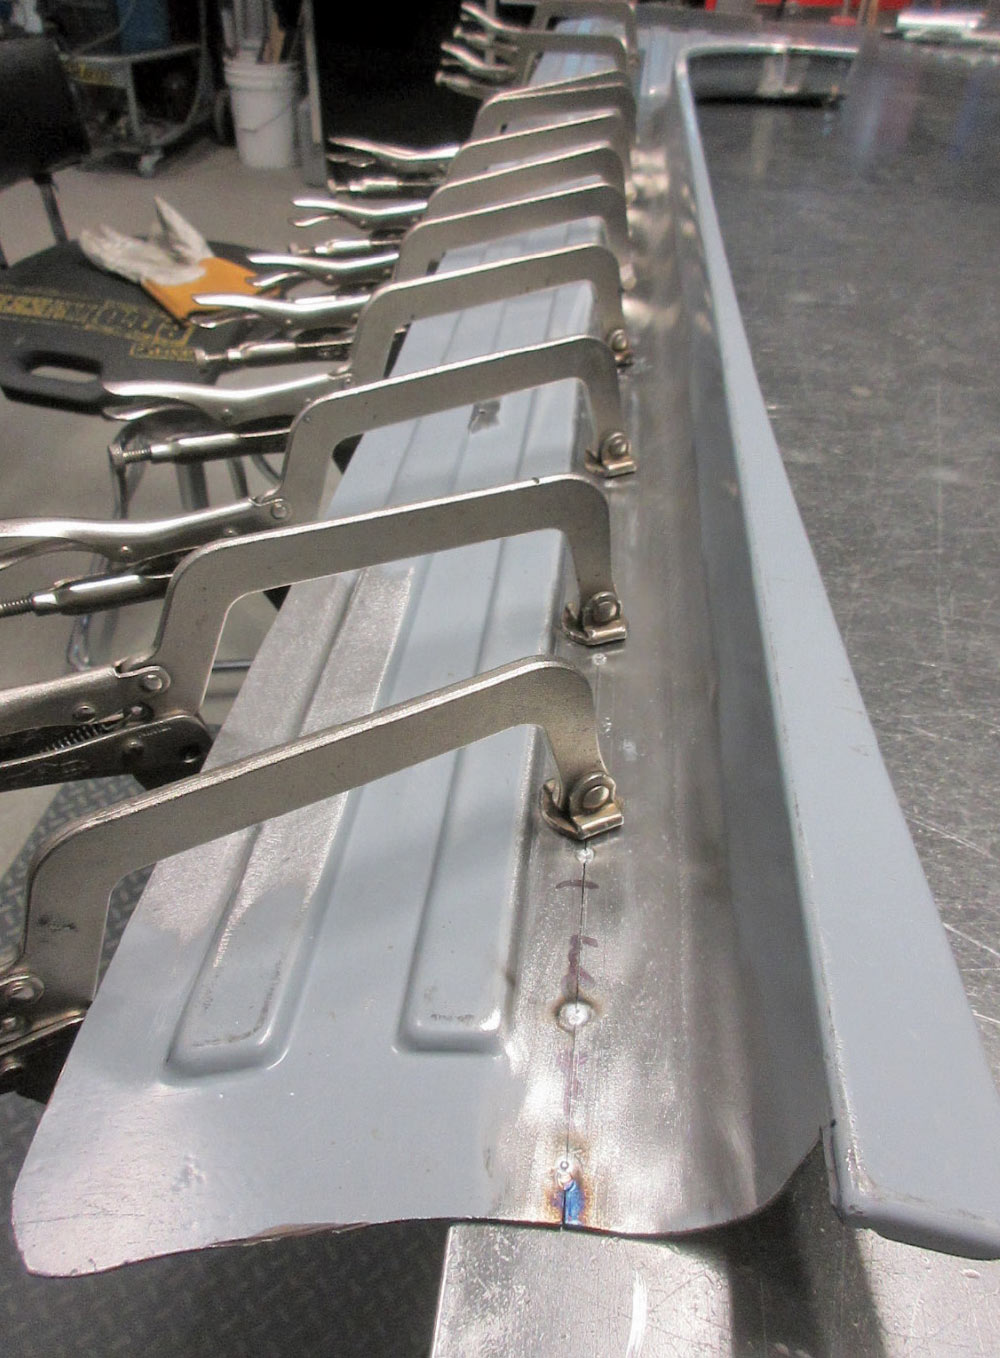
A new outer edge was made for the running boards from a strip of 16-gauge steel, bent into a U-shape. This channel was butt-welded onto the boards and metalfinished. The tips of this channel were flared out slightly to meet the fenders in a more pleasing manner.

The original running boards were bolted to the truck chassis with carriage-head bolts, which were visible of the top surface. New mounts were made and welded under the boards with studs that extend through the mounting brackets. This way, all the fasteners are hidden on the top side.

A new piece of metal was formed, positioned, and welded to the bottom of the front fender, to match the level of the running board. Once the bottom of the fender was at the right height, a flange was carefully fitted to the front of the running board, ensuring the junction was clean and tight.

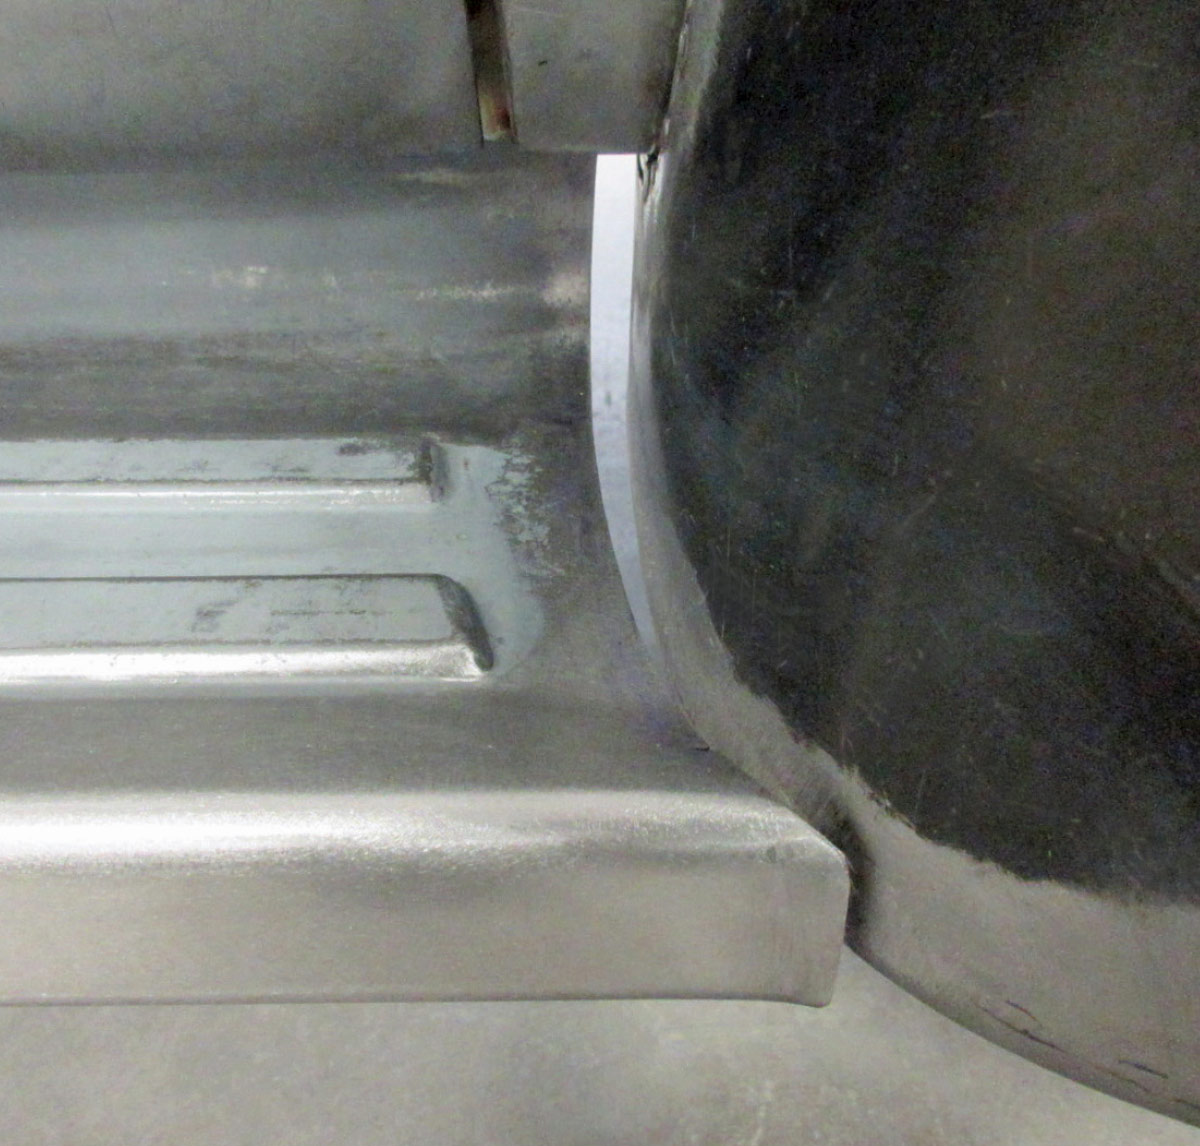
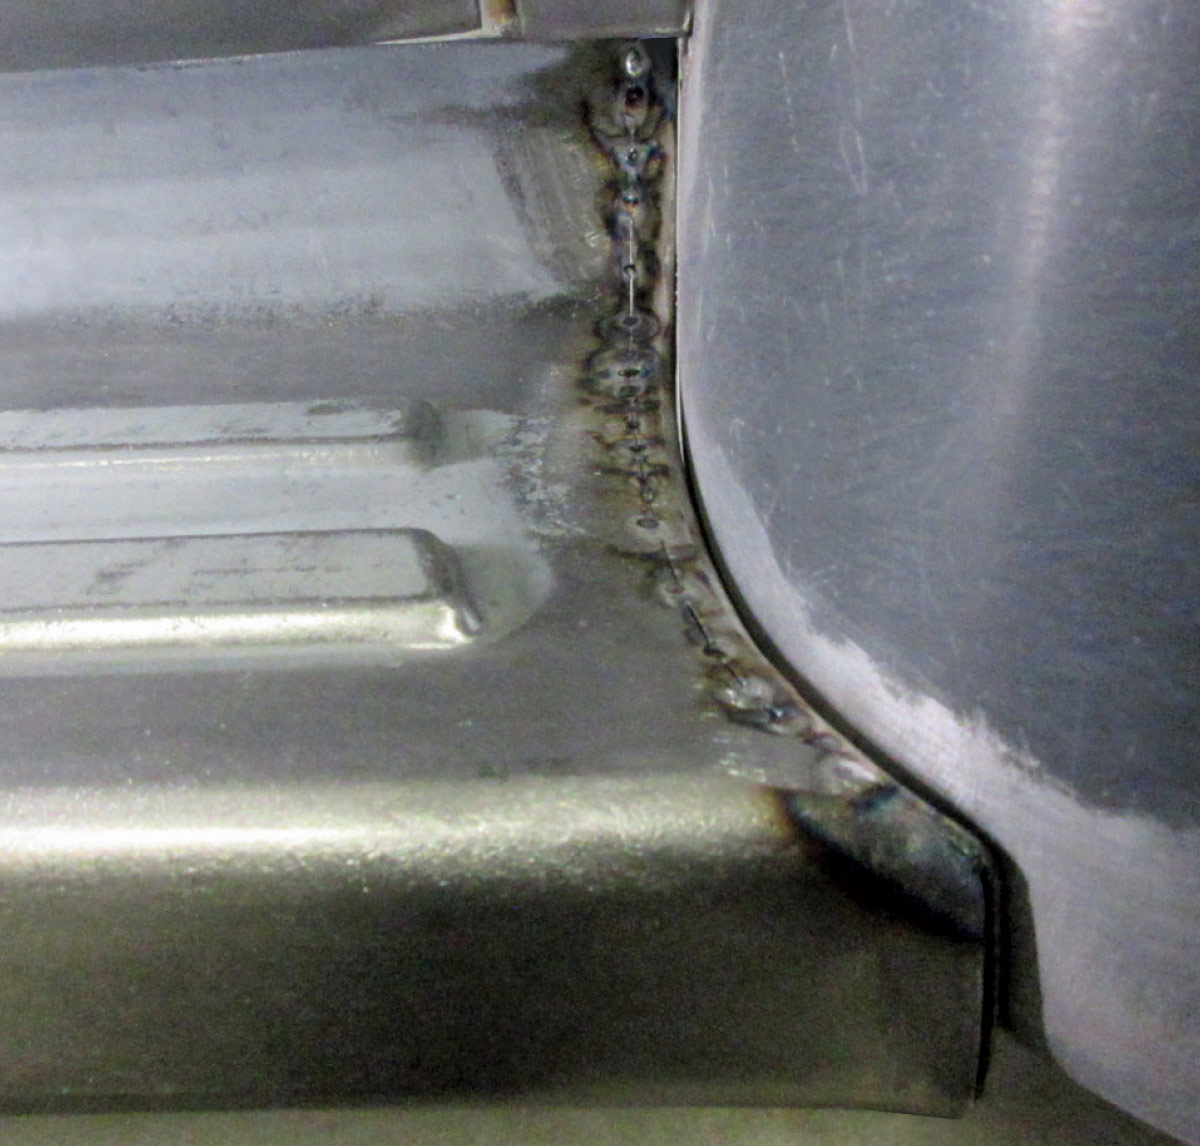
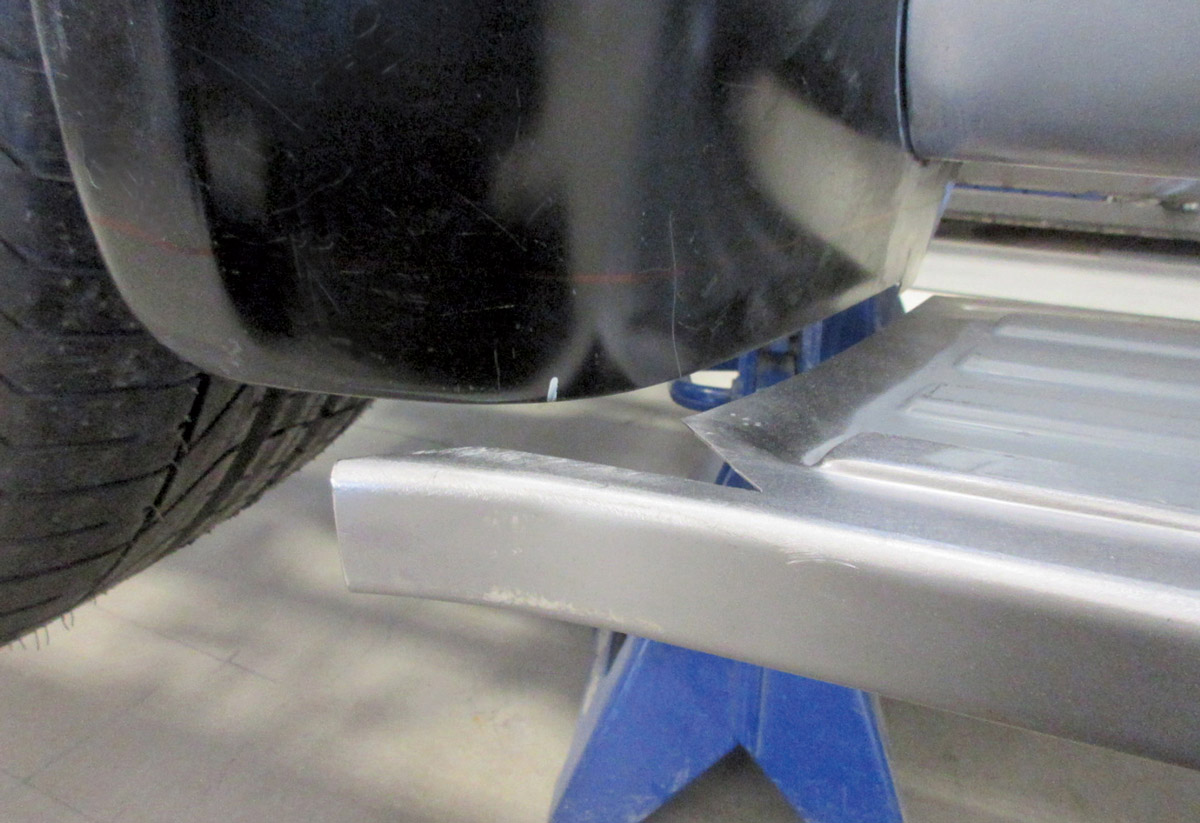
The rear fender needed similar modifications. An oversize piece of metal was grafted onto the front edge of the fender, then the running board was fitted into place and a flange was added to the running board to match the fender perfectly.

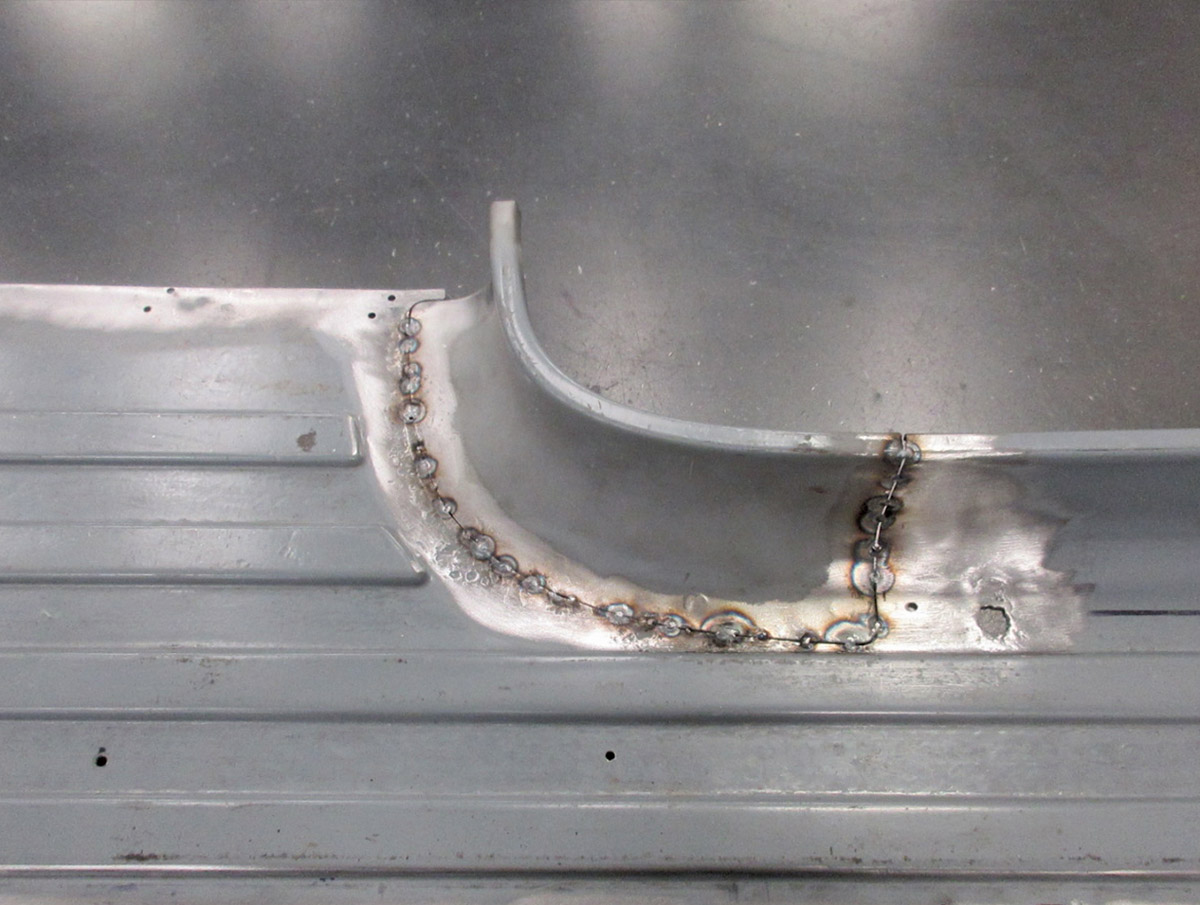
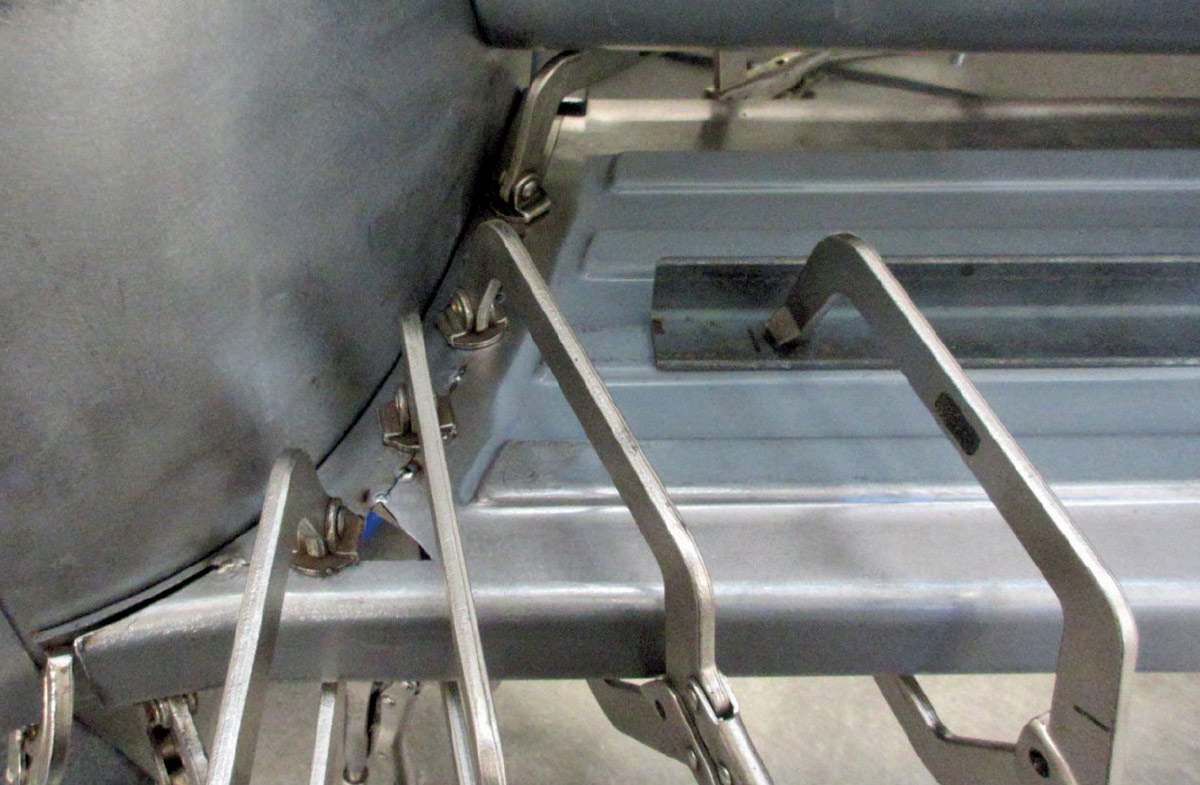
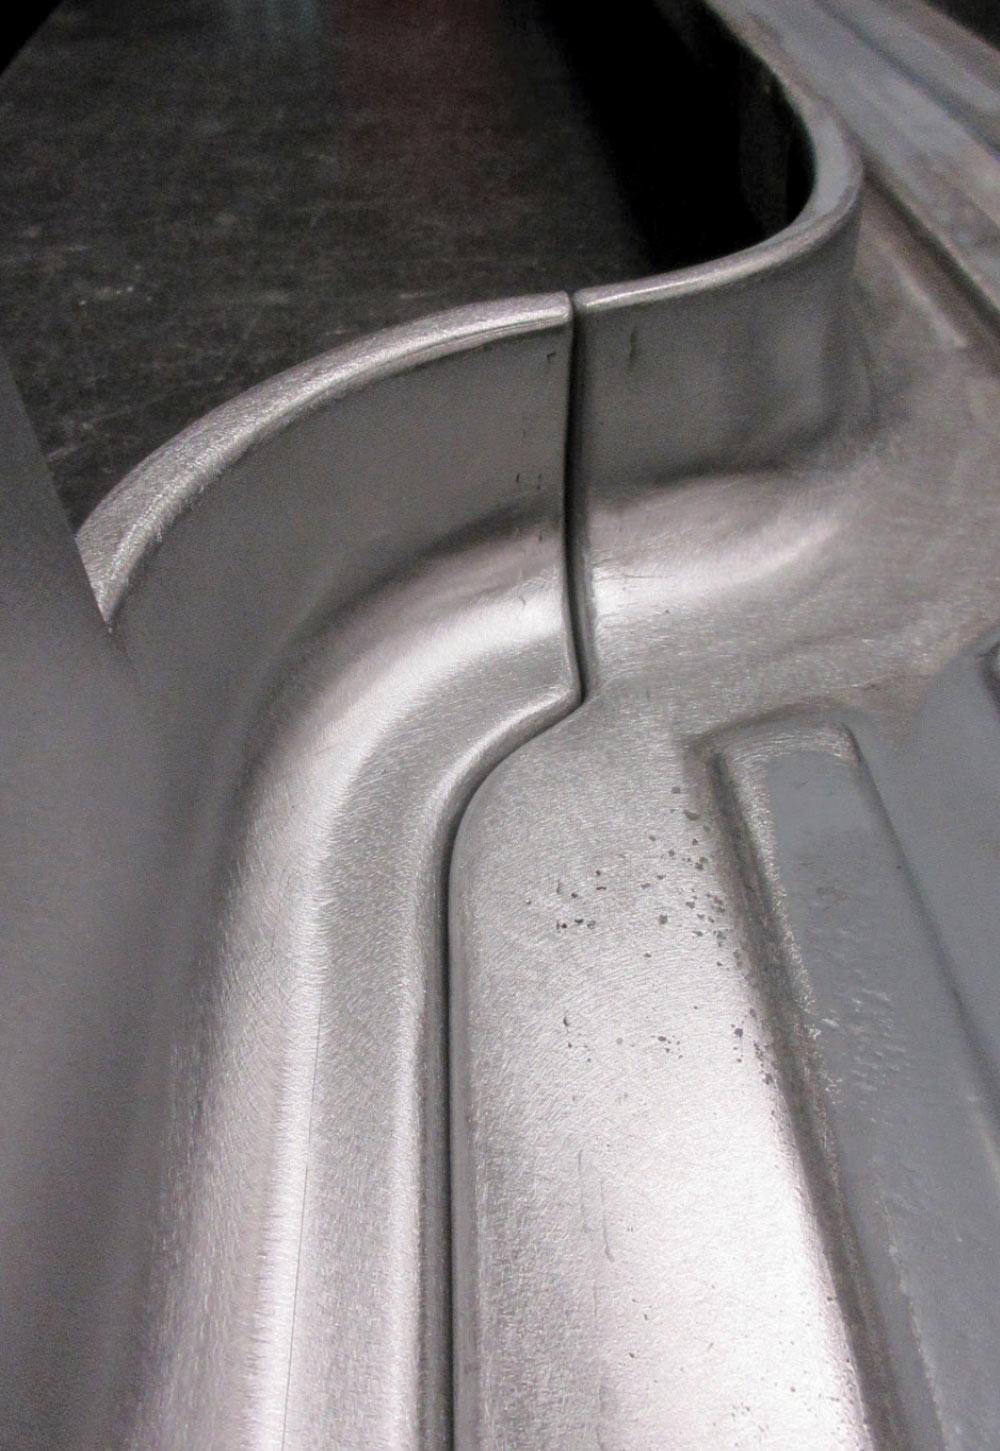
A flange was originally spot-welded to the top of the running board right under the bed, and Gary’s crew wanted to clean up this area, too. A gracefully curved flange was fabricated from many pieces of steel, and it joins to a mating surface that was attached to the running board. This is some very complex metalworking indeed, and Gary credits his lead metalman, Emilio Belmonte, who pulled it off to perfection.

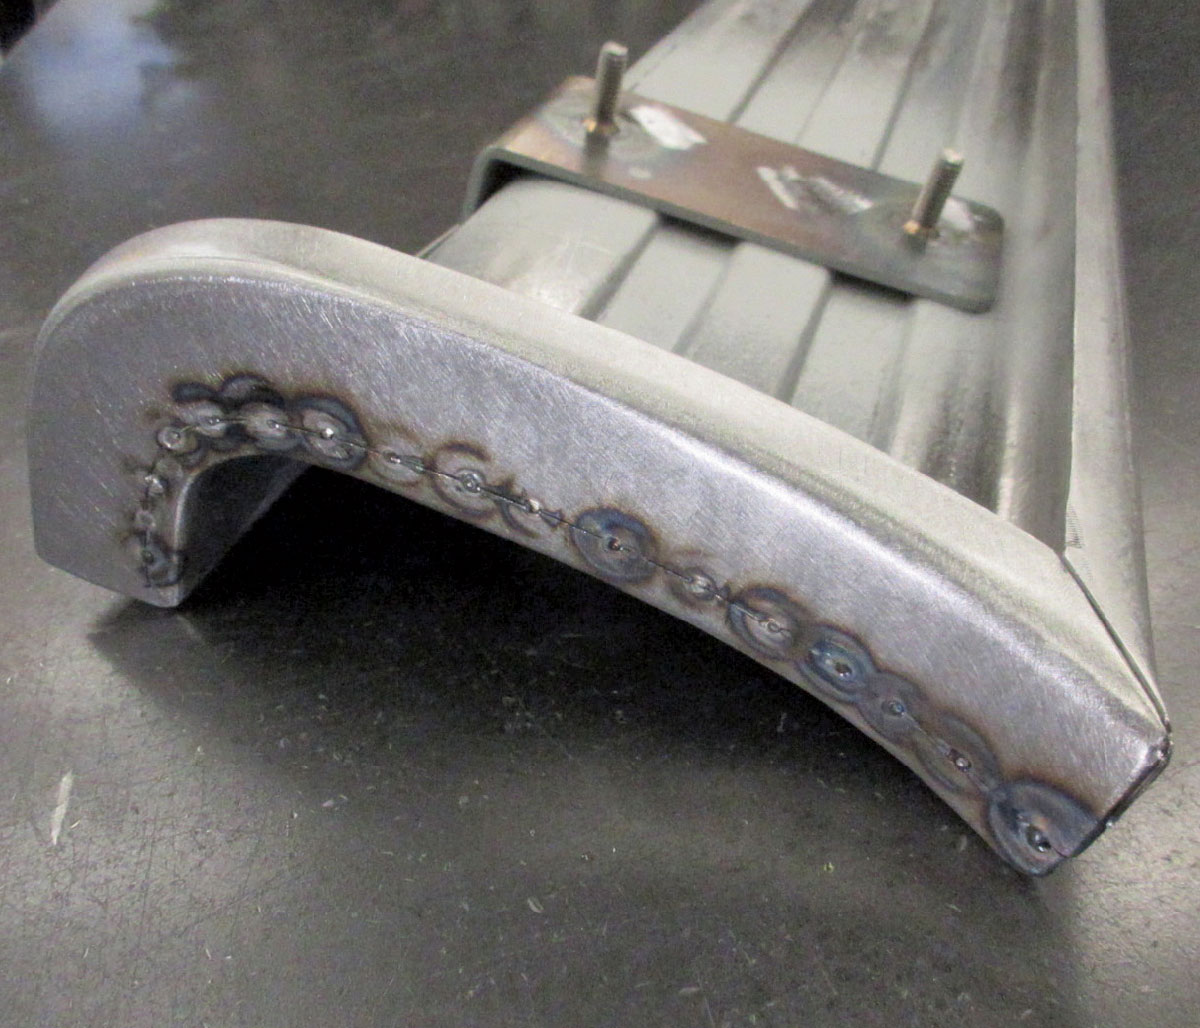
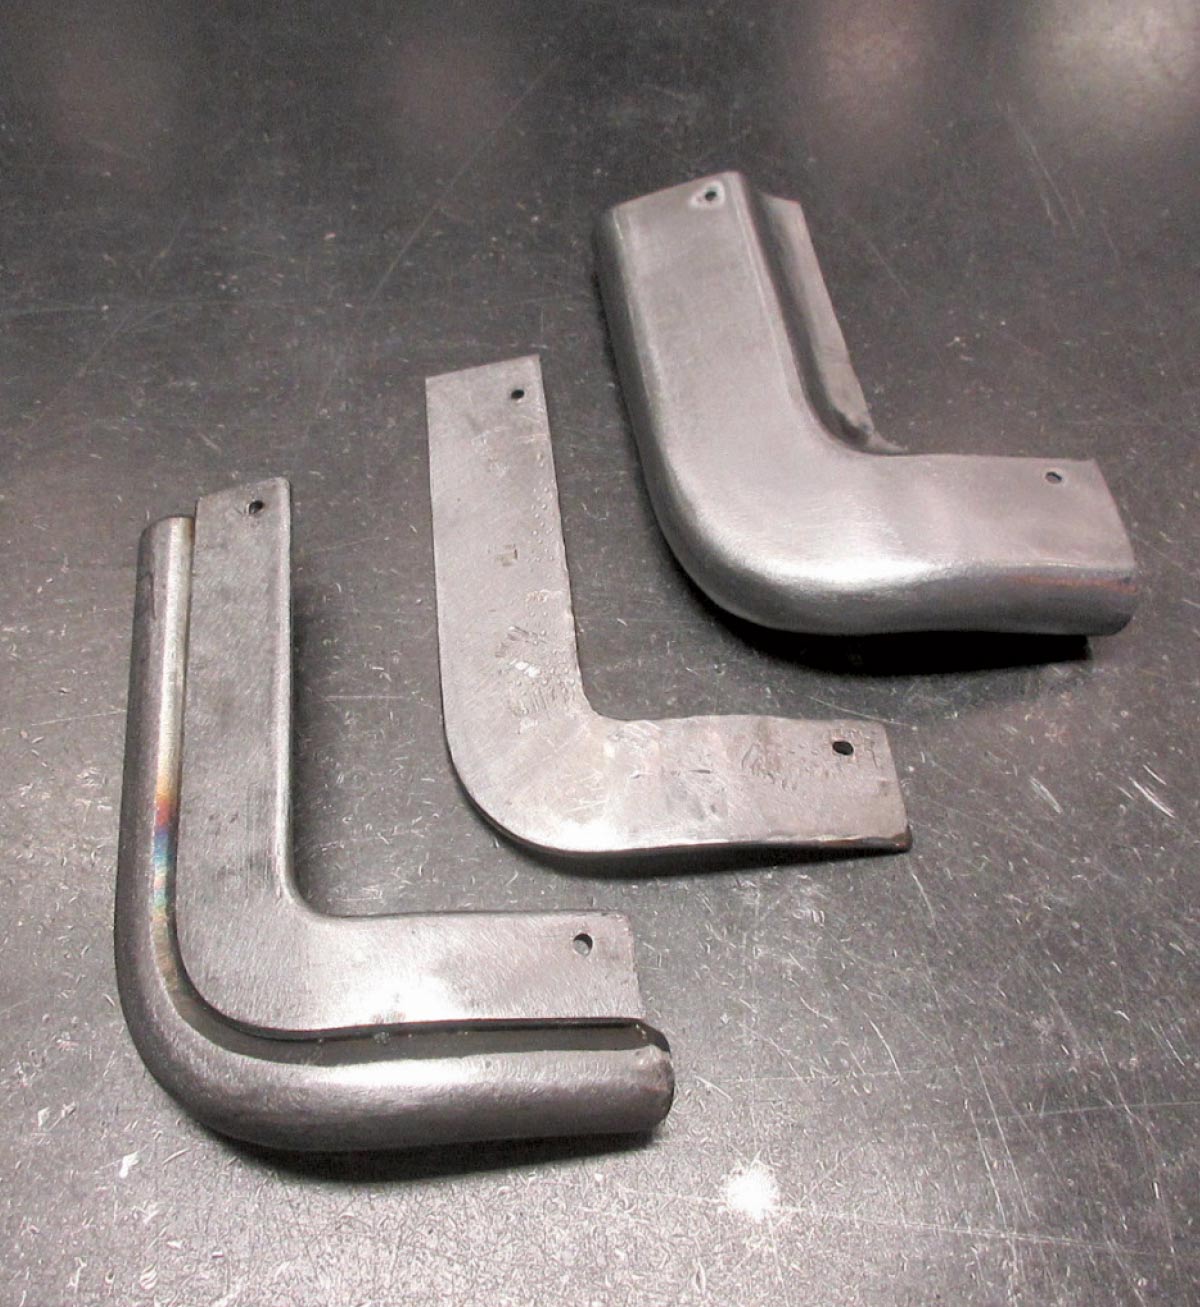
The final step was fitting a small piece of carefully formed metal to the rear fender, continuing the stepped edge around the wheelwell opening into the running board. This part required an intricate hammerform made from solid steel, which you’ll see in the photos.

Stay tuned for the next episode of this ongoing series. We’re sure you’ll like what you see!

1956 Ford F100 custom running board fabrication SEMA
1. The original F-100 running boards stick out a bit awkwardly. The plan is to slim these down and blend them into the fenders smoothly.
Ford F100 installed running board restoration process
2. The outermost stiffening rib was cut off the running board, reducing the width a couple of inches.
Ford F100 custom running board corner detailing
3. The curved corner at the rear end of the cab was originally made by spot welding a separate piece of metal into place.
Ford F100 running board corner fabrication details
4. To smooth this area, the original part was removed and the edges were prepared to make a smooth, butt-welded joint.
Ford F100 running board welding process and design
5. The panels are tack-welded back together.
Ford F100 custom running board full layout view
6. After finish welding and smoothing, the junction looks much better.
Ford F100 running board clamped for welding
7. A small wedge is removed from the front of the running board, allowing it to tuck in toward the cab a little more.
Ford F100 restored running board fabrication guide
8. The long joint is held with many clamps to ensure proper alignment as it is tack-welded together.
Ford F100 finished running board metal repair
9. After finish welding and metalfinishing, the running board is much smoother.
Ford F100 running board tack welding close-up
10. A new piece of 16-gauge metal was formed into a U-shape with a bending brake and tack welded to the edge of the running board.
Ford F100 cab corner under restoration on jack stands
11. The bottom edge of the front fender needed to be modified slightly to line up with the reconfigured running board.
Ford F100 cab corner clamped for welding during fabrication
12. Rather than welding in a long, tapered wedge of metal, a new bottom edge was made for the fender. This results in far less welding and produces a better result.
Ford F100 running board and cab corner alignment detail
13. To get a perfect fit, the small gap between the fender and running board needs to be filled.
Ford F100 cab corner weld seam close-up view
14. A shaped piece of metal is tack welded into place.
Ford F100 cab corner and running board smoothed weld joint
15. After doing some tune-up and bolting the parts together, the junction between the fender and the running board looks superb.
Ford F100 running board welded end cap fabrication
16. The underside of the flanged edge is reinforced with a carefully shaped piece of sheetmetal. You can see the studs that will mount the boards to the chassis, so there will be no visible fasteners on the top side.
Ford F100 running board fitment check near rear wheel
17. Lots of fitting needs to be done on the rear end of the running boards. The first step is extending the fender.
Ford F100 cab corner full weld with visible heat marks
18. An oversized piece of metal is grafted onto the front edge of the rear fender.
Ford F100 cab corner panel smoothed after welding
19. The joint is smoothed and metalfinished.
Ford F100 running board clamped to cab corner for alignment
20. Filler pieces are added to the running board, establishing a perfect fit with the fender.
Ford F100 running board fabrication with clean, sharp lines
21. The inner edge of the running board will be removable, which requires some very intricate fitting.
Ford F100 running board welding with visible heat marks
22. An angle, bent from 16-gauge sheetmetal, is welded to the inner edge of the running board.
Ford F100 cab corner weld detail with smooth transition
23. The inner corner of this complex junction is made from many carefully shaped pieces.
Ford F100 cab corner seam precision smoothed
24. After sanding and smoothing, the joint looks like it was die-stamped.
Ford F100 custom corner panel parts ready for assembly
25. A small piece of sheetmetal is needed to finish the lower corner of the rear fender. An elaborate hammerform was made from solid steel to help shape the part, which is seen on the upper right.
Ford F100 rear wheel corner fitment with running board attached
26. This piece is tack-welded into place and carefully adjusted before finish welding.
Ford F100 cab corner and running board seamless joint finish
27. Here’s the finished junction, showcasing the high level of work done by the crew at Gary’s Rods & Restorations.
SOURCE