CTP Tech
InTheGarageMedia.com
man inspecting a cable connecting a truck bed to its door
No Longer Lacking Latches
There’s a Better Way to Secure a Tailgate
By Ryan MansonPhotography by THE AUTHOR
W

hen new, many of what we consider today to be classic pickups were much more rudimentary when compared to their modern equivalent. Creature comforts, like climate control or a radio, were oftentimes only available as upgraded options on what would otherwise be a bare-bones workhorse. Power accessories were unheard of and anything that didn’t actually contribute to what might be the job at hand were omitted. Today, however, these trucks are receiving a new lease on life thanks to the revived interest in their use, not so much for work but for play as well. With that comes the upgrades that many of us have come to expect, having been spoiled by the creature comforts and build quality of modern vehicles. The addition of power accessories, climate control, et al, are standard fare on many classic truck builds today, as is an expectation of improved quality.

Fit and finish were unlikely talking points of our trucks originally, with terms like “strength,” “hauling capacity,” and “workload” being the more predominant adjectives. The doors and hood fit and that was about it, they opened and shut and that was the be-all end-all, for the most part. The hood and tailgate were likely the same. Things were adjusted to the point where they operated without conflict, with aesthetics and style oftentimes being overlooked or simply not of concern. Fast-forward to today and these trucks are being rebuilt to levels never dreamt of by their original designers, with fit and finish being a serious concern. This often requires reworking much of the original equipment to a point past its capability, requiring modification or complete replacement necessary. In some cases, there was no original equipment to achieve what we might set out to accomplish today.

One good example of this happens to be a fairly important part of every pickup truck: the tailgate. Up until the late ’60s, most trucks featured an extremely rudimentary fashion of securing and supporting the tailgate that consisted of a length of chain with a hook on one end. A sheath of leather or similar material made for a touch of luxury, as that prevented the resulting swinging chains from bashing against the tailgate and bedsides, effectively destroying the paint in the process. “Securing” the tailgate closed is a relative term as the hook-and-chain arrangement held it closed; but it was anything but secure, as the tailgate could move around with as much freedom as the arrangement allowed. The more the truck was used and abused, the more freedom the tailgate seemed to receive, resulting in further damage, not to mention the noise that accompanied said movement between the sheetmetal components.

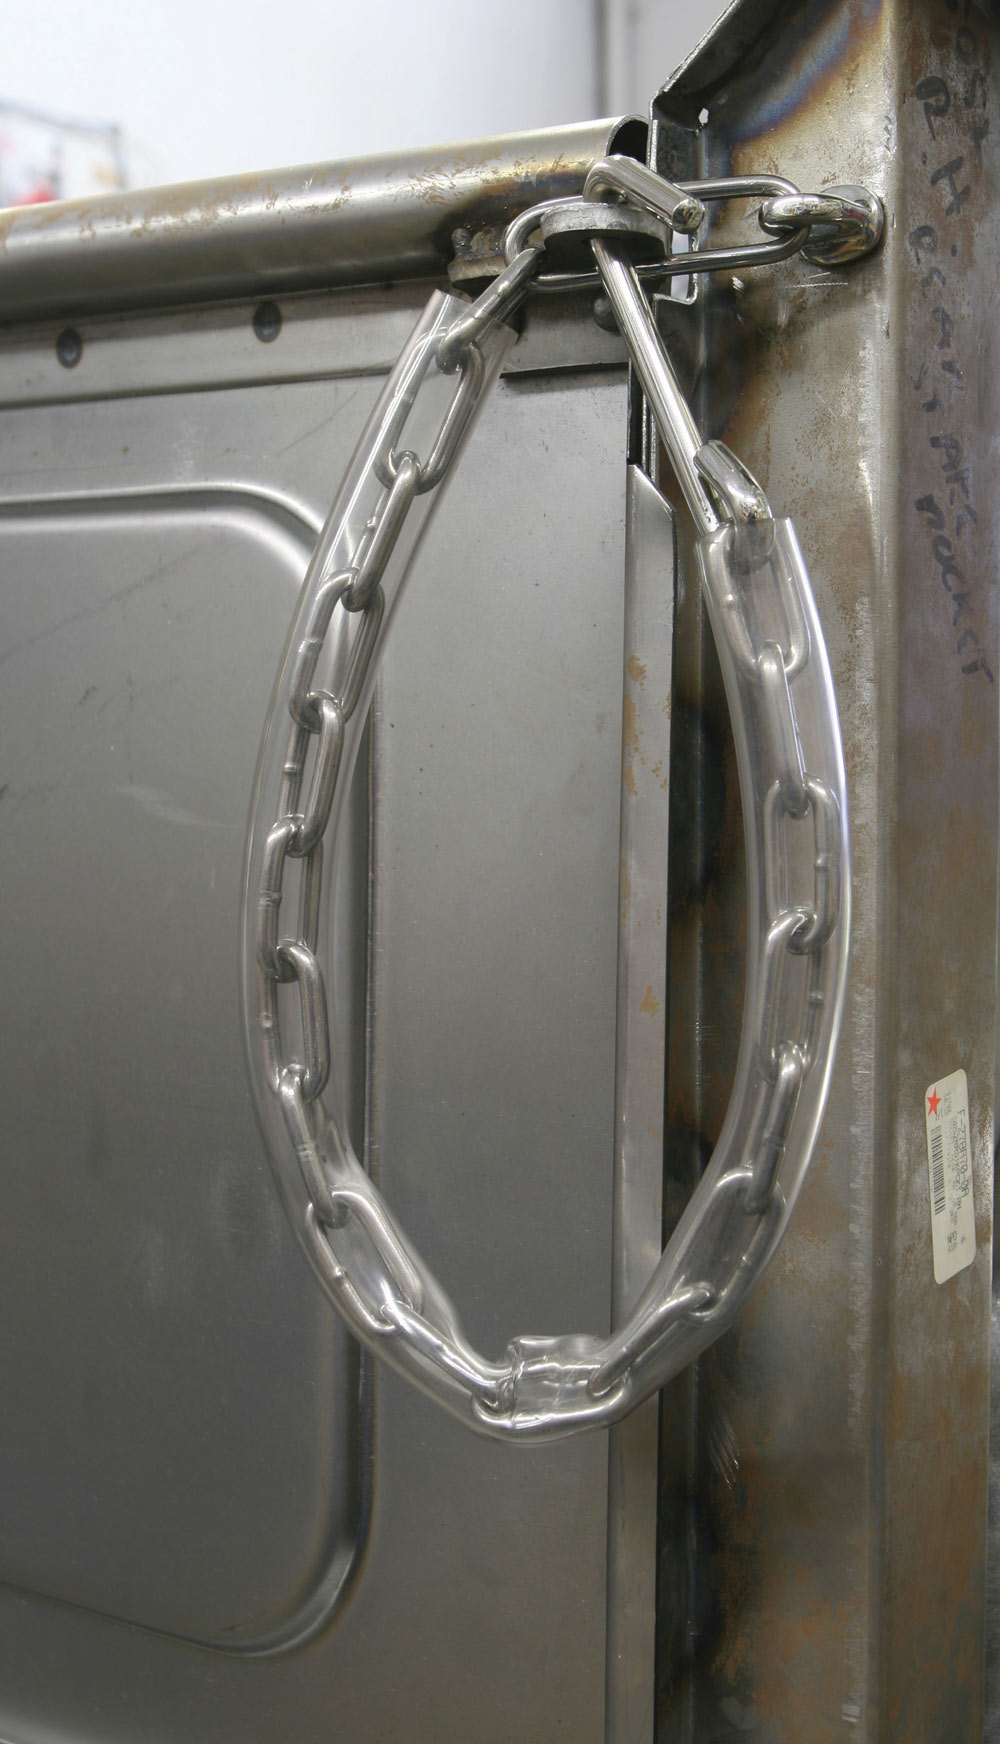
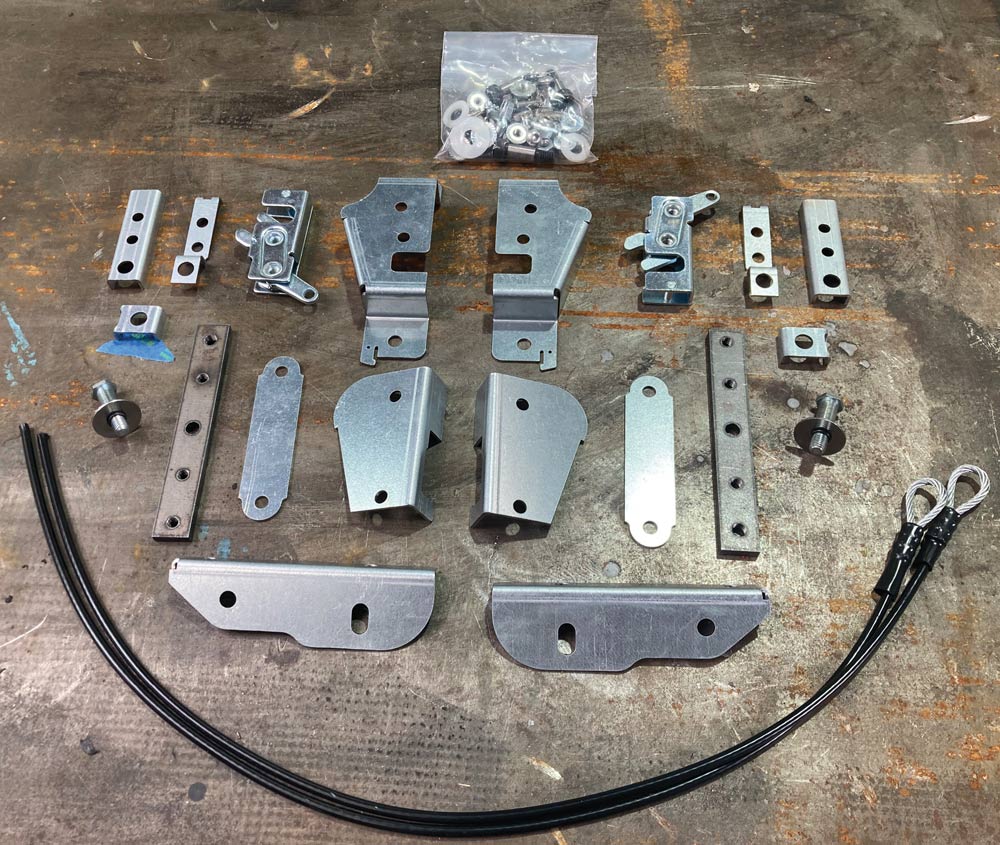
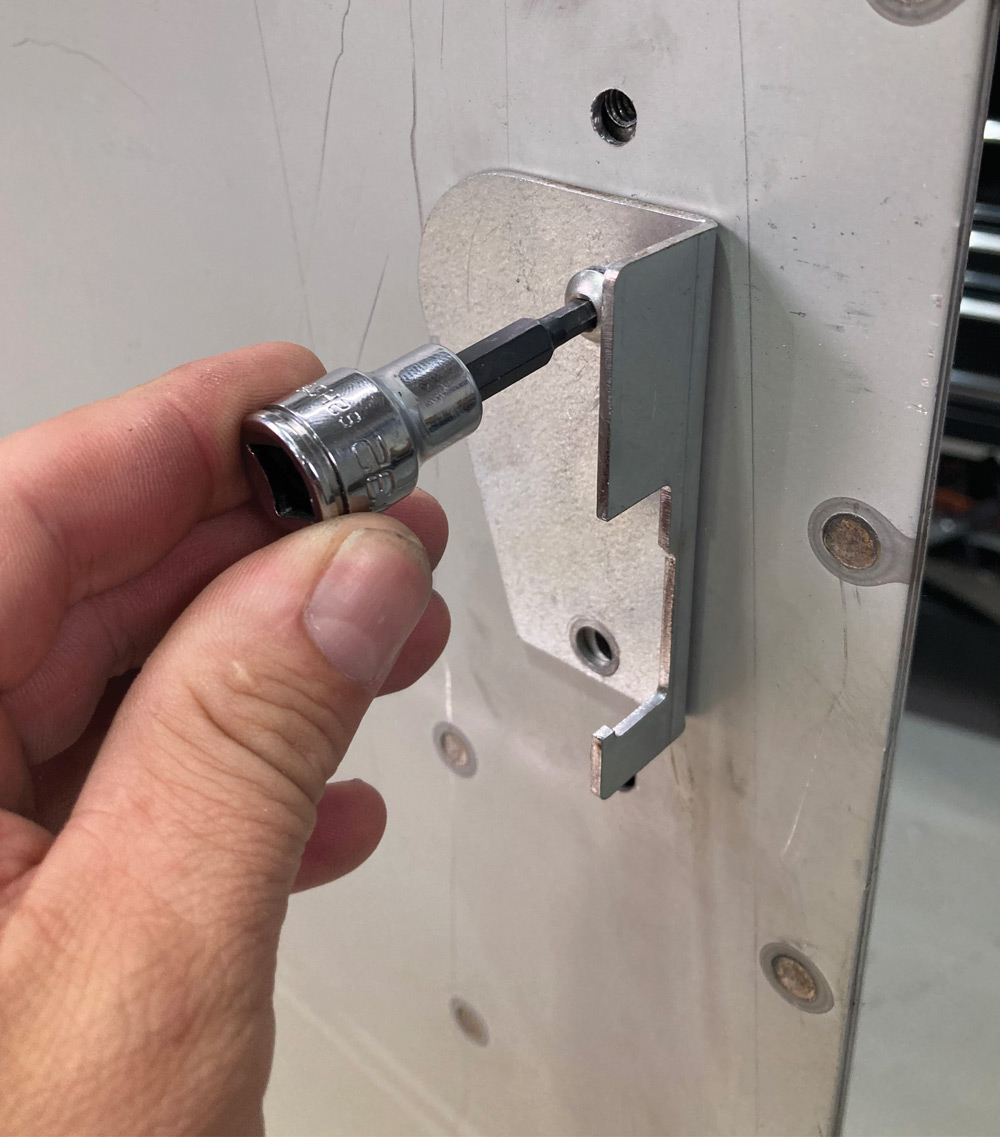
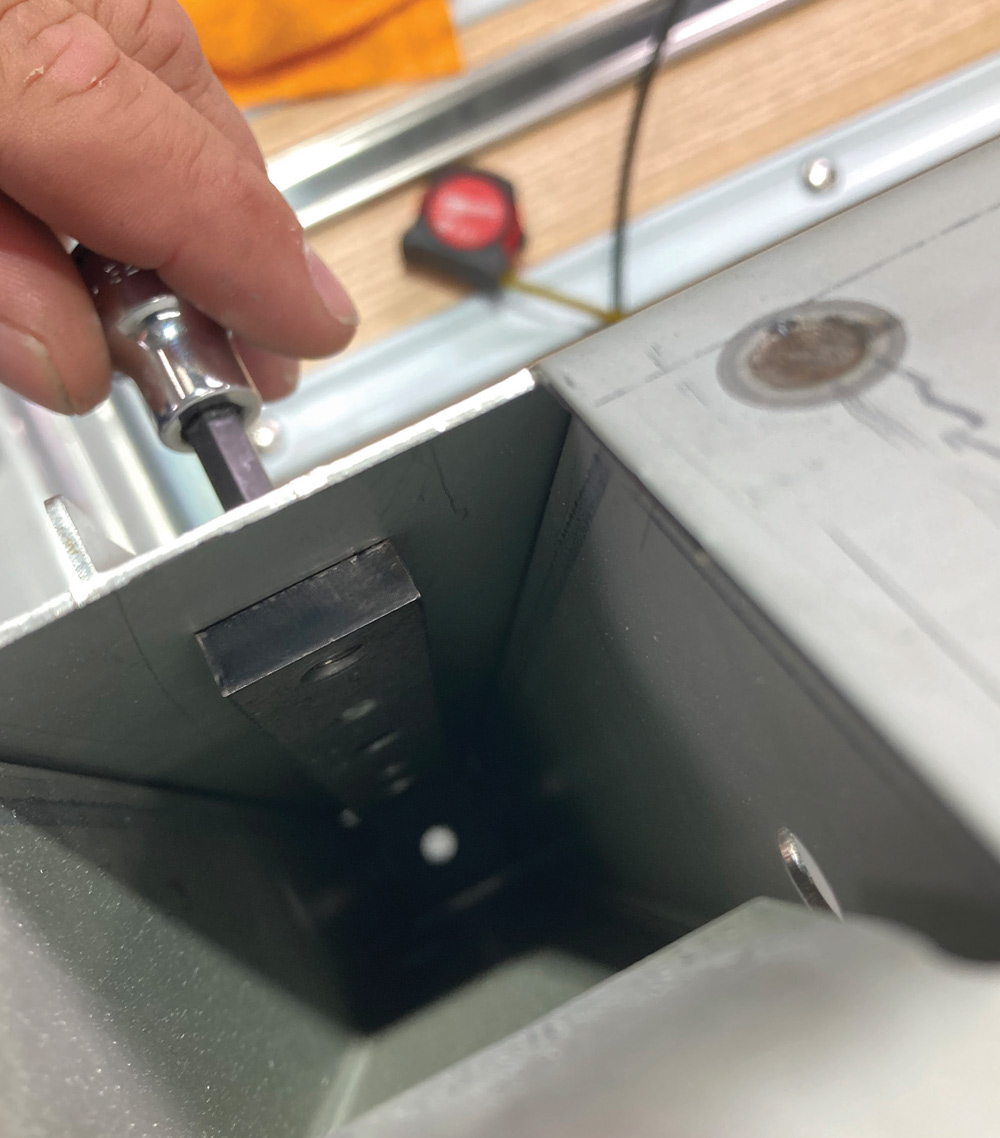
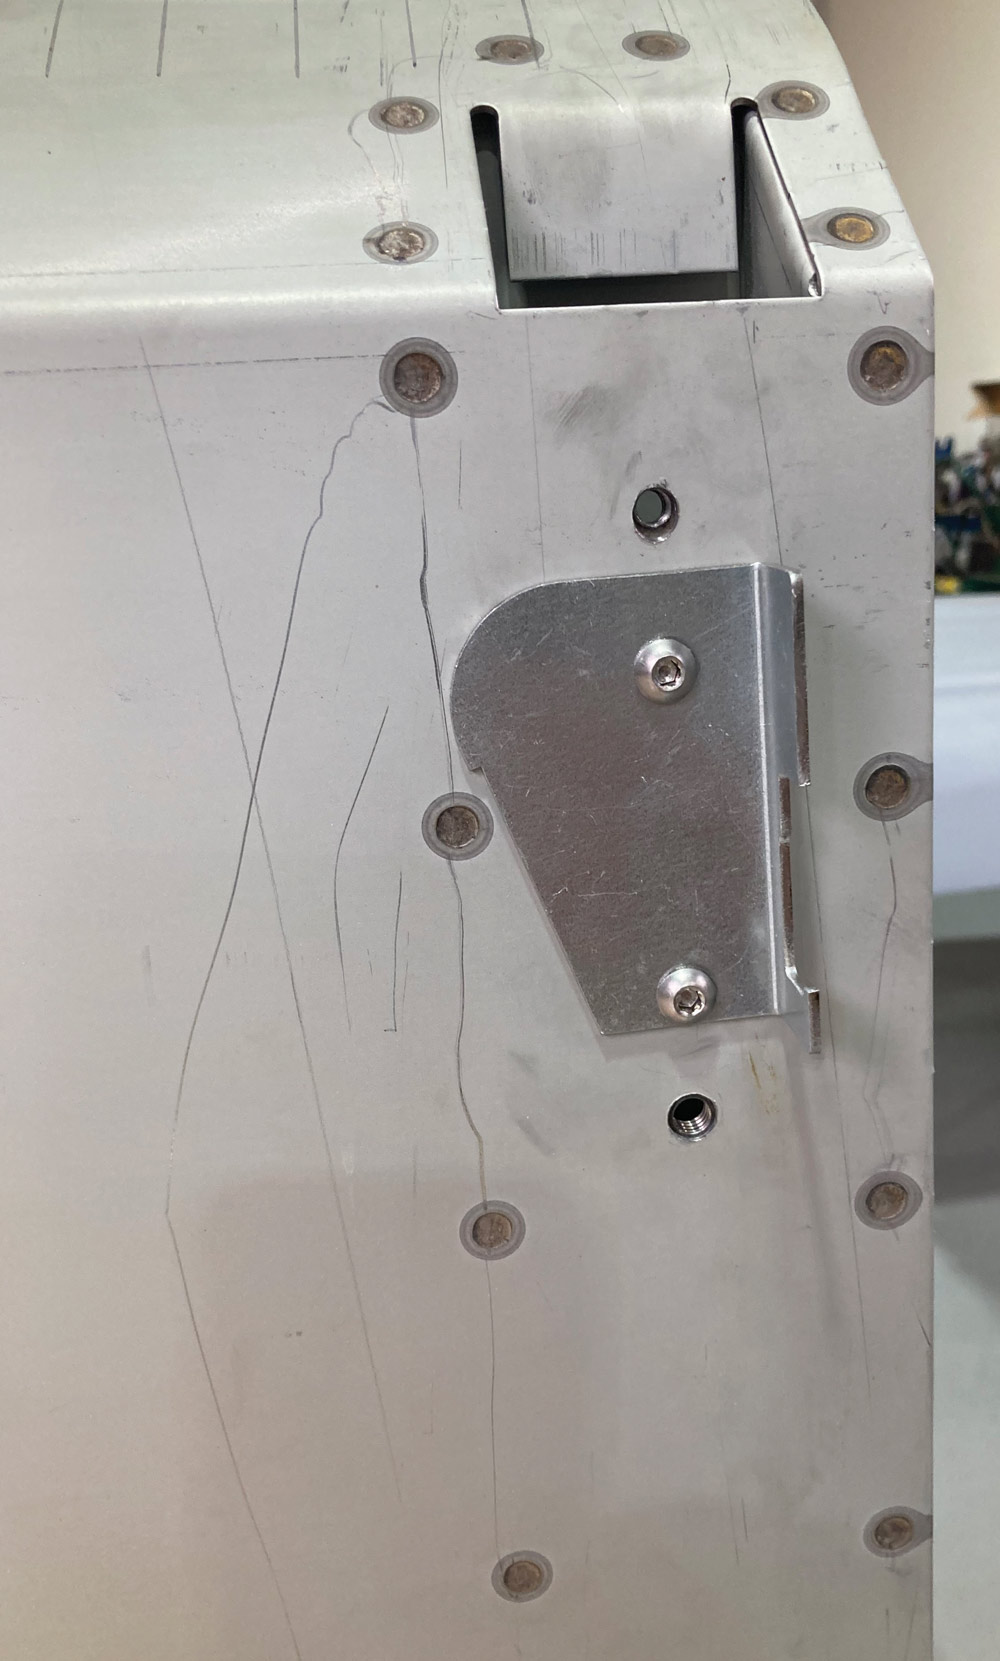
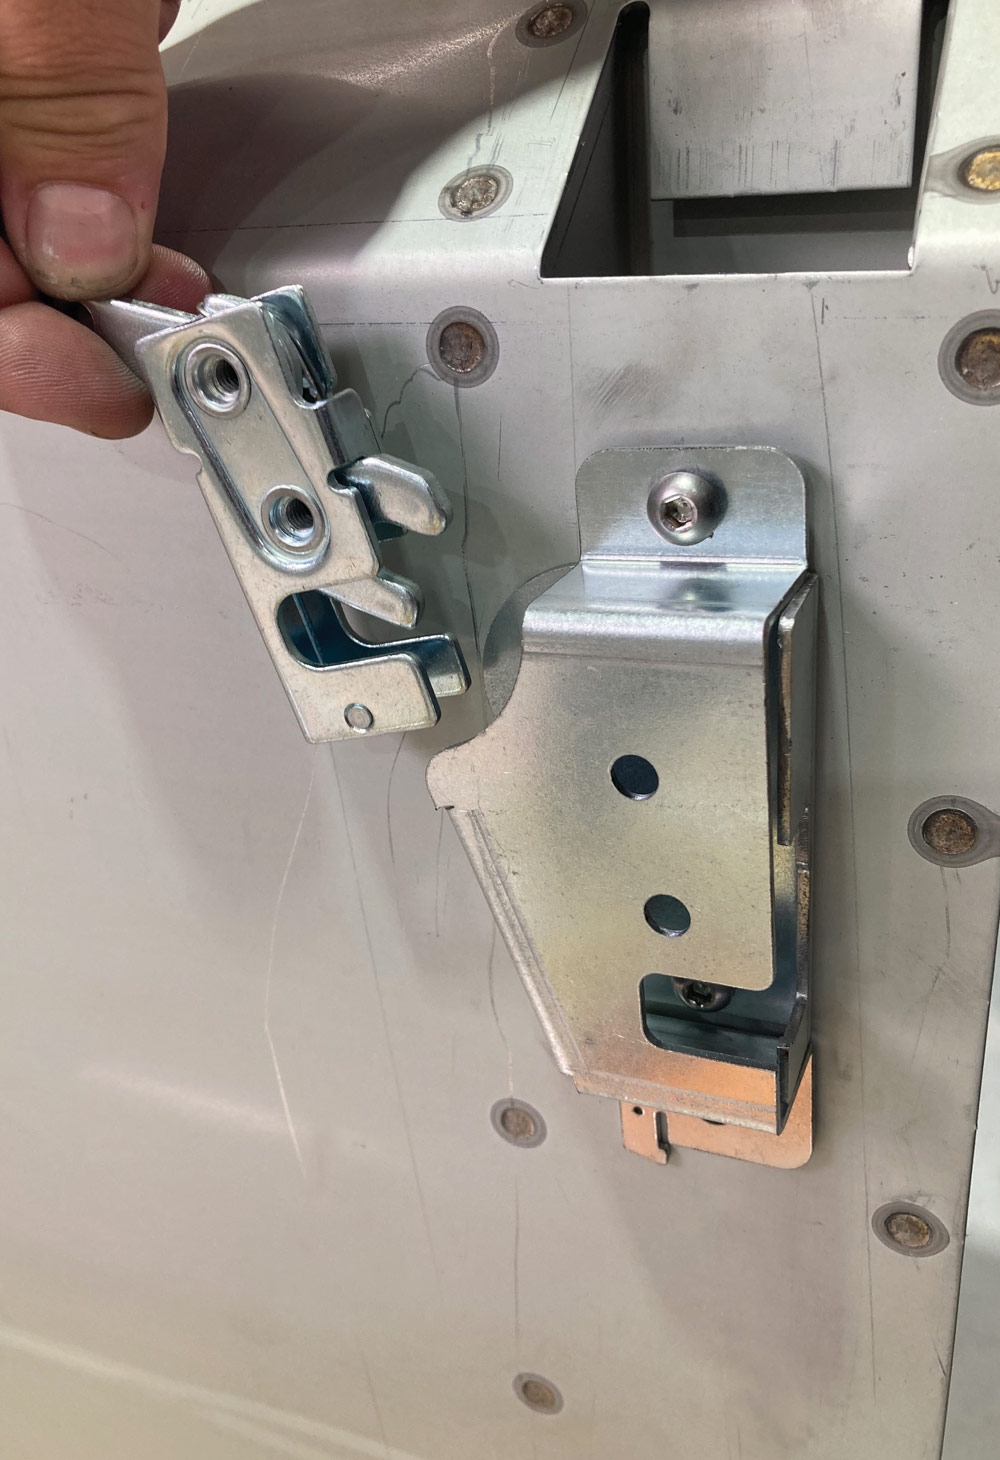
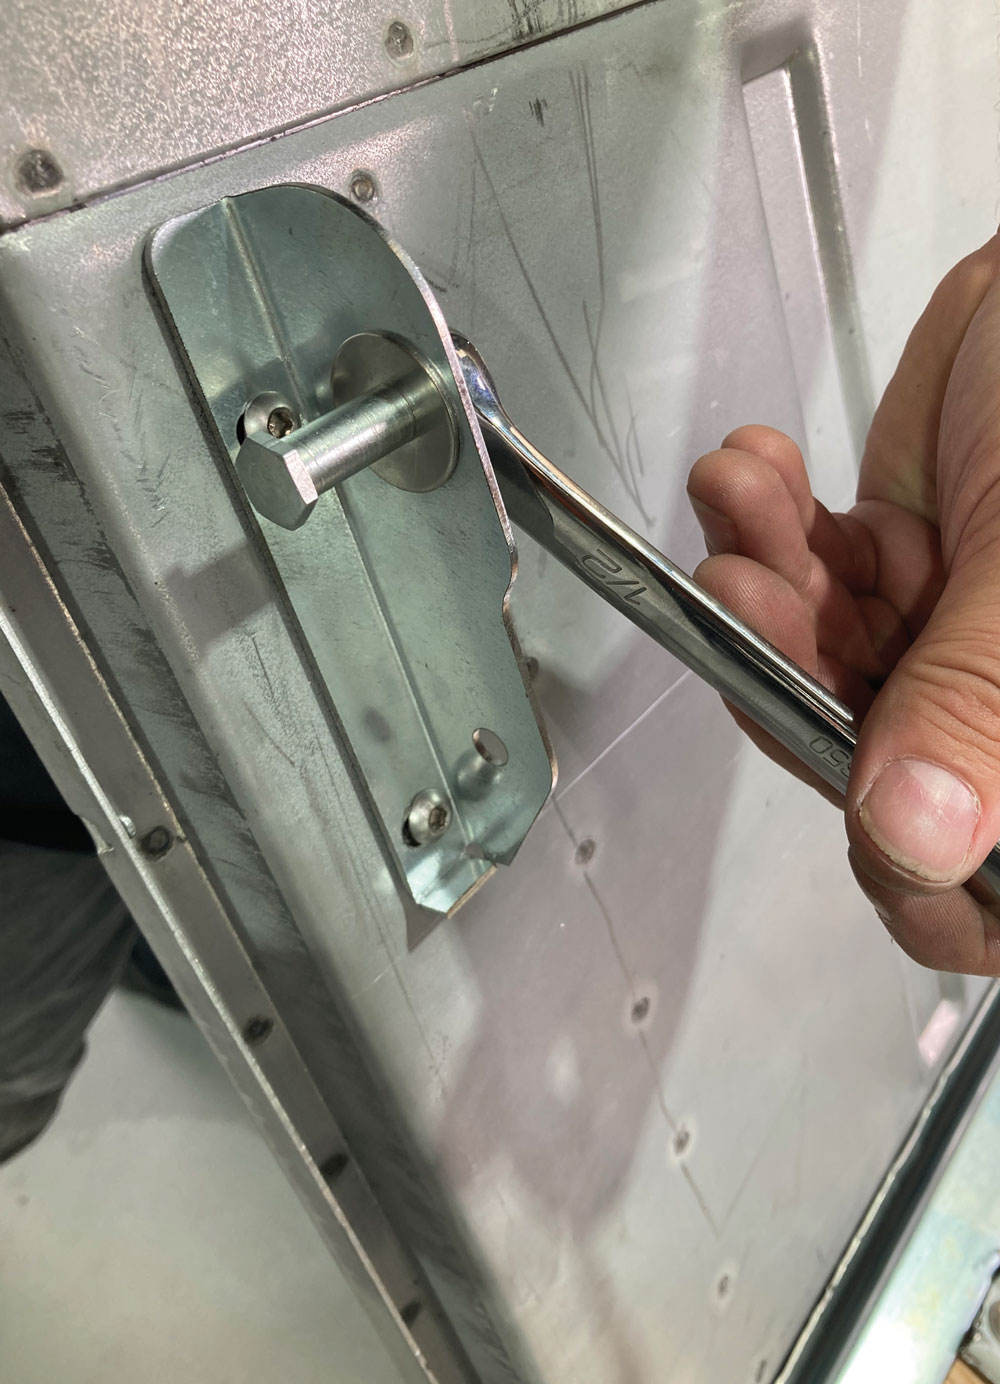
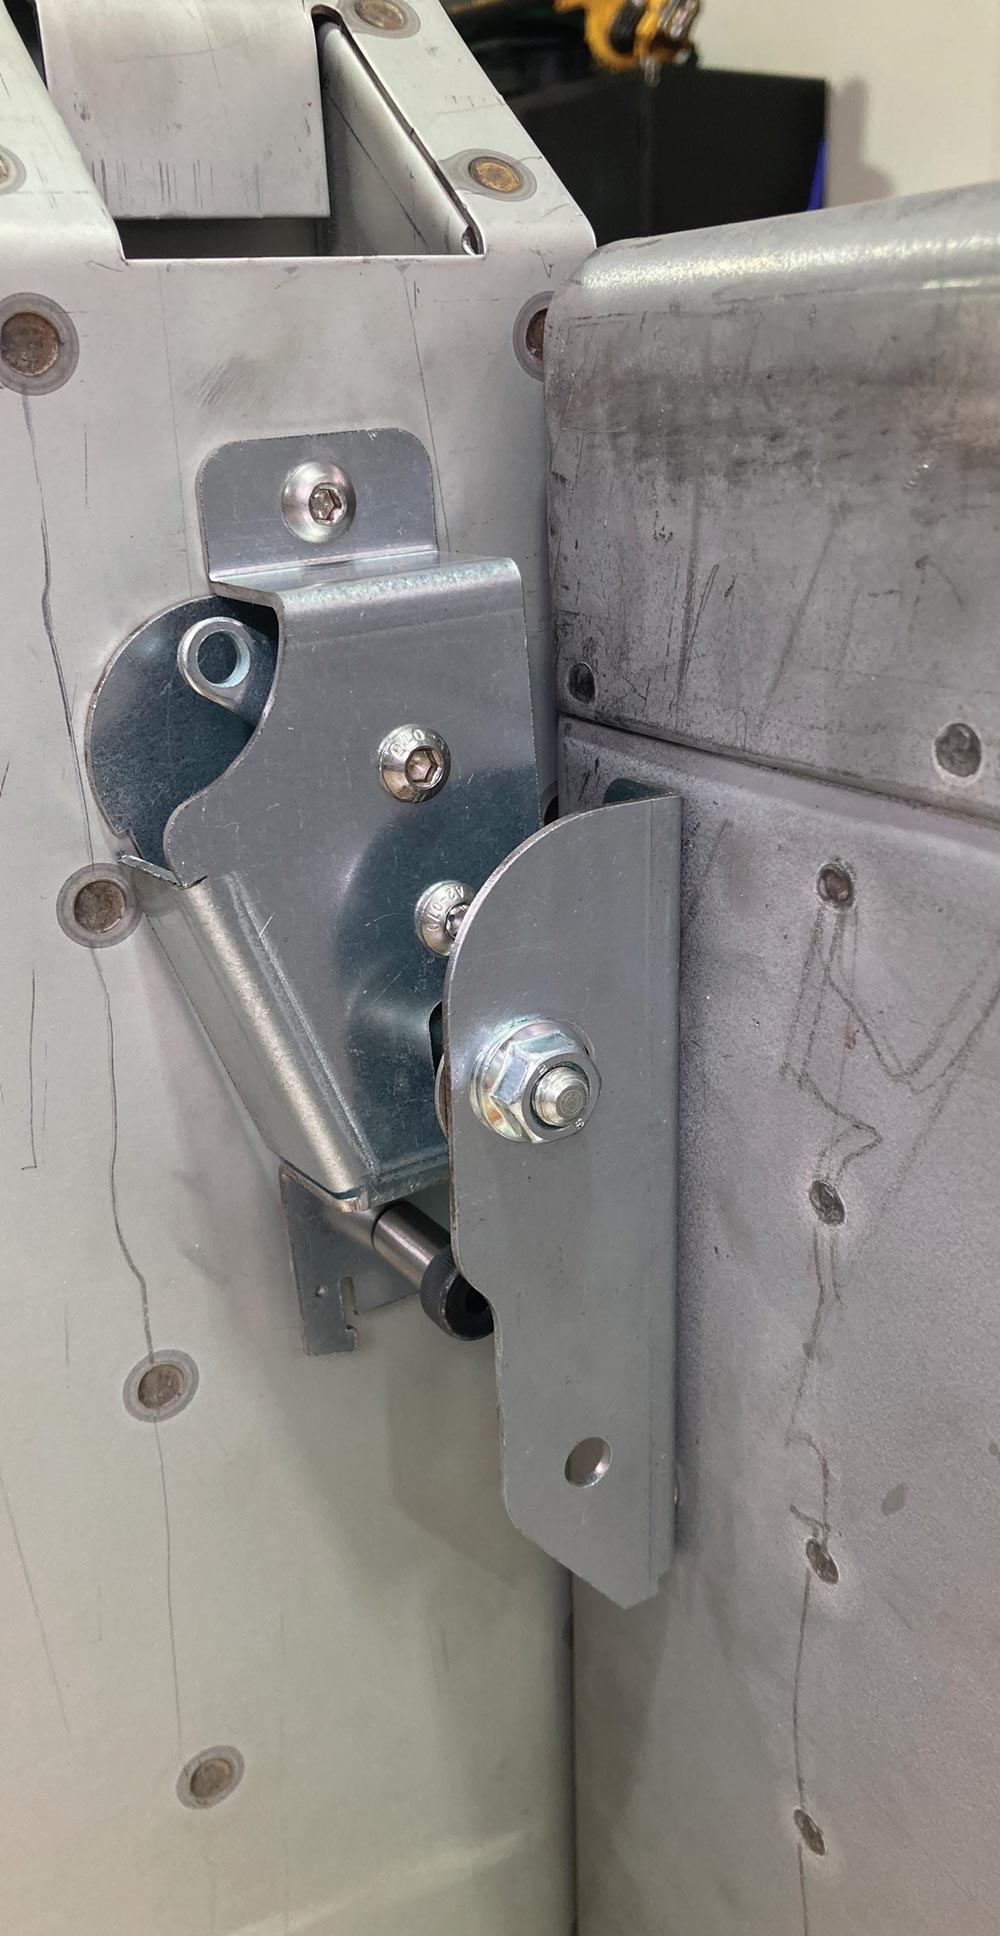
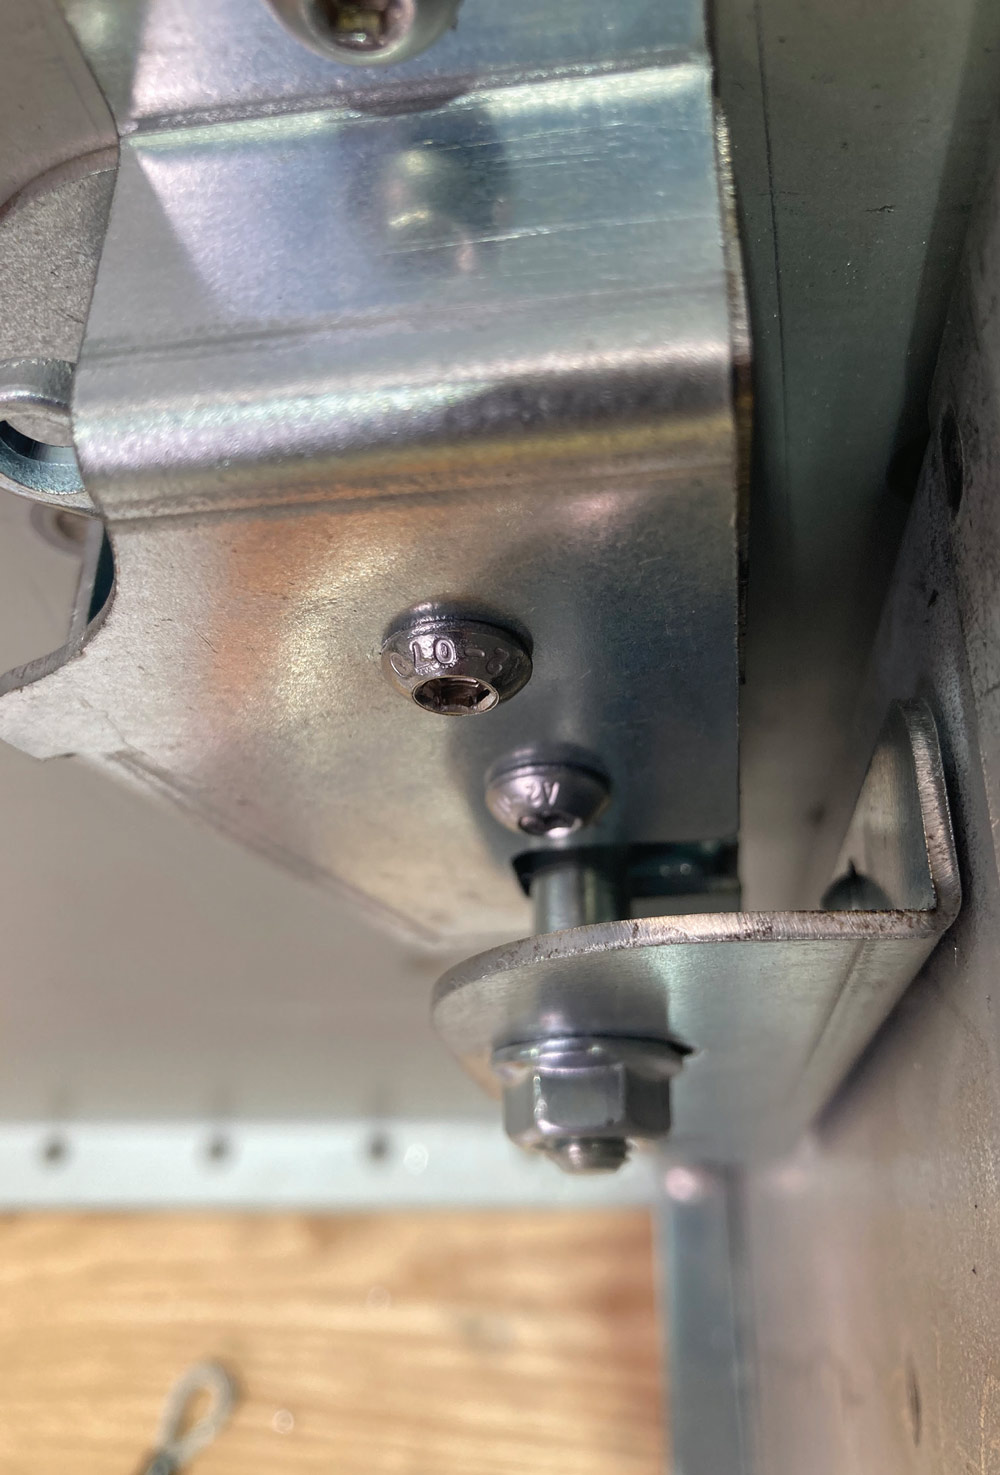
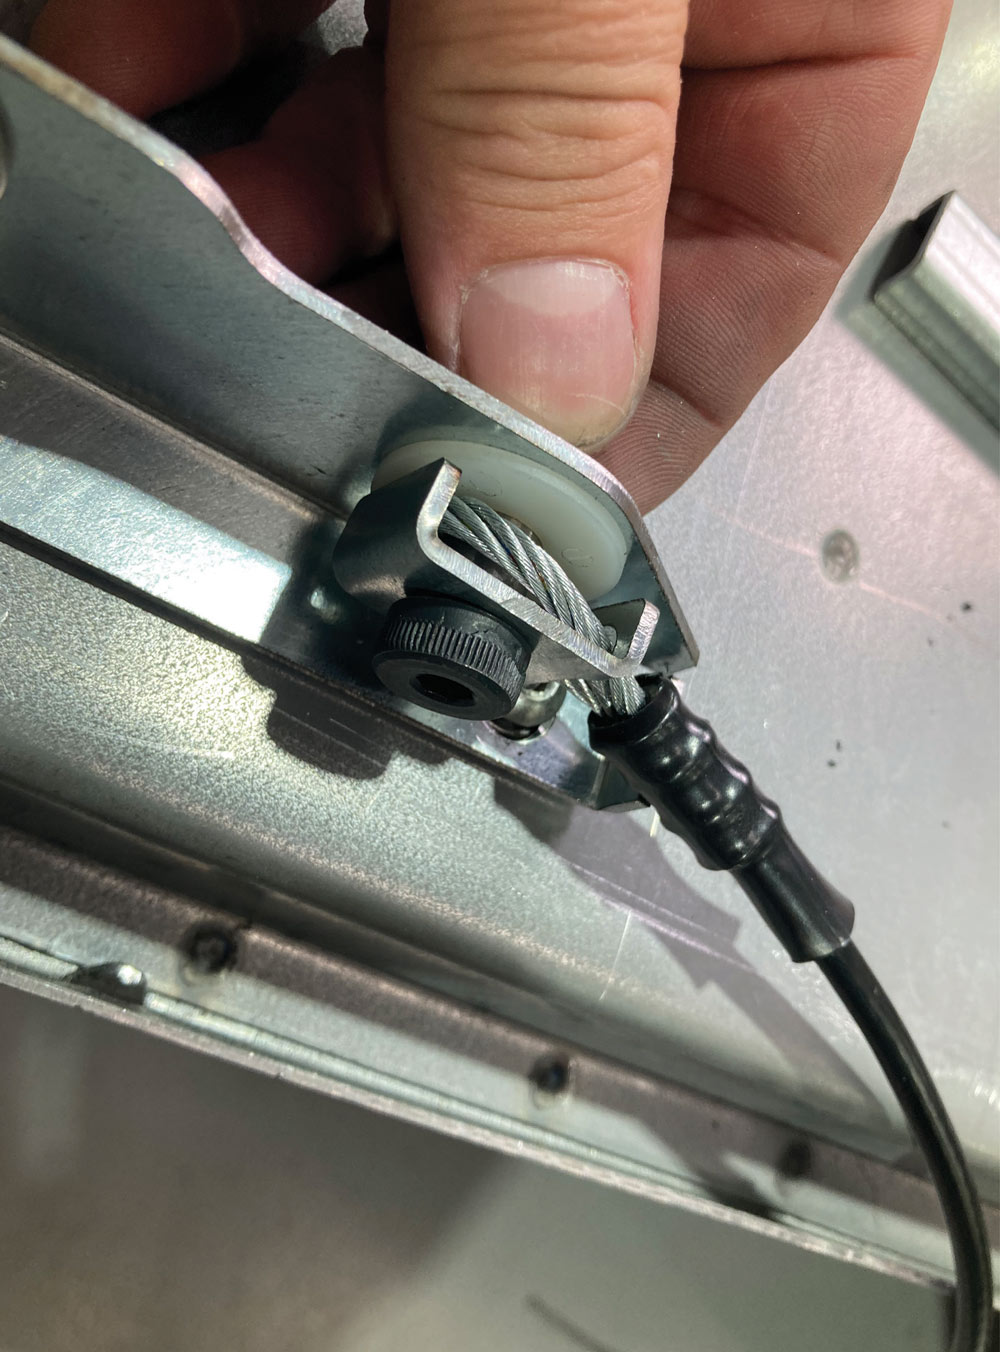
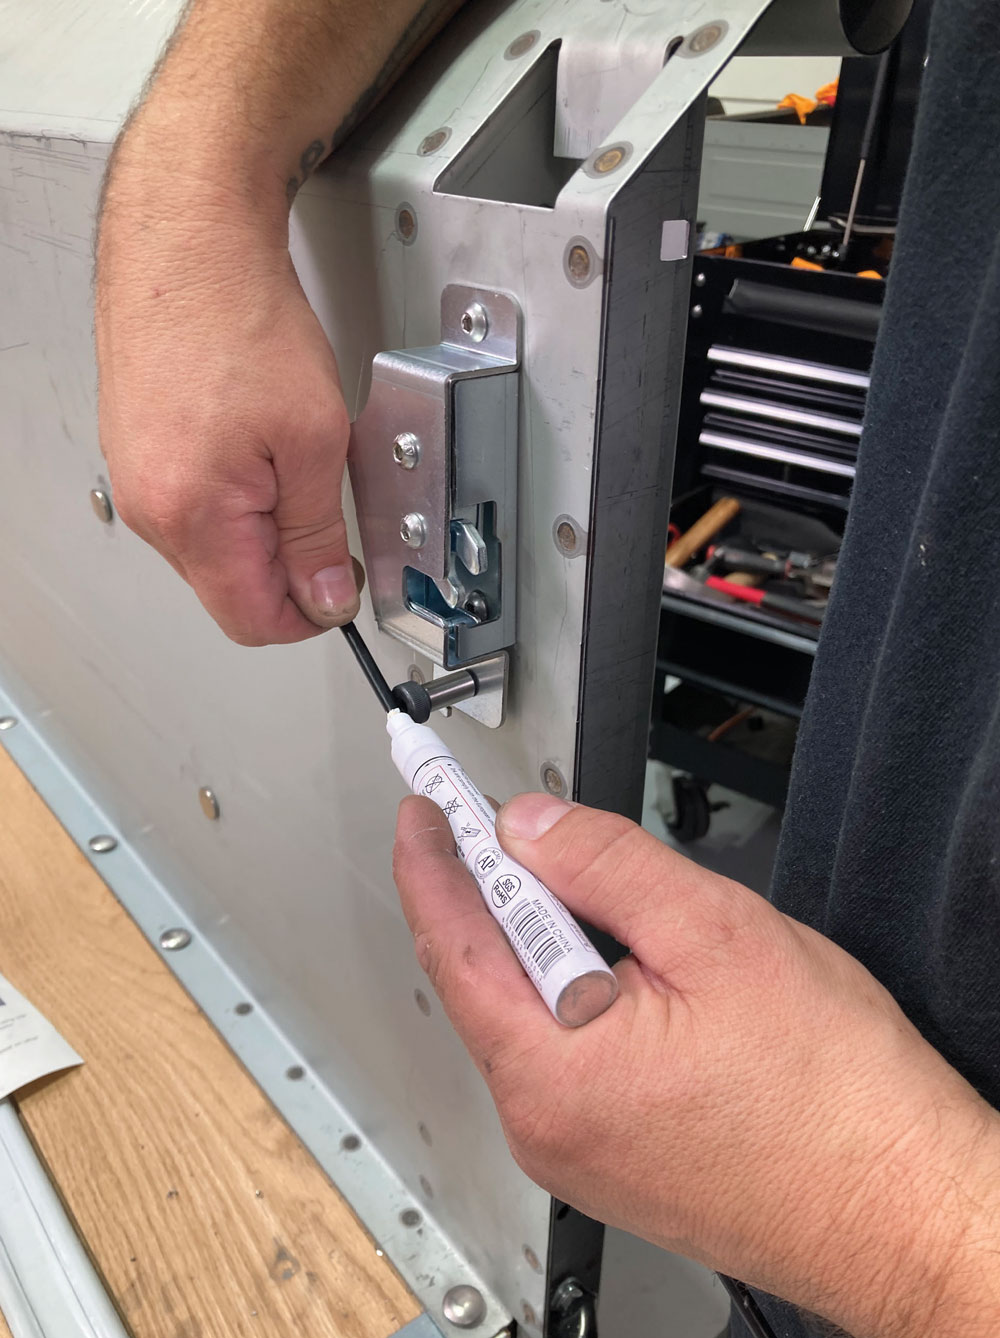
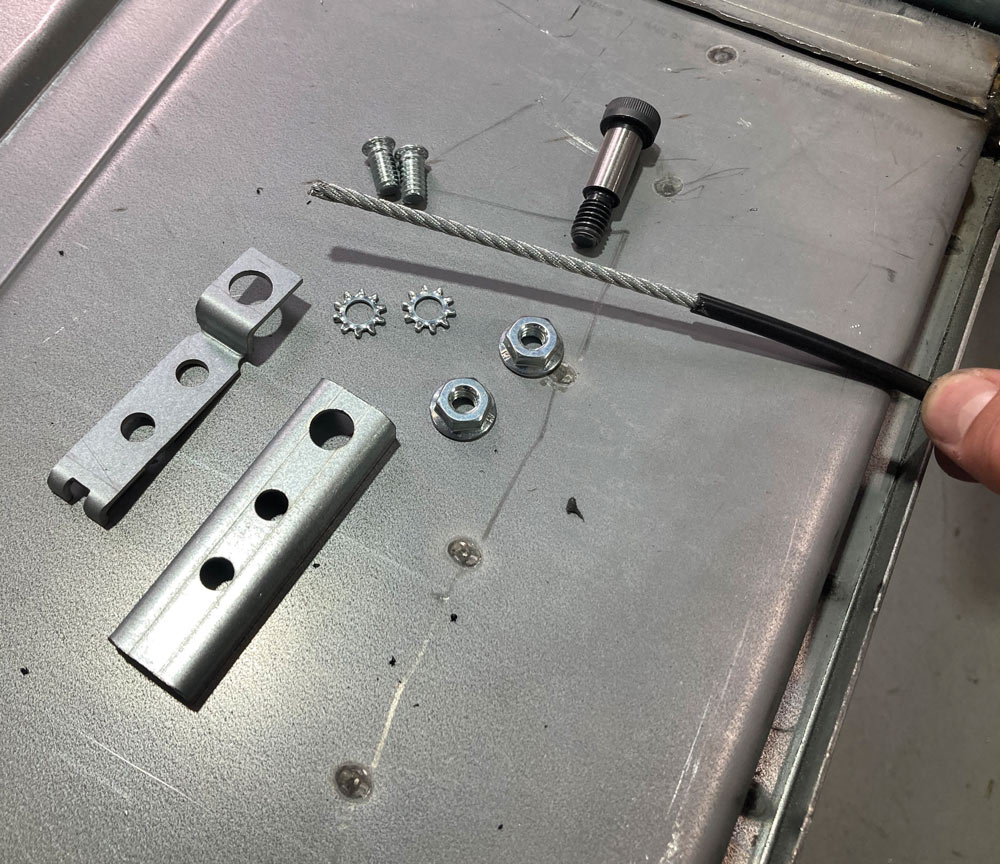
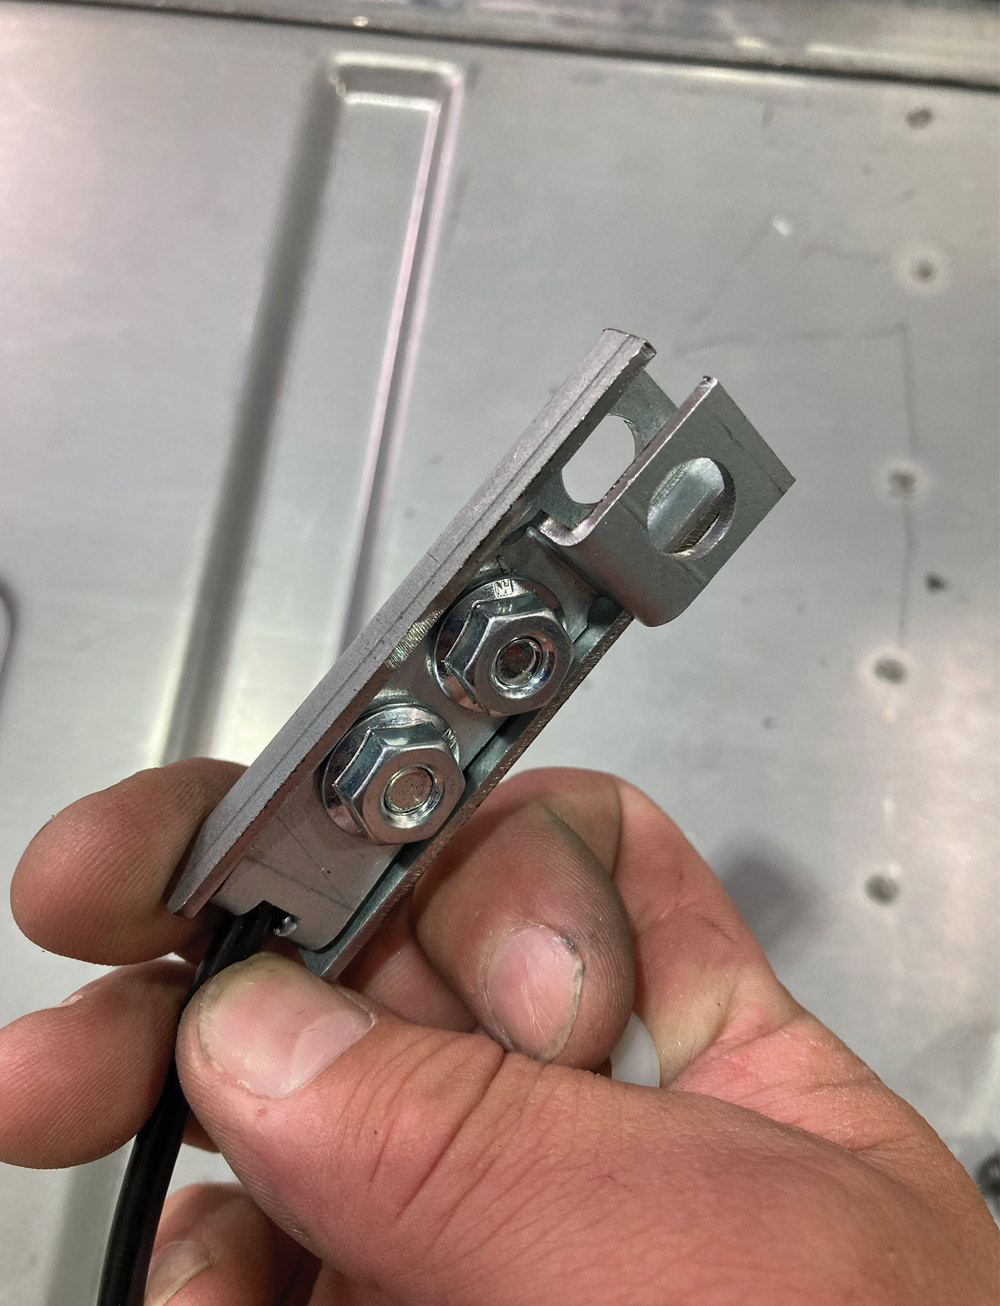
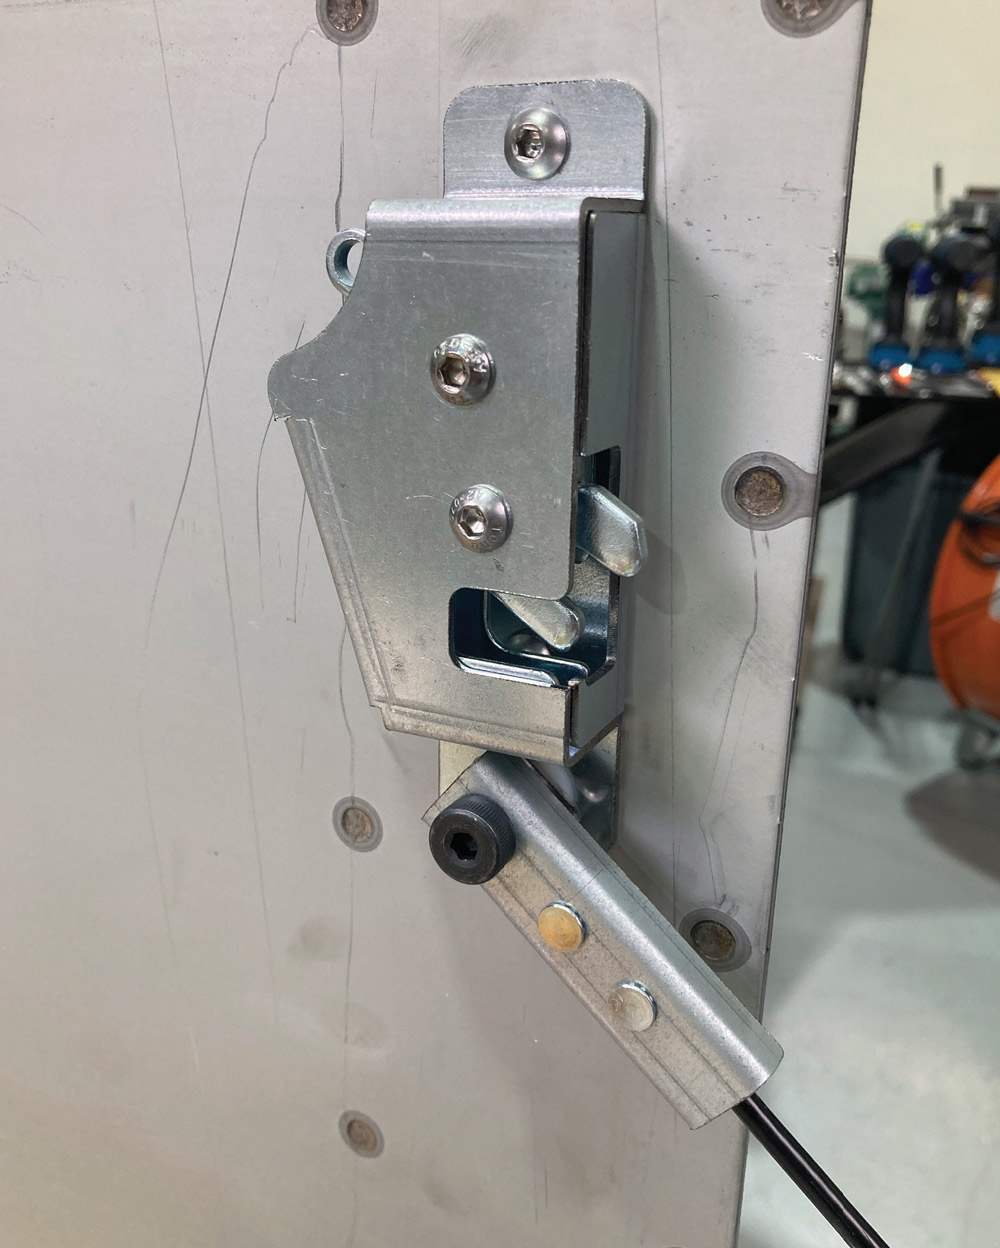
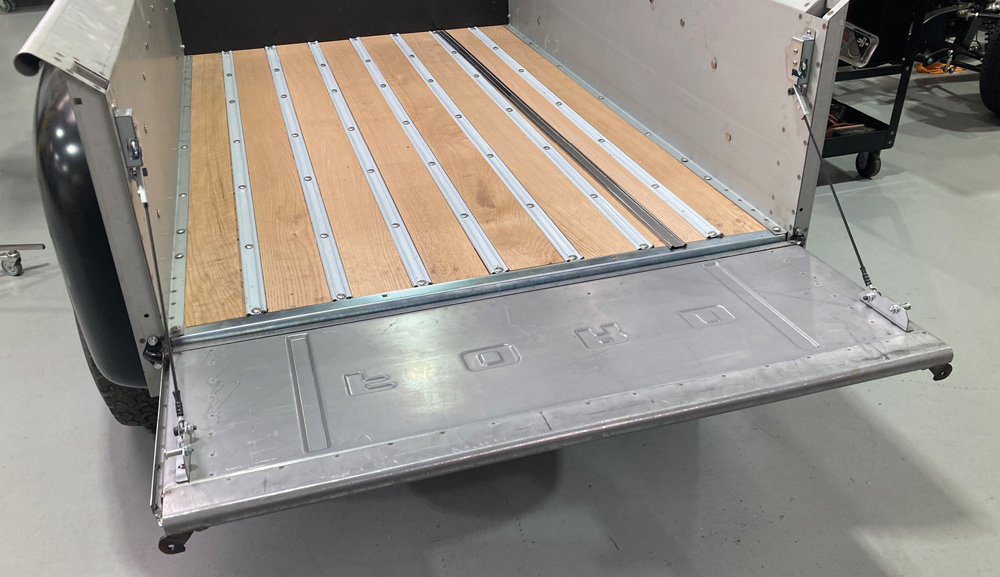
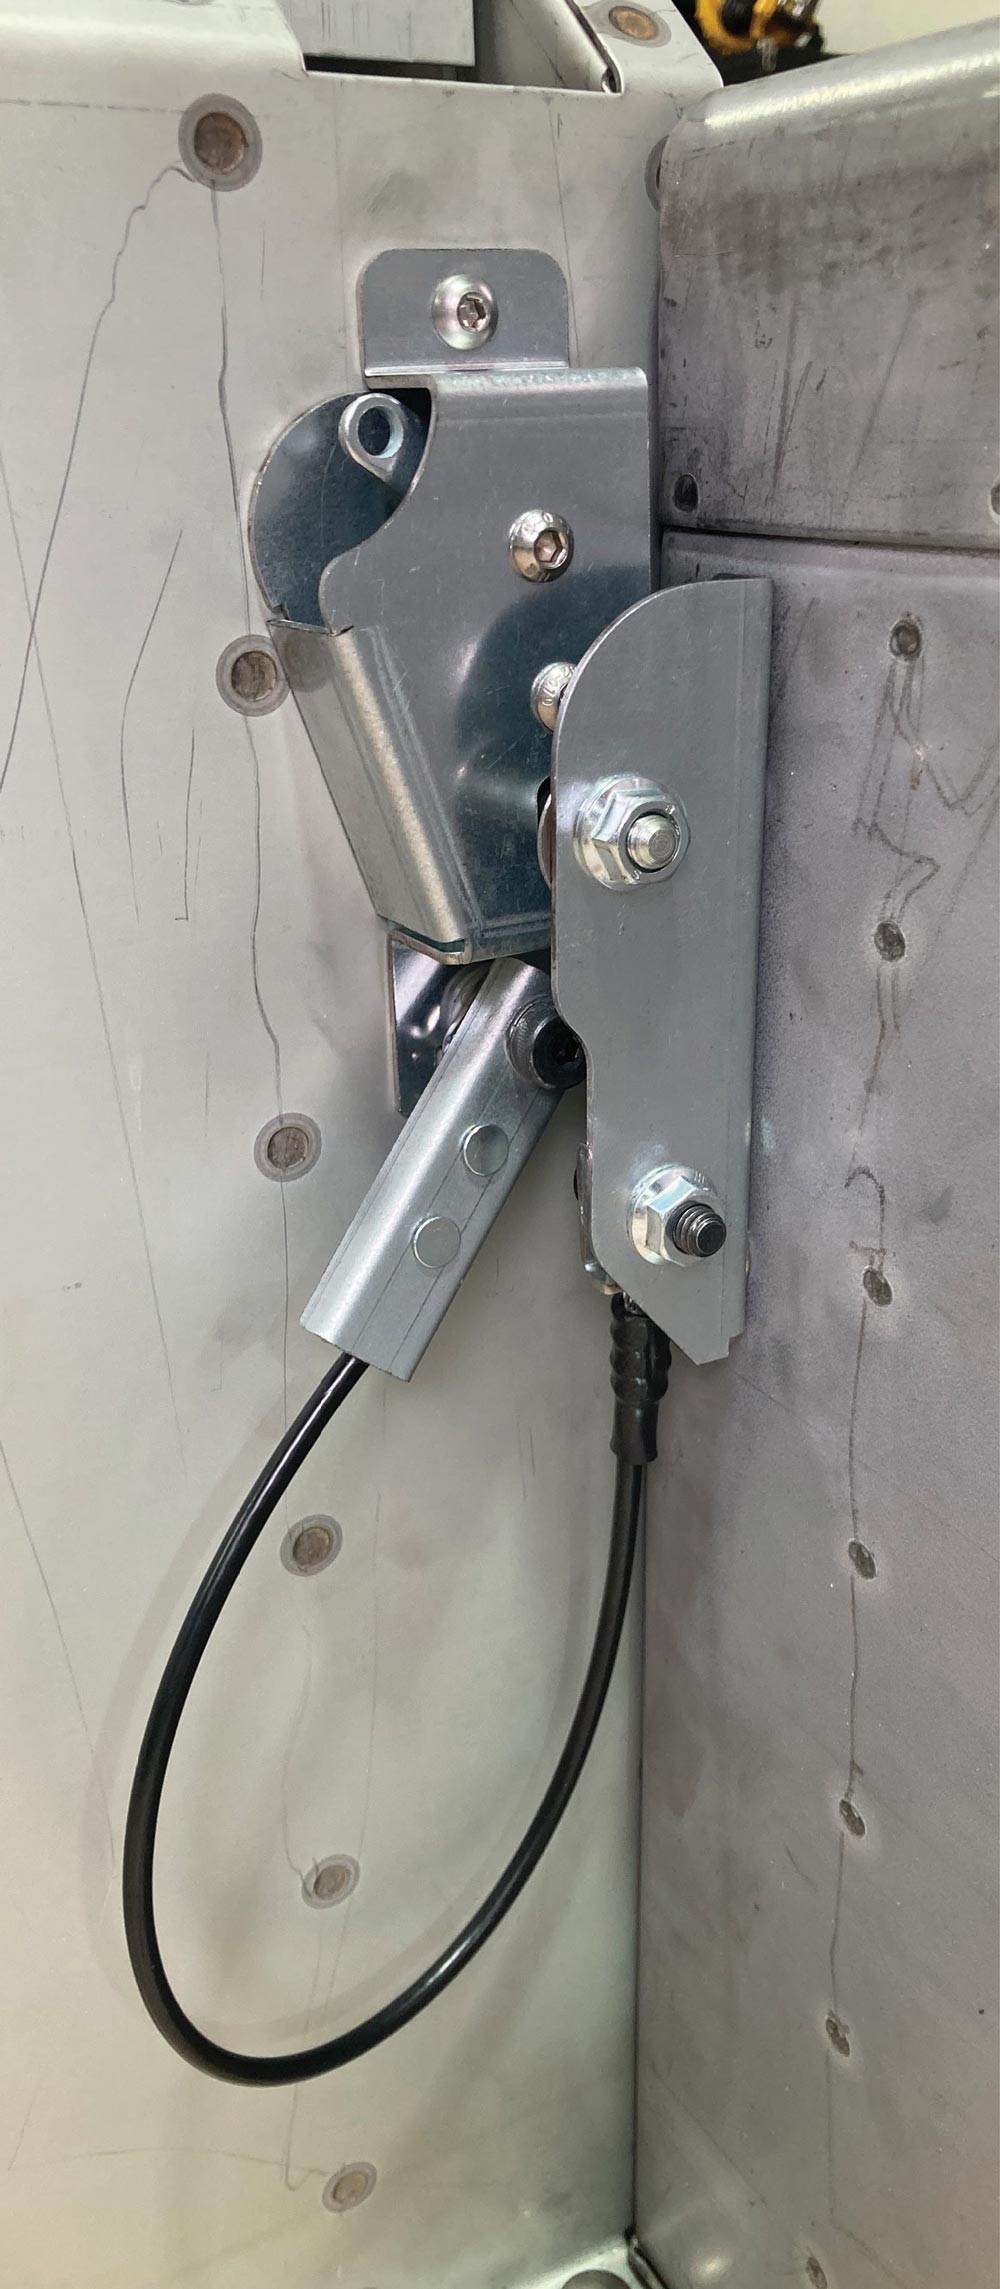
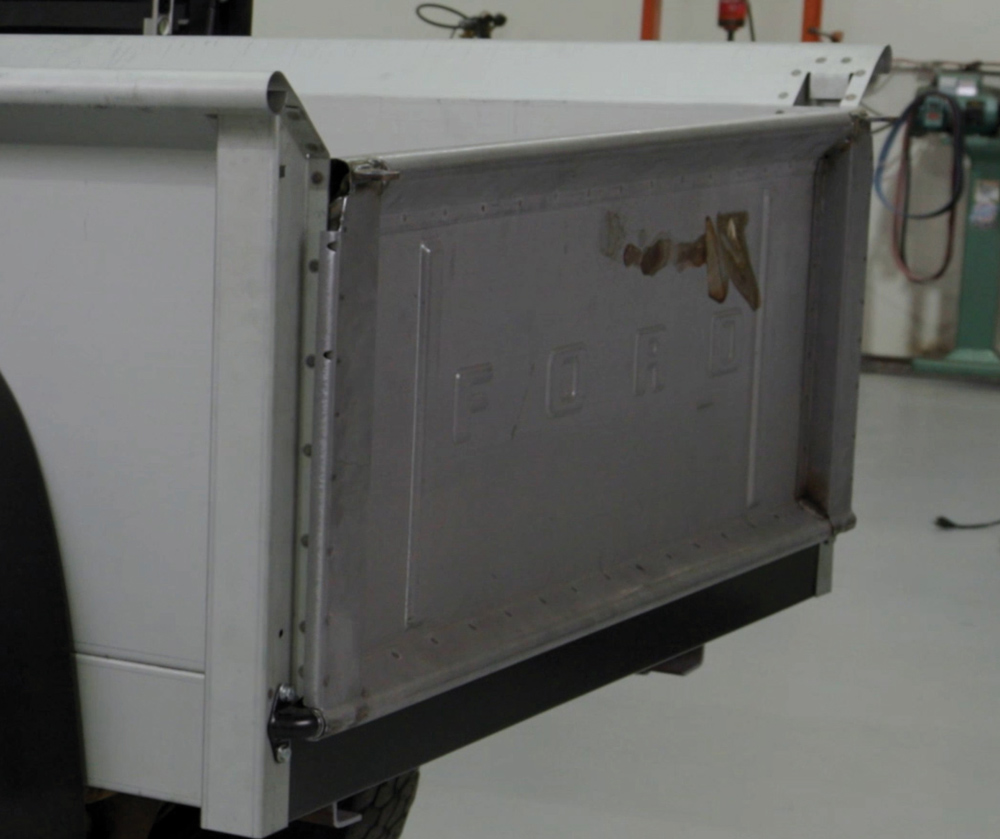
With the attention that these trucks now receive, it only makes sense to pay the same amount to the tailgate area, addressing the chain arrangement and improving an easily improved area. One of the best ways to do so that we’ve seen is by installing a Universal Tailgate Latch Kit from LMC Truck. This kit uses a modern rotary latch and pin to properly secure the tailgate when it’s closed, as well as vinyl-wrapped cables to support the ‘gate when it’s open. What’s better, the kit can be installed on nearly any latchless pickup truck, be it Fleetside or Stepside (that’s Styleside and Flareside to you Ford guys), F-100, Advance Design, Taskforce, F-1, C10, well, you get the picture. The kit can be installed by either bolted or welded methods as well, making installation easy for even the most mechanically challenged among us.

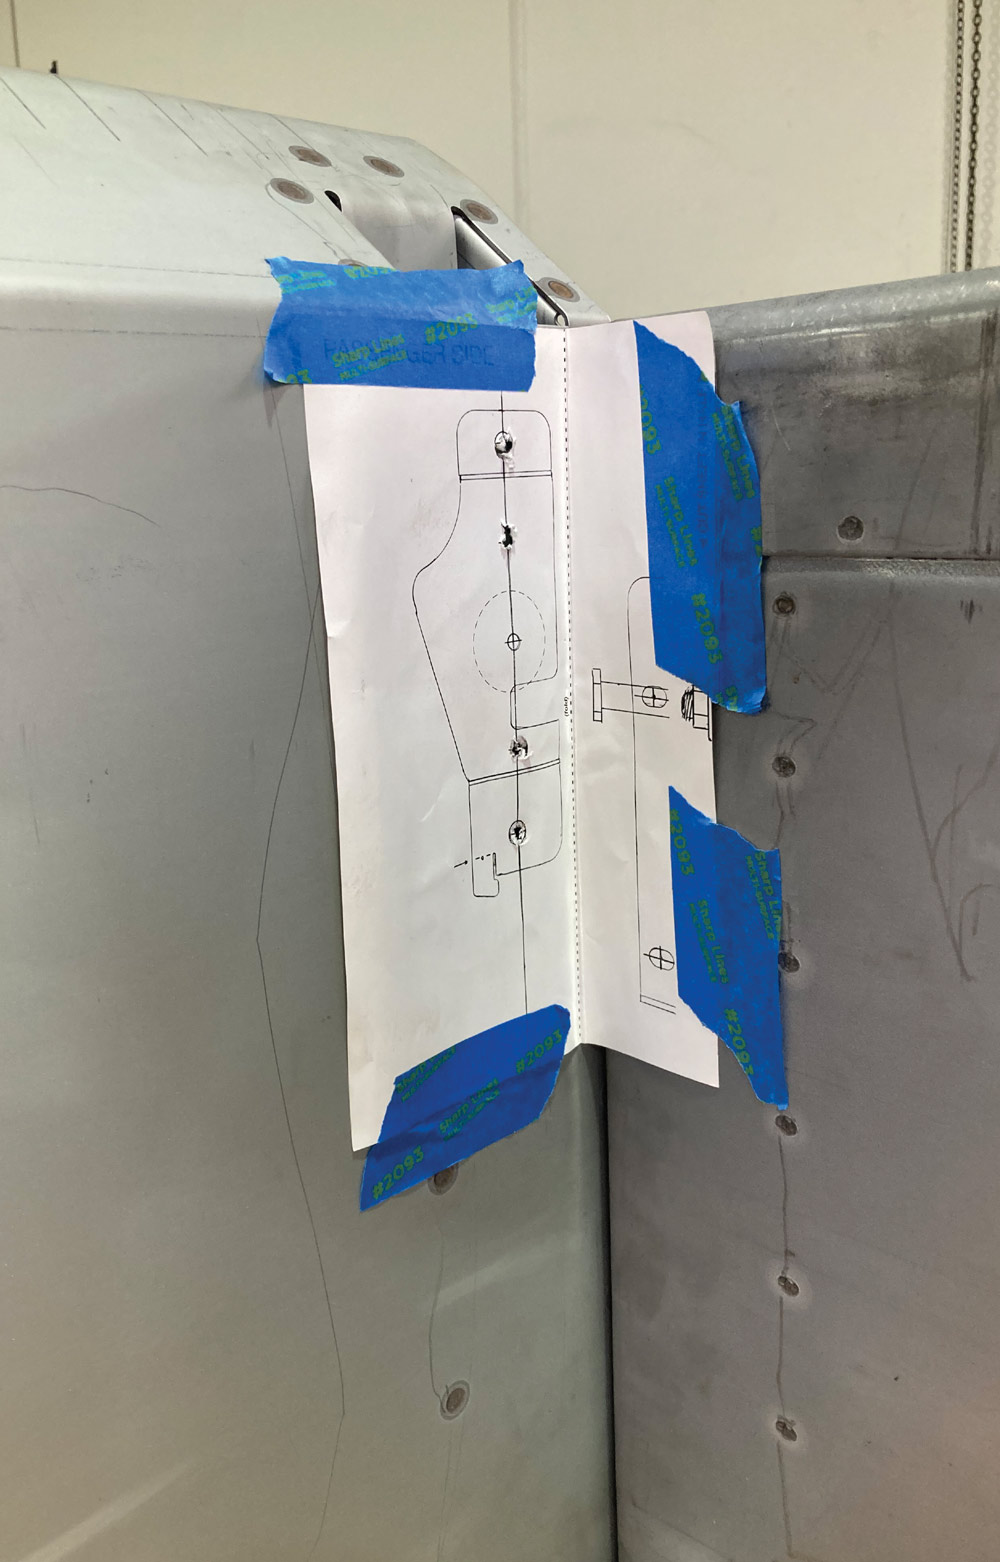
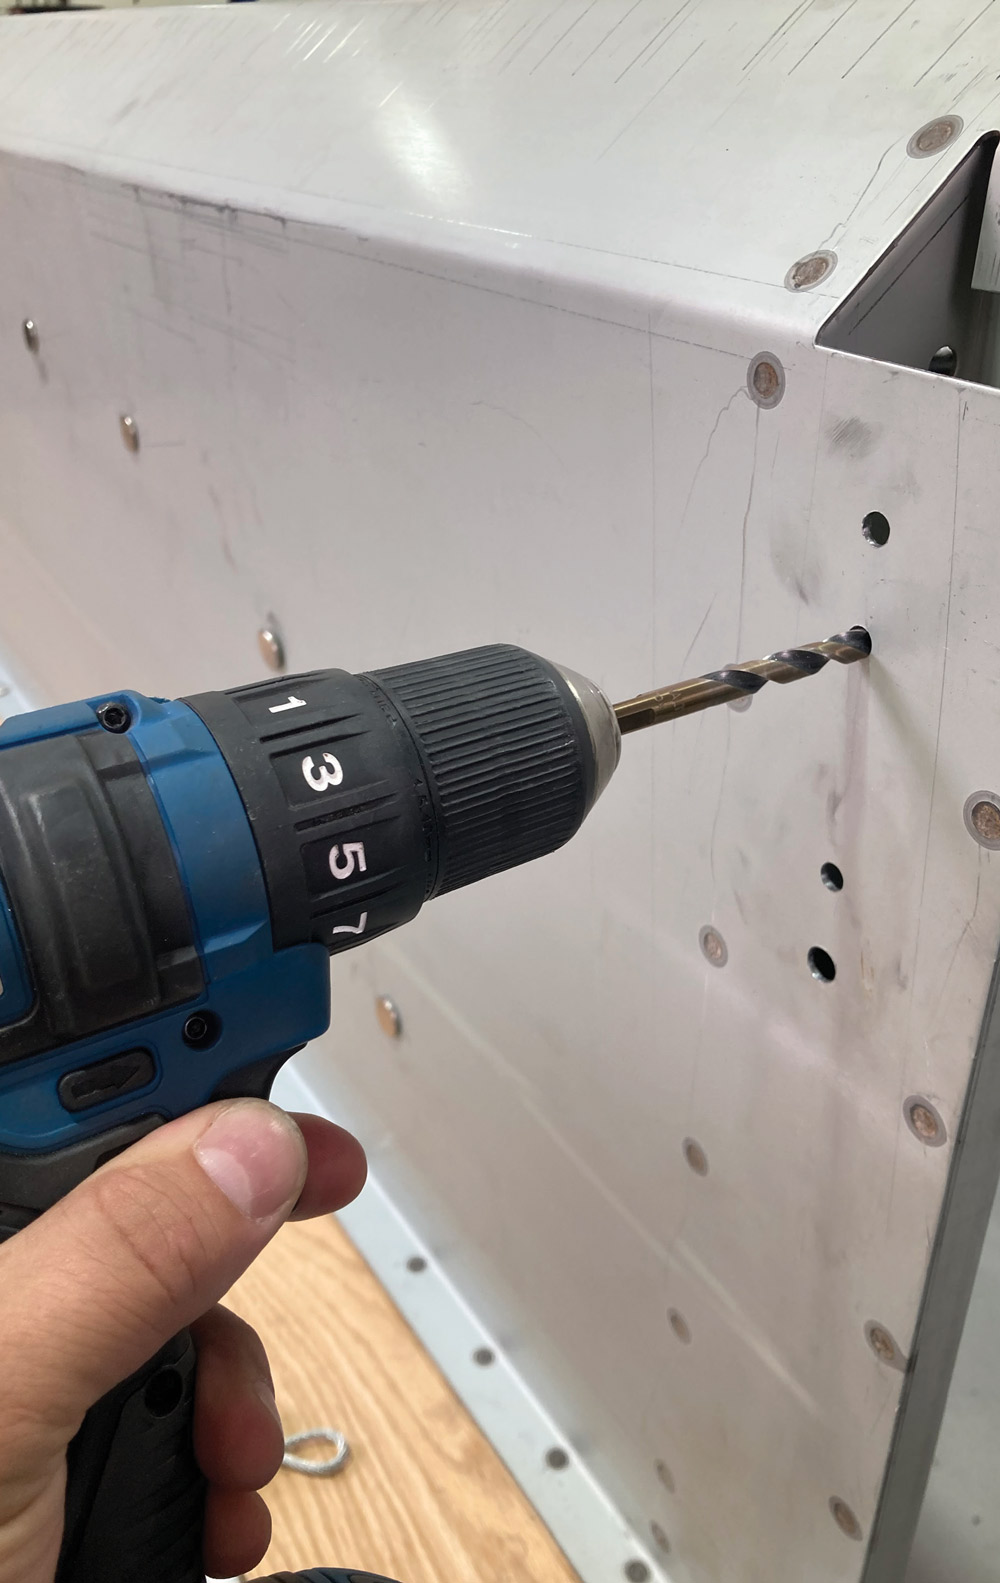
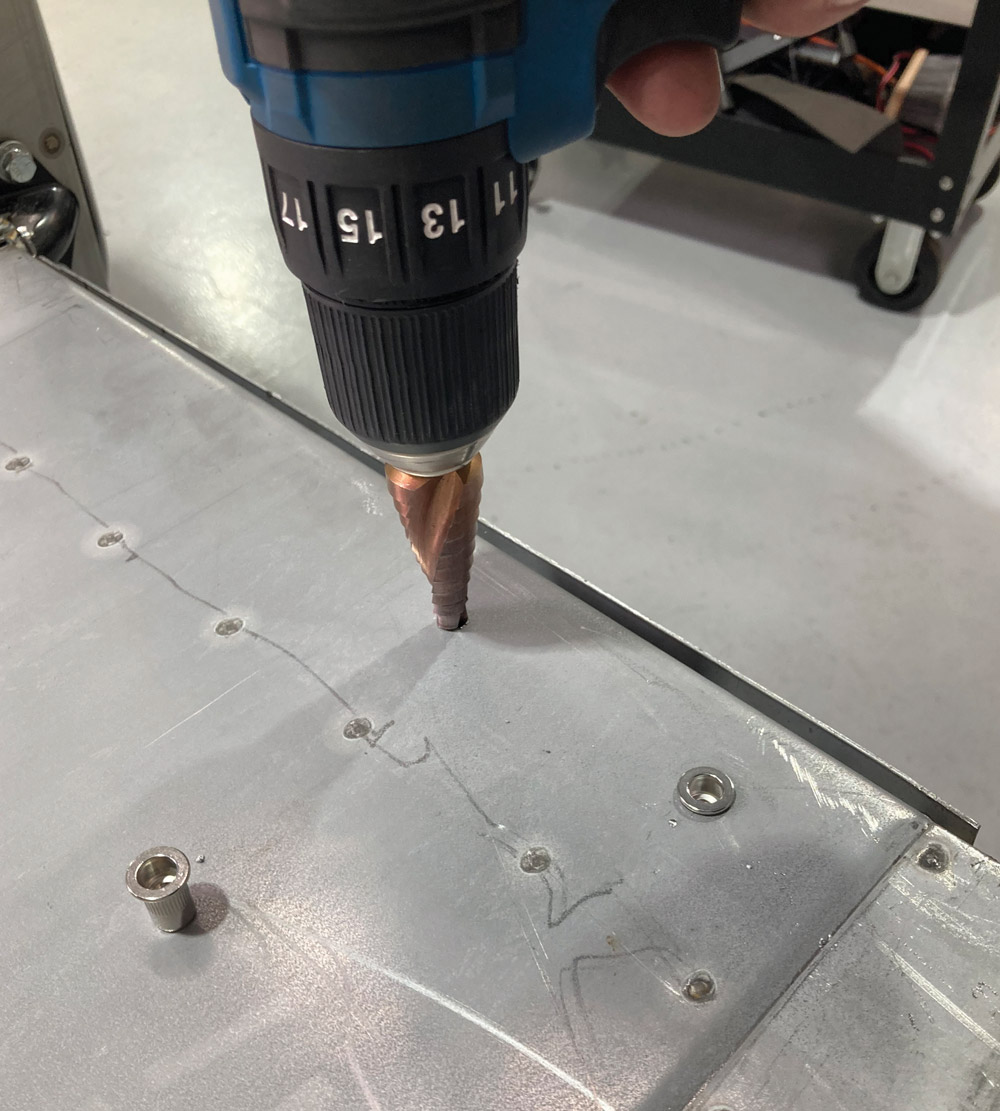
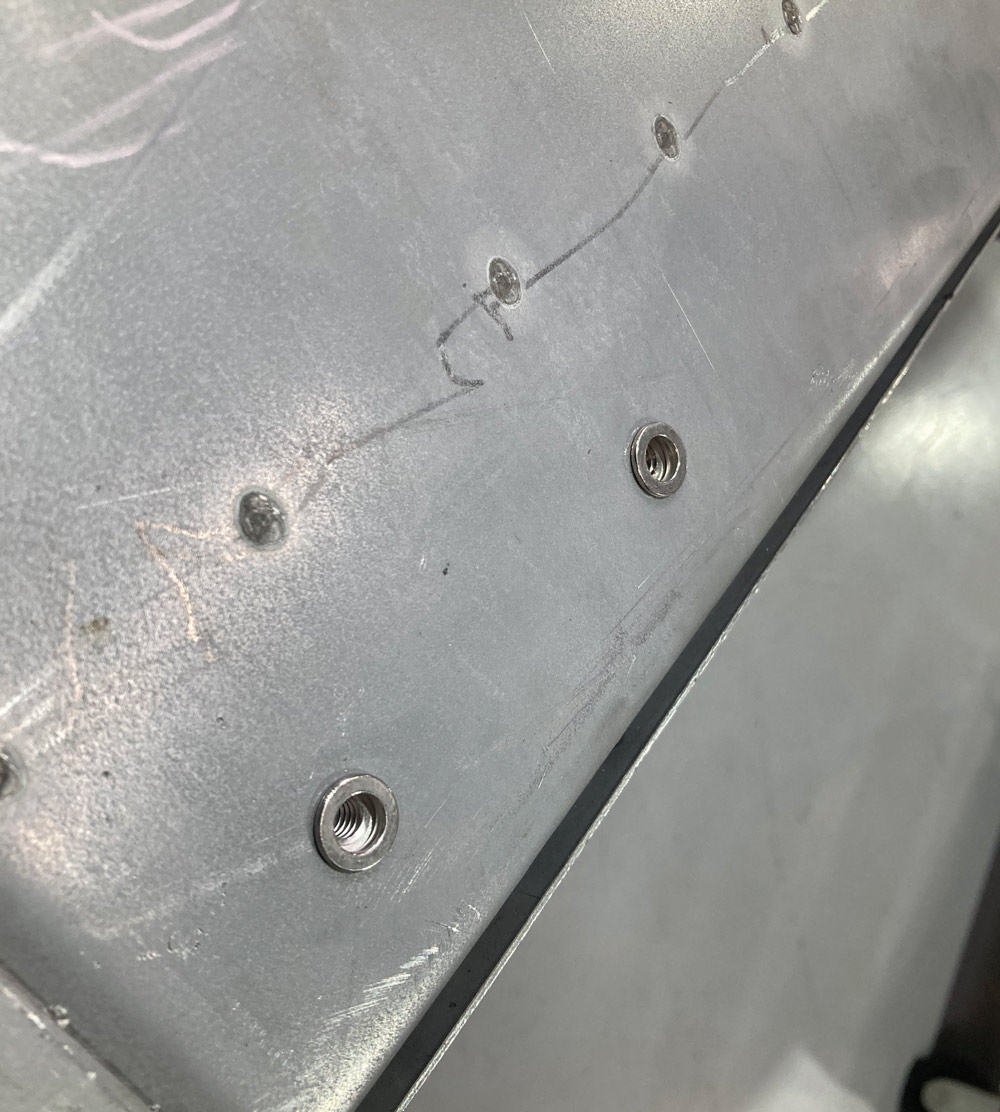
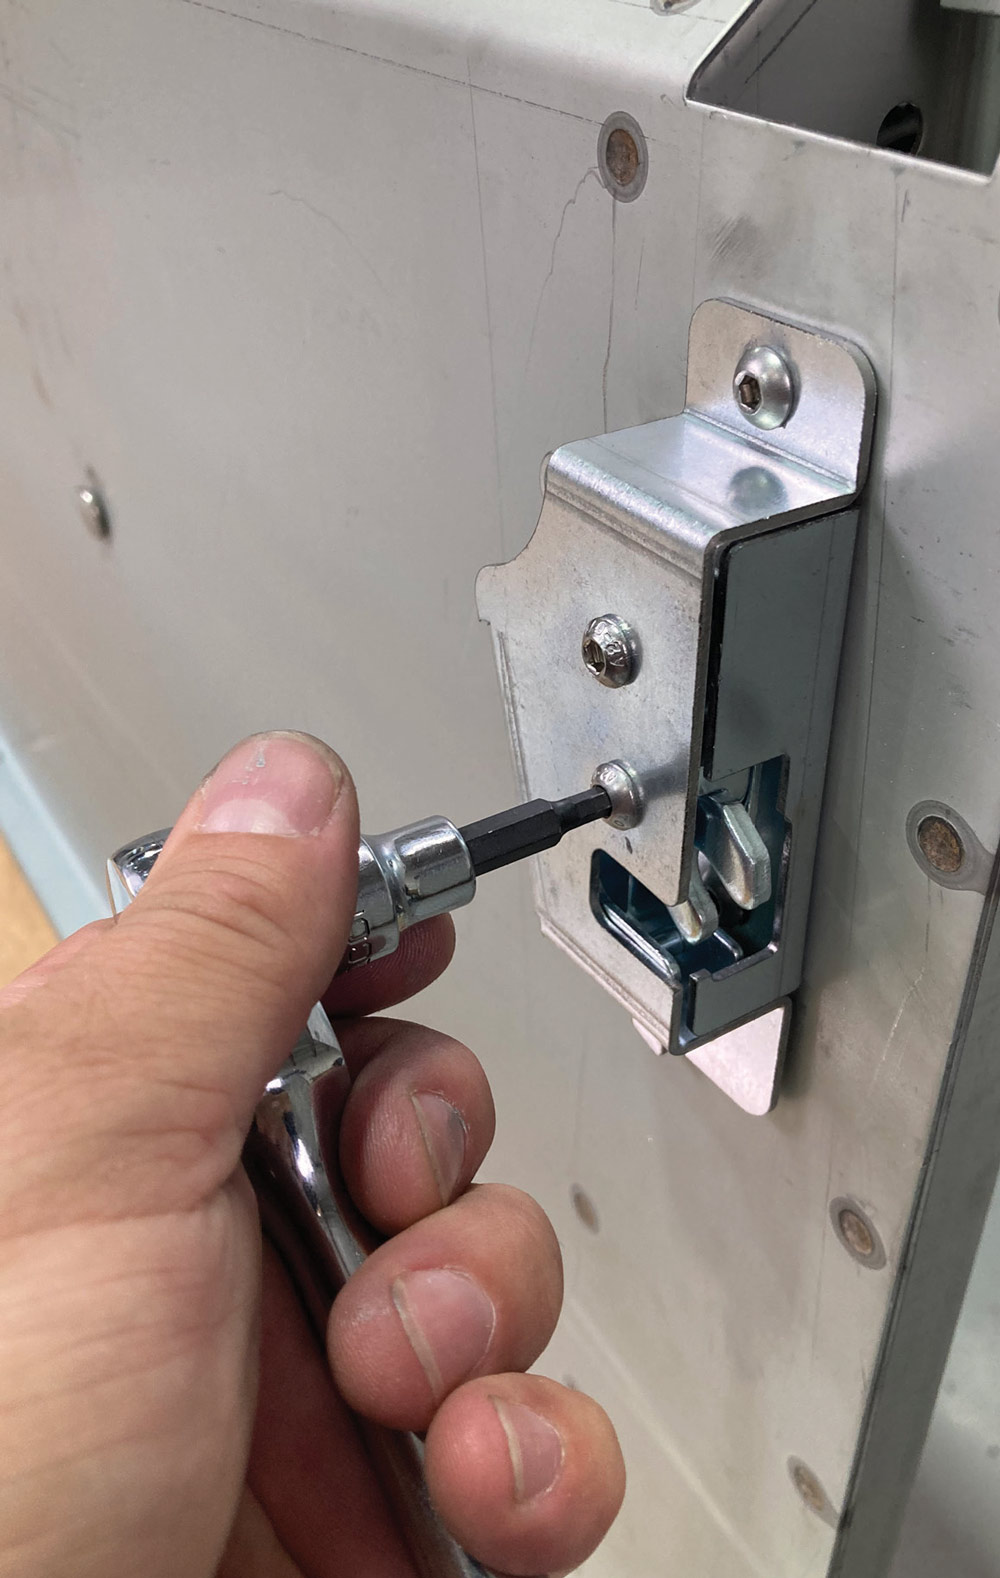
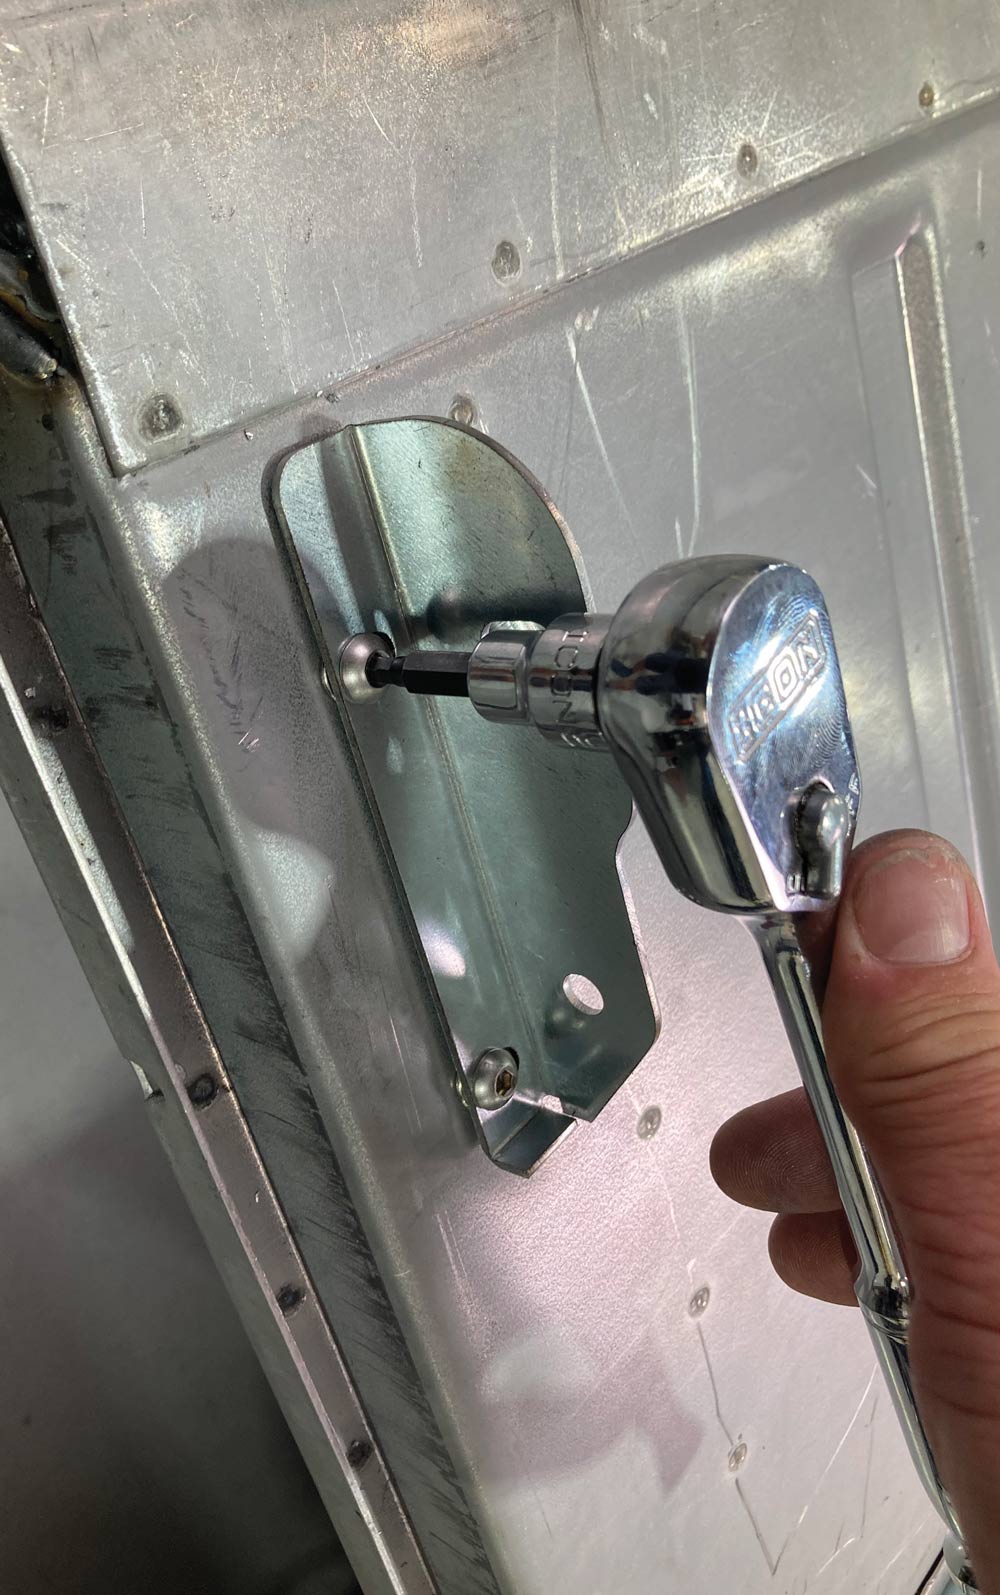
Following the assembly of our F-100 Flareside bed, we took a long look at the tailgate arrangement and agreed that those swingin’ chains weren’t going to be installed, with an LMC Latch Kit taking up their responsibilities instead. With a variety of hand tools we set out installing the kit on our newly assembled bed and in a couple hours’ time we had a tailgate that latched closed with ease and remained secure.

chain and hook arrangement as found on a ’52 Ford F-1 pickup
1. Here’s the chain and hook arrangement as found on a ’52 Ford F-1 pickup. Ford used the same bed up into the ’70s with minimal changes and Chevy used a similar setup into the late ’60s before the ’67 C10 was released featuring an internal tailgate latch. Stepside beds however remained in the “chain gang,” so, suffice it to say, there are many qualifying candidates to this upgrade.
parts laid out from LMC Truck’s Universal Tailgate Latch Kit
2. LMC Truck’s Universal Tailgate Latch Kit (PN 38-3010) is the solution for those with the bed chain woes. No more clangin’ and bangin’ from the backside of the bed, this kit will securely support the tailgate of any Fleetside, Styleside, Flareside, or Stepside bed using modern rotary latches and striker pins. Black vinyl–wrapped cables provide support when the tailgate is down. LMC’s kit includes brackets and hardware for either a bolt-on or welded installation, depending on the owner’s preference.
template taped to know where to drill holes
3. A template is provided for both sides of the bed, allowing for accurate location of the holes that need to be drilled in both the bedsides and the tailgate.
drill being used to make holes
4. After the hole locations are transferred to the sheetmetal, they are drilled to the required size.
drill being used to make holes
screw hole in a piece of sheet metal
5-6. We opted for the bolt-on route to maintain a bit of adjustment after the fact. This provided a bit of a challenge when it came to bolting the bracket to the double-walled tailgate, as access to the back side of the panel would require at the least a slit cut in the side of the tailgate. Instead, we opted to install a pair of Rivet Nuts.
hand screwing in a bracket
7-8. For the bedside bracket, a backing plate is provided with drilled and tapped holes that installs inside the stake pocket, lined up with the previously drilled holes.
inner bracket screwed into place
9. Here, the inner bracket is installed finger tight so that minor adjustments can be made later.
outer bracket being put into place
10. The outermost holes are used to mount the outer bracket, which serves to locate the rotary latch.
latch being screwed into place
11. The rotary latch slips inside the outer bracket and attaches via a pair of button head fasteners, once again installed only finger tight.
hand screwing in a bracket
12. Over on the tailgate, the bracket for the latch pin is attached to the tailgate using the Rivnuts …
latch pin being screwed into place
13. … followed by the latch pin.
brackets and latch pin screwed into place
14. Raising the tailgate, we can test the fitment of both brackets as well as the location of the latch pin until smooth, secure contact is made.
brackets and latch pin screwed into place
15. Minor adjustments are made so that the pin and latch make contact before the tailgate and bedside do. This prevents any of the painted parts from touching and will also minimize any contact due to vibration. After final adjustments have been made, each fastener is tightened a final time.
one end of the support cable
16. One end of the support cable has been crimped with a loop in place and attaches to the tailgate bracket using a shoulder bolt and bracket. A nylon washer is provided to prevent chafing between the wire rope and bracket.
bolt being installed on bracket
17. Another shoulder bolt is installed on the bedside bracket. With the tailgate level in the horizontal position, the support cable is raised and marked even with the shoulder bolt.
support cable being cut for length
18. Following the directions in the provided instructions, the support cable can then be cut to length.
bracket pieces laid out
19. Pictured is the provided brackets and hardware to affix the unfinished/cut end of the support cable to the bedside bracket.
support cable being inserted into bracket
20. The support cable is inserted on one side of the bracket assembly and looped around the two fasteners until the black nylon outer housing is even with the end of the bracket. The two fasteners are then tightened, securing the bracket assembly to the cable.
assembled bracket with cable
21. The support cable bracket assembly is then attached to the bedside bracket using the shoulder bolt.
cable connecting a truck bed to its door
22. Here’s the finished assembly with the support cable doing its thing supporting the tailgate in the open position.
bed of truck with door open
23. With both sides installed, the tailgate is securely supported and adjusted level with the bed floor. Note the chain brackets that can and will be removed, providing a clean back side to our F-100 bed.
support cable tucked into place while latched
24. In the closed position, the support cable neatly tucks into place without obstructing the action of the tailgate, a much-improved affair over the original chain and hook method!
close up of closed door to bed of truck
25. Speaking of chains and hooks, none will be found on the back of our Flareside, thanks to the modern latch kit installation. The original brackets and tabs will be removed before bodywork begins and the back side of our bed will be clean and neat in appearance.
SOURCES