CTP Tech
InTheGarageMedia.com
1. The Classic Performance Products Totally Tubular control arm and coilover kit comes with everything needed to lower an OBS Chevy and improve its ride and handling characteristics.
getting the lowdown on a new classic
Classic Performance Products Suspension Update for OBS Chevys
BY Ron CeridonoPhotography BY Taylor Kempkes
I

t’s interesting how perceptions change with time. Take classic trucks as an example. In the ’70s the term “classic” began being applied to any truck that was produced before or shortly after World War II. As the years rolled past, the definition of a classic continued to creep forward and as a result ’60s and ’70s trucks began being referred to as classics. To prove the point that perceptions, and the definitions that go with them, change with time, we offer what are often referred to as OBS (old body style) Chevys.

OBS became a term used to distinguish ’88-98 Chevy and GMC truck styling from those that would follow in 1999 (Tahoe, Yukon, and Suburban styling stayed the same through 2000). While using the term “old” to a body style that was discontinued in 1998 seems odd, that was 26 years ago. Time really does fly by.

Regardless of the label put on them, the OBS series have a lot to offer. They’re good looking, comfortable, there’s an abundance of aftermarket parts available, and they’re plentiful, which means they are reasonably affordable.

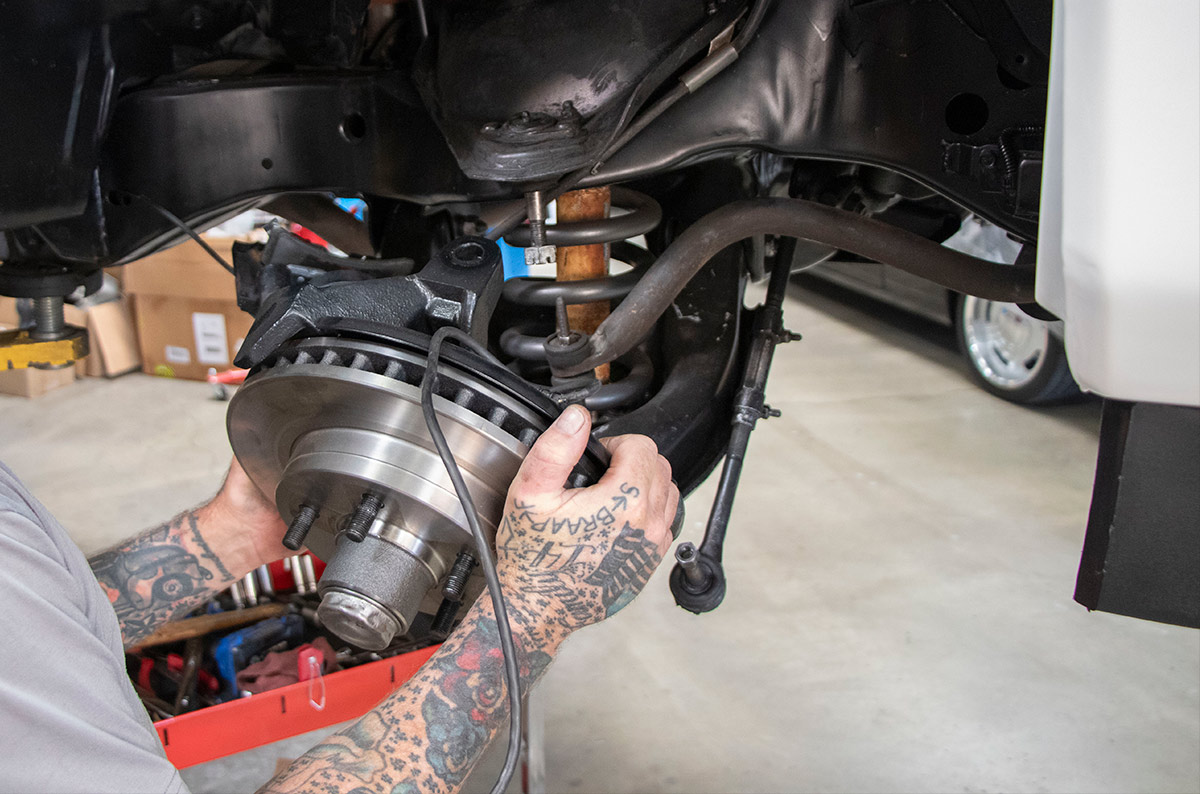
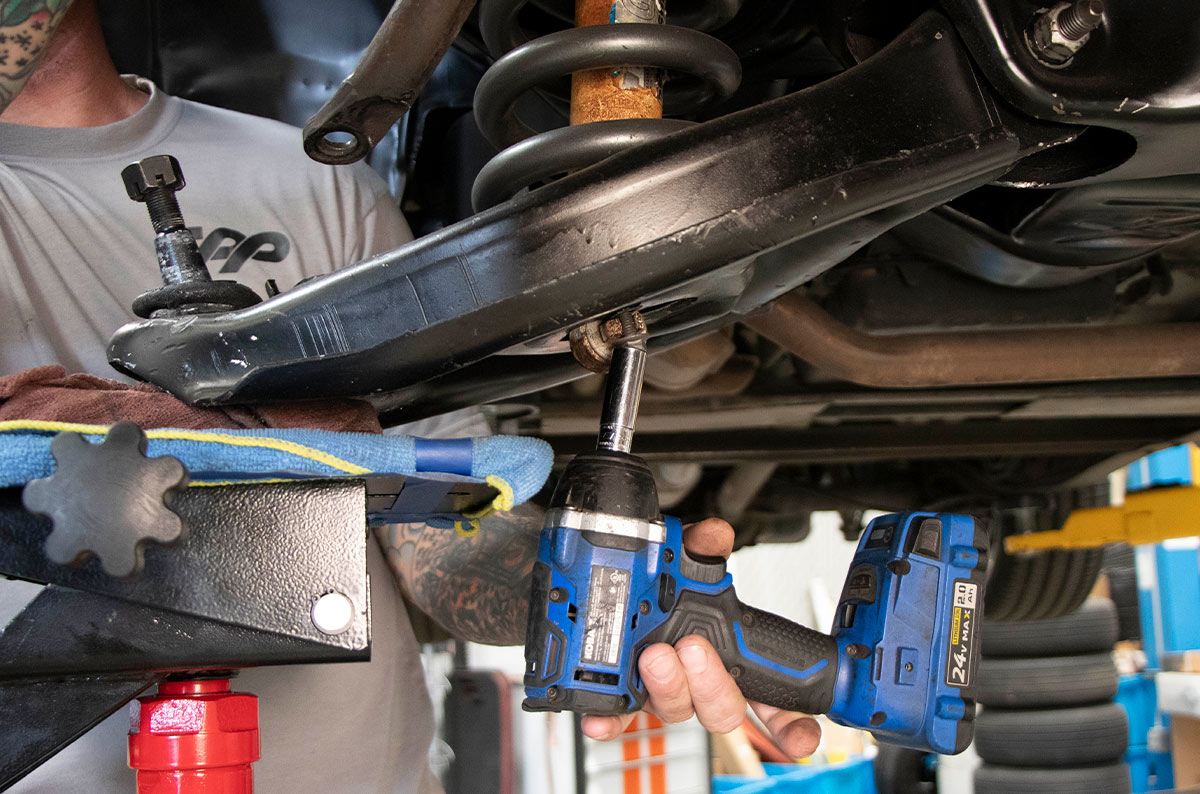
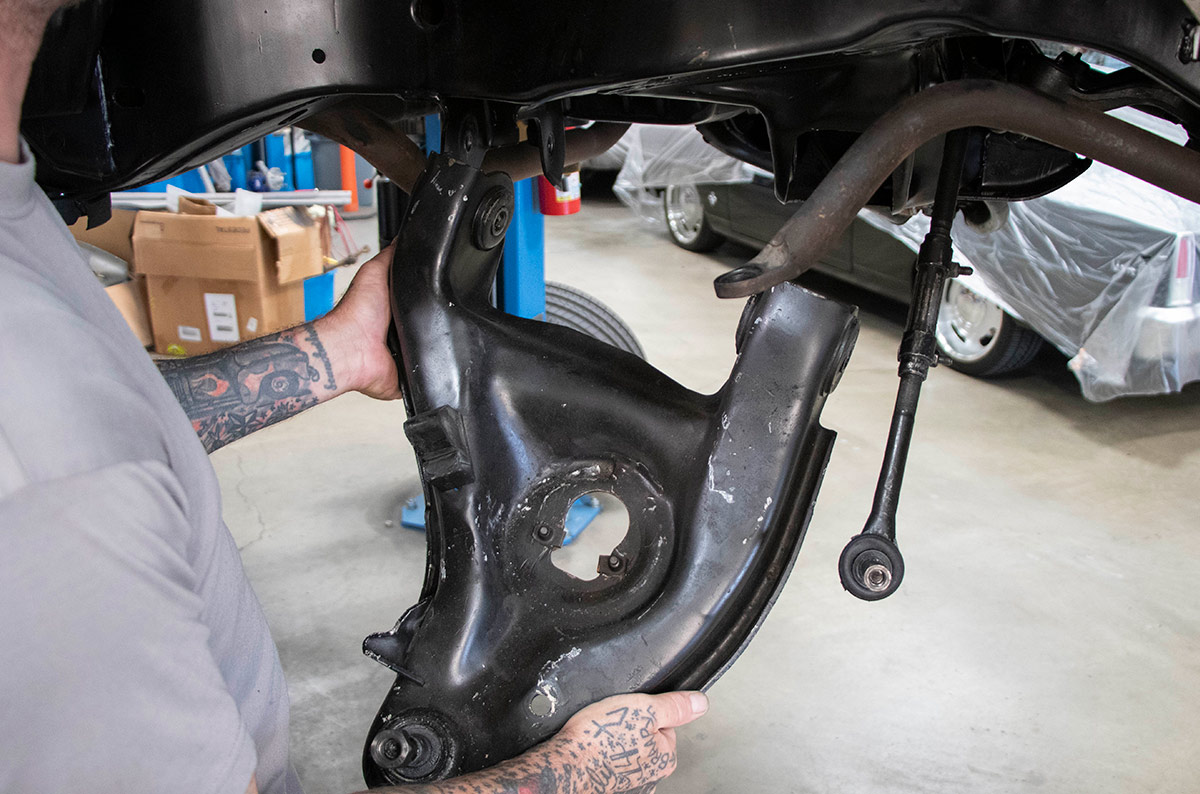
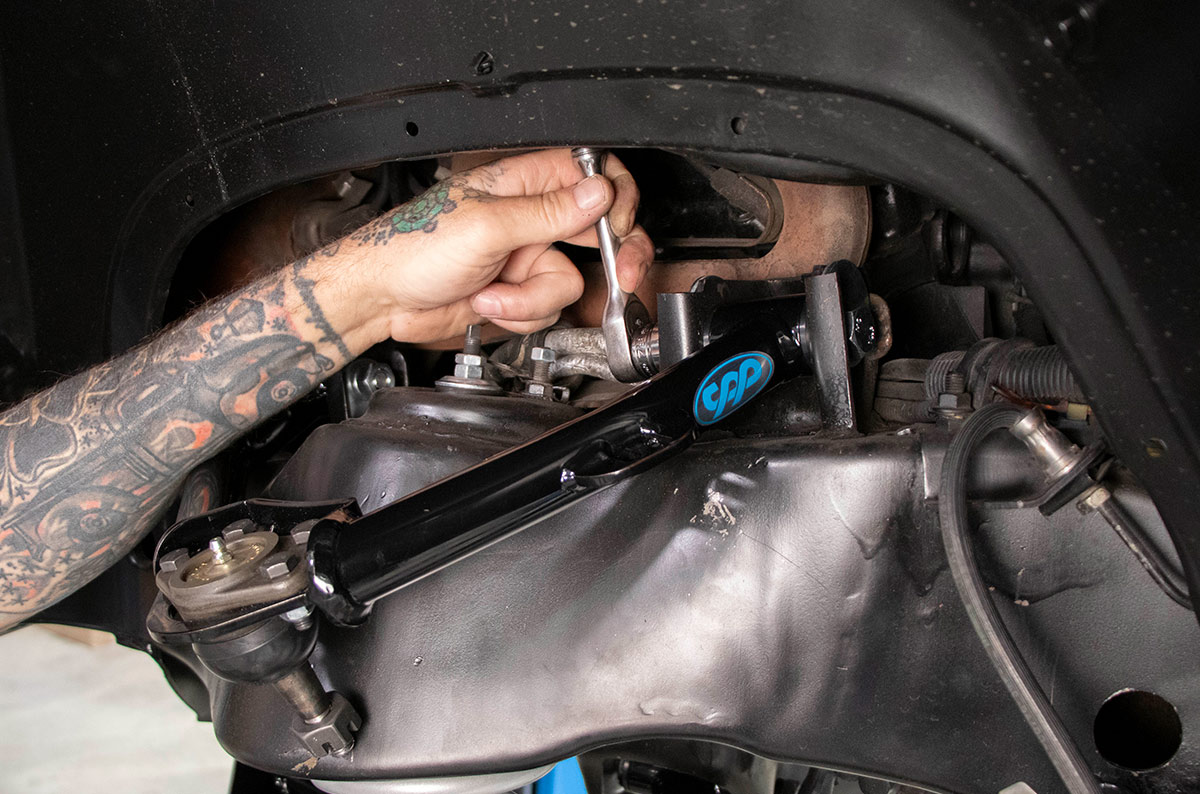
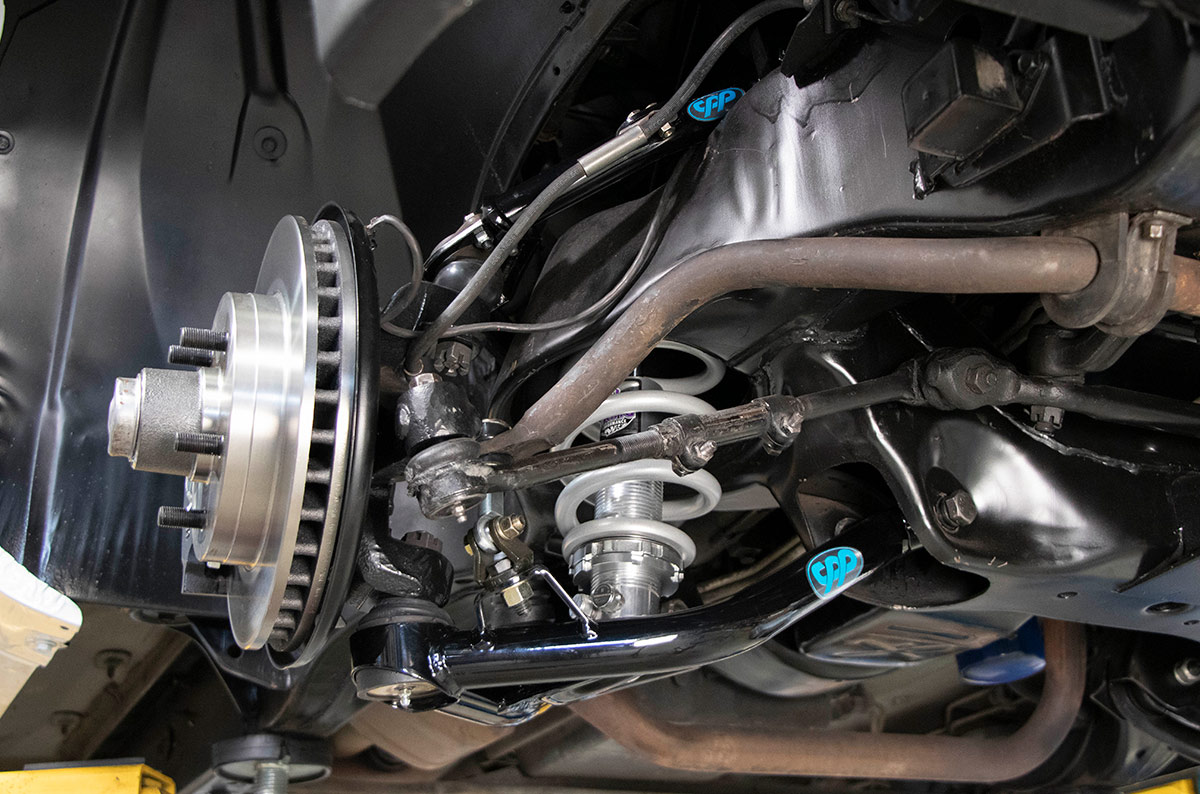
One of the most common modifications made to pickups and SUVs, including OBS Chevys and GMCs, is lowering them substantially. While that looks cool, it can create a couple of problems: ride quality may suffer and tire clearance when turning can be a problem—but there is a cure for both issues. Classic Performance Products (CPP) PN 8898FCO-K comes with coilover shocks and narrowed tubular control arms for OBS Chevy/GMC pickups and SUVs.

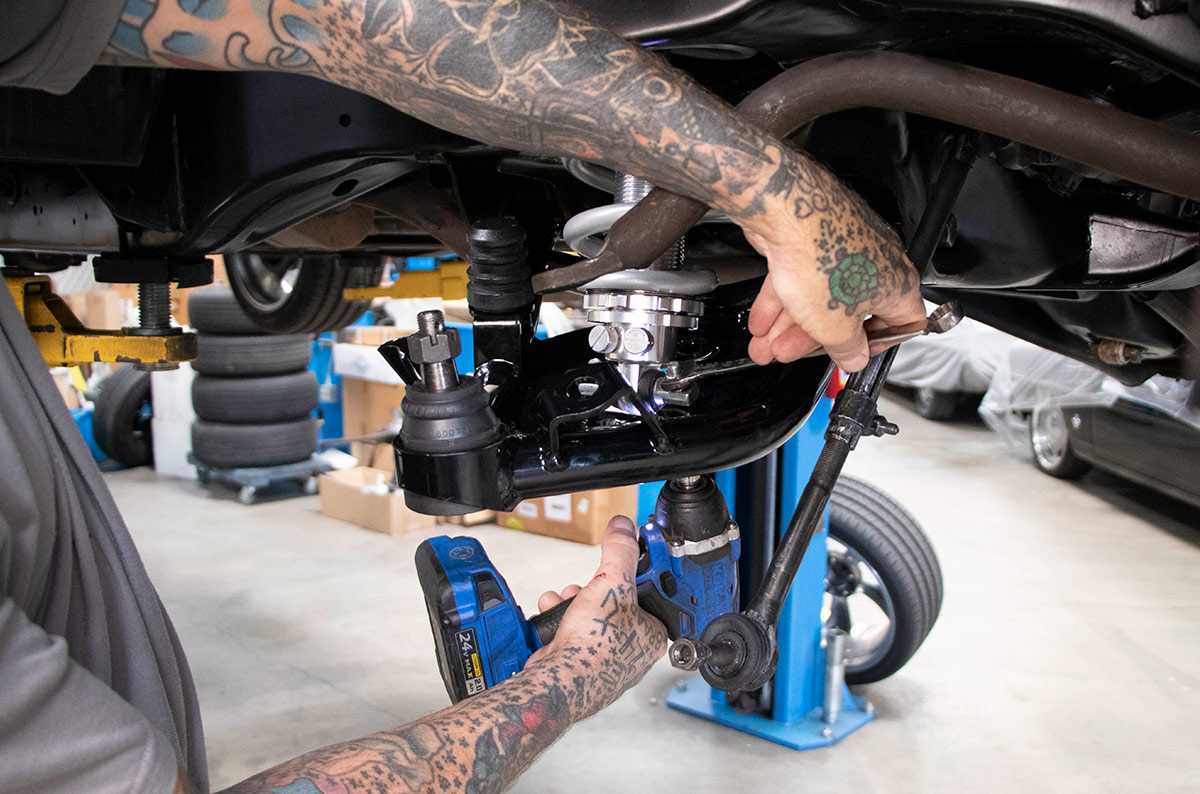
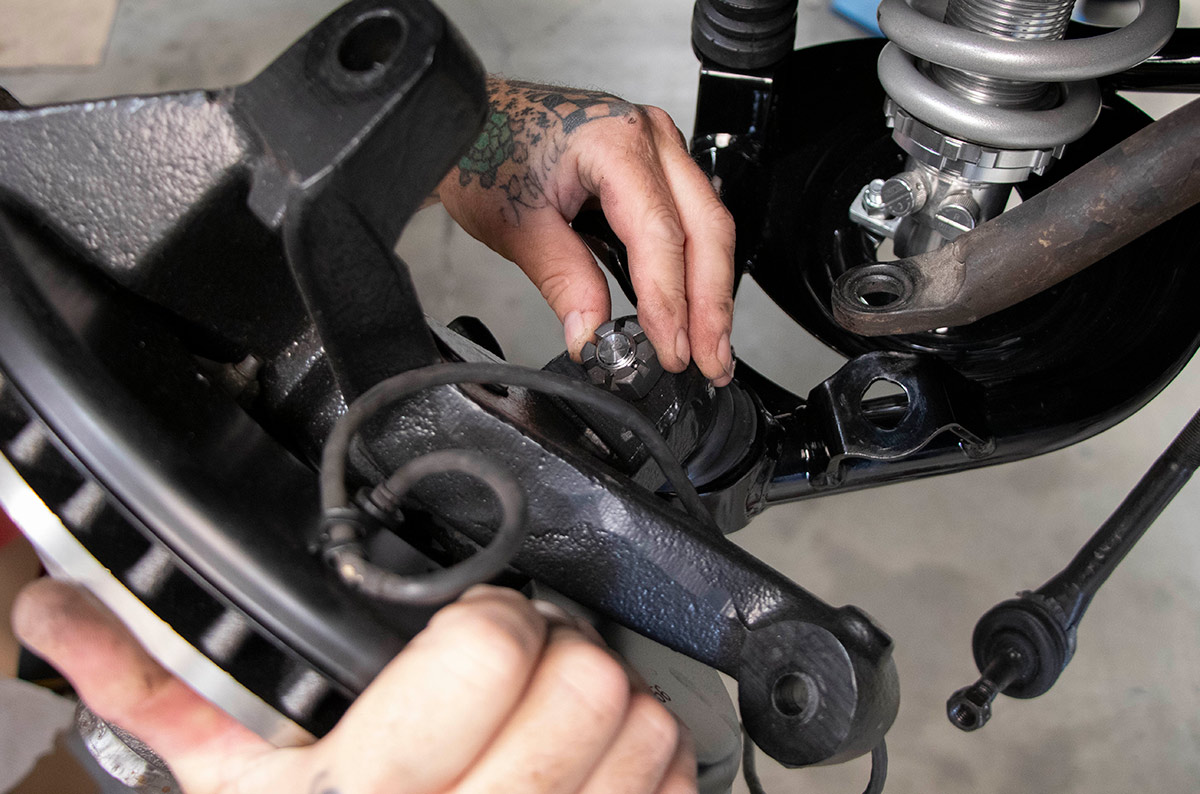
CPP’s Narrowed Totally Tubular control arms are 1-inch narrower per side, providing the added clearance necessary to keep the tires away from the fenders. Made in Placentia, California, CPP’s control arms use their proprietary D-Spec bushings and come with endlinks to accommodate the large 1-1/4-inch factory sway bar. These narrowed control arms work with factory or lowered coil springs and also make converting to coilovers a simple, bolt-on process with no fabrication required.

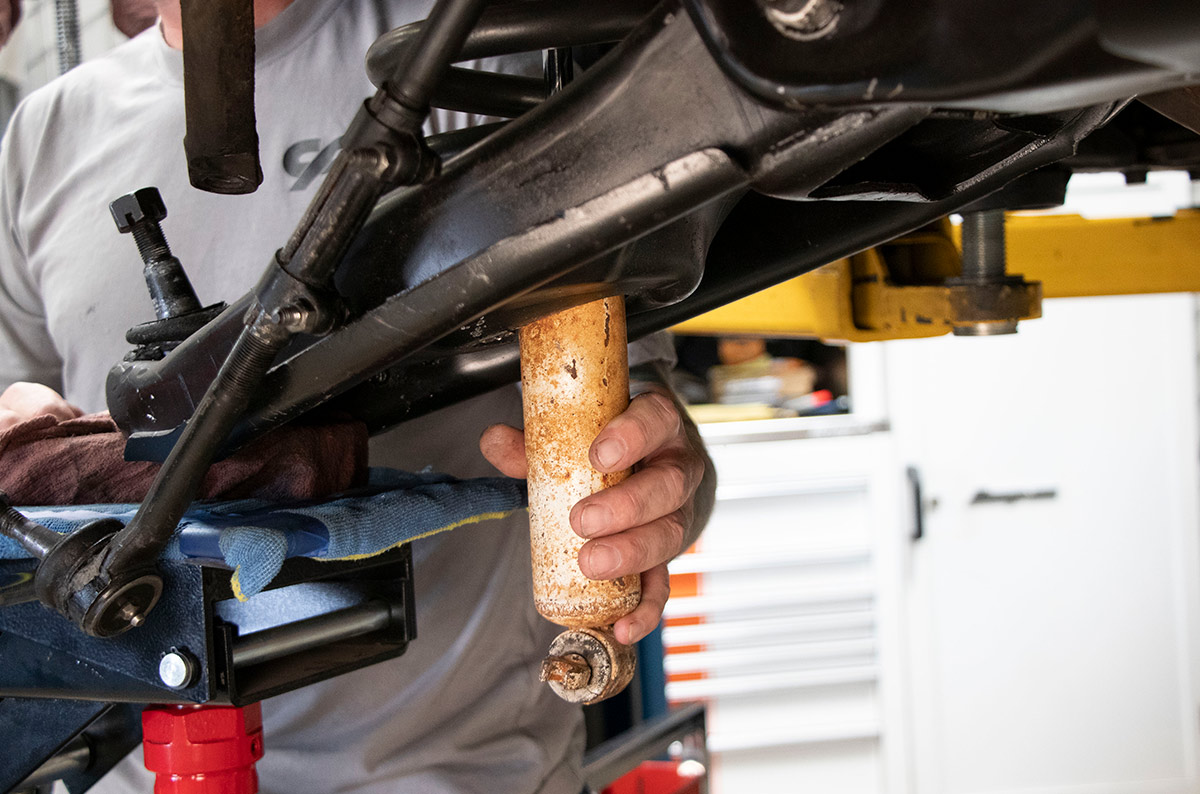
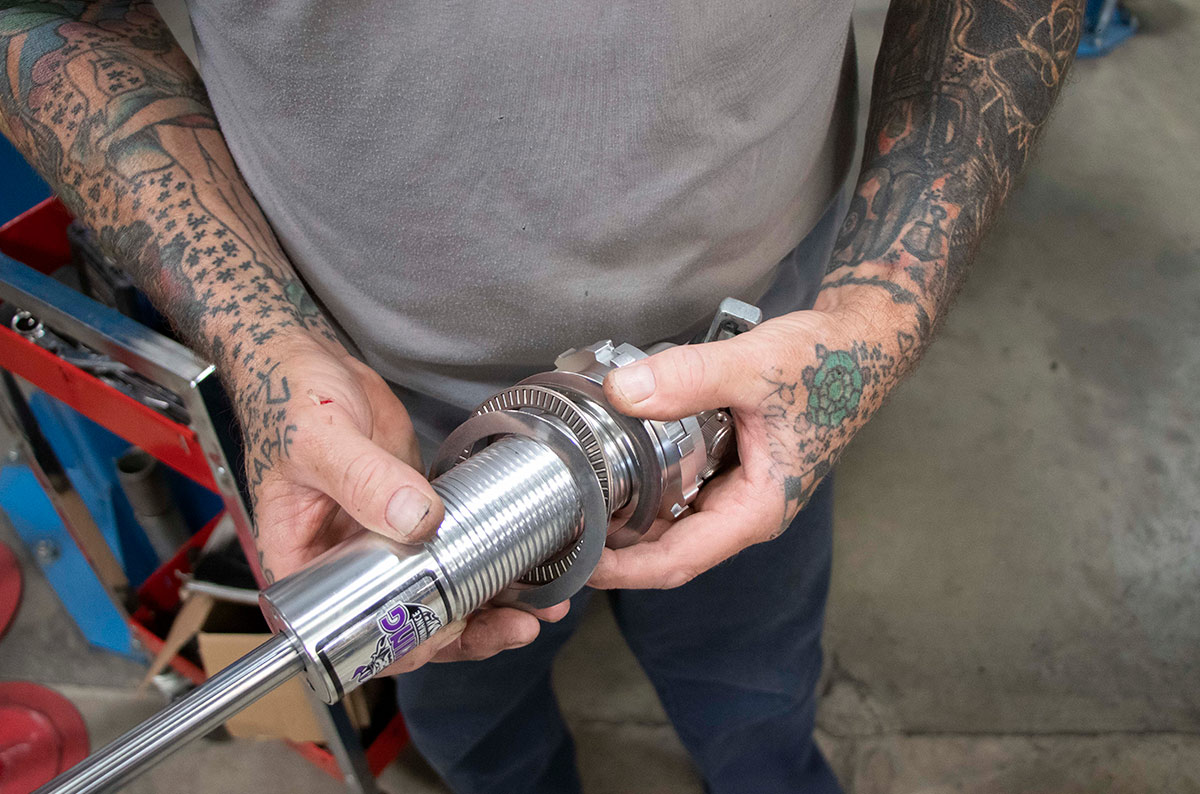
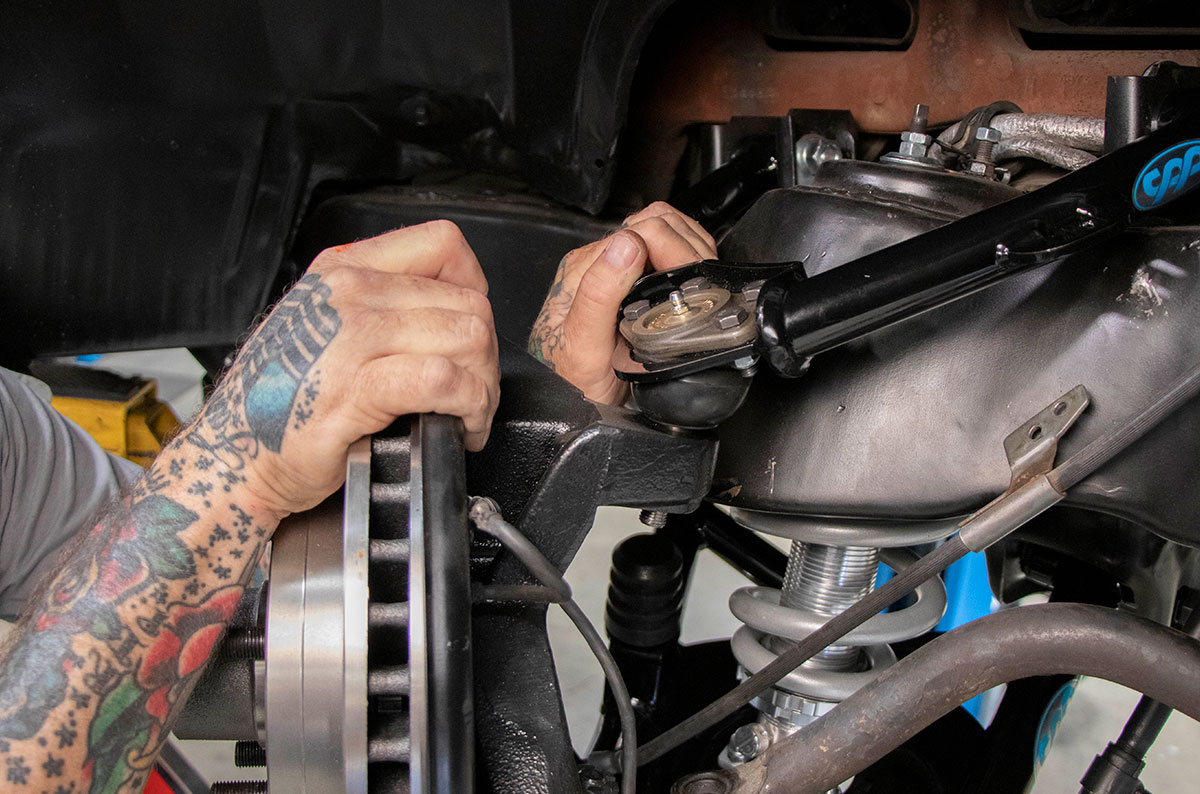
In conjunction with the control arms, converting to CPP’s coilovers provides a variety of additional benefits. Coilovers provide the capability of easily altering ride height. The threaded shock bodies and spring seats can be used to alter the preload on the springs to raise or lower the vehicle. In addition, the coils can be swapped to optimize the spring rate for the desired ride quality. To fine-tune the suspension, CPP’s coilover shocks have separate adjustments for compression and rebound damping. Each adjustment offers 19 “clicks,” resulting in a staggering 361 possible combinations.

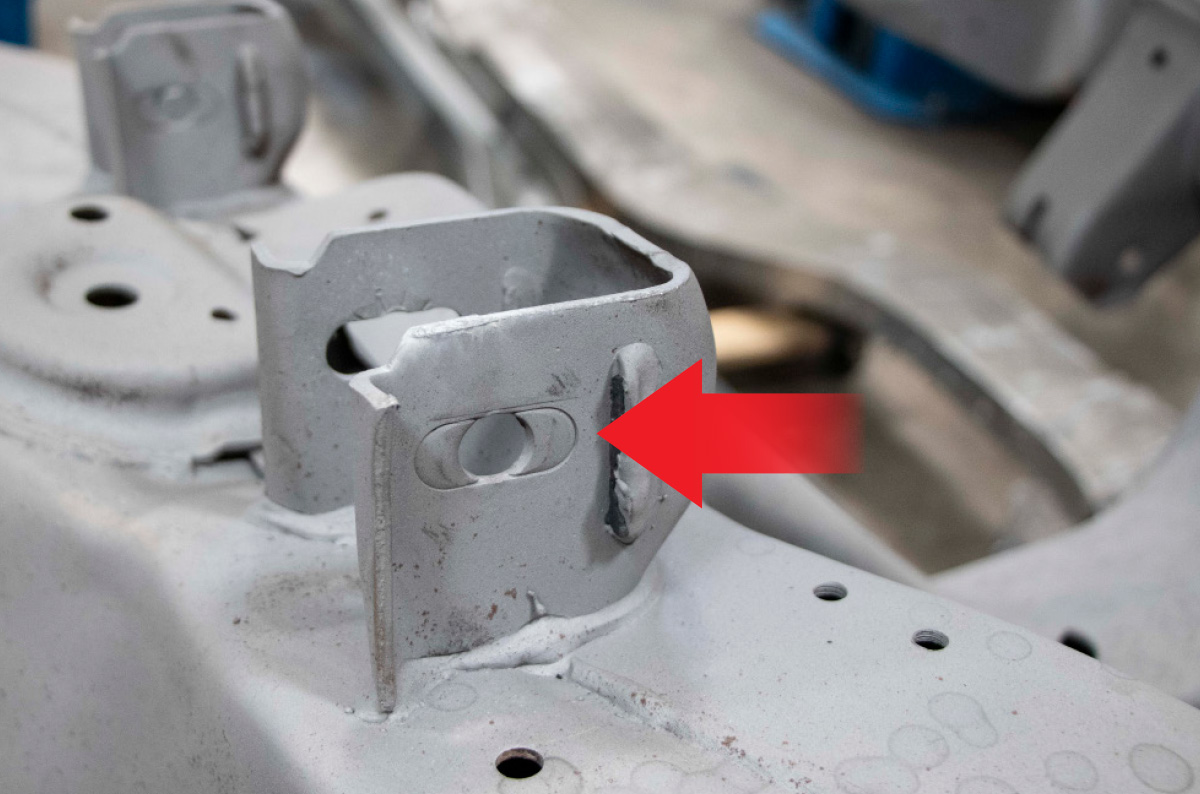
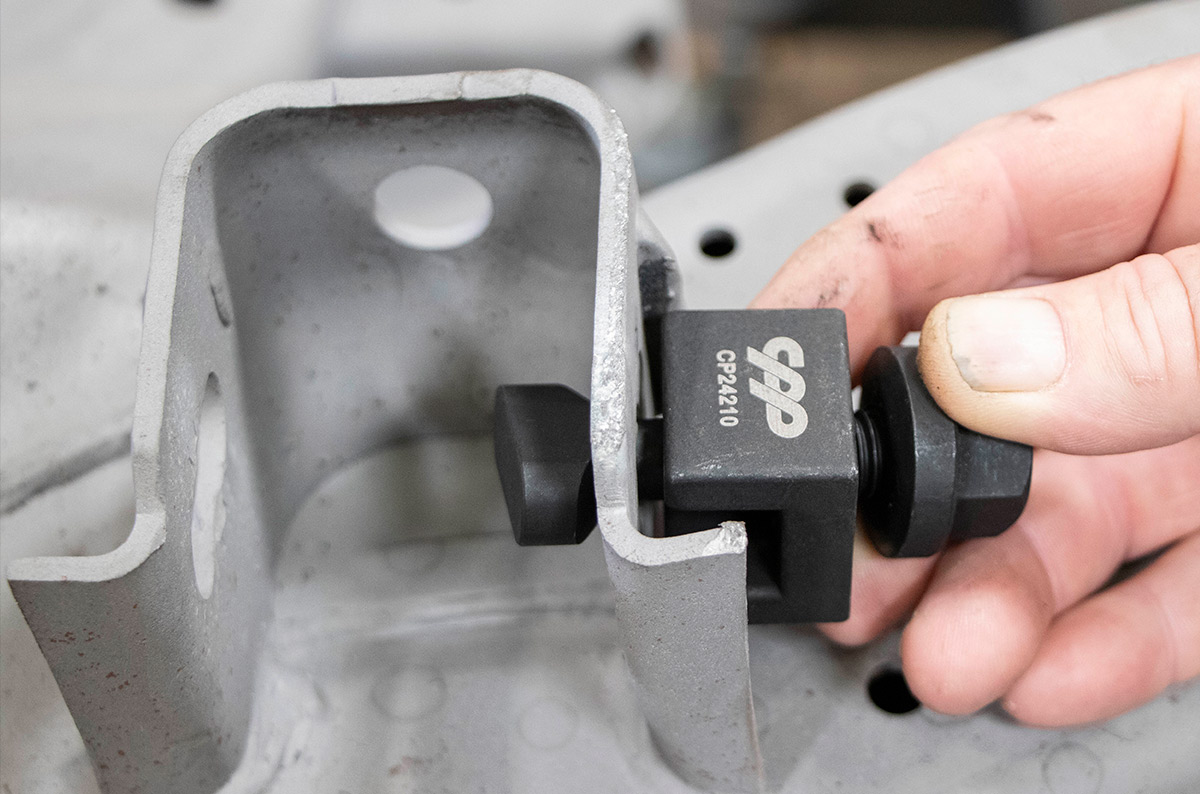
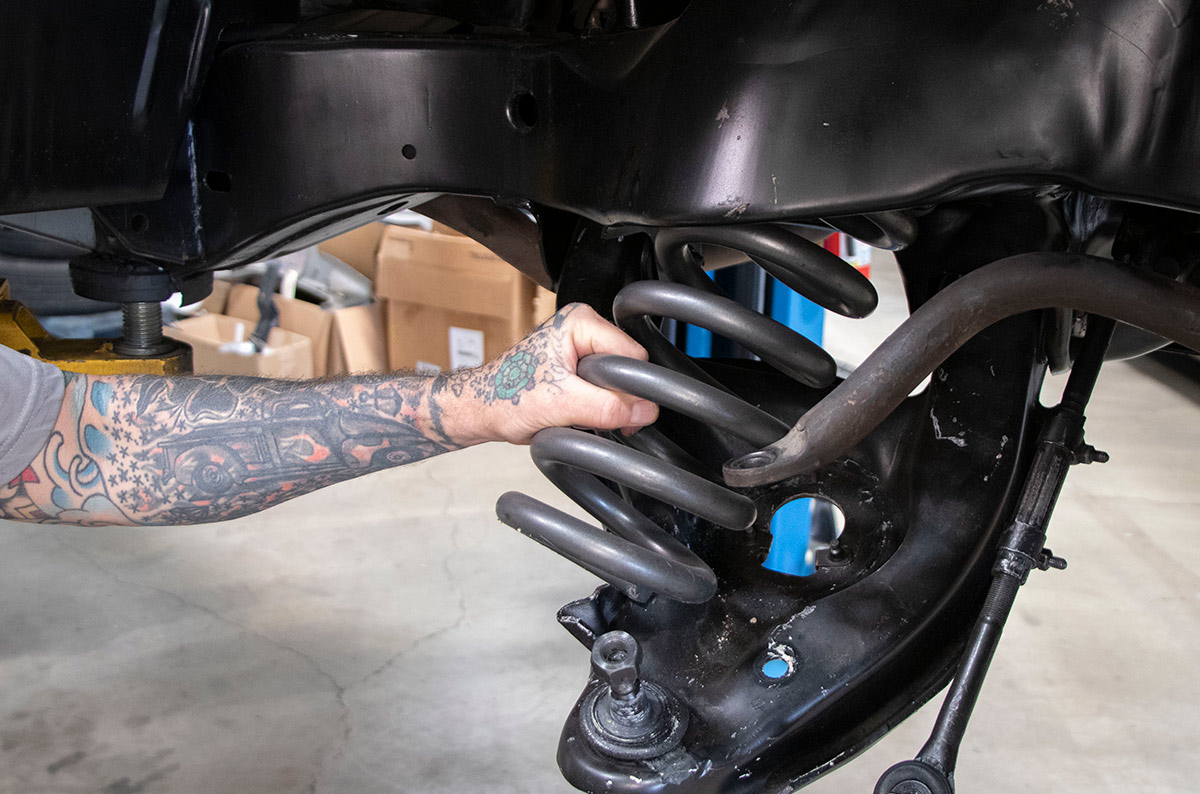
One of the obvious differences between conventional coilovers and those in the CPP kit is the design of the springs. The lower ends of the CPP springs sit on the adjusters on the shock bodies as per usual but the large-diameter upper ends fit into the original coil spring pocket in the frame. That means no modifications to the chassis are necessary. Additionally, the design allows for a longer and lighter spring for more stored energy, which results in better ride quality than can be had with shorter, conventional coilover springs. An added benefit is that by applying pressure from the springs directly to the frame, strength is improved when compared to mounting the coilover by a single stud.

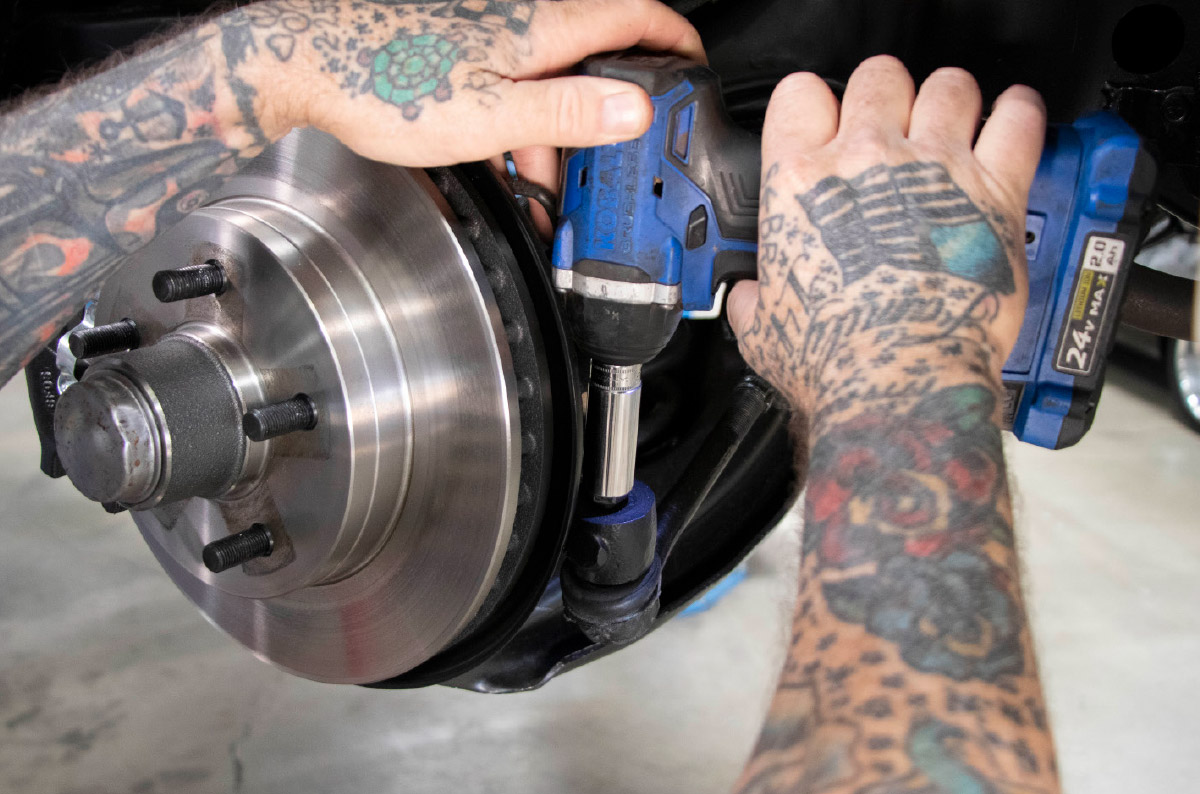
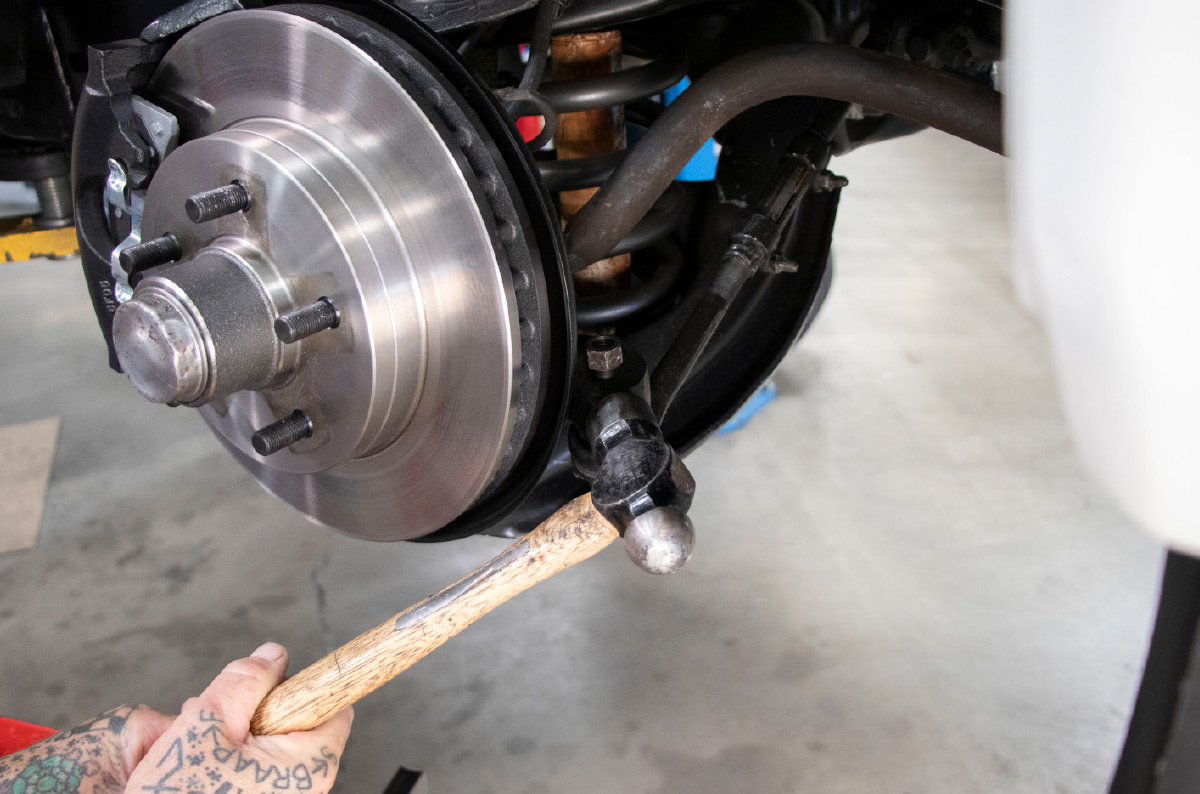
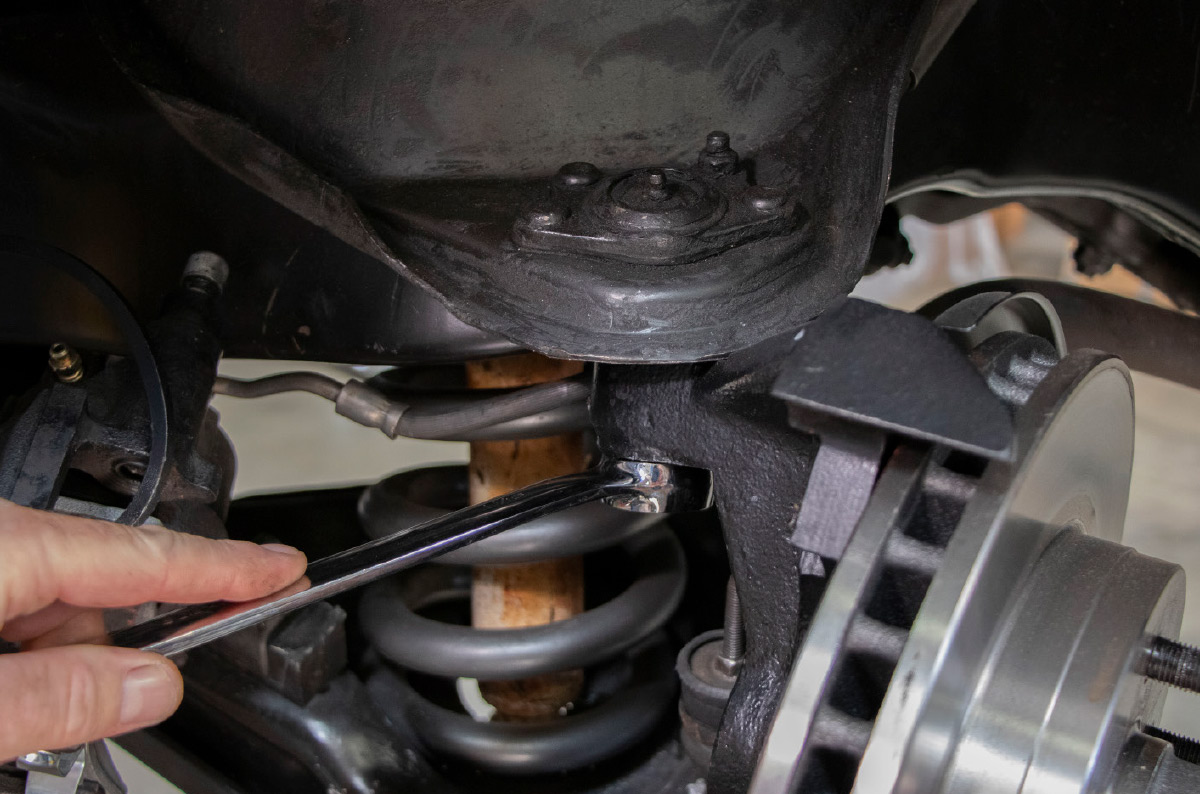
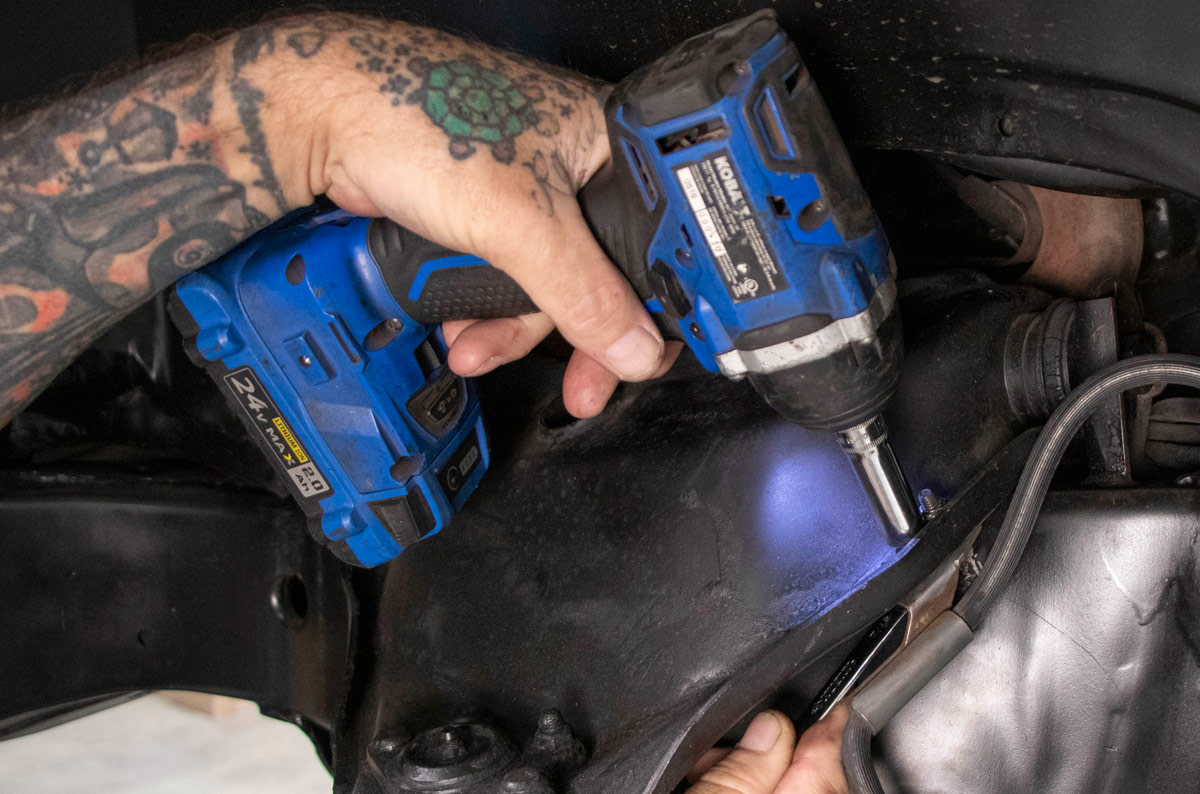
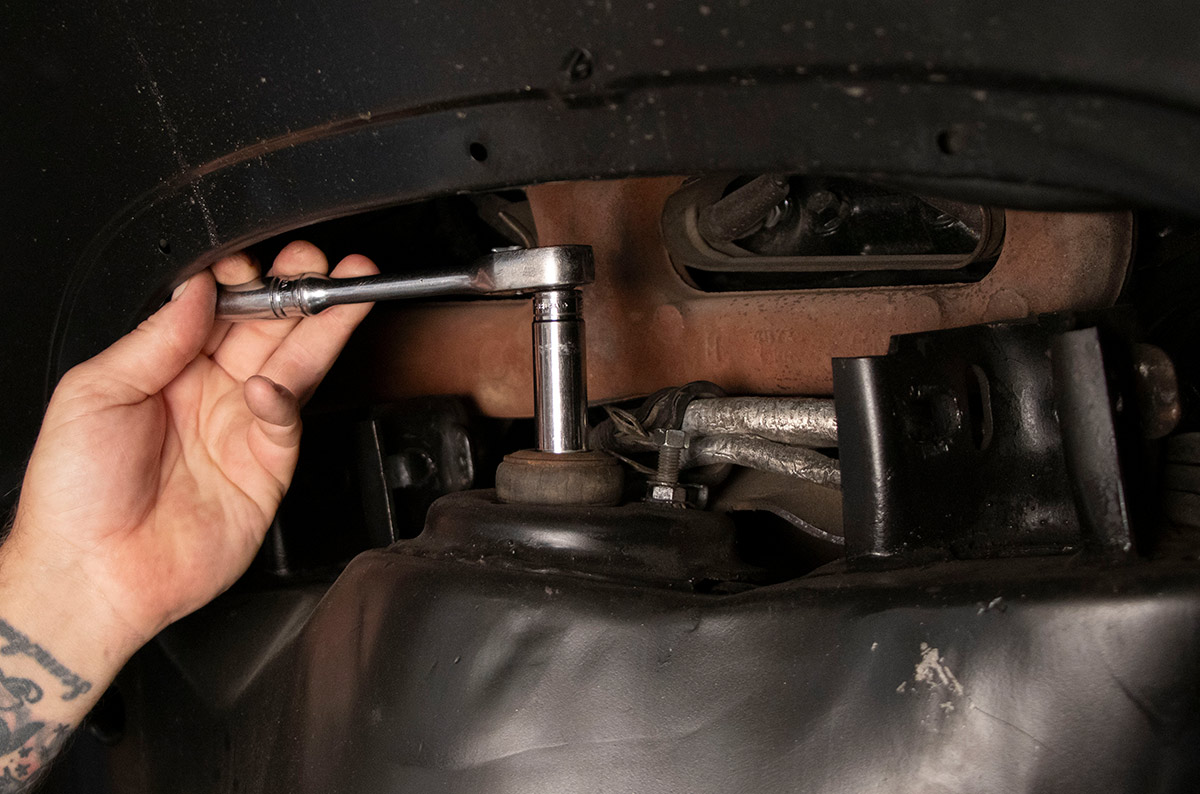
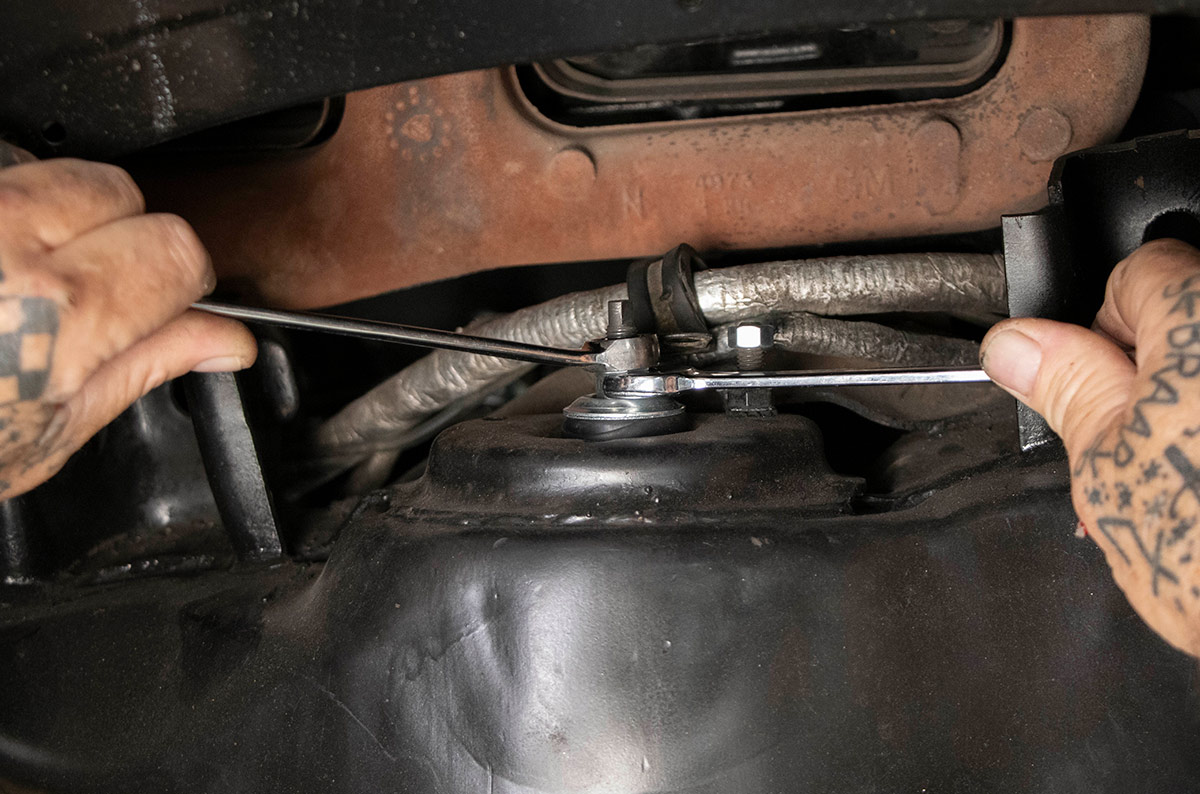
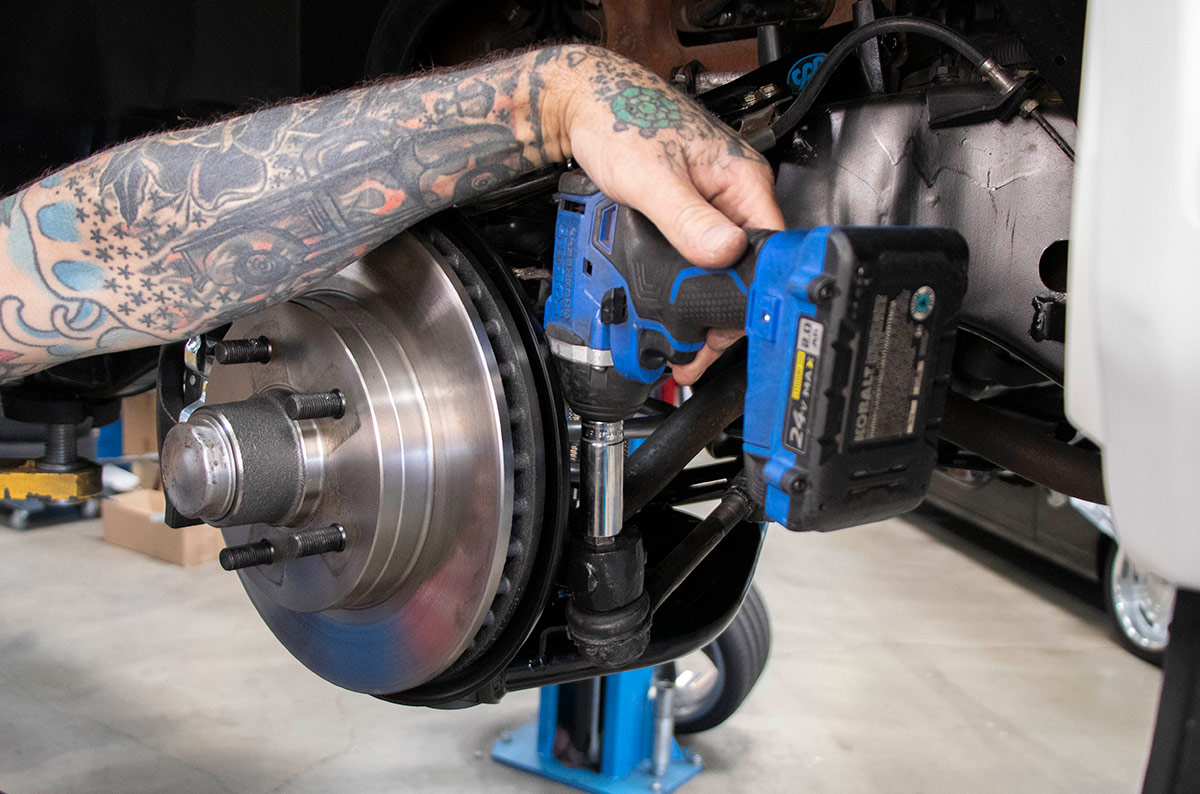
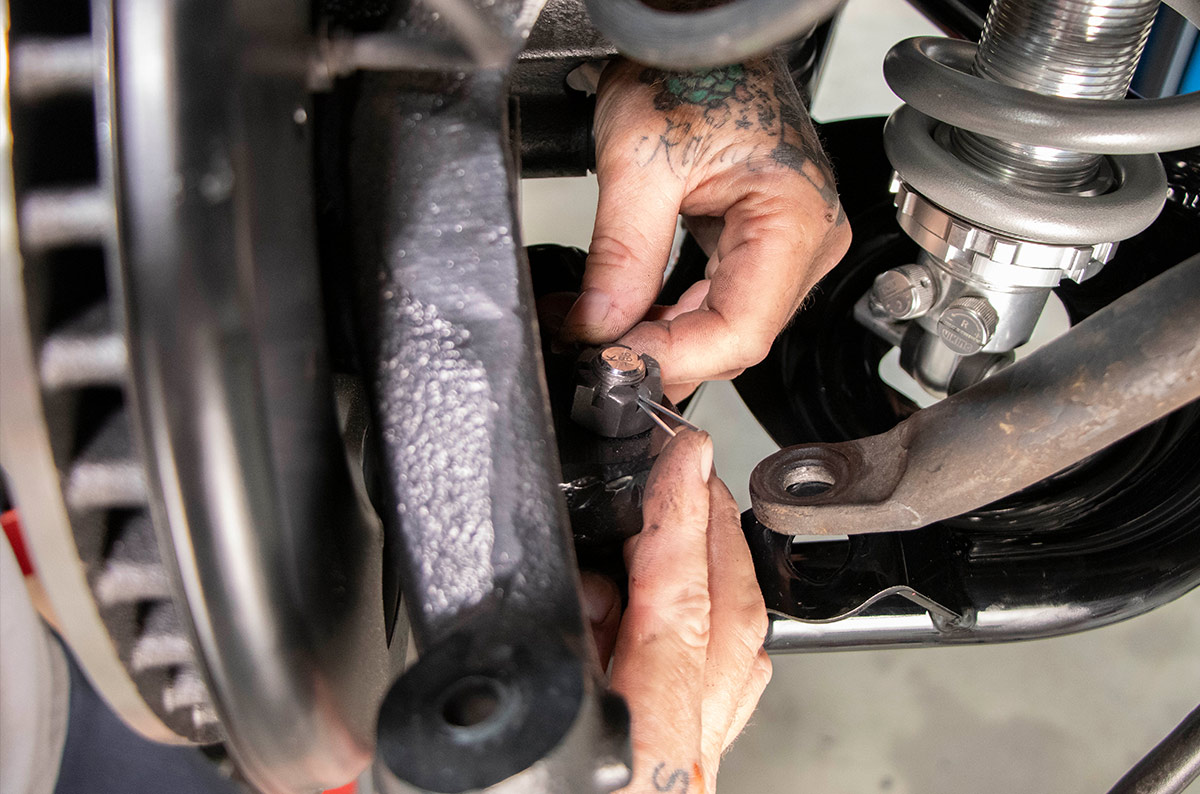
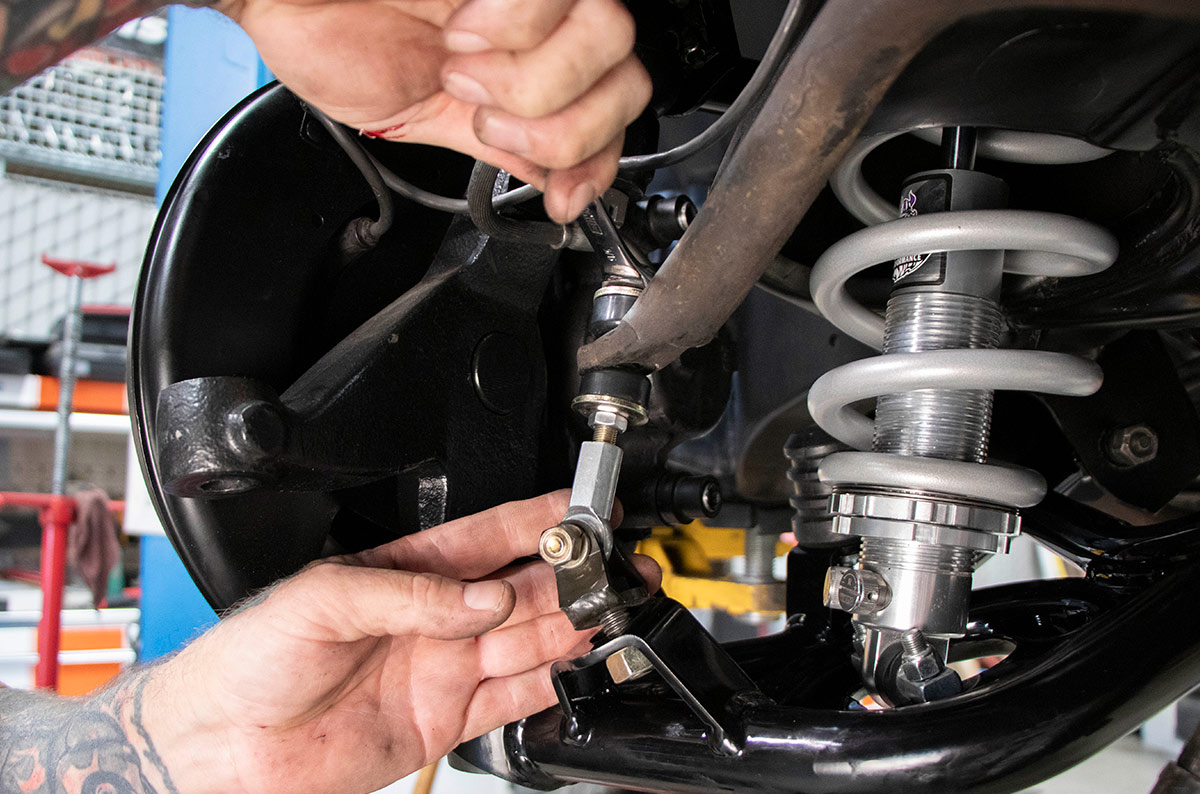
Installing CPP’s tubular control arms isn’t difficult, although it does require separating the tie-rod ends and ball joints from the spindles and removing the stock shocks and coil springs. Installing the control arms is a remove-and-replace operation, and converting to coilovers is about as simple as replacing the shock absorbers. The end results of installing CPP’s Totally Tubular control arms will provide increased clearance to eliminate tire-to-fender contact and adding coilovers will allow ride height adjustment, shock compression, and rebounded adjustments. It’s a great way to get the lowdown on a new classic.

Jason Scudellari began the suspension update on this ’96 Tahoe (aka an OBS) by removing the brake calipers.
2. Jason Scudellari began the suspension update on this ’96 Tahoe (aka an OBS) by removing the brake calipers.
Next to be removed were the tire-rod ends.
3. Next to be removed were the tire-rod ends.
With experience, a couple of well-placed whacks with a heavy hammer to the steering arms will loosen the tie-rod ends.
4. With experience, a couple of well-placed whacks with a heavy hammer to the steering arms will loosen the tie-rod ends.
After removing the cotter pins and retaining nuts the big hammer was once again used to remove the spindles from the upper ball joints. An alternative is a pickle fork or a tie rod/ball joint separator.
5. After removing the cotter pins and retaining nuts the big hammer was once again used to remove the spindles from the upper ball joints. An alternative is a pickle fork or a tie rod/ball joint separator.
The brackets holding the brake hoses to the stock upper control arms are removed. The brakes can be reinstalled without having to be bled.
6. The brackets holding the brake hoses to the stock upper control arms are removed. The brakes can be reinstalled without having to be bled.
After separating the spindle from the lower ball joint, the entire assembly with the rotor intact can be set aside.
7. After separating the spindle from the lower ball joint, the entire assembly with the rotor intact can be set aside.
A pair of bolts that include eccentrics for alignment adjustments secure the upper A-arms to the frame.
8. A pair of bolts that include eccentrics for alignment adjustments secure the upper A-arms to the frame.
All four factory retention/adjustment bolts are discarded, as replacements come with the CPP control arms.
9. All four factory retention/adjustment bolts are discarded, as replacements come with the CPP control arms.
From the factory the GM frame has “knockouts” in the alignment slots (arrow) that limit the range of adjustment that can be made.
10. From the factory the GM frame has “knockouts” in the alignment slots (arrow) that limit the range of adjustment that can be made.
CPP supplies this tool to remove the knockout so the front suspension can be accurately aligned after installing the CPP control arms.
11. CPP supplies this tool to remove the knockout so the front suspension can be accurately aligned after installing the CPP control arms.
The factory antiroll bar stays in place, the stock endlinks will be replaced. Note the shock is still in place; it will keep the spring from coming out until the bottom control arm is supported with a jack.
12. The factory antiroll bar stays in place, the stock endlinks will be replaced. Note the shock is still in place; it will keep the spring from coming out until the bottom control arm is supported with a jack.
After putting a jack in place under the lower control arm the bottom bolts securing the shocks are removed.
13. After putting a jack in place under the lower control arm the bottom bolts securing the shocks are removed.
At the top of the shocks the retaining nuts, washers, and bushings are removed.
14. At the top of the shocks the retaining nuts, washers, and bushings are removed.
With the retaining hardware removed the shocks can be tossed in the trash can.
15. With the retaining hardware removed the shocks can be tossed in the trash can.
By slowly lowering the jack the pressure on the stock springs is released and they can be removed.
16. By slowly lowering the jack the pressure on the stock springs is released and they can be removed.
Removing the stock lower control arms is now simply a matter of taking out two bolts on each side.
17. Removing the stock lower control arms is now simply a matter of taking out two bolts on each side.
The CPP lower control arms are slipped in place and secured with the factory bolts.
18. The CPP lower control arms are slipped in place and secured with the factory bolts.
Before installing the springs, CPP’s thrust bearing kit (PN 4052-K) were installed on the shocks. They make spring adjustments easier and prevent damage to the threads.
19. Before installing the springs, CPP’s thrust bearing kit (PN 4052-K) were installed on the shocks. They make spring adjustments easier and prevent damage to the threads.
CPP’s coilover shocks are made from billet aluminum that has been clearcoated. The springs are powdercoated silver.
20. CPP’s coilover shocks are made from billet aluminum that has been clearcoated. The springs are powdercoated silver.
With the top of the springs seated in the recesses in the frame, the shock assemblies are secured with OEM-style bushings.
21. With the top of the springs seated in the recesses in the frame, the shock assemblies are secured with OEM-style bushings.
At the bottom the crossbars of the coilovers are bolted to the plates on the control arms. Note the adjustment knobs for compression and rebound damping.
22. At the bottom the crossbars of the coilovers are bolted to the plates on the control arms. Note the adjustment knobs for compression and rebound damping.
CPP’s tubular upper control arm is attached to the frame brackets with the hardware that comes in the kit.
23. CPP’s tubular upper control arm is attached to the frame brackets with the hardware that comes in the kit.
The stock spindle and brake assemblies are attached to the new lower ball joint that comes installed in the control arms.
24. The stock spindle and brake assemblies are attached to the new lower ball joint that comes installed in the control arms.
Installation is made easier by jacking up the lower control arms when attaching the upper ball joints. Note there is a tab on the control arm for the brake hose bracket. It can be installed once the caliper is in place.
25. Installation is made easier by jacking up the lower control arms when attaching the upper ball joints. Note there is a tab on the control arm for the brake hose bracket. It can be installed once the caliper is in place.
The tie rods are reinstalled, however with the narrowed track width it will be necessary to have the frontend realigned.
26. The tie rods are reinstalled, however with the narrowed track width it will be necessary to have the frontend realigned.
Simple but critical, make sure to install cotter pins in the ball joint and tie-rod ends nuts.
27. Simple but critical, make sure to install cotter pins in the ball joint and tie-rod ends nuts.
The antiroll bar is attached to brackets on the CPP lower control arms with the supplied linkage.
28. The antiroll bar is attached to brackets on the CPP lower control arms with the supplied linkage.
CPP’s control arm and coilover kit will give our Tahoe, or any OBS pickup or SUV, a lower, cleaner look with improved ride and handling.
29. CPP’s control arm and coilover kit will give our Tahoe, or any OBS pickup or SUV, a lower, cleaner look with improved ride and handling.
SOURCE