TECH
InTheGarageMedia.com
Bolt on and drive off: C10 coilover IFS install
Modernizing the Front Suspension and Steering of our ’64 C10 with a Scott’s Hotrods IFS System
BY Taylor Kempkes Photography BY The Author
I

n some sense, owning a classic truck is one of the best options for a project vehicle. They offer timeless style, the utility of a bed for weekend trips to the hardware store, and room underhood for a stout, all-American V-8. What they don’t typically offer, though, are handling characteristics that inspire confidence when driving alongside modern traffic. Our ’64 shortbed C10 is no different. We plan to build it into a fun weekend run-about but not before bringing its suspension, steering, and stopping capabilities up to contemporary standards.

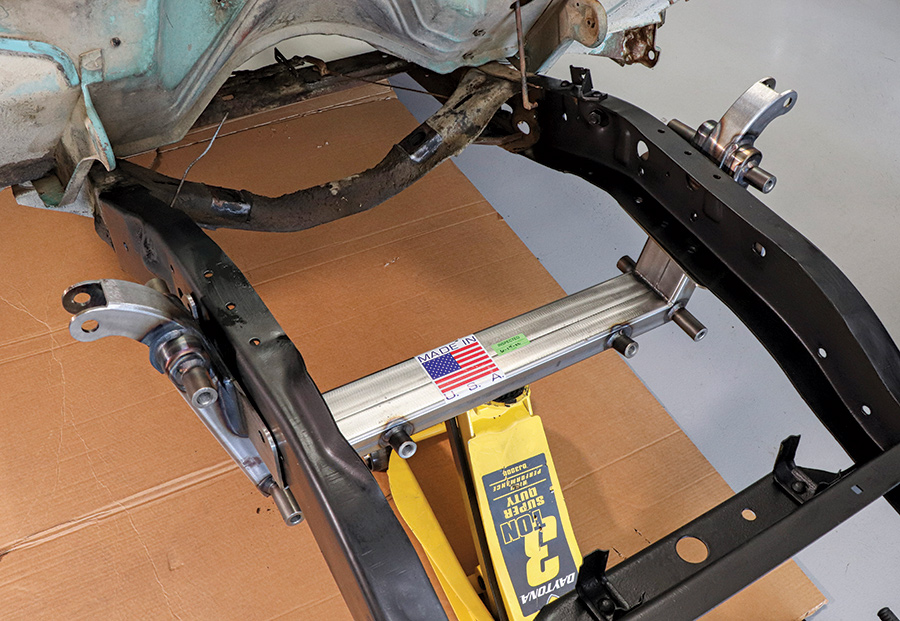
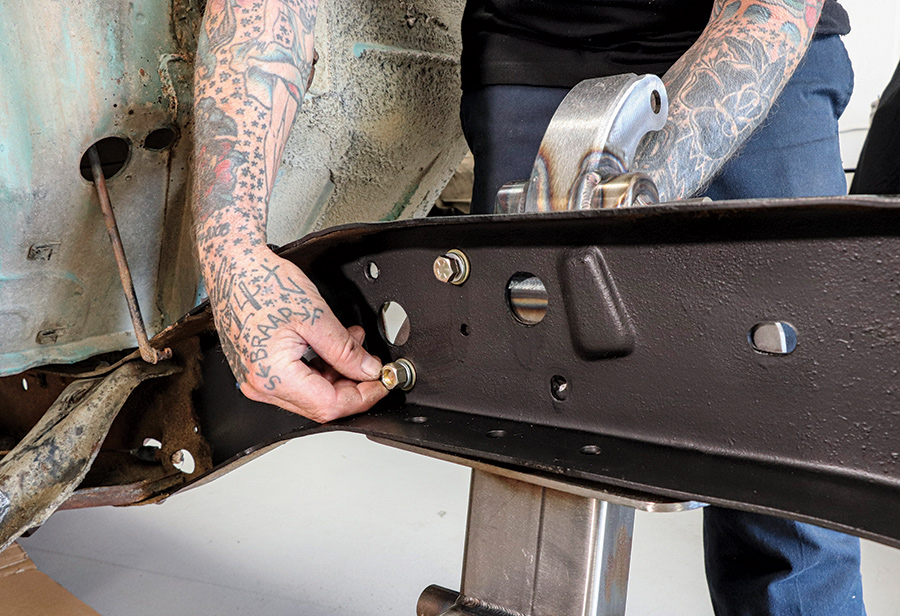
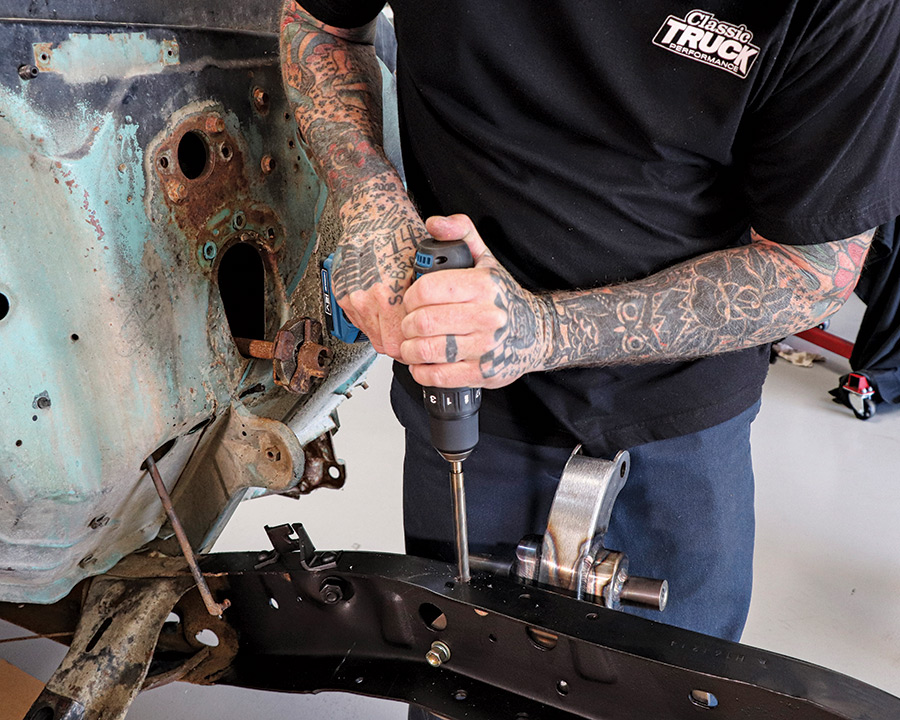
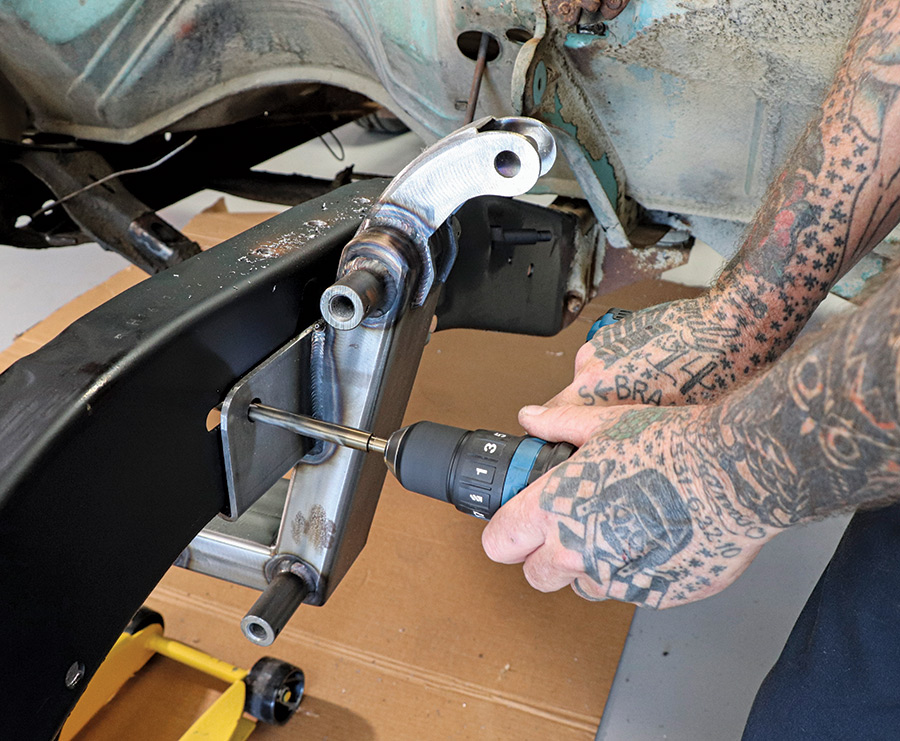
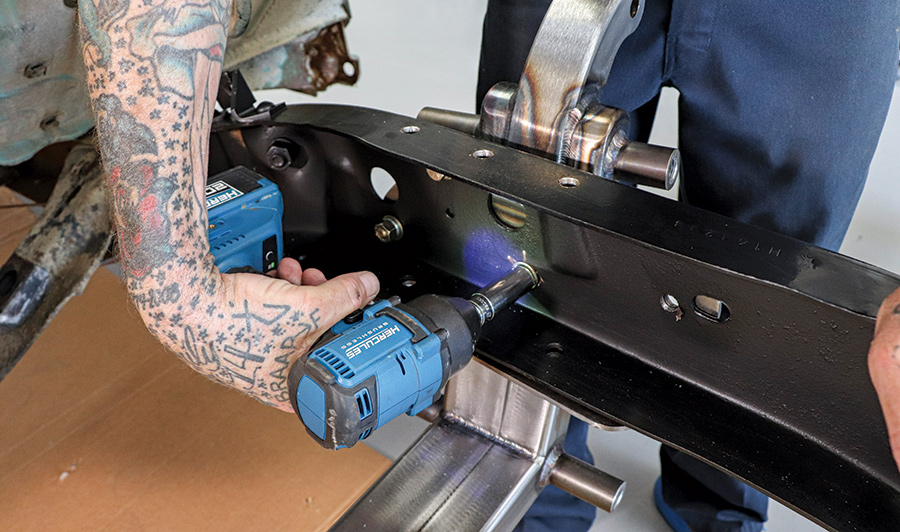
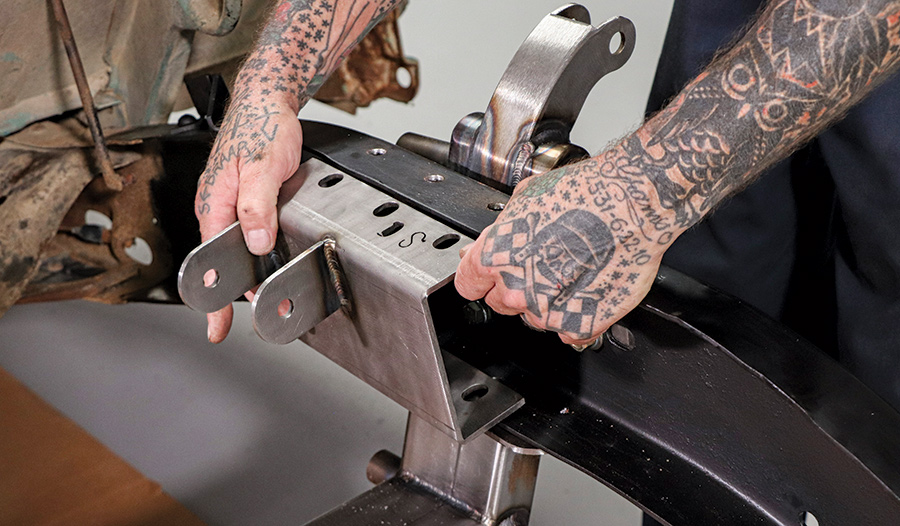
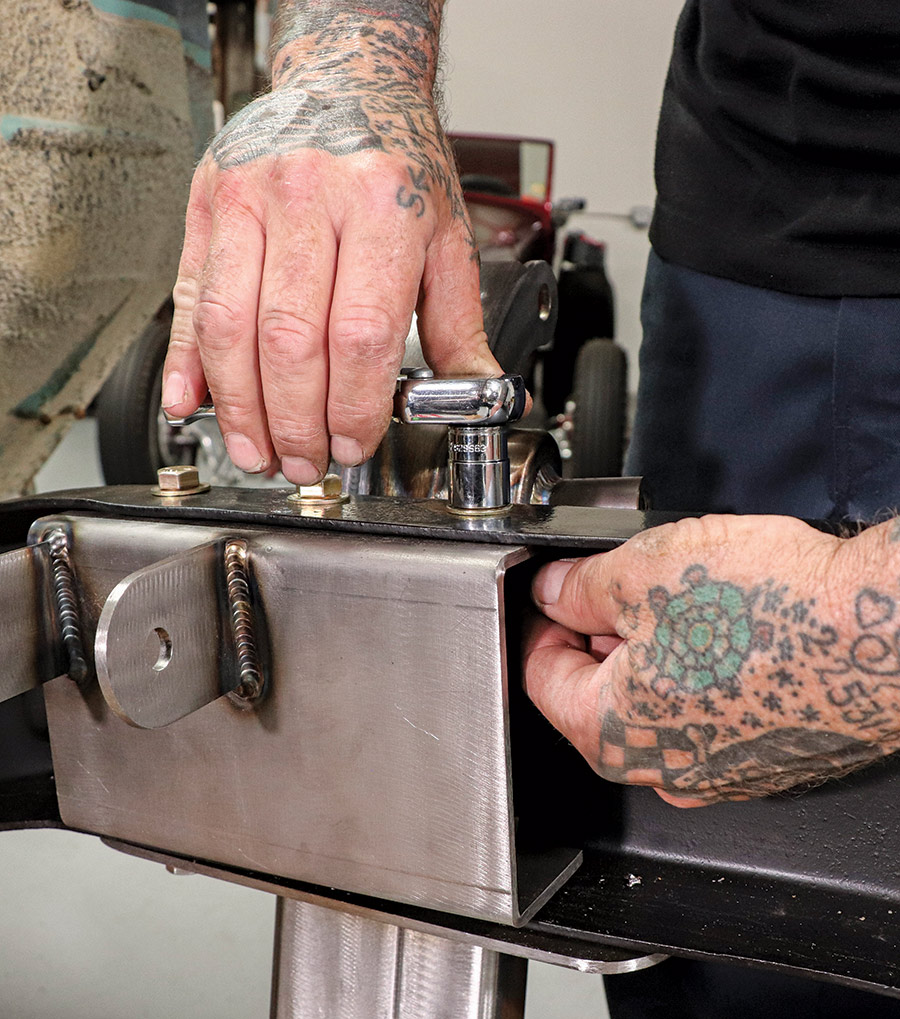
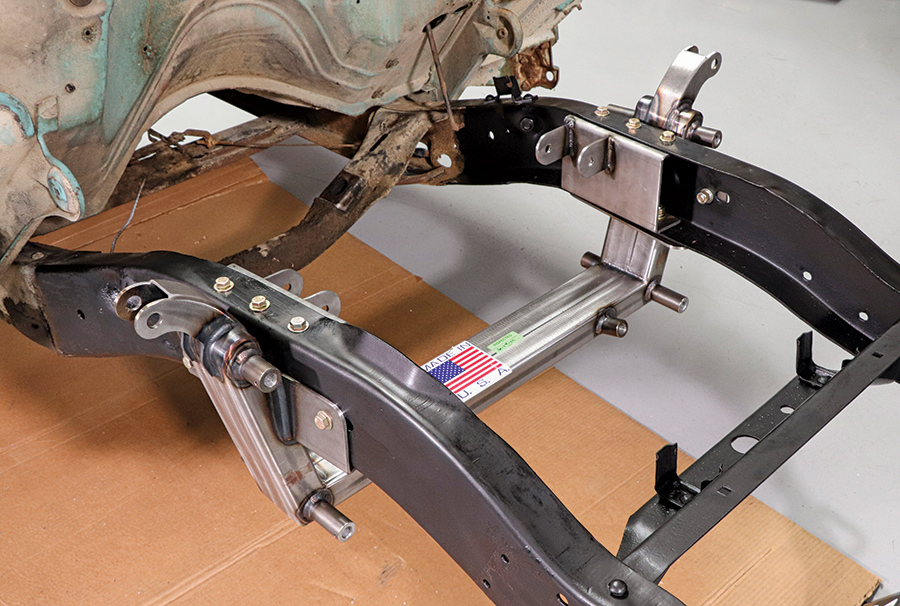
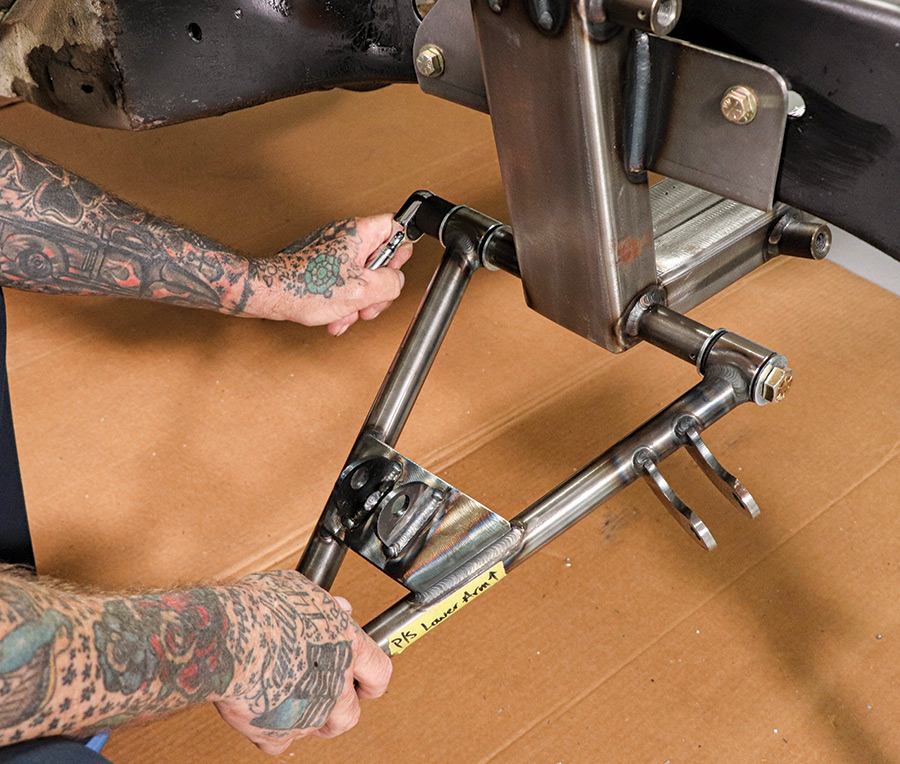
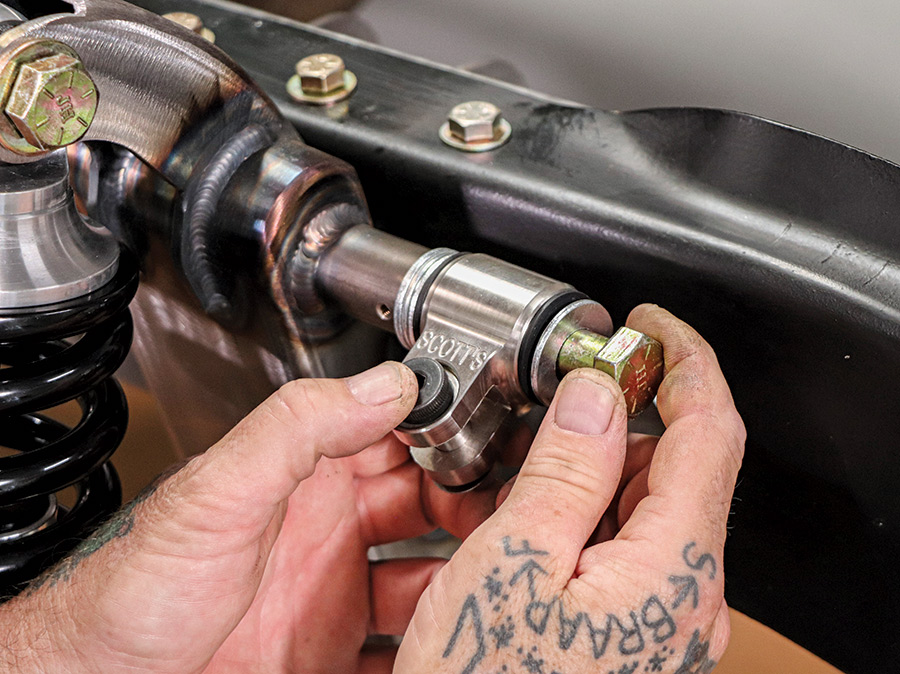
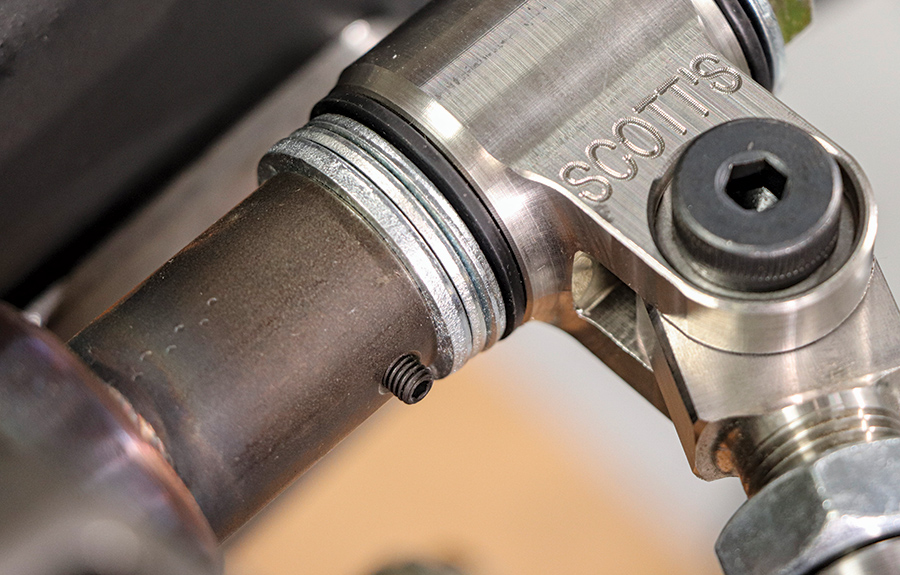
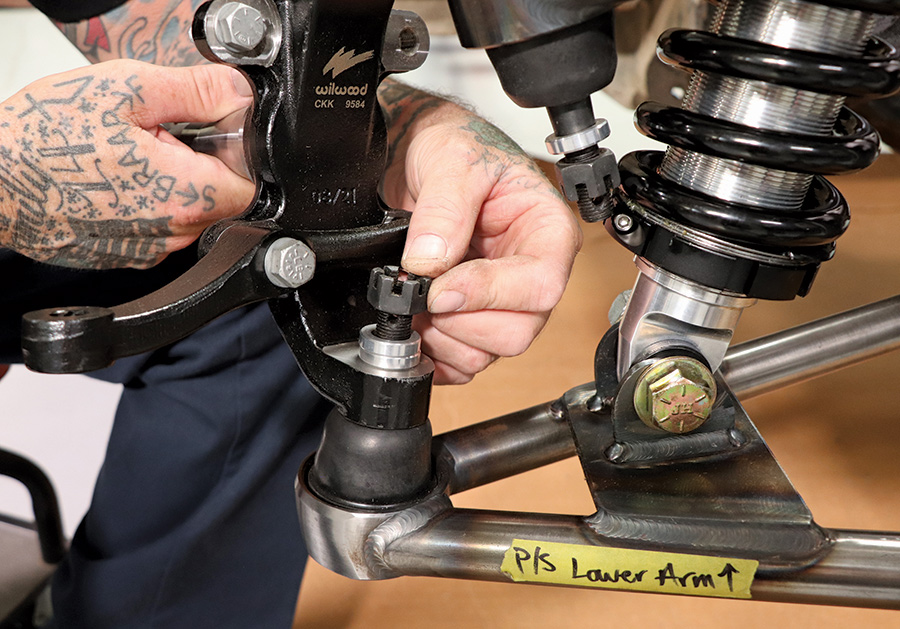
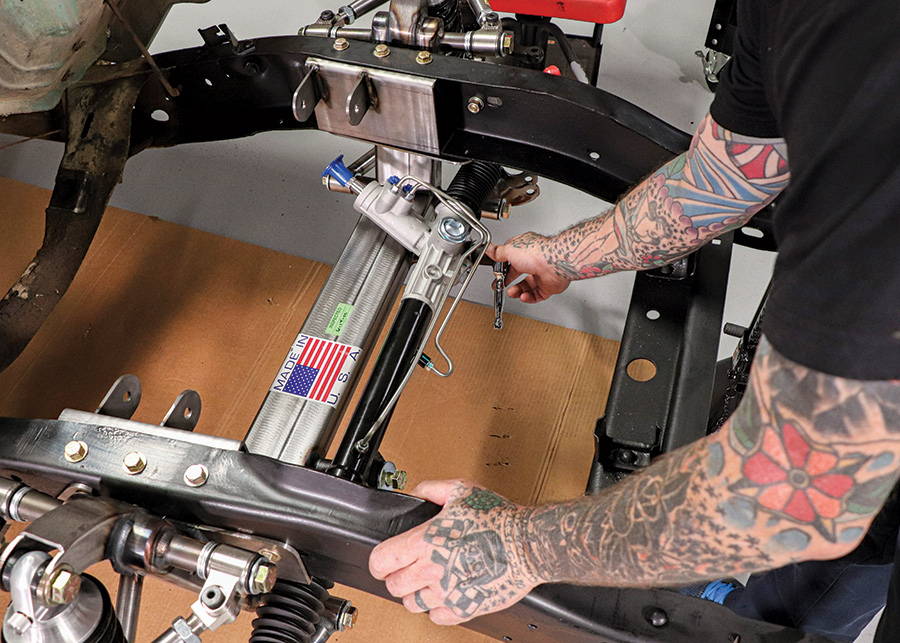
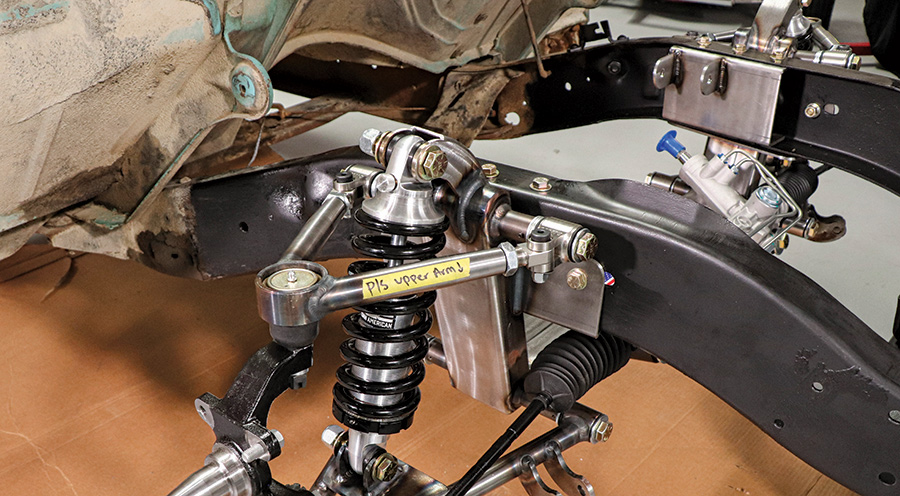
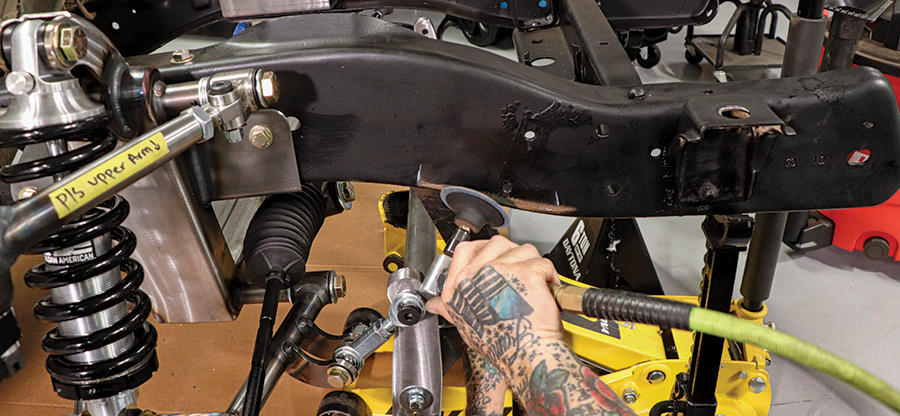
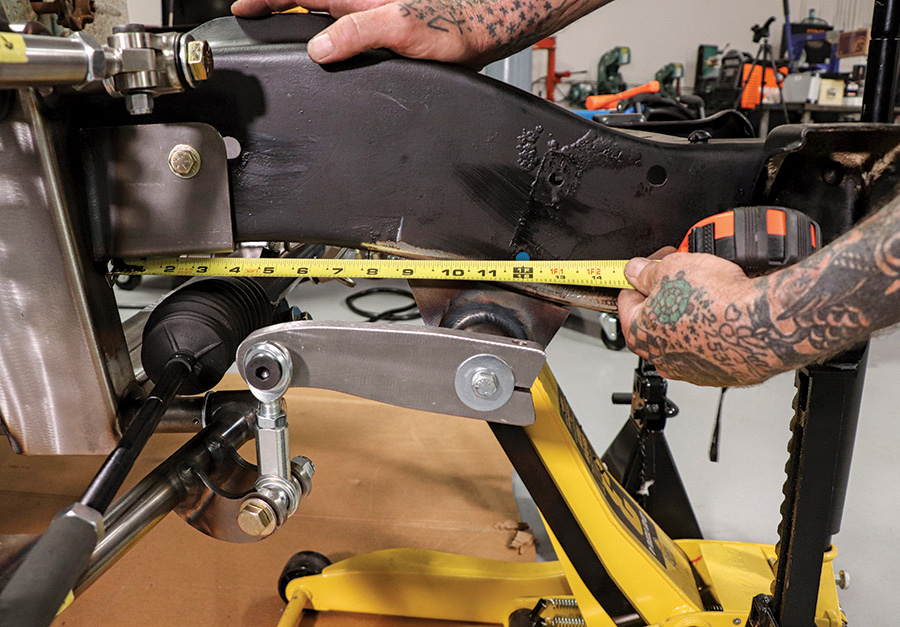
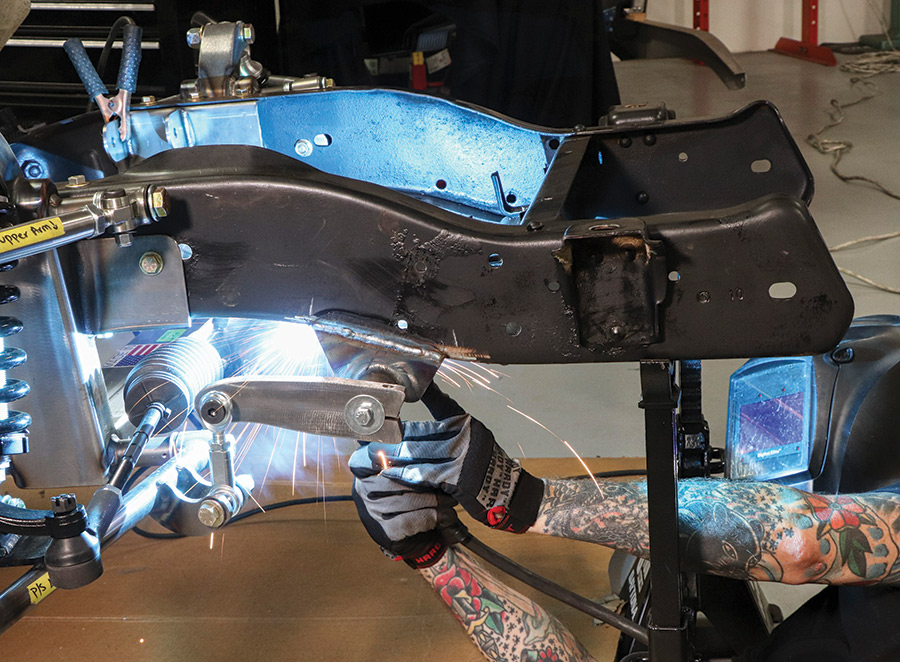
Luckily for us, the guys at Scott’s Hotrods ’N Customs have the perfect solution in the form of their bolt-on IFS system. The kit is designed for ’63-87 Chevy and GMC trucks and can be configured in a variety of ways. The basic kit comes with a bolt-on crossmember, control arms, 11-inch brakes, coilovers or airbags, and a manual steering rack—everything needed to transform the frontend of your truck. But, knowing not every build has the same goals or budget, Scott’s Hotrods also offers a whole host of other options. There is too much to list here, but some upgrades include bigger brakes, powdercoating, sway bars, and various coilovers. You can check out the full option list, as well as their other chassis and suspension offerings at scottshotrods.com.

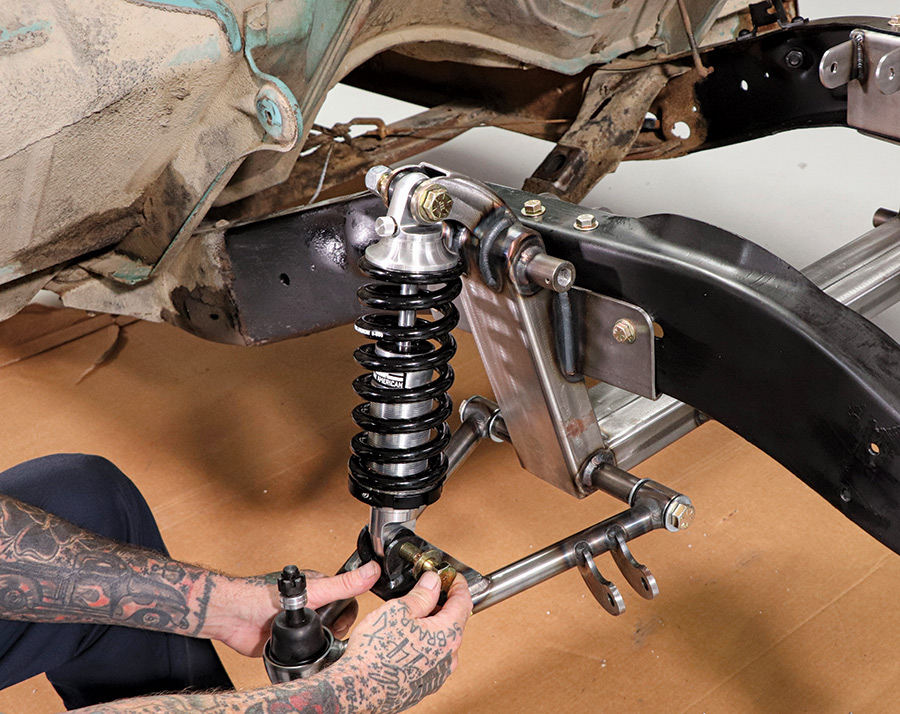
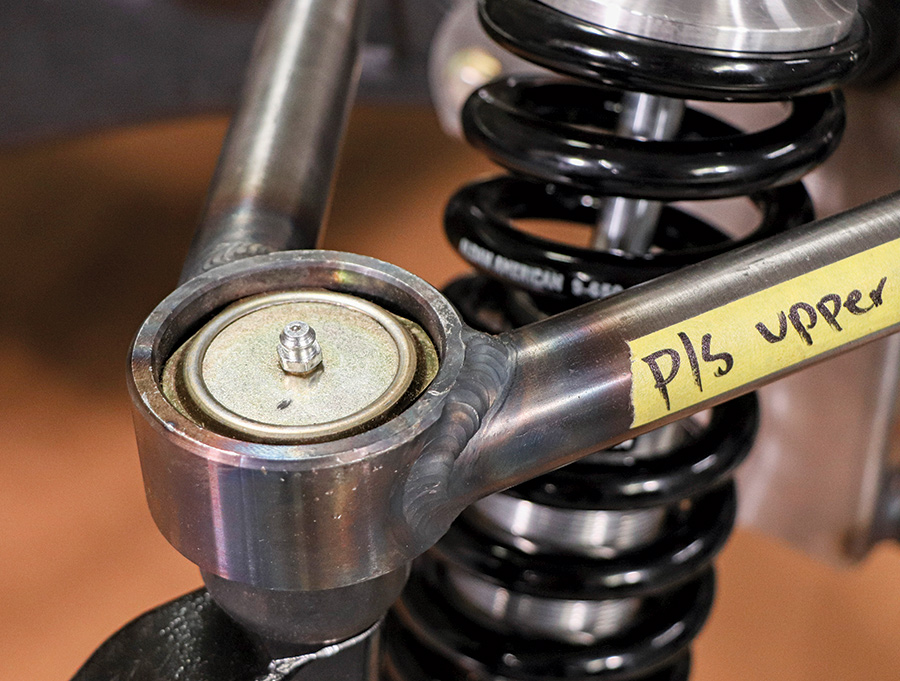
So, what about our setup? Did we go bare bones or tick every box possible? Turns out, the sweet spot for us was somewhere in the middle. We passed on powdercoating since we had yet to decide on color and we also opted for the standard single-adjustable Aldan American coilover option, trusting it would give us just the right amount of ride quality and adjustability we needed. We did upgrade to a power steering rack to make around-town cruising more enjoyable and LS motor mounts to support the truck’s future motivation. Adding a sway bar was also a must, and we decided on the beefier of the two sway bar options. Finally, we decided a stouter brake package would be ideal, so we went for the upgraded Wilwood six-piston caliper with drilled, slotted, and vented 14-inch rotors (but we’ll get to that part of the install in Part 2 of this saga).

Before getting into the meat of this install, we’ll make a little note here to acknowledge the work that’s already been done on our ’64 C10. This being a pretty comprehensive build, our truck was already stripped down to a cab and bare framerails up front. Keen readers will recognize the truck from the Dec. ’22 issue of Classic Truck Performance where Jason Scudellari removed the front subframe and steering to coat the frame in POR-15. In the future we’ll be installing new sheetmetal and a completely new engine/transmission combination, so it just made more sense to start on the front IFS system while everything else was out of the way. If you’re doing this upgrade on your truck at home, not much should change other than working around existing sheetmetal and having an engine to support.

Check back next month for Part 2 when we’ll cover the Wilwood brake portion of the Scott’s Hotrods IFS install.

Picture of a factory subframe
1. With the factory subframe and steering box removed, Jason Scudellari began by supporting the front of the framerails with jackstands. Then he held the new IFS subframe in place using a floor jack.
The side picture of a factory subframe
2. With the provided hardware, Scudellari found the holes in the Scott’s Hotrods subframe that line up with the original holes in the frame and bolt it on.
Someone drilling holes in the factory subframe
3. The top three holes in the frame that secure the frame boxing cradle needed to be drilled out for the larger hardware.
attaching another frame to the factory subframe
4. There are also a few more holes that need to be drilled in the frame to fully attach the IFS subframe—an easy task with the subframe bolted in place already.
Someone tightening the subframe
5. Make sure to fully tighten the subframe hardware on the inside of the framerails before installing the frame boxing cradle.
attaching a cradle to the factory subframe
6. Each cradle is marked with “DS” or “PS” on the top to note which side of the truck it should be installed (also note the pre-welded tabs for the LS motor mounts we selected).
Adding bolts to the factory subframe
7. Getting those center nuts on the top and bottom of the cradle can be challenging but certainly not impossible, so just take your time.
A Picture of the factory subframe
8. Once all the hardware on the subframe and boxing cradle is installed and torqued to spec, you’re ready to move onto the suspension and steering.
Control arms added to the factory subframe
9. The control arms were all labeled for upper or lower and passenger or driver side. Install a washer on either side of each arm then snug up the bolts, but do not overtighten them.
Coil added to the factory subframe
10. Scudellari proceeded to install the Aldan American coilover shock using the supplied hardware. It is generally easiest to leave the collars on the coilover at their lowest position for installation then go back and dial up the ride height later.
attaching a billet to the factory subframe
11. Install each billet upper control arm mount with three washers against the crossmember and one washer on the outside.
attaching an upper control arm to the factory subframe
12. Then attach the adjustable upper control arms and tighten all the hardware.
factory subframe has attached bolts to it
13. For added safety, and to de-incentivize overtightening the bolts, a setscrew secures each upper control arm bolt.
Spindle added to the factory subframe
14. Scudellari then installed the spindle before moving onto the steering rack. Two washers are provided for the lower ball joint between the spindle and castle nut to ensure the cotter pin hole lines up.
Picture of Zerk Fittings
15. Don’t forget to install the zerk fittings on the oversized, greaseable upper ball joints.
Steering racks on the factory subframe
16. The steering rack easily mounts up to the IFS subframe and fits like a glove. Tighten up the two mounting bolts until they bottom out on the sleeve.
Picture of an Upper Arm
17. Spin on the lock nut and outer tie rod ends, making sure to set both sides at equal lengths (obviously a professional alignment will be needed before getting the truck back on the road).
A non-bolt on
18. Next, Scudellari moved onto the one “non-bolt-on” portion of the installation: the upgraded splined sway bar. If you don’t have access to a welder, the standard 1-inch sway bar option is a bolt-on alternative. He began by attaching the rod ends to the sway bar arms.
Picture of the factory subframe adjusted
19. With the rod ends adjusted to equal lengths and the sway bar supported by a floor jack, Scudellari proceeded to clean up the area on the frame where the mounts would be welded.
A person measuring a sway bar
20. He measured both sides to make sure the sway bar was nice and square before tacking it in place. The goal is to have the endlinks as vertical as possible at ride height.
factory subframe being welded
21. With the bar positioned correctly, Scudellari went ahead and fully welded the sway bar mounts to the frame.
In the garage Media Tech Center
 SOURCES
Aldan American
(310) 834-7478
aldanamerican.com
Scott’s Hotrods’N Customs
(800) 273-5195
scottshotrods.com