CTP logoFeature star Tech
InTheGarageMedia.com
Car interior look at stick shift
1. You can tell it’s a truck transmission by the long, tall shifter and its forward position. Bulky to shift with goofy gear ratios, it’s time to upgrade to something a bit more current.
Transmission Transformation Title Typography
Installing a TREMEC TR-3550 in a ’76 F-100
BY Don Lindfors 
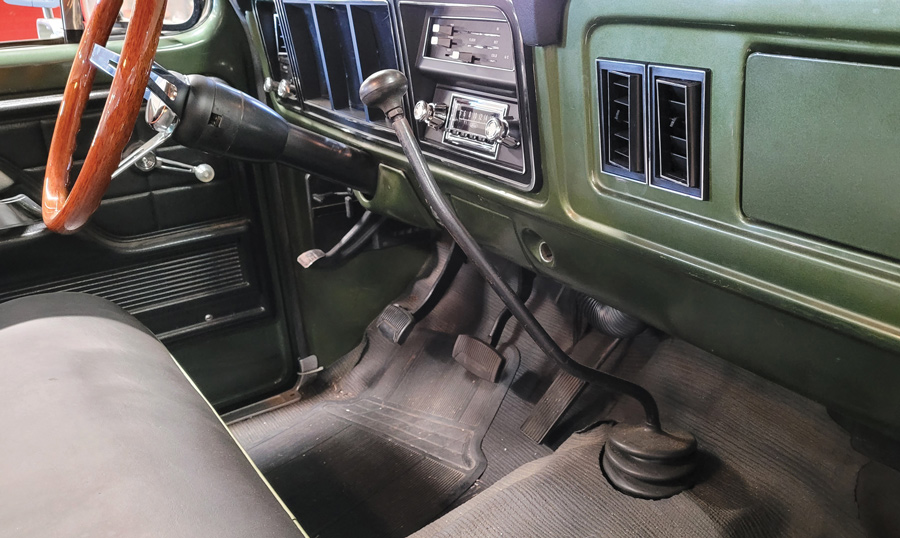
Photography BY The Author
W

hen we think of Classic Truck Performance the first thing that comes to mind is the engine. These days that usually seems to involve Coyote or LS swaps. Other performance enhancements center around suspension or complete chassis upgrades and bigger brakes. Transmissions seem to be forgotten in many cases unless an entire modern drivetrain is being transplanted.

When our classic trucks were new, they were designed as work vehicles and as such engine and transmission choices were geared toward that end. Automatics weren’t all that common and in the case of GM, offerings were originally the two-speed powerglides, later replaced by the Turbo 350 and 400. Fords were blessed with three-speed autos, but none of these transmissions, and the accompanying rearend gear ratios, were designed for the way we use classic trucks today. As personal transportation, performance vehicles, and weekend cruisers, these old gearing options don’t cut it with today’s faster speeds that seem to be the norm. On the manual transmission side, things weren’t much better with three- and four-speed “truck” transmissions. Heavy gears and slow shifting do not make for a lot of fun when driving a three-pedal truck for pleasure.

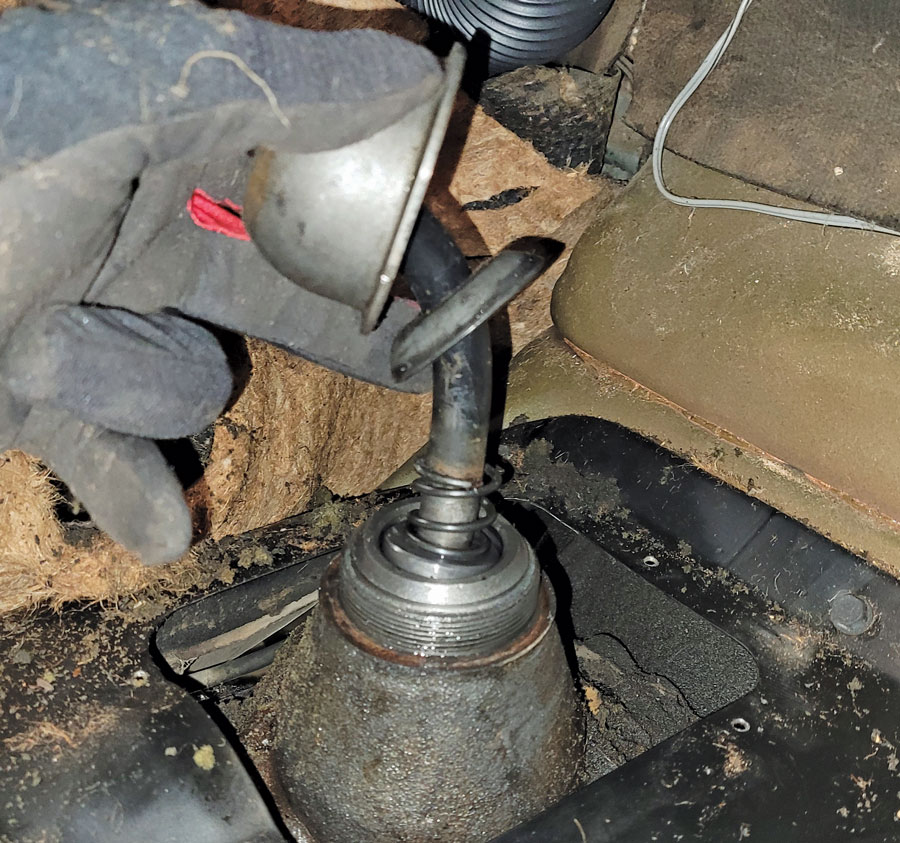
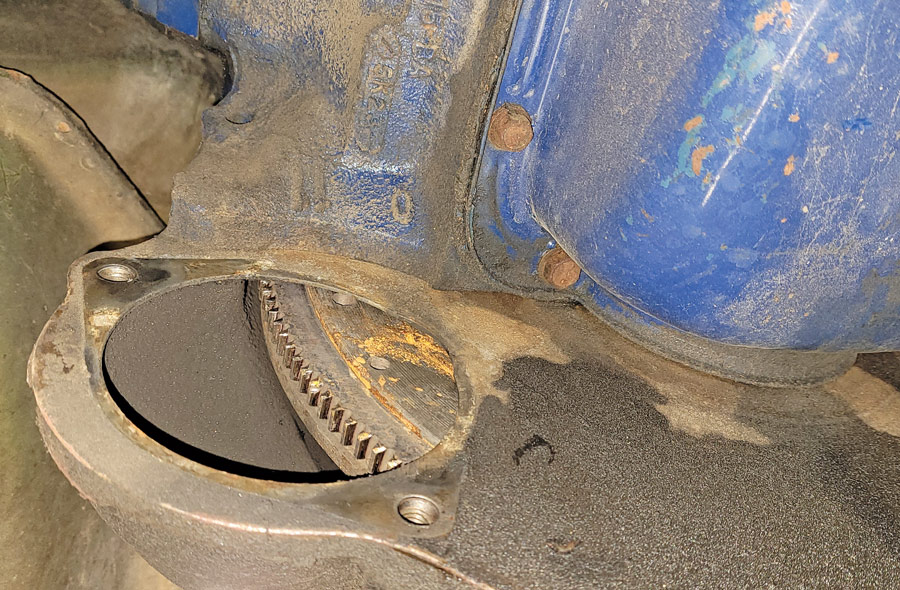
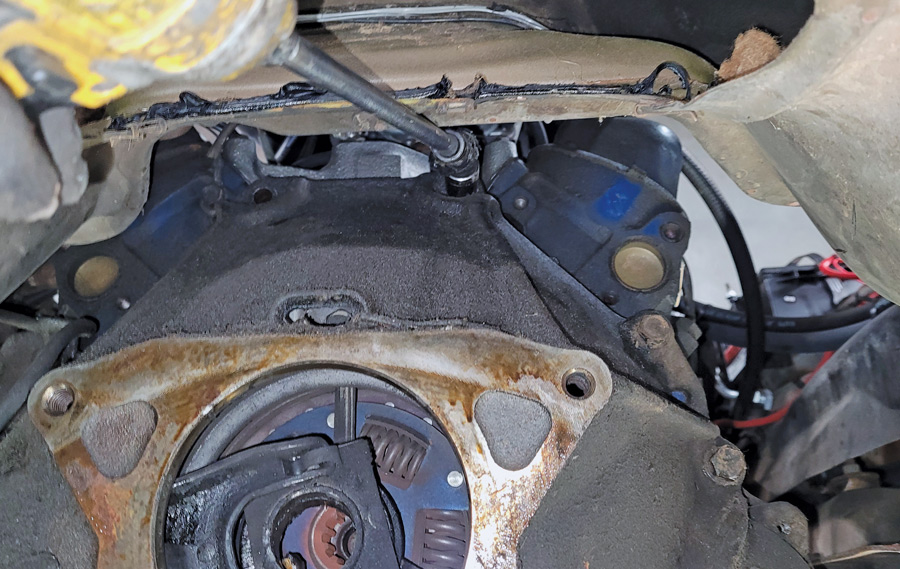
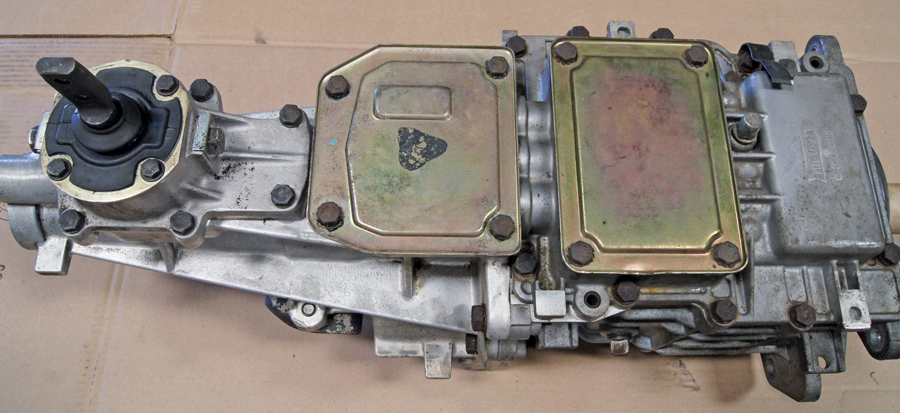
Our project ’76 F-100 was ordered as a farm truck where it spent most of its life. It had an unusual combination of a 302 small-block Ford engine with a BorgWarner T-18 four-speed, popularly called the “Granny Low” trans. First gear is an absurdly low 6.32:1 ratio, good for crawling up the side of a mountain with a heavy load. It also means you go about 10 feet before needing to shift the big gap to Second. When put behind big-block FE engines or the mighty 460, most owners just choose to use the torque and start off in Second gear, but that isn’t really an option with the 302. Something had to change to make this truck more enjoyable.

We thought about doing a late-model engine and trans swap but we really like the 302 Ford motors and want to keep this truck a budget build. Not everyone is ready to drop $10,000-15,000 (or more) on a Coyote conversion. We thought about doing a four-speed AOD automatic, but there is something about the fun of rowing your own gears that still appeals to us. So, we decided to look at modern manual transmission options.

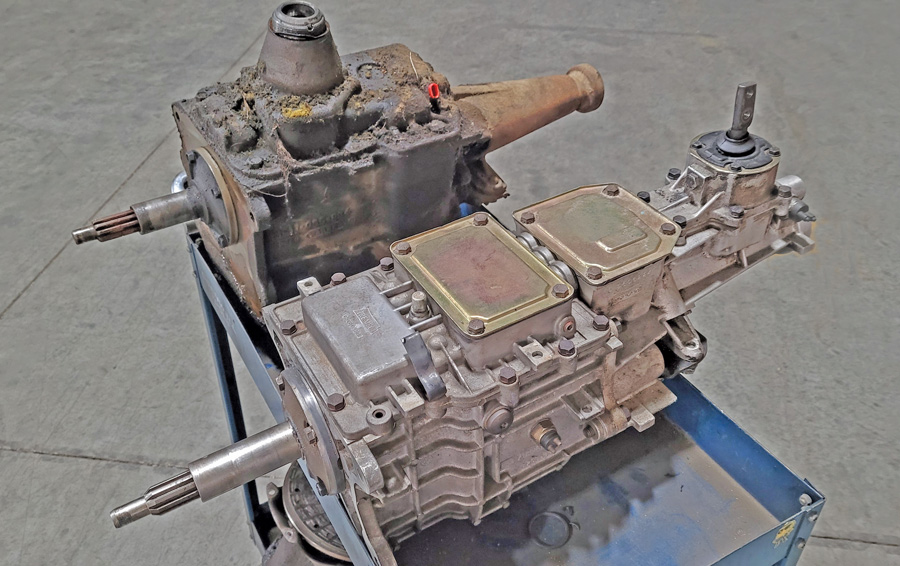
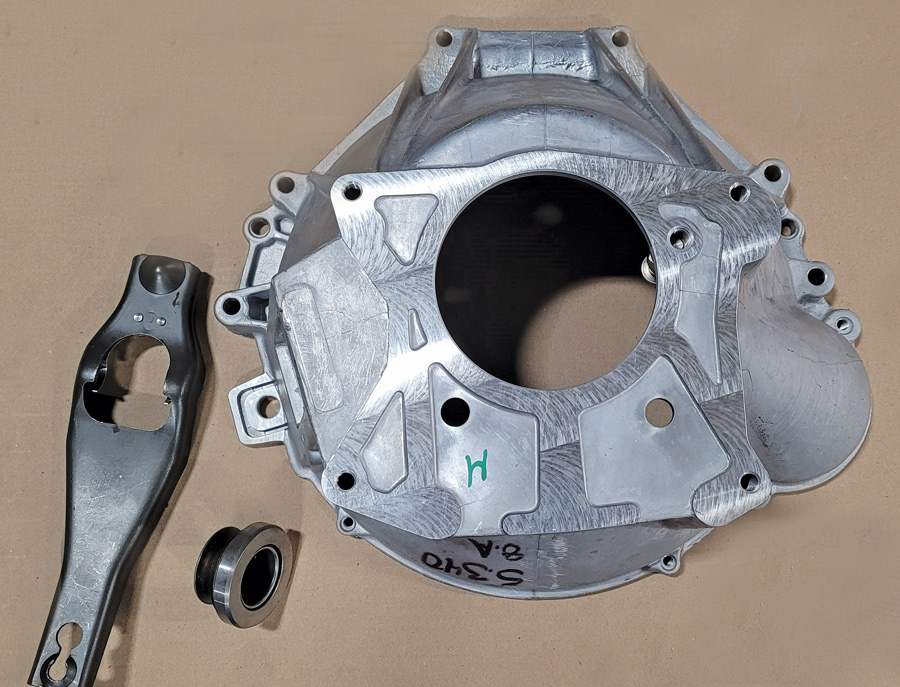
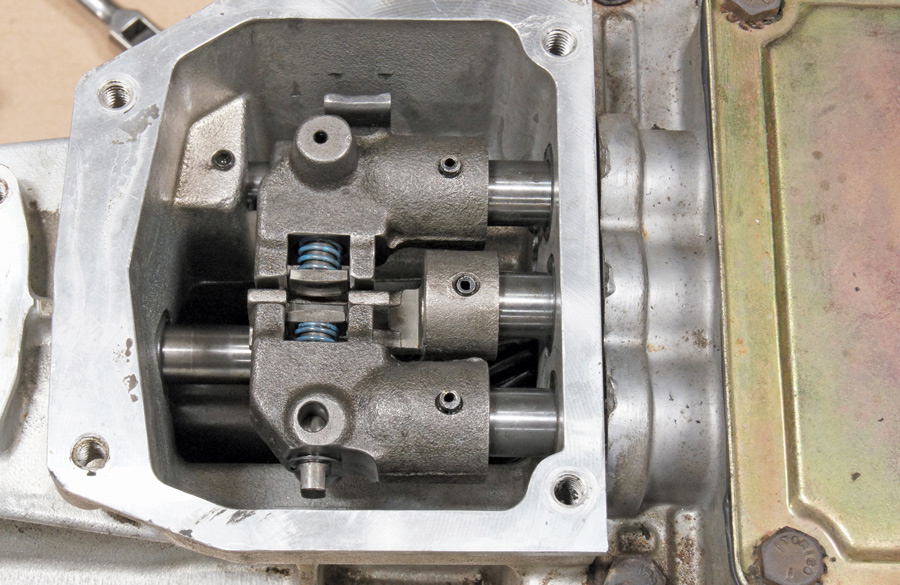
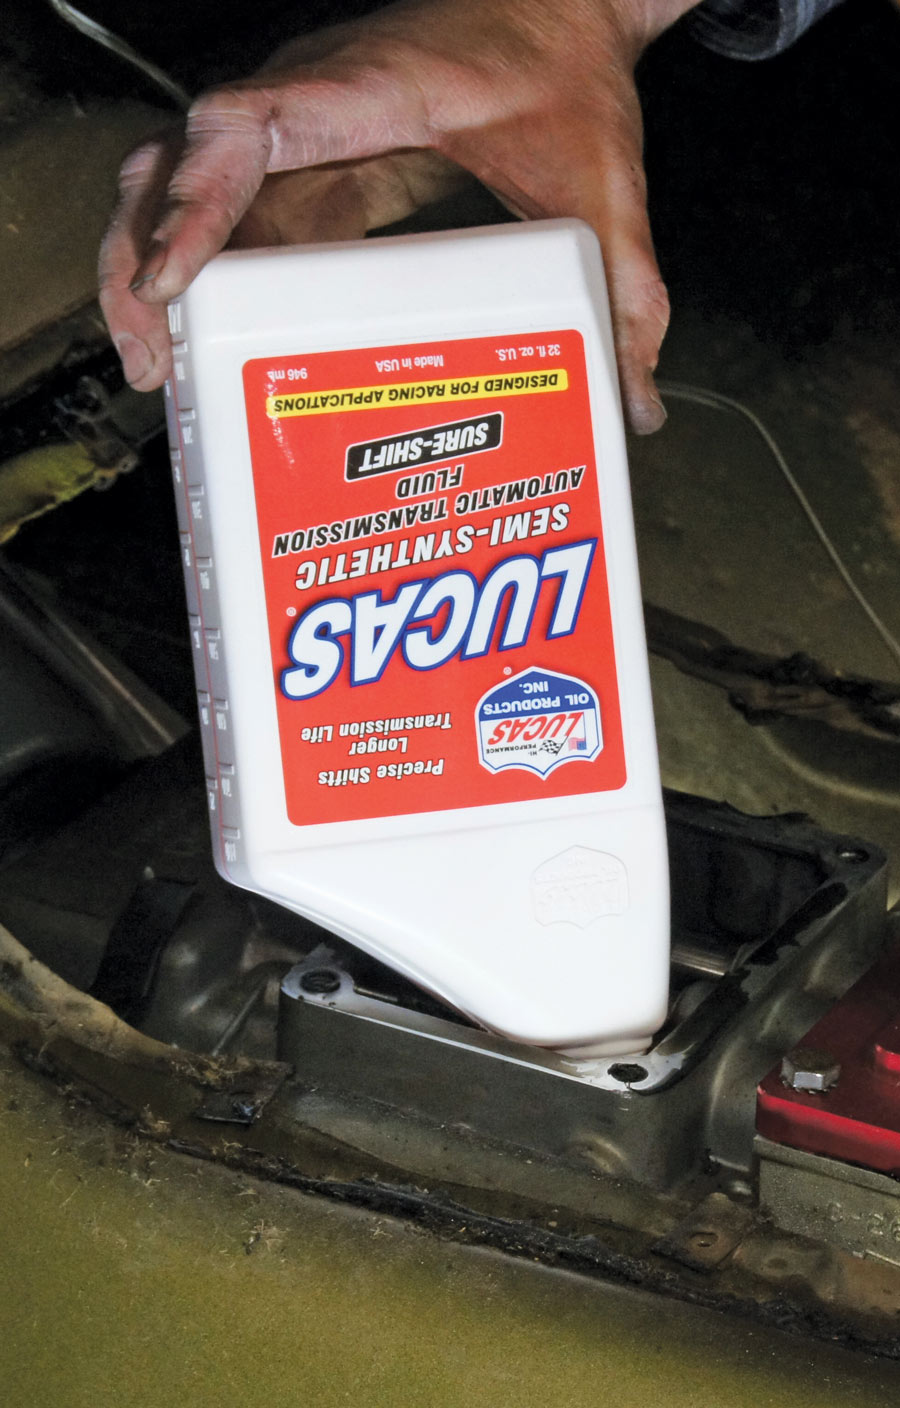
TREMEC has become the leader in aftermarket transmissions as well as the builder for many OEM manual gearboxes. Although we would have loved to just order up a new TKX five-speed or Magnum six-speed and an installation kit, you will drop a good $5,000 or more to go this way. Keeping with our budget theme, we decided to see what was available used. We did some forum watching and found a TREMEC TR-3550 five-speed that a fellow was taking out of his Falcon to get the latest six-speed. The TR-3550 is the basis for the TKO 500 and 600 and is perfect for our projected power output. This trans is somewhat unique, having only come in one car as an OEM offering, the ’95 Mustang Cobra R. But it was also offered as an aftermarket offering until 2004 when the TKO 500/600 were introduced. We talked to the Falcon guy and made a deal to purchase his TR-3550 and he included a new clutch, throw-out bearing, and the driveshaft with the proper yoke. We opened the trans and it was like new, and the oil was clean and clear. To install this in our ’76 F-100 we needed a bellhousing and a way to connect the clutch to the truck. We probably could have made the original Z Bar mechanical linkage work with some fiddling around but figured there was a better way. We talked to Bruce Couture at Modern DriveLine and found out there was.

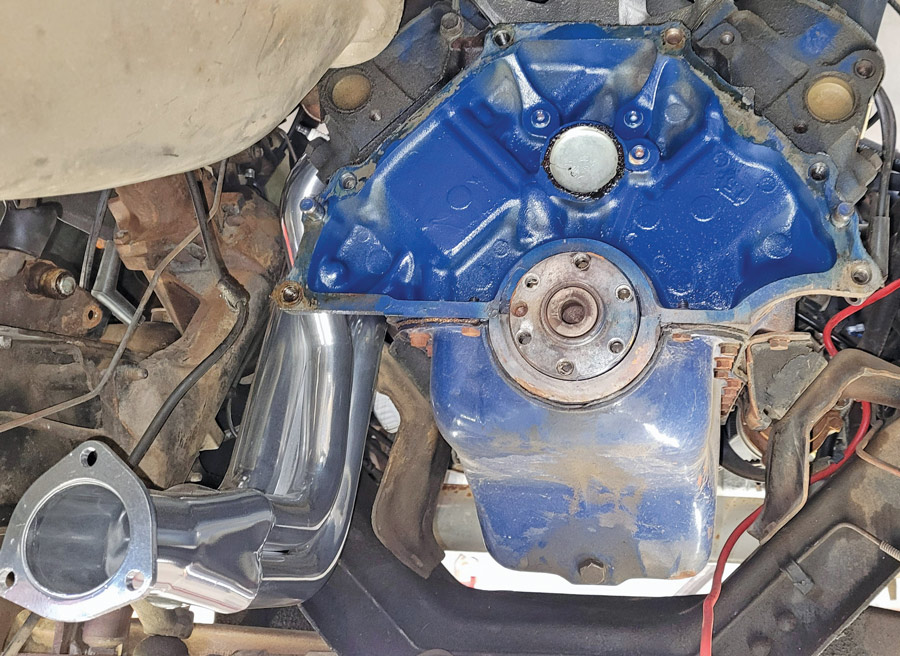
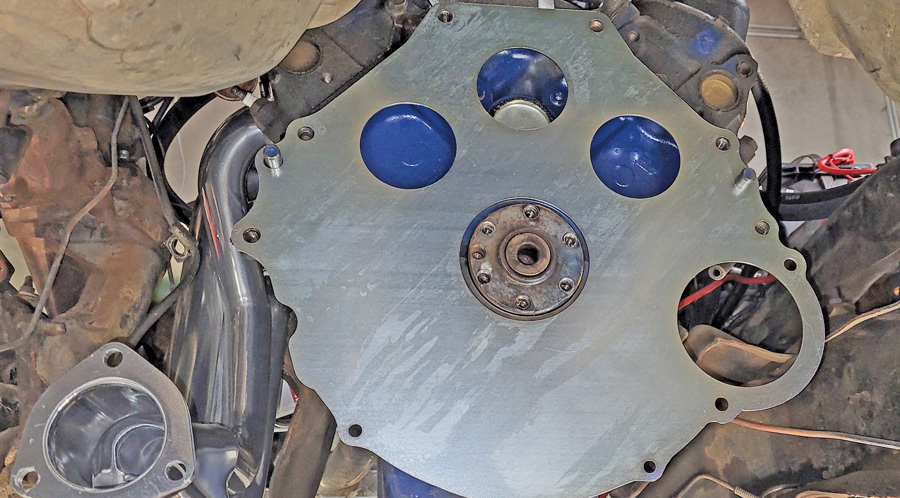
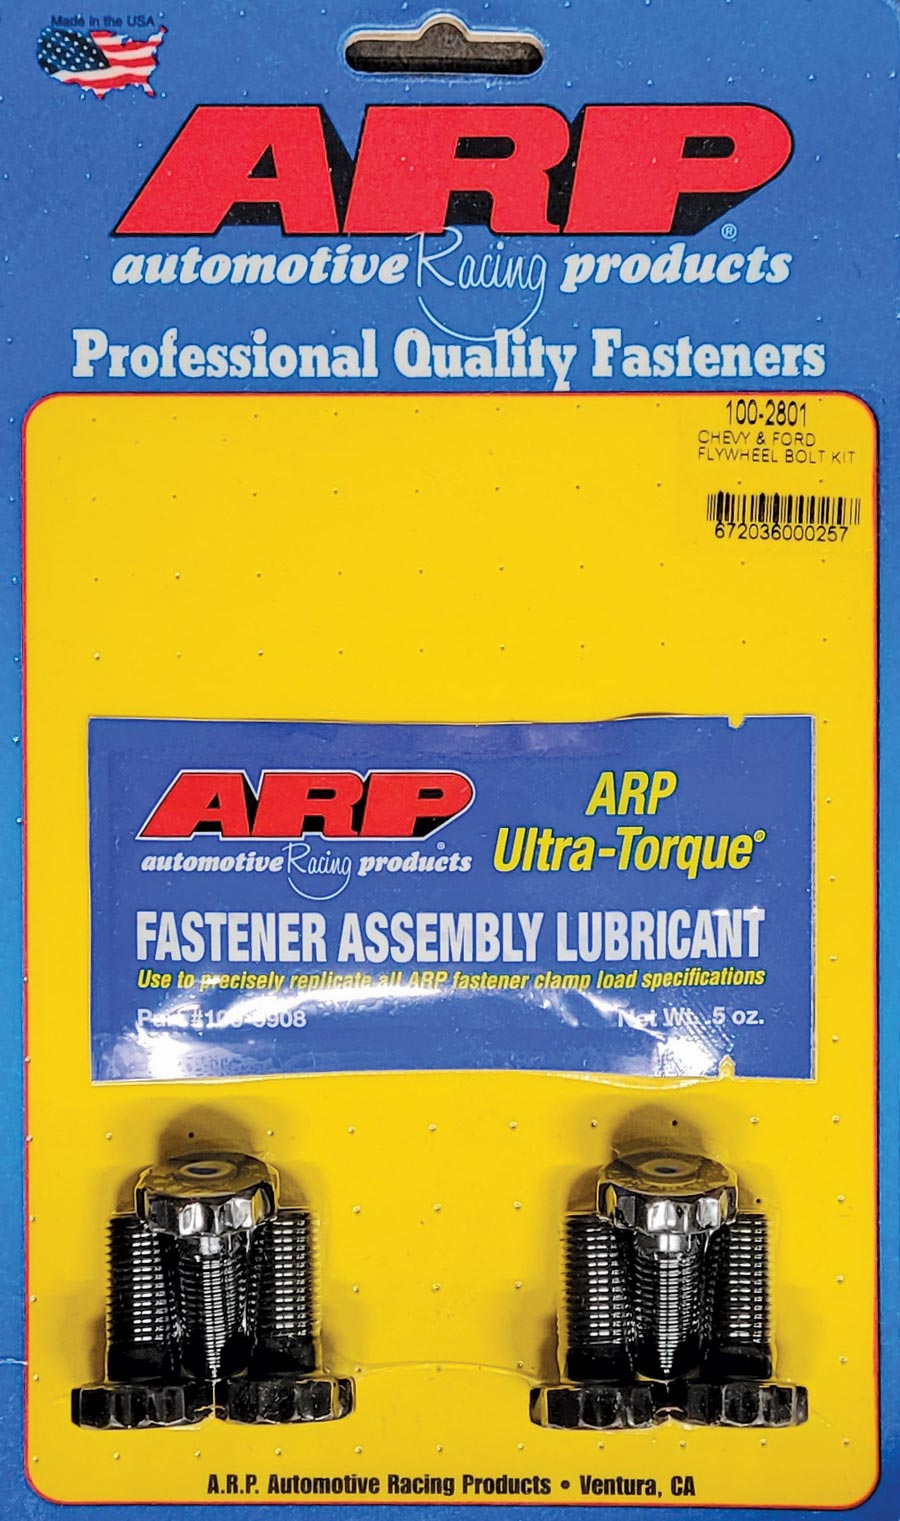
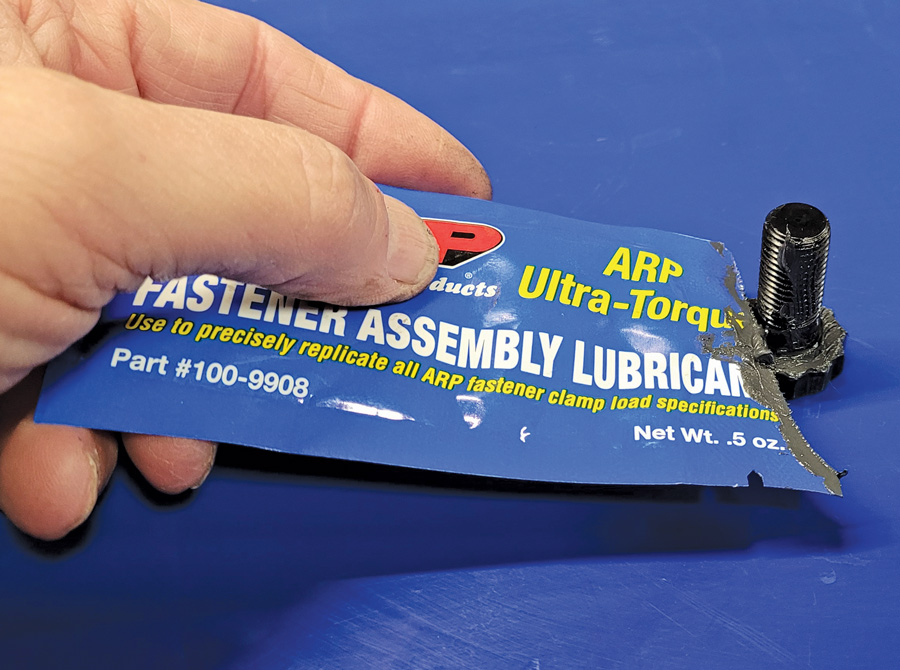
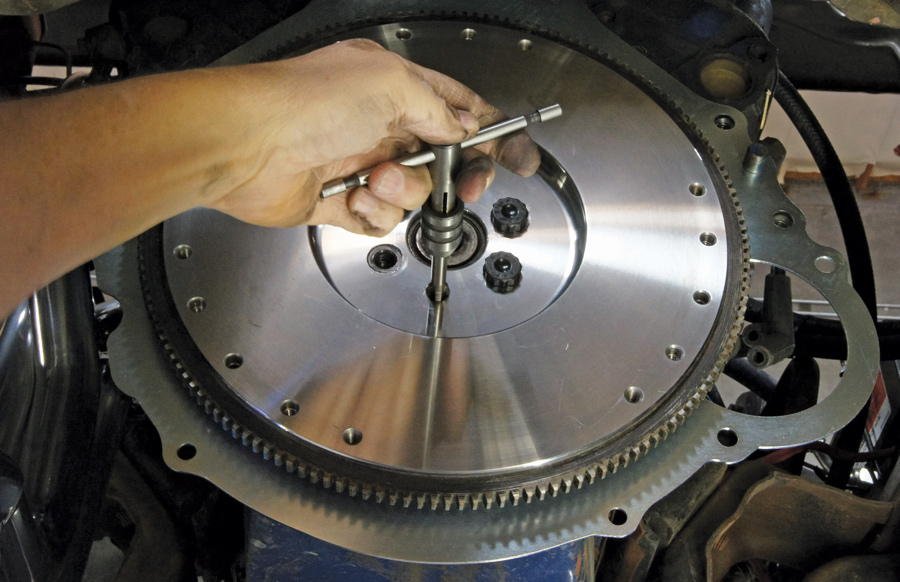
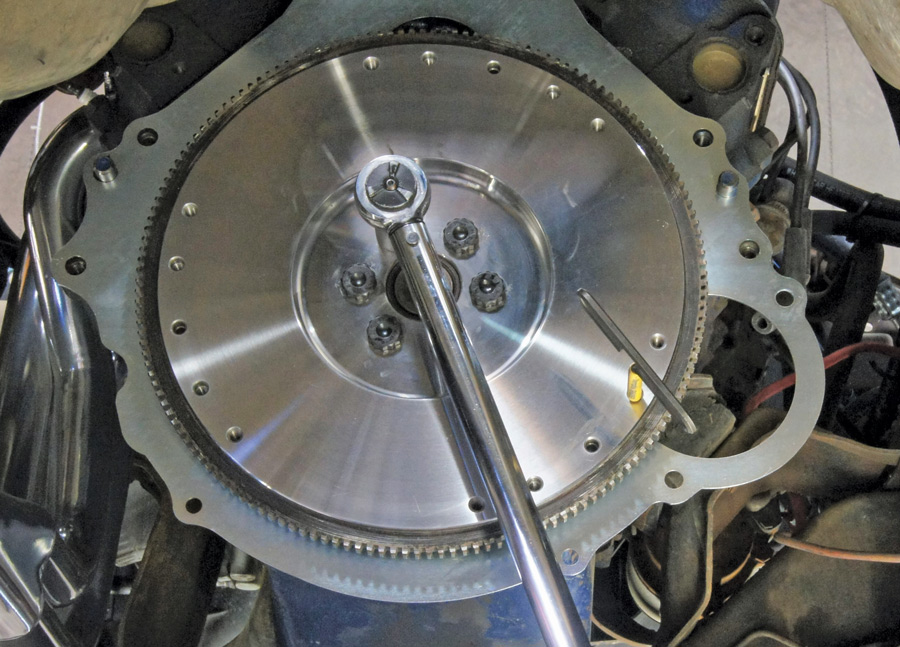
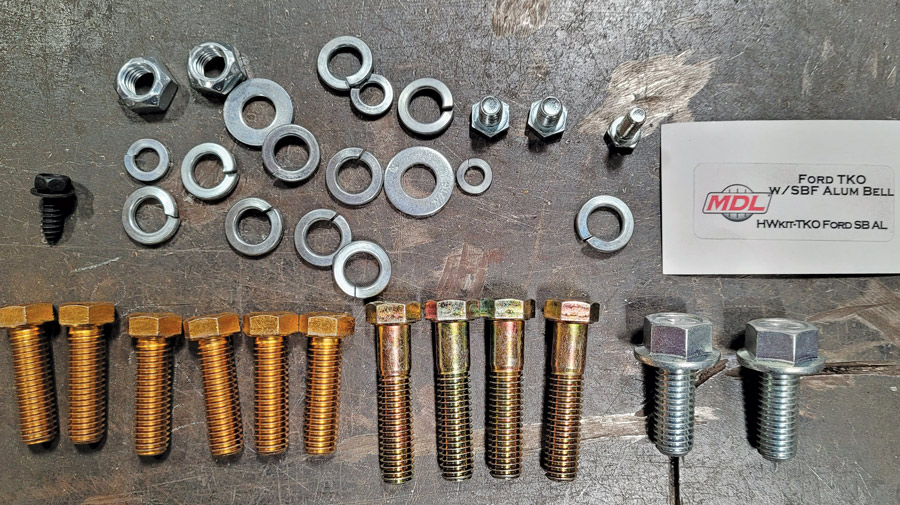
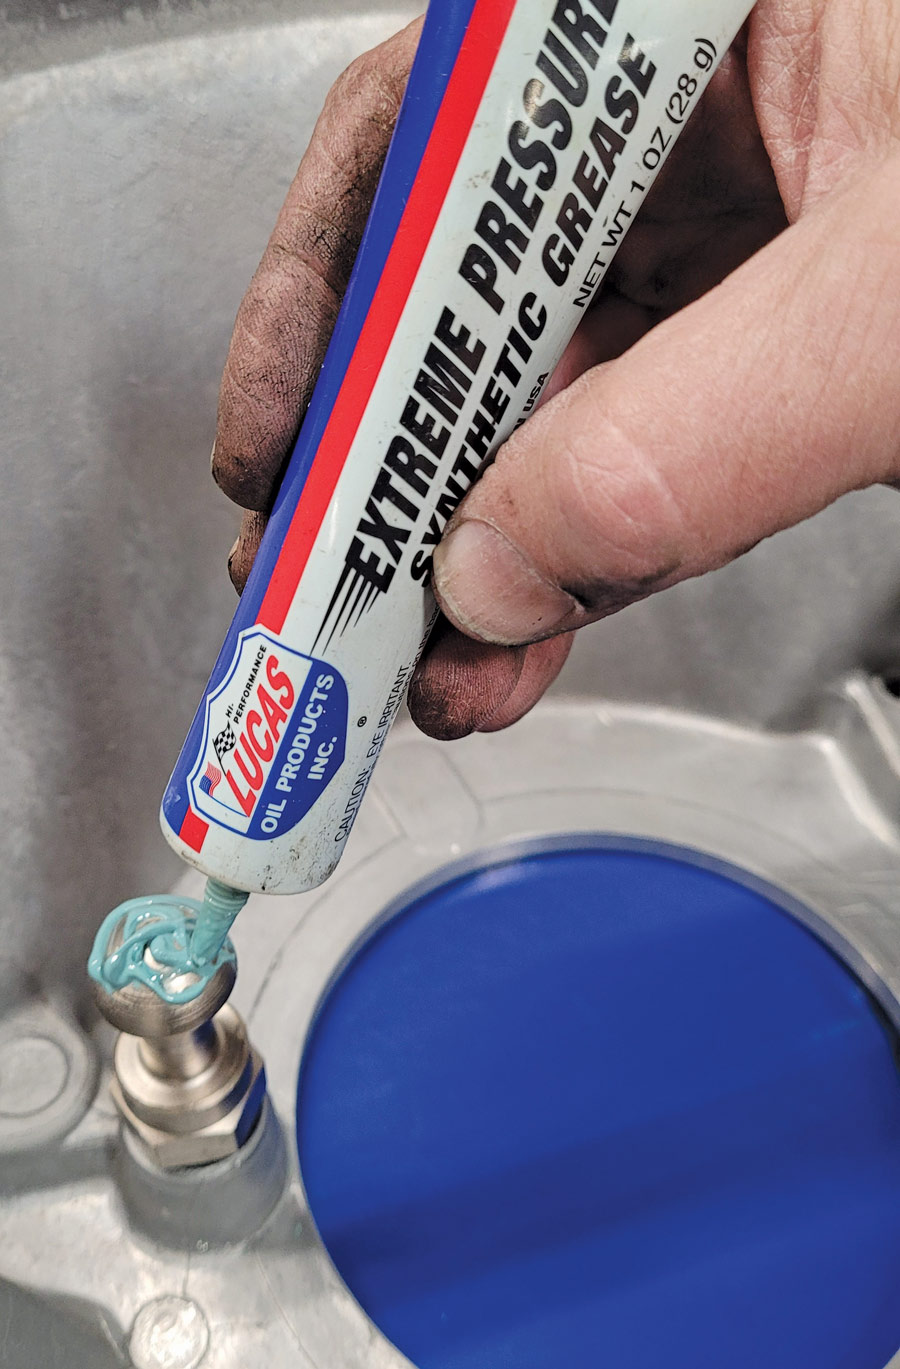
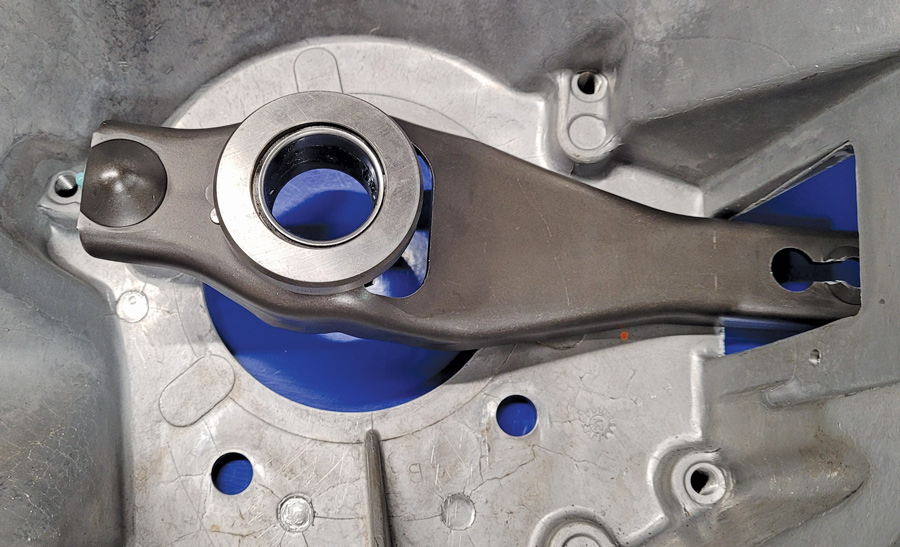
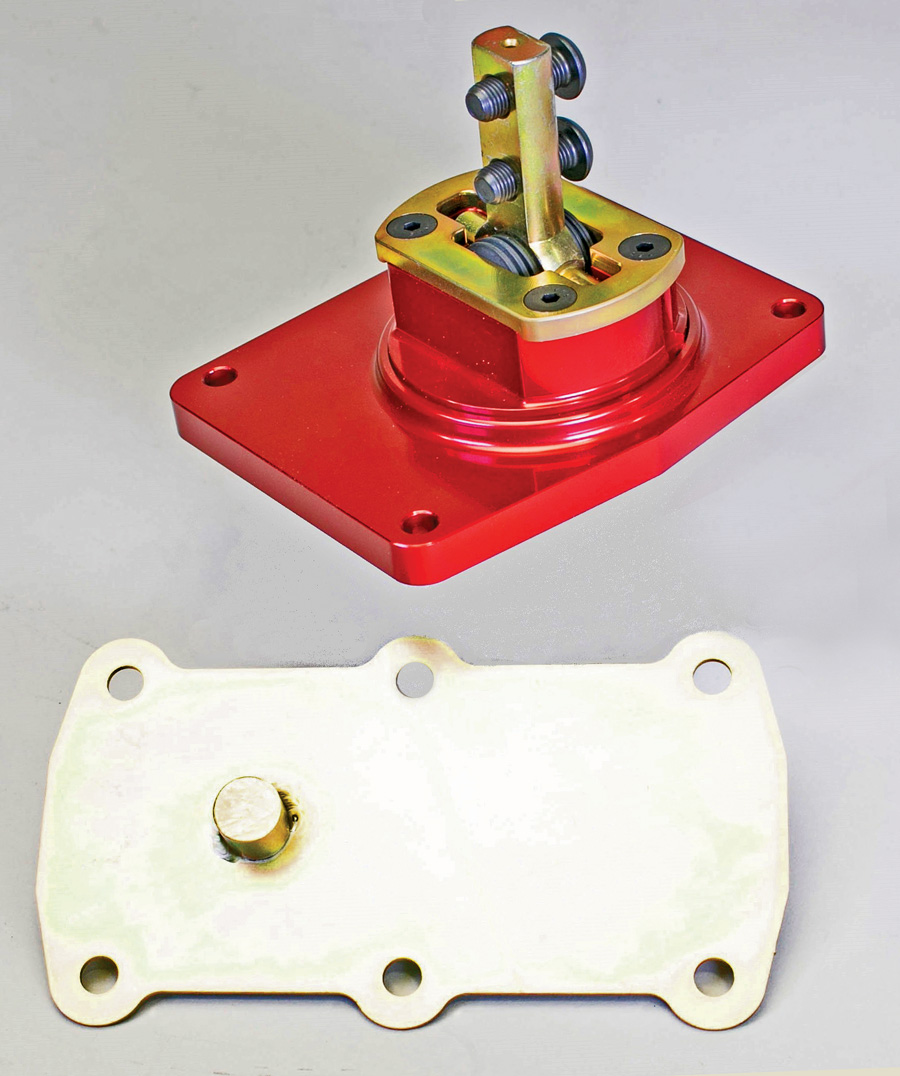
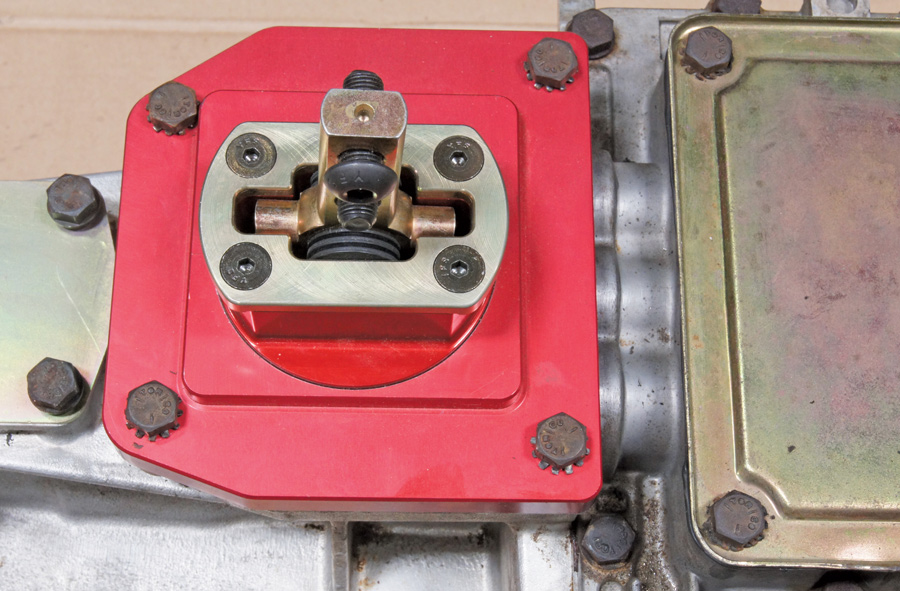
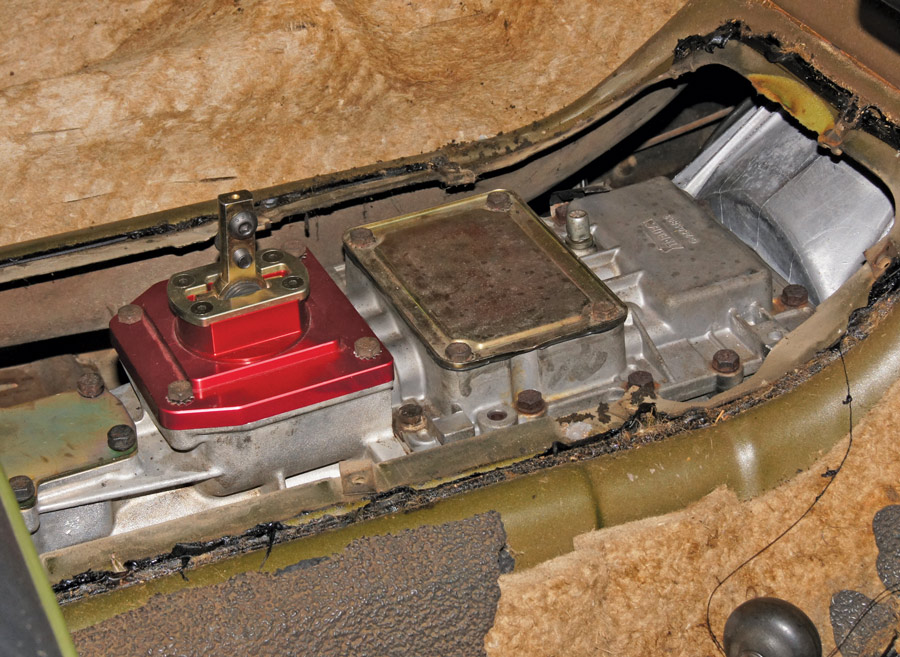
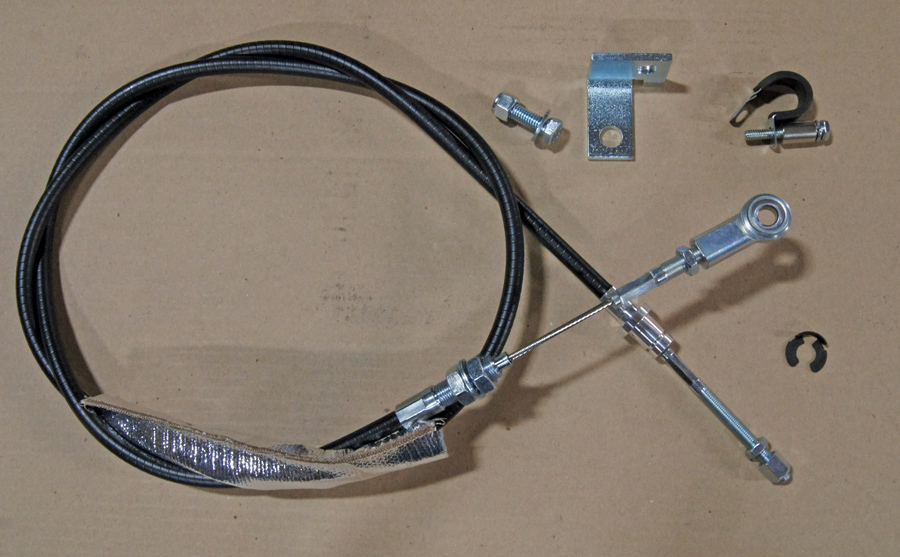
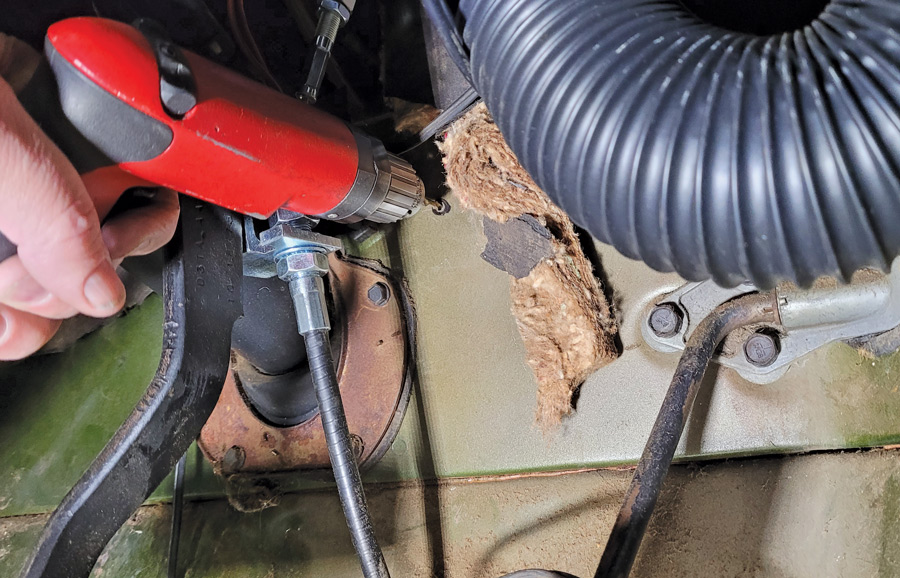
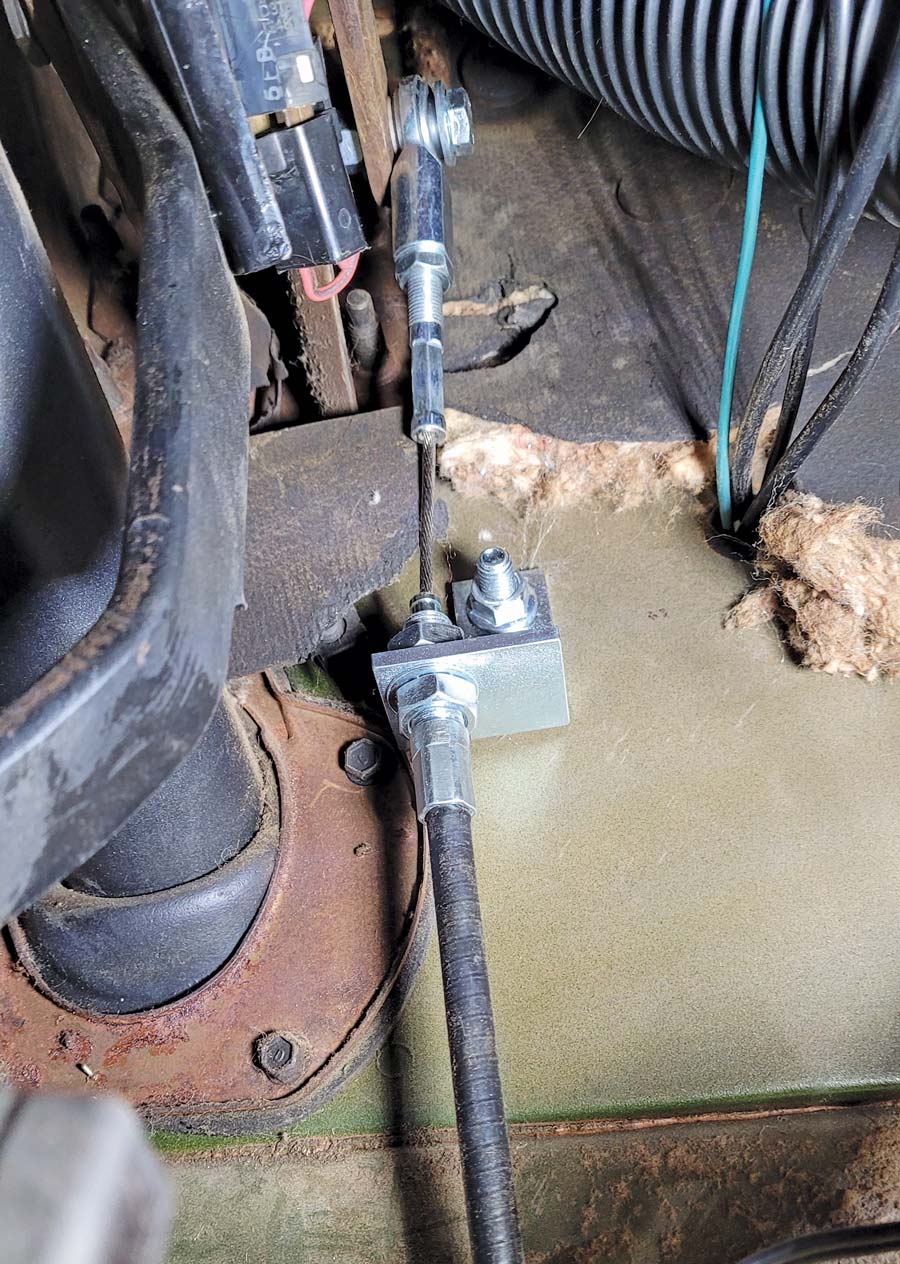
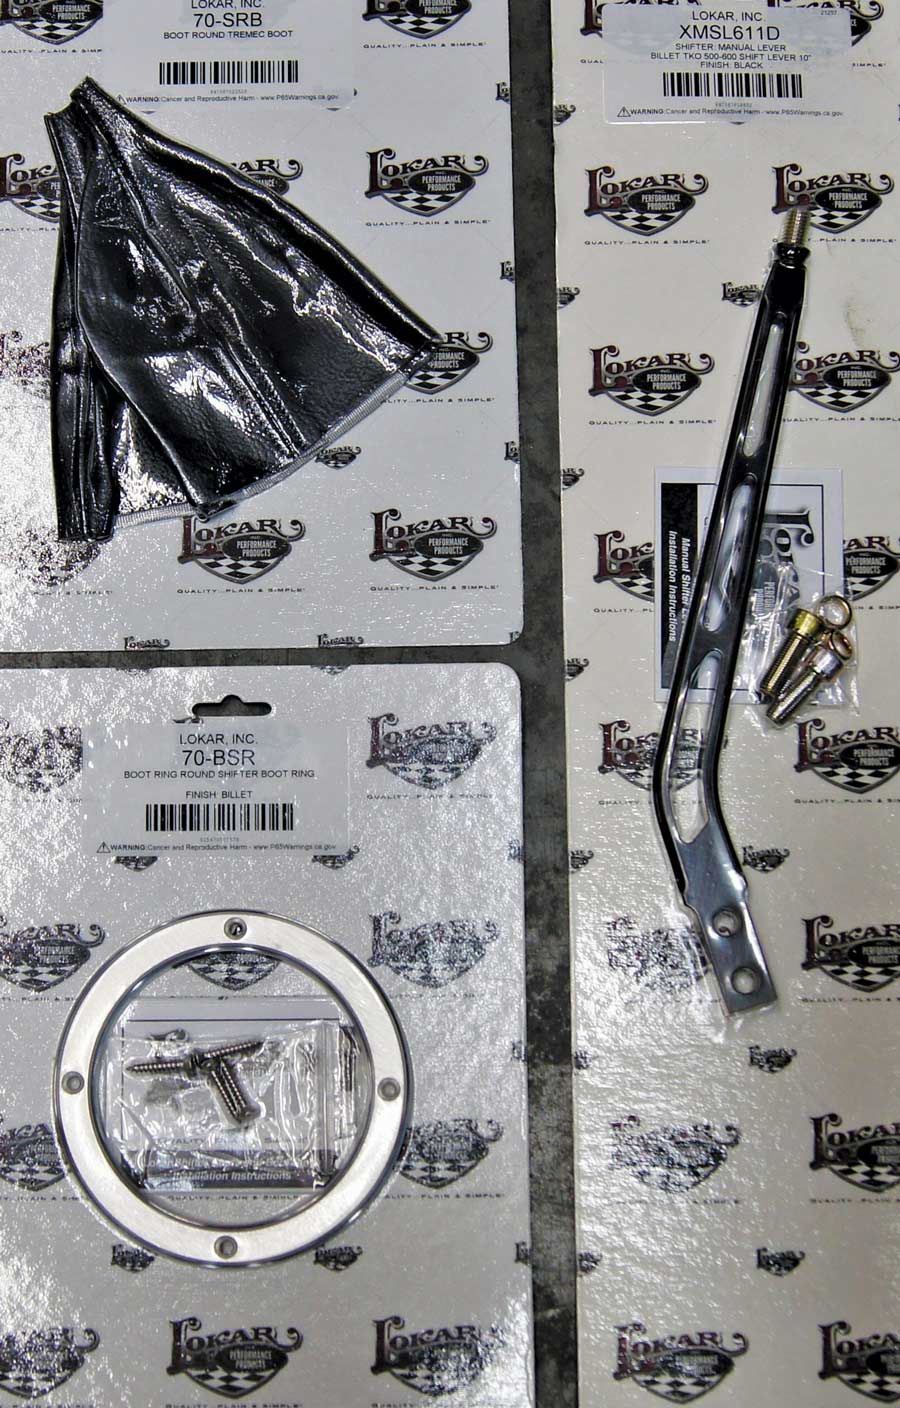
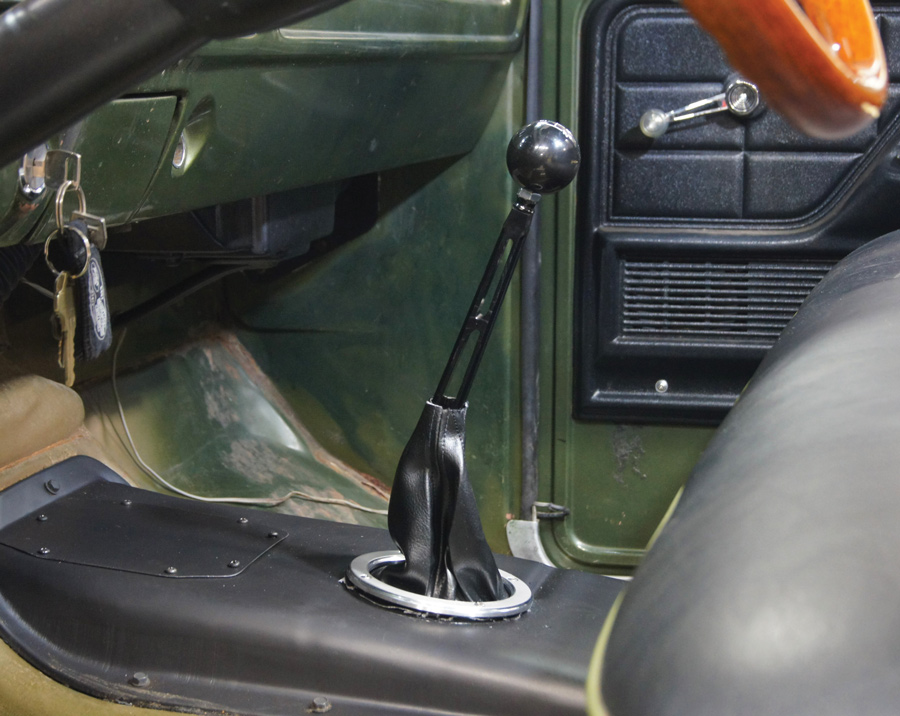
Modern DriveLine has been at the forefront of the Ford five- and six-speed conversion business for over 20 years and a TREMEC Elite distributor since 2008. They were the innovators in cable clutch conversions for early Mustangs and T5 installation kits and now offer complete kits for not only Fords, but also GM, Mopar, and even AMC vehicles. They are also a leader in hydraulic clutch conversions with thoroughly engineered kits. For our F-100 they offer a simple cable conversion using the stock clutch pedal and connecting to the TREMEC clutch fork. They have hydraulic conversions for earlier F-100s and are working on them for the ’73-78 trucks as well. Our conversation with Couture also shed some light on the shifter position of our new trans. The original Granny low shifter was a massive affair that started very far forward, basically under the dash. The new trans shifter would be right against the seat and might work with a forward leaning shifter but would keep my wife from driving as the seat couldn’t slide forward. Modern DriveLine had a solution in a mid-shifter kit that would move the shifter forward about 7 inches, a perfect location. So, we ordered up the Cable Clutch kit, a new OEM-type bellhousing with clutch fork, the Mid Shifter Kit, and the necessary hardware. We decided to splurge a little and get a fancy Billet Shifter from Lokar Performance Products, along with one of their high-quality shifter boot kits. We also needed a new 153T flywheel (the T-18 used a 164T) and went with a Ford Performance SFI billet flywheel and a set of ARP flywheel bolts to hold it all together.

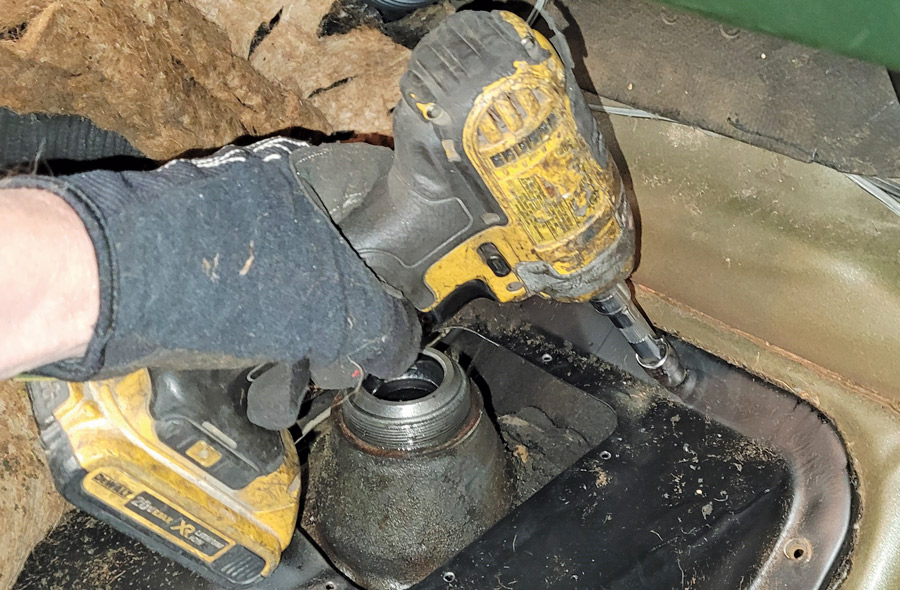
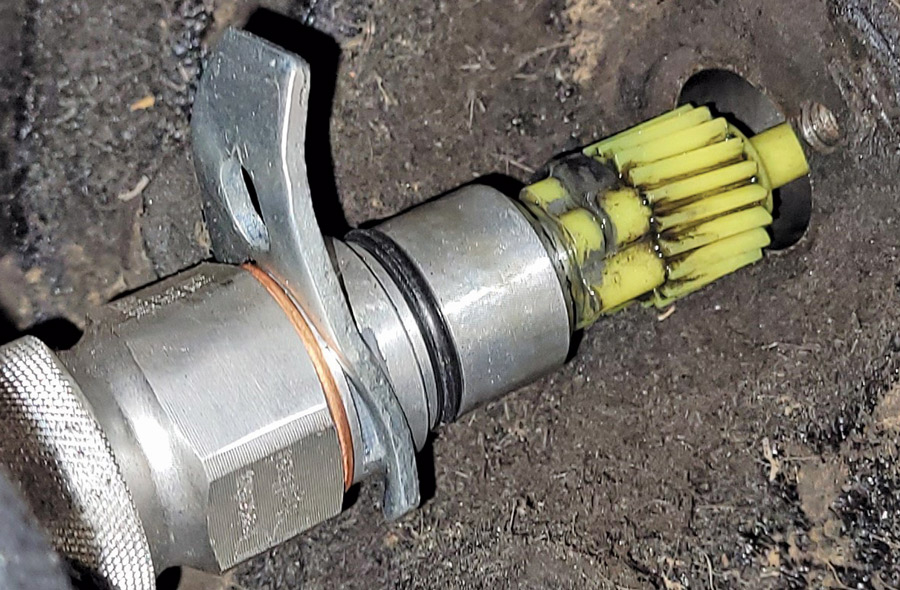
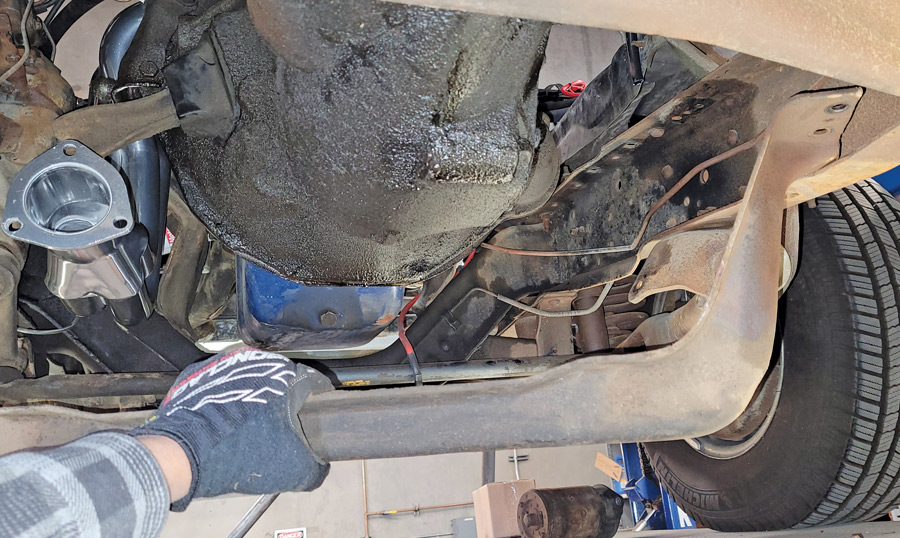
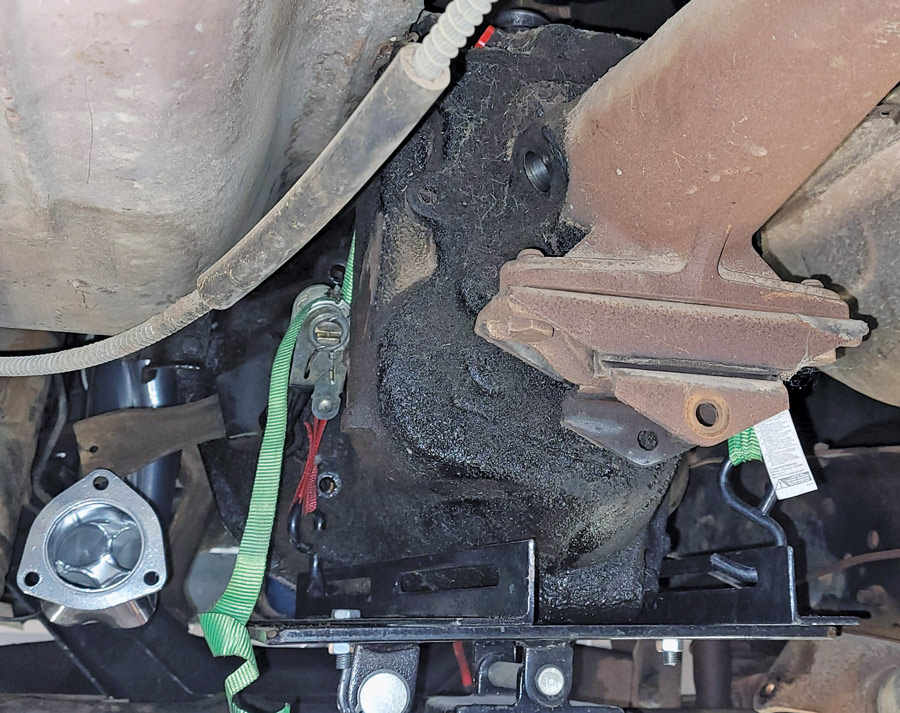
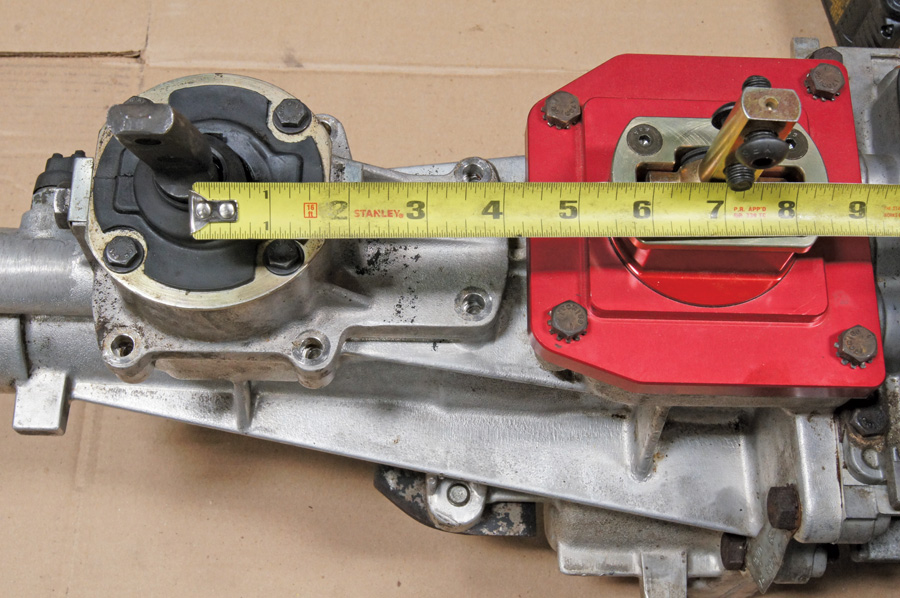
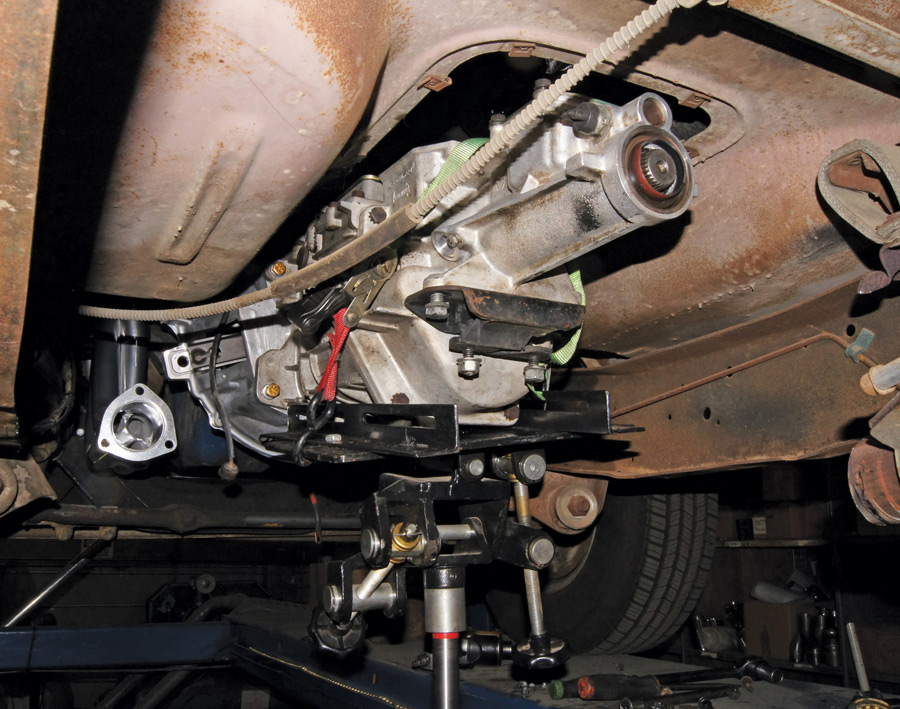
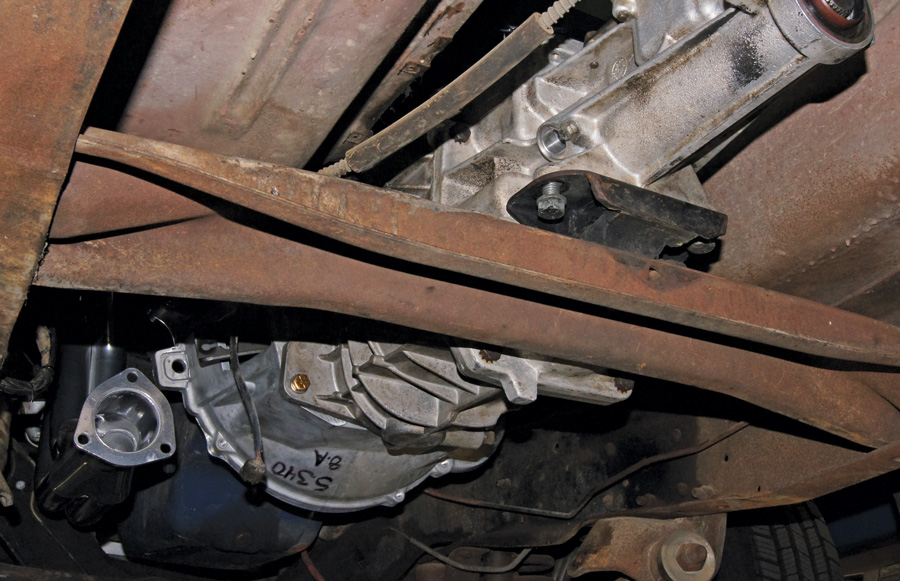
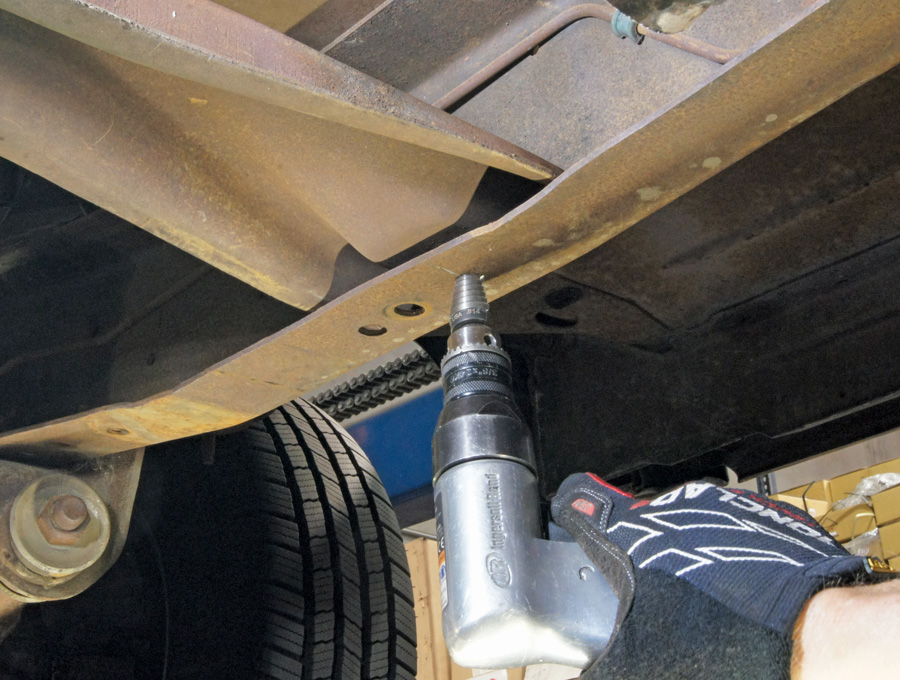
The installation was quite straight forward as you’ll see here. We were able to use the original trans crossmember by moving it rearward and drilling two new mounting holes. The yoke that we got with the trans was the same U-joint size as our truck driveshaft, so we installed it with a couple of new U-joints. The driveshaft was an inch too long, so a local shop shortened it and gave it a new balance job over night.

Now that we are driving the truck again it is amazing how much this swap transformed the truck, making it much more fun to drive. No more shifting out of First before passing the crosswalk or slipping the clutch to start in Second. The shifts are nice and crisp and the 0.68 Overdrive not only lowered the revs by about 900 rpm at 70 mph, resulting in noticeably better gas mileage, but it’s much quieter in the cab as well. All said and done we spent about half the cost of doing a new kit and if we do have any issues down the road, Modern DriveLine has the parts and expertise to rebuild the TREMEC line of transmissions as well. If you’re running a classic truck and want to improve performance while staying with the original-style engine, a transmission swap should be on your short list.

First step was to peel back the crumbling rubber mat, remove the cracked rubber boot, and unscrew the giant nut holding the shifter to the trans.
2. First step was to peel back the crumbling rubber mat, remove the cracked rubber boot, and unscrew the giant nut holding the shifter to the trans.
Next, we removed the transmission floor cover to allow easy access to the trans and wiring.
3. Next, we removed the transmission floor cover to allow easy access to the trans and wiring.
Before going underneath, we unplugged the Speedo Drive Wiring and the Back Up Light Switch Plug. That trans showed 45 years of grease and grime.
4. Before going underneath, we unplugged the Speedo Drive Wiring and the Back Up Light Switch Plug. That trans showed 45 years of grease and grime.
All the clutch linkage above the new header (more about that later) needs to be removed; we won’t be using it.
5. All the clutch linkage above the new header (more about that later) needs to be removed; we won’t be using it.
The starter bolts to the bellhousing so it needs to be removed.
6. The starter bolts to the bellhousing so it needs to be removed.
The electronic speedo sensor for the Dakota Digital gauges that we installed in the Nov. ’21 Classic Truck Performance issue unbolts; this would be the cable on stock trucks.
7. The electronic speedo sensor for the Dakota Digital gauges that we installed in the Nov. ’21 Classic Truck Performance issue unbolts; this would be the cable on stock trucks.
There are two crossmember that need to come out for trans removal; the rear one that supports the transmission mount and this forward one that ties the suspension radius arm mounts together.
8. There are two crossmember that need to come out for trans removal; the rear one that supports the transmission mount and this forward one that ties the suspension radius arm mounts together.
Using a trans jack will make the job easier and safer. After placing the jack in place we removed the trans to bellhousing bolts
9. Using a trans jack will make the job easier and safer. After placing the jack in place we removed the trans to bellhousing bolts and …
slid the trans back and lowered it out of the truck
10. … slid the trans back and lowered it out of the truck.
With the trans out of the way, the bellhousing was removed next.
11. With the trans out of the way, the bellhousing was removed next.
 side-by-side comparison between the T-18 four-speed and the TR-3550 five-speed that is going in
12. Here is a side-by-side comparison between the T-18 four-speed and the TR-3550 five-speed that is going in. For fun I decided to weigh them both. With the bellhousing, clutch, flywheel, and transmission the T-18 came in at a hefty 285 pounds! Now you can see why we used a transmission jack. With the same parts the five-speed weighed in at 175 pounds, a reduction of 110 pounds.
Rebuilt engine
13. When I bought this truck, I had a feeling the engine had been rebuilt. Once the flywheel and starter plate were out of the way it was obvious it had been; always good news.
Due to the smaller-diameter flywheel and bellhousing, the starter plate had to be replaced to match. Modern DriveLine had the right one in stock.
14. Due to the smaller-diameter flywheel and bellhousing, the starter plate had to be replaced to match. Modern DriveLine had the right one in stock.
smaller 153-tooth flywheel
15. Since the five-speed requires a smaller 153-tooth flywheel (versus the truck 164T) we picked up this billet one from Ford Performance Parts. SFI rated, we know it isn’t going to come apart on us should we put a bunch of power to it in the future.
To make sure it stays in place we always use new flywheel bolts, and ARP is the standard of the industry for the highest quality.
16. To make sure it stays in place we always use new flywheel bolts, and ARP is the standard of the industry for the highest quality.
ARP includes this special lube that goes both on the threads and under the head to guarantee the proper torque rate is achieved.
17. ARP includes this special lube that goes both on the threads and under the head to guarantee the proper torque rate is achieved.
 chase the threads in the crank
18. It’s always a good idea to chase the threads in the crank. We almost skipped this step, getting ahead of ourselves, but when starting some bolts by hand we noticed they felt tight. Sure enough, the old bolts had been installed with Loctite and material was left behind. Out came the thread chase tap and we chased all the boltholes and then blew them out with air before …
torquing them in three steps, in a crisscross pattern, to the final torque of 75 lb-ft.
19. … torquing them in three steps, in a crisscross pattern, to the final torque of 75 lb-ft.
Next came the Ford Performance Diaphragm clutch that we got with the trans.
20. Next came the Ford Performance Diaphragm clutch that we got with the trans.
Modern DriveLine supplied the new bellhousing and throw-out fork to mate the TR-3550 to out 302.
21. Modern DriveLine supplied the new bellhousing and throw-out fork to mate the TR-3550 to out 302.
all the proper hardware to install the bellhousing and the transmission
22. Modern DriveLine also has all the proper hardware to install the bellhousing and the transmission, so that saved us rooting around our hardware box for suitable bolts or ending up with inferior-quality hardware store stuff.
little bit of Lucas Extreme Pressure grease on the Ball Stud
23. We put a little bit of Lucas Extreme Pressure grease on the Ball Stud in the bellhousing and then …
installed the throw-out bearing fork before installing the bellhousing to the motor
24. … installed the throw-out bearing fork before installing the bellhousing to the motor.
TR-3550
25. The TR-3550 was set up for the Mustang Cobra that it came from, so the shifter was all the way to the rear of the transmission—not ideal for a truck installation.
billet mid-shifter conversion kit
26. To solve that problem, Modern DriveLine manufactures this billet mid-shifter conversion kit. They offer many different styles for other TREMEC transmissions as well.
mid shifter
27. To install the mid shifter you need to remove the rear mount shifter and the mid cover, exposing the shifting rods and the shift lugs that need to be changed.
The outer shift lugs need to be removed to access the center lug that gets replaced for the mid shifter
28. The outer shift lugs need to be removed to access the center lug that gets replaced for the mid shifter.
The new center lug and the original outer two are reinstalled. You can see the difference when compared to photo 27.
29. The new center lug and the original outer two are reinstalled. You can see the difference when compared to photo 27.
The new Modern DriveLine mid shifter then slips in place and bolts in with the original hardware.
30. The new Modern DriveLine mid shifter then slips in place and bolts in with the original hardware.
I put the stock shifter back in place to illustrate the difference in position between the two shifters, a 7-inch forward movement.
31. I put the stock shifter back in place to illustrate the difference in position between the two shifters, a 7-inch forward movement.
With the supplied cover plate over the old shifter hole, the trans went up on the jack and into the truck. So much easier with the lighter trans.
32. With the supplied cover plate over the old shifter hole, the trans went up on the jack and into the truck. So much easier with the lighter trans.
The rear crossmember went back in place. We replaced the old-style, single-bolt trans mount with the newer and more-common two-stud style. We just had to drill two holes in the crossmember to accommodate.
33. The rear crossmember went back in place. We replaced the old-style, single-bolt trans mount with the newer and more-common two-stud style. We just had to drill two holes in the crossmember to accommodate.
The five-speed trans mount is about 2 inches further rearward than the old four-speed, so we had to drill two holes in the frame to bolt the crossmember in.
34. The five-speed trans mount is about 2 inches further rearward than the old four-speed, so we had to drill two holes in the frame to bolt the crossmember in.
From the interior, the five-speed looks like it should have been there all along.
35. From the interior, the five-speed looks like it should have been there all along.
We decided to update the starter at the same time. PerTronix has this slick-looking line of “Contour” High Torque modern starters that can be clocked in different positions to clear headers, big bellhousings, and so on, which was perfect for our application. They offer them in polished aluminum or this shiny black powdercoat.
36. We decided to update the starter at the same time. PerTronix has this slick-looking line of “Contour” High Torque modern starters that can be clocked in different positions to clear headers, big bellhousings, and so on, which was perfect for our application. They offer them in polished aluminum or this shiny black powdercoat.
Old and new truck headers side by side
37. The headers in our truck were 40 years old and rusty, so we got a new set of silver ceramic-coated headers from Patriot Exhaust Products.
multi-layer aluminum header gaskets
38. Patriot recently started offering these multi-layer aluminum header gaskets known as Seal-4-Good. Since we hate leaky header gaskets, we decided to use them with the new headers.
With the new header in place we were able to clock the starter and install it with no clearance issues.
39. With the new header in place we were able to clock the starter and install it with no clearance issues.
well-engineered cable conversion
40. To control the clutch in the new transmission, Modern DriveLine makes this well-engineered cable conversion that does away with the original rods, brackets, levers, and other complications.
drilling one hole in the firewall for the clutch cable bracket
41. Depending on the year of your truck, you may have to drill one hole in the firewall for the clutch cable bracket like we did on this ’76. Early trucks have an existing bolt that will mount the bracket.
the cable mounts through the bracket and the heim joint end bolts to the pedal in the same hole the push rod was in from the factory
42. After mounting the bracket, the cable mounts through the bracket and the heim joint end bolts to the pedal in the same hole the push rod was in from the factory.
The cable comes through the floor in the same hole as the push rod and then loops forward around the motor mount before attaching to the throw-out fork on the transmission. It comes with this heat shield installed to protect the cable.
43. The cable comes through the floor in the same hole as the push rod and then loops forward around the motor mount before attaching to the throw-out fork on the transmission. It comes with this heat shield installed to protect the cable.
With everything bolted up we filled the trans with Lucas Sure Shift fluid. These late-model transmissions use ATF-type fluid and TREMEC recommends GM Synchromesh fluid, and this Lucas Fluid meets those specs.
44. With everything bolted up we filled the trans with Lucas Sure Shift fluid. These late-model transmissions use ATF-type fluid and TREMEC recommends GM Synchromesh fluid, and this Lucas Fluid meets those specs.
10-inch billet aluminum lever in black and to finish off the installation on one of their Shifter Boot Kit
45. As seen in the last photo, the Mustang shift lever was a bit short for the truck. We called up Lokar Performance Products and ordered a 10-inch billet aluminum lever in black and to finish off the installation on one of their Shifter Boot Kits. Modern DriveLine also offers an array of shifter levers.
Completed stick shift
46. We made a small panel to cover the original shifter location and with the floor cover and the Lokar Shifter & Boot in place, we wrapped up the conversion. It looks sportier and drives like a much more modern truck–better shifts with closer ratios and the Overdrive Fifth added fuel mileage.
Modern DriveLine
(208) 453-9800
moderndriveline.com
Patriot Exhaust
(909) 599-5955
pertronixbrands.com/pages/patriot-headers
PerTronix Starters
(909) 599-5955
pertronixbrands.com/pages/pertronix-ignition-starters
Lokar Performance Products
(877) 469-7440
lokar.com
Lucas Oil
(800) 342-2512
lucasoil.com