CTP Tech
InTheGarageMedia.com
yellow '68 C10 truck in the snow
1. This is the moment when we first laid eyes on our ’68 C10 project. The truck had been slowly decaying next to this barn for years, but we couldn’t help falling in love anyway.
The Speedway Motors '68 C10 Build
Part 1: How It All Began
BY Joe McCollough
IMAGES BY Andy Chaves & Jessica Coleman
H

ere at Speedway Motors, we love working on our in-house projects. It’s a great chance for us to put our parts to the test and develop new products to help our customers tackle similar projects. When we decided to build a C10, we wanted to start with something that would showcase the huge variety of truck parts that we offer and inspire us to create some new ones. In other words, we were looking for a truck that needed just about everything. Our goal was to find a C10 that needed to be saved, then hit the Speedway Motors shelves for the parts we would need to transform it from humble beginnings and make it into a fun driver.

What we ended up with was certainly humble. Our search turned up a ’68 C10 shortbox that was rough, rusty, and had been slowly decaying next to a South Dakota barn for who knows how long. The box, engine, transmission, and most of the interior had flown the coop ages ago. But it was a real shortbox and had that cool ’67-68 front sheetmetal that we were looking for. We fell in love at first sight with what many would consider to be a lost cause. You know how that goes.

The first phase of our mission was to literally drag the truck out of a snowdrift. It was so buried that the right rear was packed full of snow and wouldn’t roll. We winched it onto the trailer and hit the road back to our Lincoln, Nebraska, shop. We had a few hours on the road to daydream about the new project that was bobbing around in our rearview mirror. Our vision was to transform the crusty C10 into a clean driver with modern power and an updated suspension that we could drive anywhere, but it was also important that we respect the truck and not compromise its character. We love C10s and it was very important to us that it retain the soul of a classic truck with no wacky modifications that would screw up that soul, just tasteful updates to make it capable of hanging in modern traffic and look good doing it.

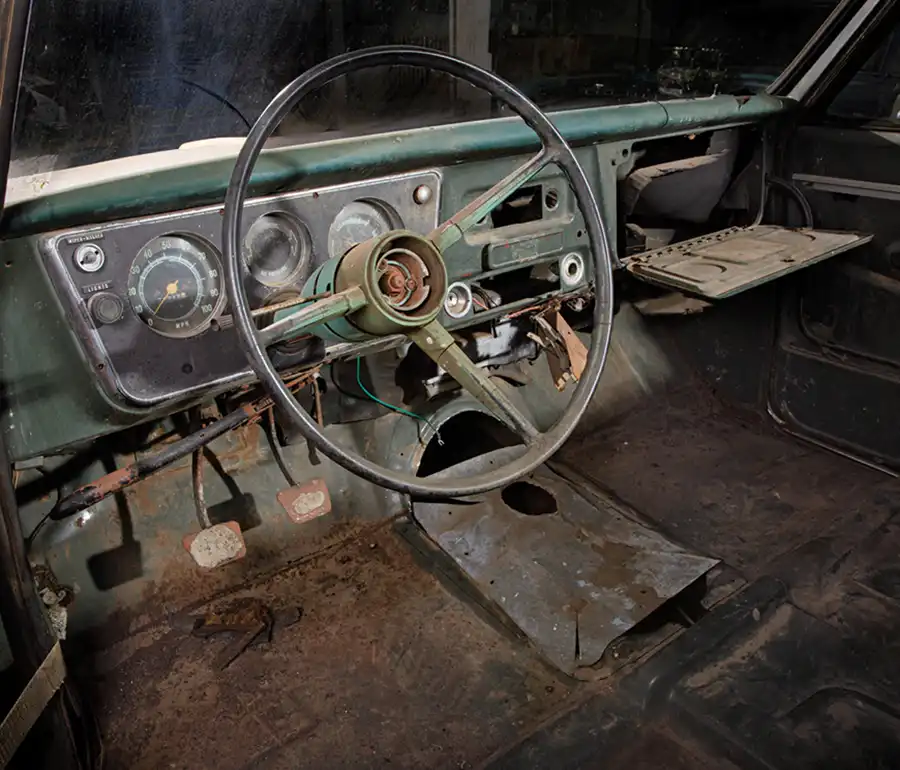
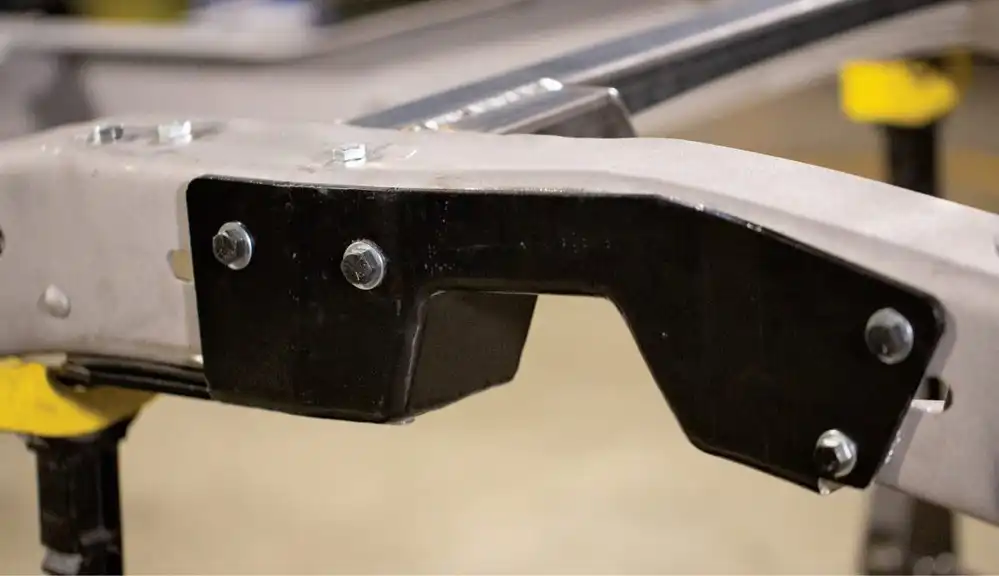
Once the snow melted and we had power washed off most of the dirt and moss, we pulled our new project into the shop to make a list of what we would need to bring it back to life. This truck had started its life in the military and still had some of the original olive drab paint hiding under the yellow rattle-bomb job. It had been used hard and had dents in places we had never seen dents before. The cab had rust in all the usual places as well, but we had certainly seen worse. It was important that the original chassis was straight and rust-free since our engineers would be using it to prototype new parts to add to our line of Speedway Motors C10 products. Fortunately, the chassis was the best part of this truck, with the notable exception of a terribly torched and stick-welded rear crossmember modification. Not a problem for us since we planned to replace it with our G-Comp rear suspension.

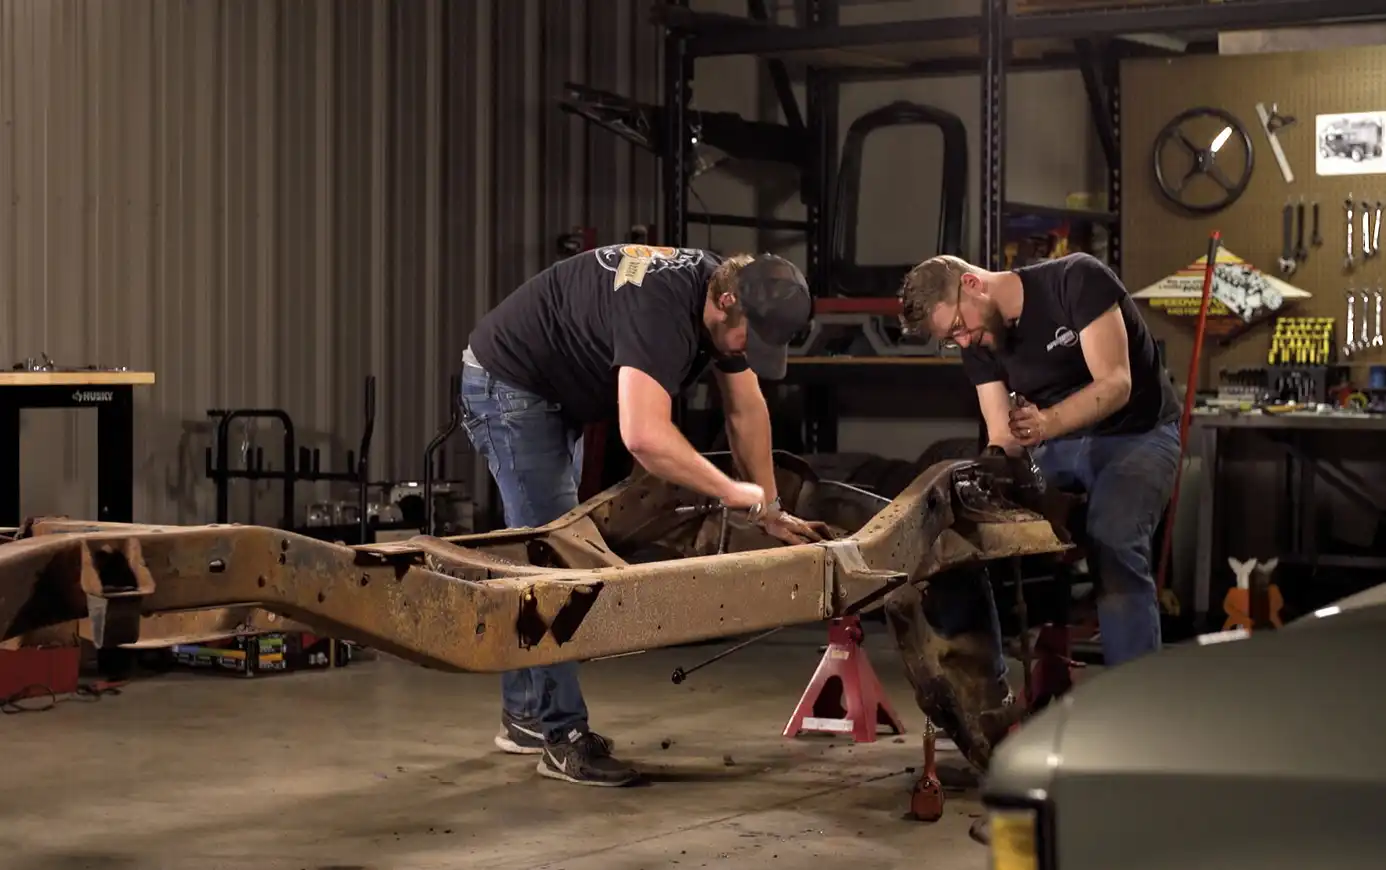
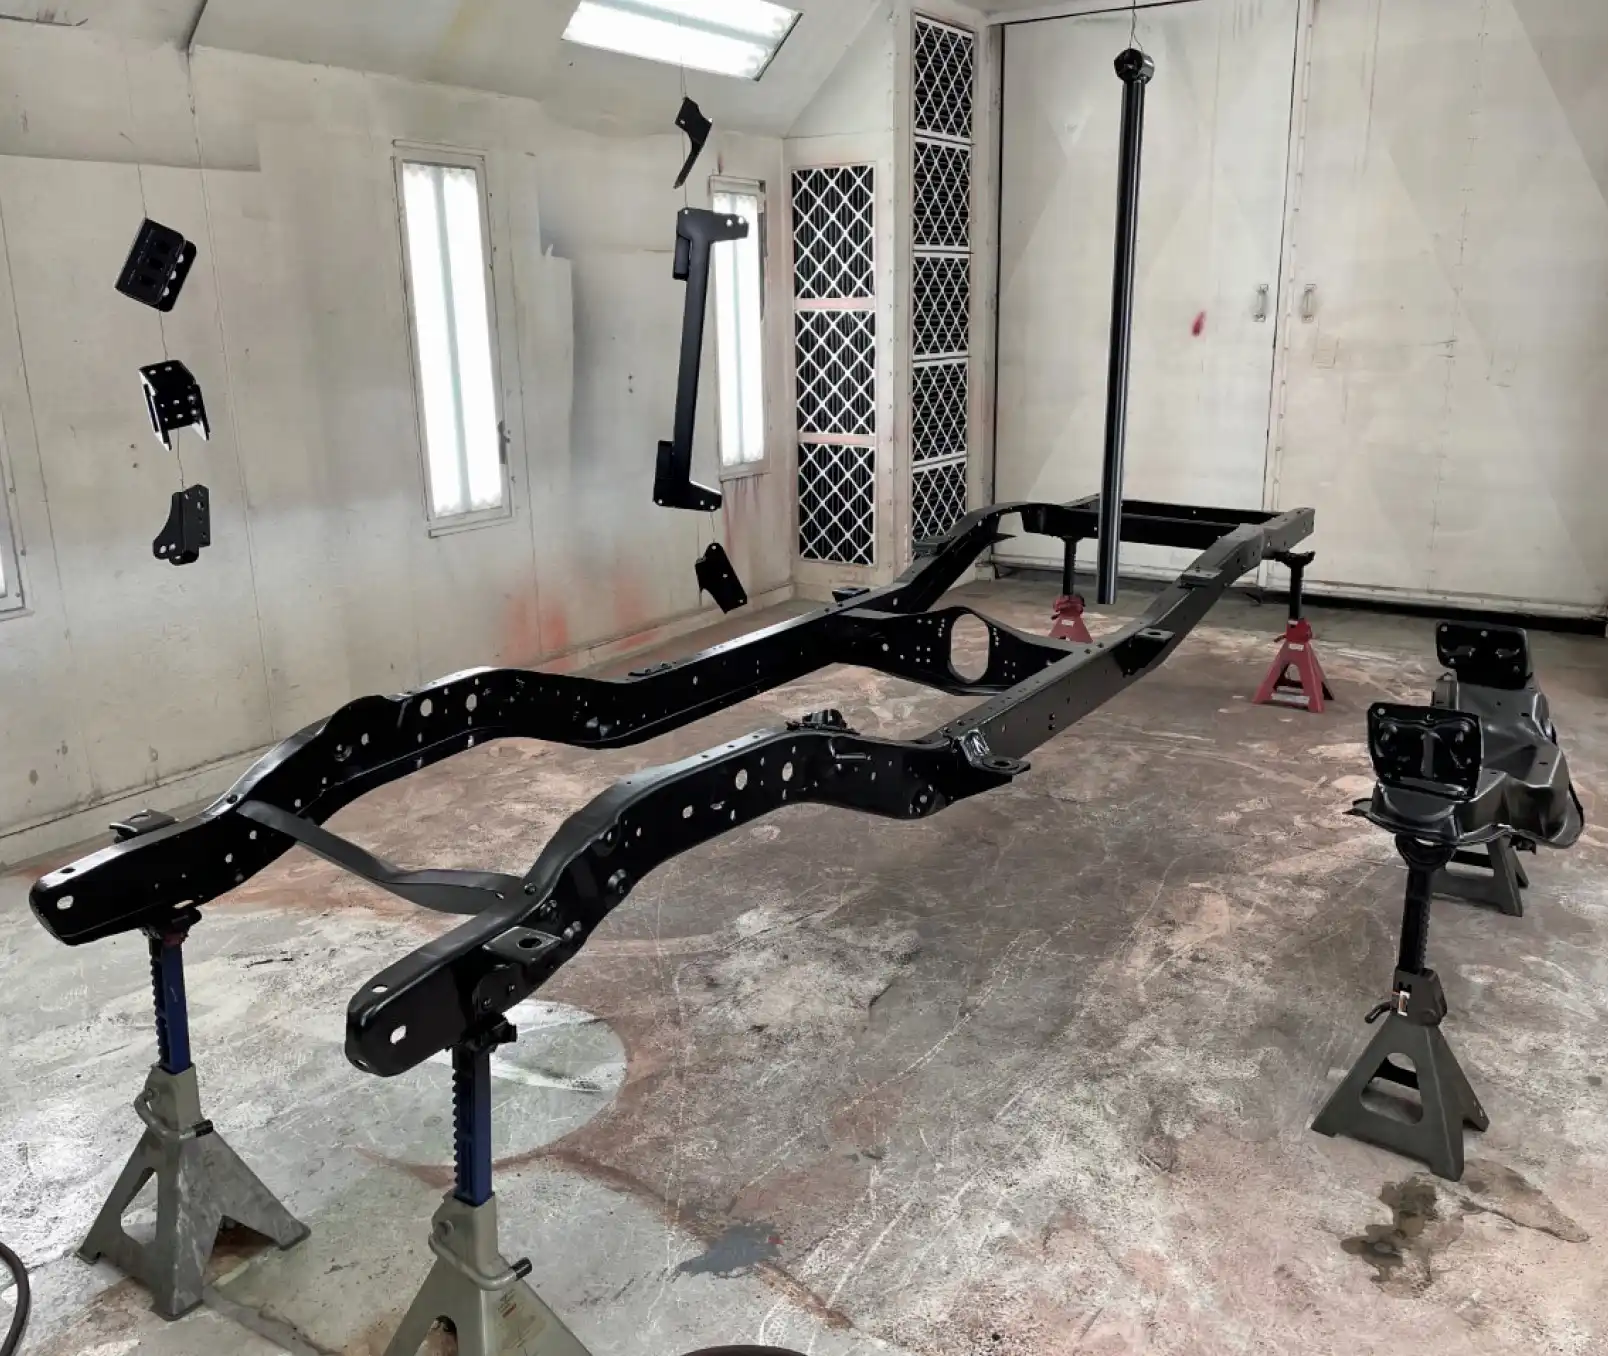
With the damage assessed and a battle plan made, we got busy ripping everything apart. Everything was just as rusty and stuck as you’d expect, but there were no surprises. We sent the cab out to the media blaster and stripped everything off the frame. The frame was then blasted as well and treated to a coat of semigloss urethane. We were thrilled to be done with the rusty parts for a while and ready to start bolting up some cool suspension pieces to lower the truck and make it perform better than ever.

Stay tuned as we get busy transforming our project truck. Next up we work our way to a rolling chassis with a lowered suspension and a hopped-up junkyard 5.3!

Those fenceposts weren’t just randomly leaning there. In fact, they were holding the door closed. The original door latch had long ago been pirated for another truck.
2. Those fenceposts weren’t just randomly leaning there. In fact, they were holding the door closed. The original door latch had long ago been pirated for another truck.
Broken free from its snowy tomb and ready to load, we were shocked that the tires were still holding air.
3. Broken free from its snowy tomb and ready to load, we were shocked that the tires were still holding air.
After shoveling some of the snow out of the way, we could see things more clearly. The back of the cab was pretty rough and the original rear crossmember had been “modified” with a torch and a stick welder long ago.
4. After shoveling some of the snow out of the way, we could see things more clearly. The back of the cab was pretty rough and the original rear crossmember had been “modified” with a torch and a stick welder long ago.
All loaded up for the long trip back to Nebraska, we spent the whole trip home gleefully daydreaming about our new project.
5. All loaded up for the long trip back to Nebraska, we spent the whole trip home gleefully daydreaming about our new project.
Back in the Speedway Motors shop and parked in front of a few of our completed projects, the farmyard C10 looked pretty rough but we were confident in our parts and ability to transform the old truck.
6. Back in the Speedway Motors shop and parked in front of a few of our completed projects, the farmyard C10 looked pretty rough but we were confident in our parts and ability to transform the old truck.
The “interior”—or what was left of one. The homemade galvanized transmission tunnel wasn’t going to cut it. Neither was the seatbelt serving as the driver door limiter.
7. The “interior”—or what was left of one. The homemade galvanized transmission tunnel wasn’t going to cut it. Neither was the seatbelt serving as the driver door limiter.
Something seems to be missing here. An LS engine was part of the plan from the beginning, so we weren’t worried about the big empty under the hood.
8. Something seems to be missing here. An LS engine was part of the plan from the beginning, so we weren’t worried about the big empty under the hood.
Disassembly was tedious as five decades worth of rusty fasteners fought us at every turn. But we had the front clip and cab separated from the frame by the end of day one. The simplicity of these truck is part of what makes them great.
9. Disassembly was tedious as five decades worth of rusty fasteners fought us at every turn. But we had the front clip and cab separated from the frame by the end of day one. The simplicity of these truck is part of what makes them great.
With the cab removed, we were able to assess the condition of the chassis. Under all that surface rust and grease was an extremely straight original frame.
10. With the cab removed, we were able to assess the condition of the chassis. Under all that surface rust and grease was an extremely straight original frame.
We had big plans to replace the rear suspension and axle with a Speedway Motors G-Comp kit and bolt-in 9-inch housing, so the original was set aside.
11. We had big plans to replace the rear suspension and axle with a Speedway Motors G-Comp kit and bolt-in 9-inch housing, so the original was set aside.
The terribly butchered rear crossmember is easy to spot here. This was the worst part of the frame and would be headed to the iron pile when we installed the G-Comp rear suspension kit.
12. The terribly butchered rear crossmember is easy to spot here. This was the worst part of the frame and would be headed to the iron pile when we installed the G-Comp rear suspension kit.
As with the rear, a new Speedway Motors front suspension kit was in the works. The original front suspension took some persuasion to get apart.
13. As with the rear, a new Speedway Motors front suspension kit was in the works. The original front suspension took some persuasion to get apart.
Though it was tempting to break out the torch, we were careful not to destroy any of the original suspension components during disassembly. You never know what you will need to reuse.
14. Though it was tempting to break out the torch, we were careful not to destroy any of the original suspension components during disassembly. You never know what you will need to reuse.
We planned to reuse the original front crossmember, so it was removed to be blasted and painted separately.
15. We planned to reuse the original front crossmember, so it was removed to be blasted and painted separately.
Looking better already, with the frame back from the blaster we were ready to get busy prepping for paint. Note the blasted and epoxied cab in the background.
16. Looking better already, with the frame back from the blaster we were ready to get busy prepping for paint. Note the blasted and epoxied cab in the background.
Before the frame was covered in fresh paint, we installed some Speedway Motors bolt-in rear C-notches to make sure we would have plenty of suspension travel with the lowered stance we had planned.
17. Before the frame was covered in fresh paint, we installed some Speedway Motors bolt-in rear C-notches to make sure we would have plenty of suspension travel with the lowered stance we had planned.
With the fabwork done, we went to the paint booth. Everything was coated with an epoxy primer followed by a single-stage urethane in semigloss black.
18. With the fabwork done, we went to the paint booth. Everything was coated with an epoxy primer followed by a single-stage urethane in semigloss black.
Back in the shop and freshly painted, it was time for the fun part. There’s just nothing like bolting up shiny new parts to a nicely detailed chassis.
19. Back in the shop and freshly painted, it was time for the fun part. There’s just nothing like bolting up shiny new parts to a nicely detailed chassis.
A closeup of the rear shows the fresh G-Comp crossmember and C-notch kit installed. Stay tuned next time as we make it a roller!
20. A closeup of the rear shows the fresh G-Comp crossmember and C-notch kit installed. Stay tuned next time as we make it a roller!
SOURCE