CTP Tech
InTheGarageMedia.com
Paul Wilson prepared for welding up holes in his ’52 Chevy pickup by adjusting his Miller Electric Manufacturing Company MIG welder on a scrap piece of sheetmetal.

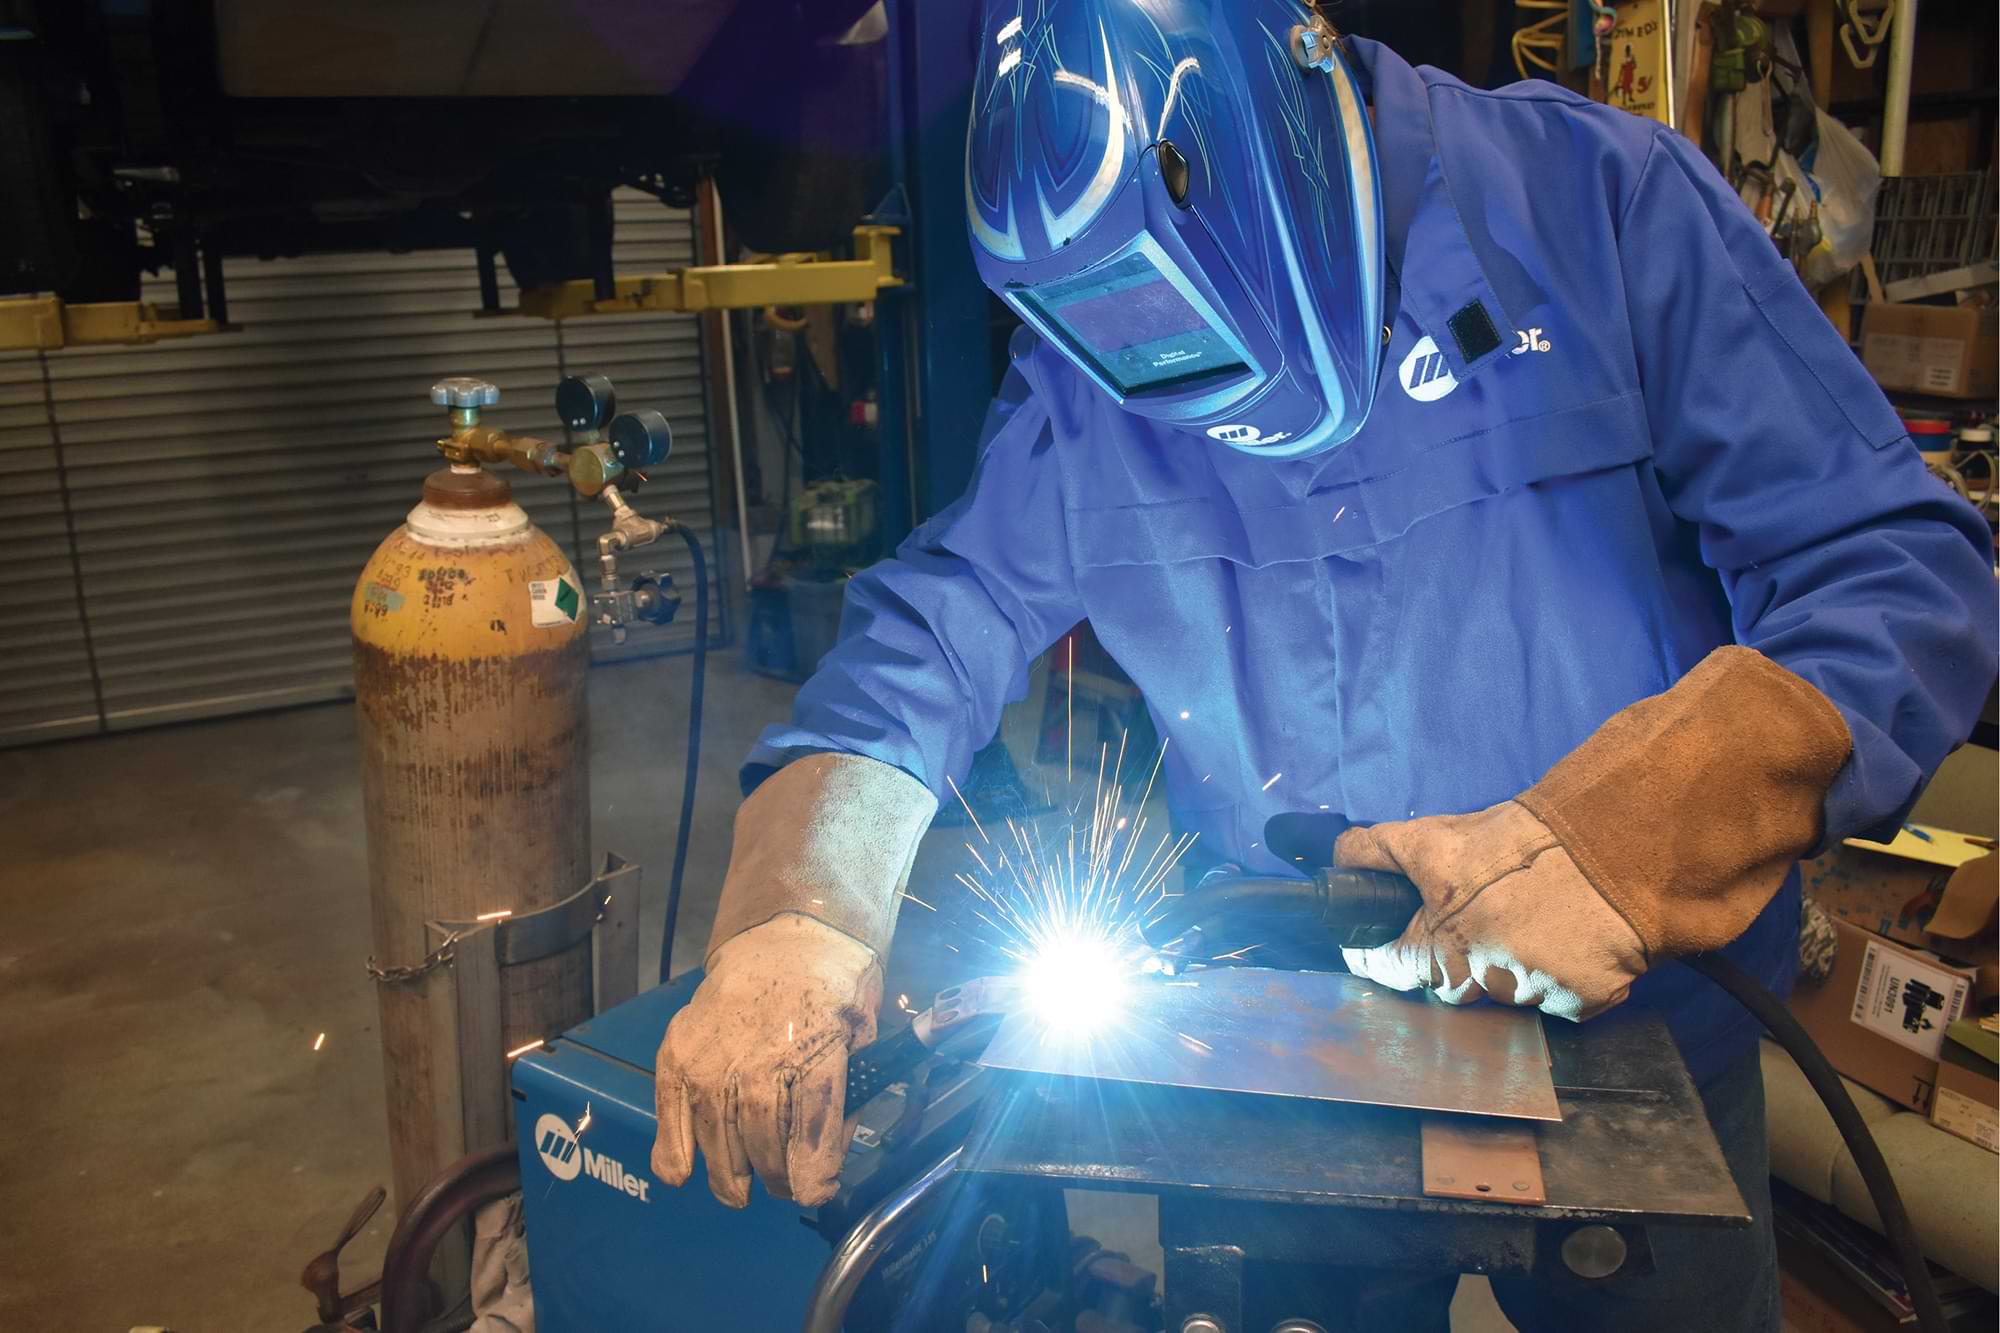
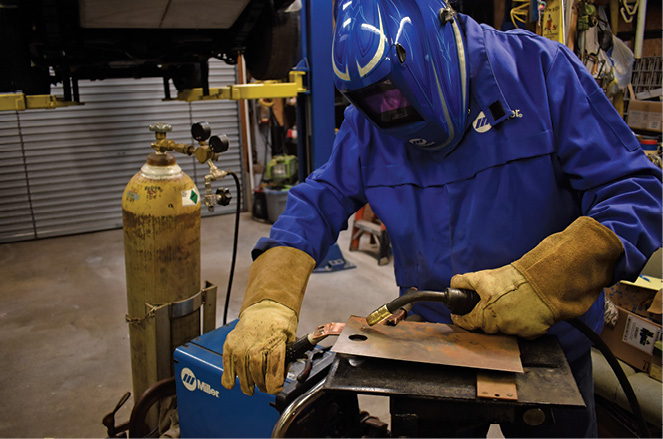
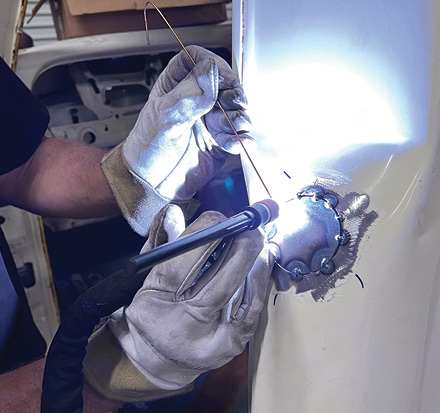
1. Paul Wilson prepared for welding up holes in his ’52 Chevy pickup by adjusting his Miller Electric Manufacturing Company MIG welder on a scrap piece of sheetmetal.

An Open and Closed Case
Welding Up Unwanted Holes

BY RON CERIDONOPhotography by THE AUTHOR & TIM FOSS

R

egardless of whether a classic truck is being modified or restored, chances are that during the bodywork phase of the project there will be holes in the sheetmetal that will have to be filled. As a general rule (keeping in mind there are extenuating circumstances), small holes less than a 1/4 inch in diameter can be filled by welding only; bigger than a 1/4 inch a copper backup plate should be used. Holes 3/8 inch and larger should have plugs welded in place.

Now the extenuating circumstances. First is the type of welder being used. The key to success is to use as little heat as possible, so despite what you may see in some of the older magazines, oxyacetylene welding should normally not be considered. That leaves MIG and TIG welding, which both work well, but most hobbyists will rely on a MIG welder because wire welders are most commonly found in home shops. Another factor is ability; if you’re an experienced welder, filling holes shouldn’t be too difficult. If you’re new to welding, drill holes in some scrap sheet and practice filling them. You’ll soon discover that controlling the amount of heat that is put into the metal is one of the keys to success. Too much heat will cause the metal to warp; that has to be avoided because it can be very difficult to repair, particularly for a novice.

Another consideration when filling holes is not to stack up a huge bead that requires a great deal of grinding. Keep in mind grinding can also create heat that may cause the area to distort. Another common mistake is grinding too much, making the area surrounding the weld thinner than it should be. The idea is to level the weld bead to match the surrounding metal and no more.

To demonstrate two different techniques we watched as Paul Wilson filled a hole in sheetmetal with a copper backup plate and his Miller MIG welder. Given the variations in welders and individual preference it’s impossible to recommend machine settings. The best advice we can offer is again to practice on scrap material that matches the thickness of the vehicle you’ll be working on.

Filling small holes is usually done by making small tack-like welds around the edge of the hole, working your way to the center (it may help to slightly countersink the hole). Work slowly and try to keep the weld as flat as possible. If there is access to the backside of the hole being filled, copper backup plates, like those shown here, are particularly helpful.

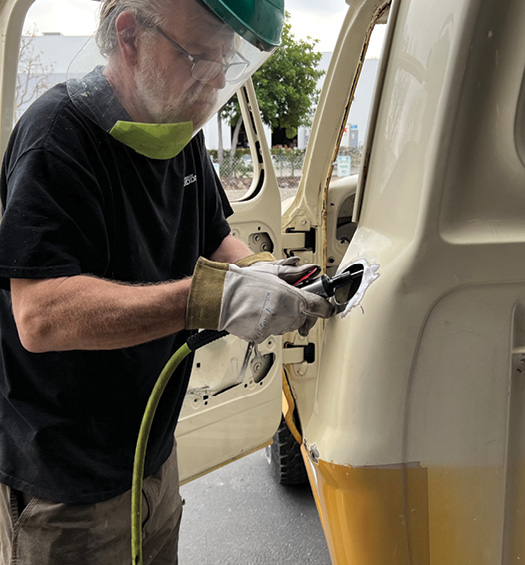
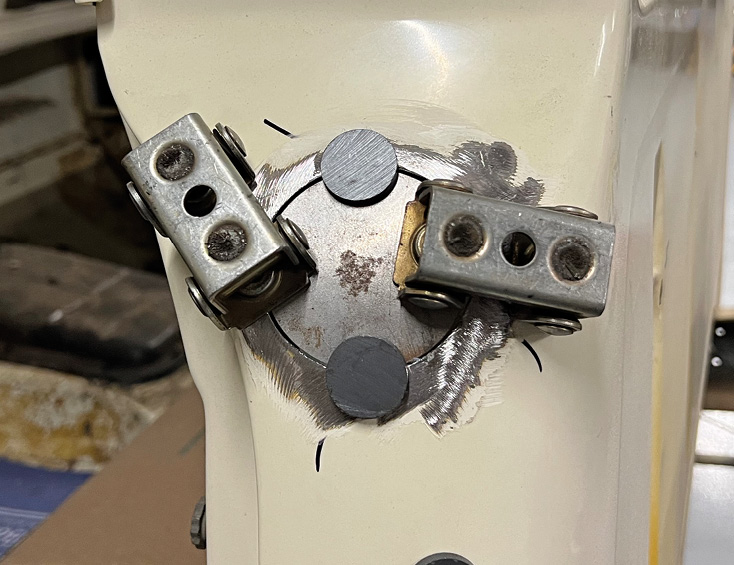
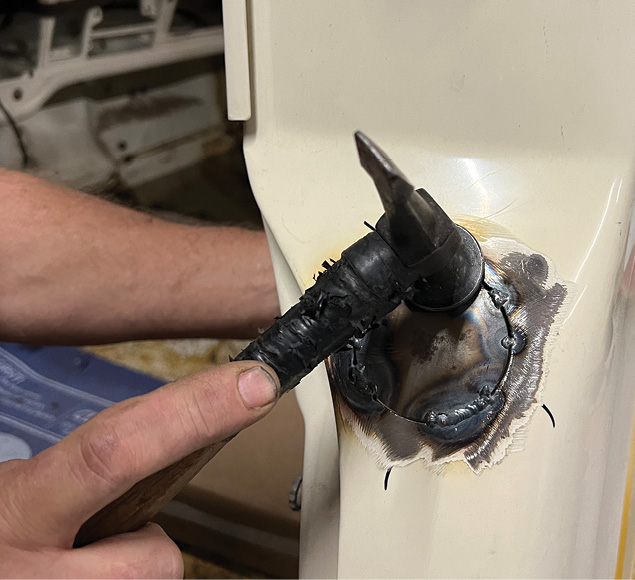
For larger holes, filler plates will be required. Tim Foss followed Kev Elliott, of Kev’s Rod & Custom, as he plugged the gas filler opening in a ’72 Ford pickup with a gas filler delete plate from LS Fabrication. Made from laser-cut, 16-gauge steel, the filler plate is contoured to match the contours of the cab.

After preparing the area to be welded, Elliott went about tack welding the filler plate in place with his TIG welder. A few deft taps with a body hammer had the filler plate fitting perfectly—after that the welding was completed and then ground smooth.

Remember when filling multiple holes move around to keep from concentrating too much heat in one area, try to keep the weld bead height to a minimum and use restraint when grinding. Filling holes in your hauler can be intimidating at first, but with patience and practice it is a skill that you can master.

Things You Should Have in Your Toolbox
Handy Helpers for Sheetmetal Repairs
H

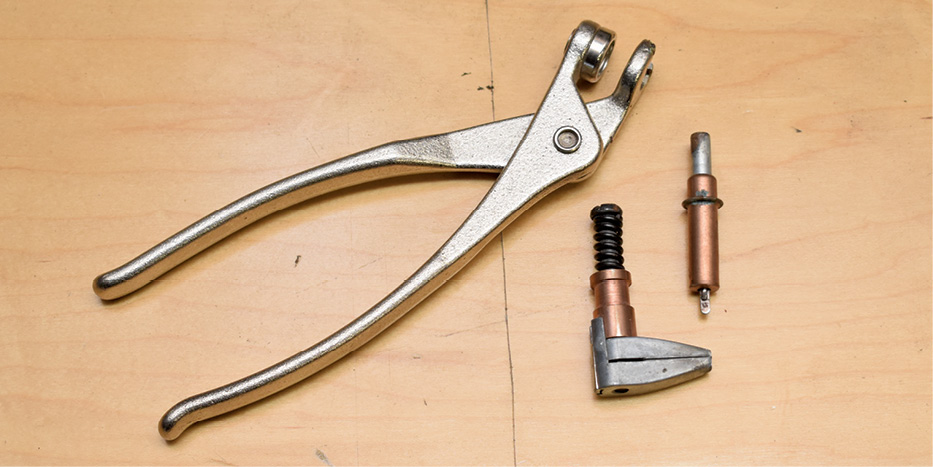
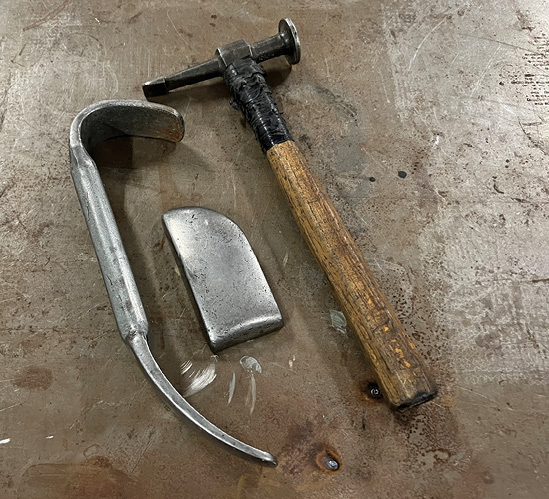
ere are three examples of sheetmetal tools you should have in your garage. We dug these out of our toolbox and grabbed some random scrap metal pieces to show how they are used.

For those occasions when sheetmetal panels have to be perfectly aligned, such as installing floorpans, quarter-panels, and the like, Summit Racing offers these butt-weld clamps (PN SUM-9785235).
1. For those occasions when sheetmetal panels have to be perfectly aligned, such as installing floorpans, quarter-panels, and the like, Summit Racing offers these butt-weld clamps (PN SUM-9785235).
When installed, these clamps maintain a 0.40-inch gap between panels, perfect for edge-to-edge welding. The number of clamps needed varies. For large panels, we’ve found over 6 inches works well.
2. When installed, these clamps maintain a 0.40-inch gap between panels, perfect for edge-to-edge welding. The number of clamps needed varies. For large panels, we’ve found over 6 inches works well.
Obviously access to the back of the pieces being welded is necessary to install and remove the clamps. In tight spaces we’ve used a magnet to grab the crossbar when the wing nut was loosened
3. Obviously access to the back of the pieces being welded is necessary to install and remove the clamps. In tight spaces we’ve used a magnet to grab the crossbar when the wing nut was loosened.
In situations where panels overlap, Cleco pins and clamps are indispensable. Summit Racing offers the pliers with 10 1/8- and 15 3/16-inch pins under PN SUM-G1850. Clamps are available separately
4. In situations where panels overlap, Cleco pins and clamps are indispensable. Summit Racing offers the pliers with 10 1/8- and 15 3/16-inch pins under PN SUM-G1850. Clamps are available separately.
After drilling the appropriate-size hole in the panels to be joined, the pliers are used to extend the tip of the pin. When the Cleco is released, the spring-loaded tip retracts and expands, locking the two pieces of metal together.
5. After drilling the appropriate-size hole in the panels to be joined, the pliers are used to extend the tip of the pin. When the Cleco is released, the spring-loaded tip retracts and expands, locking the two pieces of metal together.
Again, the number of Clecos necessary varies on how well the two pieces fit together. Once the Clecos are removed the small holes are easily welded closed.
6. Again, the number of Clecos necessary varies on how well the two pieces fit together. Once the Clecos are removed the small holes are easily welded closed.
In situations where the edges of two pieces of metal are clamped together, these Mittler Bros. Cleco Side Grip Clamps are available from Summit under PN MB-TP125SG. They work with the same pliers used to install the pin clamps.
7. In situations where the edges of two pieces of metal are clamped together, these Mittler Bros. Cleco Side Grip Clamps are available from Summit under PN MB-TP125SG. They work with the same pliers used to install the pin clamps.
The small 5/16-inch hole is typical of the holes in his pickup that will be plugged. The first step was to clean the surface with an abrasive disc.

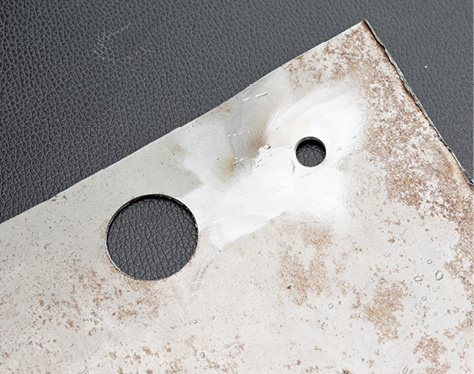
2. The small 5/16-inch hole is typical of the holes in his pickup that will be plugged. The first step was to clean the surface with an abrasive disc.

An easy way to close holes is to use a copper backup plate held tightly against the backside of the metal. The plates without the handle have magnets to hold them in place.

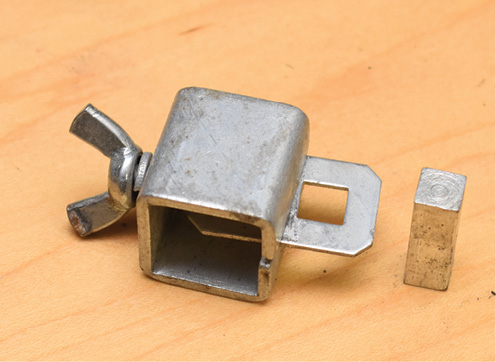
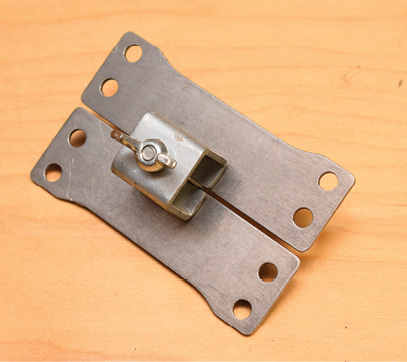
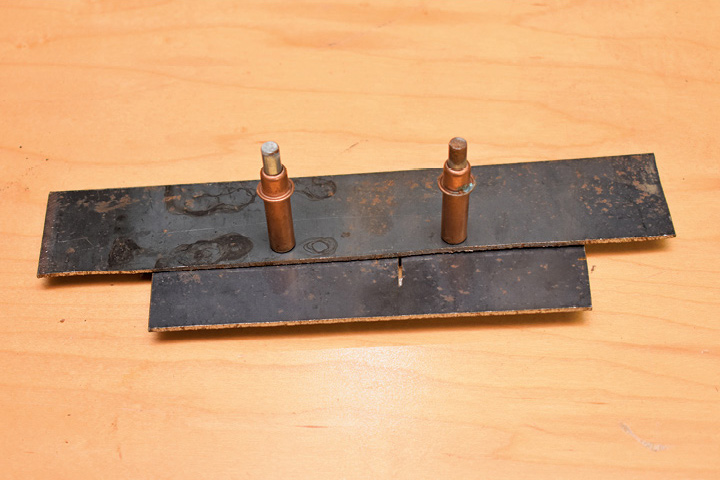
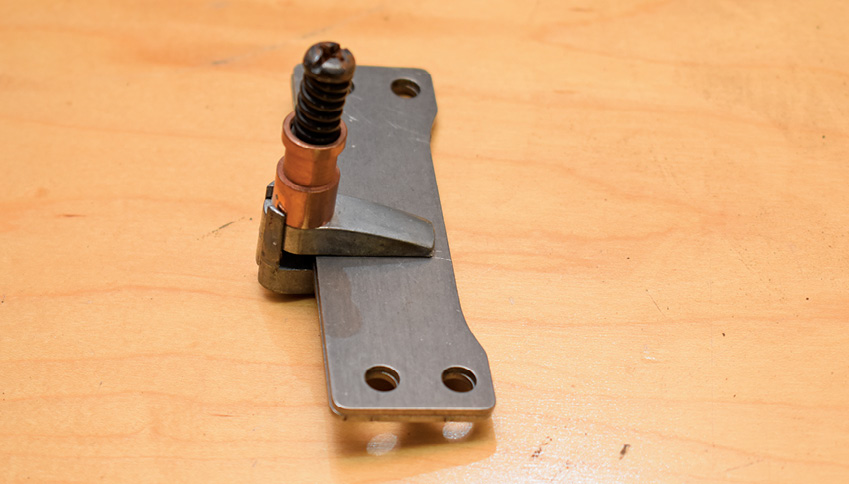
3. An easy way to close holes is to use a copper backup plate held tightly against the backside of the metal. The plates without the handle have magnets to hold them in place.

Copper backup plates do two things: They act as a heat sink to help prevent warpage from welding and they make the hole easier to fill as the weld wire won’t stick to the copper.

4. Copper backup plates do two things: They act as a heat sink to help prevent warpage from welding and they make the hole easier to fill as the weld wire won’t stick to the copper.

The completed weld is virtually flat and will require little grinding to make it flush with the surrounding area.

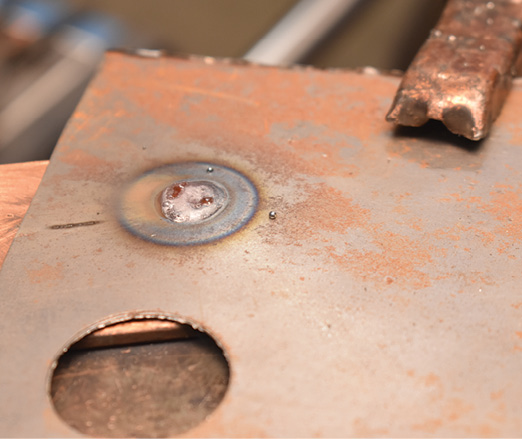
5. The completed weld is virtually flat and will require little grinding to make it flush with the surrounding area.

To dress the weld  a 60-grit “flapper” disc was used on a 4-inch electric grinder. The trick is to go slow and not apply excessive pressure, which can create heat and warp the metal—the very thing you’re trying to avoid.

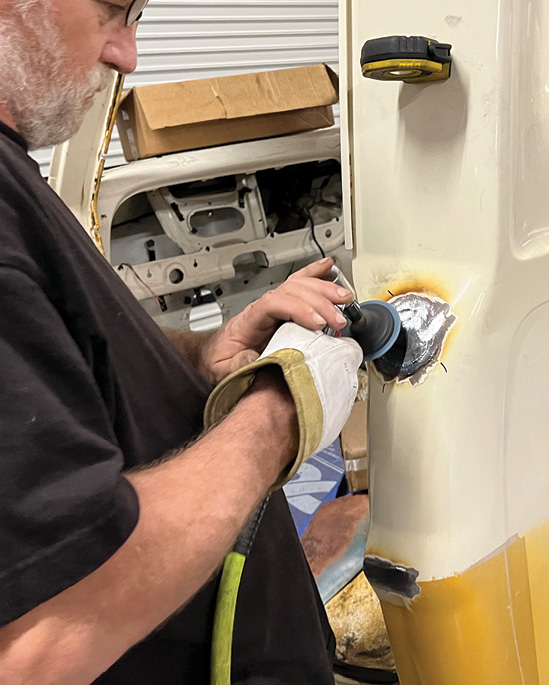
6. To dress the weld a 60-grit “flapper” disc was used on a 4-inch electric grinder. The trick is to go slow and not apply excessive pressure, which can create heat and warp the metal—the very thing you’re trying to avoid.

After careful grinding, the location of the hole is practically undetectable.

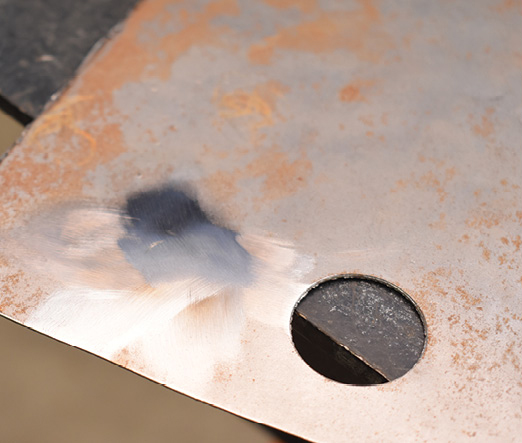
7. After careful grinding, the location of the hole is practically undetectable.

We caught master metalman Kev Elliott plugging the gas filler hole in an F-100. The first step was to remove the paint and taper the edge of the hole for a better weld.
8. We caught master metalman Kev Elliott plugging the gas filler hole in an F-100. The first step was to remove the paint and taper the edge of the hole for a better weld.
While tack welding, Elliott used magnets to hold the LS Fabrication filler plate in place.
9. While tack welding, Elliott used magnets to hold the LS Fabrication filler plate in place.
Elliott used a TIG welder to make the initial tacks, then the magnets were removed.
10. Elliott used a TIG welder to make the initial tacks, then the magnets were removed.
Skipping around the circumference of the tack welds were made in-between the tack welds.
11. Skipping around the circumference of the tack welds were made in-between the tack welds.
When filling holes in a surface with compound curves, such as this one, a hammer and dolly or two may be required. We’re willing to bet this is Elliott’s favorite hammer.
12. When filling holes in a surface with compound curves, such as this one, a hammer and dolly or two may be required. We’re willing to bet this is Elliott’s favorite hammer.
By holding the dolly against the inside of the body, the filler was “massaged” to fit perfectly.
13. By holding the dolly against the inside of the body, the filler was “massaged” to fit perfectly.
Satisfied with the fit, the filler plate was welded completely and then the edges were ground smooth.
14. Satisfied with the fit, the filler plate was welded completely and then the edges were ground smooth.
When Elliott was finished, the contour of the filler plate matched the surrounding area perfectly. After primer and paint, the modification will be undetectable.
15. When Elliott was finished, the contour of the filler plate matched the surrounding area perfectly. After primer and paint, the modification will be undetectable.
 SOURCES
EASTWOOD
(800) 343-9353
eastwood.com
KEV’S ROD & CUSTOM
(714) 686-8982
facebook.com/kevsrodandcustom
LS FABRICATION
(780) 678-9469
ls-fab.com
MILLER ELECTRIC MANUFACTURING COMPANY
millerwelds.com
Summit Racing EQUIPMENT
(800) 230-3030
summitracing.com