CTP logo Tech
InTheGarageMedia.com
Remove, Rebuild, and Run!
Rebuilding, Instead of Replacing, Stock Control Arms on a ’71 Suburban
BY Todd Ryden  Photography by THE AUTHOR
T

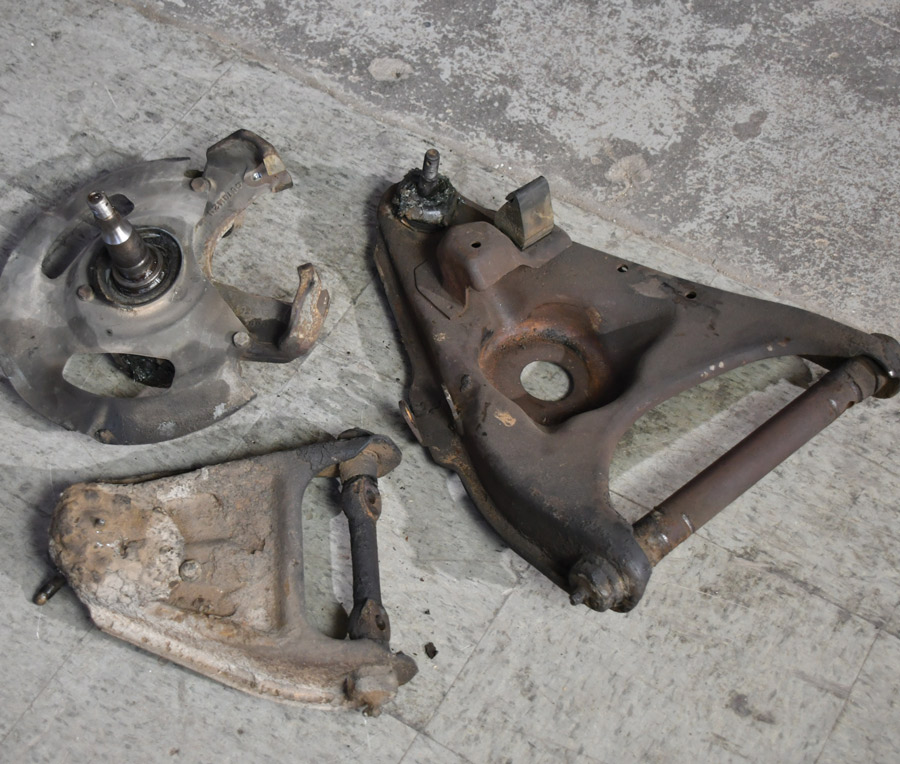
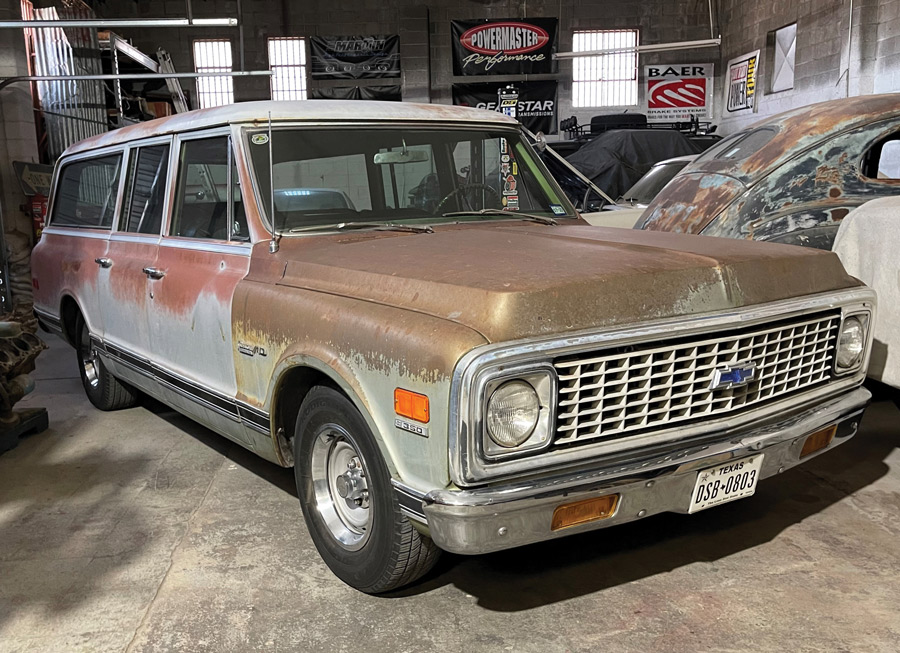
here are so many great suspension upgrade options available for most of our classic trucks these days. From trick tubular control arms to cool coilover conversions, or entire bolt-in front clip assemblies and complete chassis if you prefer to go to the extreme, there really is something for most every make, model, and budget out there, but we decided to keep things basic and try our hand at rebuilding a stock set of control arms on a ’71 Suburban. (This will work for your ’67-72 Suburban or C10.)

This Suburban is never going to be a cone-carving machine, nor a slammed-on-the-ground cruiser with modern-day big-inch rims and tires. It’s basically a second family cruise that takes the kids to practices, handles some weekend chores, and ends up at some local cruises. We’re talking 15-inch rally wheels with stock disc/drum brakes, melted paint, and three seats. As basic a cruiser as you can get.

We found ourselves at the local big-box parts store one day and asked them to look up a few replacement ball joints and cross shafts to see what was offered. We were pleasantly surprised to see a list of quality Duralast components available for the old ’burb. Duralast replacement parts are engineered to meet or exceed the OEM specs and are designed to perform as good or better than the original stuff. We figure with a little (a lot actually) elbow grease we could have the arms rebuilt with new ball joints and cross shafts for about $80 each. This was also the right time to replace the tie rods and idler arm, which were all available from Duralast.

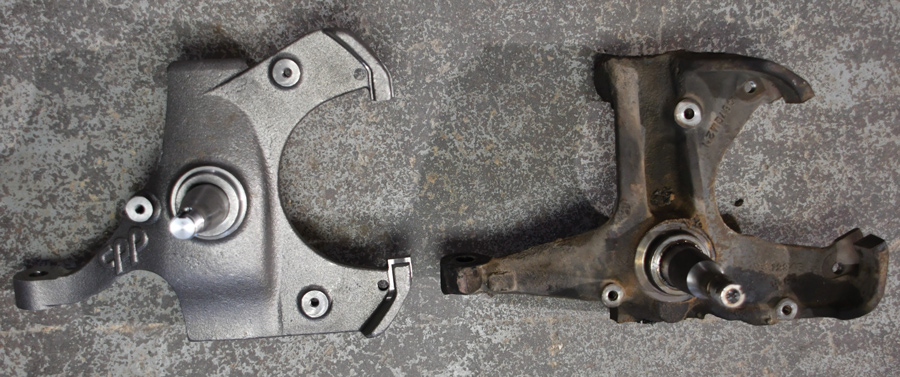
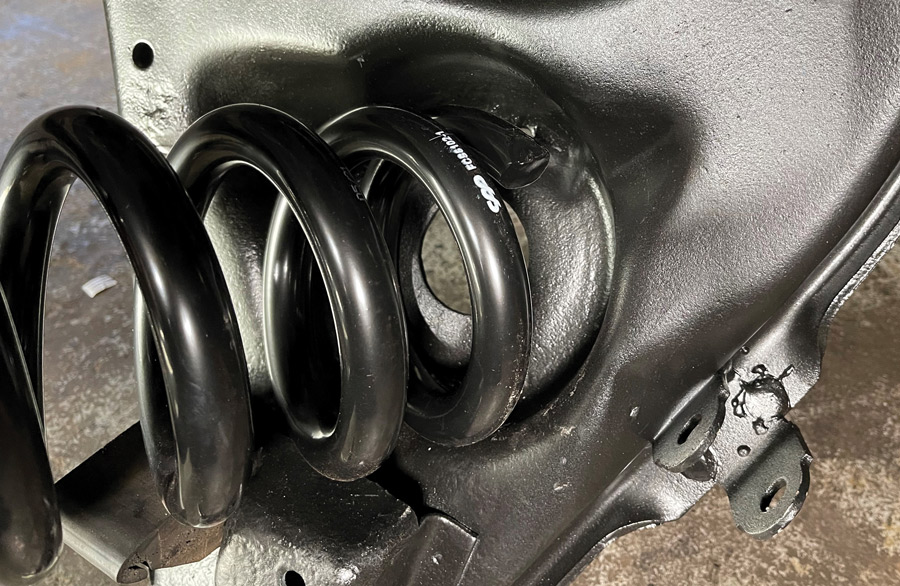
While the front suspension was going to be completely apart, it was a perfect time to improve the stance of the Sub correctly. We have no idea what coil springs were on the rig, but they had been cut so we opted for a 1-inch drop spring complemented with a set of 2-inch drop spindles from Classic Performance Products (CPP). This combination would get the Sub a bit lower while retaining proper geometry and ride comfort.

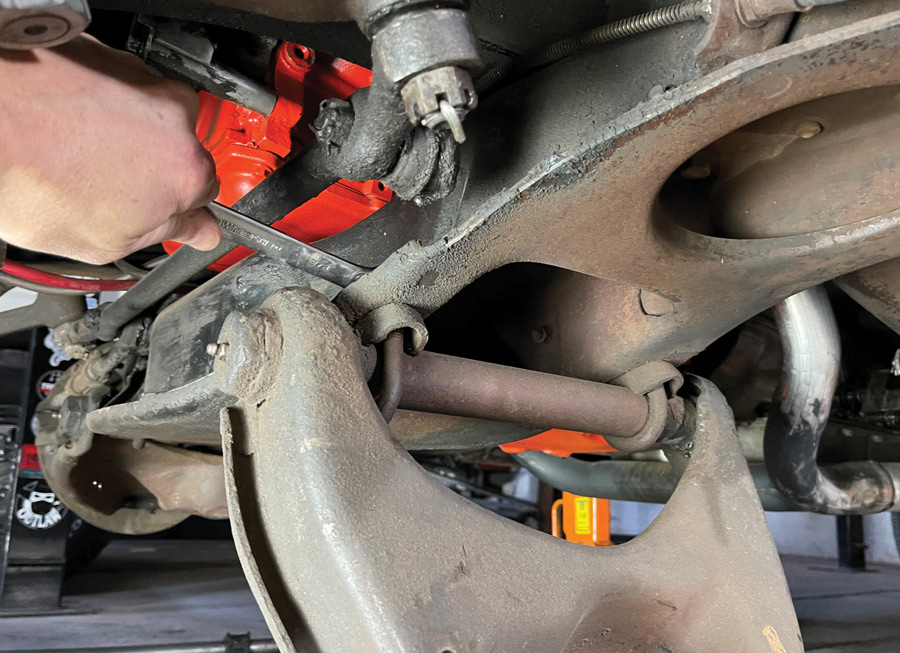
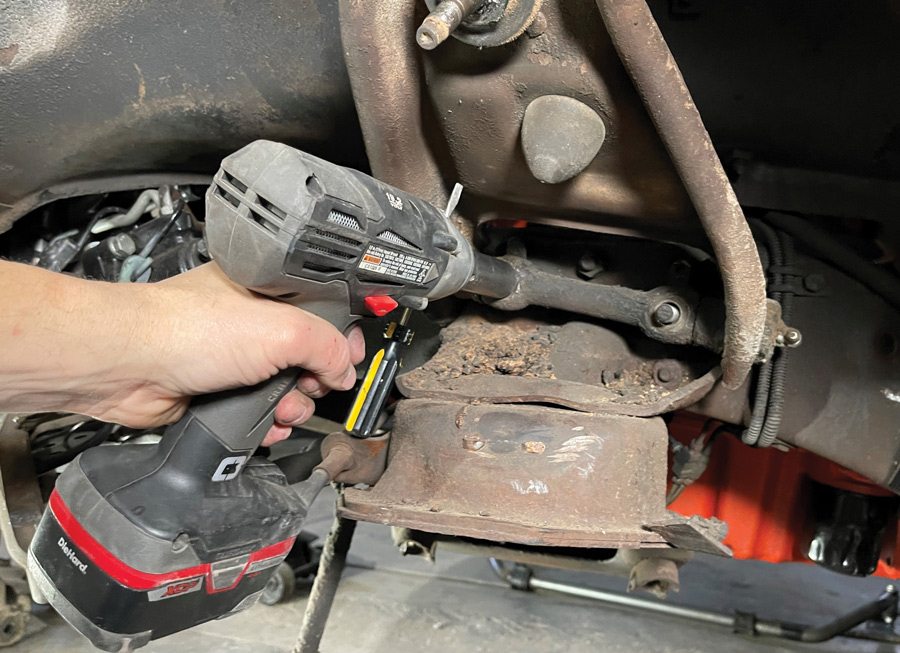
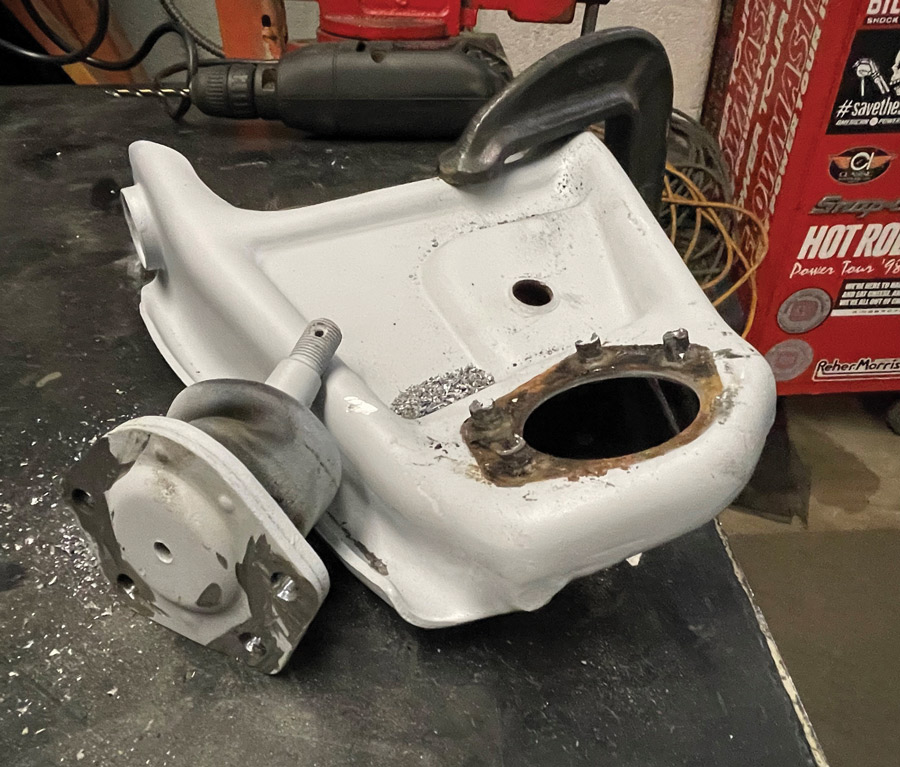
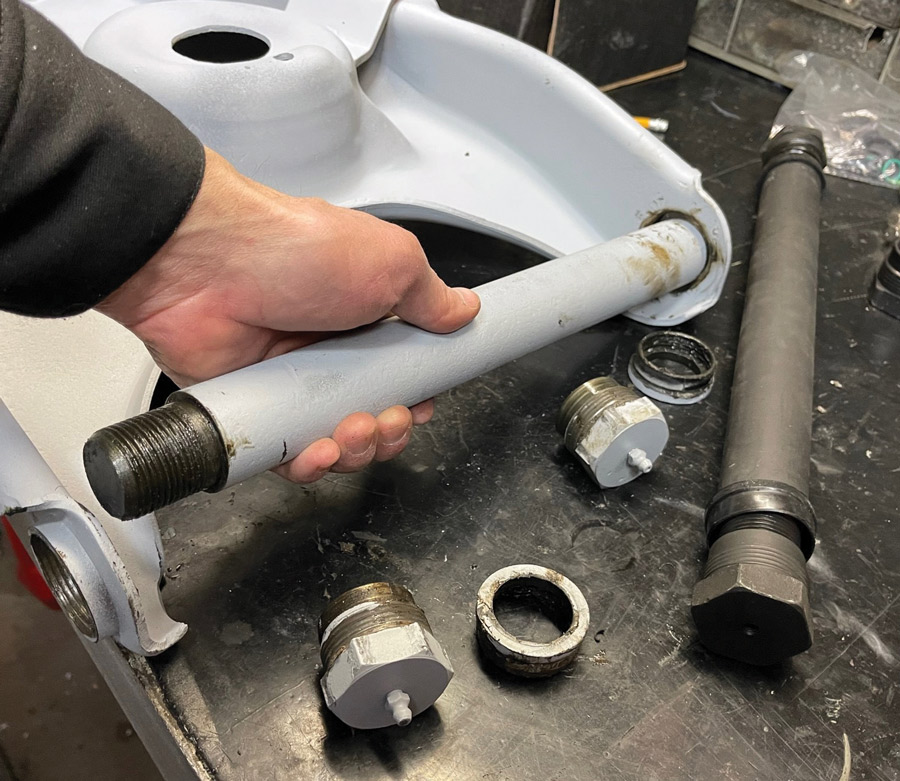
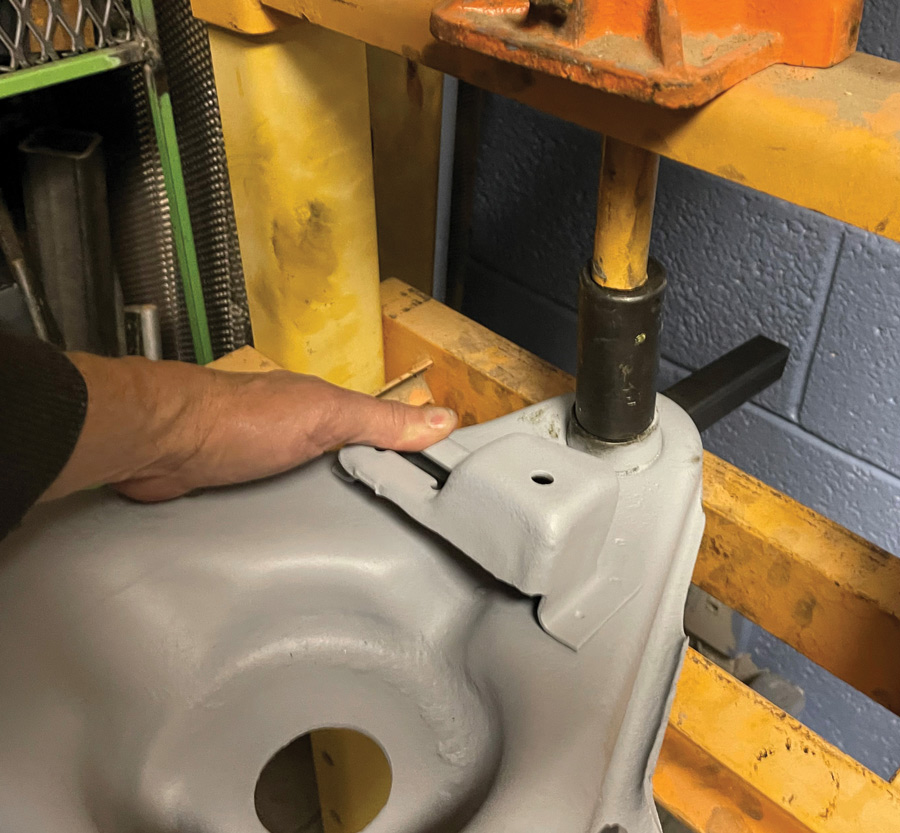
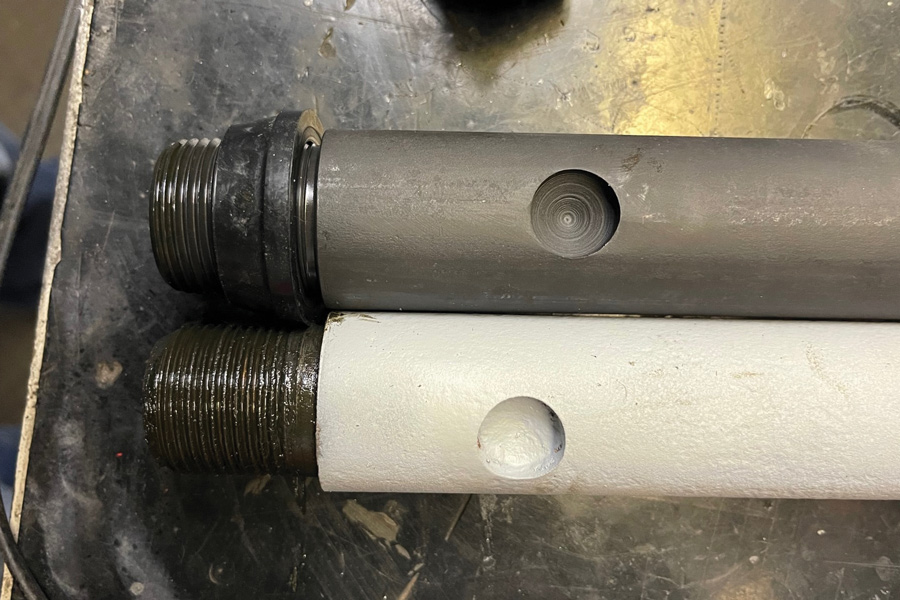
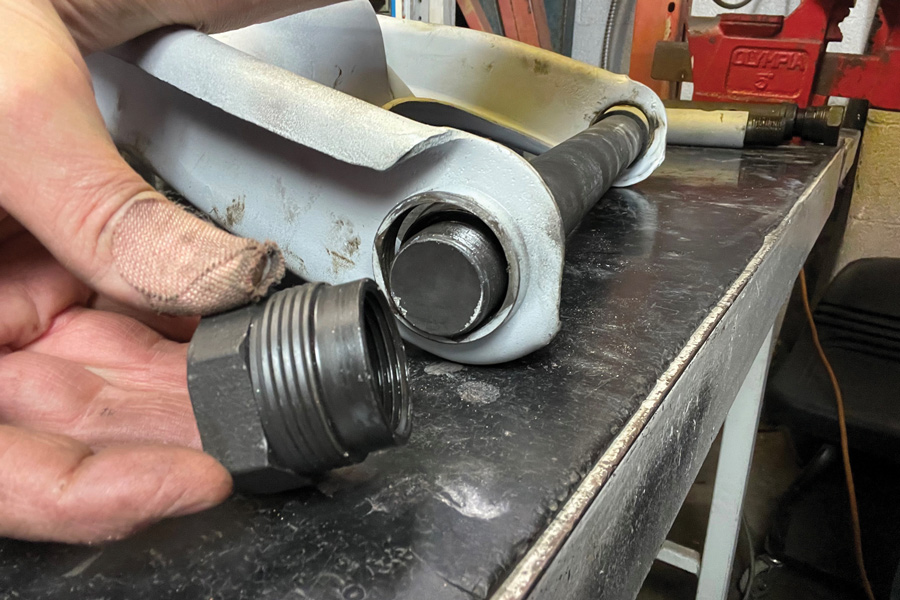
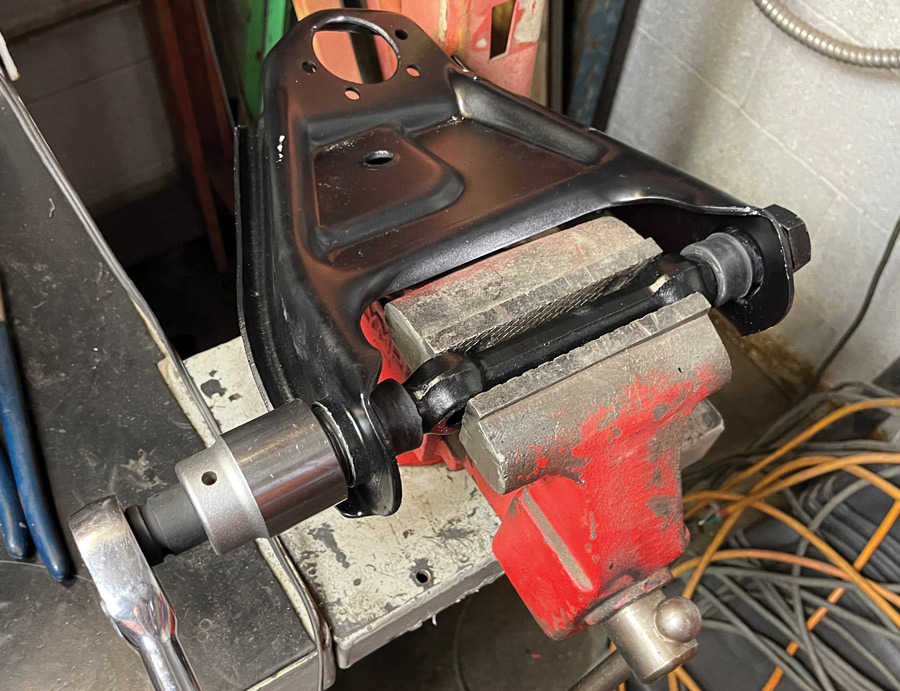
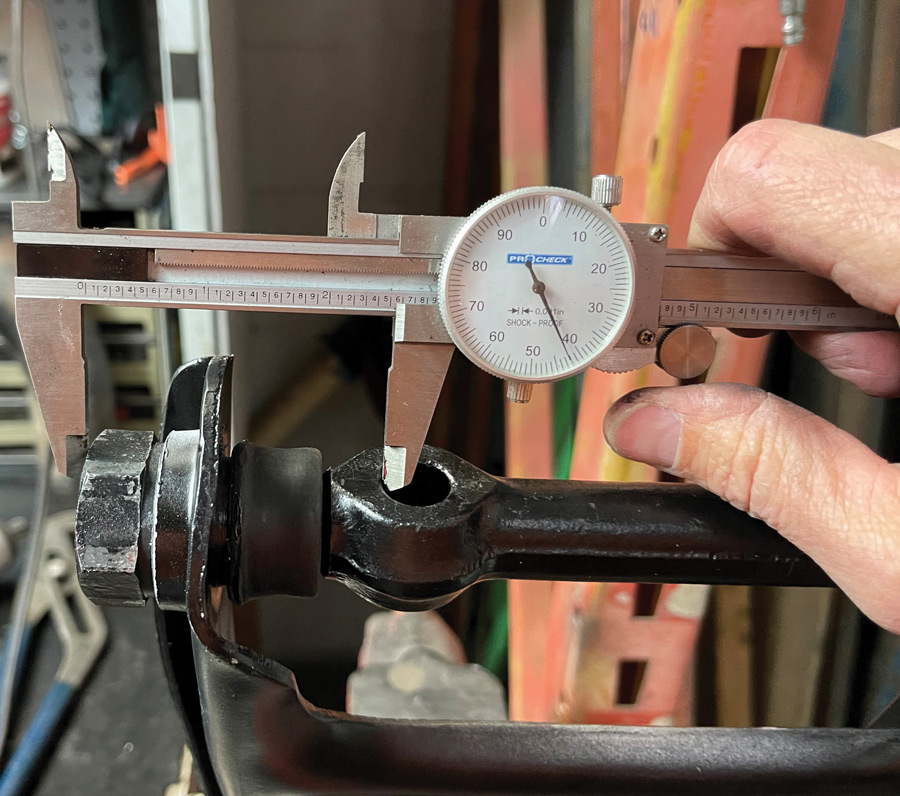
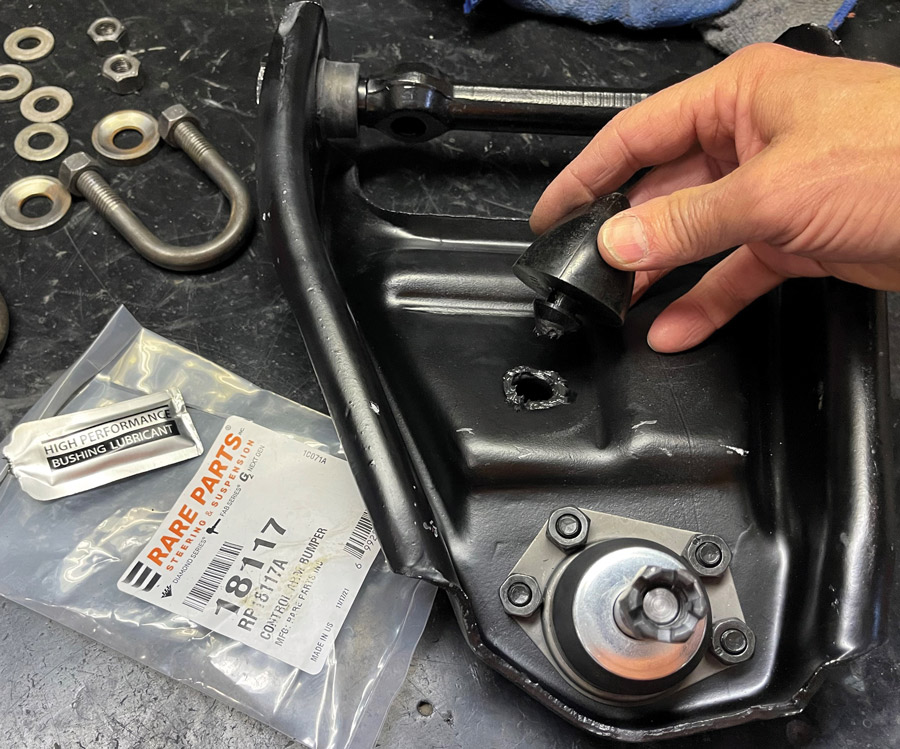
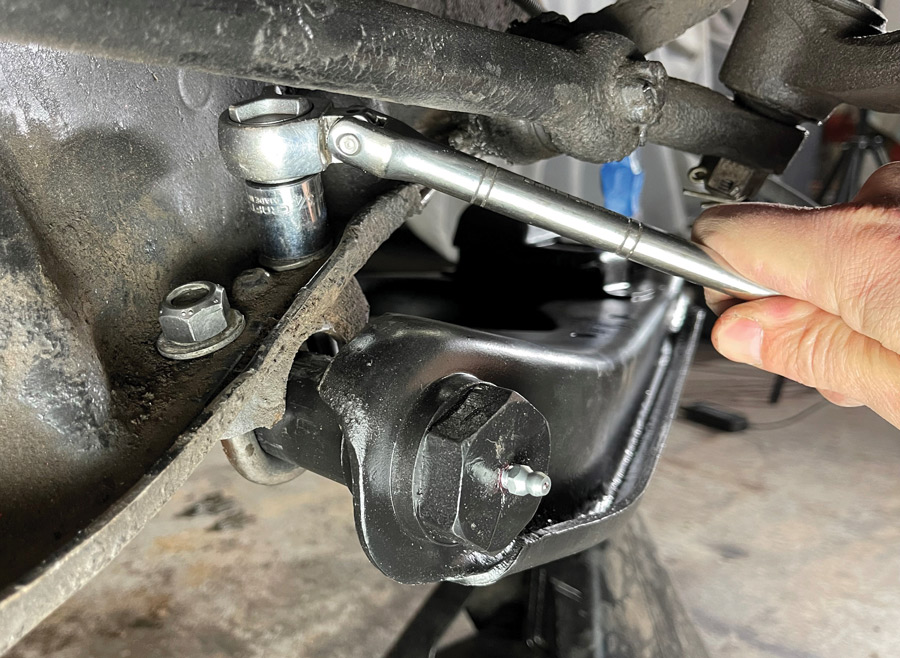
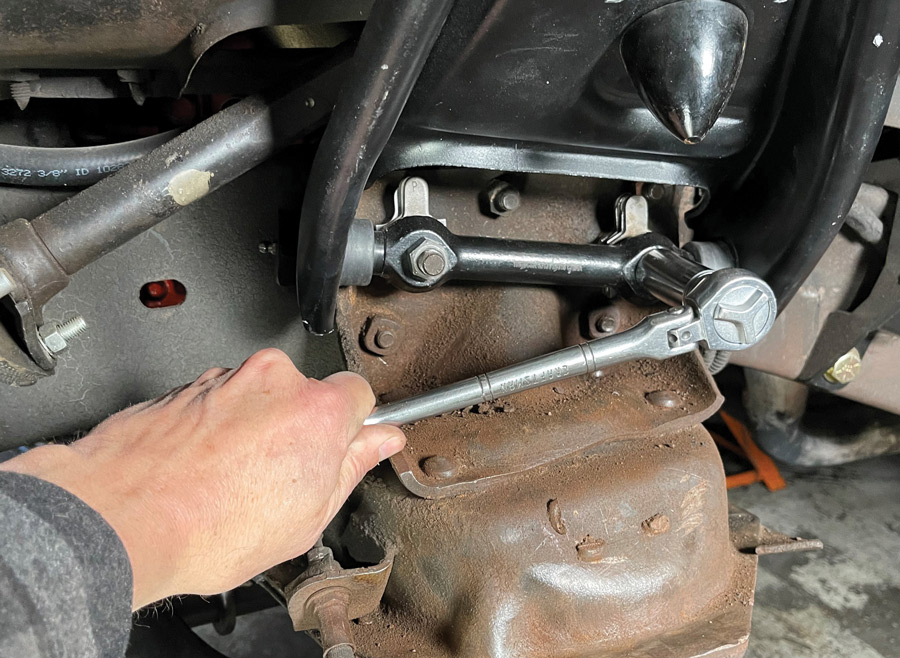
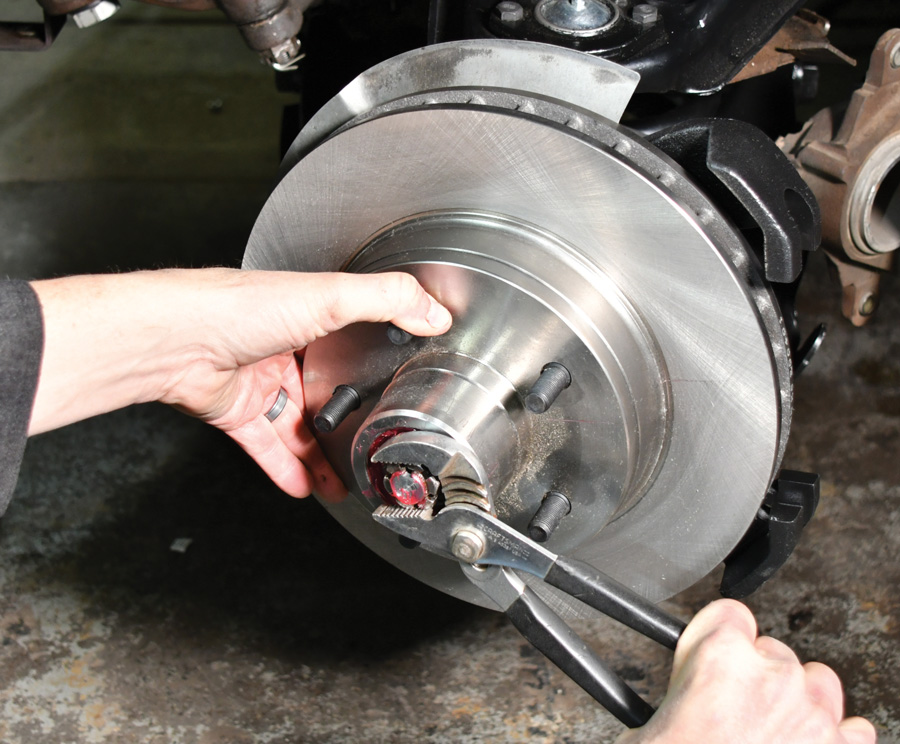
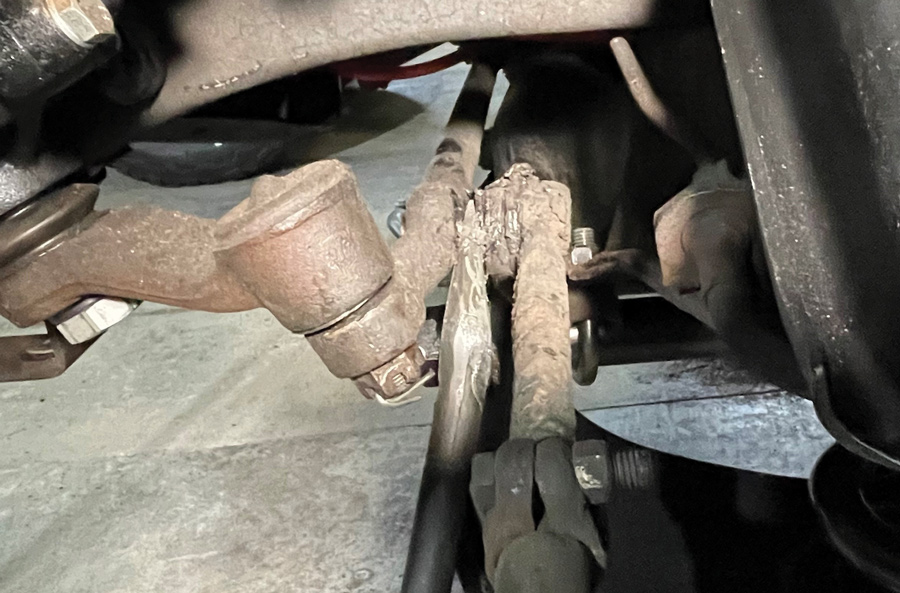
The control arms of these trucks don’t use any bushings, rather a cross shaft that threads into the arm via a couple large endcaps, which you’ll likely need to buy or borrow a couple giant sockets; 1-5/8 inch for the bottom and 1-3/8 inch for the top. (If your arms are rusty, good luck getting the endcaps unbolted!) During assembly, you need to carefully get the new cross shafts centered in the arms in order to properly set the alignment. The first arm we rebuilt probably took us as long to finish as the next three—but we got it figured out!

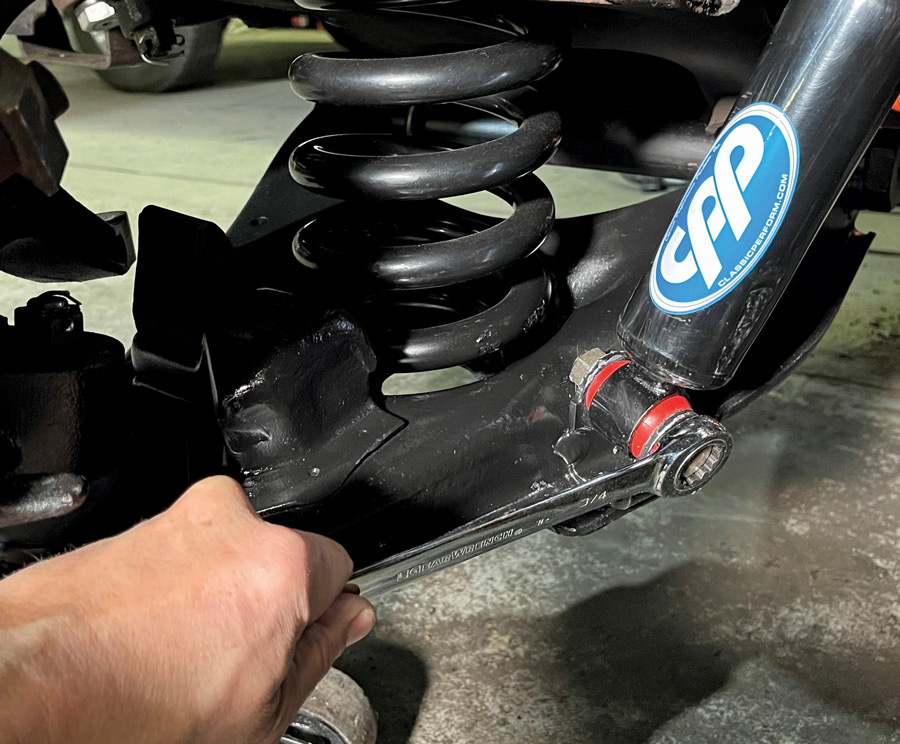
The drop spindle and spring were paired with a set of gas shocks recommended from CPP and the total drop ended up being only about 1-1/2 inches due to the mystery coil springs. We’re cool with that and now it handles bumps and dips so much smoother than before. Plus, the new tie rods seem to have tightened up the steering considerably.

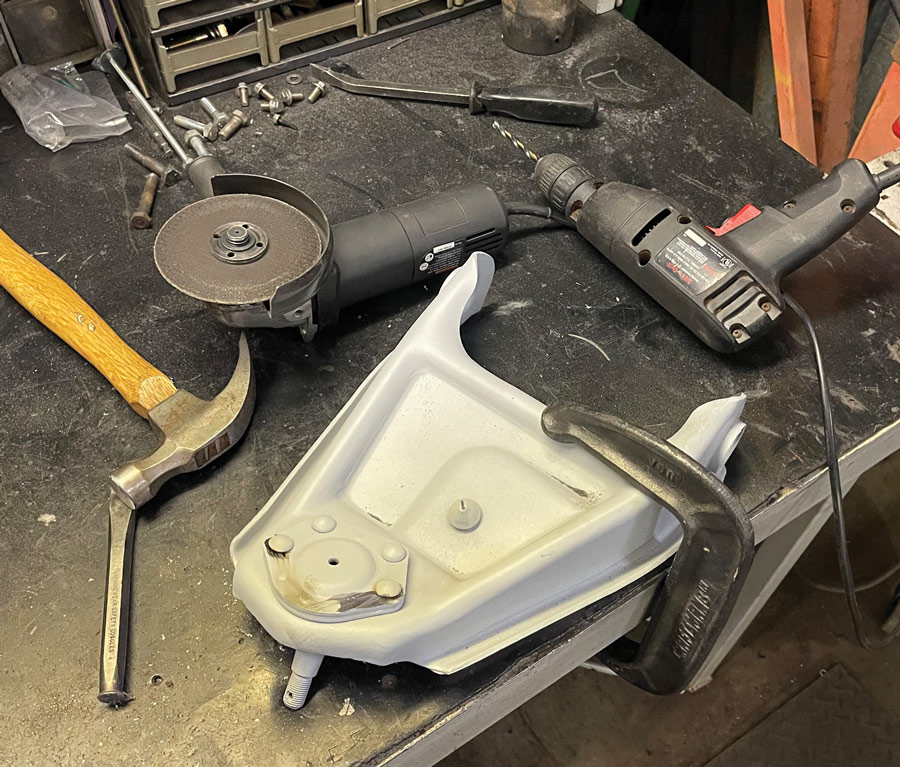
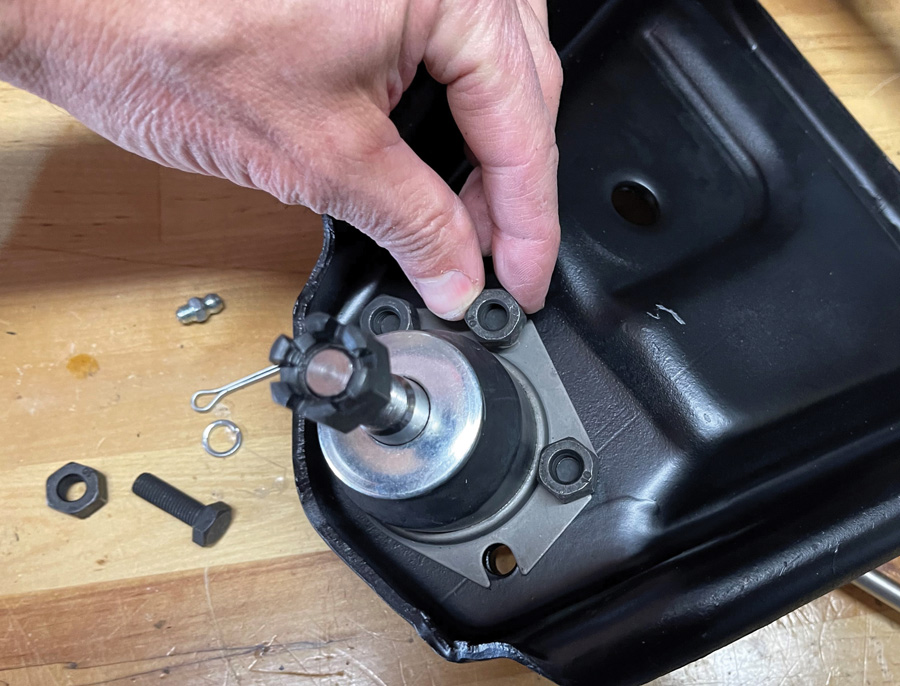
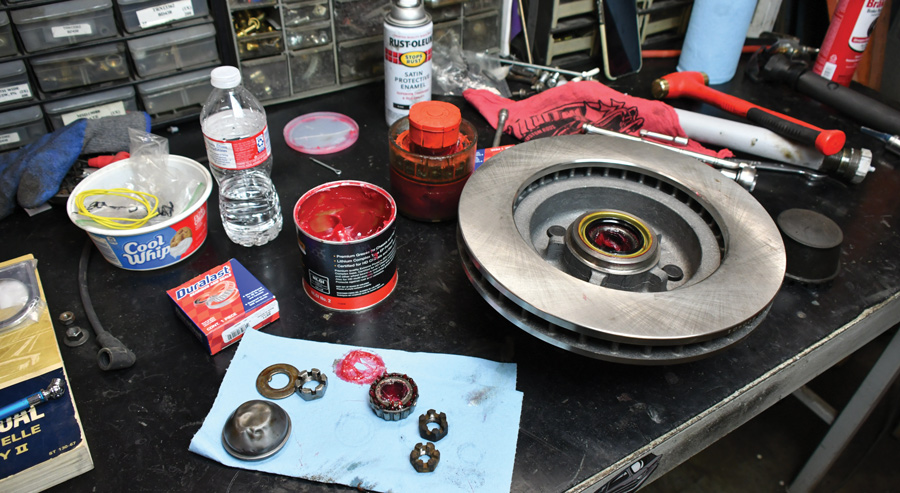
Rebuilding the stock control arms did take longer than simply bolting on shiny new stuff, but we saved a few bucks, discovered the impressive quality of Duralast replacement parts, and learned more about the mechanicals of our Suburban. We’ll tackle a few updates on the rear suspension next and be ready for the road!

removing the car parts with a hand tool
removing the car parts with a drill
1-2. With the vehicle safely positioned on jackstands we got busy removing the caliper, rotor, and the coil spring. Next up was to unbolt the two U-bolts securing the lower control arms and then the two nuts for the upper arm. Make note of the alignment shim locations to help during reassembly.
Car parts on the floor
3. Ta-da! Next stop is the cleaner and sand blaster. The ball joints were well worn and new Duralast joints should make a big difference. The spindle goes in the swap meet bin.
The upper ball joints are secured with rivets that we hit with the grinder
followed by a little drilling, a hammer, and pry bar. Crude, but effective.
4-5. The upper ball joints are secured with rivets that we hit with the grinder followed by a little drilling, a hammer, and pry bar. Crude, but effective.
The lower control arm cross shafts will take some serious grunt to remove and require a 1 5/16-inch socket and giant breaker bar (or mega-strong impact gun).
6. The lower control arm cross shafts will take some serious grunt to remove and require a 1 5/16-inch socket and giant breaker bar (or mega-strong impact gun).
The ball joint of the lower arms must be pressed out—and obviously in
Since we had the press set up, we went ahead and pushed the new Duralast assemblies in place until it was completely flush with the arm.
7-8. The ball joint of the lower arms must be pressed out—and obviously in. Since we had the press set up, we went ahead and pushed the new Duralast assemblies in place until it was completely flush with the arm.
The new lower cross shafts are supplied with endcap and seals. Note there are dimples that position the lower control arm assembly onto the chassis
9. The new lower cross shafts are supplied with endcap and seals. Note there are dimples that position the lower control arm assembly onto the chassis. Our original pieces only had one dimple while the new Duralast versions had two and were moved slightly to help improve alignment positioning and angles.
Installing the cross shafts will take a little work to get dialed in before tightening the assembly.
10. Installing the cross shafts will take a little work to get dialed in before tightening the assembly. With the shaft slid into place, we started the endcaps, making note of how many turns, then tightened the caps into the control arm. The goal is to have the shaft centered in the control arm.
The upper cross shafts install the same way with the shaft threads going into the endcaps that are, in turn, screwing into the control arm.
Again, make sure to have the shaft centered in the arm which we measured, turned, and measured again to get as close as possible.
11-12. The upper cross shafts install the same way with the shaft threads going into the endcaps that are, in turn, screwing into the control arm. It sounds confusing but it works. Again, make sure to have the shaft centered in the arm which we measured, turned, and measured again to get as close as possible.
Unlike the lower, press-in ball joints, the upper ball joints bolt in place. Duralast includes all-new hardware, including locking nuts.
13. Unlike the lower, press-in ball joints, the upper ball joints bolt in place. Duralast includes all-new hardware, including locking nuts.
We replaced the upper control arm bumpers with new ones from Rare Parts. They’re a great solution when it comes to hard-to-find restoration pieces.
14. We replaced the upper control arm bumpers with new ones from Rare Parts. They’re a great solution when it comes to hard-to-find restoration pieces.
With the new ball joints and cross shafts installed, it was time to gather our new CPP components, starting with their 2-inch drop spindles. We opted for their stock-style spindle that accepts the factory caliper, tie rod, and ball joints. The CPP one is on the left with the original on the right.
15. With the new ball joints and cross shafts installed, it was time to gather our new CPP components, starting with their 2-inch drop spindles. We opted for their stock-style spindle that accepts the factory caliper, tie rod, and ball joints. The CPP one is on the left with the original on the right.
The dimples of the lower cross shaft must align with the mounting cradles on the chassis.
The uppers slid right into position and we installed the same shim packs in their proper position to help get the alignment close.
16-17. Finally, it was time to bolt stuff back onto the Suburban. The dimples of the lower cross shaft must align with the mounting cradles on the chassis. We used the original hardware to secure the arms. The uppers slid right into position and we installed the same shim packs in their proper position to help get the alignment close.
We also used a 1-inch drop spring from CPP for a bit more drop in the front. Be sure to get the coil spring end to index with the upper spring pocket so it fits in position on the lower arm. As always, use care when installing coil springs!
18. We also used a 1-inch drop spring from CPP for a bit more drop in the front. Be sure to get the coil spring end to index with the upper spring pocket so it fits in position on the lower arm. As always, use care when installing coil springs!
A floor jack was used to raise the lower arm and spring assembly so the new spindle could be installed to tie the upper and lower arms together.
19. A floor jack was used to raise the lower arm and spring assembly so the new spindle could be installed to tie the upper and lower arms together.
We hadn’t planned on replacing the rotors originally, but figured after all this other work, fresh pads and rotors would be icing on the cake. Duralast offers a number of different pads to suit your performance goals; we opted for a set of semi-metallic pads.
20. We hadn’t planned on replacing the rotors originally, but figured after all this other work, fresh pads and rotors would be icing on the cake. Duralast offers a number of different pads to suit your performance goals; we opted for a set of semi-metallic pads.
As the castle nut is tightened, spin the rotor.
21. As the castle nut is tightened, spin the rotor. The nut was preloaded to 50 lb-ft then backed off one turn. Next, the nut was tightened to 10 lb-ft (while turning the rotor) then loosened about a 1/6-1/4 turn to align the cotter pin key and pop the dust cover in place.
To wrap up the control arm install, the new CPP gas shocks were installed
22. To wrap up the control arm install, the new CPP gas shocks were installed.
To complete the rebuild, we replaced the inner and outer tie rods with new Duralast pieces. Off came the cotter pins and nuts followed by a few blows with the ball joint separator.
23. To complete the rebuild, we replaced the inner and outer tie rods with new Duralast pieces. Off came the cotter pins and nuts followed by a few blows with the ball joint separator.
We counted the number of turns it took to remove the original tie-rod ends and tried to position the new parts as close as possible before torquing them to the spindle and centerlink. The toe will get dialed in when we take the Sub in for a pro alignment.
24. We counted the number of turns it took to remove the original tie-rod ends and tried to position the new parts as close as possible before torquing them to the spindle and centerlink. The toe will get dialed in when we take the Sub in for a pro alignment.
A fresh idler arm was also installed (we replaced our pitman arm in a previous power steering box update).
25. A fresh idler arm was also installed (we replaced our pitman arm in a previous power steering box update).
We’re pleased with the drop from the spindle and spring combination and even more so with the tighter, improved driving feel suspension rebuild. Better response, smoother, and more stable on the road! Next up will be a couple updates to the rear suspension.
26. We’re pleased with the drop from the spindle and spring combination and even more so with the tighter, improved driving feel suspension rebuild. Better response, smoother, and more stable on the road! Next up will be a couple updates to the rear suspension.
Classic Performance Products
(800) 760-7438
classicperform.com
Rare Parts
shop.rareparts.com