CTP logoFeature star Tech
InTheGarageMedia.com
Heidts’ four-bar rear suspension system for 1953-1956 Ford F-100s is almost entirely a bolt-on. The only welding required is to attach the axle and Panhard bar brackets. Scooter, the shop dog, supervised the entire installation between naps.
Four Play
CTP logoFeature star Tech
InTheGarageMedia.com
Heidts’ four-bar rear suspension system for 1953-1956 Ford F-100s is almost entirely a bolt-on. The only welding required is to attach the axle and Panhard bar brackets. Scooter, the shop dog, supervised the entire installation between naps.
Four Play
Installing Heidts’ Bolt-In F-100 Rear Suspension
BY Ron Ceridono 
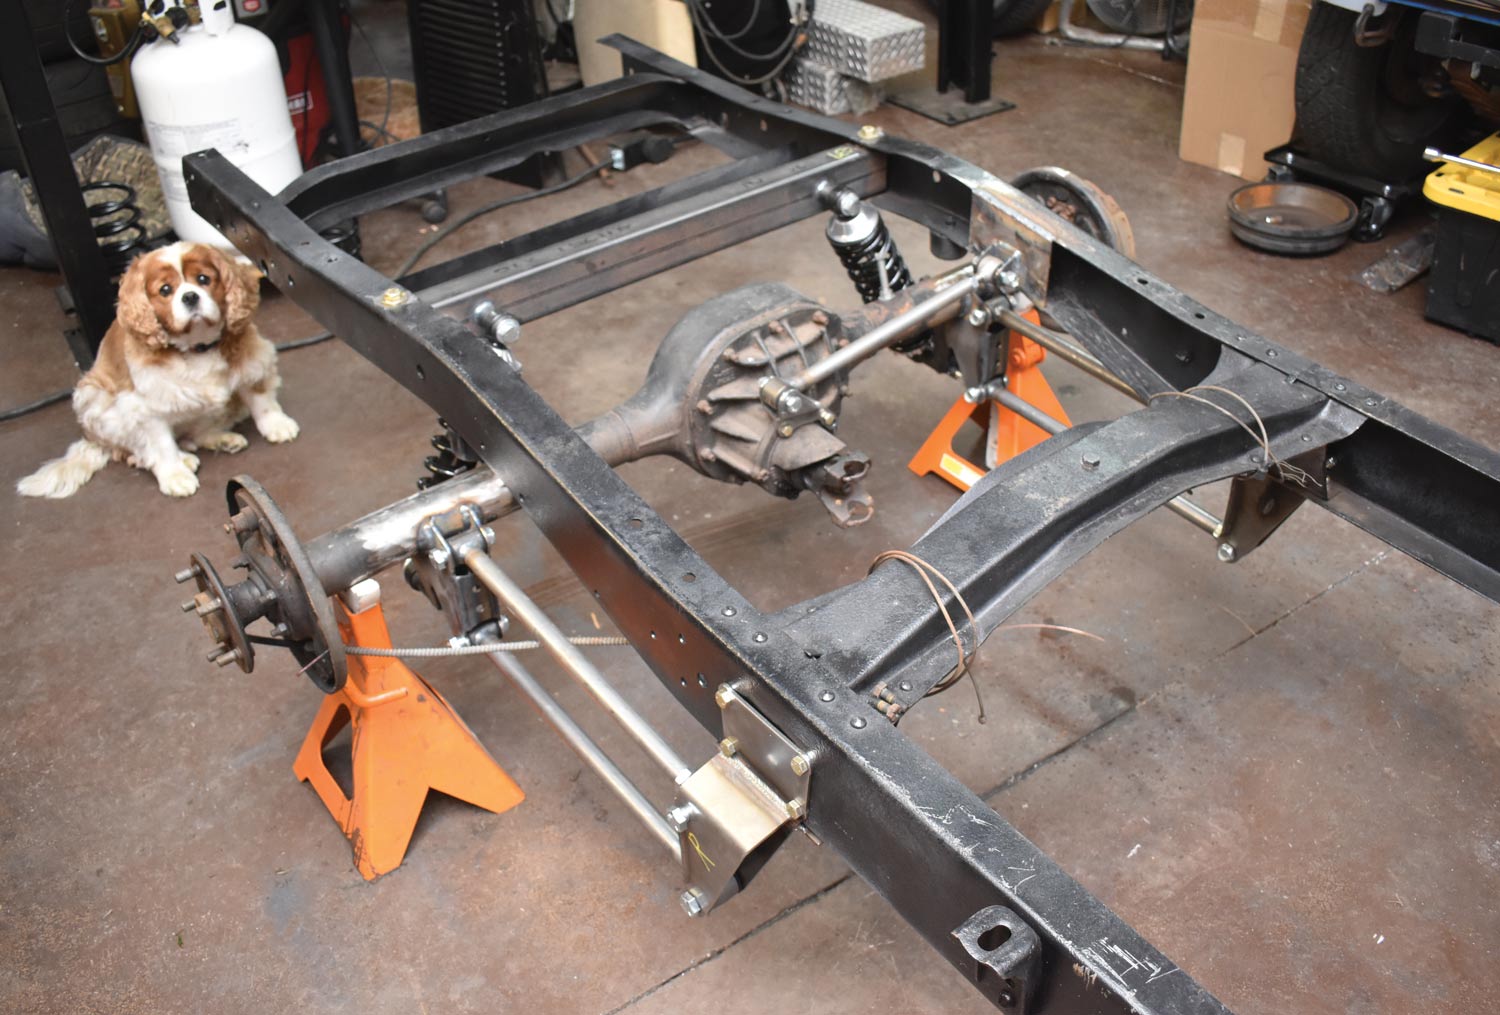
Photography BY The Author
A

fter installing some suspension components we’ve often heard our classic truck–building buddies sigh and say, “Well, if it was easy everyone would do it.” Recently we found something that came very close to fitting that description: Heidts’ 1953-1956 Ford F-100 bolt-in rear four-bar kit is so easy to install anyone with basic skills really can do it.

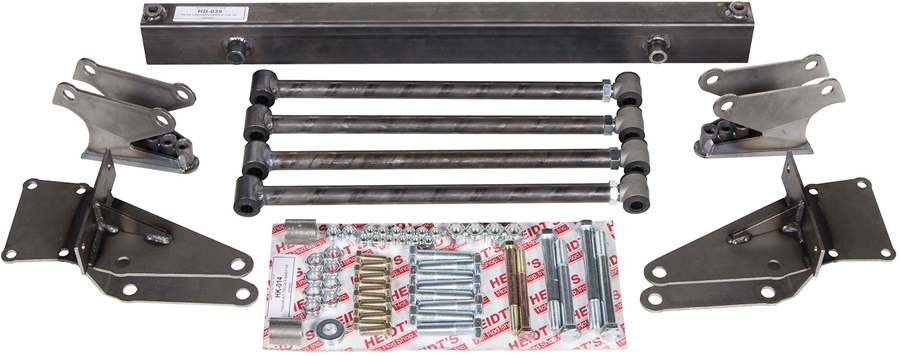
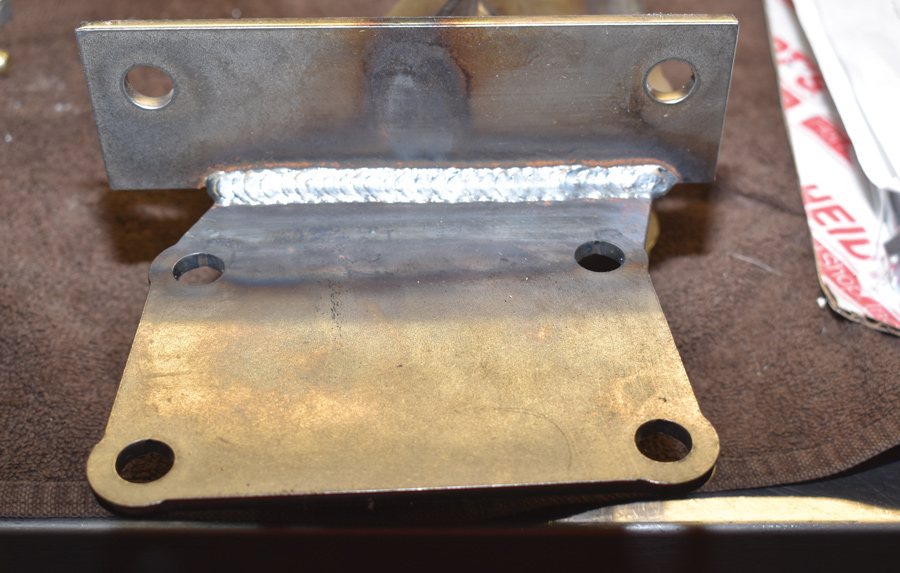
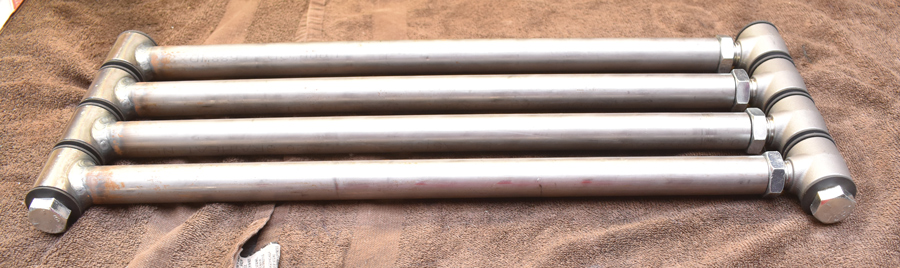
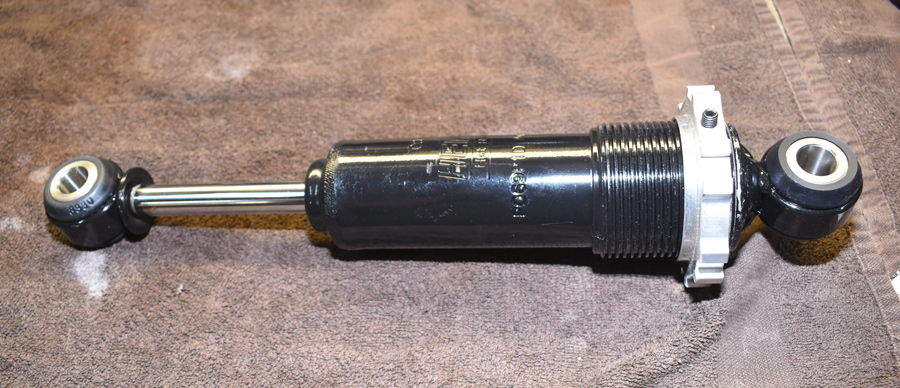
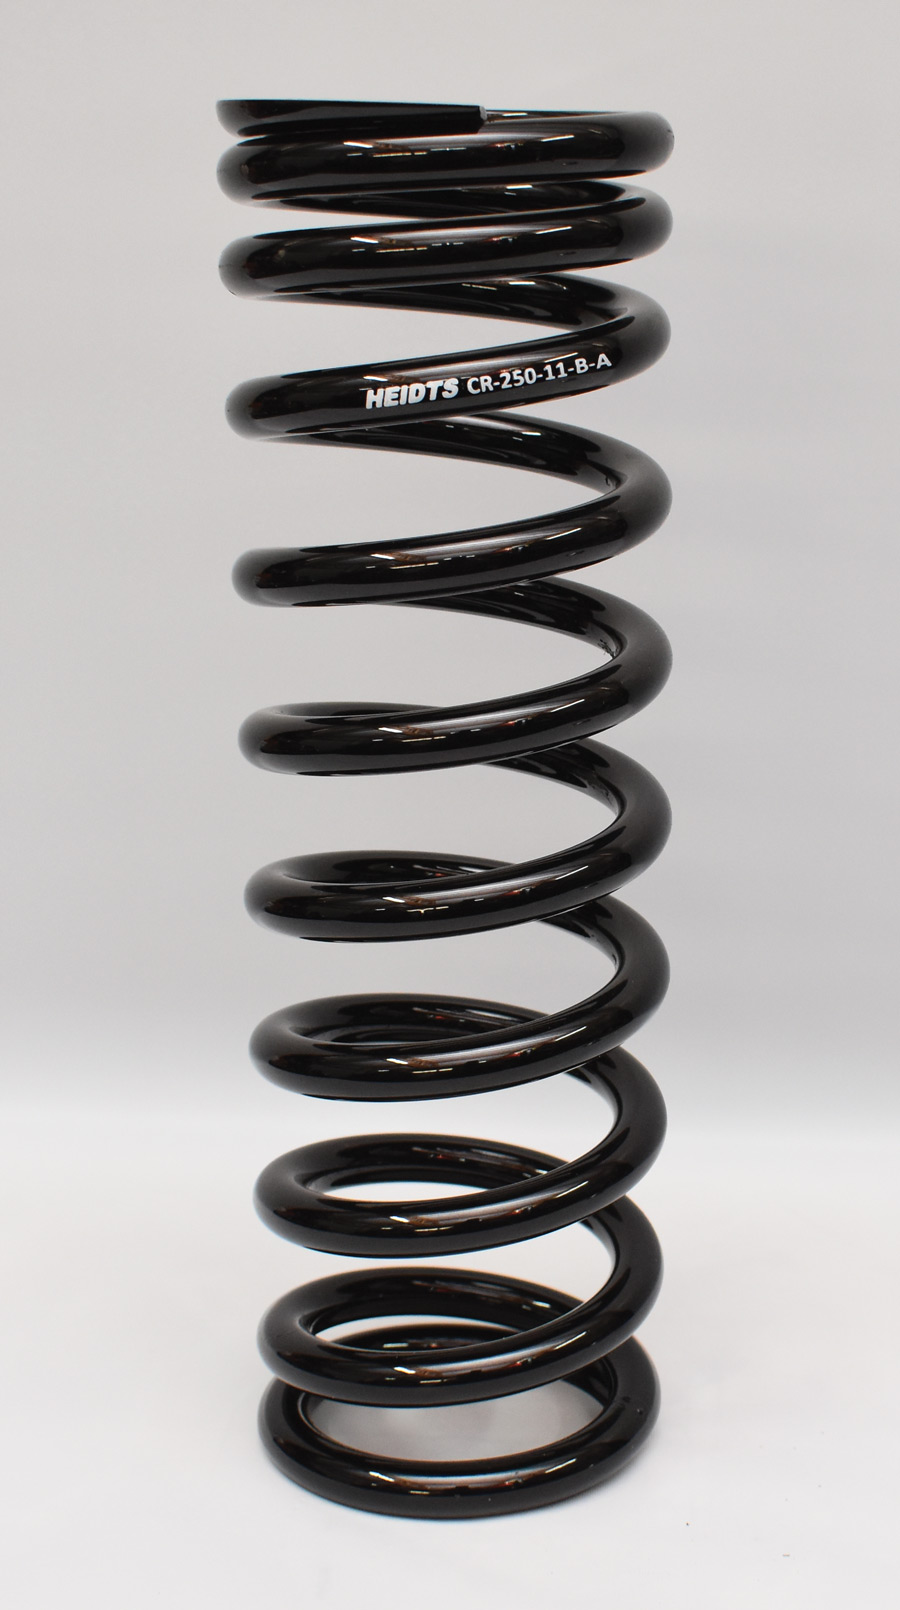
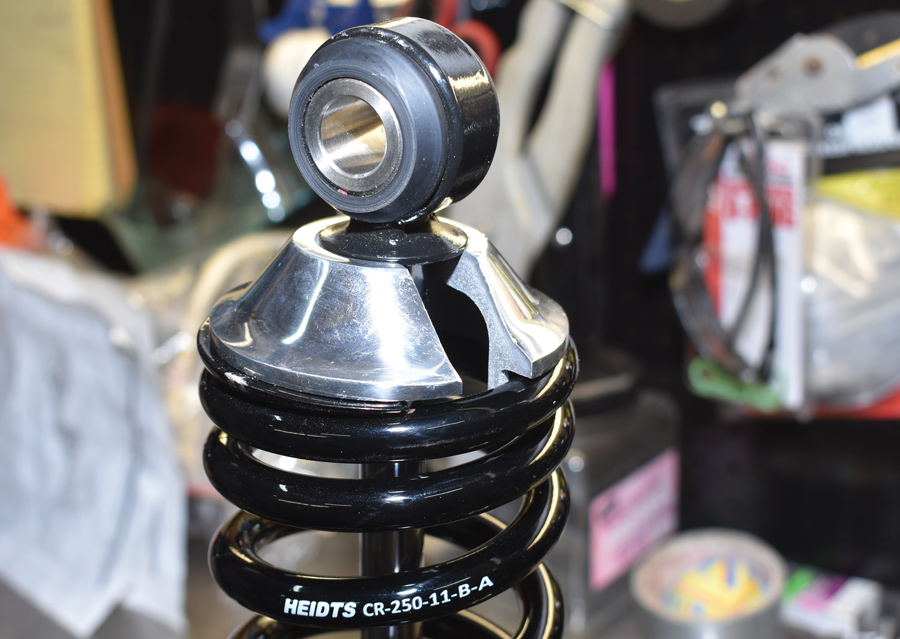
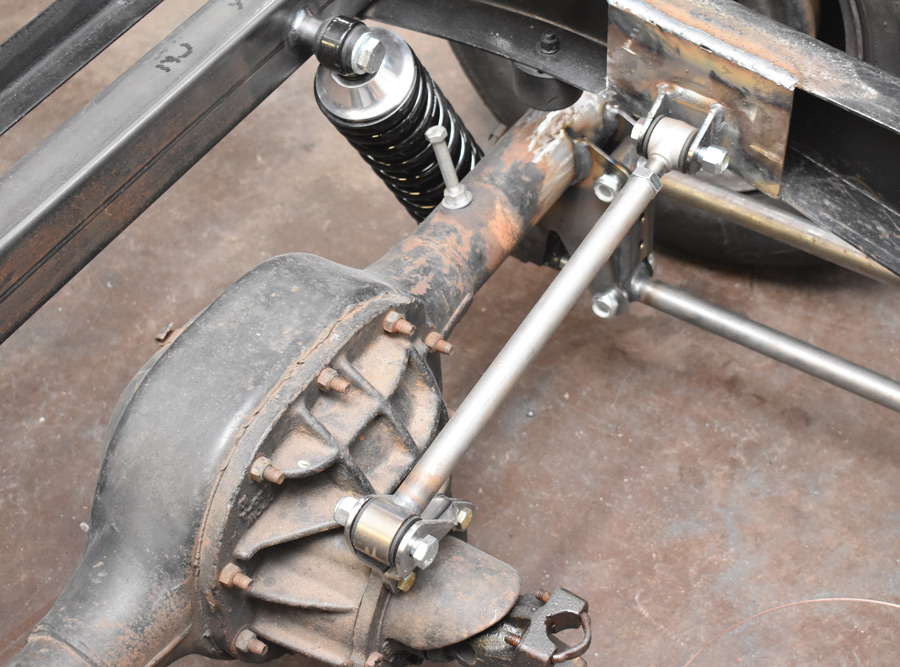
Heidts’ rear suspension kit includes a new crossmember, coilovers, four-bars, Panhard bar, and all the necessary brackets and hardware. For the most part this is a bolt-in kit, although some welding is required to attach the four-bar brackets to the axle housing and the Panhard bar bracket to the frame. For those who don’t have the ability to weld those chores can easily be farmed out after the bolt-in parts are in place.

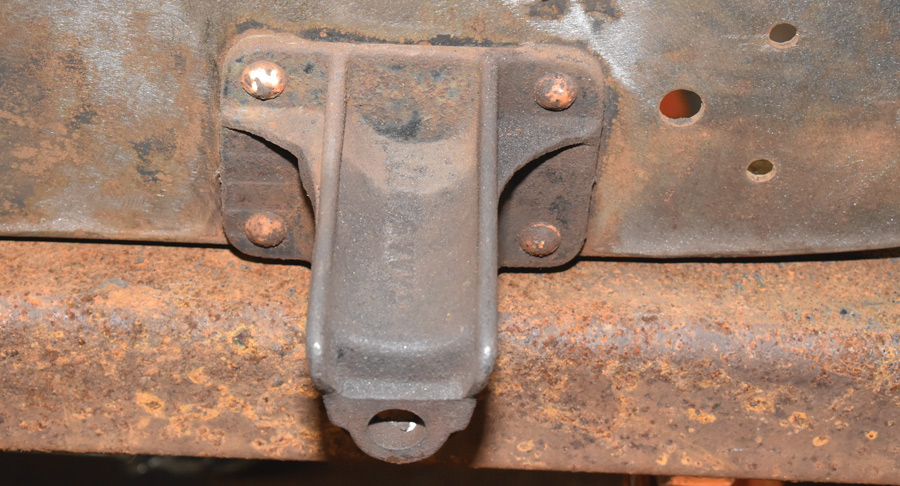
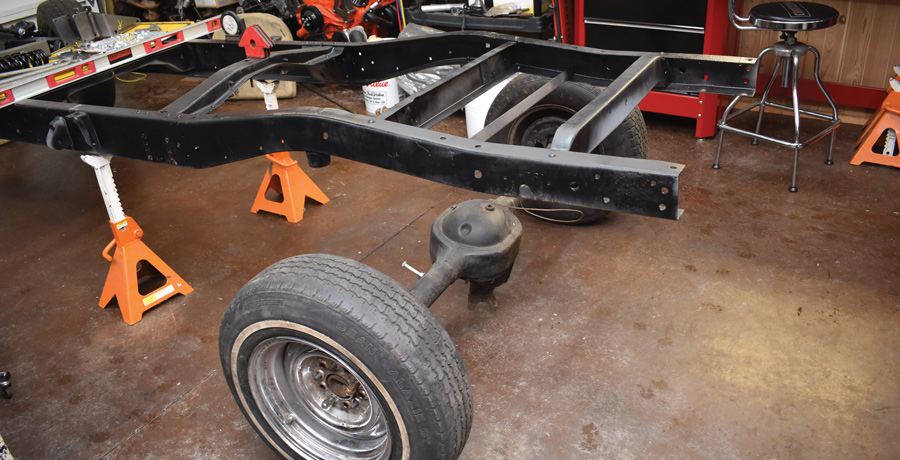
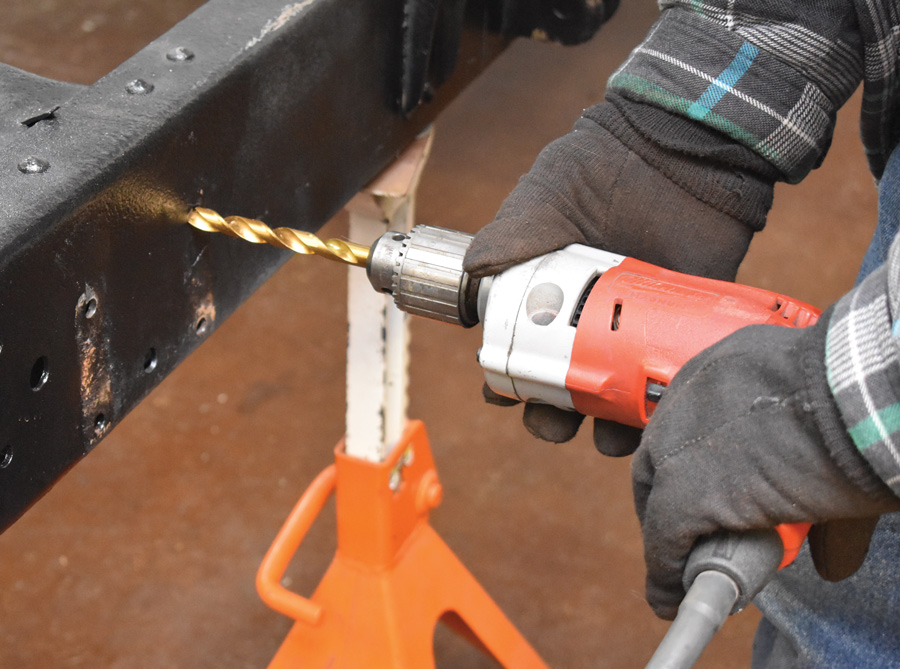
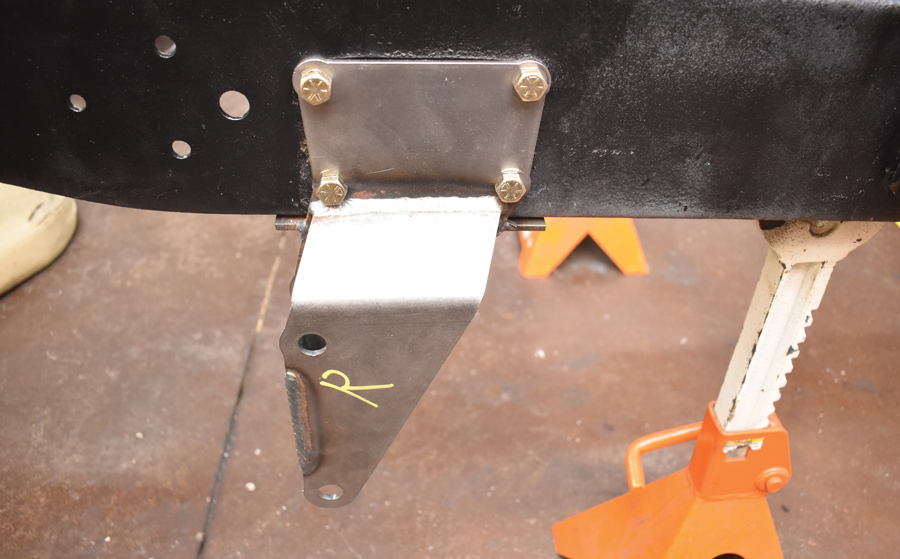
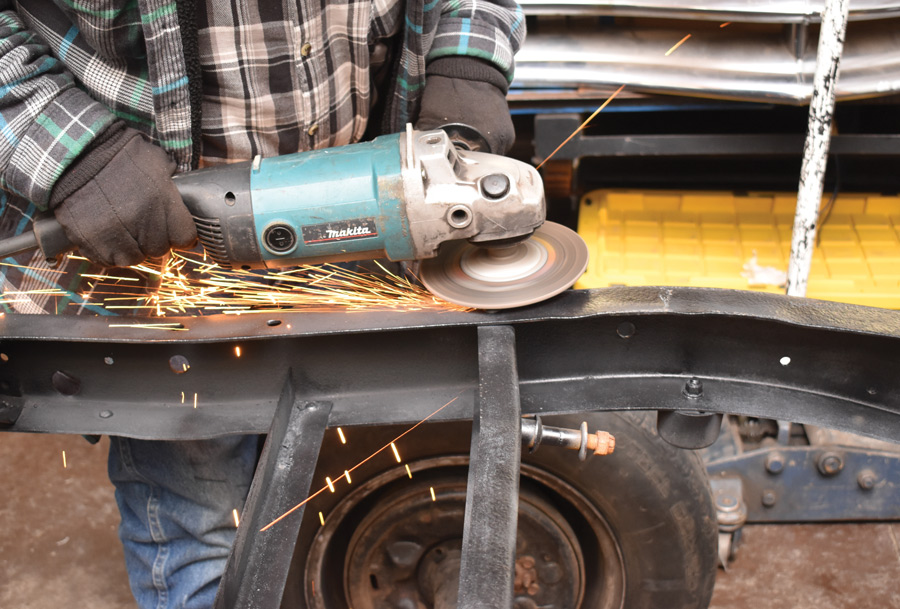
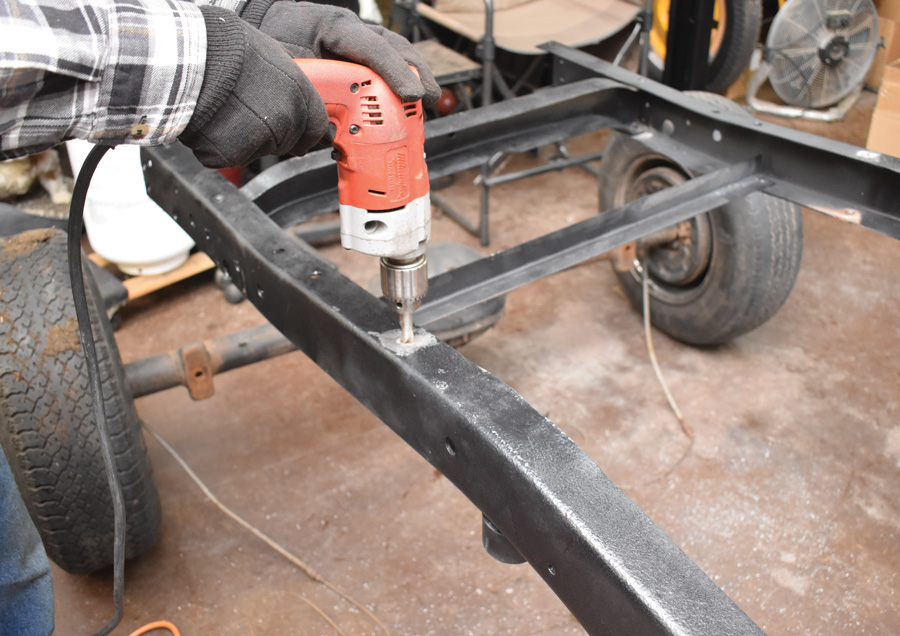
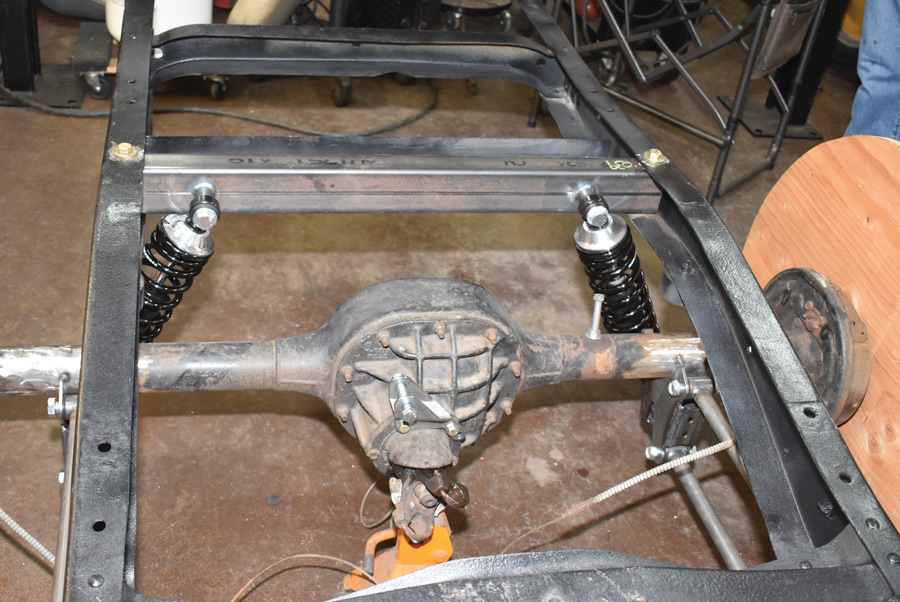
One of the most time-consuming parts of installing this kit is the removal of the original components. Once the springs and shocks are gone, the four spring hangers and the original crossmember with the upper shock mounts have to be removed by taking out the factory rivets. While that can be challenging, we’ve found that a combination of grinding, drilling, and a big hammer gets the job done. With the front spring hangers removed, the original holes are enlarged and the four-bar brackets are bolted in place. The same holds true for the new crossmember that mounts the coilovers. Using the factory holes eliminates any possibility of positioning the brackets and crossmember incorrectly.

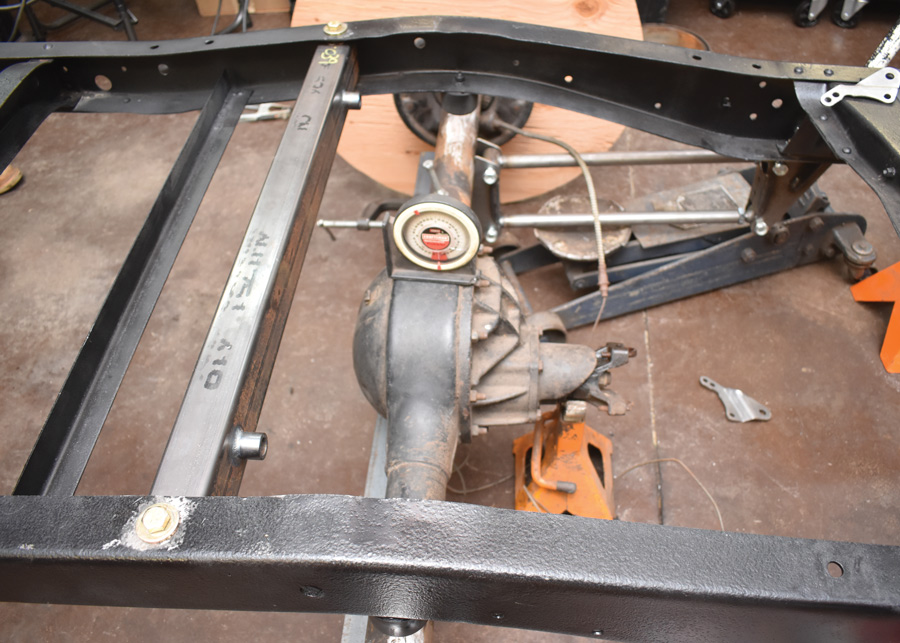
As we said some welding will be required to complete the installation of Heidts’ kit. In our case we rolled the rearend into place then approximated the correct pinion angle before welding on the axle brackets. Of course the threaded ends on the four-bars provides the ability to dial in the pinion angle perfectly once the engine and transmission are in place, as well as making minor wheelbase adjustments to center the wheels in the fenders.

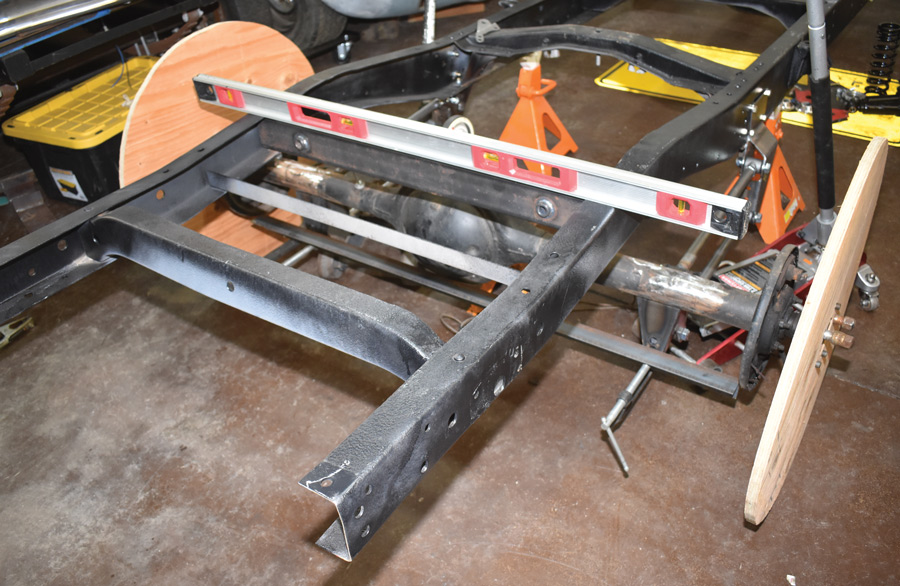
With the four-bars in place we boxed a short section of the frame to provide an attachment point for the Panhard bar bracket. On the axle end of the bar bolt-on brackets were supplied. Once in place the adjustable end on the Panhard bar allows the rearend to be centered precisely.

Heidts has made installing a rear four-bar system in a 1953-1956 F-100 quick, easy, and foolproof. Think of it a four play for classic truck lovers.

basic Heidts four-bar kit
1. The basic Heidts four-bar kit comes with frame and axle brackets, four adjustable bars, a new crossmember, and all the necessary hardware. We opted to include a Panhard bar and coilovers.
spring hanger
2. With the rear leaf springs removed, the next task was to drill out the rivets holding the spring hangers to the frame.
frame leveled on jackstands
3. With the rear springs removed, the frame was leveled on jackstands (we used washers to shim the frame to make it so). We took this opportunity to measure the frame diagonally (left front corner to right rear and right front to left rear); it was within 1/16 inch.
 holes were made larger with a 7/16-inch drill bit
4. After all four spring hangers were removed the holes were made larger with a 7/16-inch drill bit.
side of the framerails
5. The front four-bar brackets are marked left and right to avoid confusion. There are four bolts that attach each bracket to the side of the framerails.
the bottom flange of the framerails
6. There are also two bolts on each bracket that go into the bottom flange of the framerails. Those bolts replace the rivets that secure the gussets on factory crossmembers that will remain between the four-bar brackets.
bracket are secured with the supplied grade 8 hardware
7. With the holes drilled to the proper size the front four-bar brackets are secured with the supplied grade 8 hardware.
grinding off the heads of the rivets
8. The original crossmember that the shock absorbers attached to is removed. We found that grinding off the heads of the rivets, then drilling through them, worked best.
knocking out the rivets with a punch and hammer
9. The factory rivets would swell when installed, making them a tight fit in the holes. With the heads of the rivets ground and then drilled they were then knocked out with a punch and hammer.
drilling holes into the frame
10. One bolt on each side secures the new Heidts crossmember to the frame. The holes must be drilled to accept the supplied ½-inch bolts.
four-bars
11. Before the four-bars were installed we adjusted them so they were all the same length. We verified the adjustment by slipping a long bolt through the bushings.
four-bars were installed with the adjustments on the frame bracket ends
12. The four-bars were installed with the adjustments on the frame bracket ends. The bolts were installed but not tightened at this point.
grinder removing spring pads
13. Our grinder was put to work again removing the spring pads from the rearend housing. With the pads removed, the paint was removed in the area where the four-bar brackets would be welded on.
 frame was set at ride height with approximately a 2-degree rake and was checked for being level side to side
14. Before the axle brackets were installed, the frame was set at ride height with approximately a 2-degree rake and was checked for being level side to side.
rearend was then rolled in place with the pinion angle set at 4 degrees “up.”
15. We used plywood wheels the same diameter as the tires that will eventually be installed. The rearend was then rolled in place with the pinion angle set at 4 degrees “up.” The axle brackets were attached to the four-bars, which were then raised against the housing with a pair of floorjacks.
length of angle iron was clamped on to hold them in place
16. With the brackets properly located on the housing 36 1/2 inches apart, a length of angle iron was clamped on to hold them in place. The brackets were tack welded, the rearend was then removed for final welding.
non-adjustable coilover shocks with black powdercoated body
17. We used Heidts’ non-adjustable coilover shocks with black powdercoated bodies. The adjuster nuts were coated with antiseize before installation; they have socket head setscrews to hold them in place.
spring
18. Our rear springs are black powdercoated Heidts CR-250s, which are 250-pound springs. That means it takes 250 pounds to compress them 1 inch.
 top spring retainer
19. The top spring retainers fit under the upper shock eyes. The slot makes them easy to remove and replace if changing springs becomes necessary.
completed spring
20. To raise or lower the rear of the truck, or to make is level side to side, the preload of the springs can be altered with the adjustment nuts. The proper wrench for the job is available from Heidts; it fits into the slots on the nuts.
new crossmember and coilovers
21. Here the new crossmember and coilovers have been installed and the axle brackets are completely welded. The pinion angle will likely have to be adjusted once the engine and transmission are in place—easy to do with the adjustable four-bars.
small boxing plate was welded to the frame to mount the other end
22. The last step was the installation of the Panhard bar. The supplied bracket for one end of the bar bolts onto the pinion retainer. A small boxing plate was welded to the frame to mount the other end.

 SOURCE

Heidts Hot Rod & Muscle Car Parts
(800) 841-8188
heidts.com