CTP logoFeature star Feature
InTheGarageMedia.com
Door-Dash
Chevs of the 40’s Delivers the Goods to Refresh the Doors and Dash of Your 1941-1946 Chevy Truck
BY Chuck Vranas Photography By THE AUTHOR
I

t’s hard to imagine that some of the hardest-working parts on your classic truck aren’t just related to your driveline. While we’re tuned to think of everything from pistons to torque converters and rearends, the truth is that there are far more wear-and-tear items when you start to pin them down. For example, think about how many times your doors have been opened and closed along with the windows over the decades. Through all sorts of weather they thanklessly take a beating while keeping the gateway to your interior protected from the elements. It’s easy to take them for granted but keeping them in top operating condition should be a priority.

Likewise, your dash functions as the epicenter for relaying critical information by keeping track of your speed as well as your engine’s vitals on a minute-to-minute basis. Flash-forward through the decades and it’s easy to see that it might need some refreshing to bring it back to perfect operating standards since the components have been switched on since your truck left the assembly line. Regardless of whether you’re taking on a full build, restoring, or updating, it’s a perfect time to take a step in the right direction to address these items. In the case of the 1946 Chevy in our article, bringing a barn find truck back to the streets gave us an opportunity to tackle a number of important subjects.

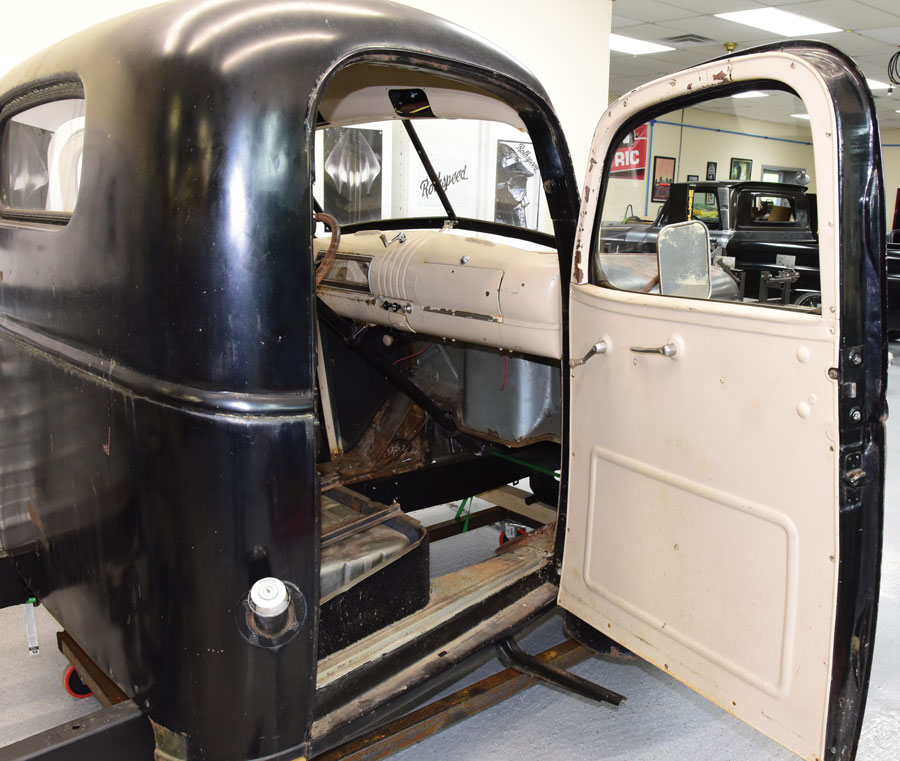
When it came time to sourcing parts for the project we obviously wanted to contact the experts on Art Deco Series trucks. Chevs of the 40’s, in Vancouver, Washington, are the world’s most-complete supplier of 1937-1954 Chevrolet car and truck parts. Their knowledgeable staff and extensive catalog gave us plenty of options for our needs, regardless of whether we wanted restoration-level parts or something more modern. To take on the project we met with Scott Roth, co-owner of Rothspeed in Milton, Vermont, who got started by carefully disassembling the doors. Evaluating them proved that they were structurally sound and ready for a complement of new parts to bring them back into perfect service. They did, however, suffer from a number of issues, including yellowed and delaminating glass, difficult-to-operate latches and window regulators, dried-out and deteriorating rubber parts, and droopy door handles. We opted to focus on stock restoration parts knowing that Chevs of the 40’s offered everything we would need.

Looking at the original dash, it was obvious the components handled the quest through the years well, but it was clear they had reached their end. Once removed from the cab, the dash was placed on strands and striped of all its components, wiring, and tattered glovebox. Chevs of the 40’s was able to supply us with everything we needed for the rebuild, including a restored original gauge cluster updated for our V-8 application, new four-position key starter conversion kit, headlight and windshield wiper switches, dash accessories, and even a complete new glovebox kit. Installation of the components was a snap, bringing new life to the dash for years to come. There was no better way to seal the deal than with the addition of a classic new factory steering wheel to complete the look. Taking the time to freshen up the doors and dash was time well spent, easily seen through the images that follow.
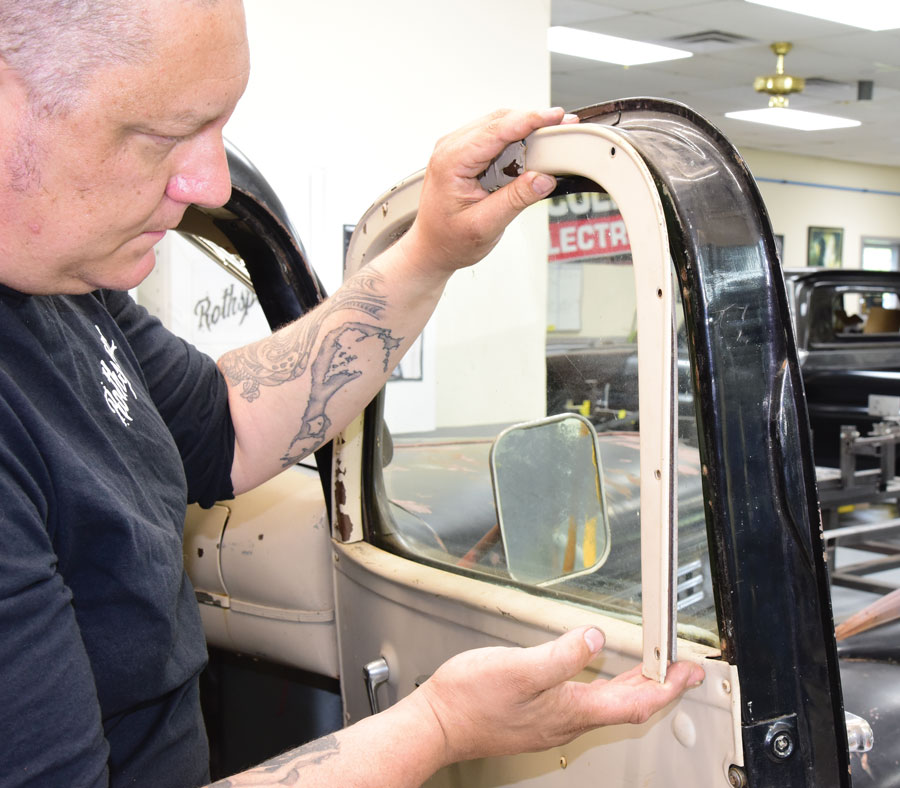
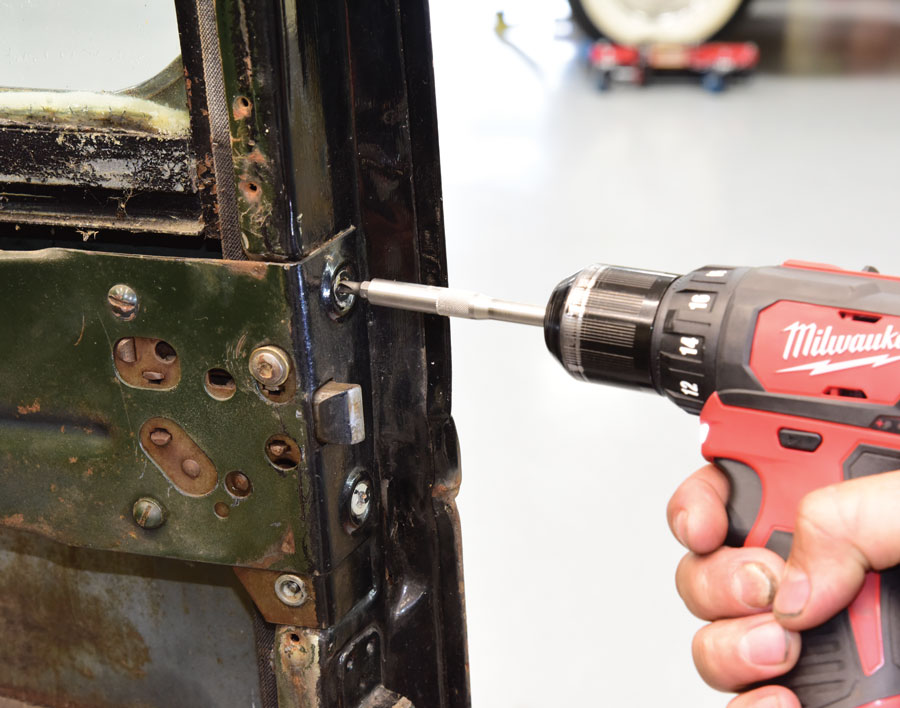
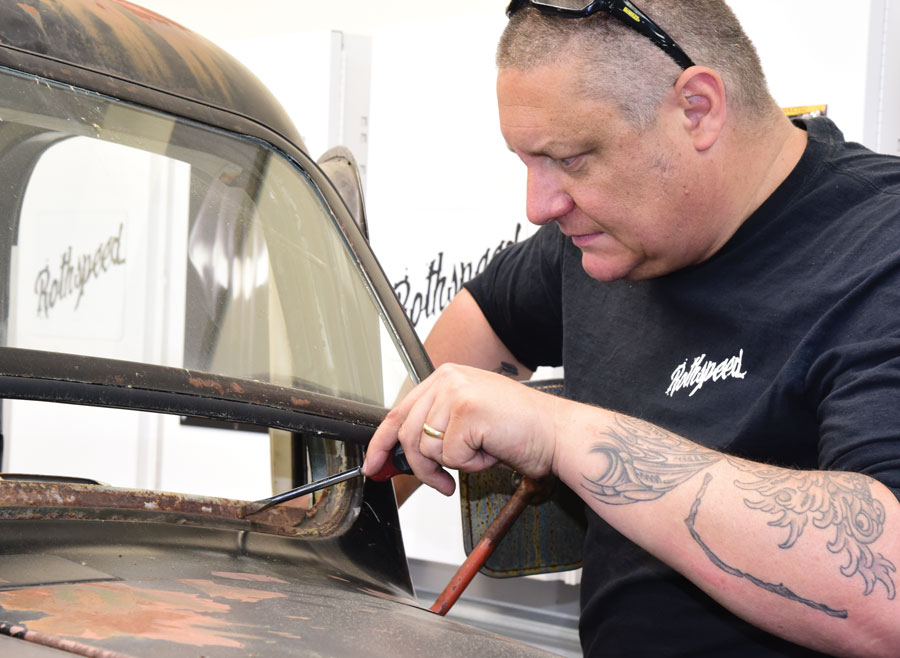
1: Getting started, Scott Roth from Rothspeed in Milton, VT, removed the screws to the upper door garnish moldings using a 5/32-inch clutch head drive
1. Getting started, Scott Roth from Rothspeed in Milton, VT, removed the screws to the upper door garnish moldings using a 5/32-inch clutch head drive. He followed by removing the molding from the doorframe.
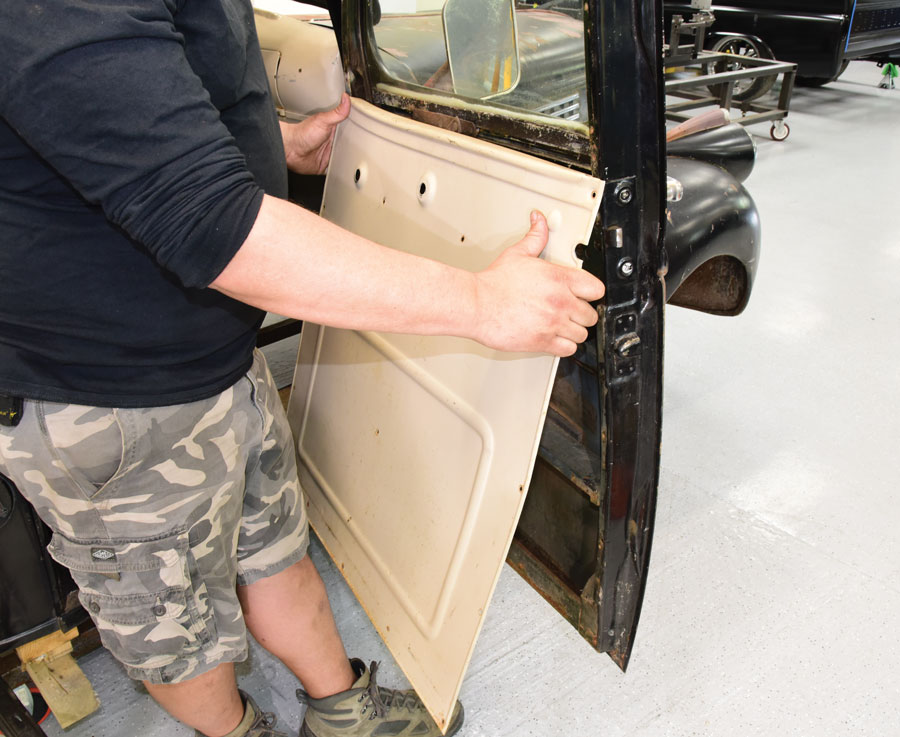
2: The inner door handle, window-riser handle, and door panel screws were removed next using the same clutch head drive
2. The inner door handle, window-riser handle, and door panel screws were removed next using the same clutch head drive. The door panel was then lifted from the door.
3: Pretty basic stuff to see once the door panel was off, including the window regulator, regulator support bar, and latch assembly
3. Pretty basic stuff to see once the door panel was off, including the window regulator, regulator support bar, and latch assembly. The door latch assembly was then removed using a cordless drill.
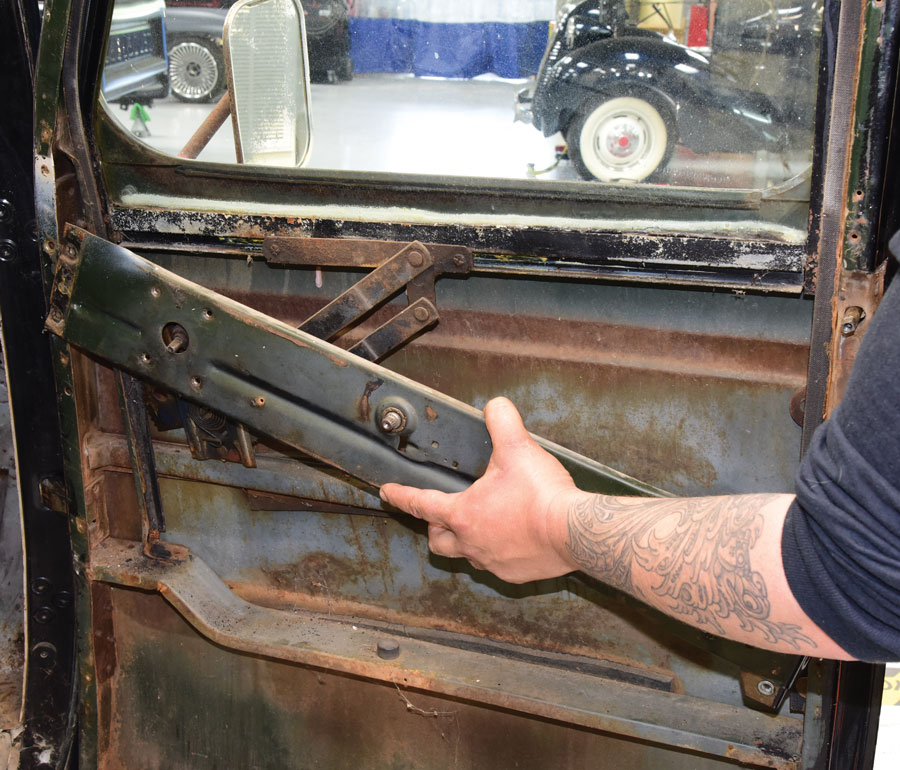
4: Next, the window regulator support bar and hardware were pulled from the inner doorframe
4. Next, the window regulator support bar and hardware were pulled from the inner doorframe.
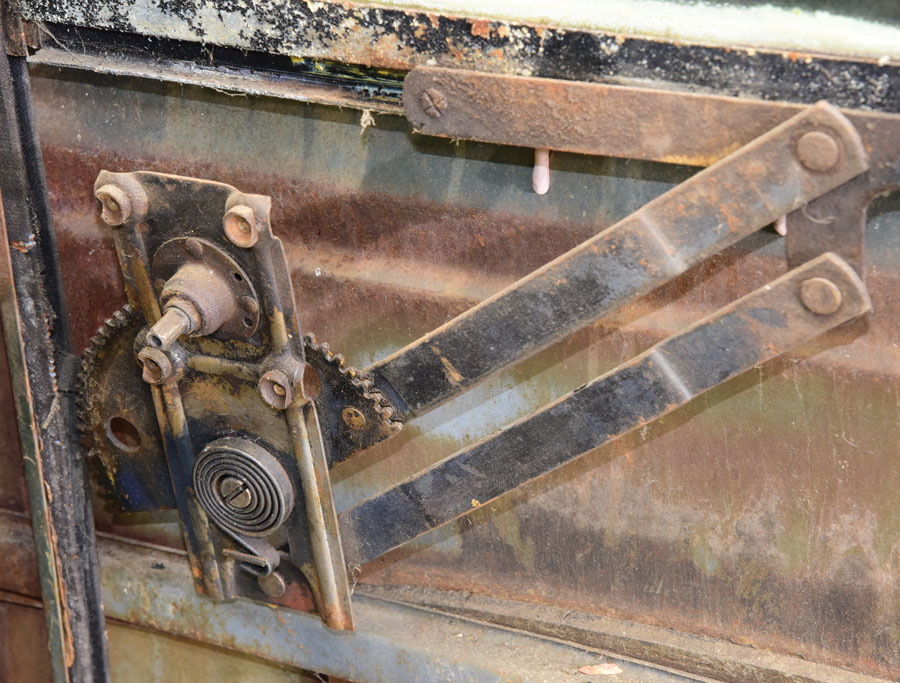
5: For being well-over 70 years old, the window regulator was still in decent condition
5. For being well-over 70 years old, the window regulator was still in decent condition. We still removed it, with plans to freshen it up on the bench. At this time the exterior door handle was also pulled.
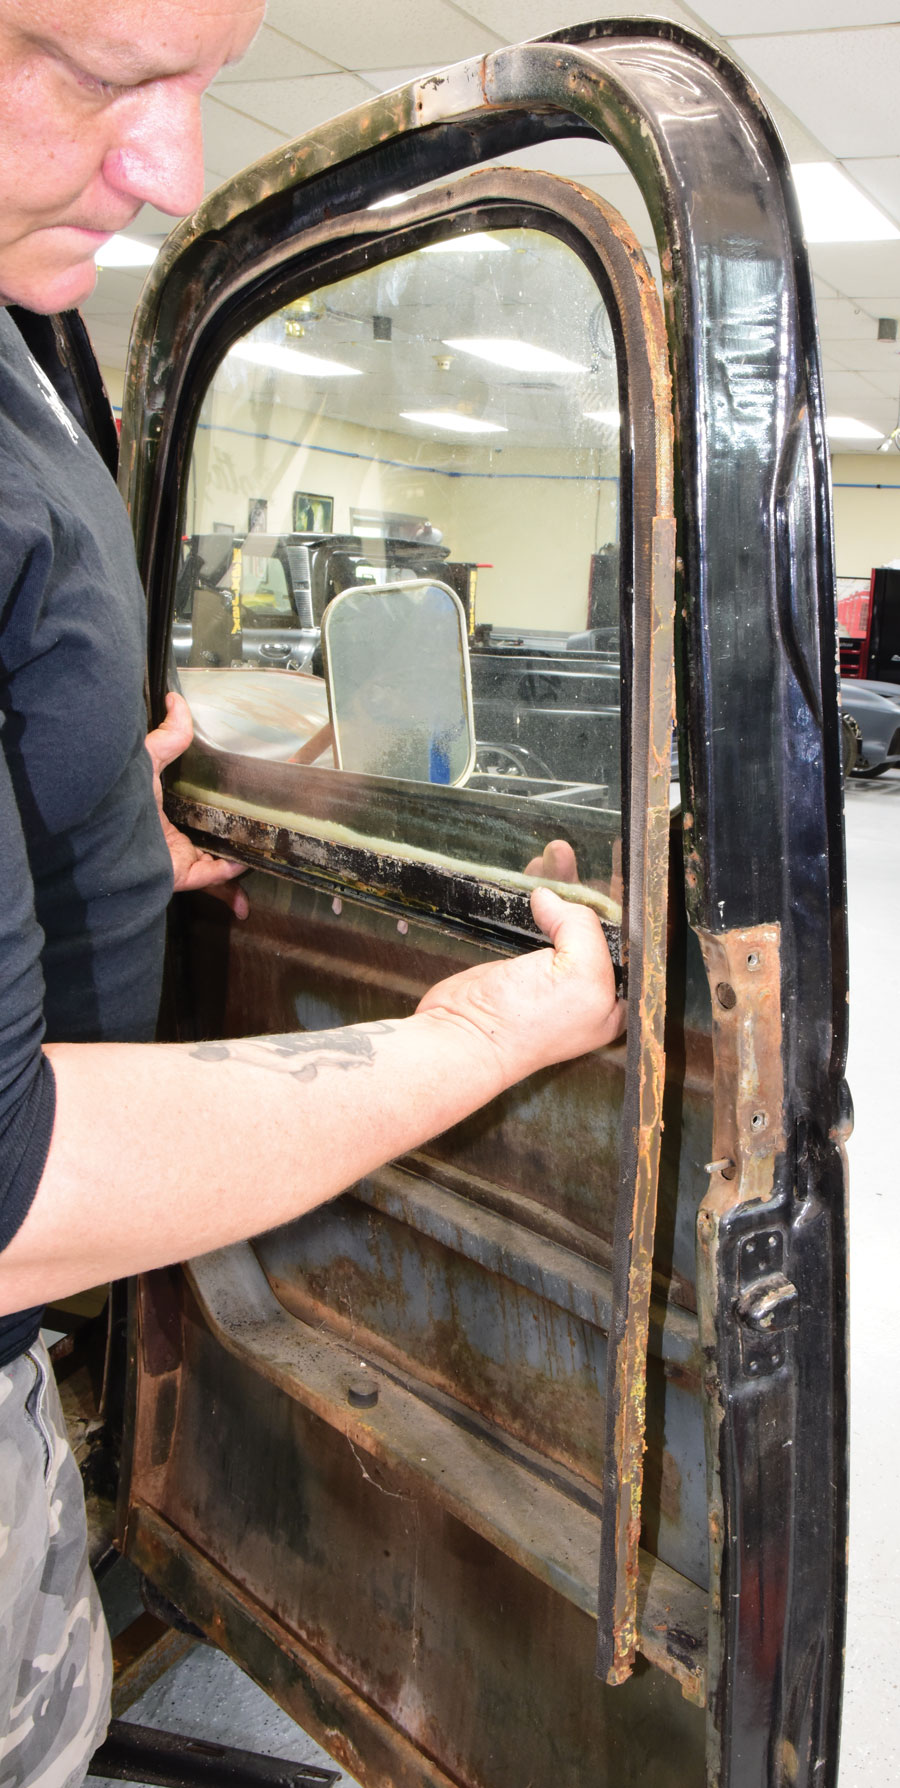
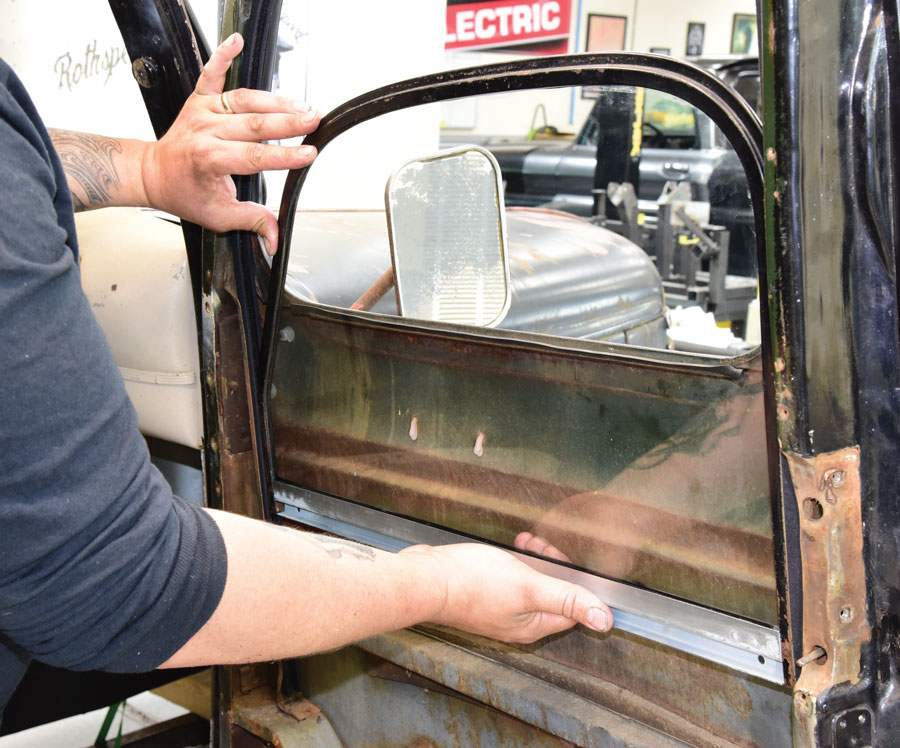
6: Finally, the door glass with frame and inner flex channel were removed to prepare them for a full rebuild with parts exclusively from Chevs of the 40’s
6. Finally, the door glass with frame and inner flex channel were removed to prepare them for a full rebuild with parts exclusively from Chevs of the 40’s.
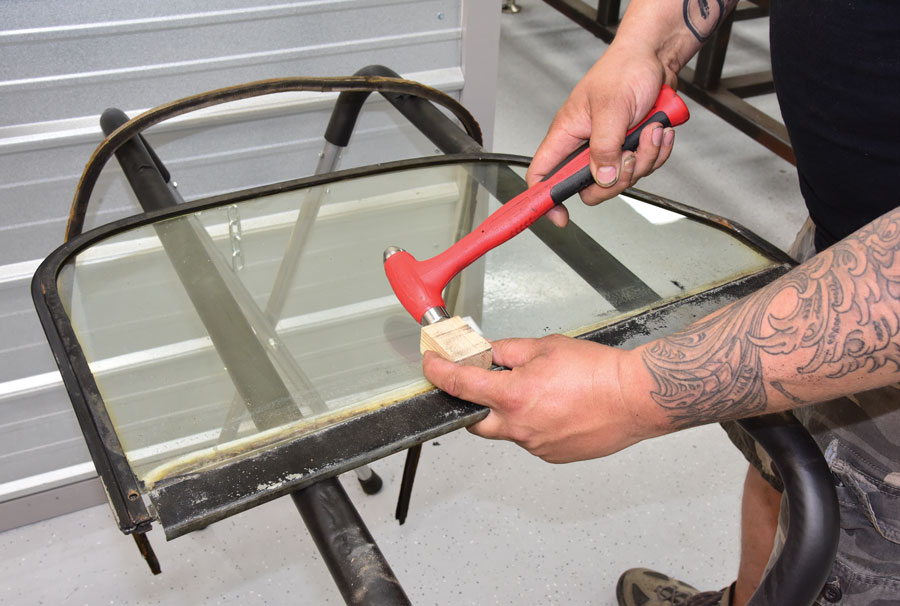
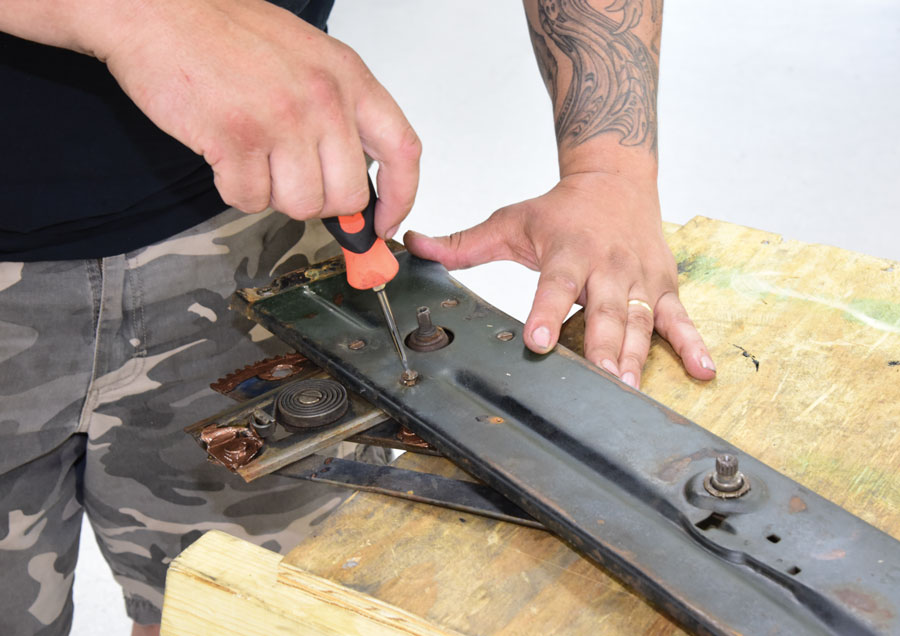
7: In disassembling the door glass, the outer frame lower screws were removed from both sides of the channel while secured on a padded stand
7. In disassembling the door glass, the outer frame lower screws were removed from both sides of the channel while secured on a padded stand. Next, a small wooden block and hammer were used to carefully tap and separate the lower glass channel loose from the setting tape.
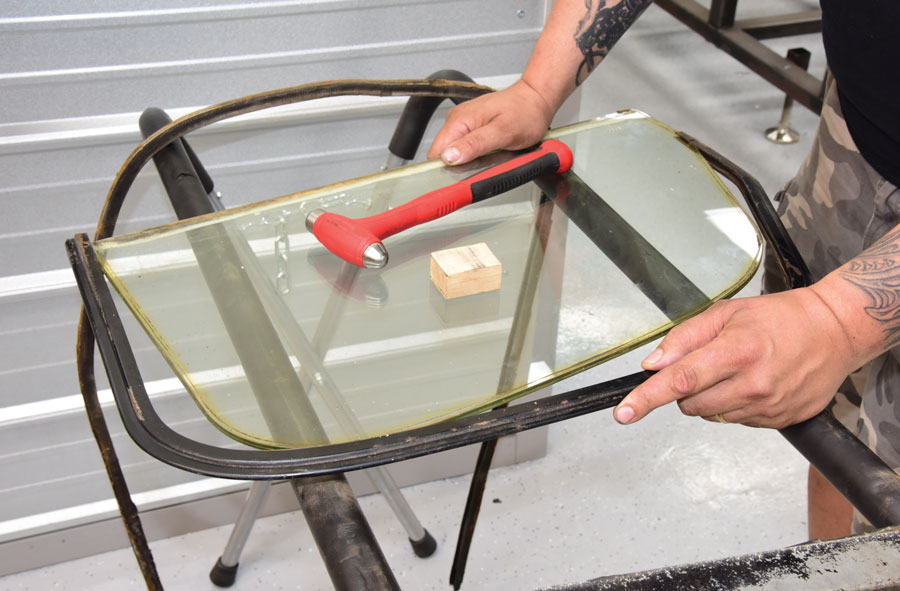
8: Once the lower channel was removed it allowed the glass to be pulled from the upper frame
8. Once the lower channel was removed it allowed the glass to be pulled from the upper frame. Note that this step takes time and care, especially since this was original glass sitting in the frame installed on the assembly line.
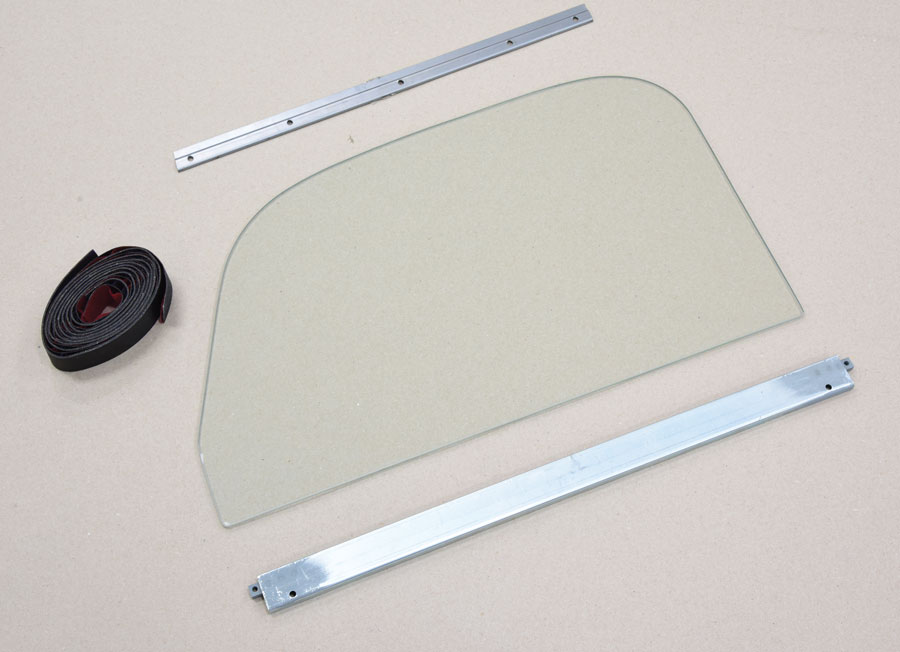
9: One call to Chevs of the 40’s was all it took for everything to update our door glass, including options for clear or tinted glass, fresh lower glass setting channels, and setting tape
9. One call to Chevs of the 40’s was all it took for everything to update our door glass, including options for clear or tinted glass, fresh lower glass setting channels, and setting tape.
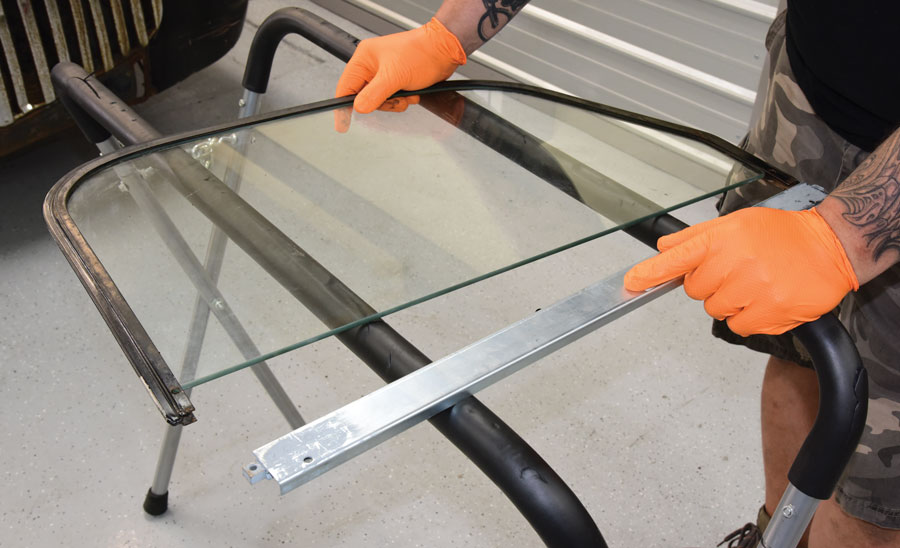
10: With the original door glass frame prepped and cleaned it was ready for installation of the new glass
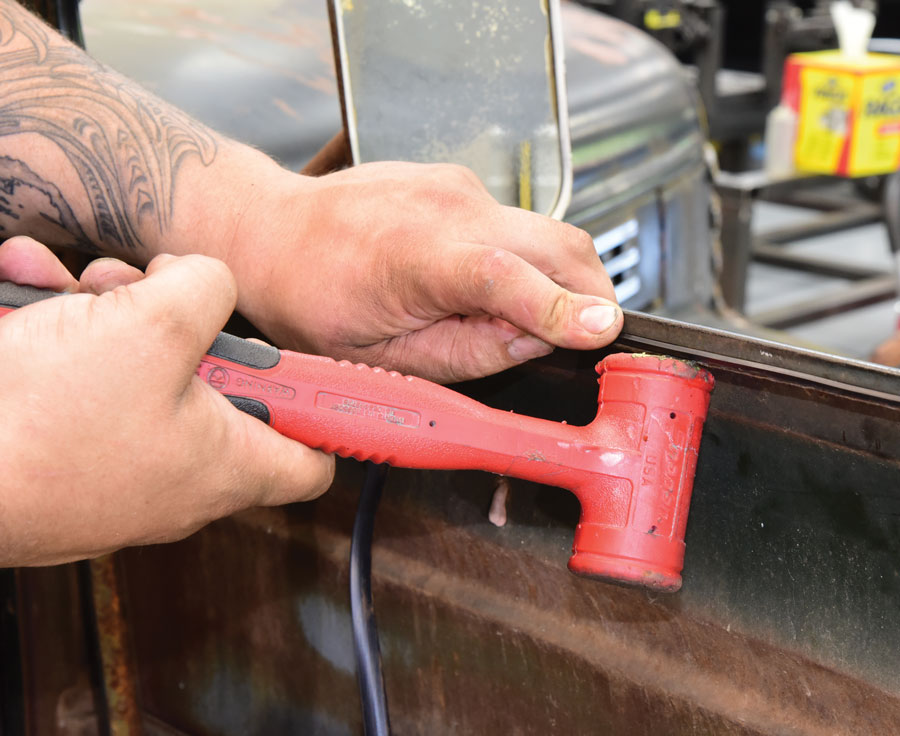
10. With the original door glass frame prepped and cleaned it was ready for installation of the new glass. Using a healthy coating of soapy water on the glass, a rubber mallet was used to carefully seat it in the frame. Fresh setting tape was then set into place on the new lower glass setting channel. Reassembly was a snap using the original hardware.
11: Years of abuse led to the outer and inner window wipers to deteriorate, requiring their replacement
11. Years of abuse led to the outer and inner window wipers to deteriorate, requiring their replacement. A set of pliers were first used to roll down the channel, followed by using a pick hook to remove what was left. The new wipers from Chevs of the 40’s were cut-to-fit and set in place using a small rubber mallet to reset the channel.
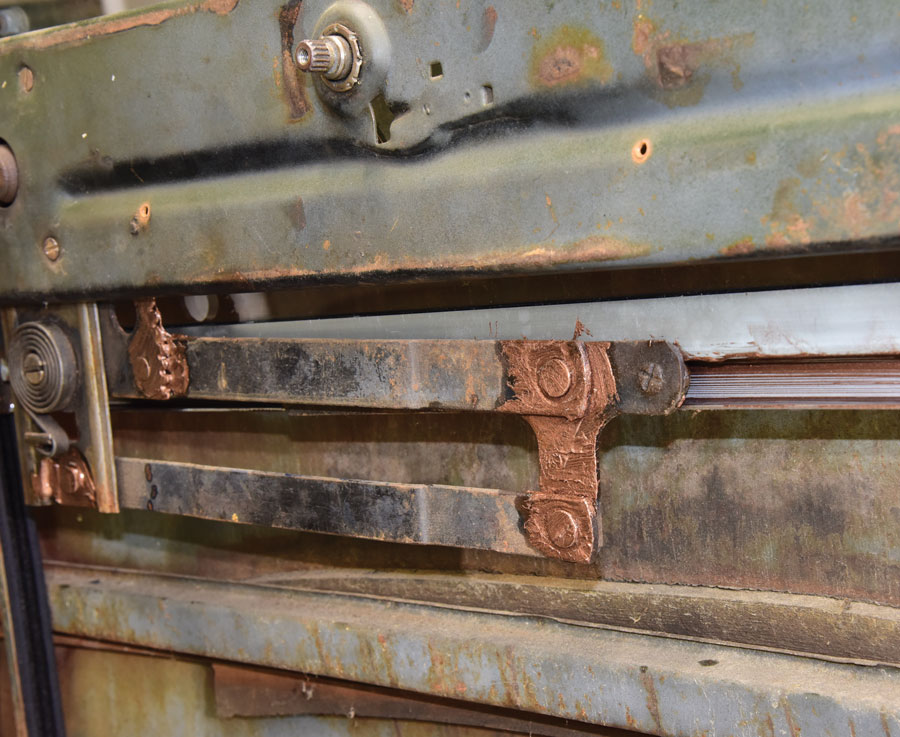
12: The nearly seized window regulator was decontaminated using brake cleaner along with a scrub brush and clean cloth while wearing eye protection
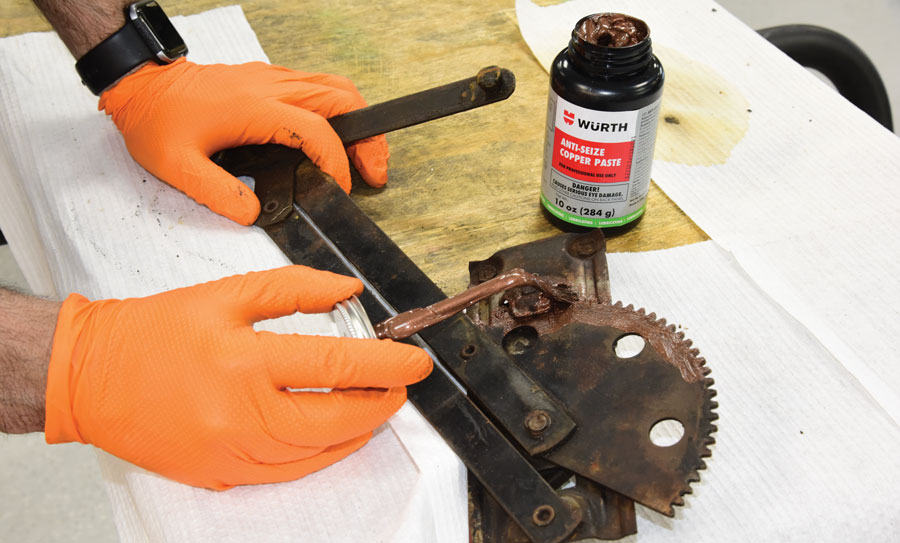
12. The nearly seized window regulator was decontaminated using brake cleaner along with a scrub brush and clean cloth while wearing eye protection. The mechanism was then fully lubricated with a healthy coating of Wurth Anti-Seize Copper Paste to renew its original smooth operation on all moving parts.
13: The window regulator and door latch assembly were then reinstalled to the window regulator support bar
13. The window regulator and door latch assembly were then reinstalled to the window regulator support bar.
14: Focusing on the door reassembly, a new flexible cloth-covered window channel from Chevs of the 40’s was measured and set in place
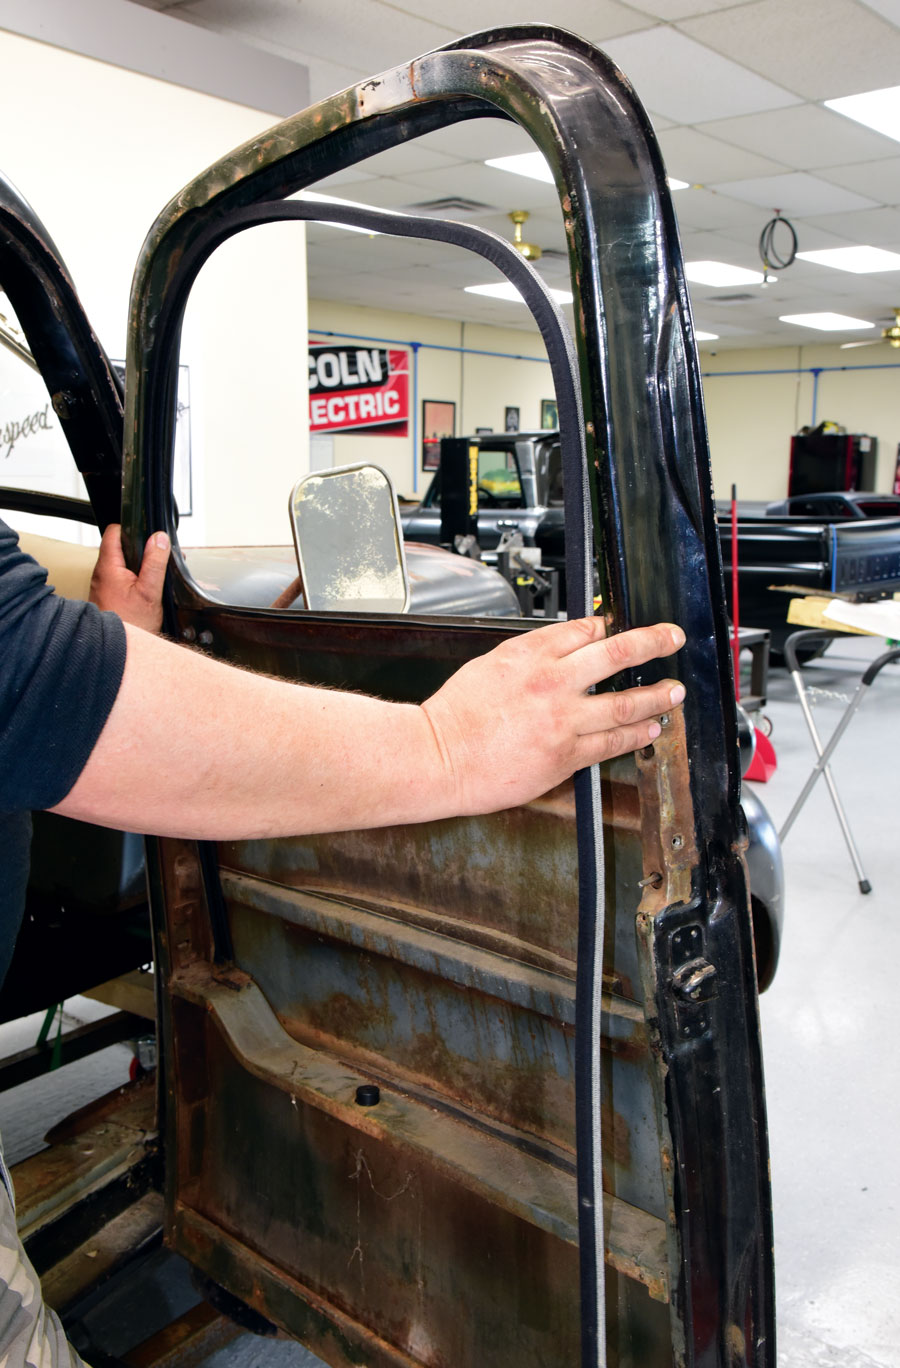
14. Focusing on the door reassembly, a new flexible cloth-covered window channel from Chevs of the 40’s was measured and set in place.
15: The freshly replaced new door glass and frame were then reinstalled and slid up into the window channel
15. The freshly replaced new door glass and frame were then reinstalled and slid up into the window channel.
16: This close-up lets you see the newly restored and lubricated window regulator mounted to the window regulator support bar mounted in place ready for action once again
16. This close-up lets you see the newly restored and lubricated window regulator mounted to the window regulator support bar mounted in place ready for action once again. Tired of the exterior door handle droop, we also reinstalled the original door handle with a fresh return spring eliminating the problem. We wrapped up by installing a new window stop bumper.
17: Back together and better than ever, the door now features fresh glass combined with new inner and outer rubber window wipers, lower glass setting channels, flexible cloth-covered window channel, and window stop bumpers all from Chevs of the 40’s
17. Back together and better than ever, the door now features fresh glass combined with new inner and outer rubber window wipers, lower glass setting channels, flexible cloth-covered window channel, and window stop bumpers all from Chevs of the 40’s.
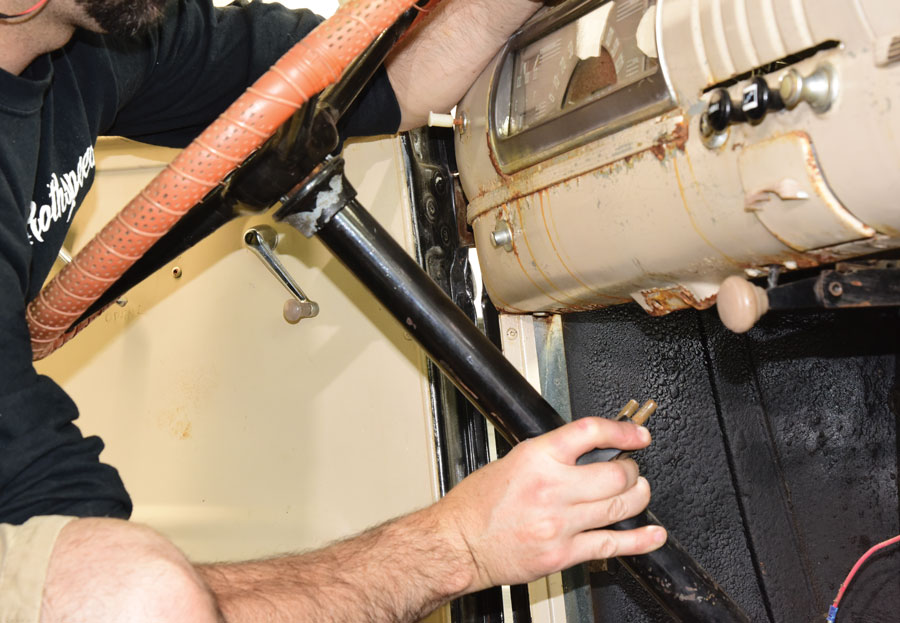
18: Moving onto the dash, team member Dylan King first dropped the steering column using a ½-inch socket and ratchet
18. Moving onto the dash, team member Dylan King first dropped the steering column using a ½-inch socket and ratchet. With the steering box previously removed, it allowed him to pull the column and wheel as one unit.
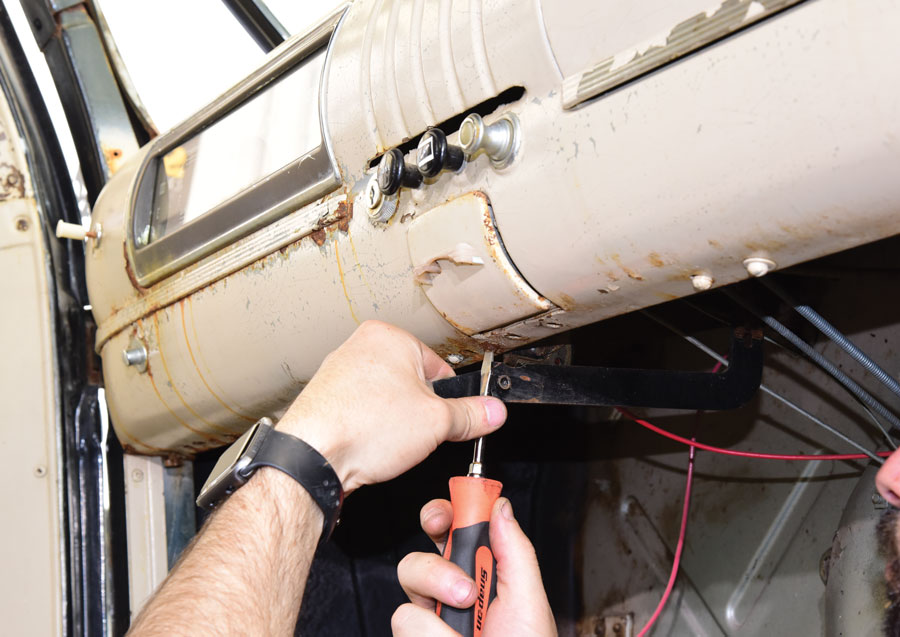
19: After extending the windshield, a flathead screwdriver was used to remove all screws from the top lip of the dash
19. After extending the windshield, a flathead screwdriver was used to remove all screws from the top lip of the dash.
20: From the bottom of the dash, all anchoring screws were removed as well as the support bracket for the cowl vent mechanism
20. From the bottom of the dash, all anchoring screws were removed as well as the support bracket for the cowl vent mechanism. At this time you should also disconnect and tag all wiring, cables, and senders from the rear of the dash prior to its removal.
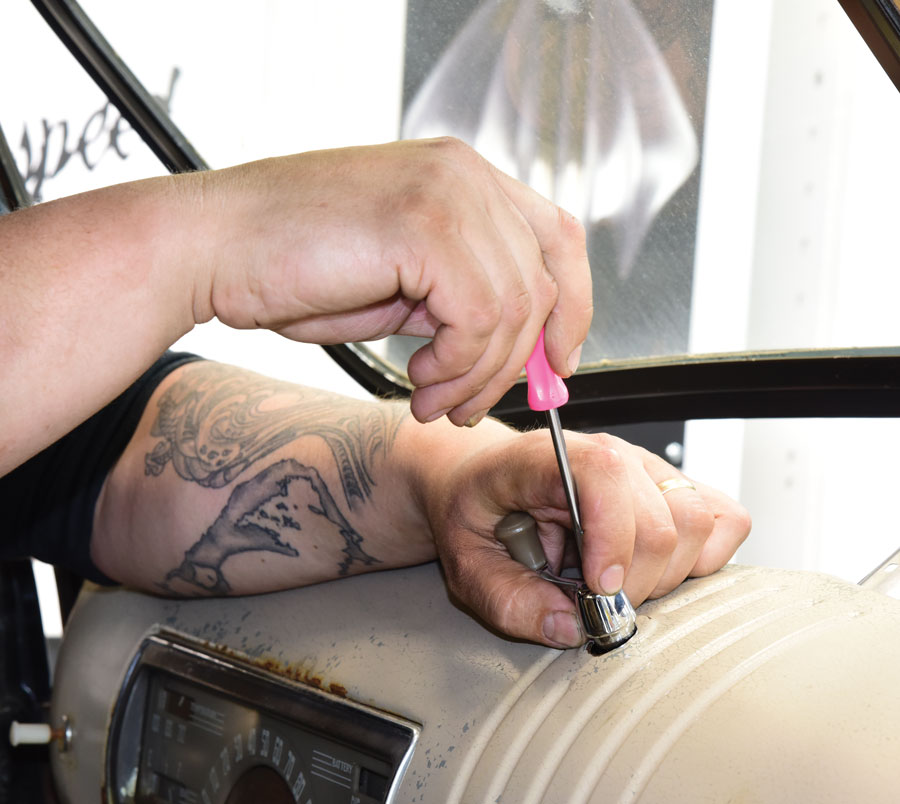
21: Finally, using a 5/32-inch clutch head drive the windshield crank was removed
21. Finally, using a 5/32-inch clutch head drive the windshield crank was removed.
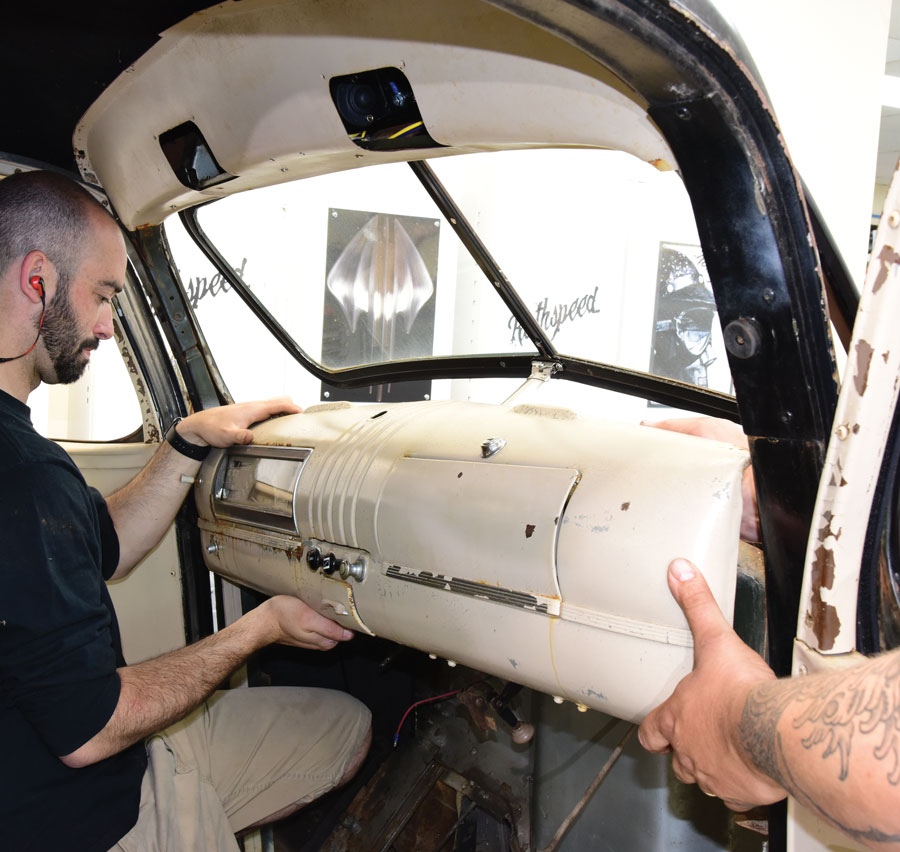
22: The dash was then carefully removed for the first time since the truck was built
22. The dash was then carefully removed for the first time since the truck was built. It’s a good idea to have some extra help at this step, if available.
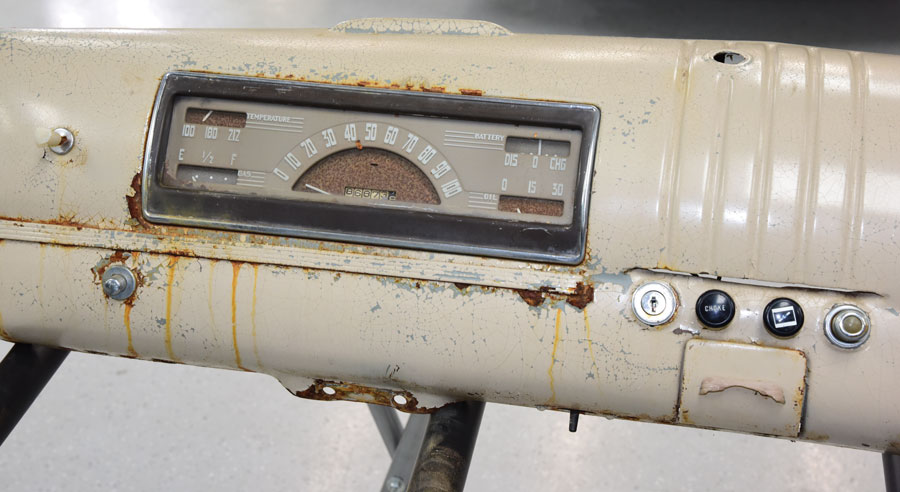
23: There’s nothing cooler than a dash with a nicely weathered look, however it’s obvious the instrument cluster has taken quite a beating over time, along with all of the individual switches, including those for the ignition, headlights, and windshield wipers
23. There’s nothing cooler than a dash with a nicely weathered look, however it’s obvious the instrument cluster has taken quite a beating over time, along with all of the individual switches, including those for the ignition, headlights, and windshield wipers.
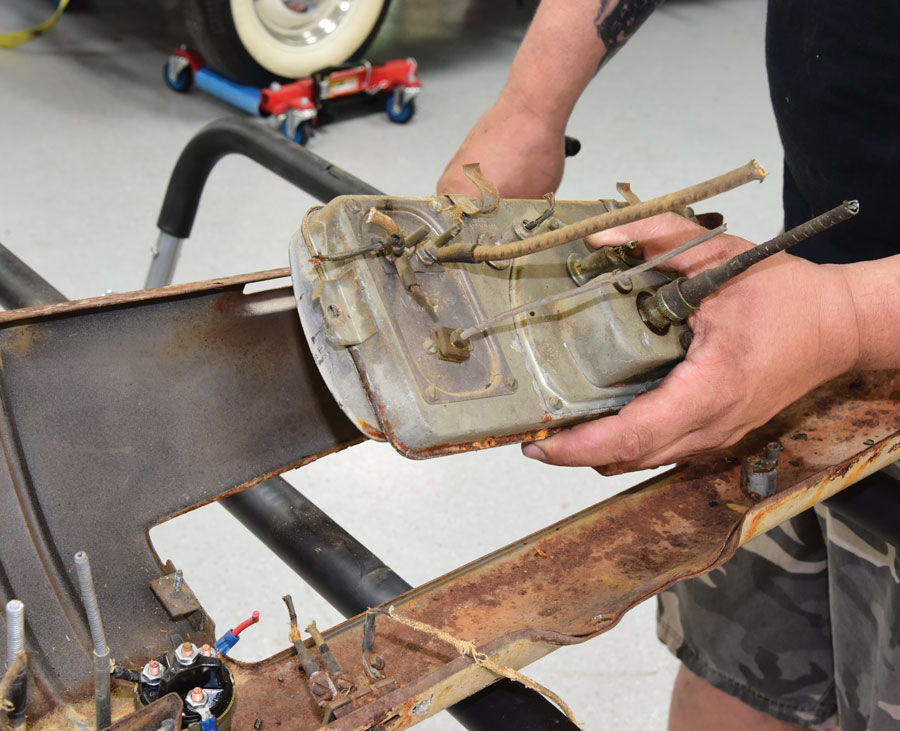
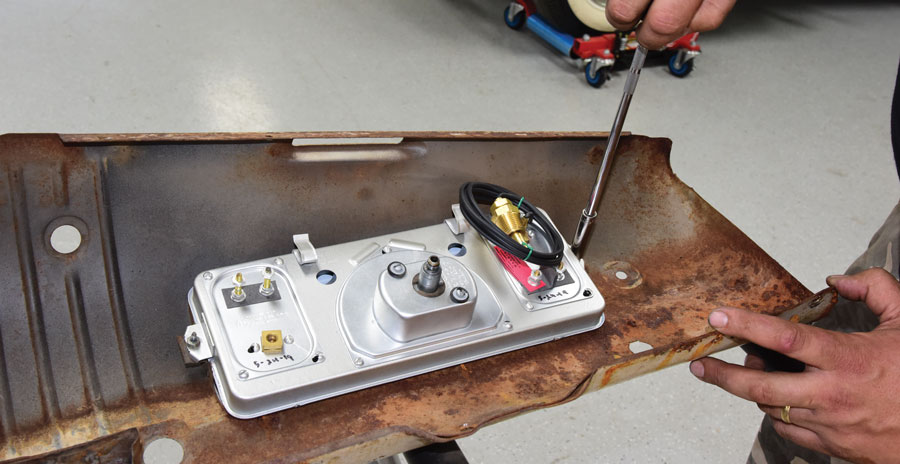
24: Flipping the dash over, we were greeted by a horrendous mess where the original wiring harness was in rough shape
24. Flipping the dash over, we were greeted by a horrendous mess where the original wiring harness was in rough shape. Knowing our plan to rewire the truck, a set of wire cutters were used to cut it all away. An 11/32-inch socket was then used to carefully free the cluster from the back of the dash as it will be returned for use as a core in a future rebuild.
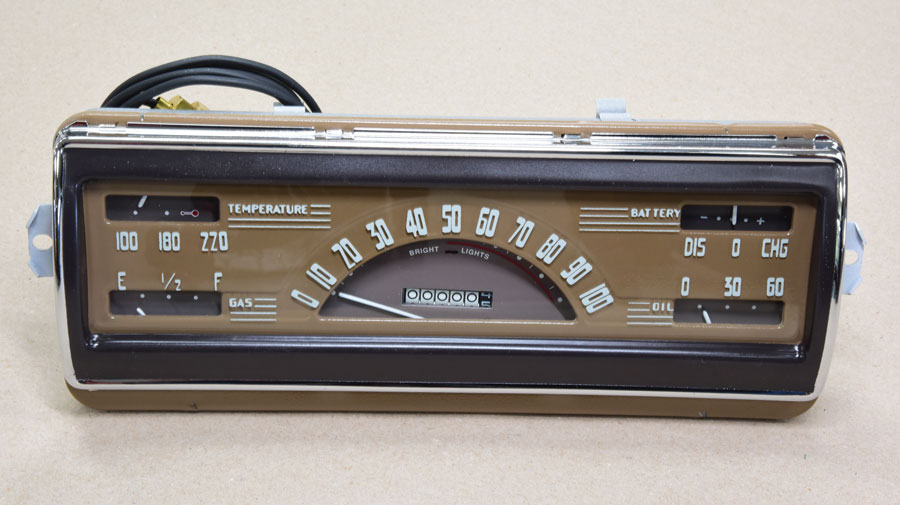
25: There’s nothing like a freshly restored gauge cluster from Chevs of the 40’s to bring new life to your dash
25. There’s nothing like a freshly restored gauge cluster from Chevs of the 40’s to bring new life to your dash. This cluster was rebuilt for V-8 use and was ready for installation to start monitoring our engine’s vitals.
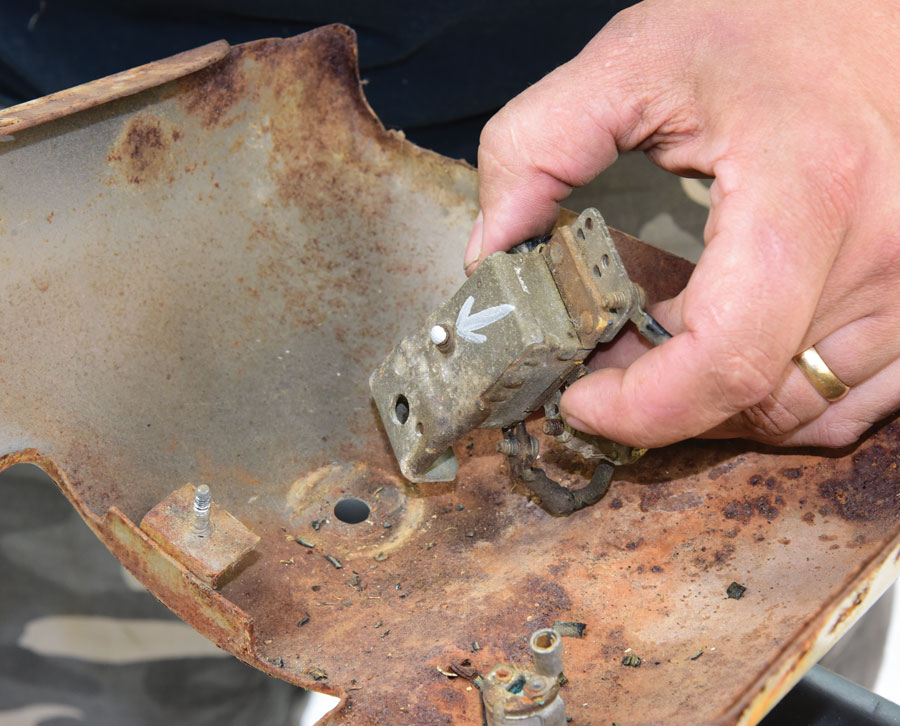
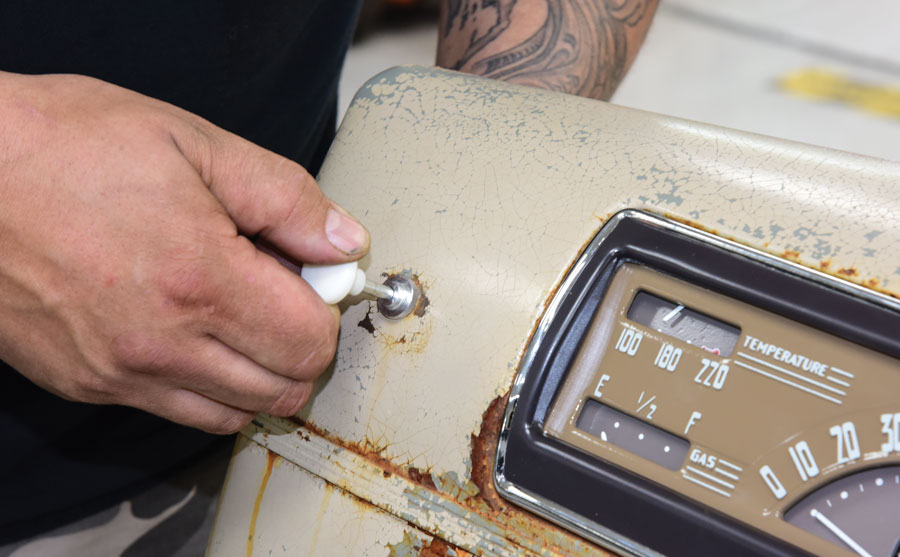
26: When removing the headlight switch, spin off the dash knob and then depress the shaft release button (we marked it with an arrow) to separate the shaft from the switch and follow by unscrewing the dash bezel
26. When removing the headlight switch, spin off the dash knob and then depress the shaft release button (we marked it with an arrow) to separate the shaft from the switch and follow by unscrewing the dash bezel.
27: By unscrewing the bezel, we were able to remove the existing electric key starter conversion from the dash
27. By unscrewing the bezel, we were able to remove the existing electric key starter conversion from the dash. Next, the remaining switches were removed from the dash, including those for the choke, lighter, and windshield wipers.
28: Next, from the rear of the dash the restored instrument cluster, complete with new chrome bezel, was set in place using the original hardware using an 11/32-inch socket
28. Next, from the rear of the dash the restored instrument cluster, complete with new chrome bezel, was set in place using the original hardware using an 11/32-inch socket.
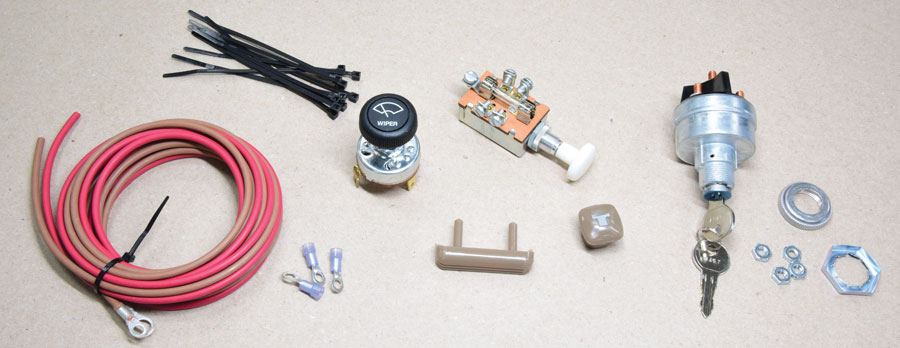
29: When it comes to rebuilding your dash, Chevs of the 40’s stocks everything you’ll need to take on the job
29. When it comes to rebuilding your dash, Chevs of the 40’s stocks everything you’ll need to take on the job. Here you can see parts we selected, including a fresh four-position key starter conversion kit, headlight and windshield wiper switches, and dash accessories.
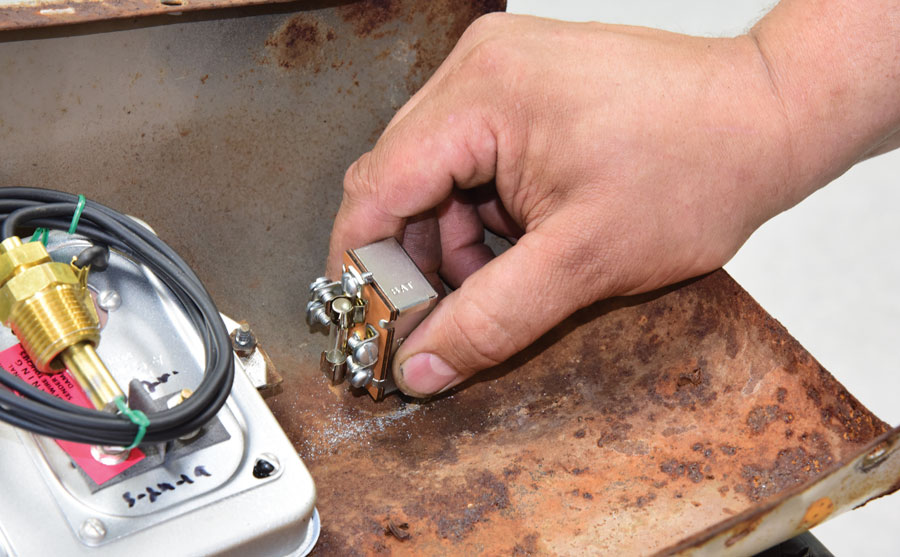
31: For plenty of dependability, a new 30-amp headlight switch was then installed
30-31. For plenty of dependability, a new 30-amp headlight switch was then installed.
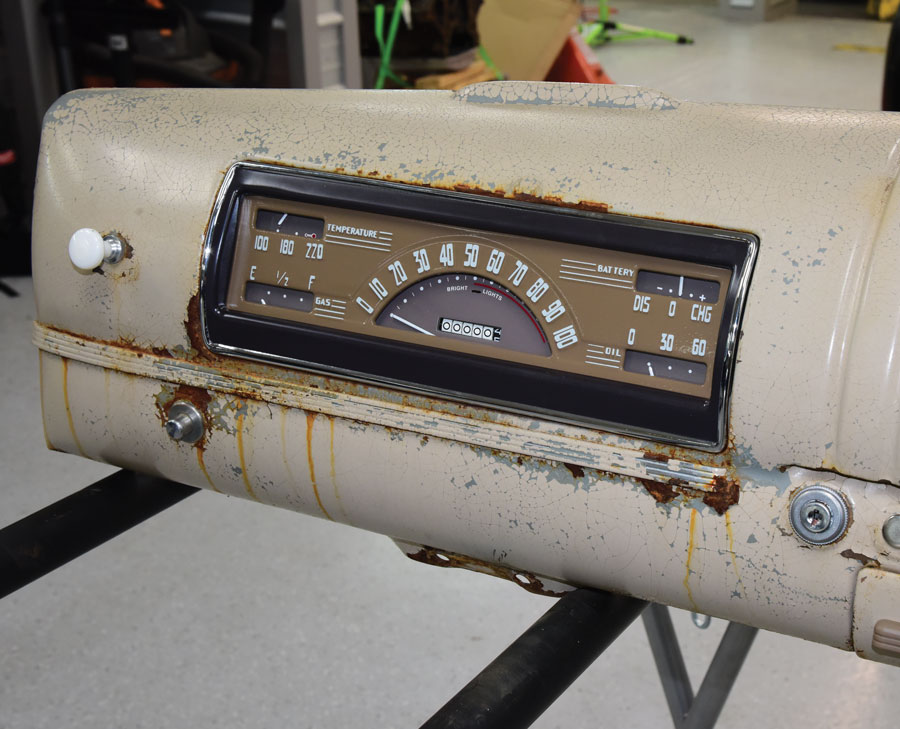
32: Here you can clearly see the difference as the driver side of the dash looks amazing once again with the restored gauge cluster installed, complemented by new switches and even a fresh pull handle or the ashtray
32. Here you can clearly see the difference as the driver side of the dash looks amazing once again with the restored gauge cluster installed, complemented by new switches and even a fresh pull handle or the ashtray.
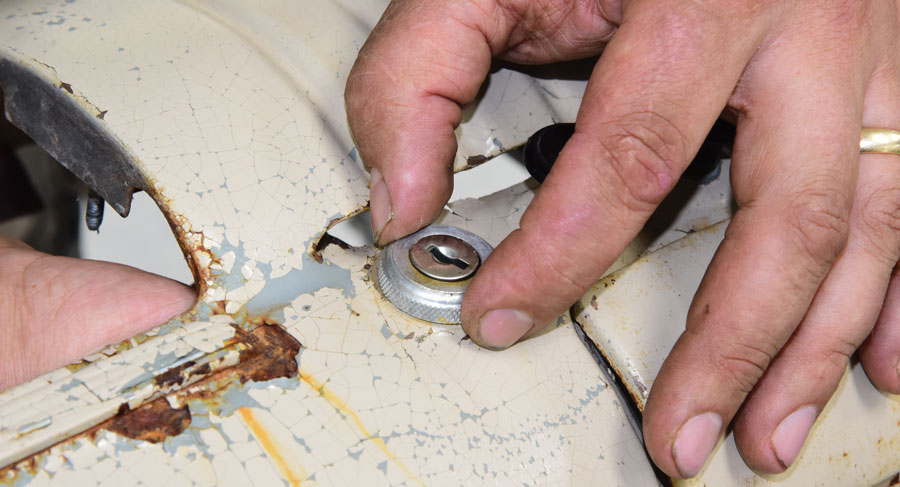
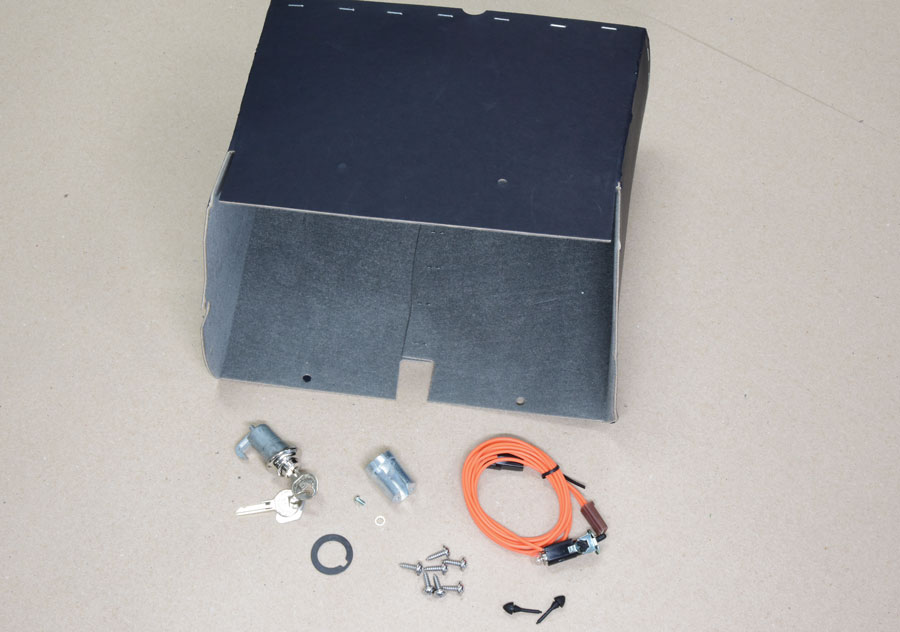
33: Since the original glovebox was beyond repair and the latch mechanism was frozen it was time to freshen it up
33. Since the original glovebox was beyond repair and the latch mechanism was frozen it was time to freshen it up. Chevs of the 40’s supplied us with everything needed to handle the job, including a cloth-lined glovebox with mounting hardware, glovebox lock and retainer, lock-to-door gasket, rubber bumpers, and light kit.
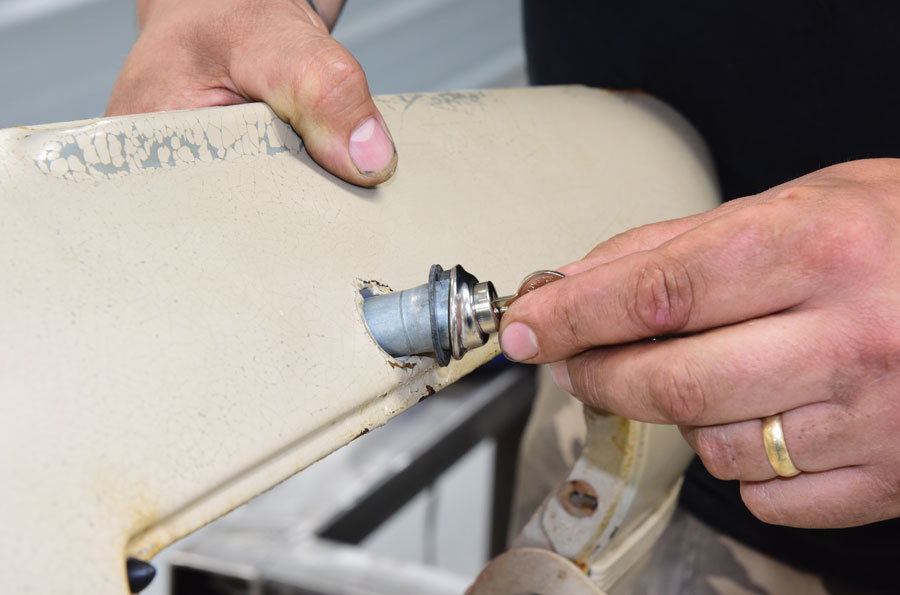
34: Here you can see the final install of the new glovebox lock assembly and gasket, which were set into place and secured with the retainer using a standard flathead screwdriver
34. Everything went together in a snap. Here you can see the final install of the new glovebox lock assembly and gasket, which were set into place and secured with the retainer using a standard flathead screwdriver. The dash was then reinstalled to the cab using the original hardware.
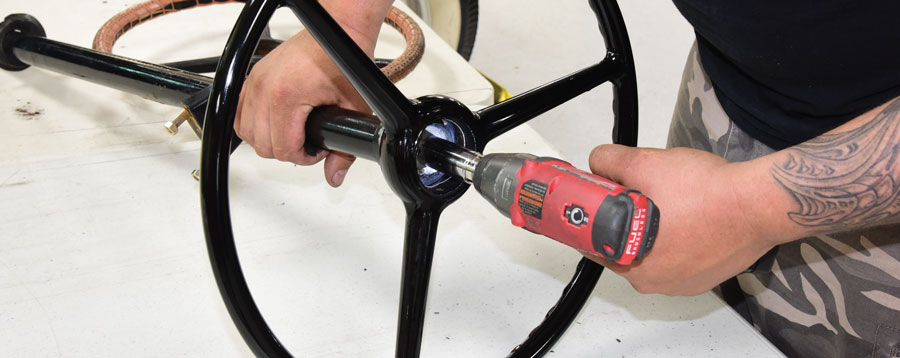
35: The final icing was the installation of a new steering wheel since the original was in rough shape due to years of abuse
35. The final icing was the installation of a new steering wheel since the original was in rough shape due to years of abuse. Chevs of the 40’s offers factory replacement wheels in your choice of brown or black as well as offering new U-bolt mounts, column insulator, horn button, and spring, if needed.
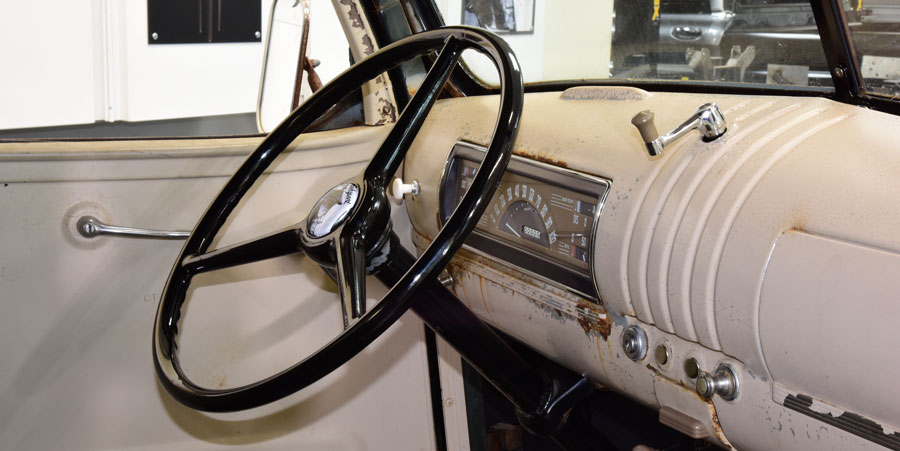
36: The end result showcases the updates to the dash and steering of the 1946 Chevy to keep us well informed of our speed and engine’s vitals as we prepare it to hit the streets once again
36. The end result showcases the updates to the dash and steering of the 1946 Chevy to keep us well informed of our speed and engine’s vitals as we prepare it to hit the streets once again.

 SOURCES

CHEVS of the 40’s
(877) 735-0587
chevsofthe40s.com
ROTHSPEED
(802) 777-2886
rothspeed.com