


CTP Tech
InTheGarageMedia.com
Green 1995 Chevy OBS truck parked inside a garage warehouse.
THE STEERING UPGRADE YOU DIDN'T KNOW YOU NEEDED
Flaming River’s 1988-98 OBS Rack-and-Pinion Conversion
BY ROB FORTIER IMAGES BY THE AUTHOR
Y

ou would think, for the most part, that the factory-equipped power steering on your average 1988-98 OBS 1/2-ton would be sufficient for modern, everyday driving. We sure thought so. Then, suddenly, after the success of their bolt-in 1967-72 C10 rack-and-pinion conversion (followed by the 1973-87 version), Flaming River introduces their all-new rack conversion for the OBS (PN FR371KTPWNC) … so we began to wonder, is there room for improvement?

Having installed both aforementioned conversion kits on the C10 and Squarebody, we were quite confident that Flaming River knew what they were doing, so we searched for a conversion candidate and what we came up with was more than we bargained for—in a good way.

Hoping for a superclean yet mostly stock ’88-98 shortbed, we ended up getting Ruben Pina’s insanely clean (more like stunning) ’95 Chevy—recently painted, upholstered, and full Stone Custom Fab suspension with 22-inch Hot Rods by Boyd wheels and Wilwood six-piston brakes, respectively. In other words, seemingly the perfect candidate for a rack-and-pinion upgrade. But, even Pina himself was skeptical at first; not sure why anyone would want or need to perform such an upgrade, but was more than happy to allow us and Flaming River to show him why!

Unlike the previous two cradle swaps we performed, this one for the OBS does not require an additional power steering upgrade in order to perform at optimum level—it works with the OE C1500 pump, making the installation that much easier. Again, even with Pina’s upgraded Stone Custom Fab control arms, which included aftermarket tie-rod assemblies as well as a torsion-style sway bar, the Flaming River cradle was an easy, direct bolt-in requiring no modifications. It’s a good idea to ensure your factory column is in good, usable condition (not requiring a rebuild; Flaming River does offer aftermarket replacements if so) before performing the job, as well and making sure your factory front suspension is as well! The basic rack install shouldn’t take more than day’s work, providing your truck meets all the above requirements!

After we’d spent the better part of a day with Pina’s Chevy, we sent him off for a quick alignment before giving his period-correct OBS a real road test. But when he got back to us after that following weekend, we weren’t prepared for what he had to report back: “…when I’m doing a hard turn or a U-turn, I don’t feel the ‘clicking over’ like it used to, almost as if the old parts had play in them. Also, when you’re driving and there are grooves in the road, the truck doesn’t track anymore—it just stays straight. Like I said, I didn’t even know I needed this or that this [kit] would fix all of those driveability issues!”

That’s not a magazine editor hyping up someone’s part(s); that’s true testimonial straight from the truck owner himself! Doesn’t get much better than that, now does it?
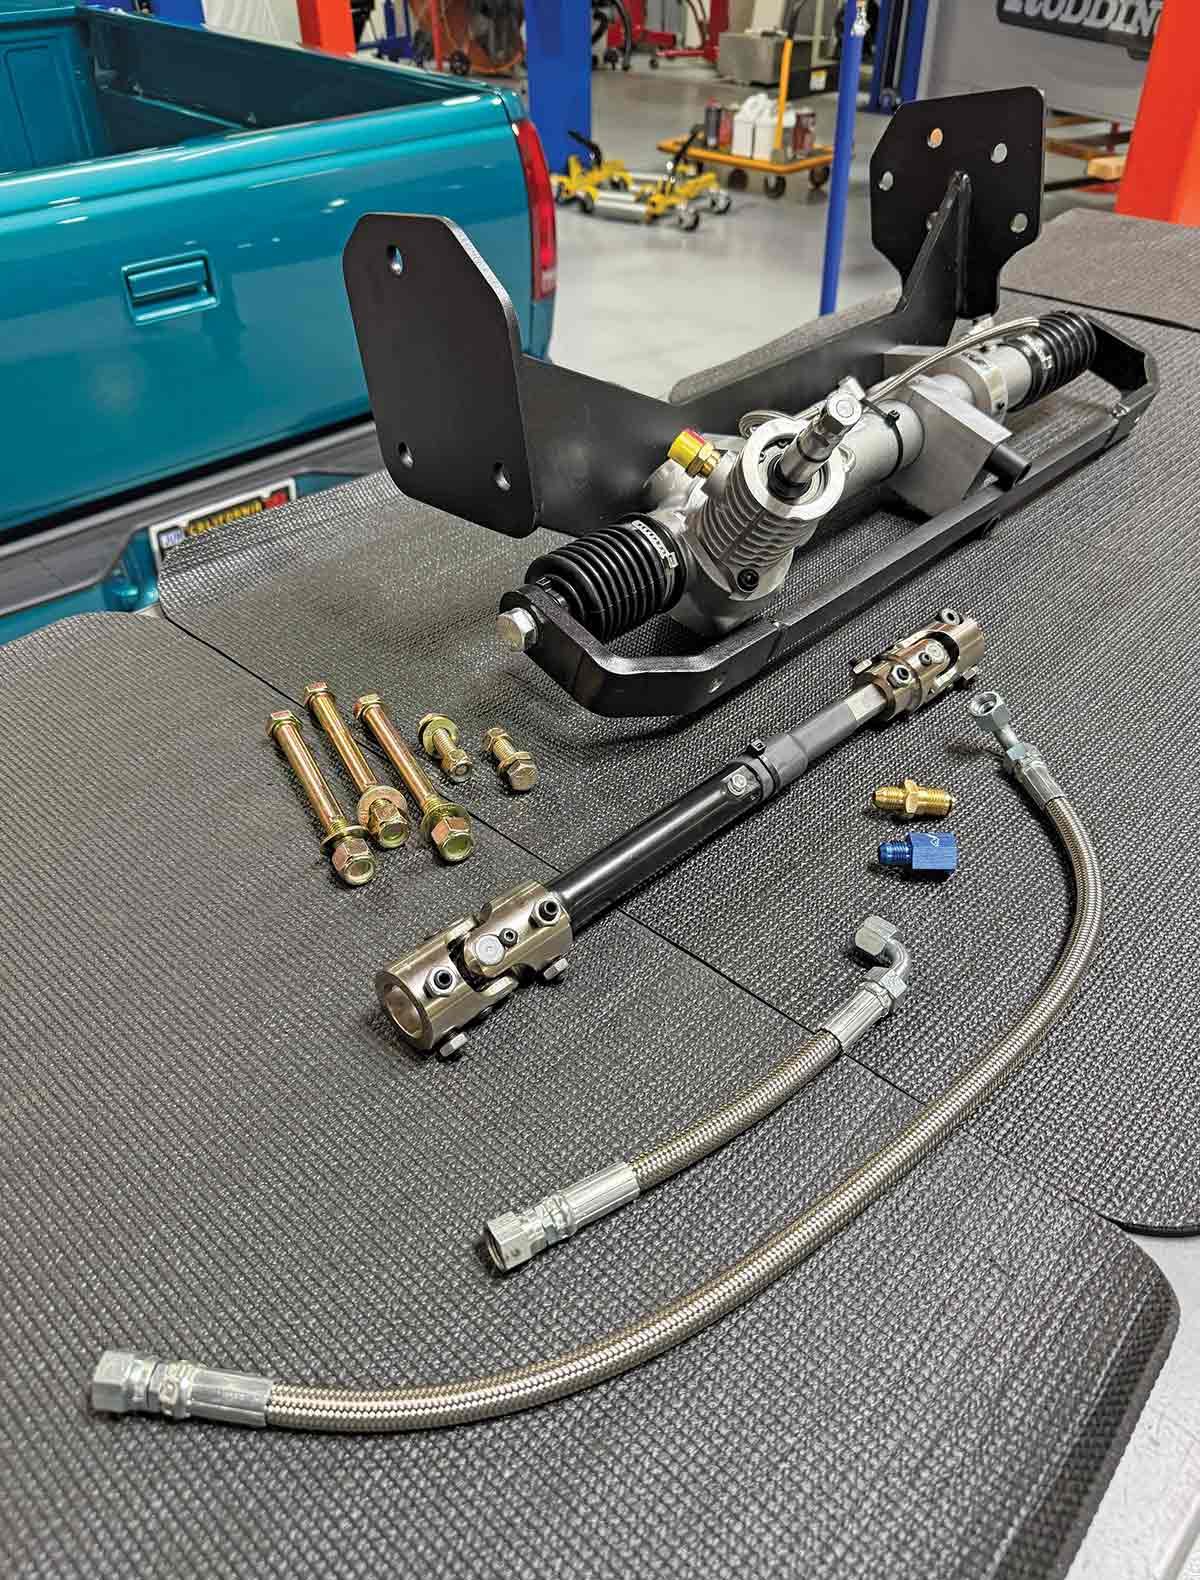
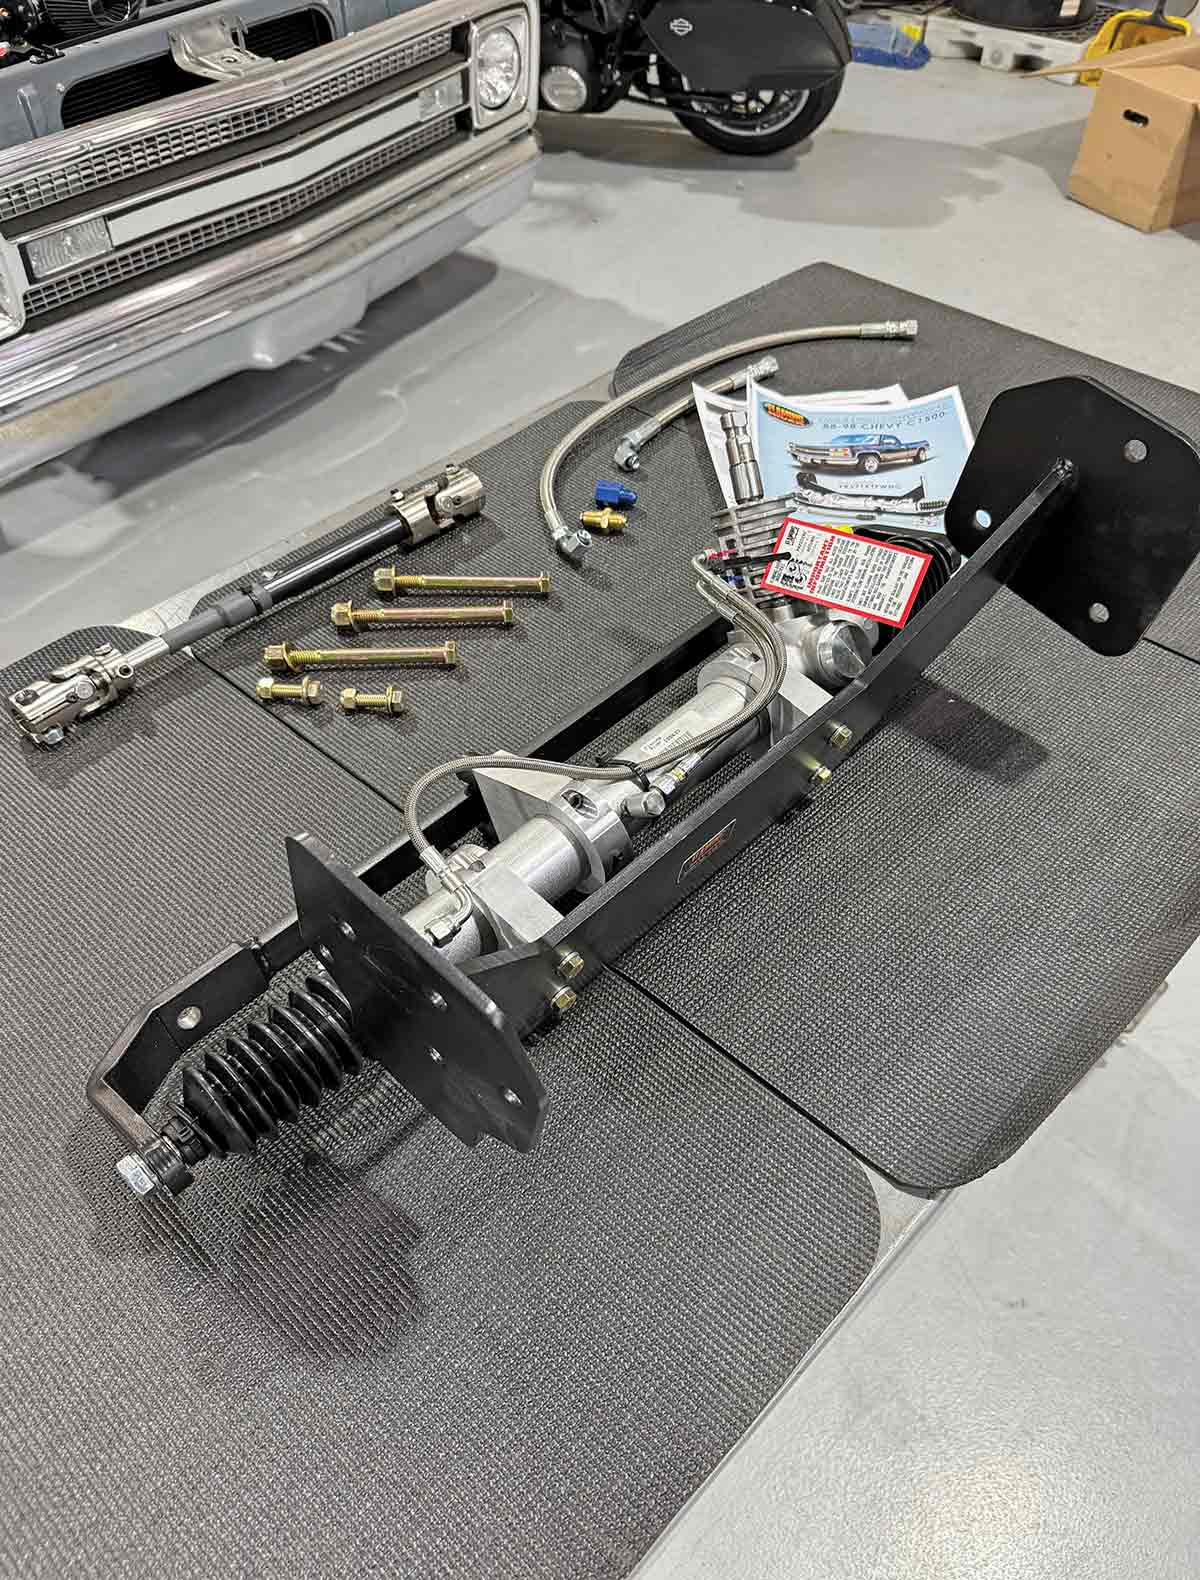
Flaming River rack-and-pinion conversion kit components.
Unboxed rack-and-pinion conversion kit with hardware.
1-2. Flaming River’s all-new rack-and-pinion conversion kit for the 1988-98 Chevrolet/GMC C1500 (PN FR371KT-PWNC); the steering upgrade you never knew you needed for your OBS! Kit is designed to work with OE suspension (stock or up to 6-inch drop), and as you’re about to see, with aftermarket suspension components, too! Also, the kit uses the factory power steering pump, further simplifying this bolt-in install!
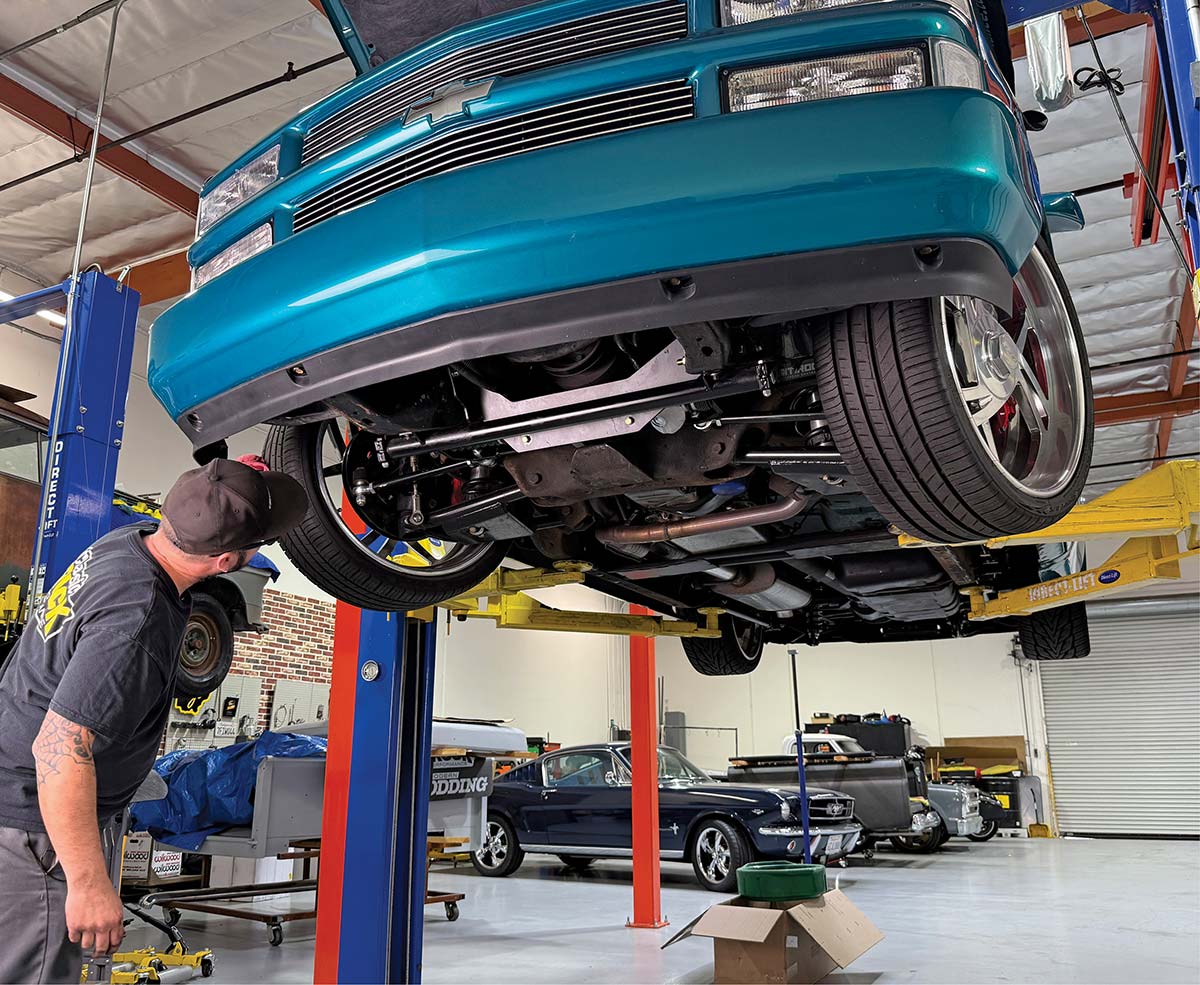
Under-chassis view of Ruben Pina's customized 1995 Chevy.
3. Ruben Pina was gracious enough to let us “borrow” his beautifully redone ’95 Chevy for the install, which we’d assumed still had OE control arms, when in actuality it had Stone Custom Fab’s full coilover conversion kit with Wilwood disc brakes. No problem!
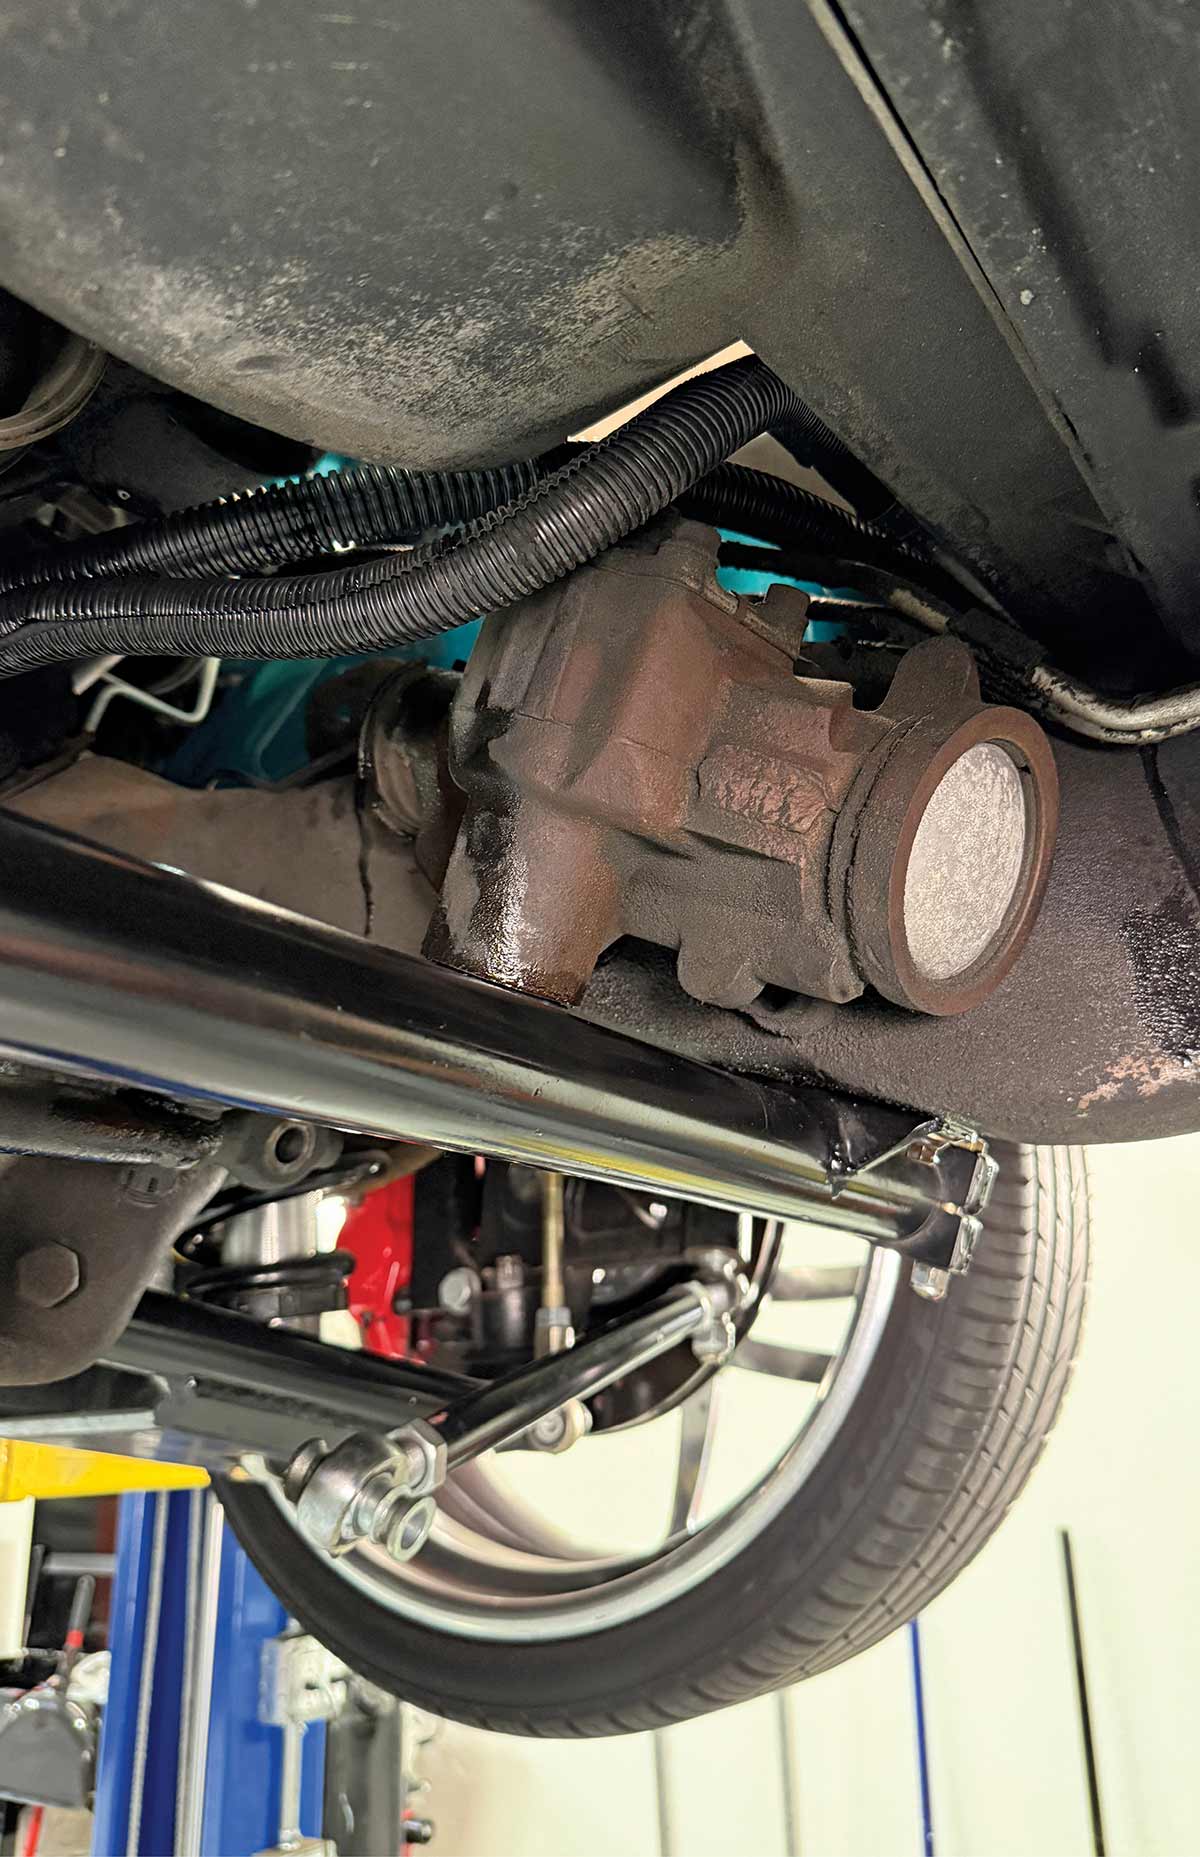
Original steering box and column in 1995 Chevy.
4. What we knew Pina’s OBS had was the original steering system, from the box to the column …
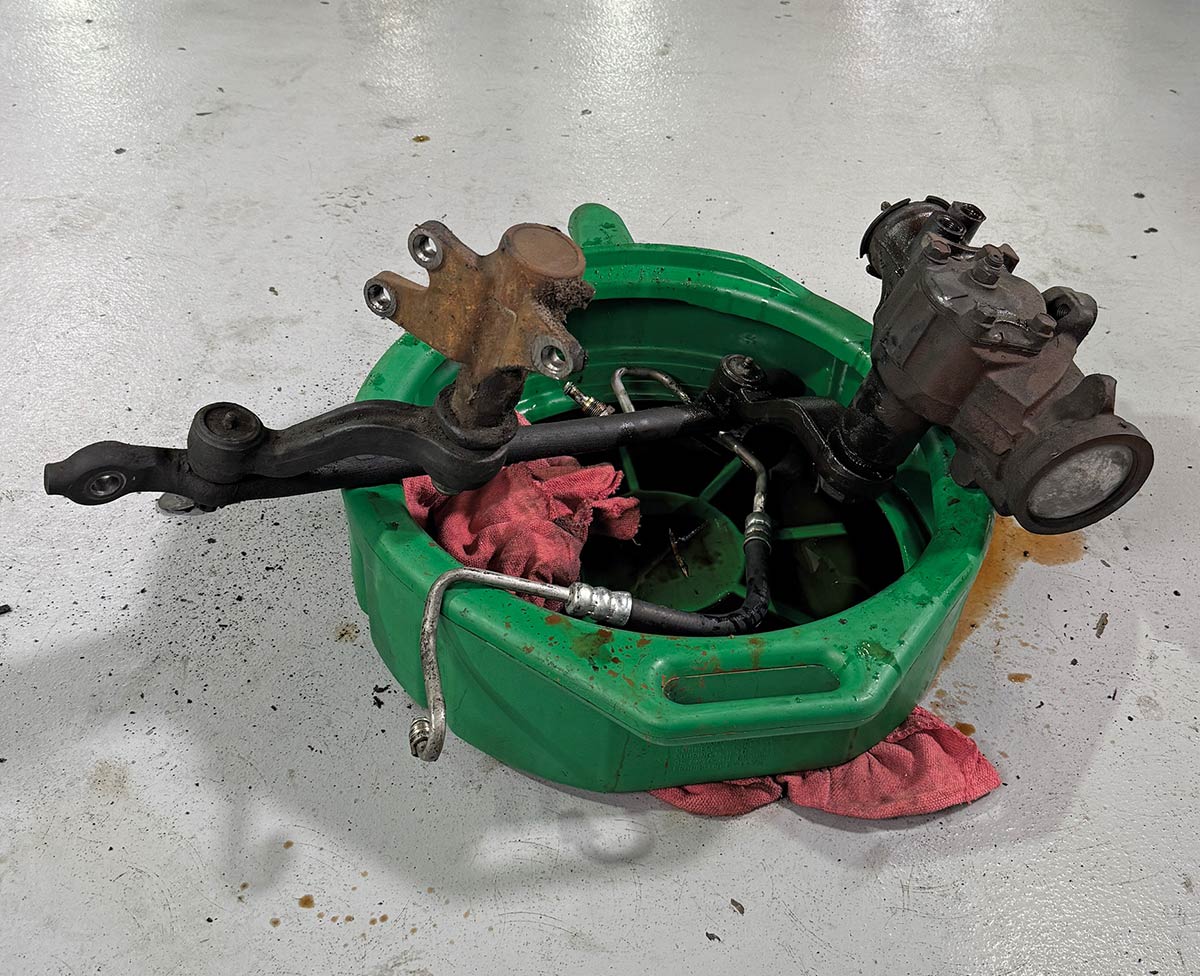
Worn steering components removed from the truck.
Empty chassis space after steering box removal.
5-6. … the former of which proved ultimately to be well worn was removed entirely and stored properly, leaving us with a semi-fresh canvas in which to work with around the Stone Custom Fab components.
Drilling out tapered holes on the travel bar.
7. We will note, however, that since the upgraded tie rods use heims rather than tie-rod ends, the Flaming River “travel bar” (centerlink) must have its tapered holes drilled out to 5/8 for the hardware replacing the tapered pins.
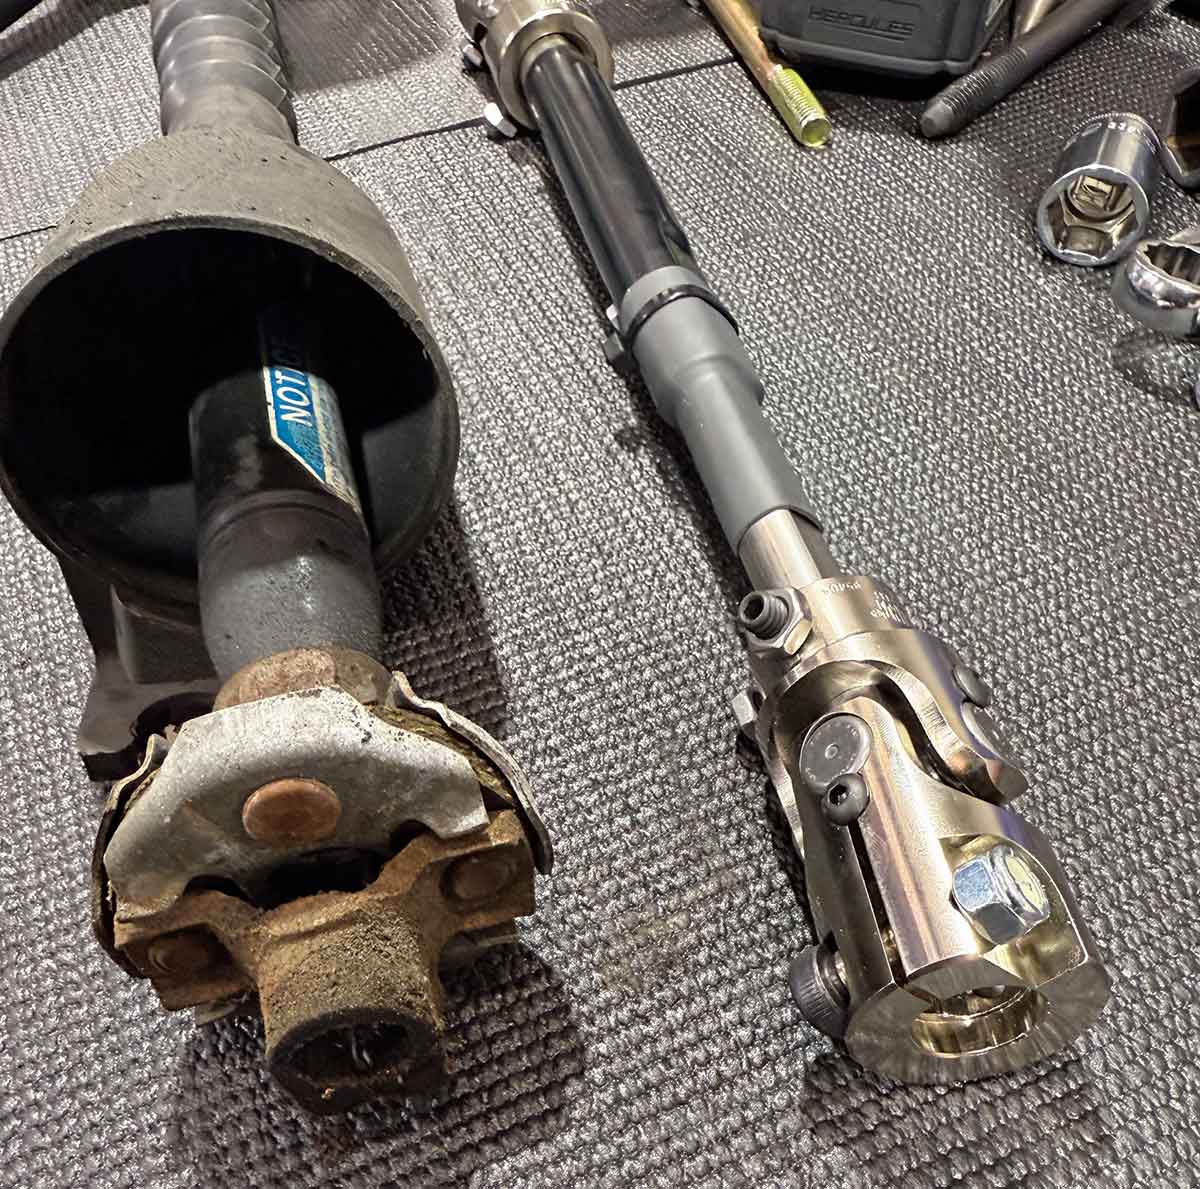
Removing the original equipment collapsible steering shaft.
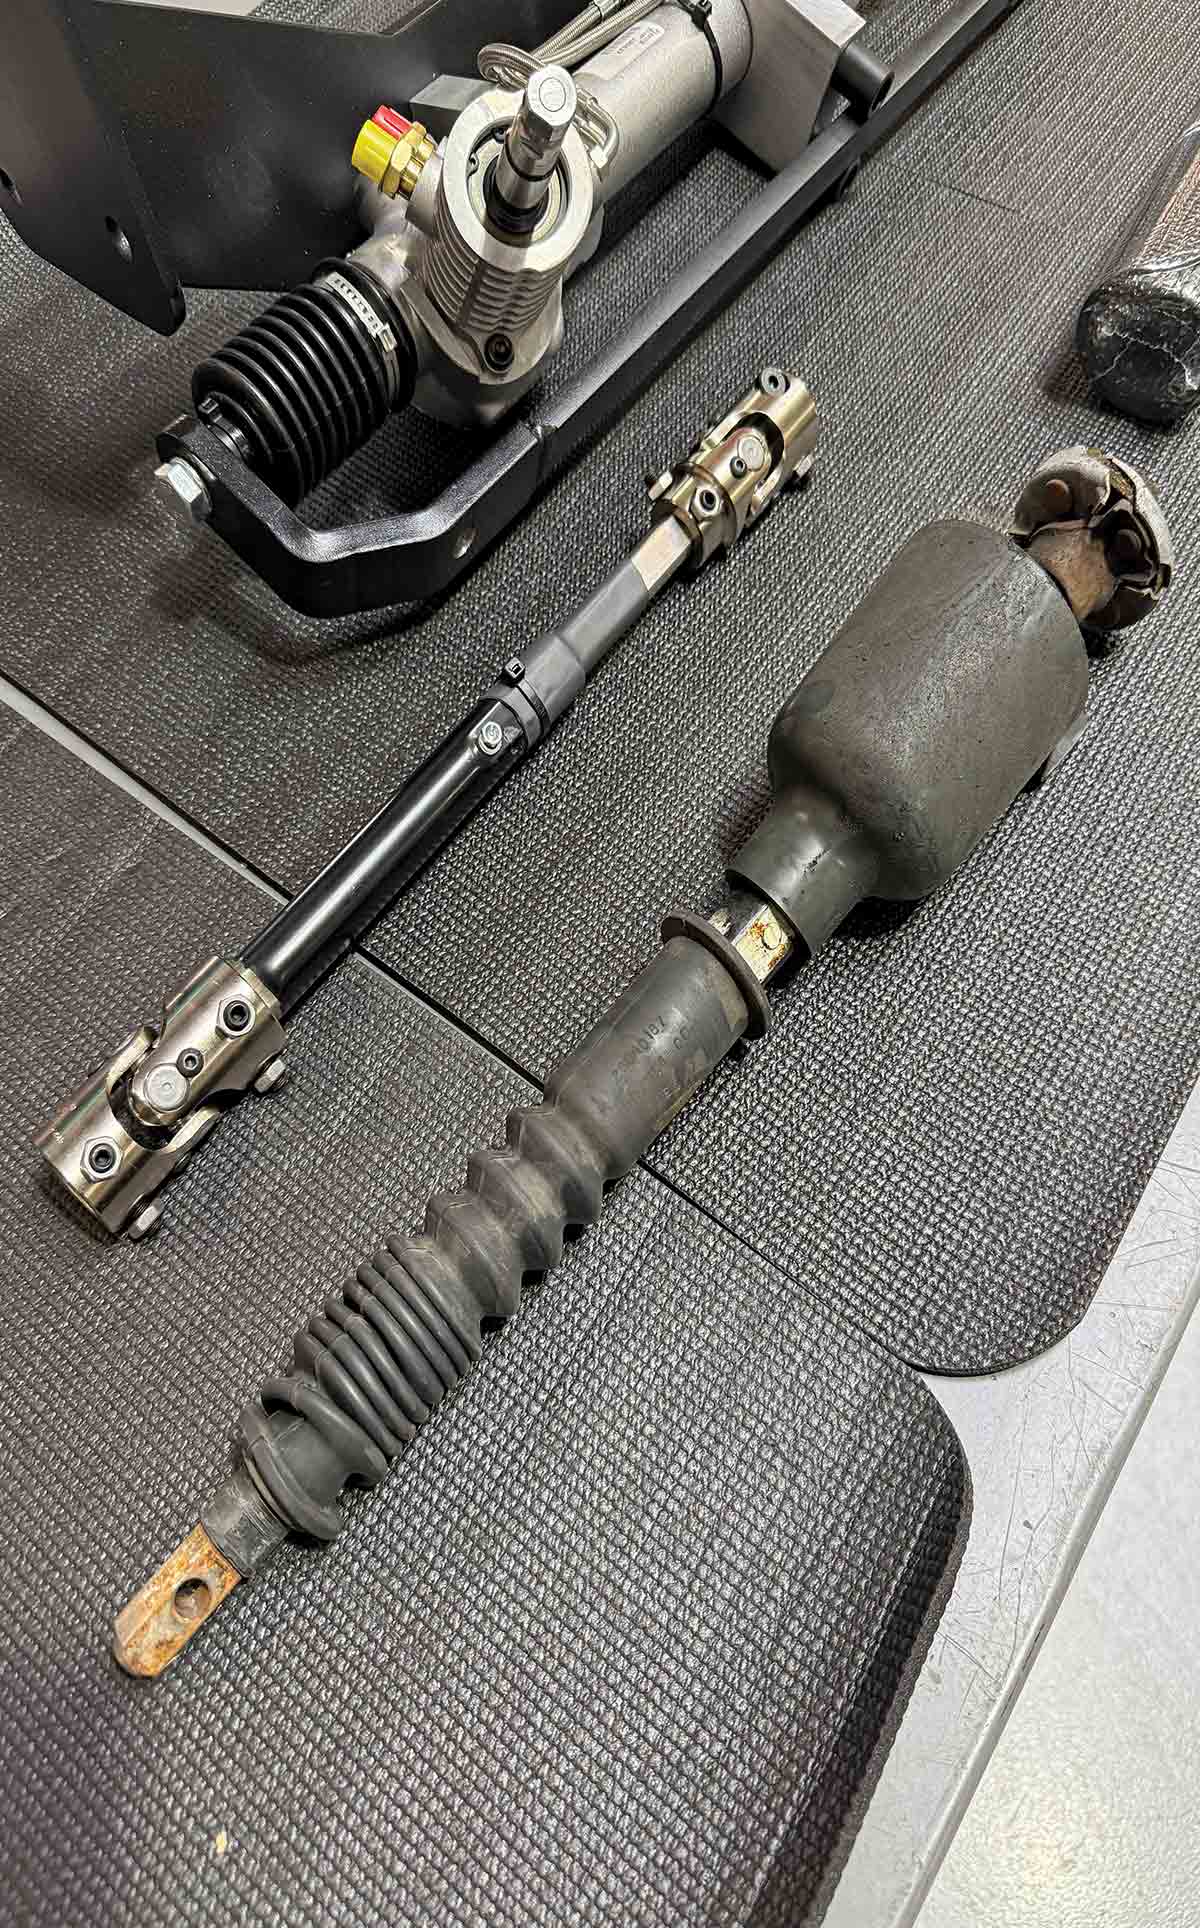
Comparison of original shaft versus new stainless slip shaft.
8-9. The OE collapsable steering shaft had seen better days, as well, which is to be expected from something that’s been in use since Sammy Hagar shared a stage with Eddie Van Halen! No worries—Flaming River supplies a “ragless” stainless slip shaft with a pair of stainless U-joints to mate the power rack to the factory column.
7. We will note, however, that since the upgraded tie rods use heims rather than tie-rod ends, the Flaming River “travel bar” (centerlink) must have its tapered holes drilled out to 5/8 for the hardware replacing the tapered pins.
8-9. The OE collapsable steering shaft had seen better days, as well, which is to be expected from something that’s been in use since Sammy Hagar shared a stage with Eddie Van Halen! No worries—Flaming River supplies a “ragless” stainless slip shaft with a pair of stainless U-joints to mate the power rack to the factory column.
Positioning the cradled rack assembly on the frame.
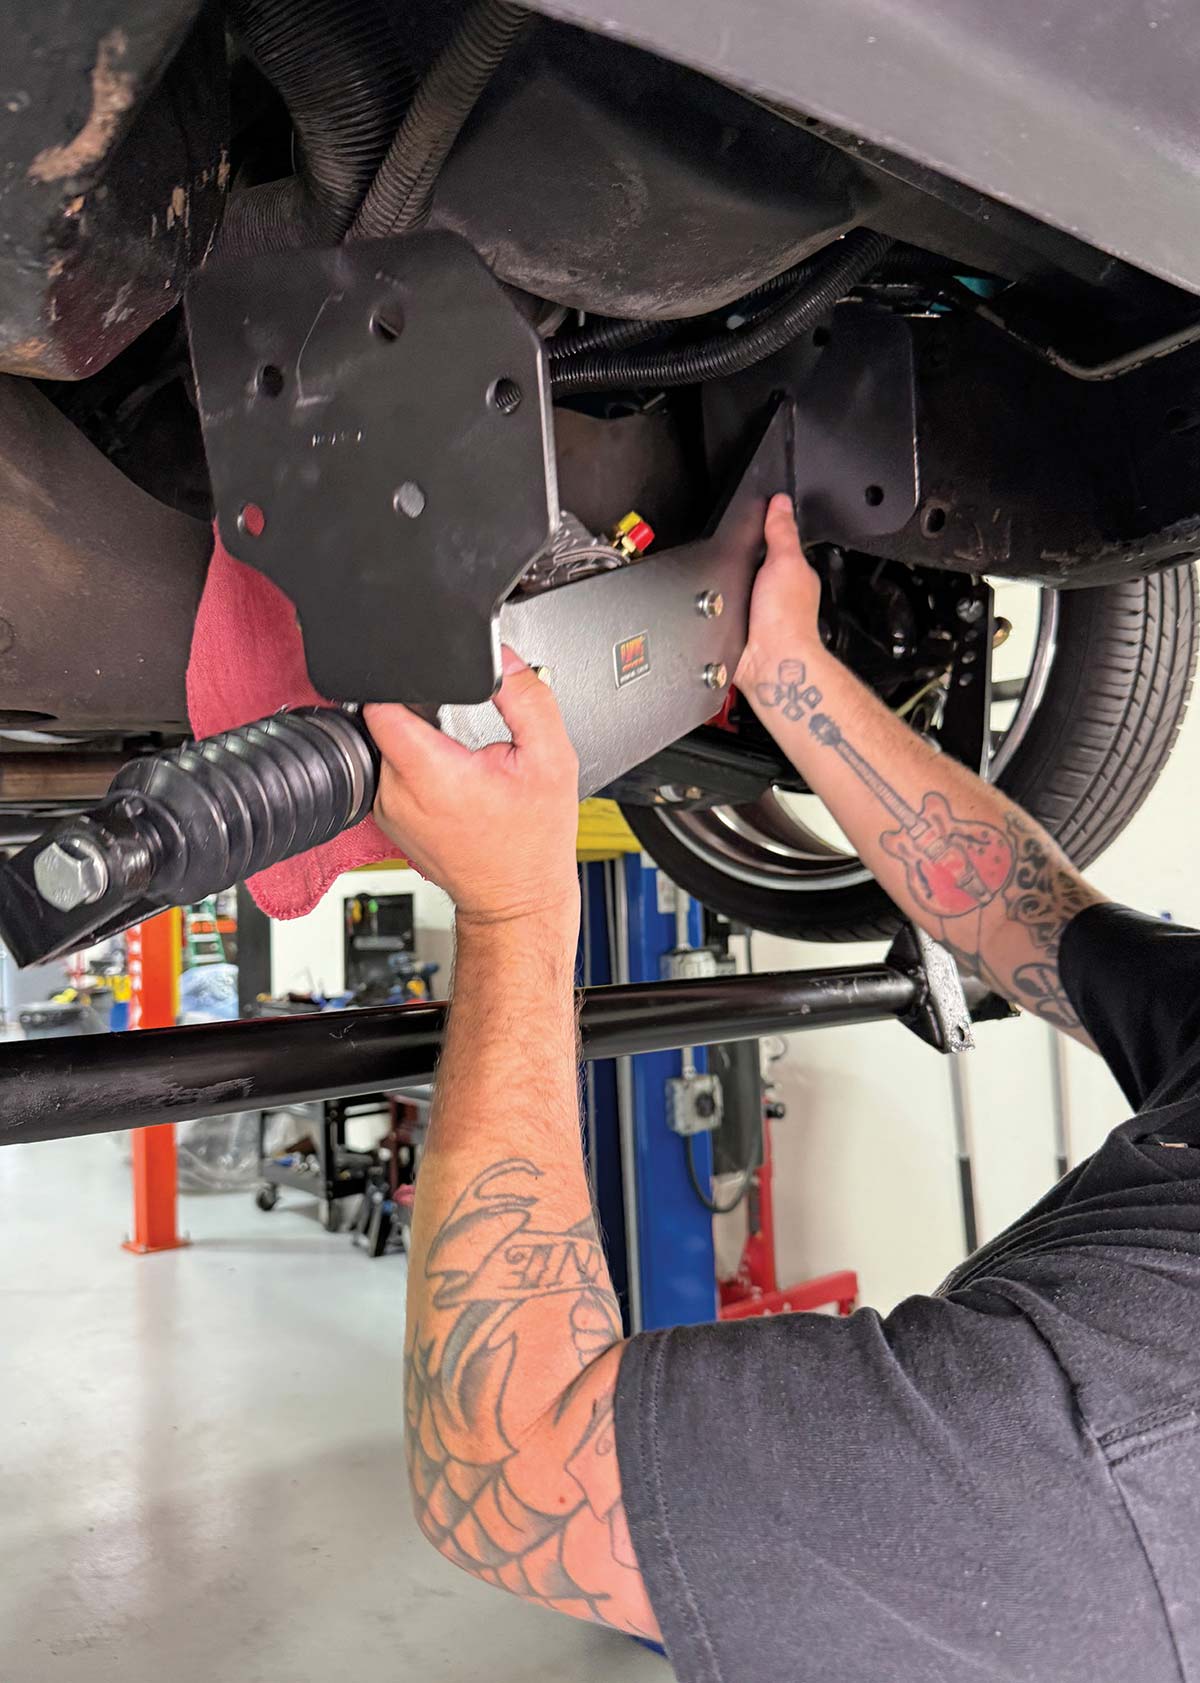
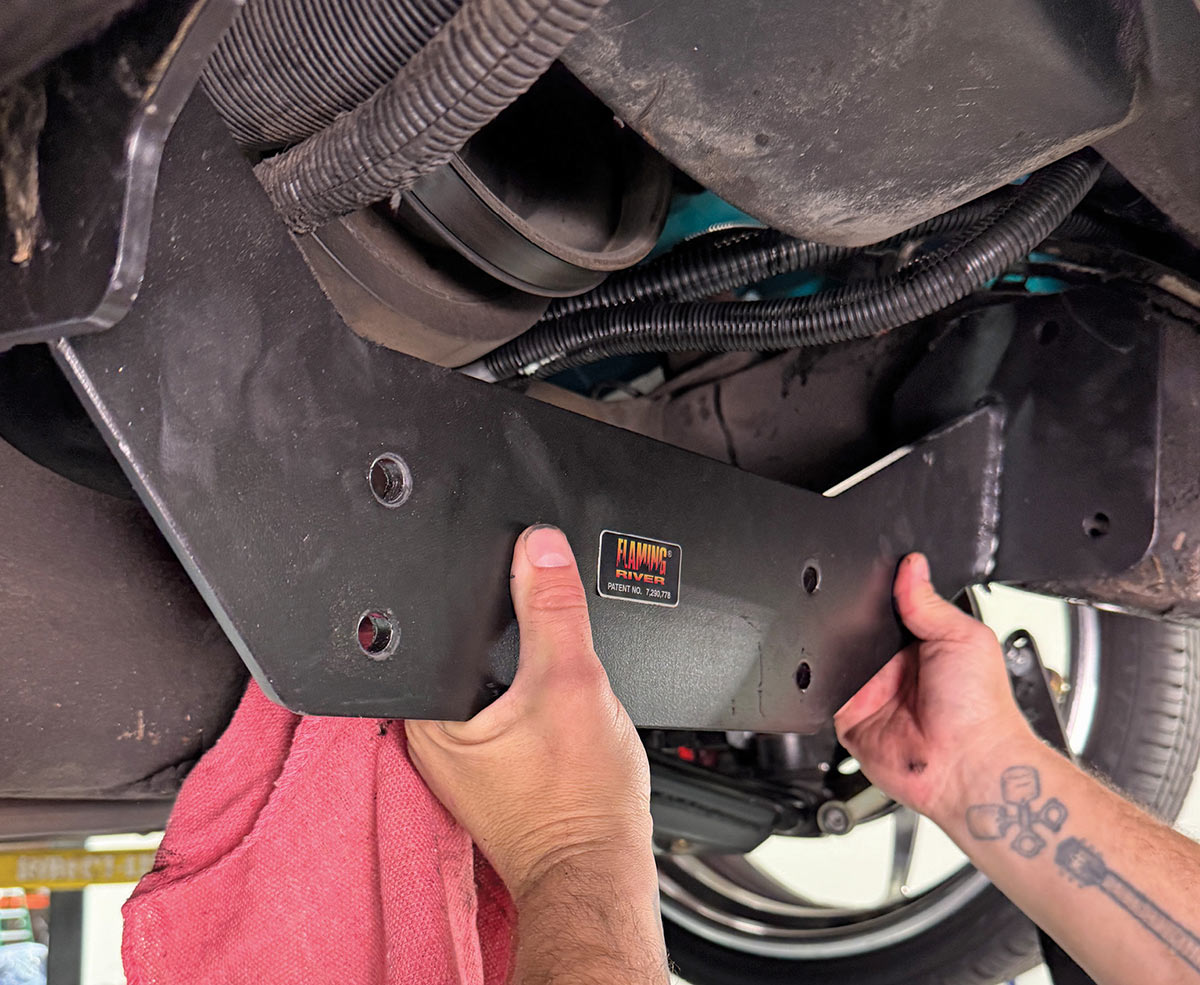
10. With all the old out, time to replace with the new—starting with the cradled rack assembly, which locates to existing holes on the box framehorns (the driver side using the leftover steering box mounting holes).
Close-up of front crossmember snout during installation.
11. If the front crossmember “snout” poses an issue getting the loaded cradle in place, simply remove the rack-and-pinion temporarily until you’re able to get the cradle nestled in its place.
Mounting bolt taped to a socket.
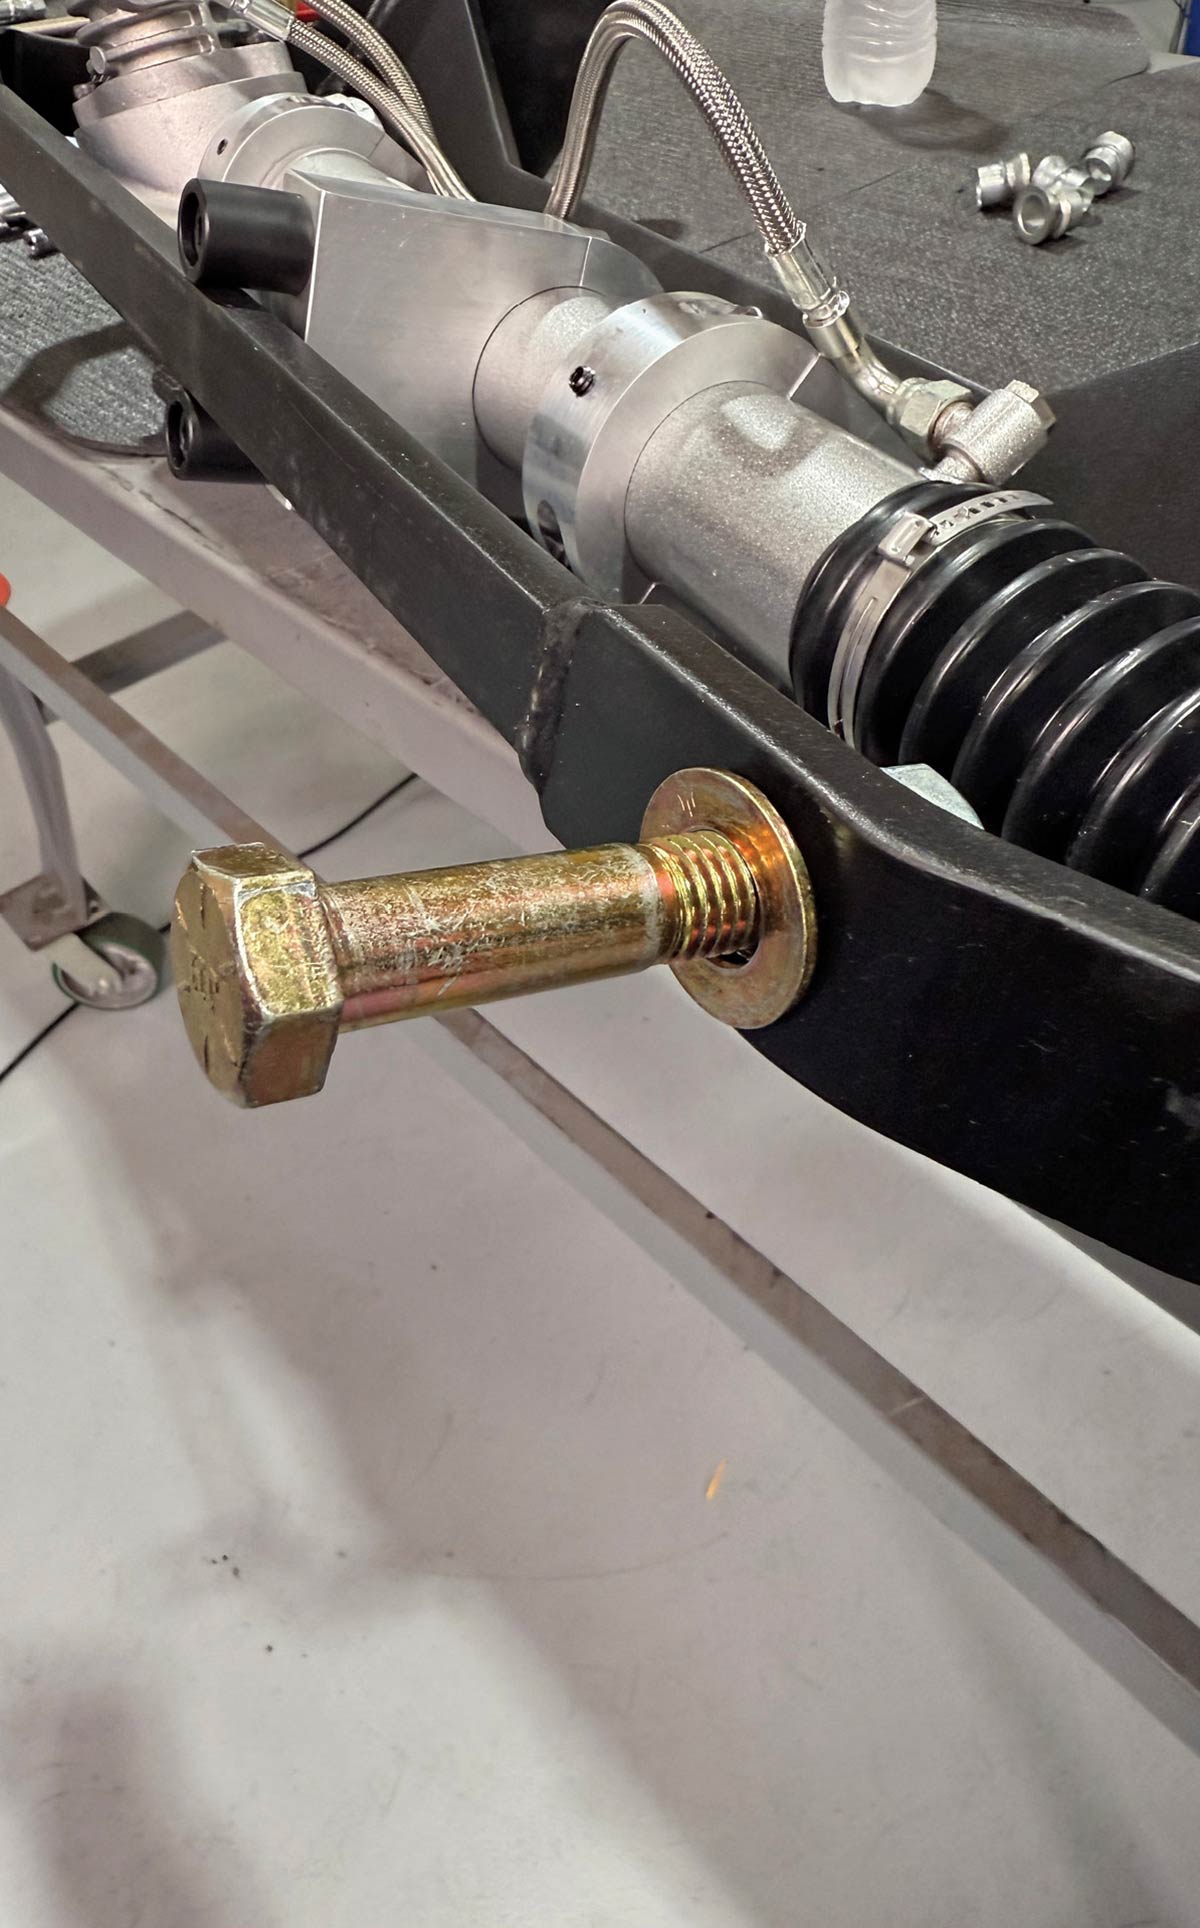
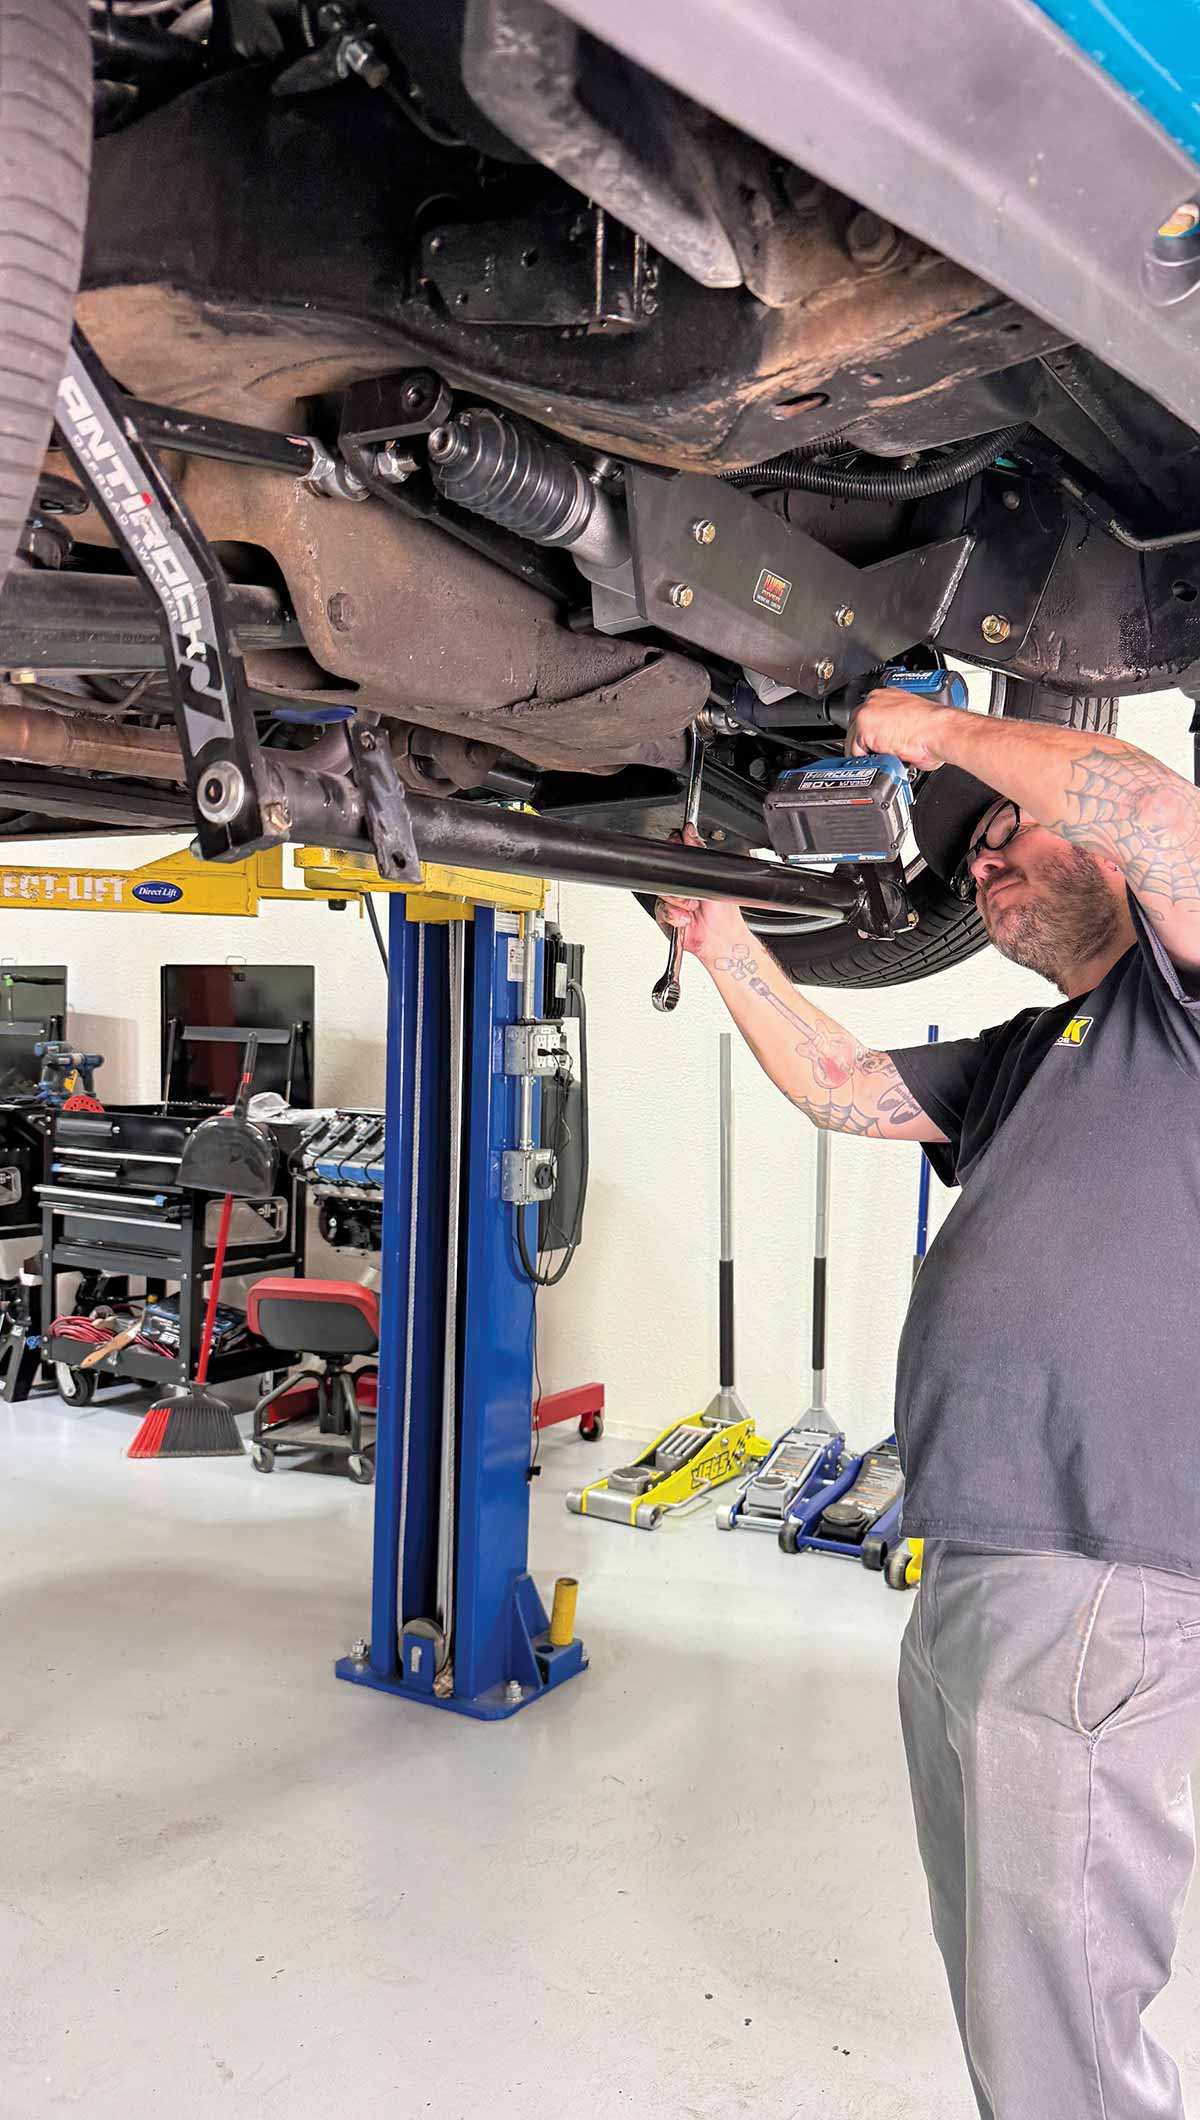
Securing cradle mounting bolts through the boxed framerail.
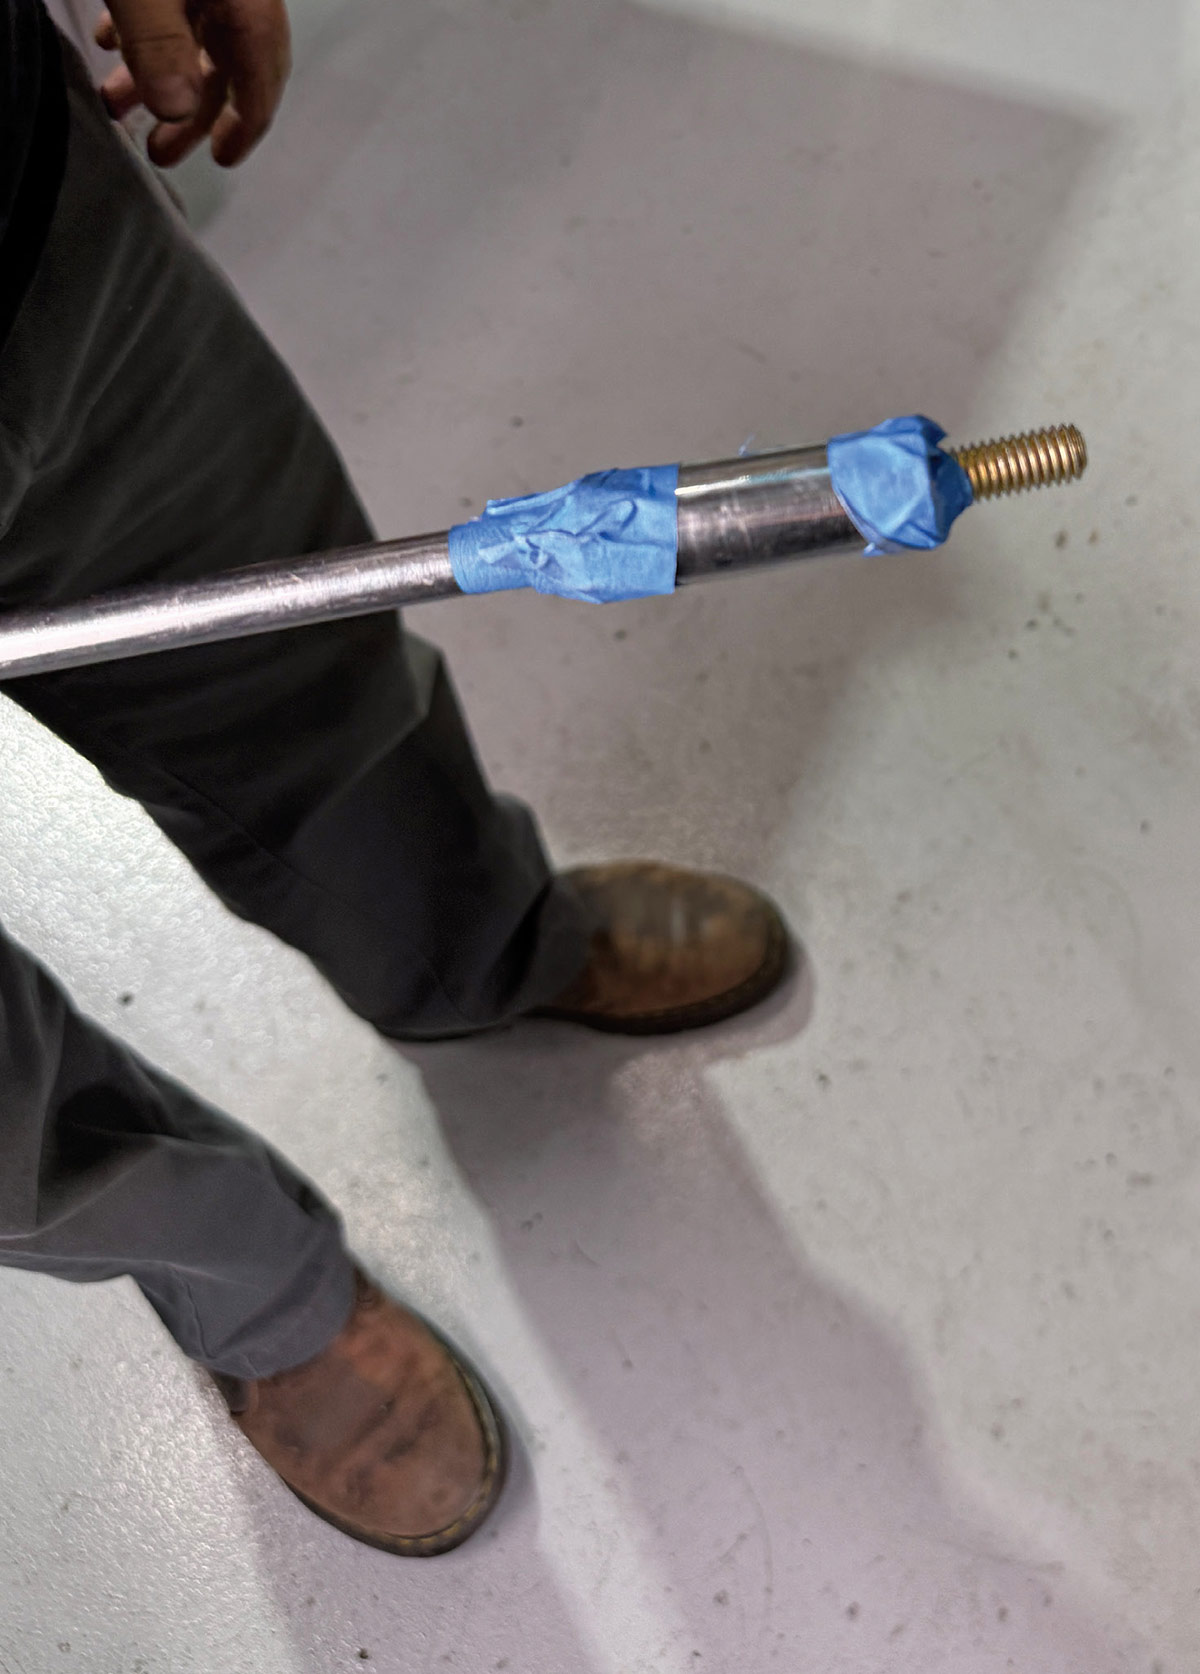
12-13. Little tip that Ryan Manson had to improvise in getting the cradle’s mounting bolts “through” the boxed framerail without pulling out the rest of his hair—taping the bolt to the socket … an age-old busted knuckles trick!
Connecting steering linkage to the travel bar.
Bolt-in connection of tie rod heim joints.
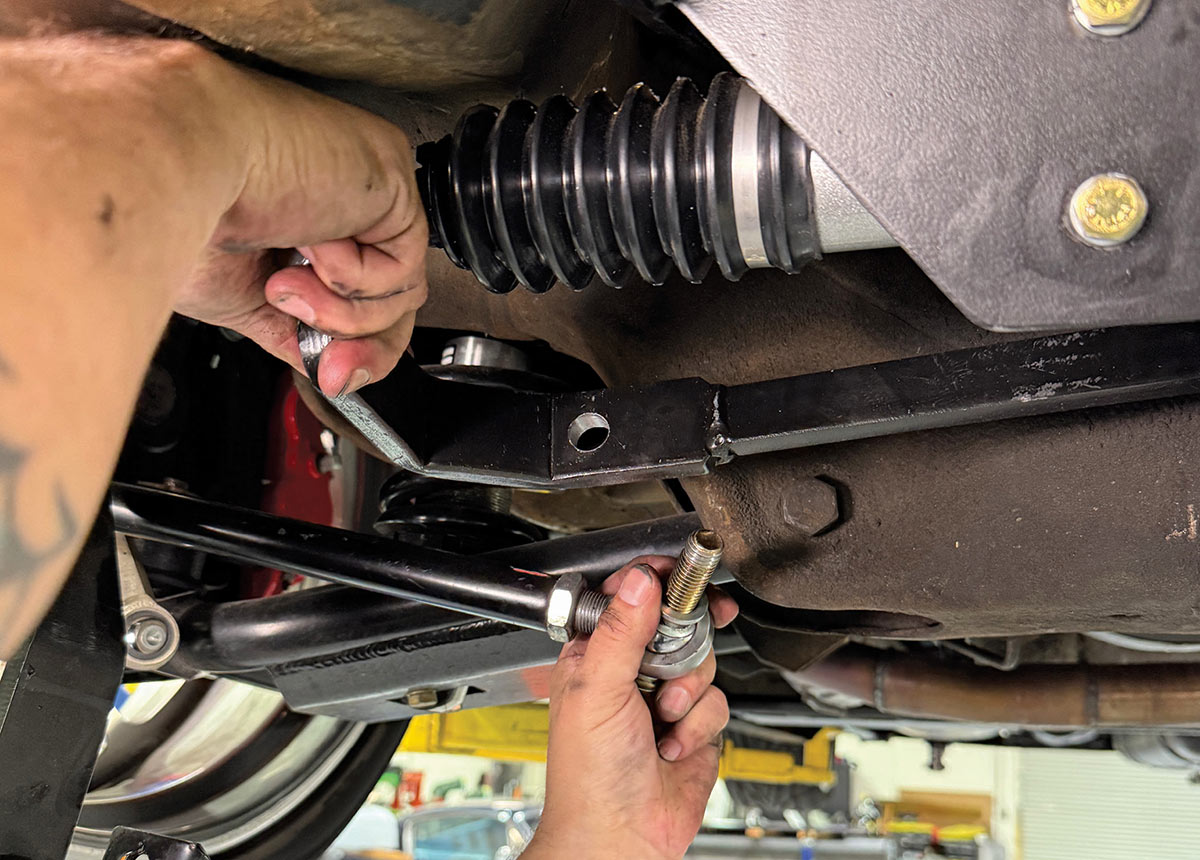
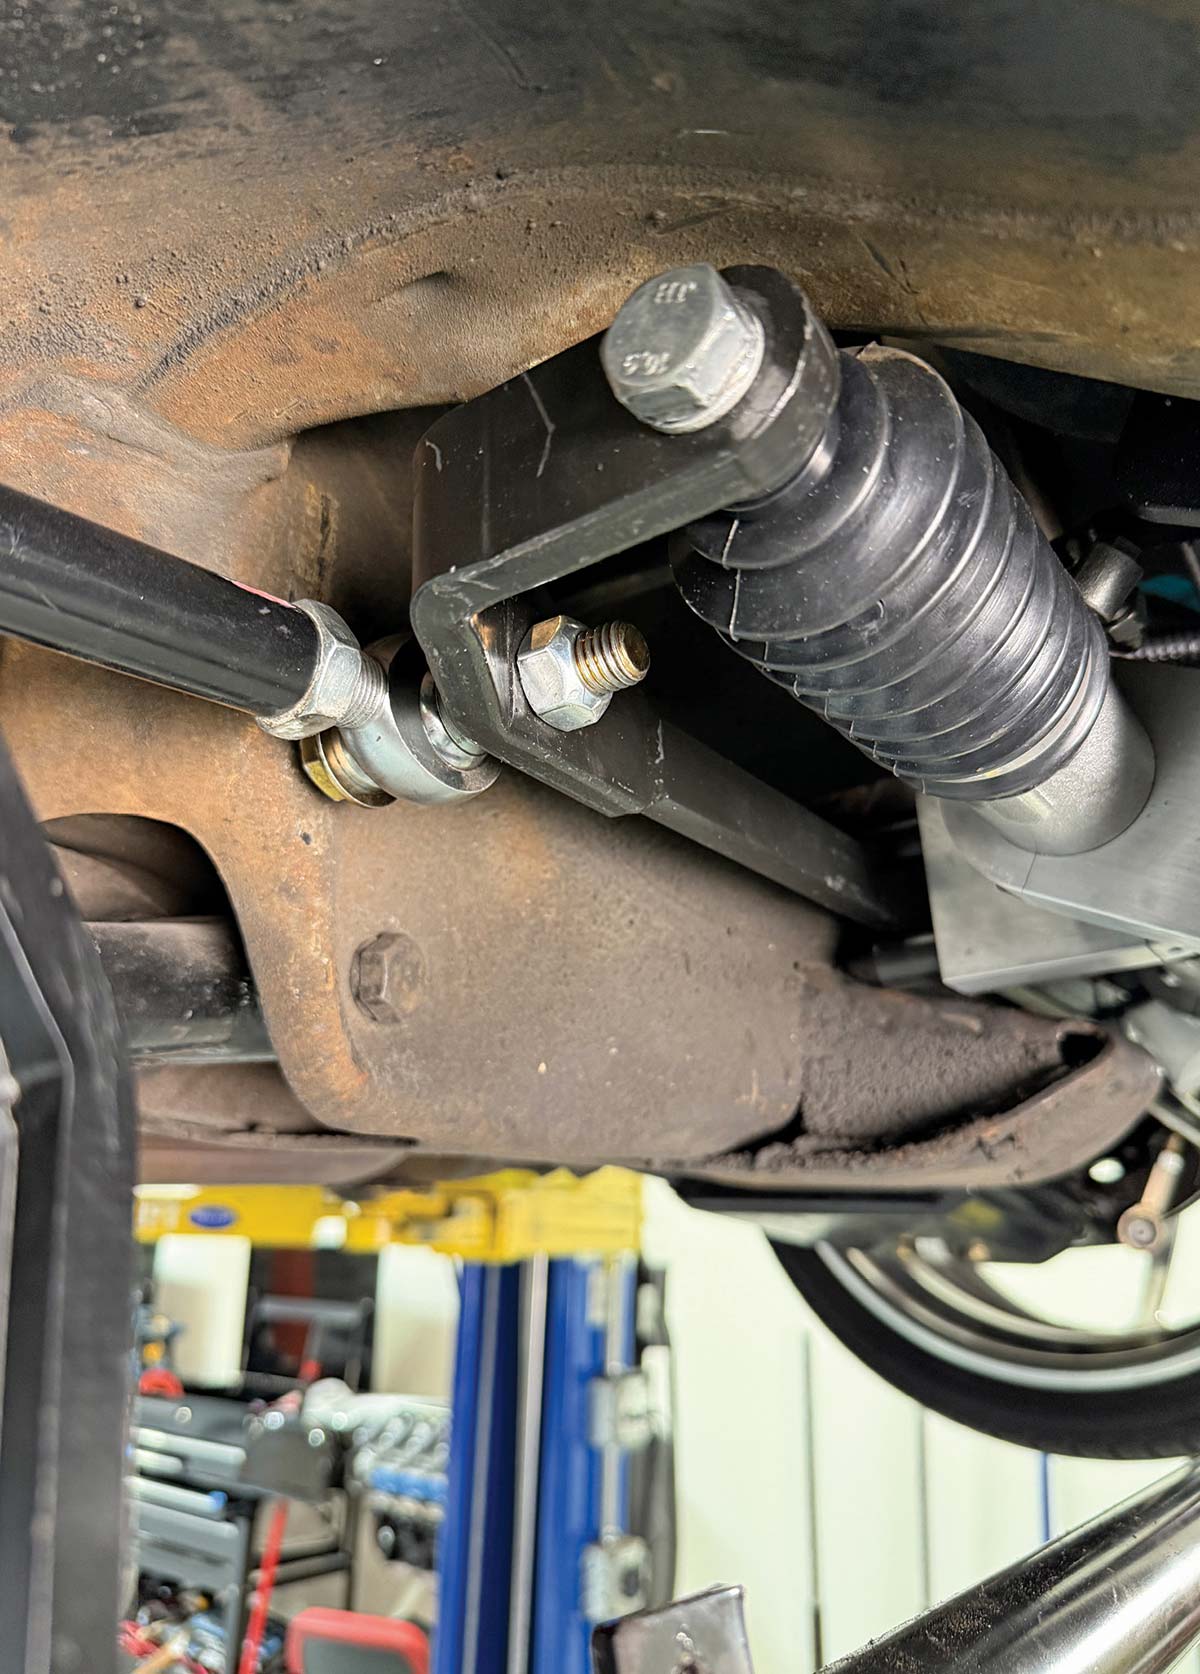
14-15. With the rack-and-pinion unit mounted in place, the steering linkage can now be connected to the travel bar, which is made to the same geometry as the old centerlink. The tie rods (heims in this case) bolt from back to front.
Reinstalling the torsion-style sway bar.
16. Last item to be tended to is reinstalling the sway bar, which we had previously determined at the onset (due to its torsion nature) would pose no mounting or operational interference issues.
Completed rack conversion installed with high clearance.
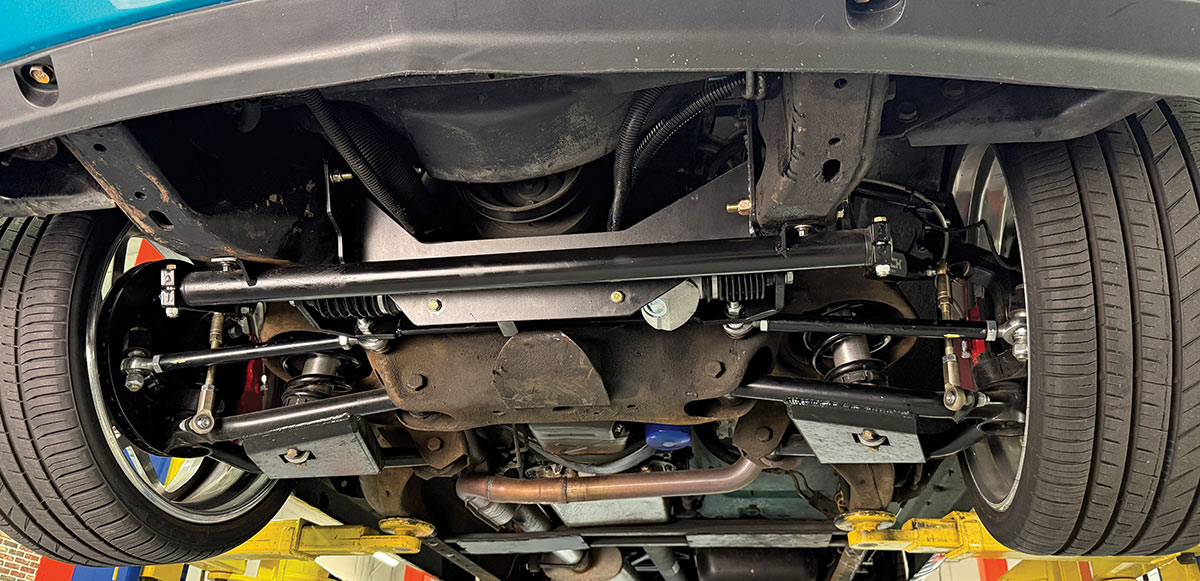
17. The completed main portion of the rack conversion—as you can see, the unit sits nice and high, with its 3/8-inch plate steel cradle assuring zero flex during “non gridlock” (i.e., autocross or canyon carving!) use.
Articulating the rack to check for binding issues.
18. Before moving on up beneath the hood to finish the install, Manson fully articulated the rack to ensure no binding issues with the aftermarket linkage—of which there were none!
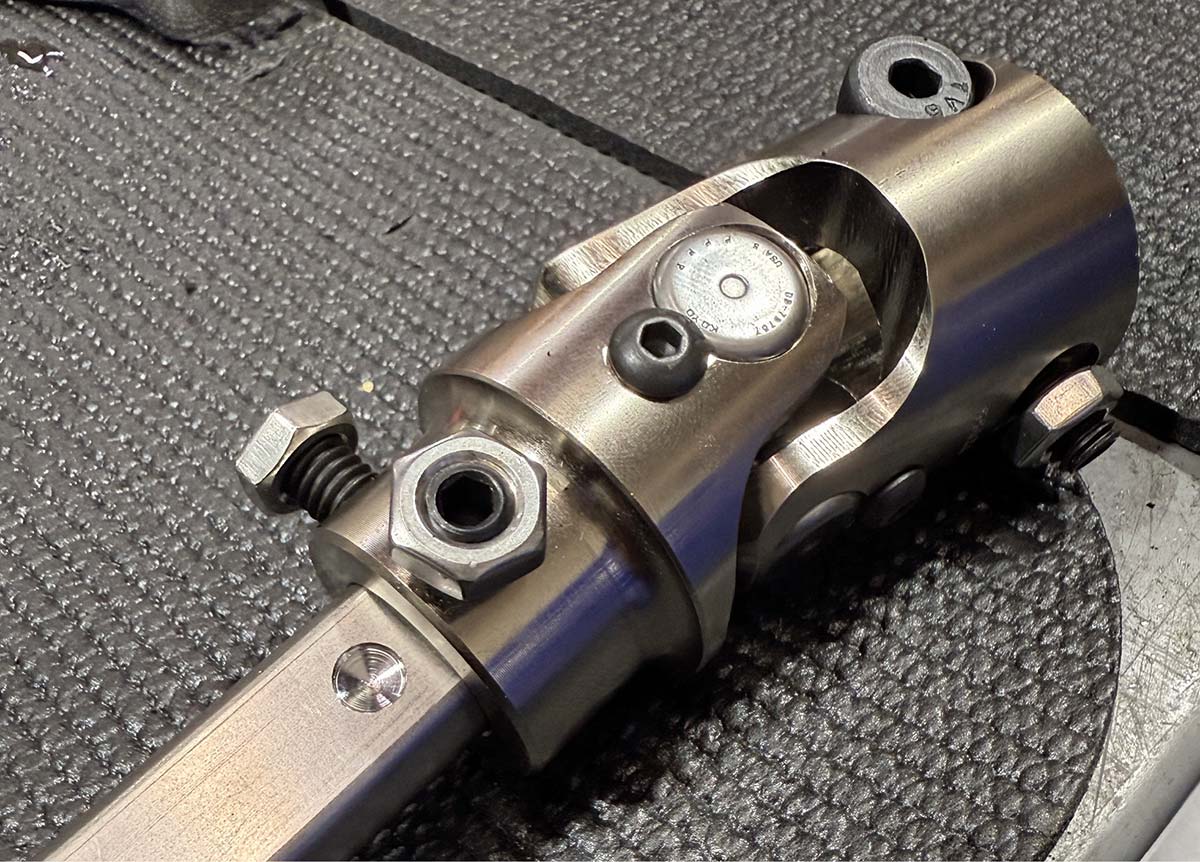
Factory rag joint compared to new stainless U-joint.
19. The factory rag joint provided a fixed intermediate shaft mounting; the new Flaming River stainless 3/4-36×3/4-DD U-joint will allow adjustable mounting, if needed (the rack is adjustable on the cradle) for alignment, such as header/exhaust clearance.
Dimpling the steering shaft for set screw placement.
20. Something often overlooked but should always be addressed: dimpling the steering shaft for the set-screws once the linkage is measured and cut to size! Don’t forget the thread locker (and trimming down the Allen screw in tight-fit situations).
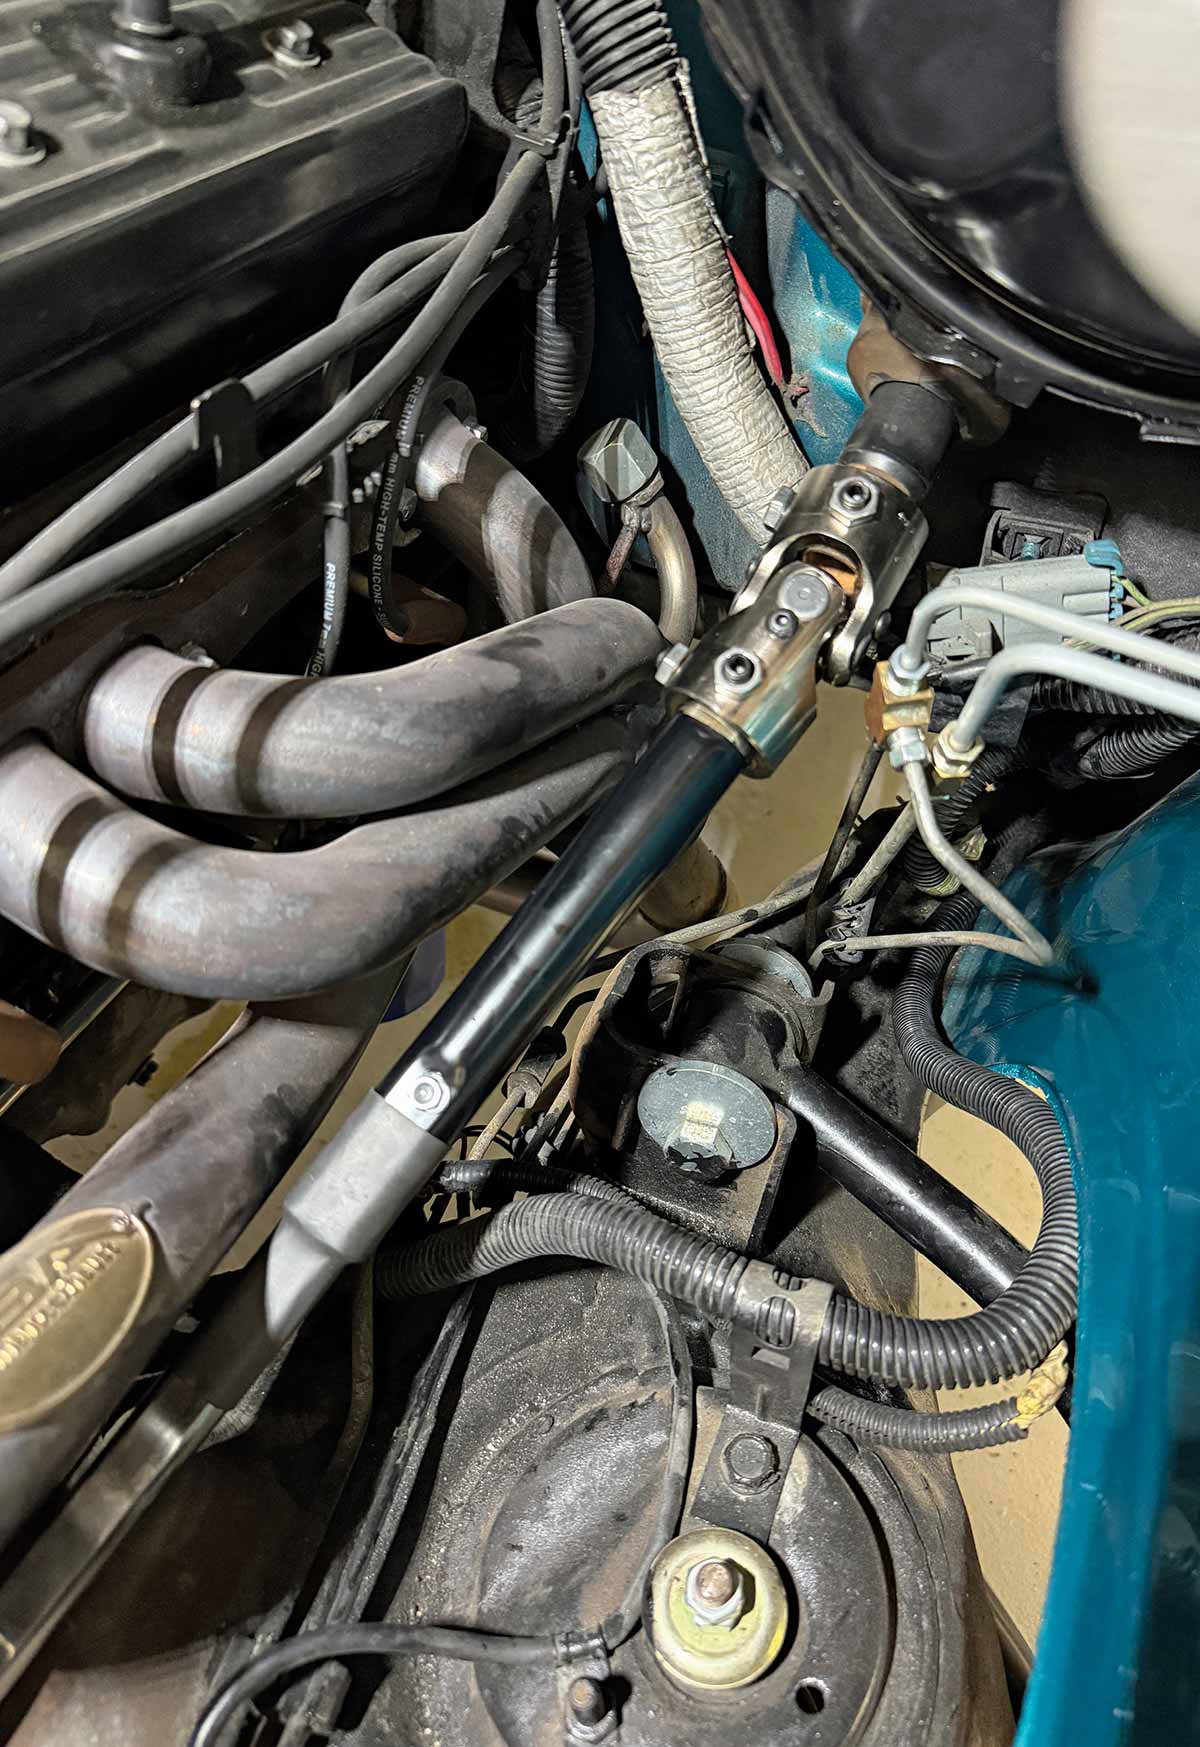
Clearance view between steering linkage and tube headers.
21. Pina’s OBS is running JBA tube headers, which the linkage cleared; factory exhaust manifolds should offer more room to work around.
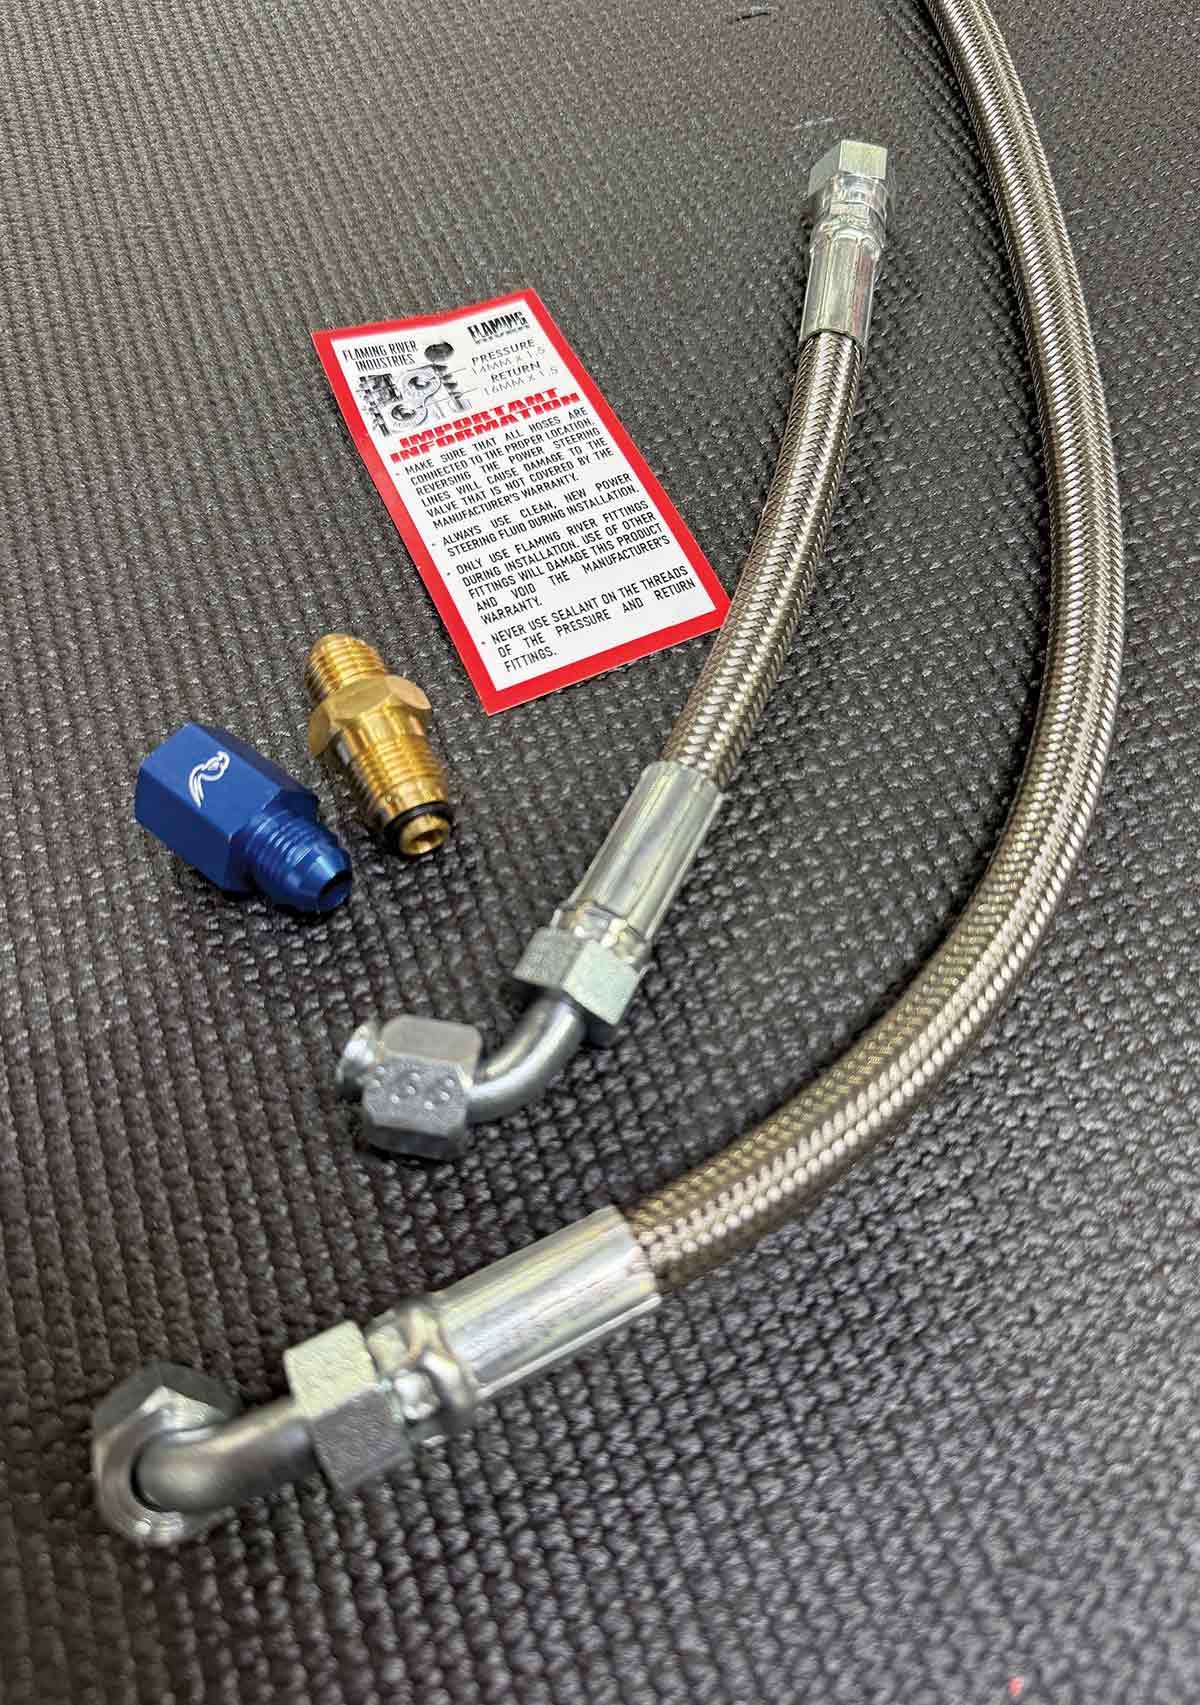
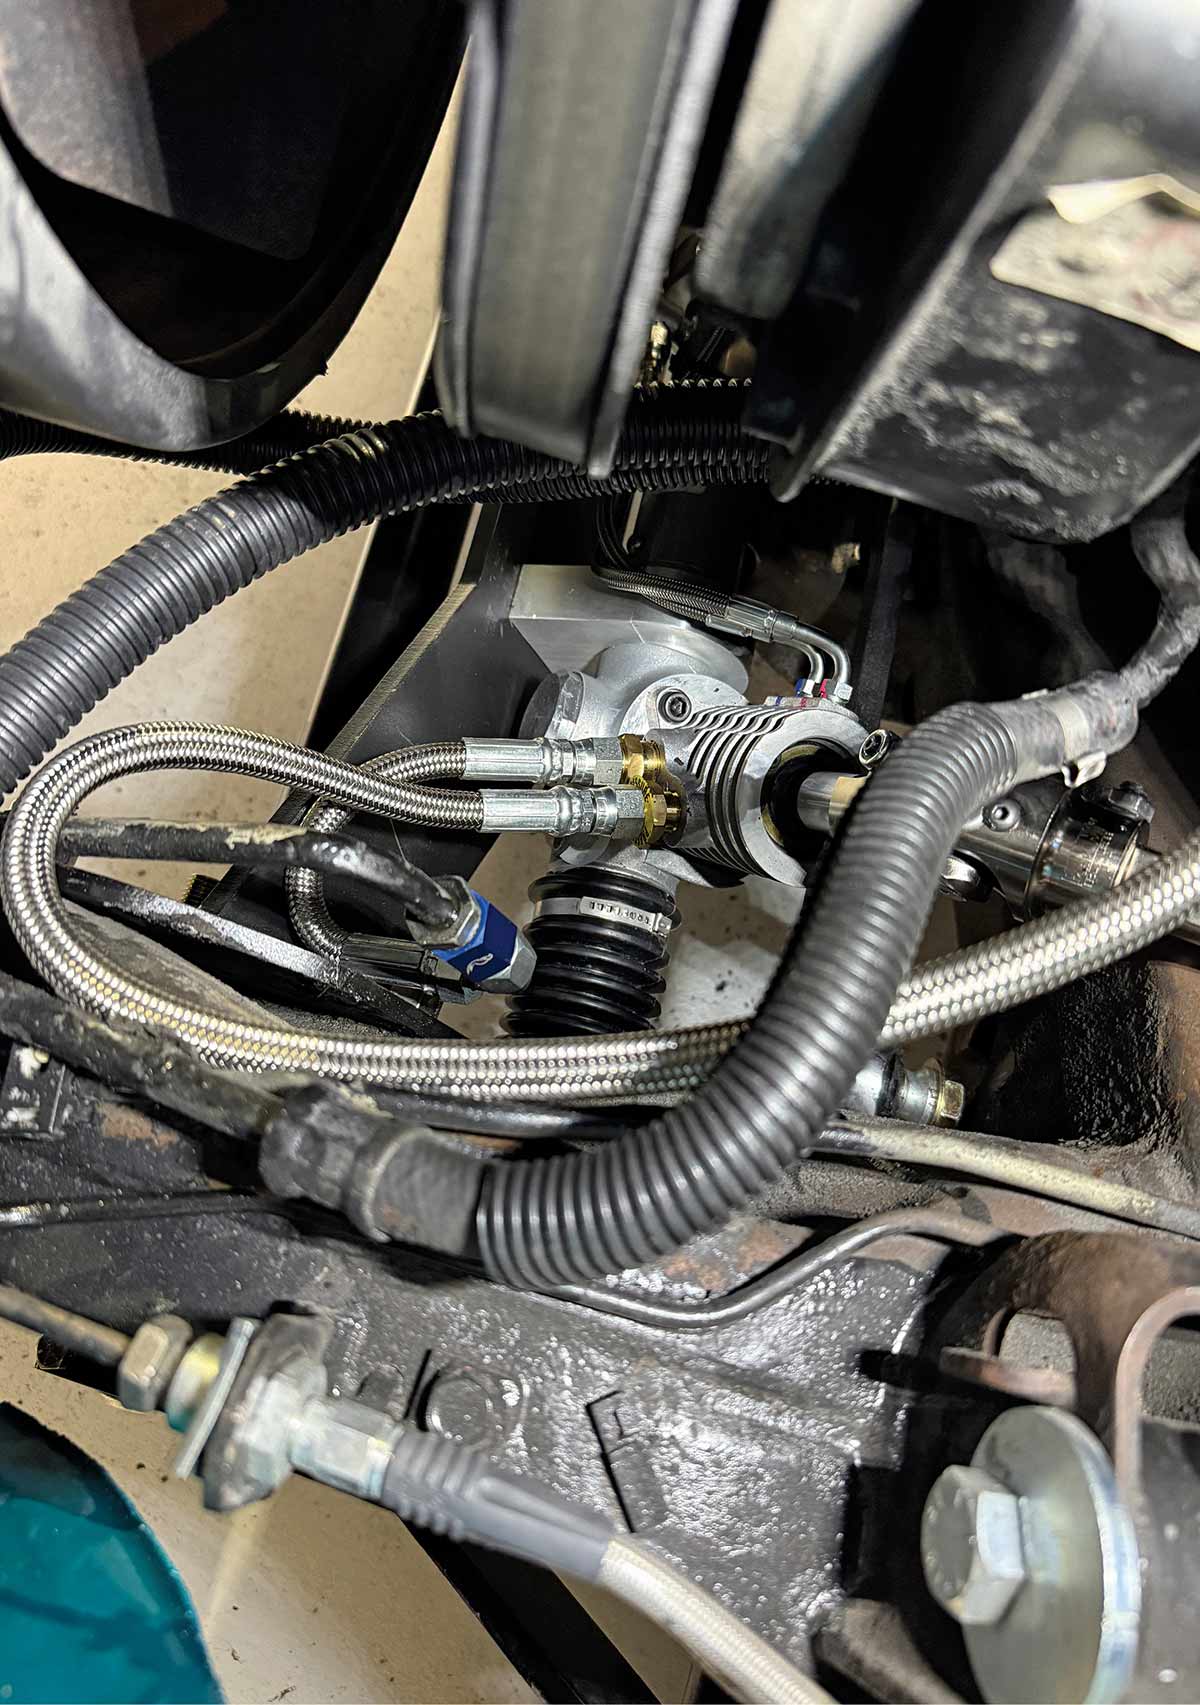
Power steering fittings and braided stainless lines.
Power steering plumbing installed on the rack unit.
22-23. Last item to address: power steering plumbing. Flaming River supplies precut/crimped braided stainless lines and all necessary fittings (including the AN return adapter for the stock PS filter system).
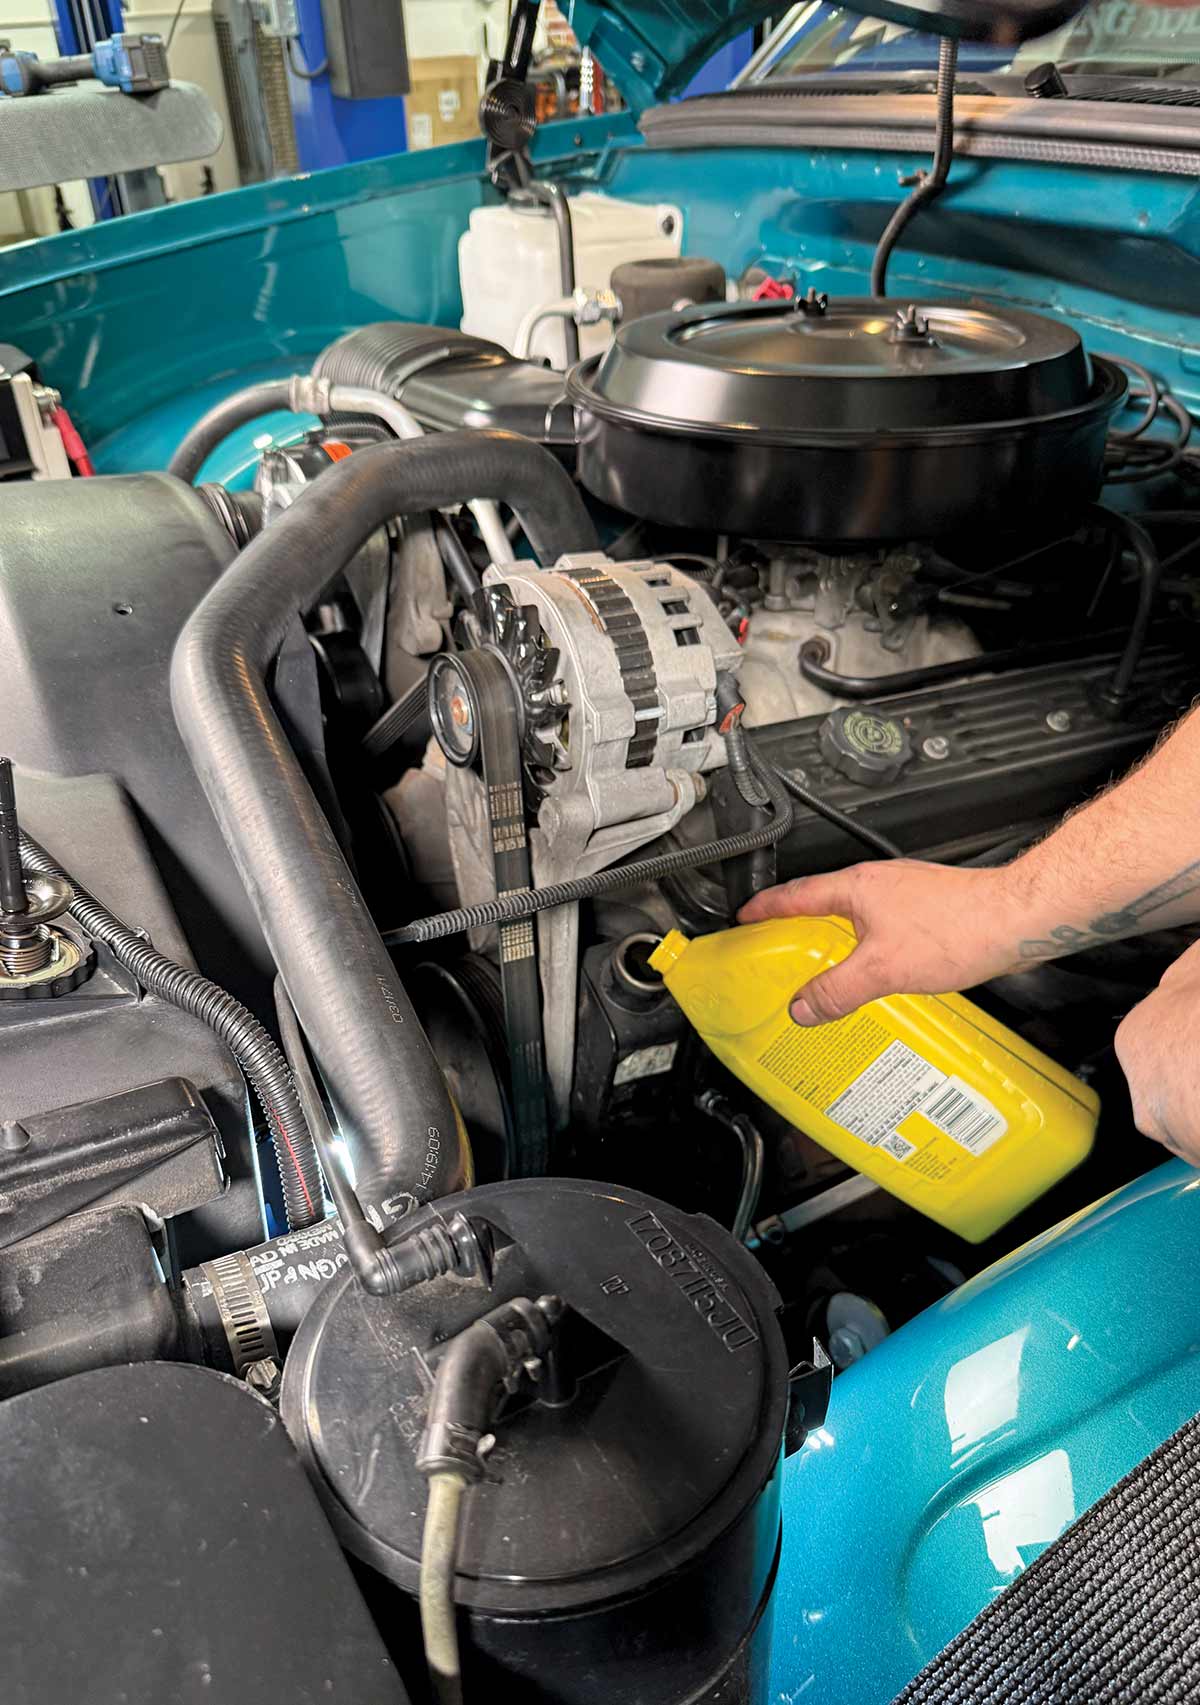
Topping off and bleeding the power steering reservoir.
24. With the plumbing buttoned up, Manson topped off and bled the fluid reservoir, then we did a quick on-the-ground toe-in alignment before testing for any potential fluid leaks (none) and ultimately an initial testdrive (amazing!).
22-23. Last item to address: power steering plumbing. Flaming River supplies precut/crimped braided stainless lines and all necessary fittings (including the AN return adapter for the stock PS filter system).
24. With the plumbing buttoned up, Manson topped off and bled the fluid reservoir, then we did a quick on-the-ground toe-in alignment before testing for any potential fluid leaks (none) and ultimately an initial testdrive (amazing!).
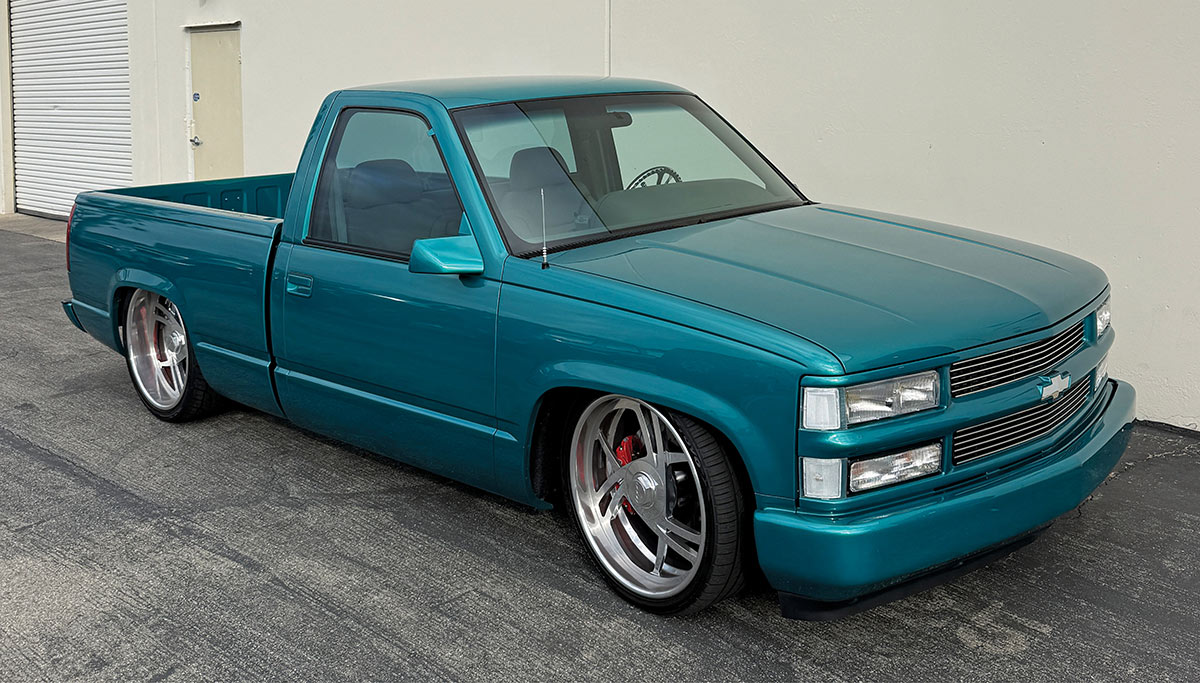
Green 1995 Chevy OBS truck parked after installation.
25. If you read the story, you already know what Pina reported back after having his Chevy professionally aligned and putting some serious miles on the odometer—proving that to date, this is one of our most successful rack-and-pinion conversions!
In The Garage Media
Flaming River Industries logo

(440) 826-4488
flamingriver.com
Stone Custom Fab logo

(559) 513-6755
stonecustomfab.com