CTP logo Tech

InTheGarageMedia.com

Speedway Motors' '68 C10 Build
Speedway Motors’ ’68 C10 Build
Part 2: Chassis & Suspension
BY Joe McColloughIMAGES BY THE AUTHOR
I

n the last installment of our Speedway Motors C10 build, we gathered up a derelict ’68 C10 shortbox and dragged it back to our shop. What was left of the old truck was carefully taken apart and the chassis was blasted and treated to a fresh coat of epoxy and black urethane. Now it’s time for the fun part to begin with the install of our G-Comp rear suspension, a rebuild of the front suspension with some new parts for a lowered stance, and an upgrade to the brakes.

Though our truck wasn’t much to look at, the chassis was exceptionally straight and rust-free. The glaring exception was a rear crossmember that had been crudely torched at some point in this truck’s eventful past. We were eager to get rid of this eyesore, so we elected to start at the rear. We selected the Speedway Motors G-Comp C10 Coilover Truck Arm Rear Suspension kit for its bolt-on installation, improved geometry, and adjustability over the stock suspension, not to mention the addition of coilovers. The fact that the kit included a fresh new crossmember direct from our fab shop that would replace the hacked stocker was icing on the cake.

Before we got started with the suspension install, we bolted in a Speedway Motors C-notch kit. This kit worked well with the G-Comp rear, requiring only a small hit with the grinder to clear the Panhard bar bracket. The notch kit promised plenty of clearance for the G-Comp’s lower ride height.

We were eager to bolt in our trick new suspension, but we had some work to do before we got to the fun part. The factory crossmember, Panhard bar bracket, and truck arm pivot brackets needed to be removed, which meant that the factory rivets needed to go as well. We used a combination of grinding, drilling, hammering, and air chiseling to get ours free. Just remember that those factory holes will be reused with the G-Comp brackets, so don’t let them get oversized or otherwise out of shape.

With the stock pieces removed, we were ready to mock up our G-Comp suspension. Note that we did this before any parts were painted, then disassembled for paint before moving onto final assembly. We started with the new crossmember and truck arm pivot brackets that came with the kit. The G-Comp suspension allows for adjustment to the truck arm pivot points to dial in driveline angle and make instant center adjustments. The same front brackets also utilize some nifty cams to fine-tune rear axle alignment.

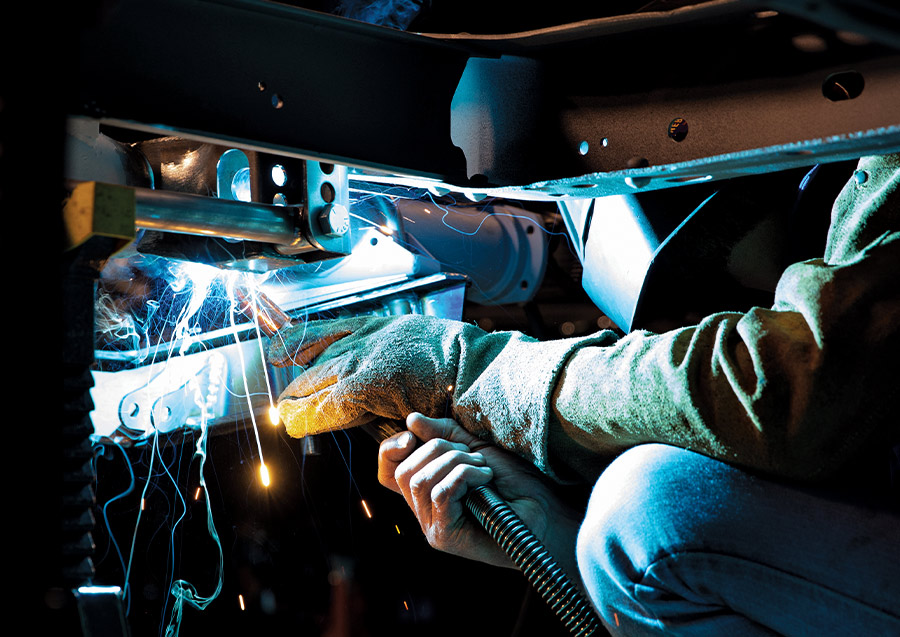
With the crossmember and brackets installed, we were ready to move onto the axle housing. Instead of spending time and money upgrading the stock axle, we elected to use a brand-new Bolt-In 9-Inch Housing, fully assembled Speedway Motors Third-Member with a 3.50 gear ratio and a weld-on Universal Disc Brake Kit. This setup was sure to handle the power that we planned to throw at it with the added bonus of converting from the stock six-lug axles to the later 5-on-5 bolt circle. Whether using a new housing or your truck’s original, the only welding necessary is the attachment of the Panhard bar bracket to the housing.

Before we made anything permanent, we mocked everything up at ride height and carefully measured to several reference points to be sure we were centered and aligned. We measured 12-3/8 inches center to center on the shock lengths to determine our ride height. We then set up approximately 6 degrees of driveline angle using some angled shims between the housing and the truck arms. Finally, we measured (and remeasured) to be sure the housing was centered. Finally, the Panhard bar bracket was tacked in place.

At this point, we were ready to pull the rear suspension apart to fully weld the new Panhard bar bracket, cut the stock Panhard bracket off, then prime and paint everything. All that remained was final assembly and we were ready to move onto the front.

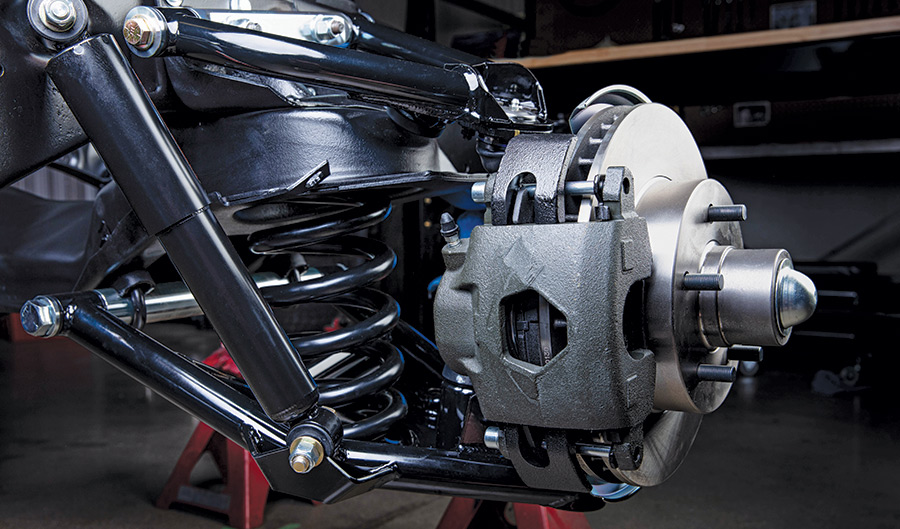
Our goal with this truck is not to win at the autocross or lay frame. Instead, we’re after a lowered driver that sits right and is ready for lots of miles out on the road. To reach those goals, we chose a tried-and-true recipe to drop our C10’s frontend and make it stop better, starting with a Speedway Motors ’63-70 Complete Front Suspension Kit. This kit comes with everything you need, down to the nuts, bolts, and cotter pins, to lower the ride height and convert pre-’71 trucks to stock-style disc brakes. In addition to the brake kit, this kit also includes 2-1/2-inch dropped spindles, 2-inch dropped springs, and shocks designed for the lower stance. That combined 4-1/2 inches of drop will be noticeable without being excessive.

We also chose to upgrade to a set of tubular upper and lower control arms. The arms were installed first, followed by the dropped springs. Next up came the spindles, taking care to point the caliper brackets to the rear. At this point the included wheel bearings were packed, seals installed, and rotors slid into place. The brake calipers were installed with the included slide bolts and we were pleased to find new brake hoses were included as well. The kit included new upper shock mounts and even the bolt for the bottom of the shock. With the shocks bolted up, we were ready to wrap up our install. Working with the fresh, new parts from the Speedway Motors kit made this all a breeze and we even surprised ourselves by finishing it all up in a morning.

Power steering was a luxury that didn’t make the cut when our truck was ordered from GM. We decided to make the upgrade using a new power steering box. As a part of the install, we also chose to use a Chevy Pickup Front End Rebuild Kit to freshen up the rod ends and tie rod components. With all of these new parts, about all that was left from the factory steering setup was the centerlink and idler arm bracket, which had to be liberated from the crusty remains of our stock suspension, blasted, and painted. With the dirty work done, we bolted up our new box along with the new rod ends, idler arm, and power steering pitman arm.

Next was the moment of truth. A rolling chassis is always a big moment, and we couldn’t wait to see the results of our altitude adjustment, even if there was no weight on it yet. We bolted up a set of 15×8 front and 15×10 rear Speedway Motors Rally Wheels with some redline radials for that requisite ’60s vibe and dropped the jack. We couldn’t help but grin at the sight of our freshened chassis with a noticeably lowered ride height. Moments like these are what fires us up to keep pushing through the rest of the build, and we were already scheming on a hopped-up junkyard LS engine to drop between the ’rails. Stay tuned as our C10 receives its heart and makes some surprising power!

steel bar in rear suspension
1. After a few hours of cutting and hammering the factory rivets, we kicked the hacked rear crossmember to the curb and started the install of our new Speedway Motors G-Comp rear suspension. Note that we’re mocking everything up in bare steel before painting.
G-Comp C10 Coilover Truck Arm Rear Suspension Kit
2. The G-Comp C10 Coilover Truck Arm Rear Suspension Kit (PN 91604054) offers several advantages over the stock truck arms, and one of them is the ability to adjust the instant center geometry by moving the truck arm pivot points up and down. This will help us dial in some forward bite when our truck hits the street.
closeup of person using the G-Comp rear suspension kit
3. Another cool feature of the G-Comp rear suspension kit is the cams that locate the front of the truck arms. These allow for a precise setup when it’s time to align the truck.
cams placed in the center for the mock-up
4. We set the cams in the center for our mock-up. We will fine-tune them when the truck is complete to dial in the alignment.
two people installing the housing
5. Time to install the housing. We chose a Speedway Motors Bolt-In ’67-72 Chevy Truck 9-Inch Housing (PN 91046118) and a 9-Inch Clutch-Style Posi Differential Third-Member (PN 91049345).
moving the housing up to ride height
6. We moved the housing up to ride height to continue our mock-up. Note the considerable increase in available travel from the C-notch kit (PN 91006372).
closeup of person using a hand saw to trim a piece of the bracket
7. Next up was the Panhard bar. The bracket on the housing side is the only welding necessary in the whole install. The 9-inch housing also necessitated a small amount of trimming to the bracket to match the shape of the housing where the centersection meets the axle tubes.
view of Panhard bar brackets
8. We mocked the housing at ride height, then measured and remeasured the pinion angle and side-to-side positioning of the housing before tacking the Panhard bar bracket in place on the axle. Note the multiple holes in the Panhard bar brackets to allow roll center adjustment.
person wearing a welding helmet tacking the Panhard bar bracket in place
9. With all of our measurements verified, we tacked the Panhard bar bracket in place. For ease of access, we’ll wait to fully weld it until the housing is out of the truck. Remember to weld a little at a time to avoid warping the housing. This is a critical part of the suspension, so farm this out to an experienced welder if you’re not comfortable with your welding skills.
view of rear suspension reinstalled and with paint
10. Here’s our rear suspension all painted up and reinstalled. The coilovers will allow us to fine-tune the ride height so we can nail the perfect stance. Also visible in the photo is the Speedway Motors weld-on Universal Disc Brake Kit (PN 91031933).
stock suspension
11. Ugh. Here’s the stock front suspension as it rolled into the shop. We chose a few upgrades to the stock geometry that would help us meet our goal of a dropped truck with better handling and braking than ever before.
person handling a set of tubular upper and lower control arms
12. After lots of blasting and painting, it was time to move onto the shiny new parts. First up was a set of tubular upper and lower control arms (PN 91036375). These were fully assembled and ready to go out of the box, saving us hours of rebuilding the stock arms and adding better performance and a trick appearance to our suspension.
tubular arms fully installed
13. Here are the tubular arms fully installed. We had to reuse the stock upper control arm spacer bushings, so be sure not to pitch those when you disassemble the stock stuff.
closeup of springs
14. Time to install the components from the Speedway Motors ’63-70 Complete Front Suspension Kit (PN 91016575). In addition to lowering the ride height, the 2-inch dropped springs’ shorter height allows them to be installed without the need for a spring compressor.
person painting the spindles before installation
15. The 2-1/2-inch dropped spindles were painted before installation. Be sure to orient the caliper brackets to the rear.
spindles installed
16. Spindles installed and ready for brakes. The 2-1/2-inch raised spindle pin is clearly visible in this shot.
view of disc brakes
17. The Complete Front Suspension Kit also converted our truck to disc brakes with the ’71-and-up 5-on-5 bolt circle.
closeup of person installing dust shields
18. The front suspension kit included stock-style dust shields and all the necessary hardware.
person using a front suspension kit
19. OE-style calipers come with the kit as well as the slide bolts. The kit is complete down to the stock-style rubber brake hoses and clips to secure them to the chassis.
person installing new shock mounts
20. The included shocks are engineered to work on lowered trucks. Once again, the “complete” suspension kit did not disappoint; new shock mounts and even the bolts to secure the shocks to the control arms were included.
old stock manual steering box
21. Just when we thought we were done with rusty parts, we remembered that we would need to reuse the stock centerlink and idler arm bracket. The stock manual steering box, however, was not going to make the cut.
person using a mallet to disassemble the stock components
22. In spite of their rusty and crusty appearance, the stock tie-rod components came apart with only a few taps from the pickle fork.
person aligning the new steering box to the chassis
23. Our ’68 chassis had all the holes in the right place to allow our new ’67-74 C10 Power Steering Box (PN 91015007) to bolt right up.
closeup of the Power Steering Pitman Arm
24. While most of the tie-rod components interchange between the manual and power steering setup, the pitman arm does not. A new Power Steering Pitman Arm (PN 91015008) was sourced to mate up to the new power box.
Speedway Motors Chevy Pickup Front End Rebuild Kit being added to the dropped spindles and stock centerlink
25. A Speedway Motors Chevy Pickup Front End Rebuild Kit (PN 91006770) got us new tie-rod ends and adjuster sleeves and mated up perfectly to the dropped spindles and stock centerlink.
closeup of new rod ends and idler arm
26. The new rod ends and idler arm will give us peace of mind when our truck hits the road, knowing that pretty much every component on the front suspension is brand new.
view of finished front suspension
27. What an improvement! The Speedway Motors Complete Front Suspension Kit installed in a morning and offers a better stance, better braking, and looks extremely trick, especially when compared to the rusty stock stuff.
view of wheel beside completed chassis
28. We were dying to see our newly completed chassis on the ground as a roller so we pulled some Speedway Motors Rally Wheels (PN 9101968) with the 5-on-5 bolt circle and added some flat caps (PN 9101973) and redlines radials for the right look.
view of finished chassis
29. It’s a roller! It took a lot of work to get here and we still have a long way to go, but seeing our chassis all cleaned up and on the ground has us fired up to keep moving.
SOURCE