CTP  Tech

InTheGarageMedia.com

Honking with Conviction
Big Horns Trump Sheepish Beepers
BY “Rotten” Rodney BaumanPhotography BY THE AUTHOR
C

ruisin’ low and slow in big-city traffic I’ve certainly heard my share of automobile horns. Have you heard the shrill pitch of a typical modern horn today? Those don’t exactly issue an authoritative warning, do they? Years ago when American iron was more likely to be manufactured in America, you’d have absolutely known if you’d received a honking.

For our long-ongoing ’55 Chevy second-series project, it’s finally time to think about the littler things. With shelves’ worth of parts inventoried on pallet racks, we have only the standard left-side horn in the mix. Coincidentally, we’ve not yet ever seen an original truck of this type with a complete pair of horns. Despite the core support’s louvers for two, so far there’s always only one.

As decibel dispensers, a two-tone pair of originals would surely command respect. Since we know they’d bolt right on and line right up with existing louvers, it would make good sense to use them—if we could only find them.

At times like these it’s good to have access to an older wrecking yard. If I haven’t already mentioned this too many times before, I was brought up in that type of environment. Today there’s not much left of the inventory, but for a short time longer there’s still a few parts stashed.

Back in California, on the front porch of one crumbling structure there’s a wall of ancient orange crates. They’re historically significant in their own right, but they were also used for pre-dismantling and stocking small parts. Last I checked there’s a matching pair of 12V horns still in one of those crates.

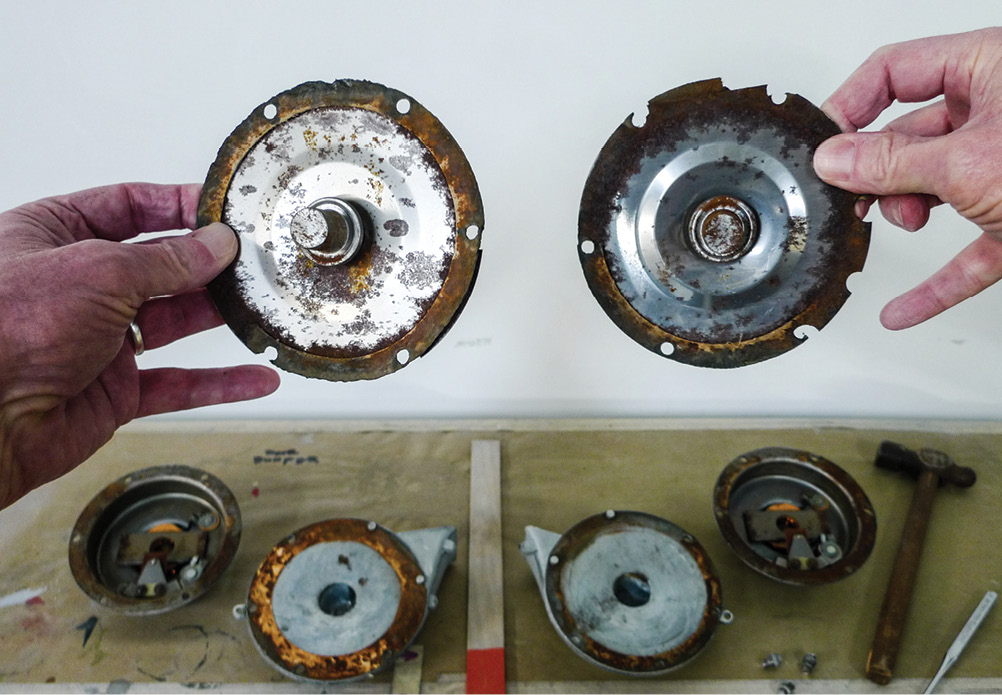
Going only by memory, the aforementioned horns are from the Delco-Remy division of General Motors, and they’re early enough that they’re not made of plastic. I’d imagine they date to circa late ’60s—and that’s when horns were honkers!

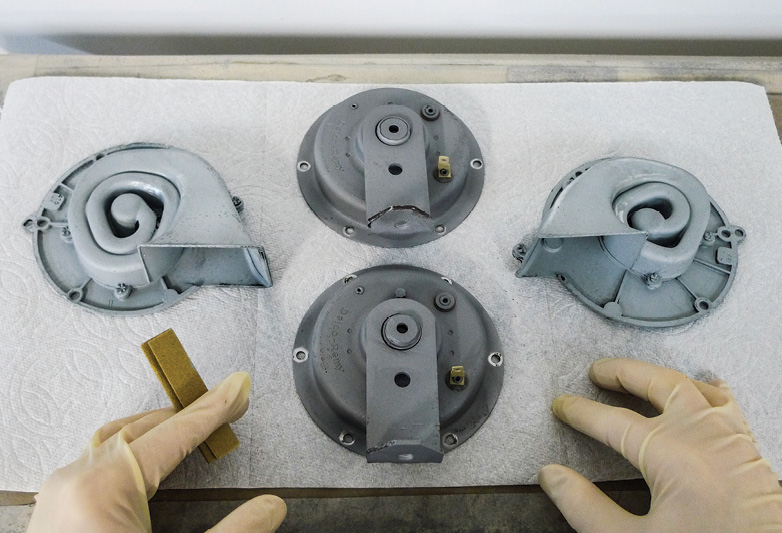
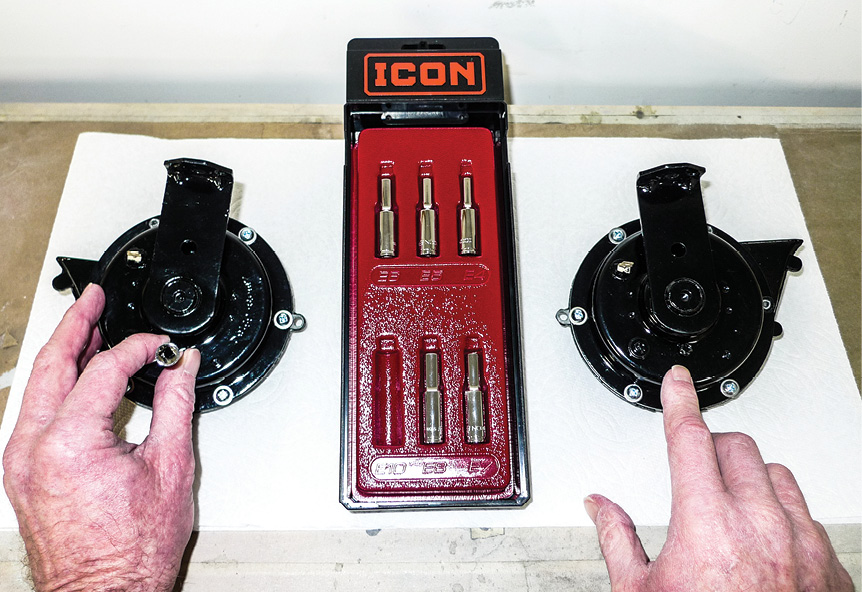
Best of all, as I recall, the pair is symmetrical, as in (right and left) mirror images of one another. Since a lifted hood will occasionally expose them, we’d like them to look as though they belong.

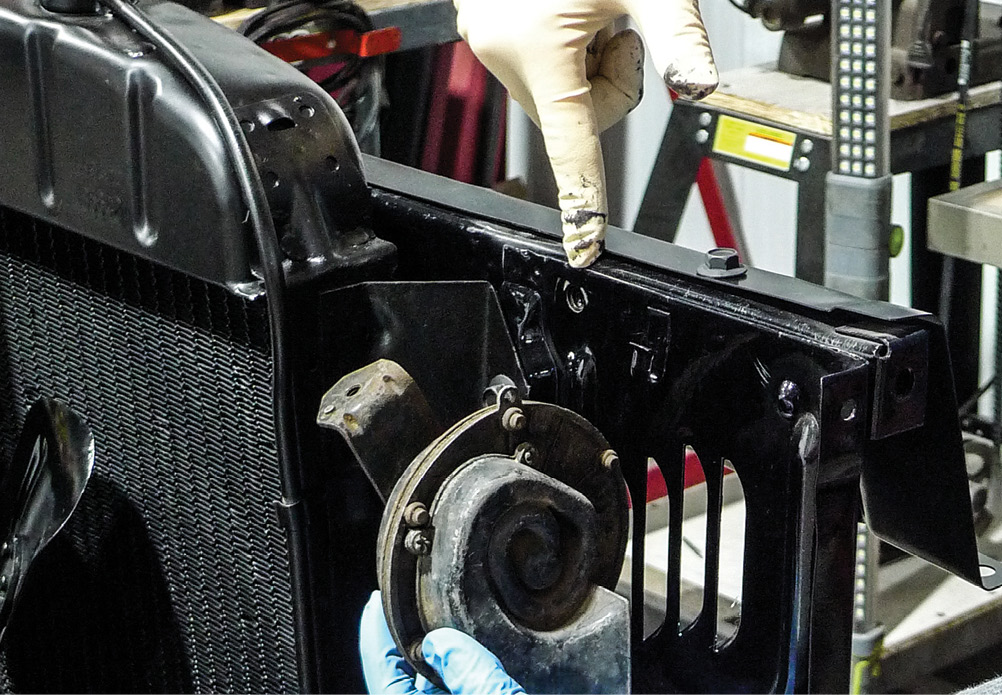
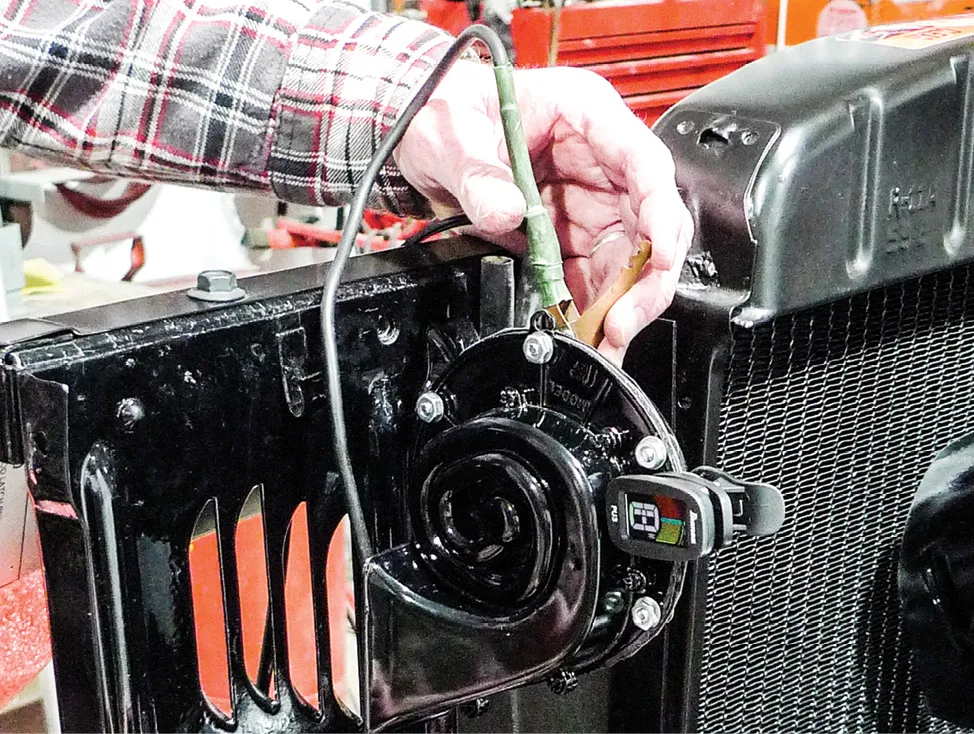
In just the right positions behind the core support’s louvers, the smaller-than-stock Delco-Remy horns should look right at home. Quite conveniently for us, threaded mounting holes are already present in about the right places.

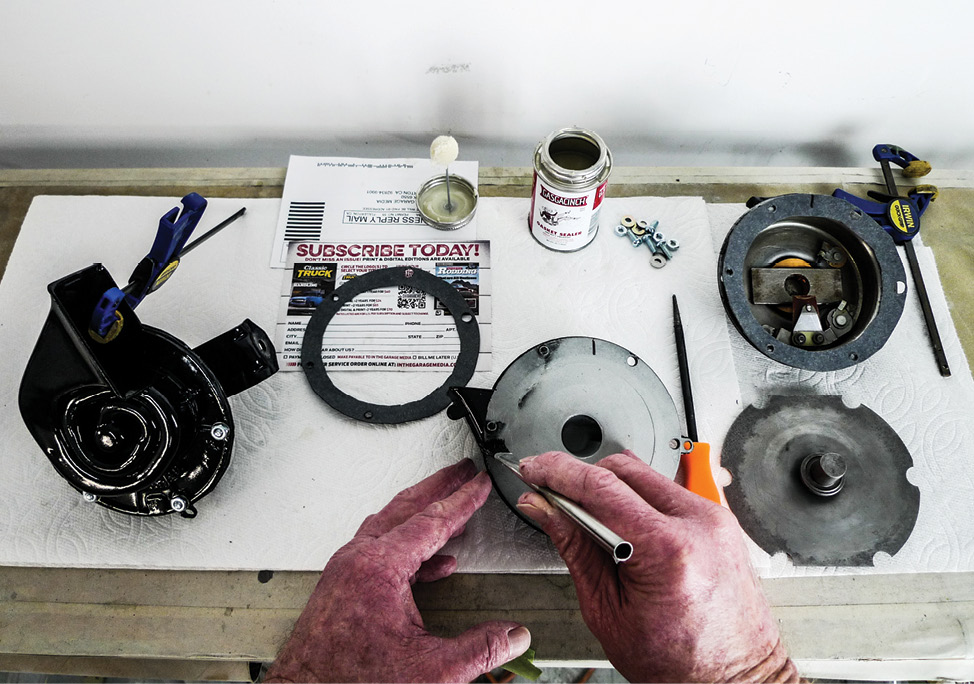
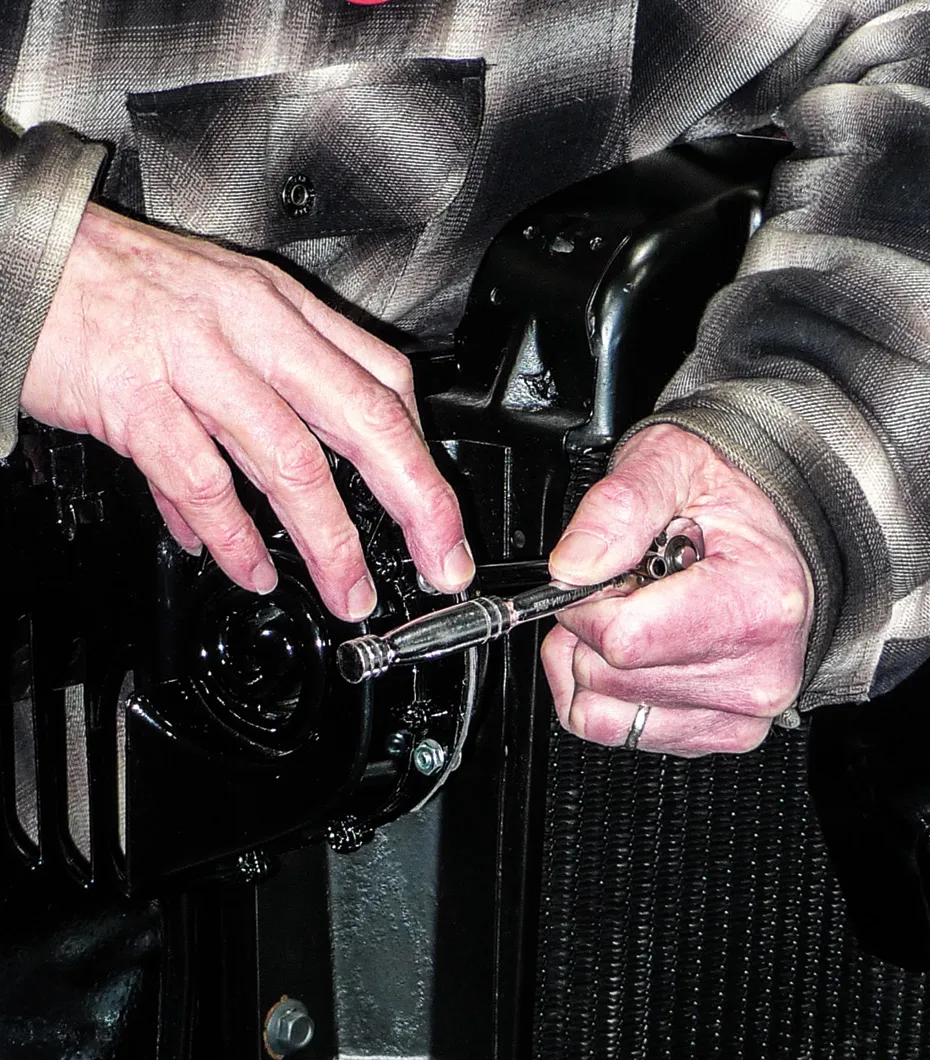
To get the mini-megaphone portions aimed properly through their louvers, the horns will need to be re-clocked. We can modify brackets for that, but providing certain rivets are uniformly spaced, there may be an easier way.

First things first; for any of this to actually happen there’ll be travel involved. The way our horns are hidden, shipping won’t be possible. It’s not like I can give directions to the secret stash place where no one else would ever go.

As the plan stands I’ll just go fetch that matching pair of symmetrical, two-tone, Delco-Remy horns. For the return trip I’ll just stuff them in my Samsonite and roll—without much illustration for that particular step.

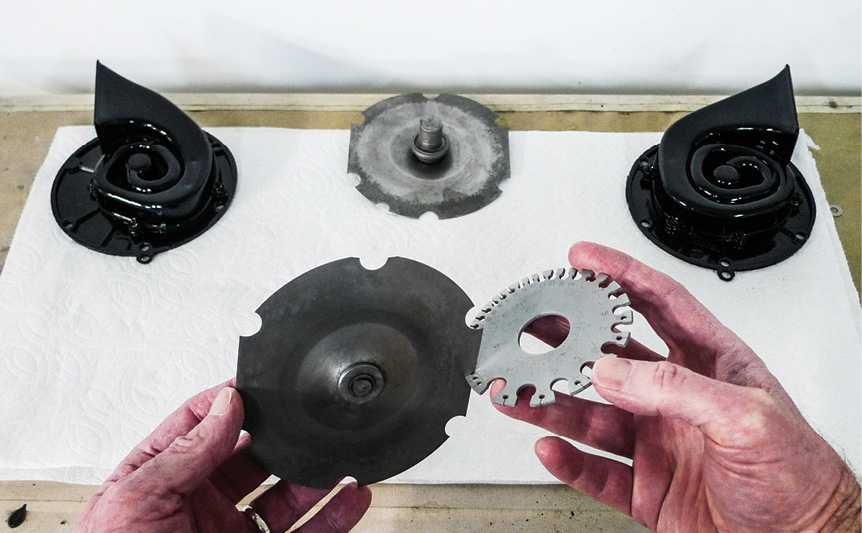
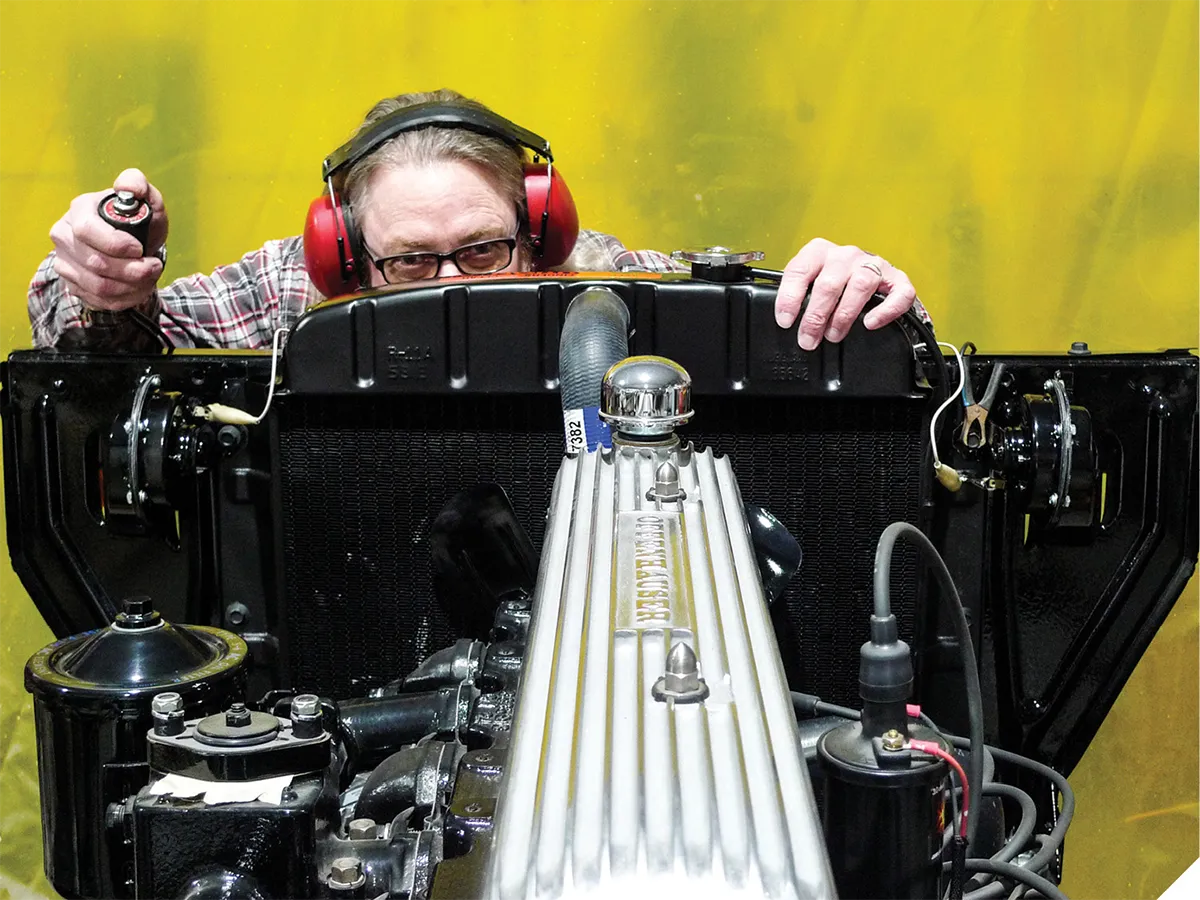
Have you ever wondered what (apart from a big-city motorist) makes a horn honk? Back at the shop, we’ll conduct exploratory dissection. If it turns out they’re good enough to continue working with, we’ll restore and/or modify our honkers as necessary from there.

For our own particular purposes, we don’t mind that they’re not exactly stock for our ’55 Chevy second-series project, nor do we mind that a to-the-letter restorer of GM muscle cars might gladly pay up for the pair. Once they’re resplendent in shiny black urethane they should fit in with their classic truck surroundings just fine.

According to ancient treasure maps and what’s left of my own memory, our horn quest should conclude on the porch of this old house.
1. According to ancient treasure maps and what’s left of my own memory, our horn quest should conclude on the porch of this old house.
Sure enough, they’re still right here in the same old orange crate. For whatever reason, they were pulled but not sold. We’ll never know that part of their story.

2. Sure enough, they’re still right here in the same old orange crate. For whatever reason, they were pulled but not sold. We’ll never know that part of their story.

Back at the shop, let’s first confirm fitment expectations. The factory-provided horn-mounting holes are already threaded, and indeed they’re in the right places.
3. Back at the shop, let’s first confirm fitment expectations. The factory-provided horn-mounting holes are already threaded, and indeed they’re in the right places.
For our horn’s initial cleanup blast, we’ve stuffed some paper toweling up their snouts. This’ll be their first of two laps through the old bead-blasting cabinet.

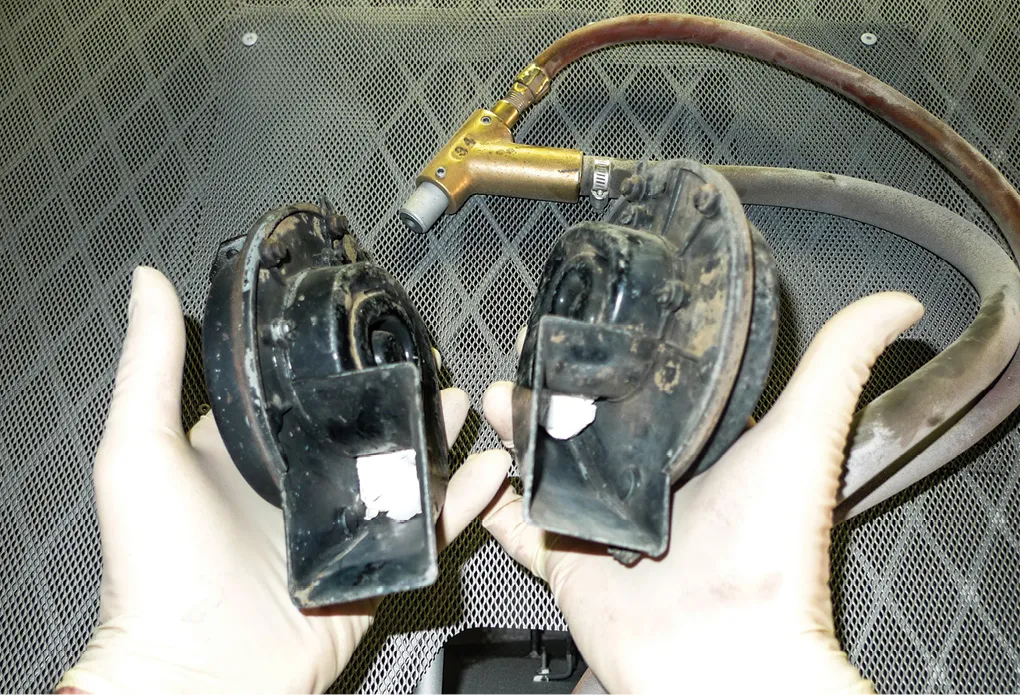
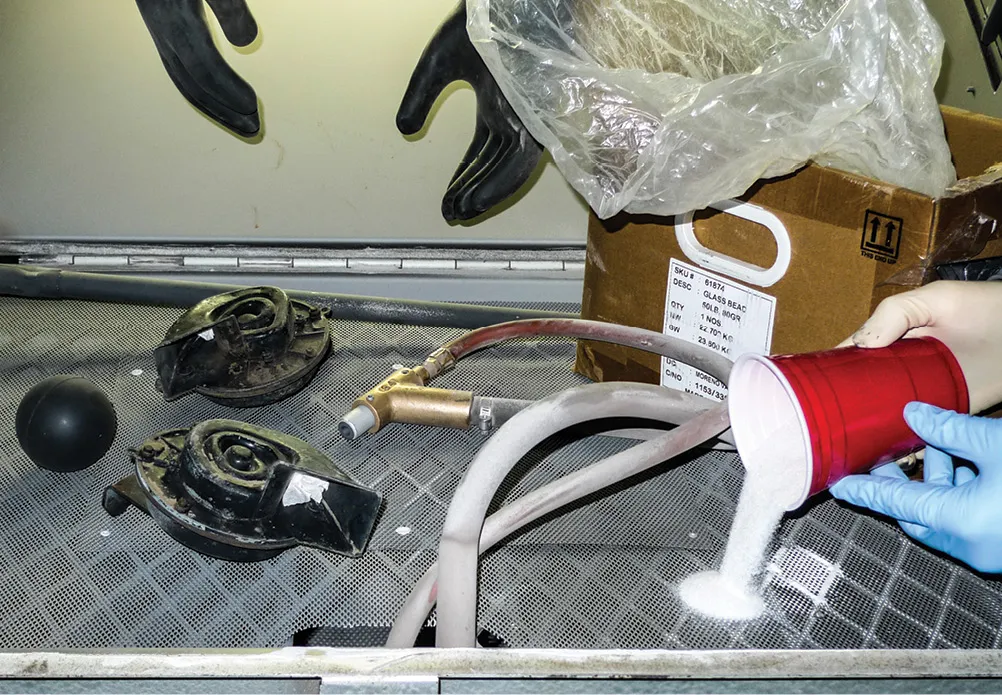
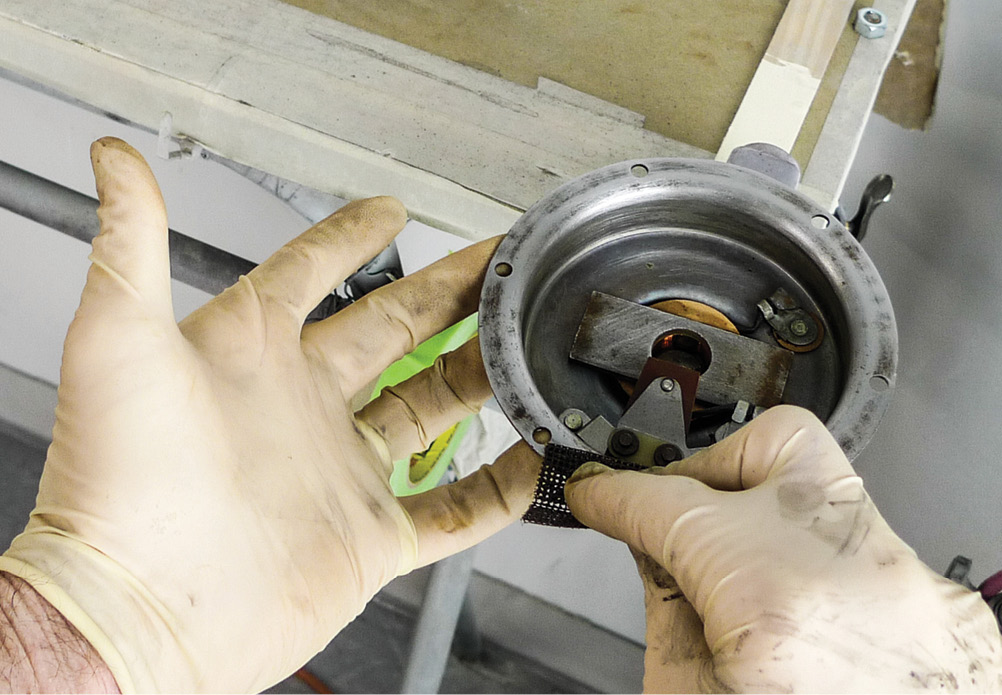
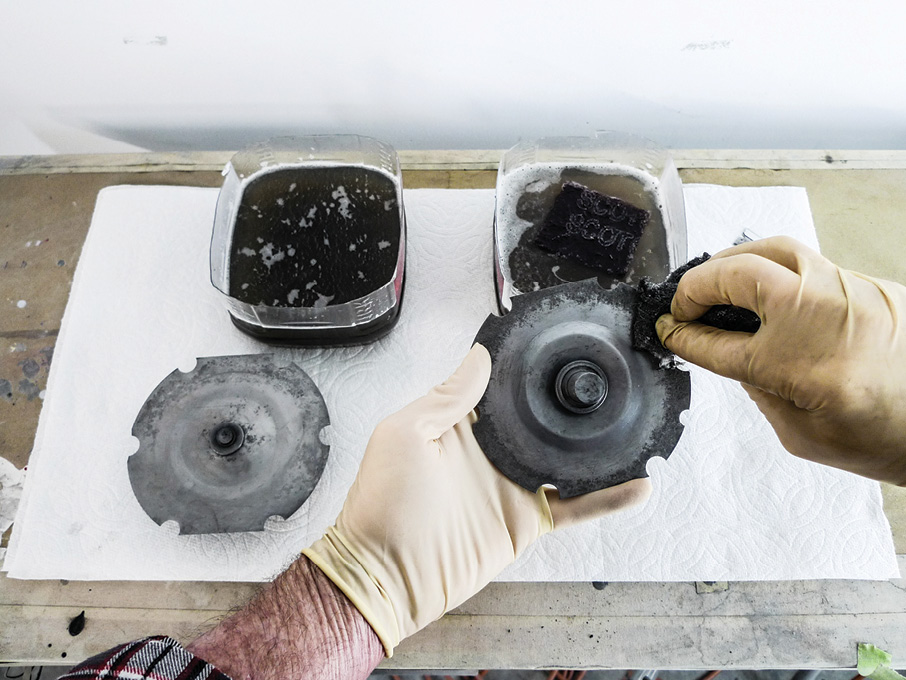
4. For our horn’s initial cleanup blast, we’ve stuffed some paper toweling up their snouts. This’ll be their first of two laps through the old bead-blasting cabinet.

Since it’s time to replenish anyway, we’re adding new 80-grit glass beads. We get ours down the road from our local Harbor Freight store.
5. Since it’s time to replenish anyway, we’re adding new 80-grit glass beads. We get ours down the road from our local Harbor Freight store.
With initial bead-blasting pretty much done, we’re grinding heads of rivets. Here a little Harbor Freight angle die grinder with a 3-inch, 36-grit, Roloc-type disc works well.

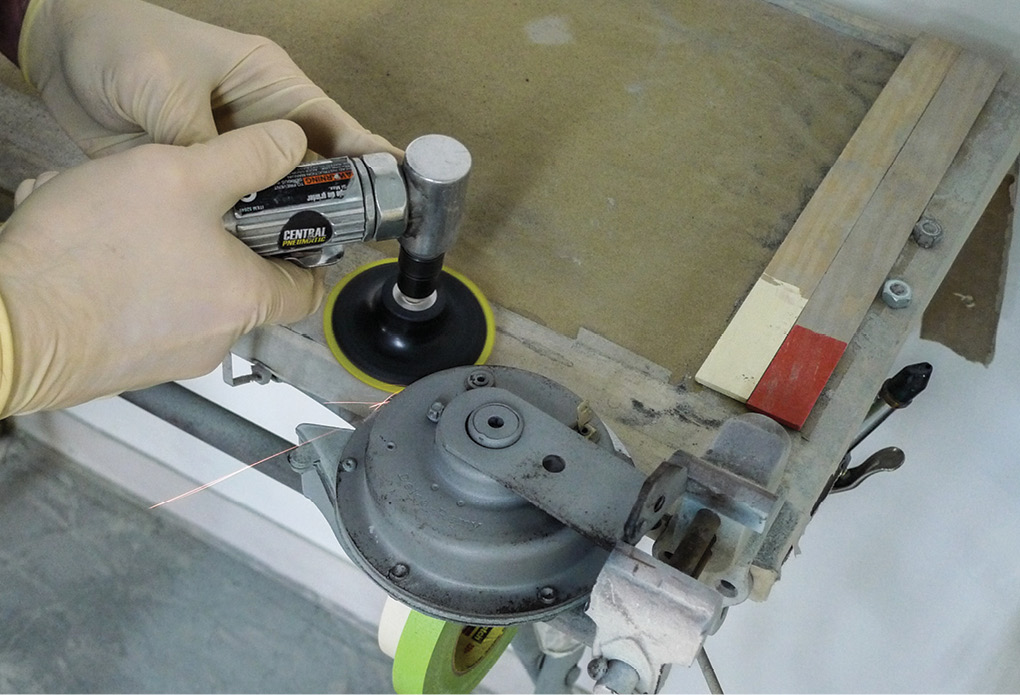
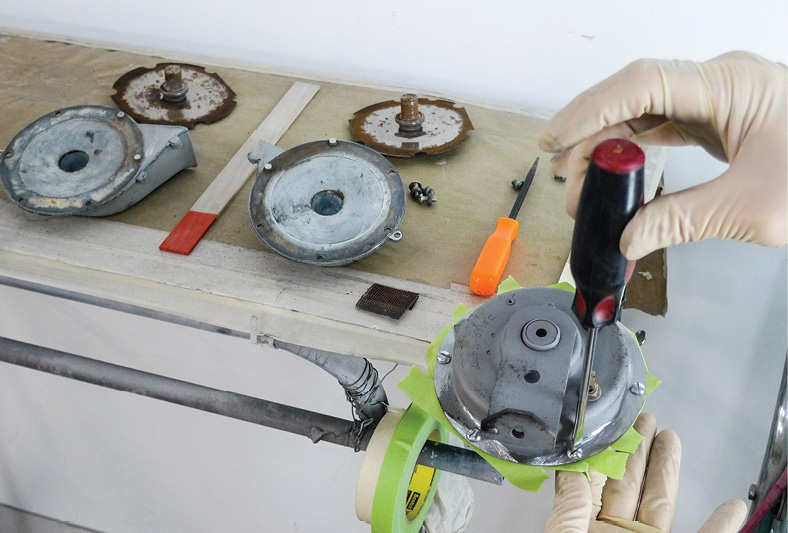
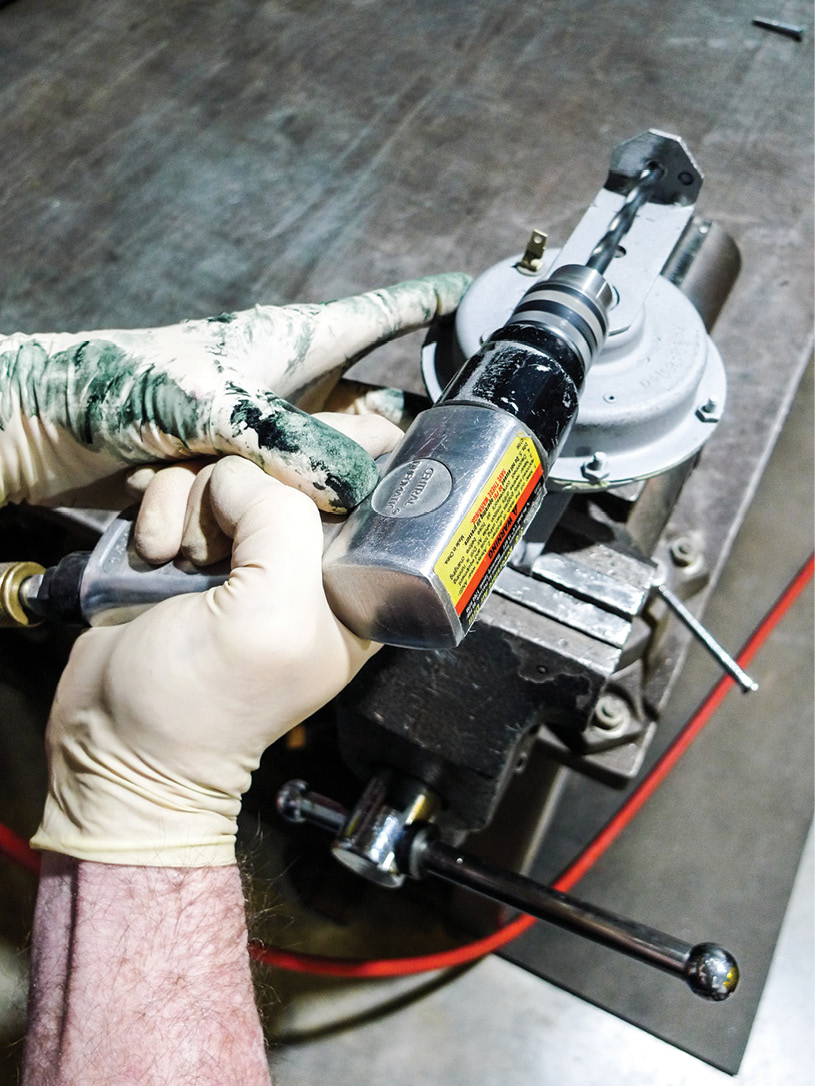
6. With initial bead-blasting pretty much done, we’re grinding heads of rivets. Here a little Harbor Freight angle die grinder with a 3-inch, 36-grit, Roloc-type disc works well.

Because this pair has taken in moisture, their dainty diaphragms show rust right through their protective plating. Bead-blasting would likely ruin these parts.
7. Because this pair has taken in moisture, their dainty diaphragms show rust right through their protective plating. Bead-blasting would likely ruin these parts.
We won’t be bead-blasting the inner workings, either. In a manual manner we’ll clean these up as best we can. Obviously, there’ll be no salvaging the gaskets.

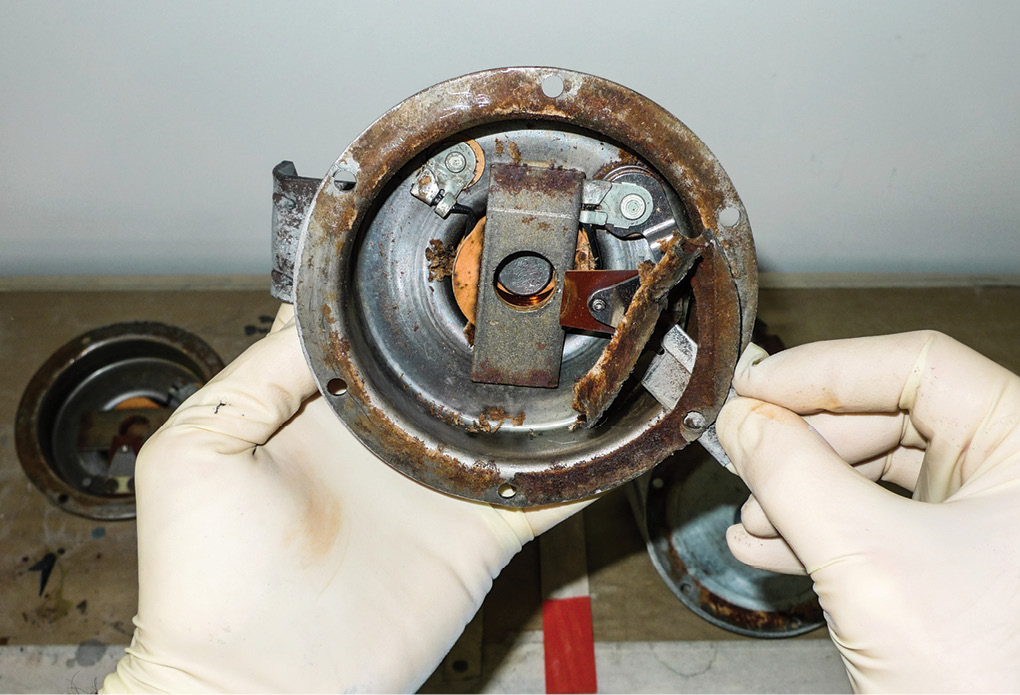
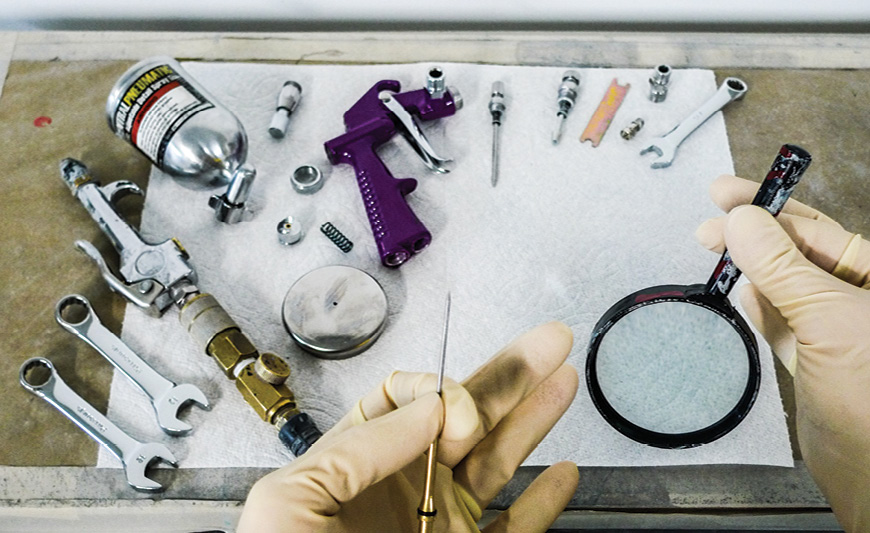
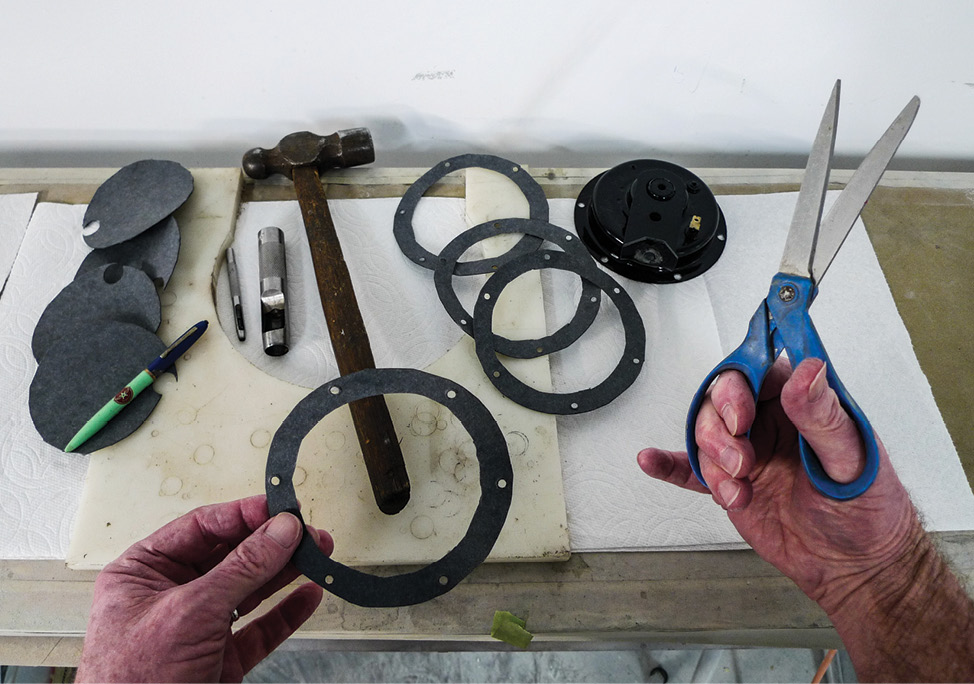
8. We won’t be bead-blasting the inner workings, either. In a manual manner we’ll clean these up as best we can. Obviously, there’ll be no salvaging the gaskets.

Perhaps partly due to age, the factory’s sealant glue is tough. To clean the gasket-mating surfaces a short length of Emery cloth is helpful, but still, this is tedious work.
9. Perhaps partly due to age, the factory’s sealant glue is tough. To clean the gasket-mating surfaces a short length of Emery cloth is helpful, but still, this is tedious work.
With their innards now ’tended to, it’s time for a second lap through the old bead-blasting cabinet. For that we’ll fashion temporary gaskets and screw these together.
10. With their innards now ’tended to, it’s time for a second lap through the old bead-blasting cabinet. For that we’ll fashion temporary gaskets and screw these together.
This might be a good time to enlarge mounting holes as necessary. Since our bit wants to seize, a reversible drill is handy. From Harbor Freight, this one owes us nothing.
11. This might be a good time to enlarge mounting holes as necessary. Since our bit wants to seize, a reversible drill is handy. From Harbor Freight, this one owes us nothing.
At this point we’re satisfied with our blasting. These pieces can now be blown off and painted, but what about the rusty diaphragms?
12. At this point we’re satisfied with our blasting. These pieces can now be blown off and painted, but what about the rusty diaphragms?
While we’re painting other pieces we’ll let Evapo-Rust clean diaphragms. This non-toxic rust remover is reusable, is quicker than molasses, and is sold at Harbor Freight.
13. While we’re painting other pieces we’ll let Evapo-Rust clean diaphragms. This non-toxic rust remover is reusable, is quicker than molasses, and is sold at Harbor Freight.
Back in 2018 this cute little Harbor Freight detail gun was only $11.99 on sale. Since its purchase, it’s been shelved and waiting for just the right job.
14. Back in 2018 this cute little Harbor Freight detail gun was only $11.99 on sale. Since its purchase, it’s been shelved and waiting for just the right job.
Following disassembly and thorough removal of preservative lubricant, it can finally be put to work—had I not dropped and lost one tiny packing nut, it would’ve been.
15. Following disassembly and thorough removal of preservative lubricant, it can finally be put to work—had I not dropped and lost one tiny packing nut, it would’ve been.
Due to technical difficulty (my own clumsiness) we’ll not expound the paintwork steps. The nutshell version is, we’re pleased. Now let’s go check on our diaphragms.
16. Due to technical difficulty (my own clumsiness) we’ll not expound the paintwork steps. The nutshell version is, we’re pleased. Now let’s go check on our diaphragms.
Having soaked for 72 (or so) hours, our previously rusty diaphragms have cleaned up nicely. Around their edges a household scouring pad is used on remaining glue.
17. Having soaked for 72 (or so) hours, our previously rusty diaphragms have cleaned up nicely. Around their edges a household scouring pad is used on remaining glue.
With parts now scrambled we discover that our diaphragms differ in thickness. The cast seashells are marked (H ‘n’ L) so let’s use the thinner diaphragm for the high-note horn.
18. With parts now scrambled we discover that our diaphragms differ in thickness. The cast seashells are marked (H ‘n’ L) so let’s use the thinner diaphragm for the high-note horn.
From the outside of the stamped steel housings our points are adjustable. They look fine, but we’re using a flexible point file just the same.
19. From the outside of the stamped steel housings our points are adjustable. They look fine, but we’re using a flexible point file just the same.
Later for tuning we’d like a proper socket. Our adjusting screws are stars. A 1/4-inch 12-point wouldn’t fit, so we ran to Harbor Freight for this E-Torx set to try—prior to pliers.
20. Later for tuning we’d like a proper socket. Our adjusting screws are stars. A 1/4-inch 12-point wouldn’t fit, so we ran to Harbor Freight for this E-Torx set to try—prior to pliers.
As we’ve learned, having gaskets in place is important. During testing without them our horns made humming sounds only. Now let’s reassemble and try again.
21. As we’ve learned, having gaskets in place is important. During testing without them our horns made humming sounds only. Now let’s reassemble and try again.
Here at our makeshift honk-testing station we like what we hear. They’re obviously two-tone. They’ll likely sound even better mounted solidly in place.
22. Here at our makeshift honk-testing station we like what we hear. They’re obviously two-tone. They’ll likely sound even better mounted solidly in place.
Now that we’re satisfied they’re functional and we won’t need to go back in, let’s disassemble once more and seal the deal with gasket cement.
23. Now that we’re satisfied they’re functional and we won’t need to go back in, let’s disassemble once more and seal the deal with gasket cement.
For final installation, star washers are used for best-possible grounding. Bull’s-eyed right behind their louvers, mini-megaphones are downturned just right for drainage.
24. For final installation, star washers are used for best-possible grounding. Bull’s-eyed right behind their louvers, mini-megaphones are downturned just right for drainage.
With temporary test-wiring done enough, it’s time for fine-tuning as necessary. This little tuner works great for stringed instruments. Let’s see how well it works for horns.
25. With temporary test-wiring done enough, it’s time for fine-tuning as necessary. This little tuner works great for stringed instruments. Let’s see how well it works for horns.
OK, so it’s not working here. By ear, however, our horns are honking out low E and high F notes. We think they’ll sound just fine together. Next up, let’s test our theory.
26. OK, so it’s not working here. By ear, however, our horns are honking out low E and high F notes. We think they’ll sound just fine together. Next up, let’s test our theory.
Oh my goodness, the devastating decibels! Granted, we’ve worked for this, but here in the end our good ol’ American honkers emit some vicious pitches.
27. Oh my goodness, the devastating decibels! Granted, we’ve worked for this, but here in the end our good ol’ American honkers emit some vicious pitches.
 SOURCE
Harbor Freight Tools
(800) 423-2567
harborfreight.com