CTP TECH
InTheGarageMedia.com
A man in a plaid shirt installs a window regulator mechanism into the partially disassembled inner panel of a car door.
1. With the original manual window regulator removed, Paul Willis slipped the Ball’s power window unit in the door of his 1955 F-100 for a test-fit. The regulator may be installed with the motor toward the front or rear of the door.
An Open-And-Shut Case typography
Installing Ball’s Universal Power Window Regulators
By Ron Ceridono 
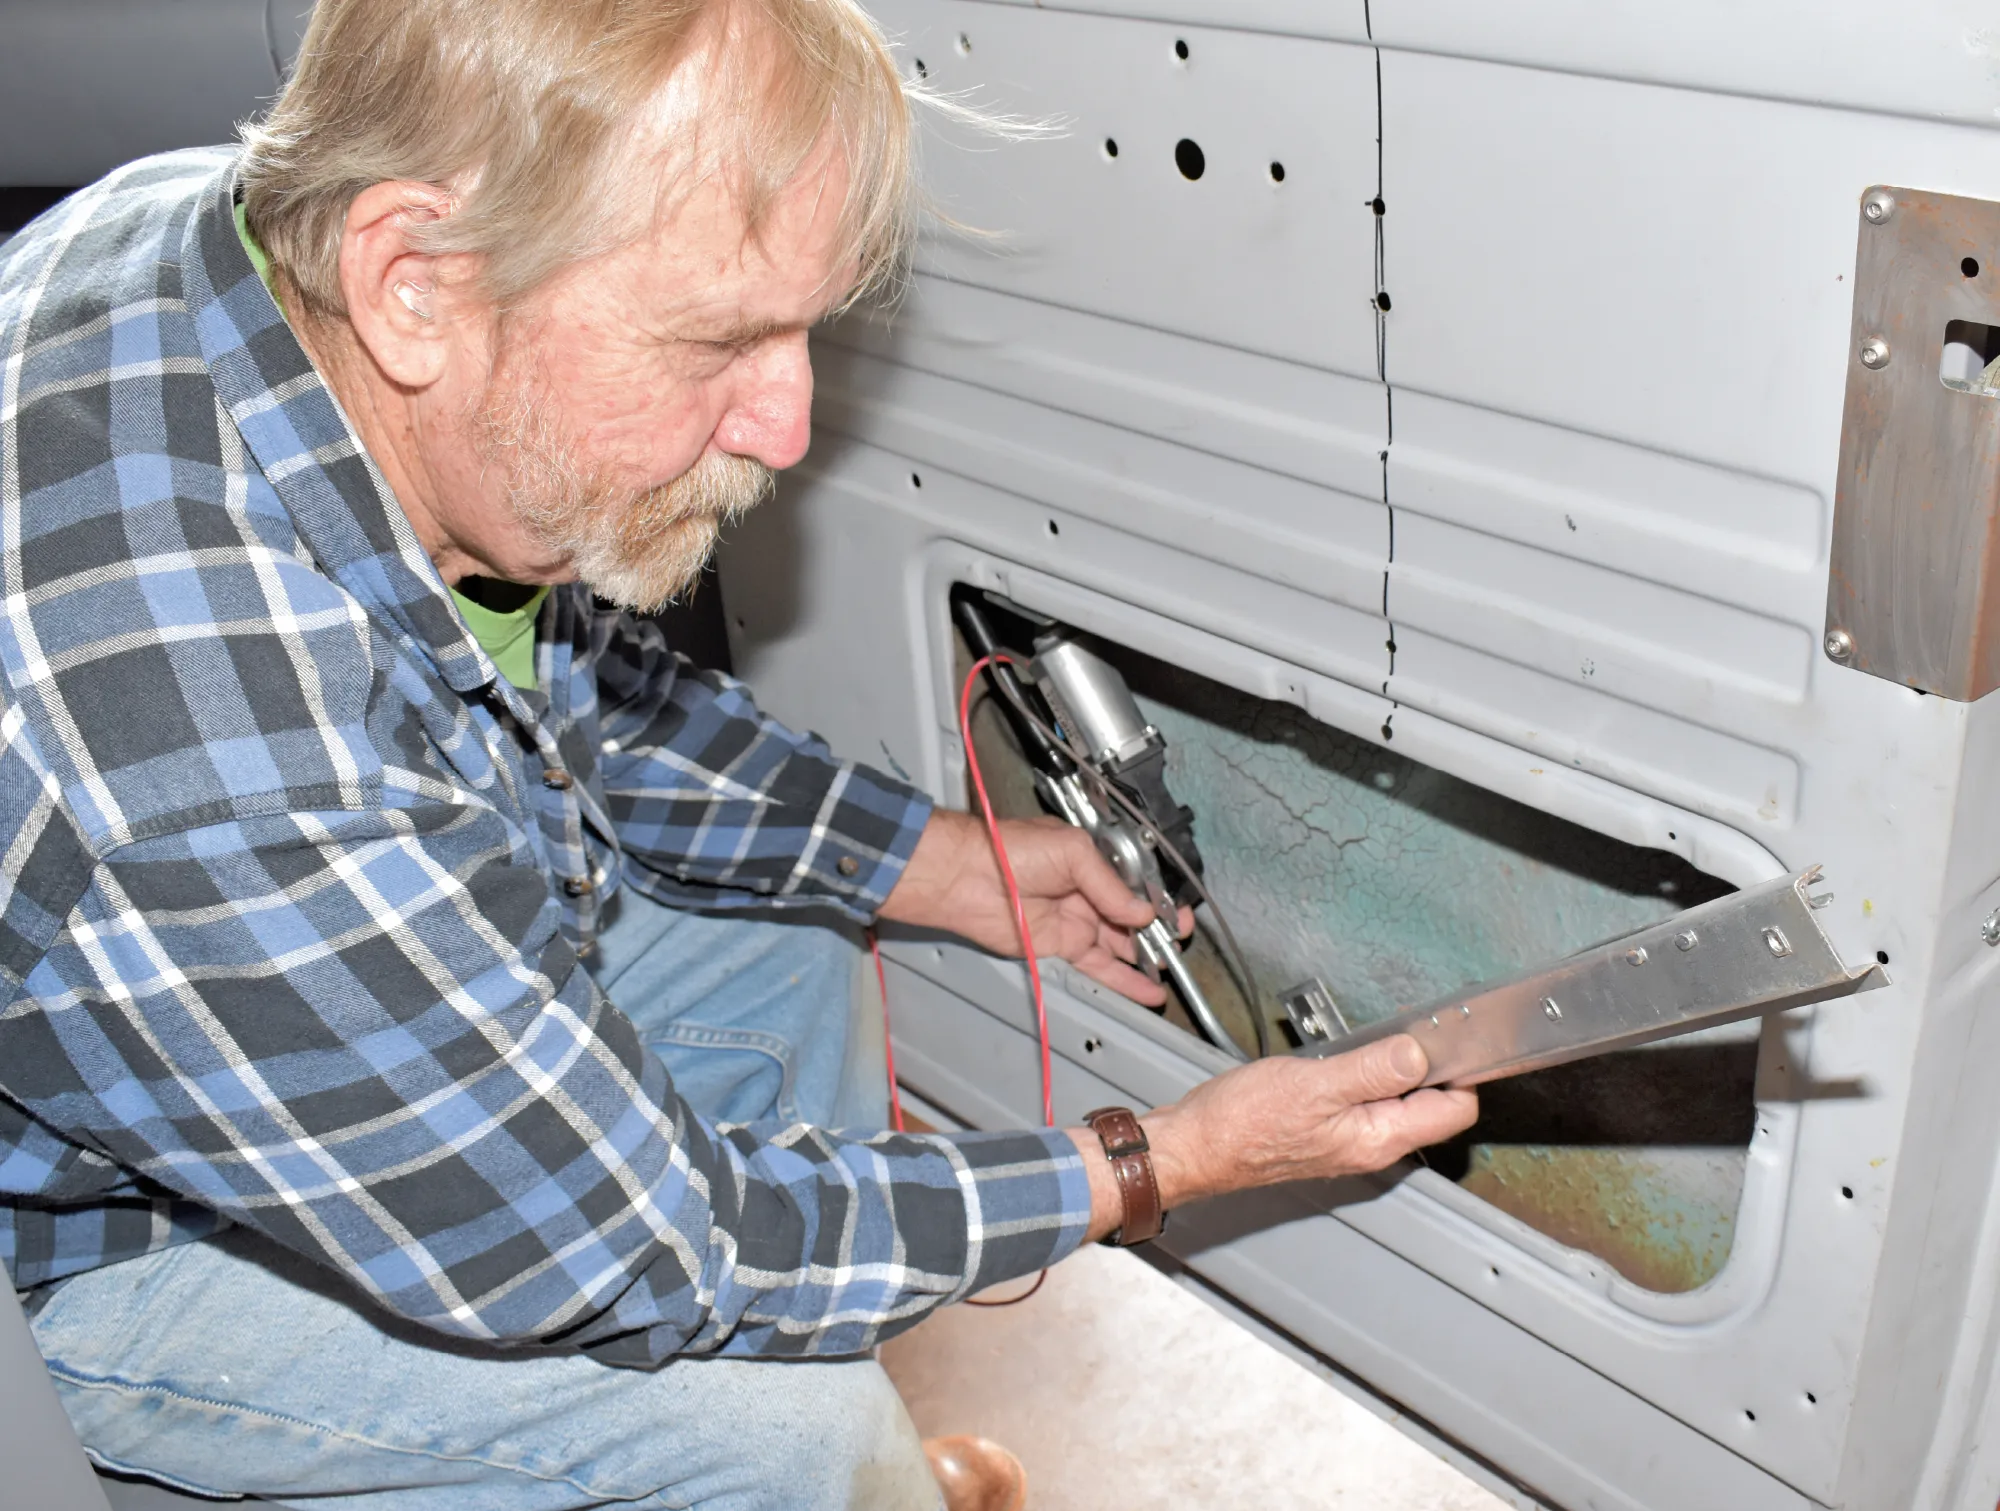
Images by THE AUTHOR
W

hile power windows are pretty much standard equipment in modern trucks, that hasn’t always been the case. General Motors was the first to offer them in Chevy and GMC pickups in 1977; they became available in Fords for 1984, but they weren’t on the Dodge option list until 1989. But for those who would like to raise and lower his/her classic truck’s windows by pushing a button rather than spinning a crank, Ball’s Power Windows makes it easy and affordable to add this contemporary feature.

There are several reasons to consider installing power windows. Certainly, there is ease of operation, plus the convenience of being able to roll down the passenger window from the driver seat without having to reach across the cab. Of course, it’s often an opportunity to get rid of a worn mechanical regulator that needs to be replaced anyway; and then there is the fact power windows in an early truck are cool.

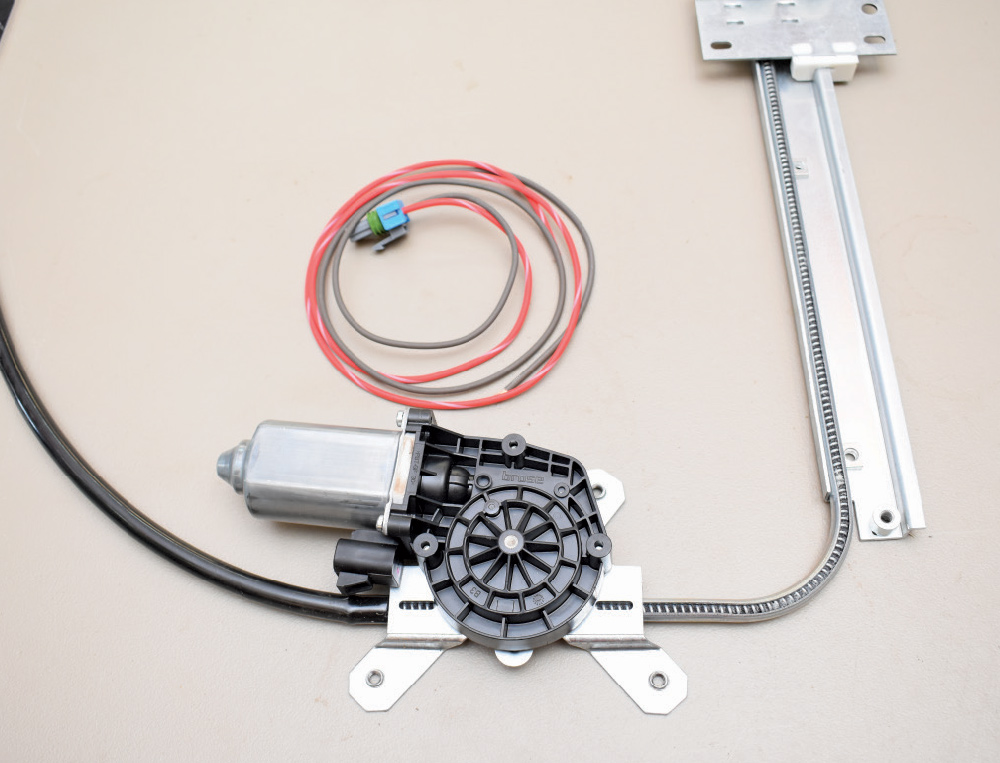
While in the process of refurbishing his 1955 Ford F-100, Paul Willis decided to scrap the truck’s original 70-year-old mechanical window regulators and install a Ball’s Power Windows universal kit for flat glass. First used as original equipment on Mack trucks, these heavy-duty regulators are also used to operate the large privacy partition in limousines, to raise heavy bulletproof/resistant glass and even to raise and lower flat-screen televisions hidden in motorhome cabinets (which would also be the world’s coolest workbench feature in a shop/man cave).

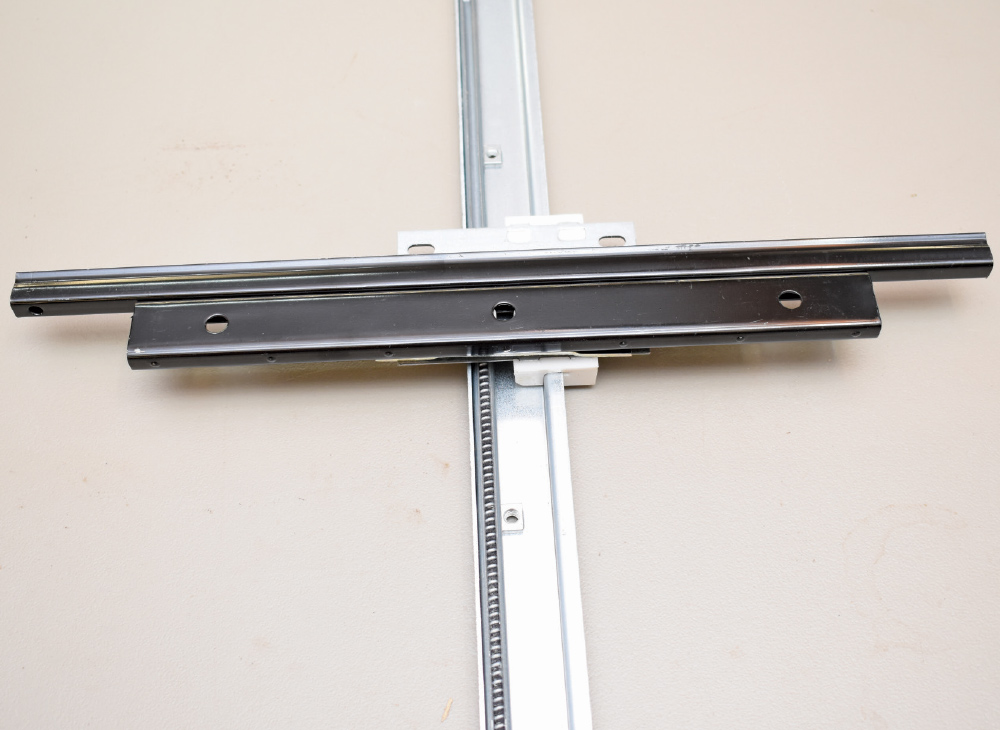
For simplicity and reliability Ball’s flat glass power window regulators have few moving parts. A vertical channel with a “glide pad” attaches to the glass, which is then moved up and down in the channel by a motor-driven cable—the operation is both smooth and quiet. Made in the USA, these regulators have been tested for over 100,000 cycles and they don’t have any of the plastic failure-prone components found in “off-shore” brands.

Installing the new Ball’s power window kit regulator/motor assemblies was as simple as removing the original manual regulators, drilling a few holes, and bolting the motor and regulator assembly in place with no other modifications to the doors required. Due to the compact design these kits fit inside narrow doors, and if necessary the riser channel may be shortened to fit as long as enough length is provided to open and close the window completely. In this case, no trimming was necessary.

Of course, adding power windows does require some wiring. Ball’s included a wiring pigtail with our kit and a variety of conventional switches are available, but we elected to go with a covert option, electric switches that look like a window crank. These switches can be wired individually, or with the addition of a push button the driver side switch can operate both windows. Ball’s also offers their express module (PN JW-530) that completely opens or closes the windows with one touch of the switch.

Along with power window kits and accessories, a Ball’s subsidiary, Vintage Glass manufactures domestic windshields, side and back glass for pre-1980 cars and trucks. With over 25 years in the business, if Vintage Glass doesn’t have what you need, they can make it. All glass they produce is processed on a CNC machine and cut to NAG standards (National Auto Glass Specifications). For custom applications, customer-supplied patterns can be scanned and cut at no additional charge. All glass is then polished and tempered (except windshields, which are laminated). Vintage Glass also offers a wide range of one-piece door glass kits (call for specific applications).

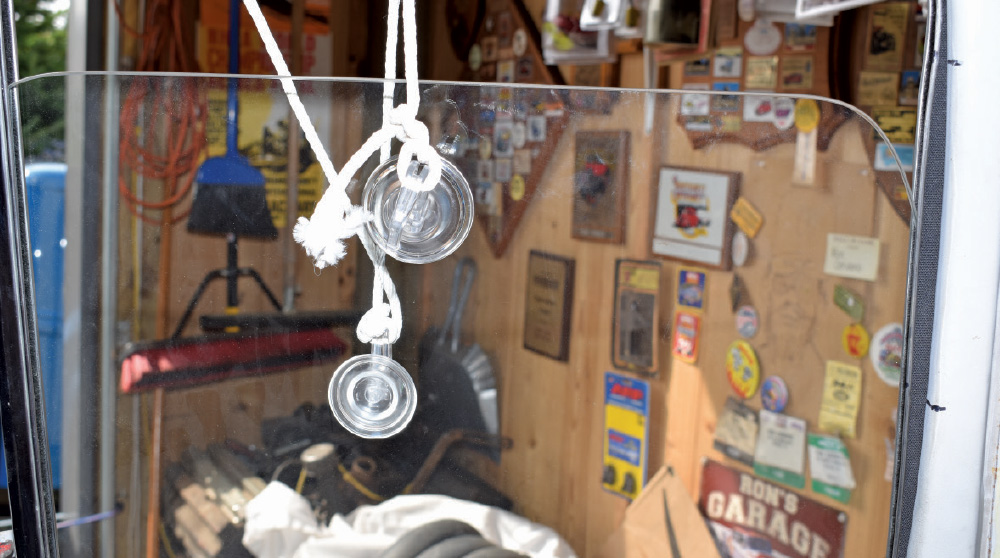
The descriptive reference to automotive glass being either laminated or tempered refers to the manufacturing process used to produce it. Laminated glass is made with two layers of glass with a sheet of plastic material (polyvinyl butyral) in-between and is primarily used for windshields. If a laminated windshield is broken, rather than shattering the broken pieces stick to the plastic layer to prevent injury from flying glass. During production tempered glass goes through a rapid heating and cooling process that strengthens it, making it tough enough to withstand reasonable impacts. However, if tempered glass is broken the result is small, blunt pieces rather than sharp shards that can cause serious injury.

If you’re planning to convert a classic truck from manual to power windows, and if precut replacement glass is needed as well, Ball’s Power Windows and Vintage Glass can provide everything needed—and they’re just a phone call away.

Components of a power window regulator laid out, including the motor, guide rails, and the toothed metal track.
2. We used Ball’s flat glass power window kit that mounts the motor off to the side. It is available with a fixed window lift channel (on the left with three holes) that bolts to a pad on the drive cable; on the right is the optional floating channel.
A motorized power window regulator for a car, showing the electric motor, gear, and the toothed metal track assembly.
3. The Ball’s power window regulator is a “center lift” design that prevents the glass from rocking as it is raised or lowered.
Power window regulator assembly laid out, showing the motor, toothed track, and a separate coiled wire harness.
4. A powerful screw motor and stainless steel drive cable provides up to 75 pounds of lift with up to 21 inches of travel.
Close-up of a car's power window regulator carriage, showing the metal plate, white rollers, and the toothed track.
5. When using the floating window channel use this plate with a pair of rollers. This design allows the glass to move and follow the profile of the window run channels.
Close-up of a car window regulator track and the metal carriage bracket that moves along the rail.
6. Here rollers are installed in the floating window lift channel. The roller bracket bolts to the pad on the lift channel.
A power window regulator track assembly, featuring two black metal guide rails lying on the silver toothed track.
7. With the rollers attached to the lift pad the lift channel simply slides in place. Note how the pad attaches to and slides on the channel.
A man in a plaid shirt installs a window regulator mechanism into the partially disassembled inner panel of a car door.
8. The large access hole in the F-100 doors makes it easy to install the regulator assembly. The vertical line drawn on the door indicates the centerline of the glass.
Interior view of a car door panel showing a new power window motor and regulator partially installed through the access hole.
9. Threaded rods were used to locate the motor and lift channel in line with the glass. With the location verified, tubing spacers and bolts will be installed.
Four chrome power window switches.
10. Ball’s offers a variety of window switches, including the classic “paddle” style to control single or multiple window regulators.
Various metal components of a power window assembly, including two square metal housings and several chrome-plated shafts/pins.
11. To maintain the original appearance we opted for these switches that mount the stock window cranks. They come with a variety of adapters to accept splined or square shank handles.
Close-up of a white car door panel showing a chrome door handle and holes for mounting the window switch assembly.
12. The large hole is where the original manual window crank was located. The two smaller holes were attachment points for the regulator.
A template with a center hole is taped onto a car door panel next to a chrome handle, marking where to drill the switch holes.
13. Included with the new switches is a template to mark the location of the mounting screws.
A manual, chrome-plated window crank handle mounted on a car door panel next to markings for new switch holes.
14. Here the new switch has been installed along with a stock-style reproduction window crank. The handle is moved up or down to control the motor—an internal stop limits the travel of the handle.
A newly installed, spring-loaded door check mechanism bolted to a car's door frame and body panel.
15. The wires for the power window motors were routed through flexible wire conduit that moves in and out of the A-pillar as the door opens and closes. There is also room in the conduit for door-mounted speaker wiring.
A man in a plaid shirt holds a metal window track component next to the open access hole of a car door panel.
16. With the vent window in place, the division bar with the front window channel is placed inside the door but not attached.
A man inserts a piece of glass into the car door panel to install the window, with the orange engine block visible in the background.
17. Pushing the division bar toward the front of the door allows the glass to be slipped inside the door.
A man works on the latch and lock mechanism of a car door frame in a garage setting with an orange engine block nearby.
18. While holding the glass into the channel in the back of the door, the division bar is placed on the front edge of the window.
Car window glass held by two suction cups and a white rope, positioned in front of a cluttered garage work area.
19. A pair of suction cups and a cord over the top of the door held the glass while the division bar was secured to the door.
View through the window opening of a white car door, showing the chrome trim piece and a cluttered garage work area.
20. With the division bar attached to the door, the top portion of the window channel can be put in place.
Interior view of a car door panel showing a newly installed power window motor and track assembly through the access hole.
21. The finished installation. When attaching the lift channel to the glass window tape may be used, however, butyl windshield sealer is recommended.