CTP Tech
InTheGarageMedia.com
Project Backpay
A black and orange 1966 Chevy C10 truck in a mechanic's garage
Project Backpay title
Howe’s It Doin’ Garage Does the “Big Window” Conversion on the AMD ’66 C10
BY Jason Chandler
Photography BY THE AUTHOR
B

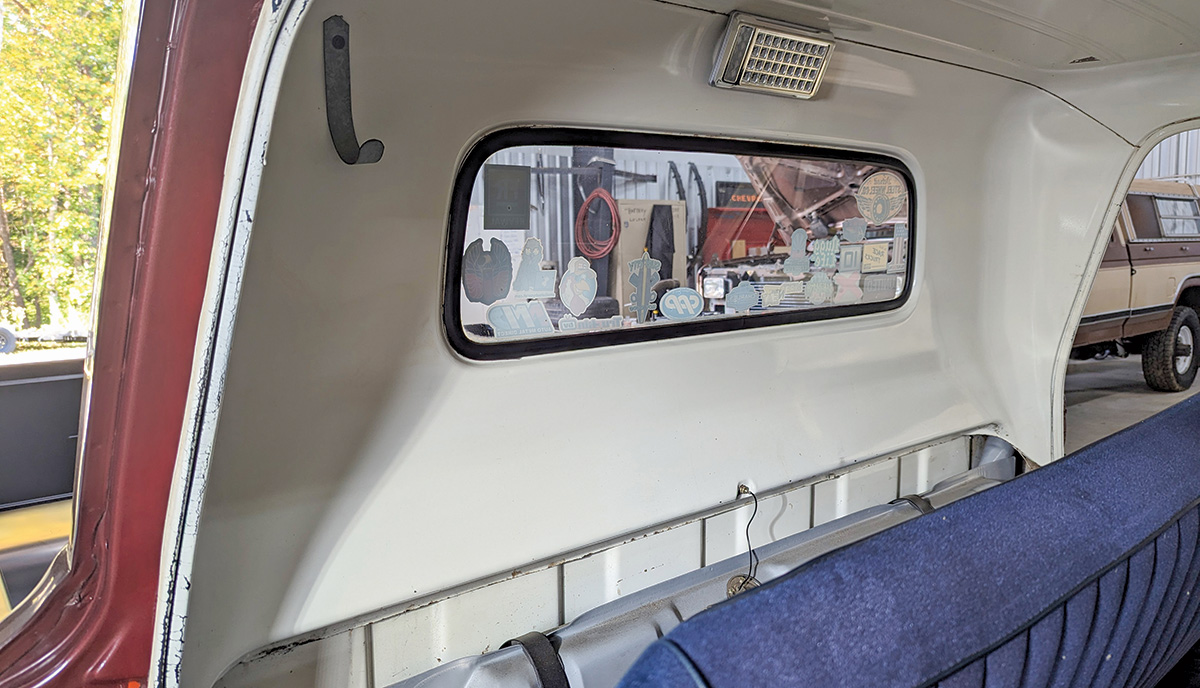
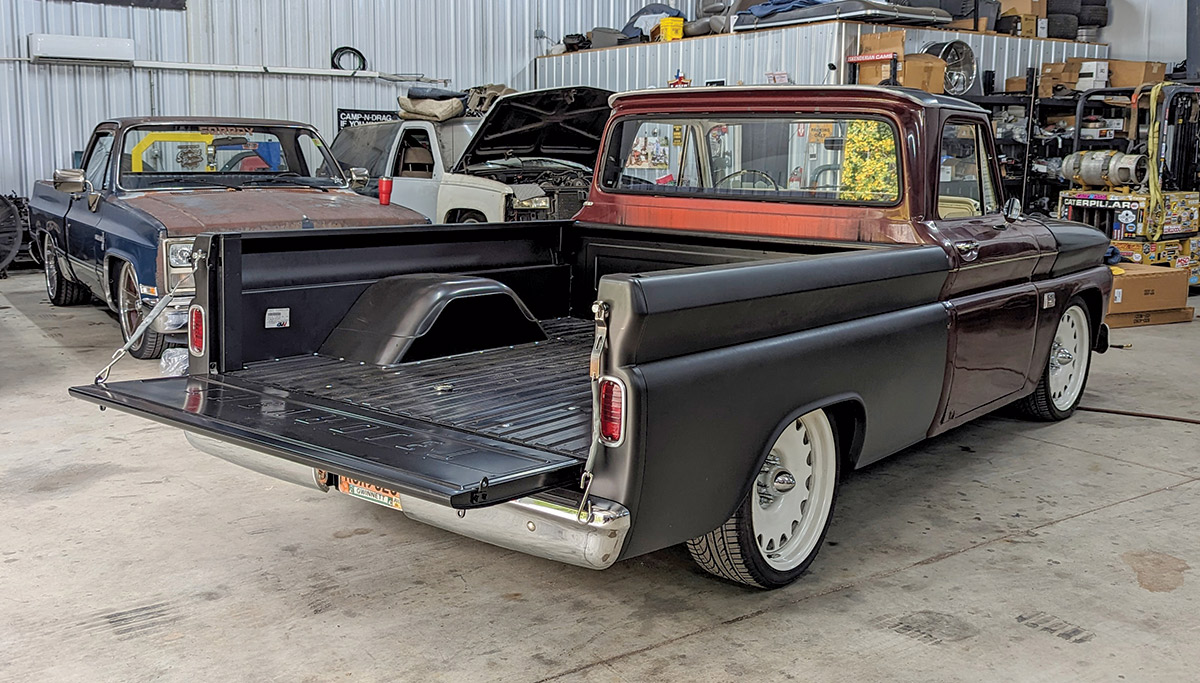
ack on Project #backpay! This ’66 Chevy C10 truck has been under major reconstruction. If you have been following along, you already know that with a step-by-step approach, you can do these same repairs at home. Last time you saw #backpay we featured the power steering and column conversion.

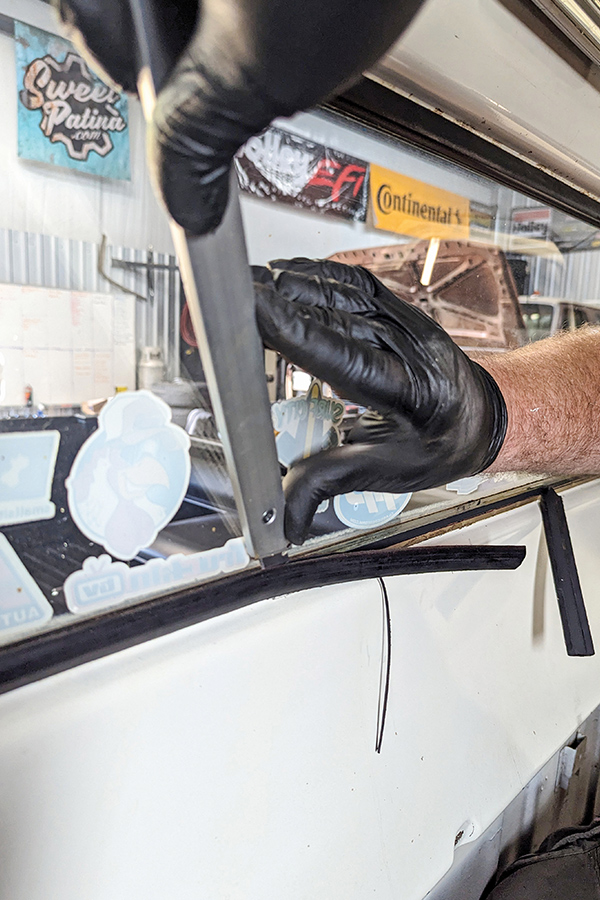
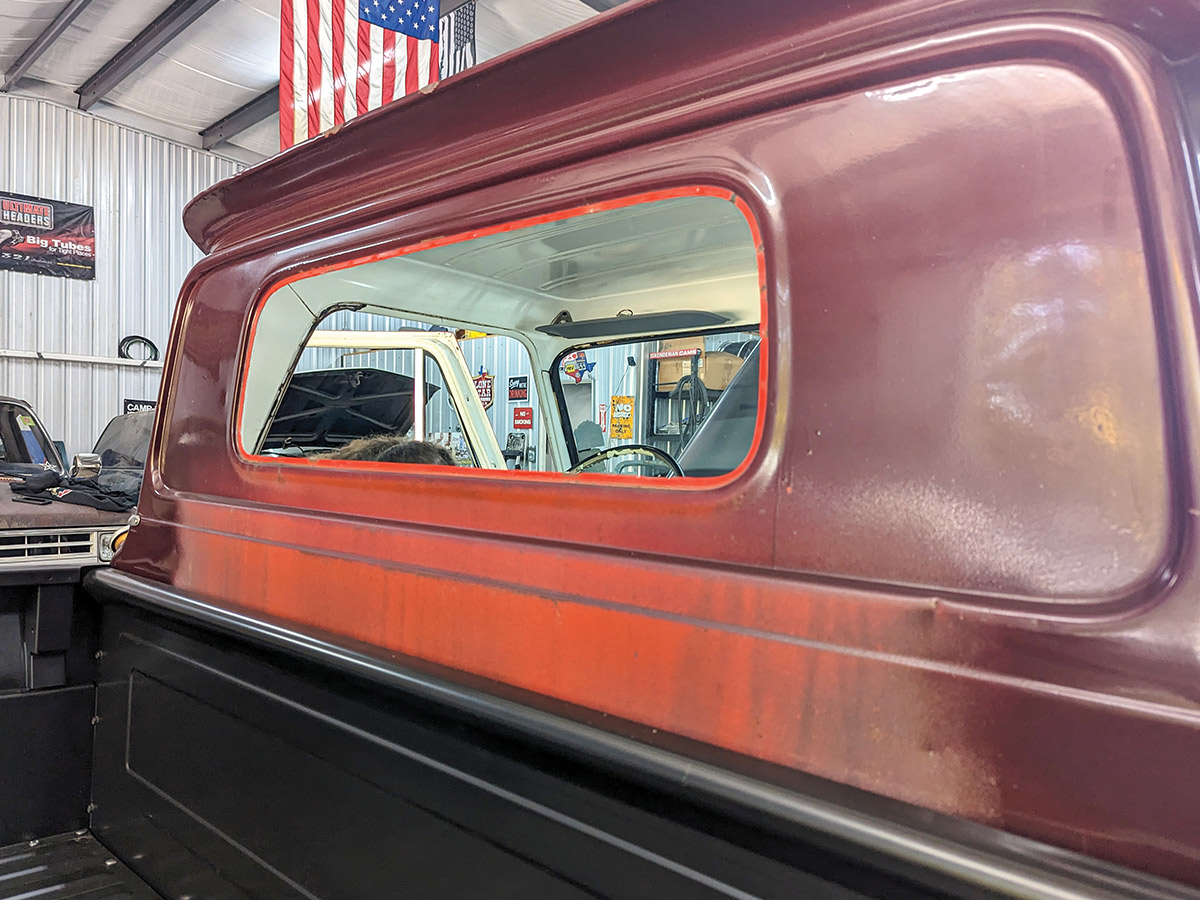
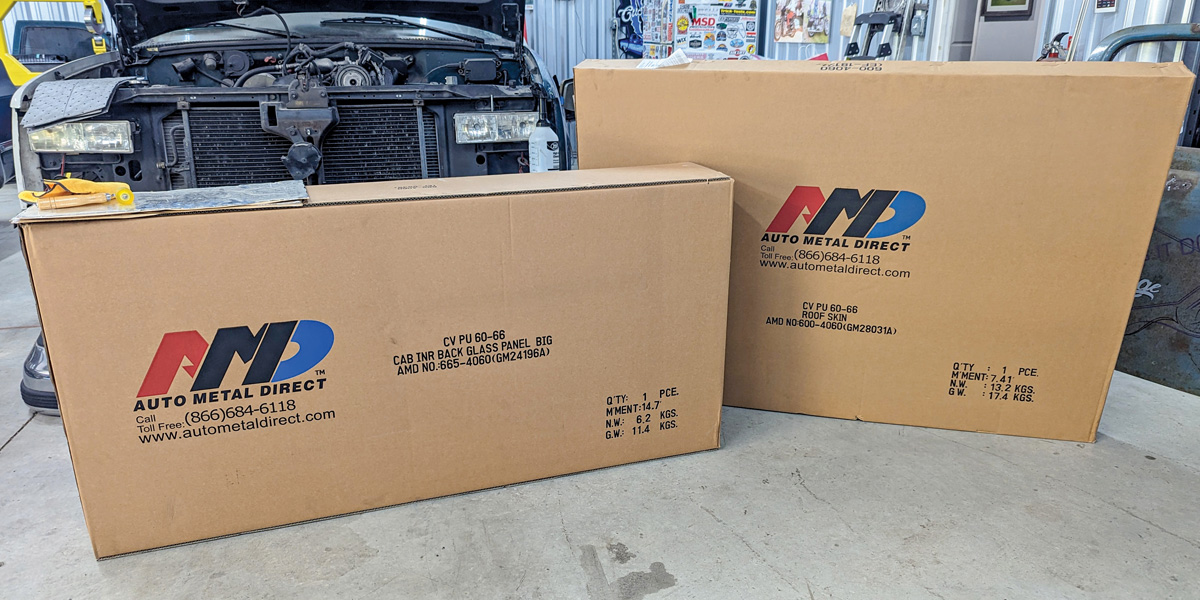
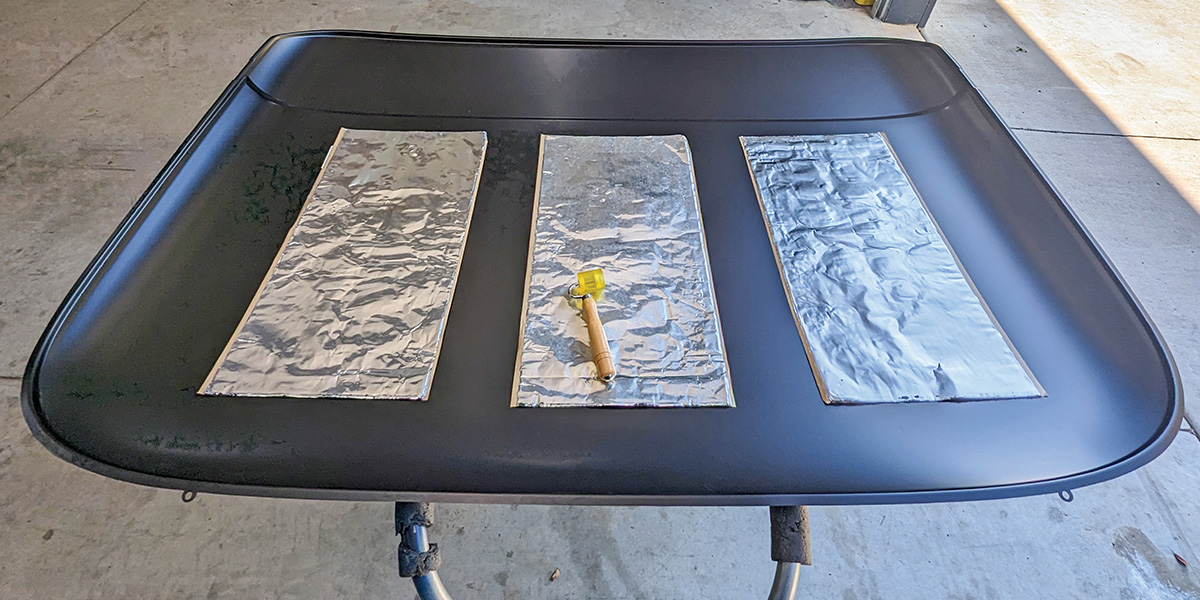
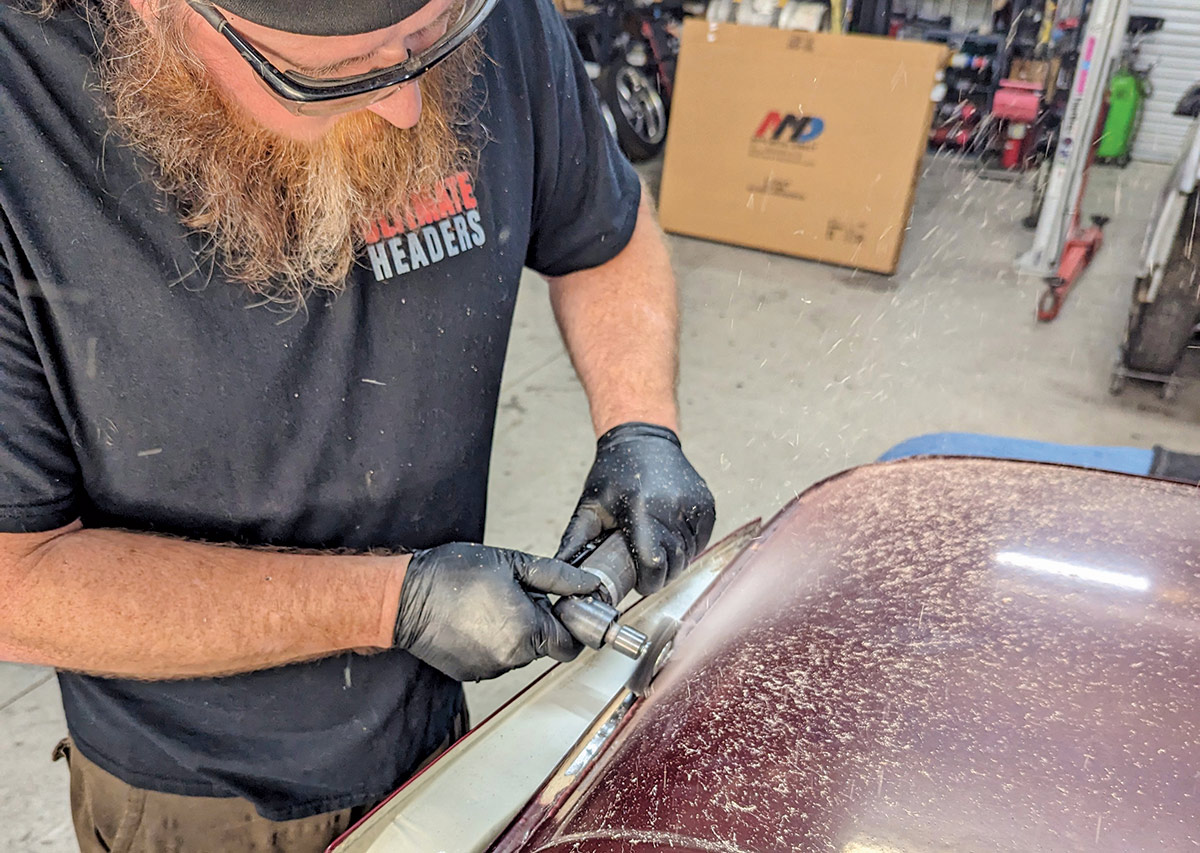
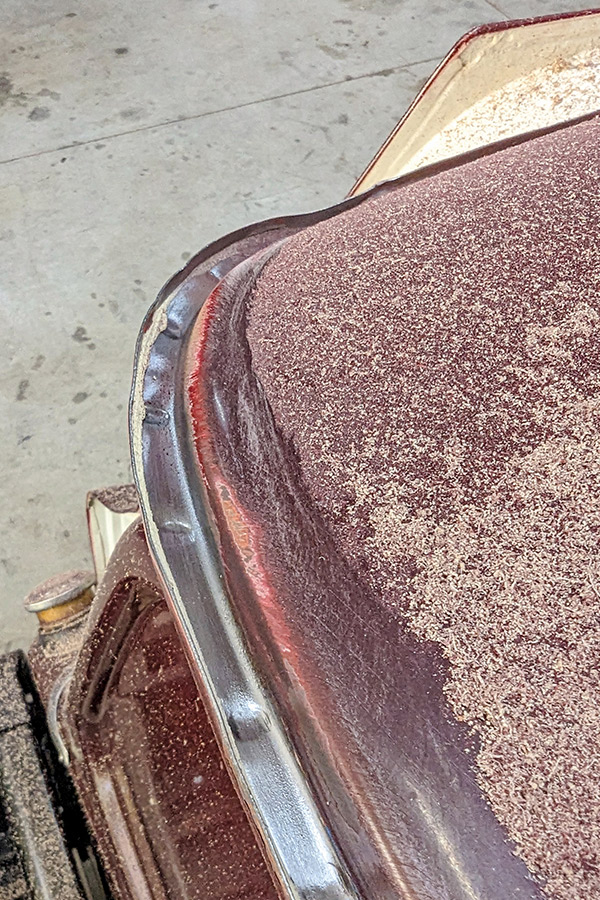
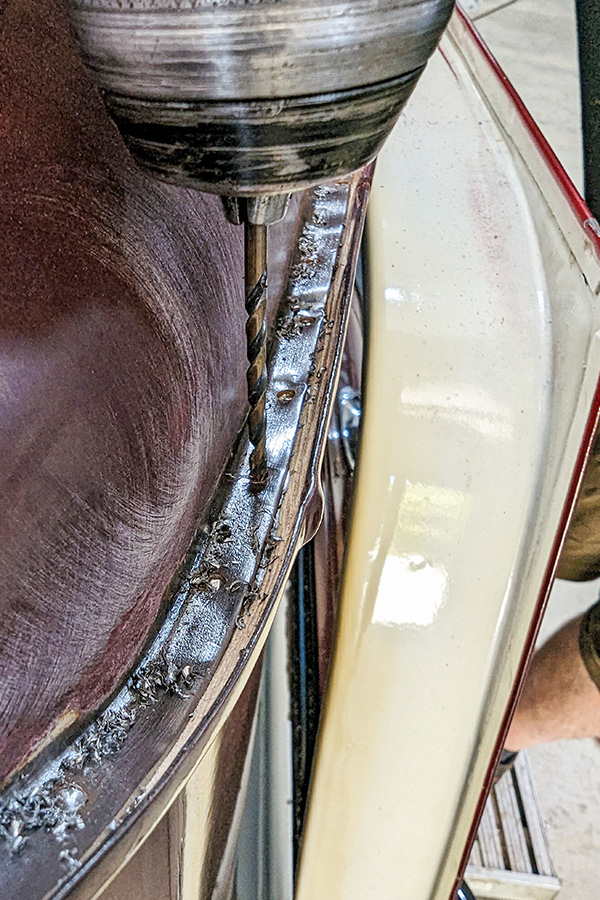
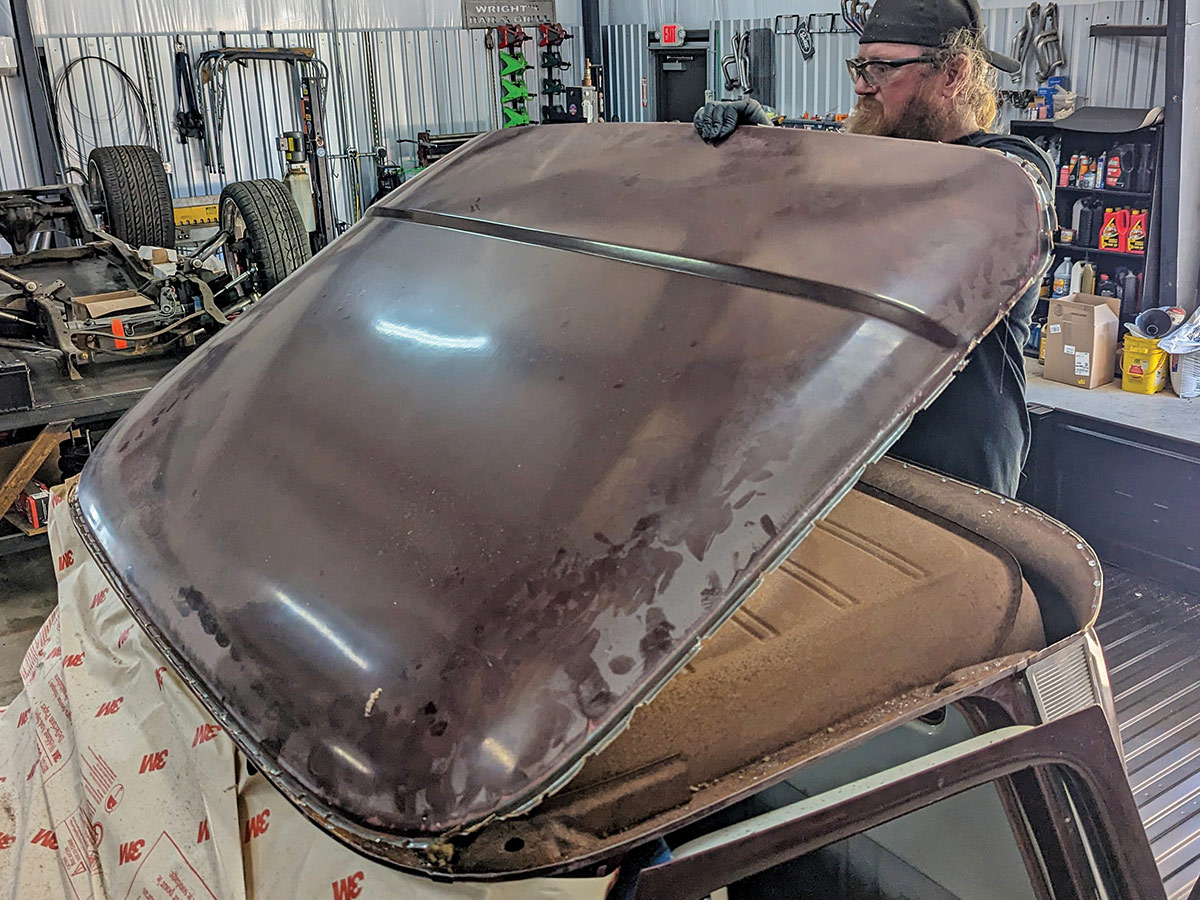
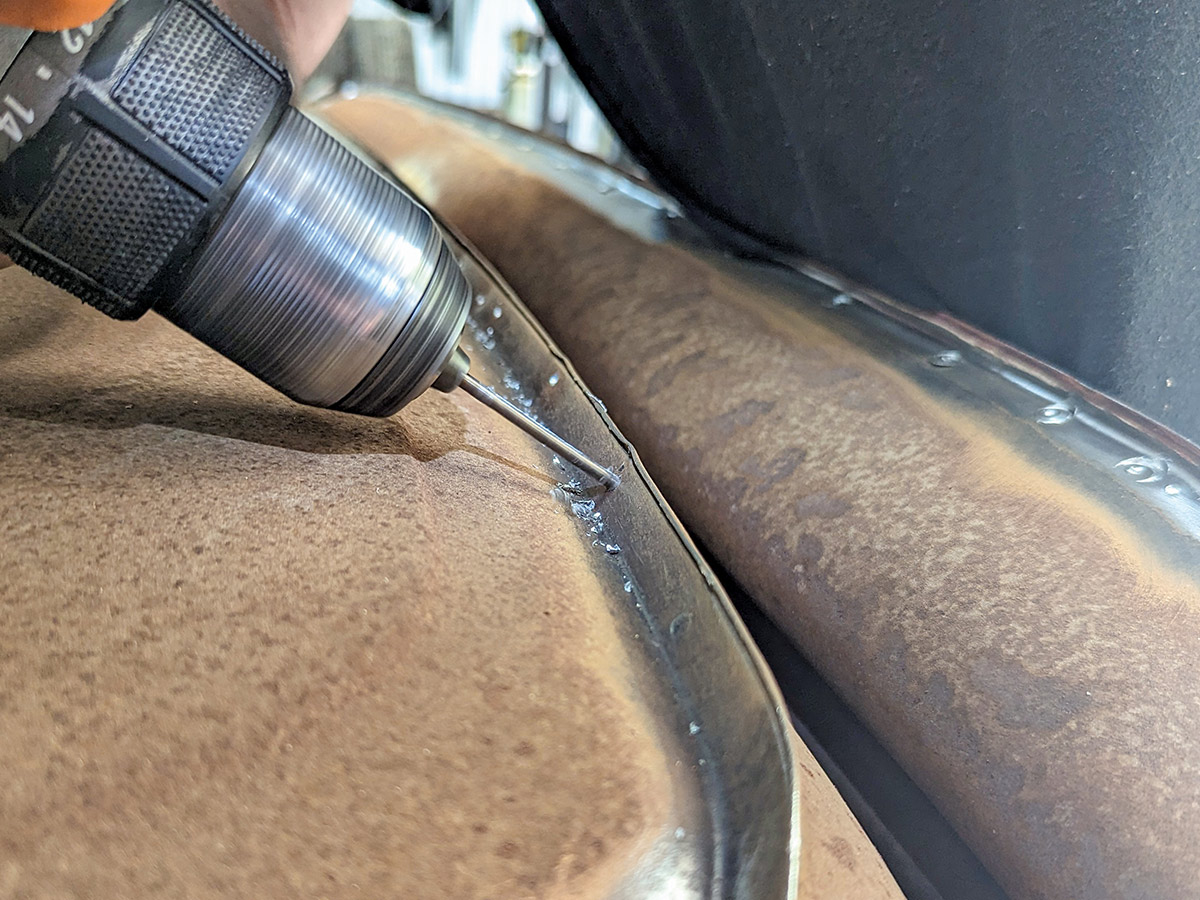
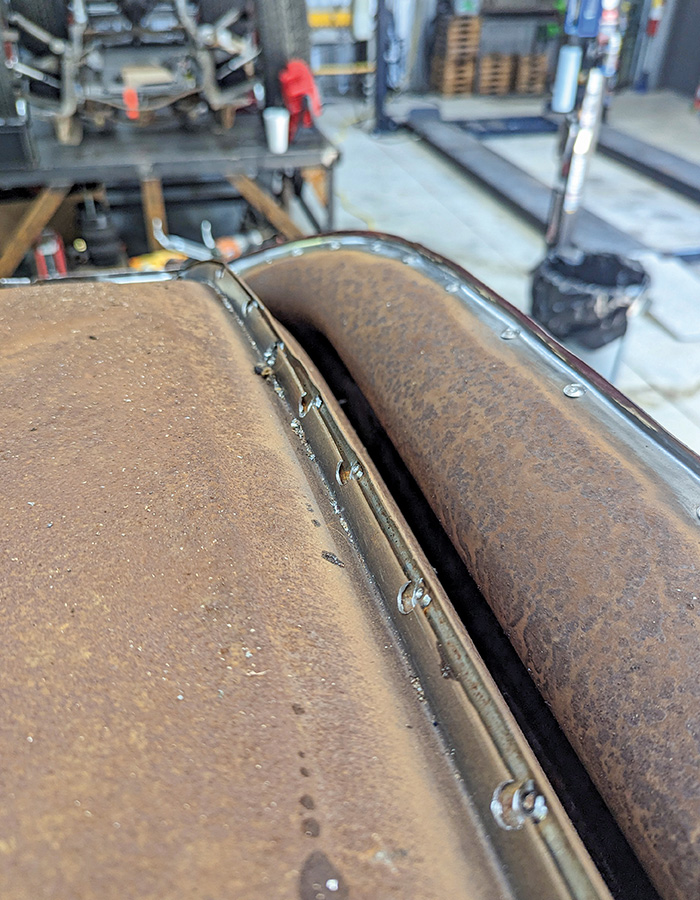
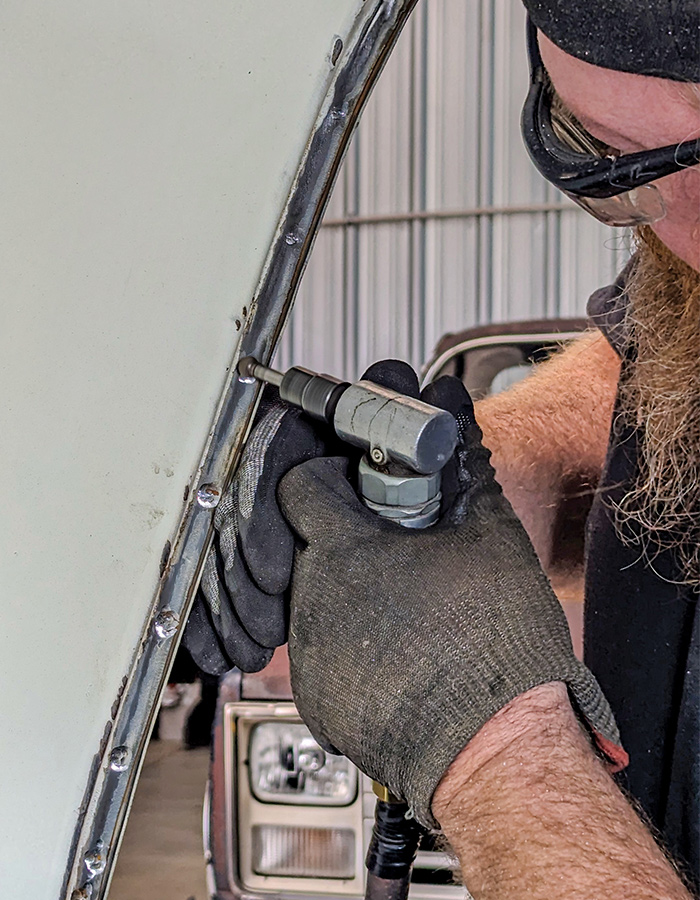
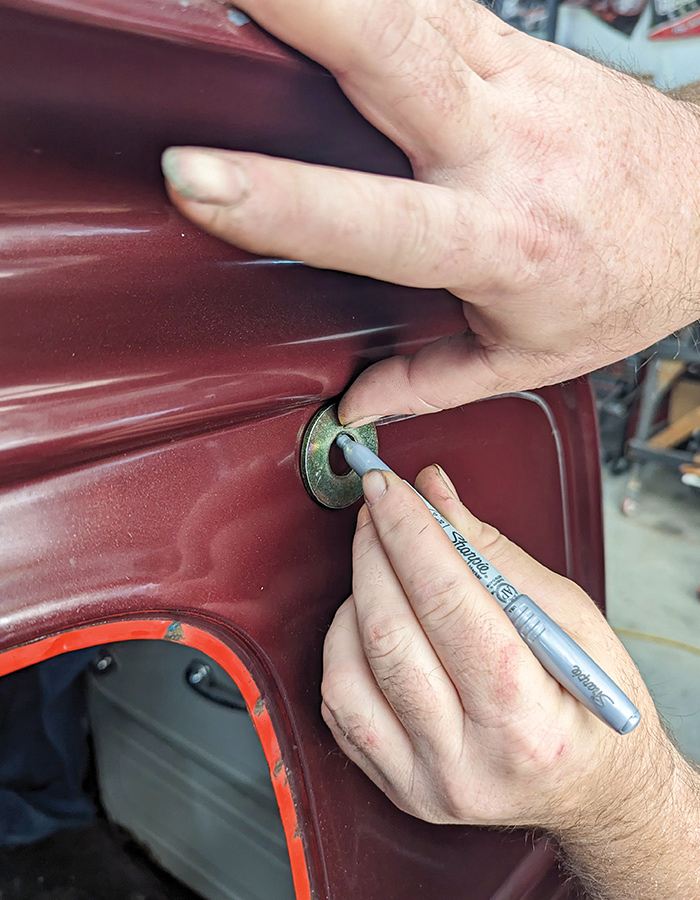
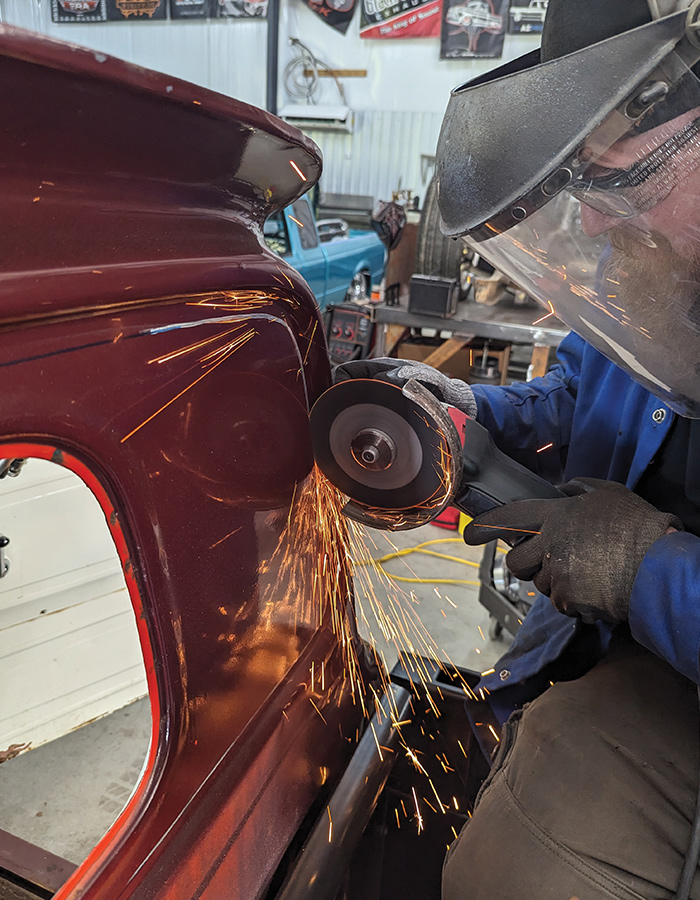
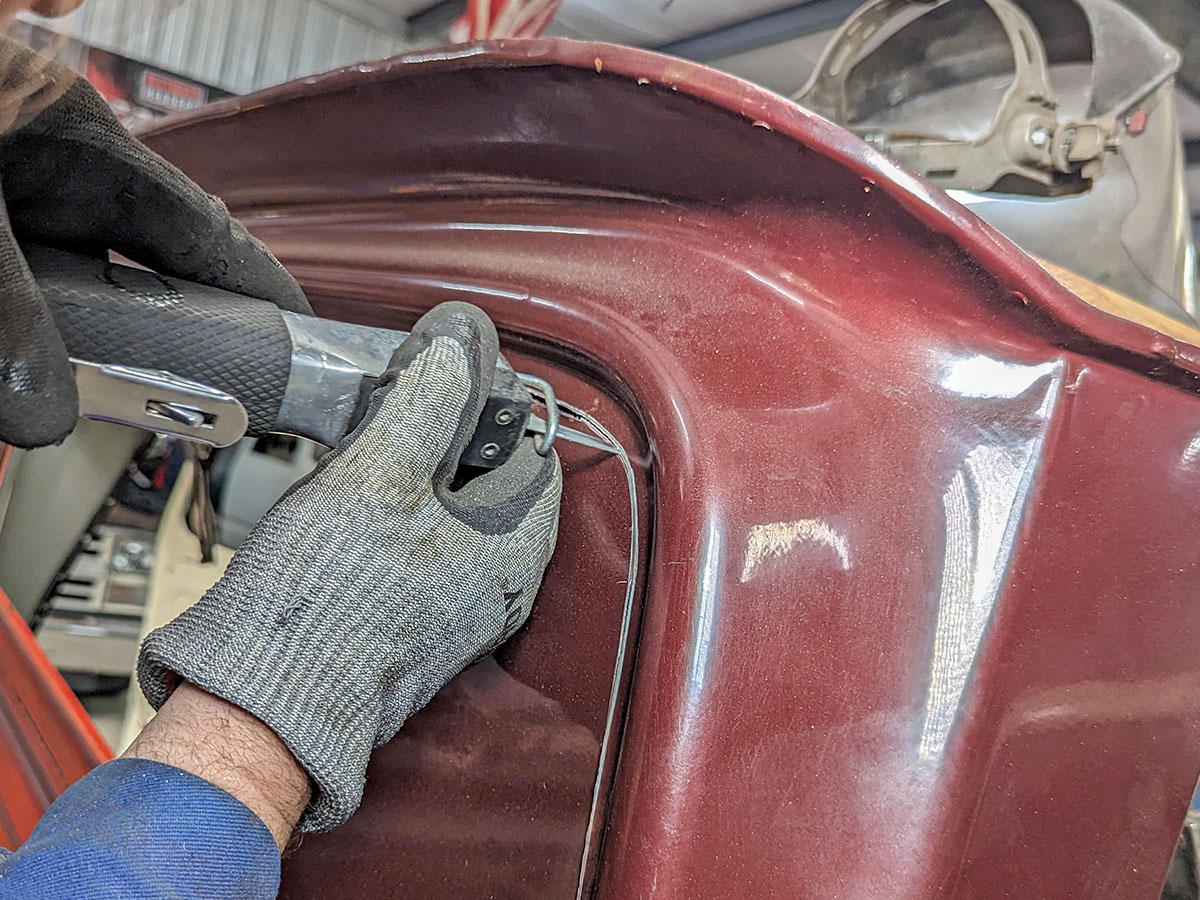
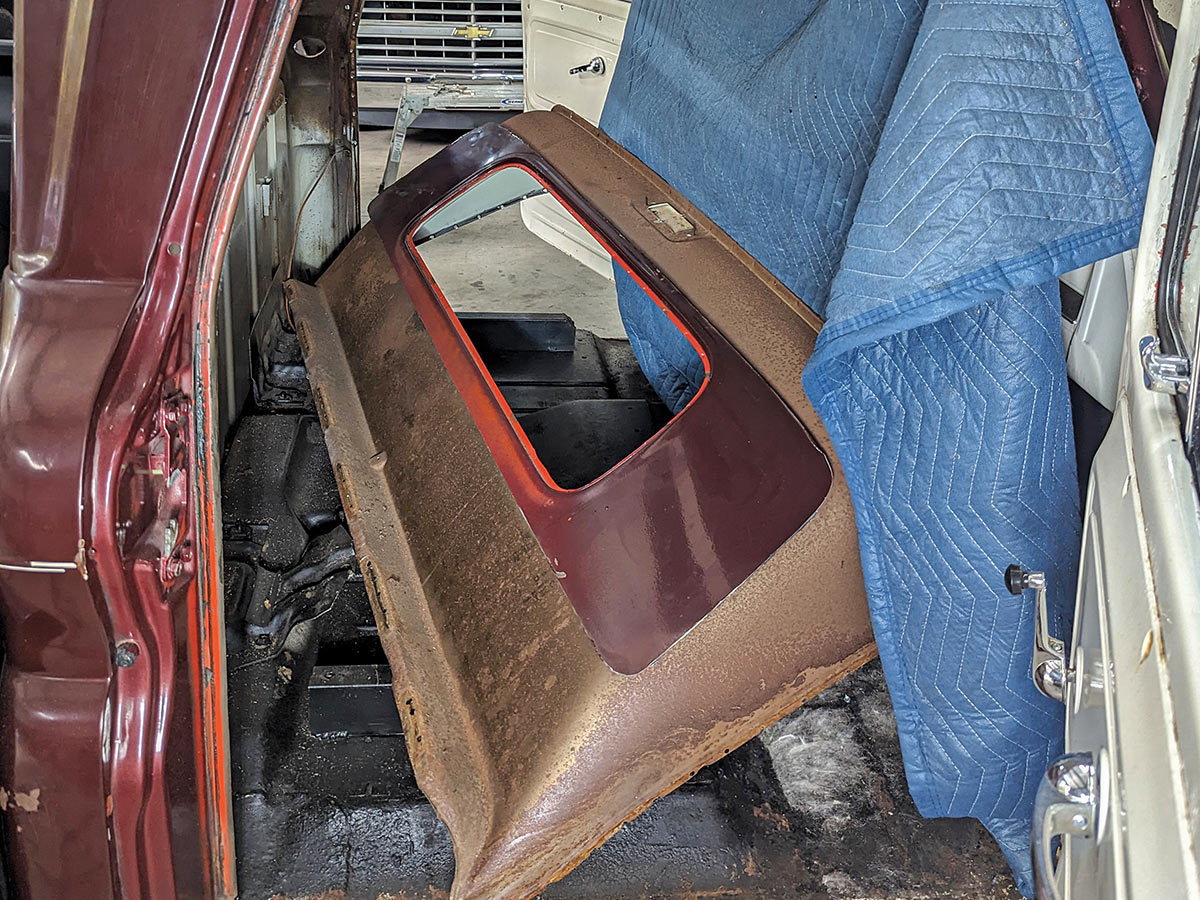
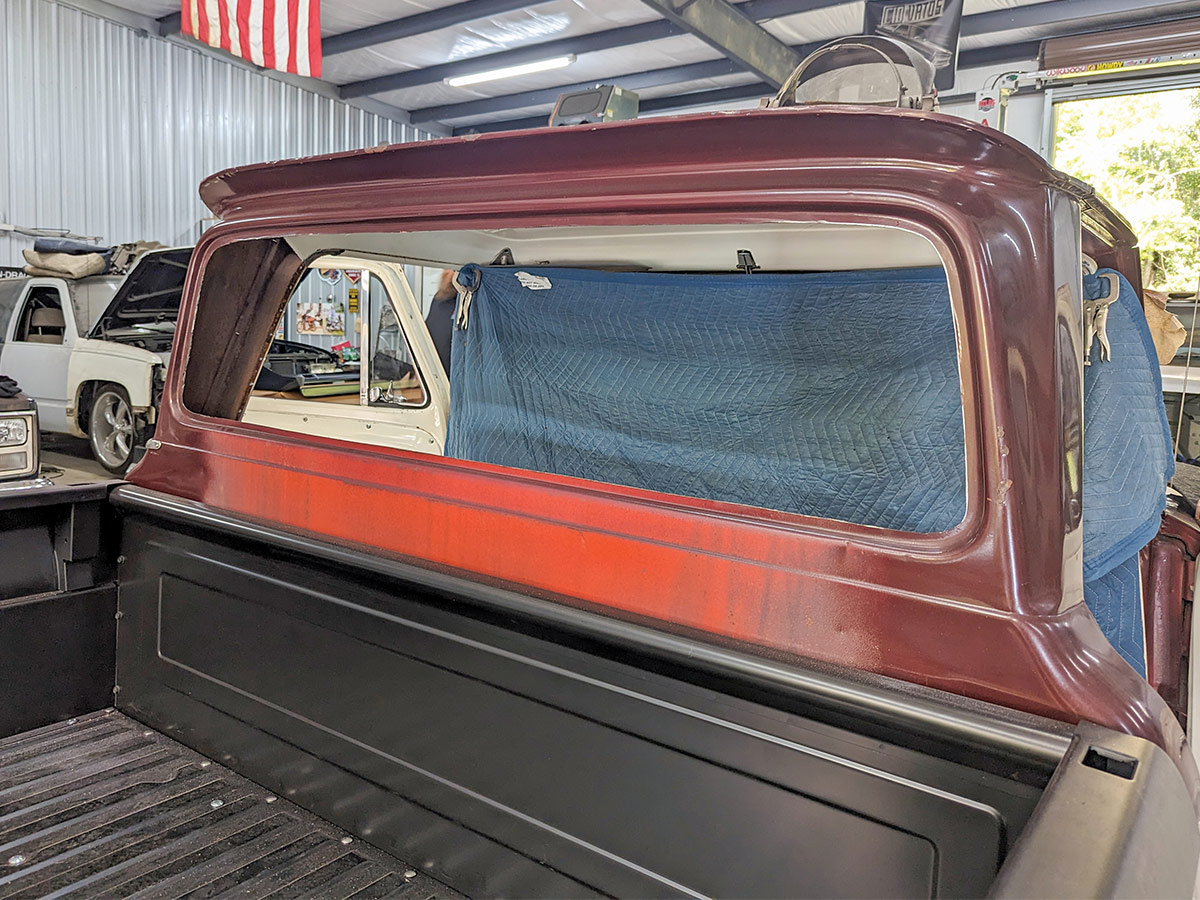
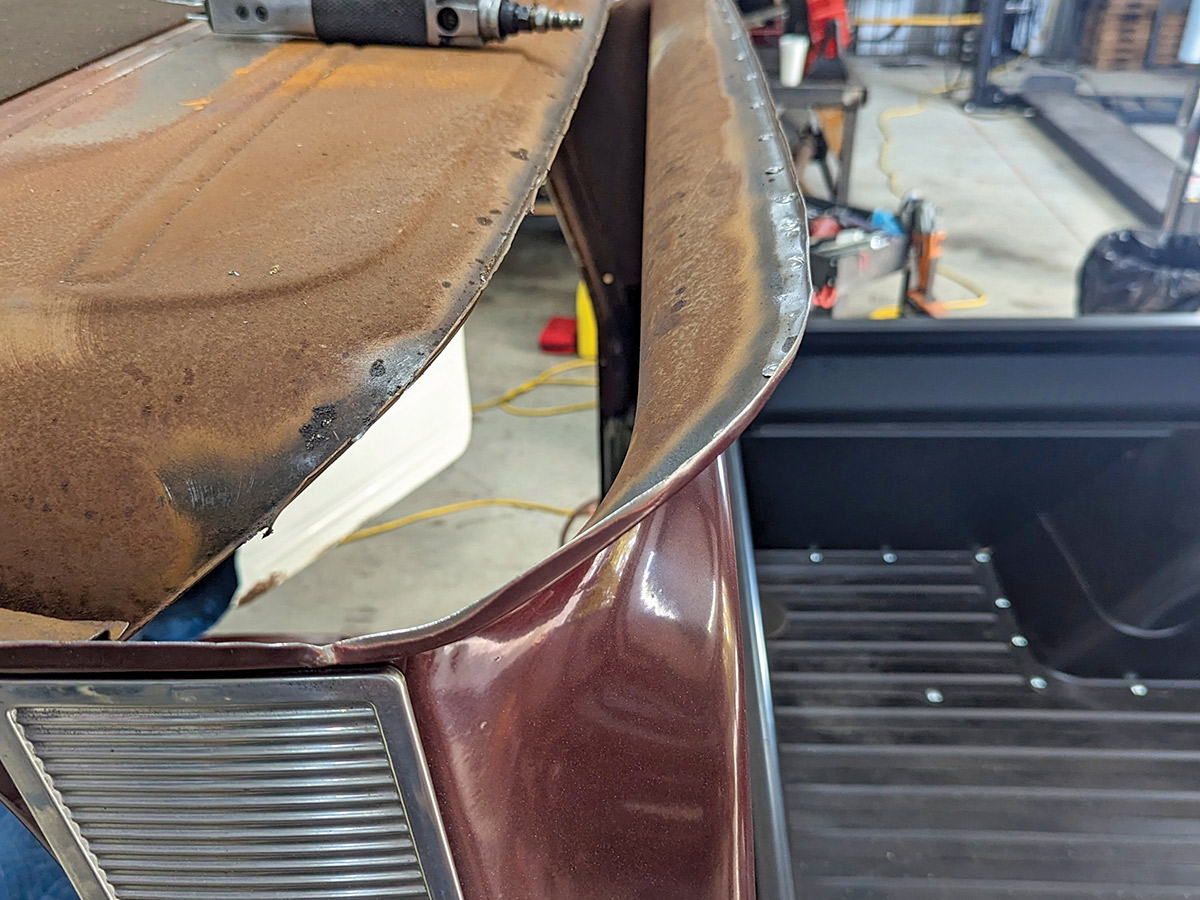
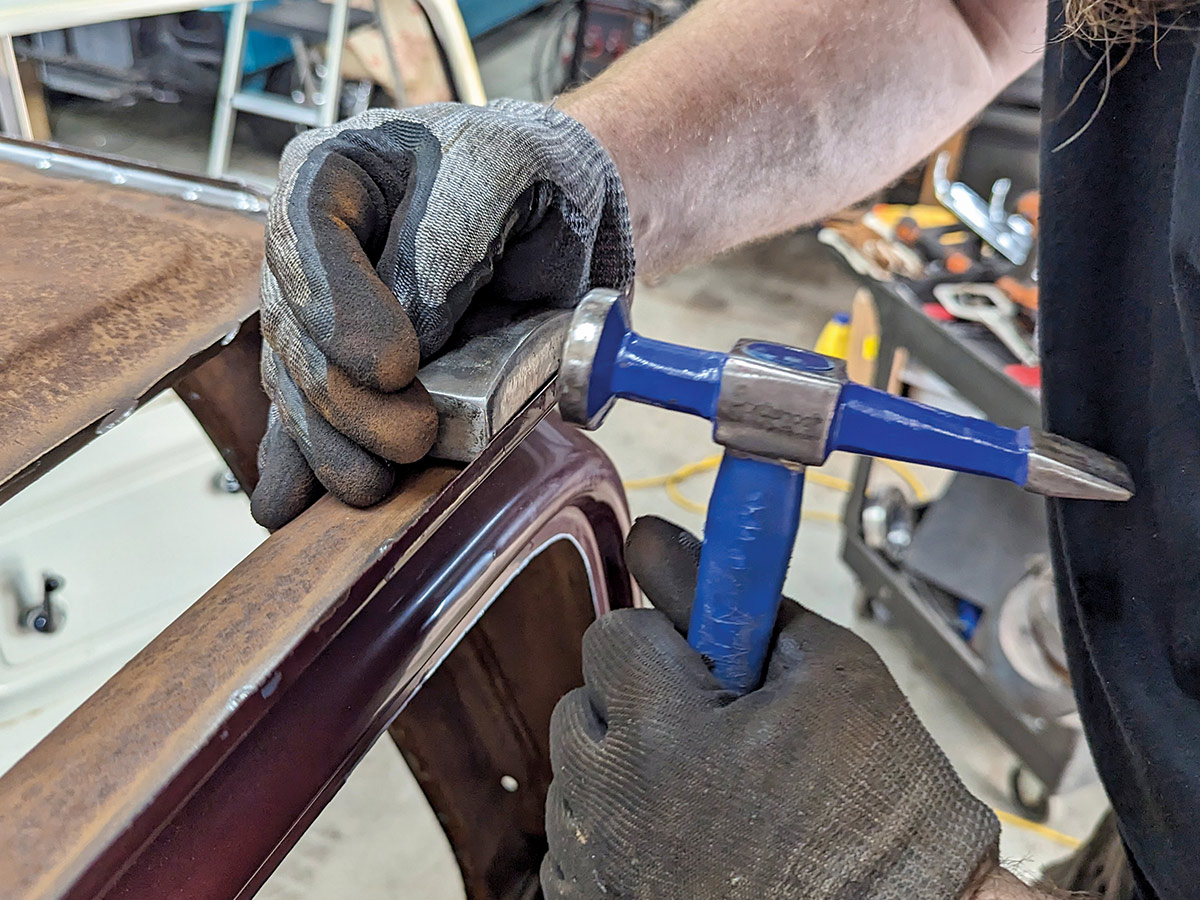
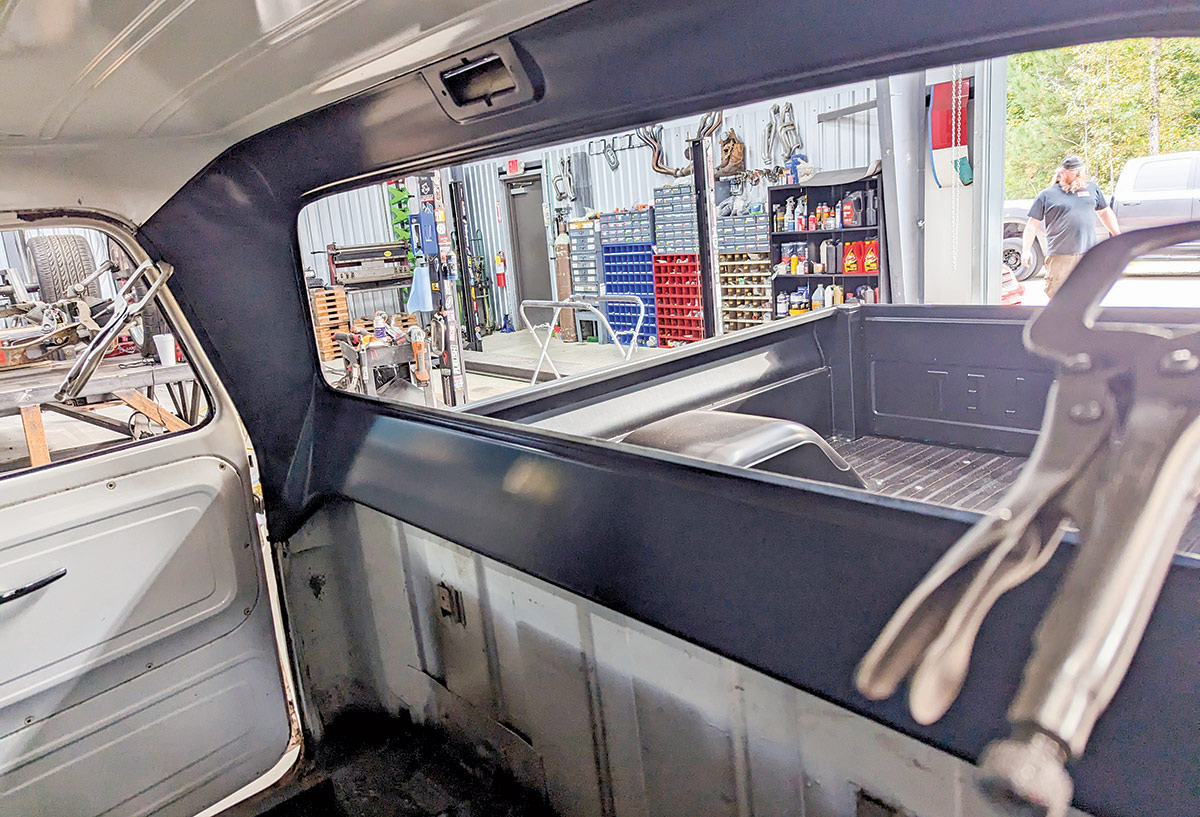
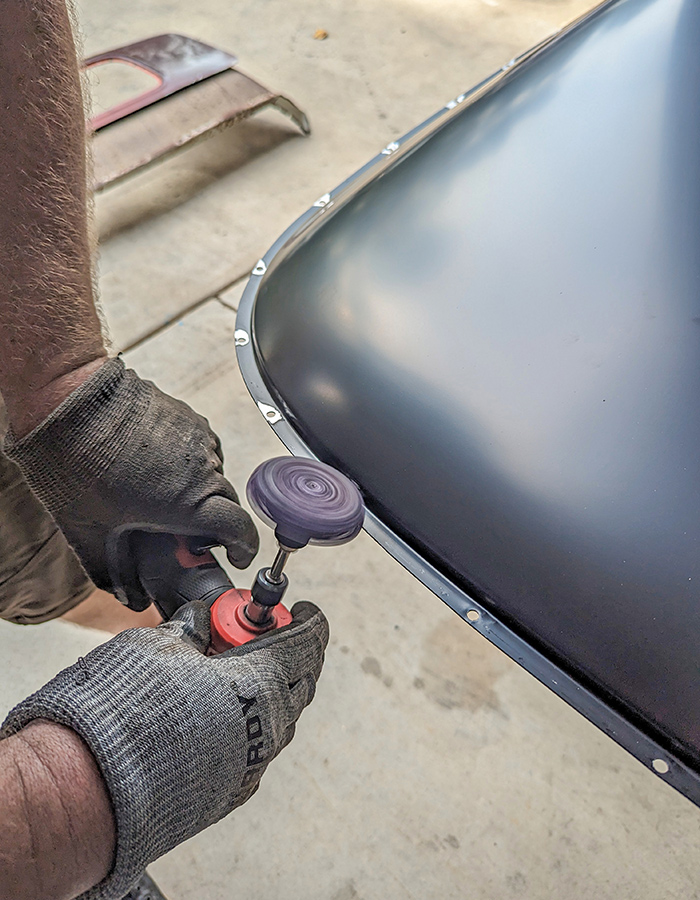
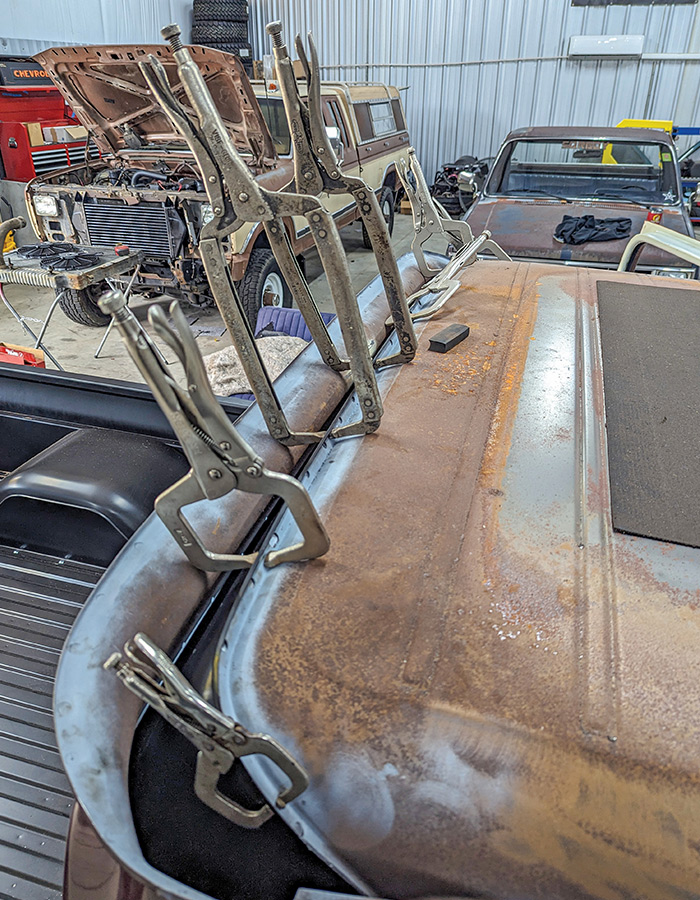
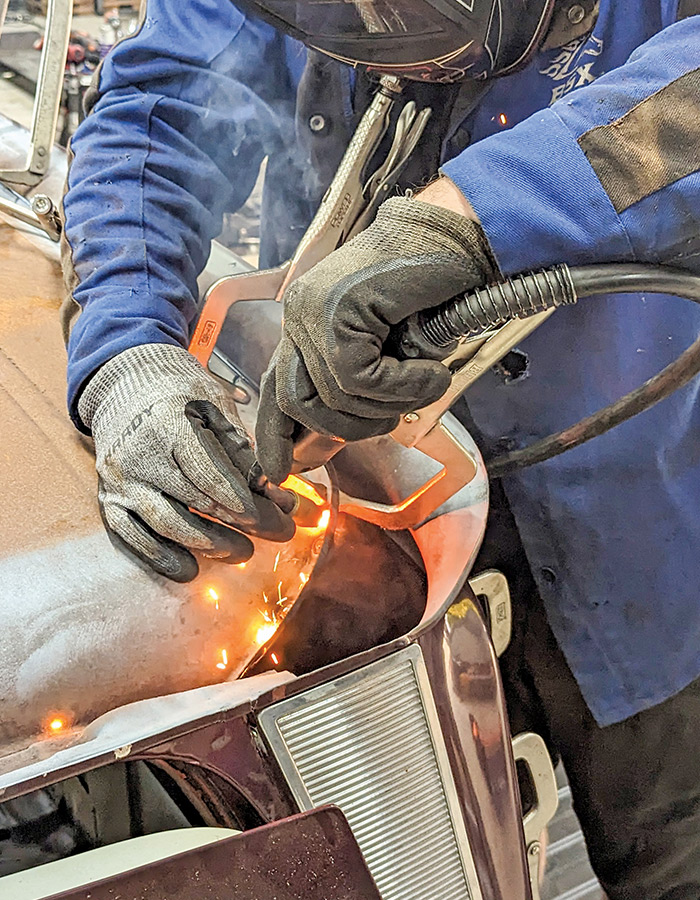
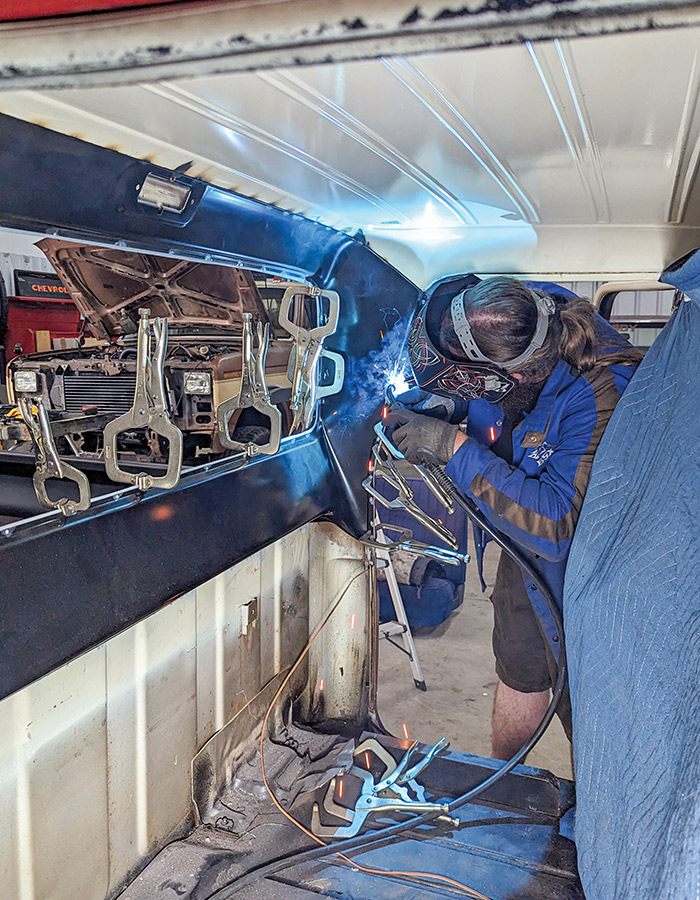
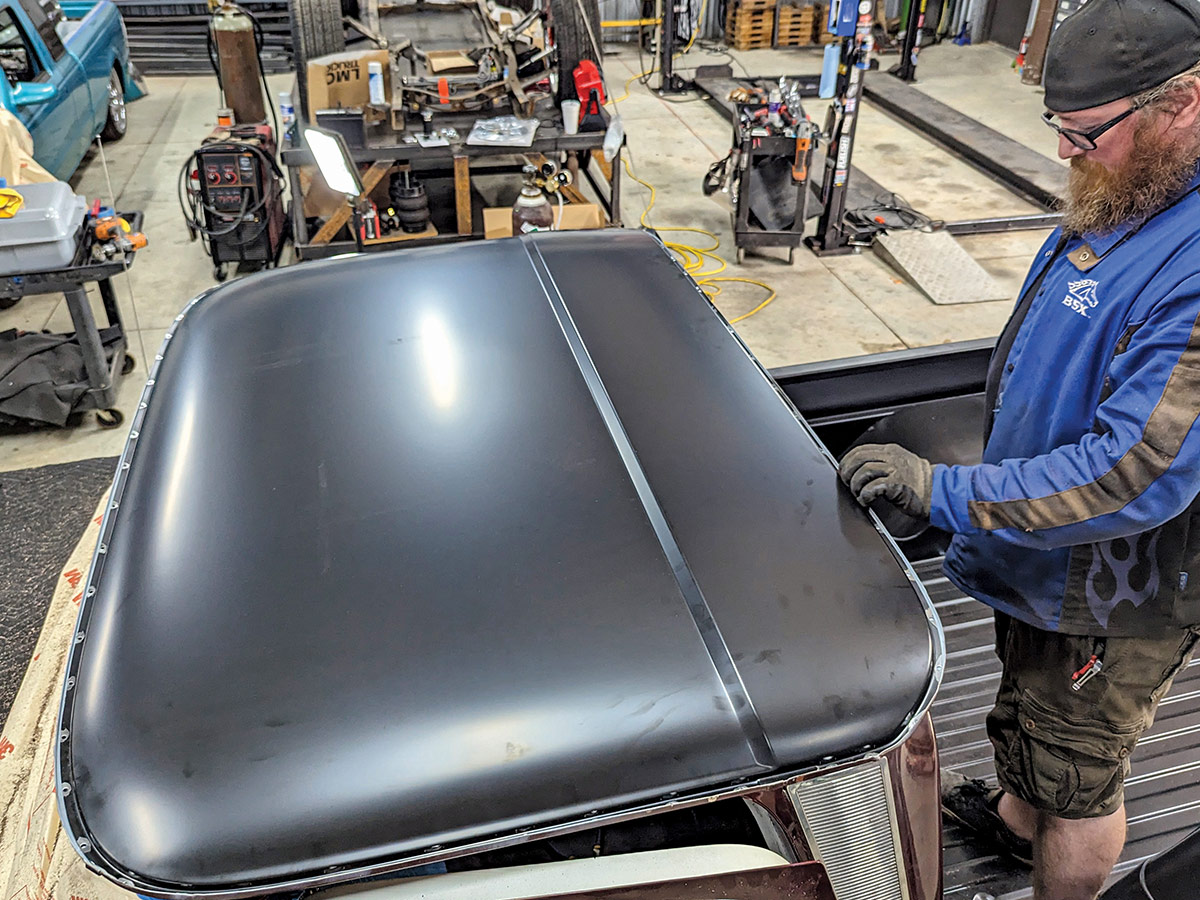
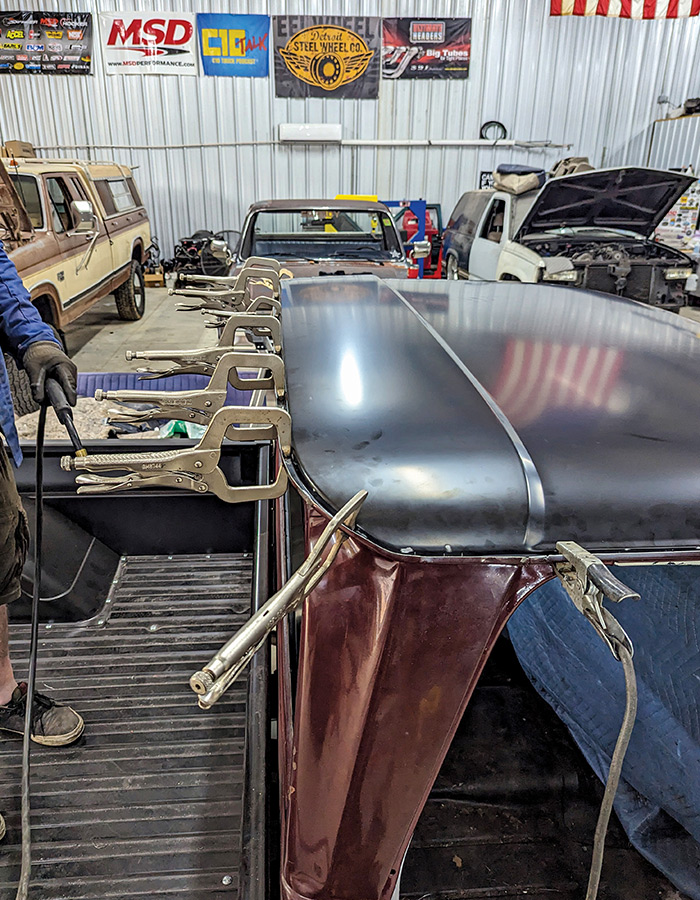
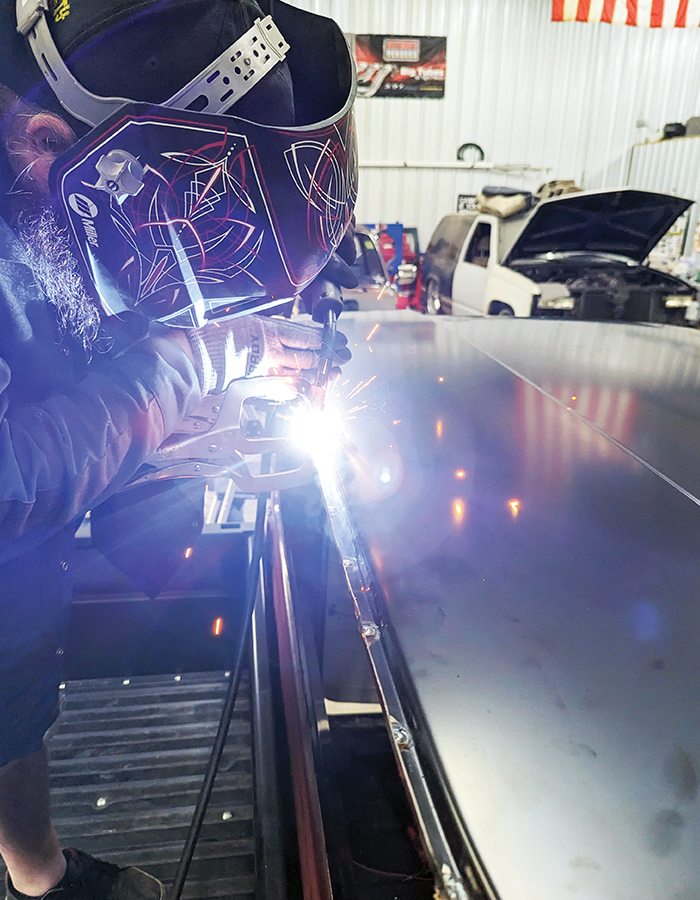
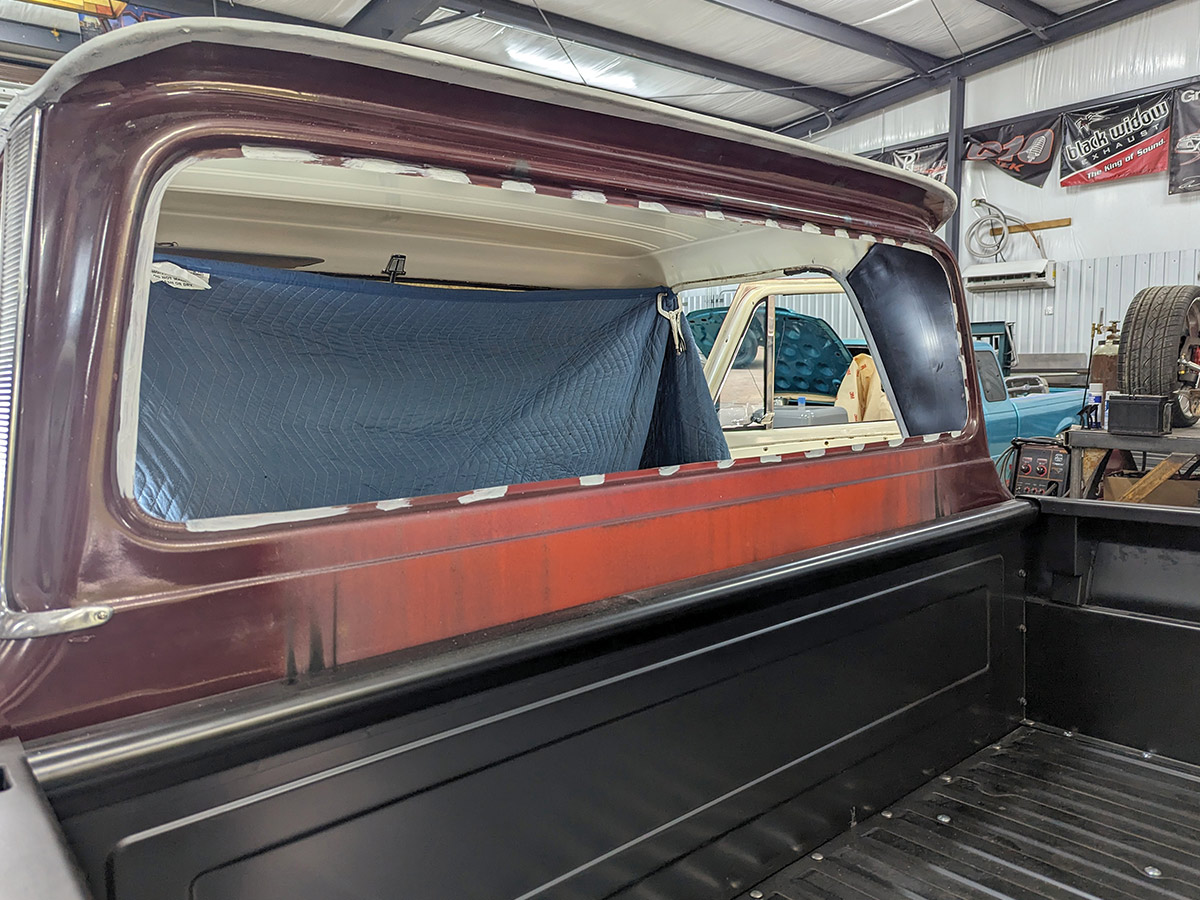
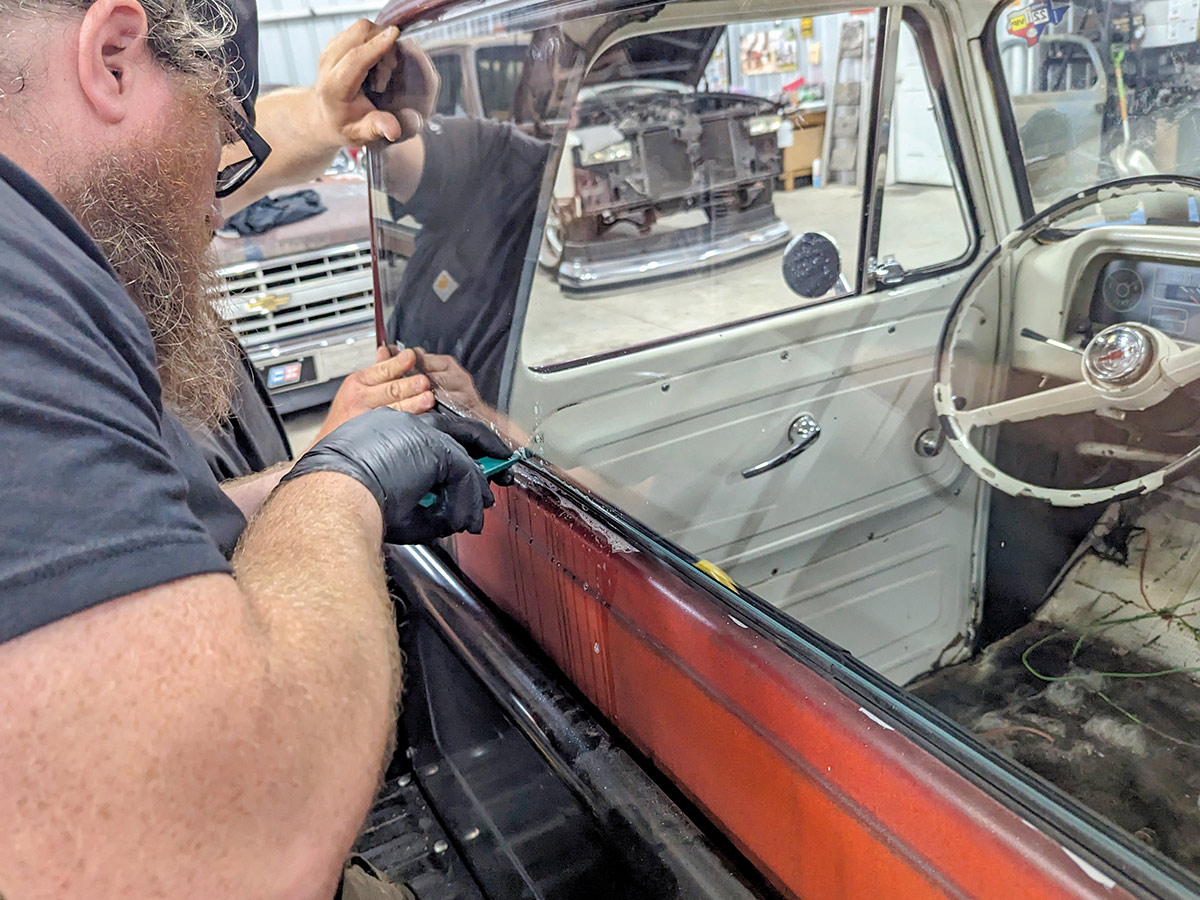
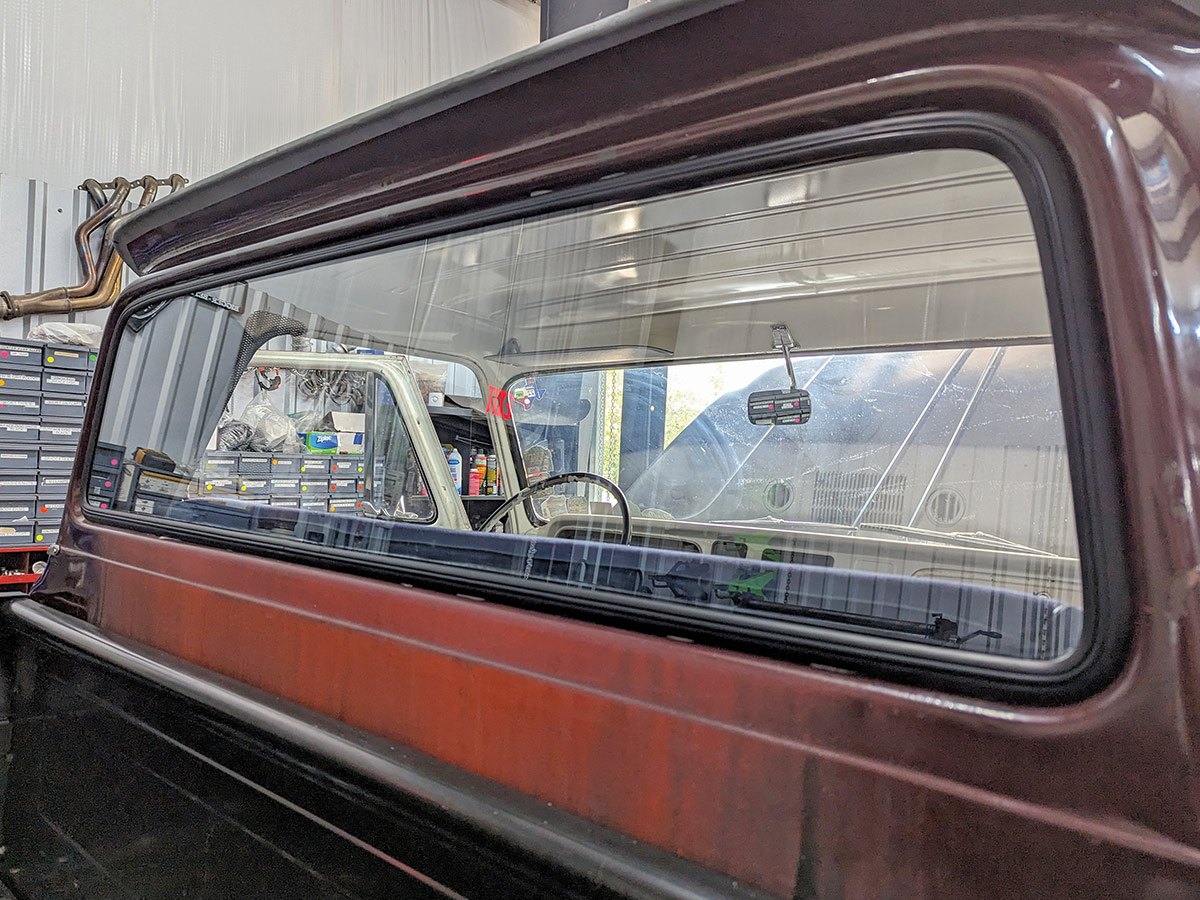
This time we will go in-depth on installing a new big back window conversion. We headed to Howe’s It Doin’ Garage in Dallas, Georgia, with Mike Howe performing the installation. Some of what you will see here covers the roofskin installation. Although the roofskin on this truck is in great shape, the removal is necessary to get to the factory spot welds on the original inner back window panel. Auto Metal Direct (AMD) has all the parts you need to swap out your small back window panel with all-new fresh restoration parts for the conversion.

The big back window trucks have always fetched a premium … all starting back in 1955 when GM first offered a variation of back window sizing in their trucks. Since then, guys have been swapping their trucks for the larger glass with all kinds of different methods to make it happen. AMD has gone the distance to make sure that your conversion is as easy as can be. They have developed all-new tooling to bring to you a full factory-style replacement panel. The full removal and installation are straight forward and can be done in a weekend.

Let’s go to Howe and see what we have to work with!

Inside view of the rear window of a '66 Chevy C10 truck
1. Although in good shape, the small window has received its eviction notice.
Hands cutting out the rubber edge of the rear window
Rear window opening with no window in the Chevy C10
2-3. Mike Howe starts with his fancy glass removal tool. A sharp utility knife will work as well. And with a quick once around, the old back glass comes out with ease.
2 big cardboard boxes sitting on the garage floor
4. AMD’s new roof and big back window panels for this project come well packaged and are damage free (helping ensure the installation is that much easier by preventing the need to fix any faux pas caused by poor handling during shipping!).
Three metallic sheets on a roofskin of a chevy that is laying on the ground
5. While we have the new roofskin out, we are going to install some sound-deadening material on the underside, for obvious reasons.
Man using a grinding tool on the exterior of the Chevy
6. Howe preps the truck for the installation by covering glass and other areas to minimize grinding debris and welding sparks that could otherwise damage these areas.
Close up of the edge of the truck's roof exterior with grinding marks
7. Removing the seam sealer is a hell of a mess. Your wire wheel will work great to get this out of the channel.
Close up of a small pilot hole being drilled into the center of each spot weld on the roof
8. With the sealer removed, the factory spot welds are easily accessed, making removal that much easier. A small pilot hole is drilled into the center of each spot weld; this will allow us to align the spot weld remover and keep it from moving around. Be careful not to drill too deep or you will be welding up more than one hole. A spot weld remover is a great tool to have at this stage.
Man lifting the roof shell off the truck
9. Howe uses a sharpened screwdriver and body hammer to separate the roofskin from the other panels. The roofskin is removed, also notice the nest from a previous resident. That area will get cleaned and treated before installing the new AMD roofskin.
Close up of a drill being used on the roof
10. Now you have access to clean the inner roof panel as well as get a better cleanup on the seam sealer left behind. You want to remove all the sealer as it will cause issues when you go to weld everything back up.
Close up of the seem of the roof
11. Repeat the same process on the inner roof panel. Small pilot holes, spot weld remover, and cleanup. You don’t have to worry as much about drilling too deep here as that inner back cab panel will have new metal to weld back to.
man using a deburring tool to separate the sides of the inner back cab panel
12. Howe moves to the inside and elects to use his deburring tool to separate the sides of the inner back cab panel from the door surround. The remaining spot welds are found at the bottom of the panel across the back of the cab.
hand holding a washer to mark the back of the cab where the new window will go
13. Howe uses a washer to mark the back of the cab where the new window will go. He purposely chose a washer oversized to make sure there is enough metal to install the new window and gasket.
Man wearing a welding mask, using a small hand held saw to cut into the back of the truck
14. With the cut line marked, Howe cuts out the new opening. (This is a great example why the seat, carpet, and fuel tank were all removed; lots of sparks, not to mention the extra room needed to work with!)
Close up of hands using a body saw on the truck
15. A body saw makes quick work of the corners of the panel as opposed to attempting those areas with the cutoff wheel.
The old back panel laying inside the truck cab
16. And voilà: The old panel comes out just like that.
Close up of the back of the truck without the old back panel
17. The new opening already looks great. Howe will clean up and treat the inside in preparation of the new panel being installed.
Close up of rusty edges of the truck
18. With the panel out of the way, now is the time to prepare all the surfaces to receive the new parts. A 40-grit sanding disc will clean up the rest of the spot welds.
Hands holding a blue hammer and a dolly
19. While you have easy access, grab your hammer and dolly and straighten up all the edges.
Interior view of a test fit for the new panel
20. A test-fit on the new inner back cab panel proves that AMD spent plenty of time making sure the new panel goes in perfectly. Go ahead and mark your holes at this point and start prepping the new panels for installation.
Hands using a tool to clean up the edges of the new panel
21. We will be plug-welding the new parts on and Howe uses his pneumatic punch to make holes perfect to accept the welds. Clean up around each hole to ensure that the weld penetrates without any issues.
Metal clamps holding onto the edge of the roof of the truck
Metal clamps holding the edges around the hole for the window
22-23. Using self-etching weld-through primer ensures that the mating surfaces are protected after they are welded together. (Be sure to apply the primer to the truck and the new panels.) With the new big back window panel installed, clamp it in place and position it exactly where you want it before welding it in.
Man wearing a welding mask and gloves, welding the two panels
24. Now we begin welding the two panels together. The key to a great weld is a tight fit. Howe positions the clamp directly next to the welding hole to make sure the two panels are lying flat against one another. Clean the welded area with a wire wheel to remove any contaminates from welding and apply a coat of primer to prevent the surfaces from rusting.
Man welding the panels inside the cab of the truck
25. Howe moves to the inside of the cab to continue welding the panel into the truck, just like original. Welding across the back of the cab at the bottom of the new inner panel can be tricky. Howe uses a pry bar to ensure that the two surfaces are flush and that he gets a good weld. Grabbing every clamp you own is the name of the game here. We can’t stress enough that a tight fit is the key to a solid weld.
Man inspecting the new roofskin on top of the truck
26. With the new big back window panel in place, Howe installs the new AMD roofskin.
Clamps holding the new roofskin in place
27. Be sure to align everything and clamp it in place before welding; measure/align as many times as necessary before striking that first weld arc!
Close up of man in mask and gloves, welding the roof skin
28. Howe starts in the center and works his way out to completely weld the roofskin in place. With everything welded correctly, Howe will test-fit the new glass from AMD into the opening. Further grinding and sanding is required on the opening to get a perfect fit. Remember it is always easier to take away than to add metal back.
Close up of the back of the truck with no window installed yet
29. Be sure to clean up all the spot welds inside and out. Apply a protective coating at all the areas serviced. Our truck will be under- going more metalwork, so we are only applying spot coverage to the exposed areas for now.
Man installing back glass gasket in opening for window
30. Howe begins installing the new Precision Replacement Parts back glass gasket we picked up from AMD. The gasket comes complete with the lock strip included. The new AMD glass goes in and the weatherstripping tool was a great add on from Precision.
Close up of new back glass installed in the truck from exterior
Close up of new back glass installed in the truck from interior
31-32. With the new glass installed, this conversion couldn’t have been easier. The new big back window panel fit perfect.
A black and orange 1966 Chevy C10 truck in a mechanic's garage
33. Stay tuned for our next installment of this tech series where we go in-depth on that steel bed floor conversion.
 SOURCES
Auto Metal Direct
autometaldirect.com
Howe’s It Doin’ Garage
instagram.com/howes_it_doin_garage/