CTP logoFeature star Tech
InTheGarageMedia.com
Cutting Cab Corners typography
1. Every project needs a foundation, and this heavily modified (with an Art Morrison mandrel-bent IRS back-end) TCI chassis will definitely be up to the task.

1. Every project needs a foundation, and this heavily modified (with an Art Morrison mandrel-bent IRS back-end) TCI chassis will definitely be up to the task.

Cutting Cab Corners typography
Chassis, Cab Floor & Firewall
BY Ron CovellPhotography BY THE AUTHOR, Michael Christensen & Gary George
G

ary George, who runs Gary’s Rods & Restorations in Northern California, has a long history of building outstanding vehicles. He was recently approached by Jason Souza to build a showstopping ’56 Ford F-100. This will be a “no-holds-barred” project, but they want the truck to have an elegant and refined character rather than going for shock value. Look for future articles that will include sectioning the cowl and the hood, moving the wheelwell openings in the front fenders, and scratchbuilding a new bed that matches the shape of the cab.

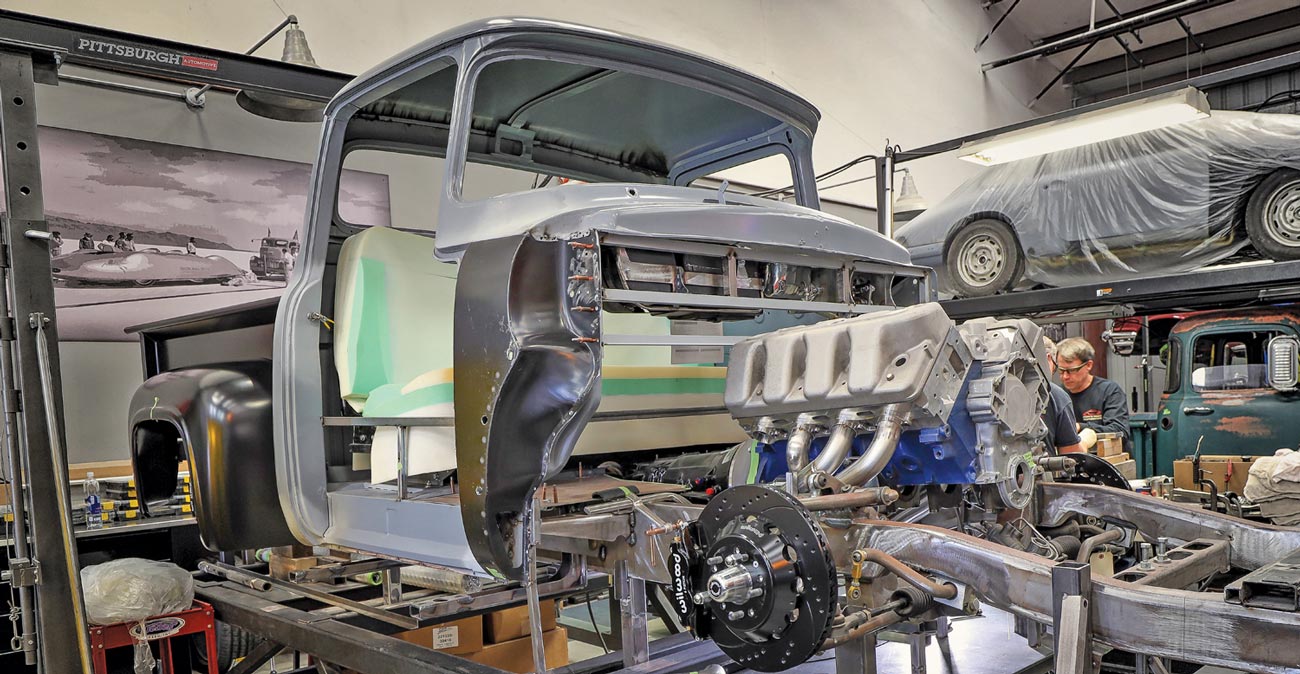
Careful thought went into laying the foundation of the project. The Total Cost Involved (TCI) chassis has been extensively modified by Dave McIntyre, George’s chassis guru. He moved the front crossmember forward 4 1/2 inches, built new front and rear framerails, and made a beefy X-member to further stiffen the frame. He extensively modified the Art Morrison Enterprises (AME) independent rearend to allow the truck to be dropped to the ground. Mittler Bros.’ Hydroshox suspension units are used on all four corners, allowing the truck to be radically lowered for shows and then quickly raised to the desired ride height.

McIntyre also built an outstanding exhaust system and included a custom-fitted set of headers that feed into the Vibrant Performance mufflers and then into gorgeous 2×4-inch oval stainless tailpipes that gracefully snake through the confines of the frame.

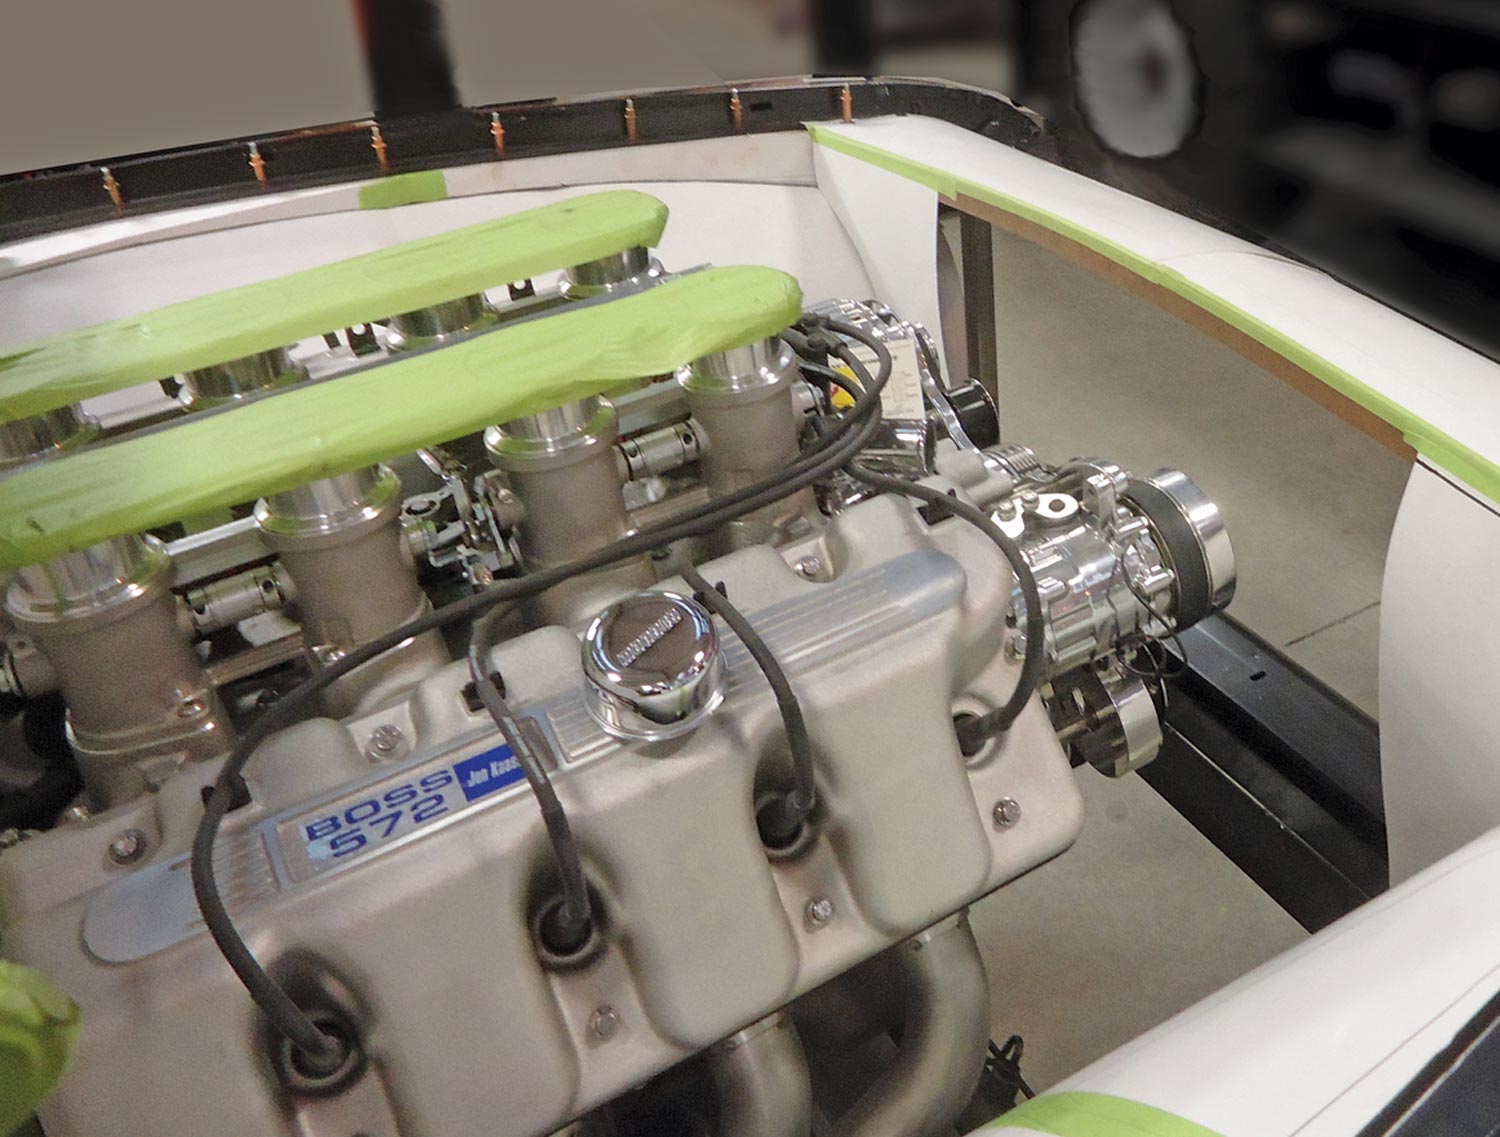
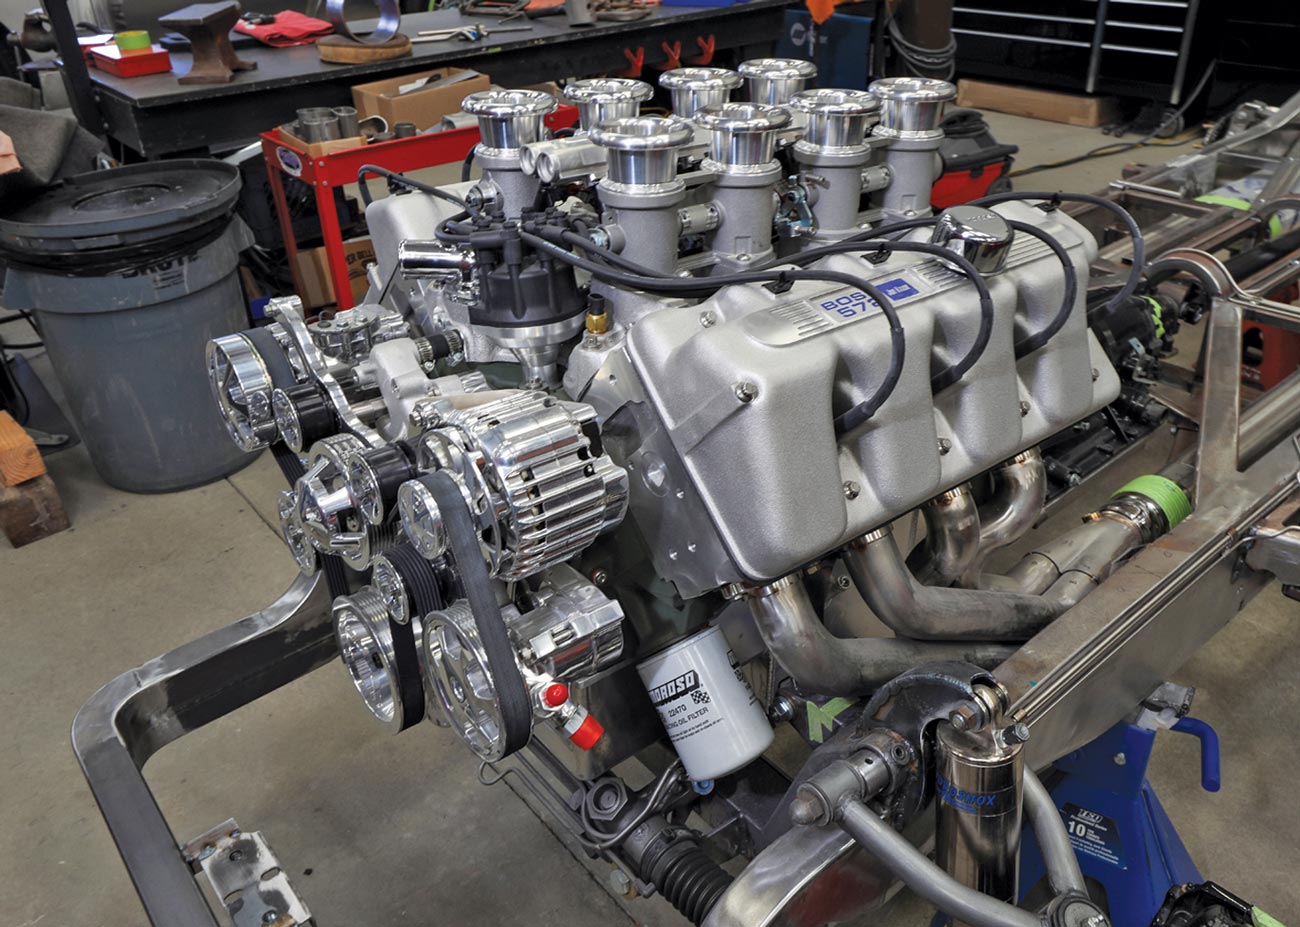
The engine is a Ford Boss 572, fitted with Jon Kaase stack injectors and accessories, backed by a Hughes Performance–built 4L85E transmission.

To start the project, George had all the sheetmetal panels stripped and powdercoated. This ensures that all the nooks and crannies are protected from rusting, inside and out, and will provide a stable foundation for the extensive body modifications to come.

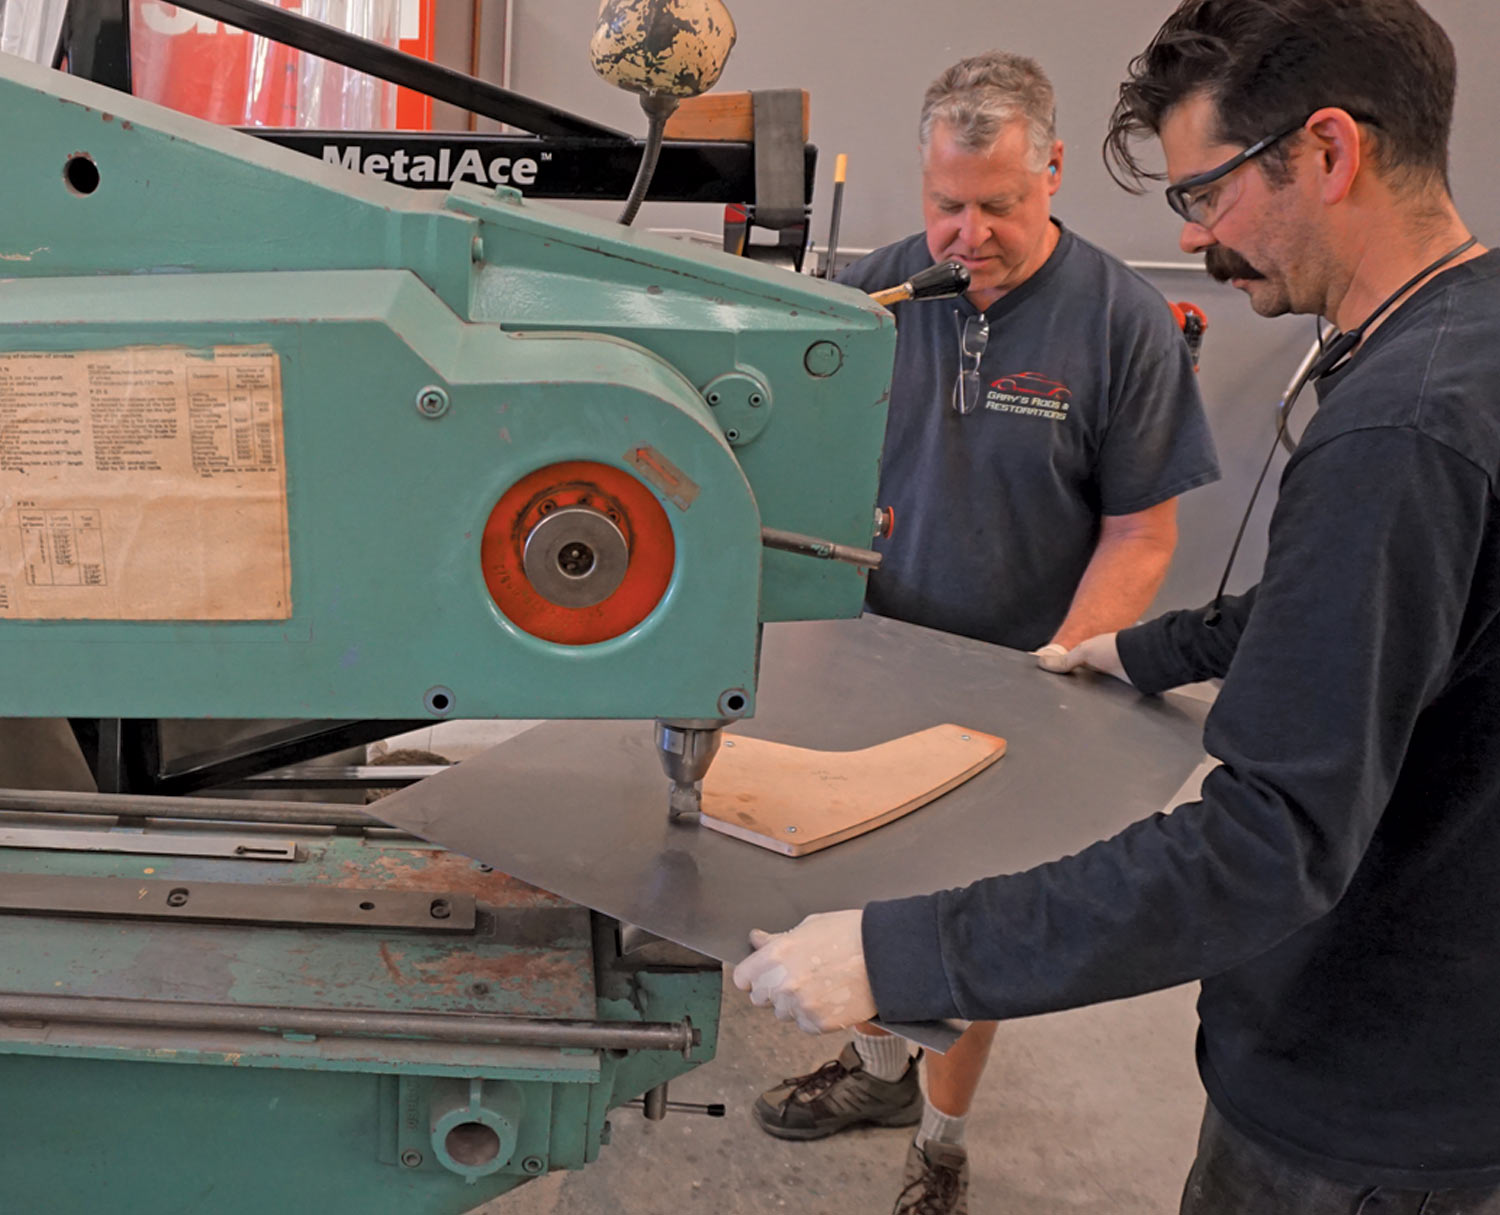
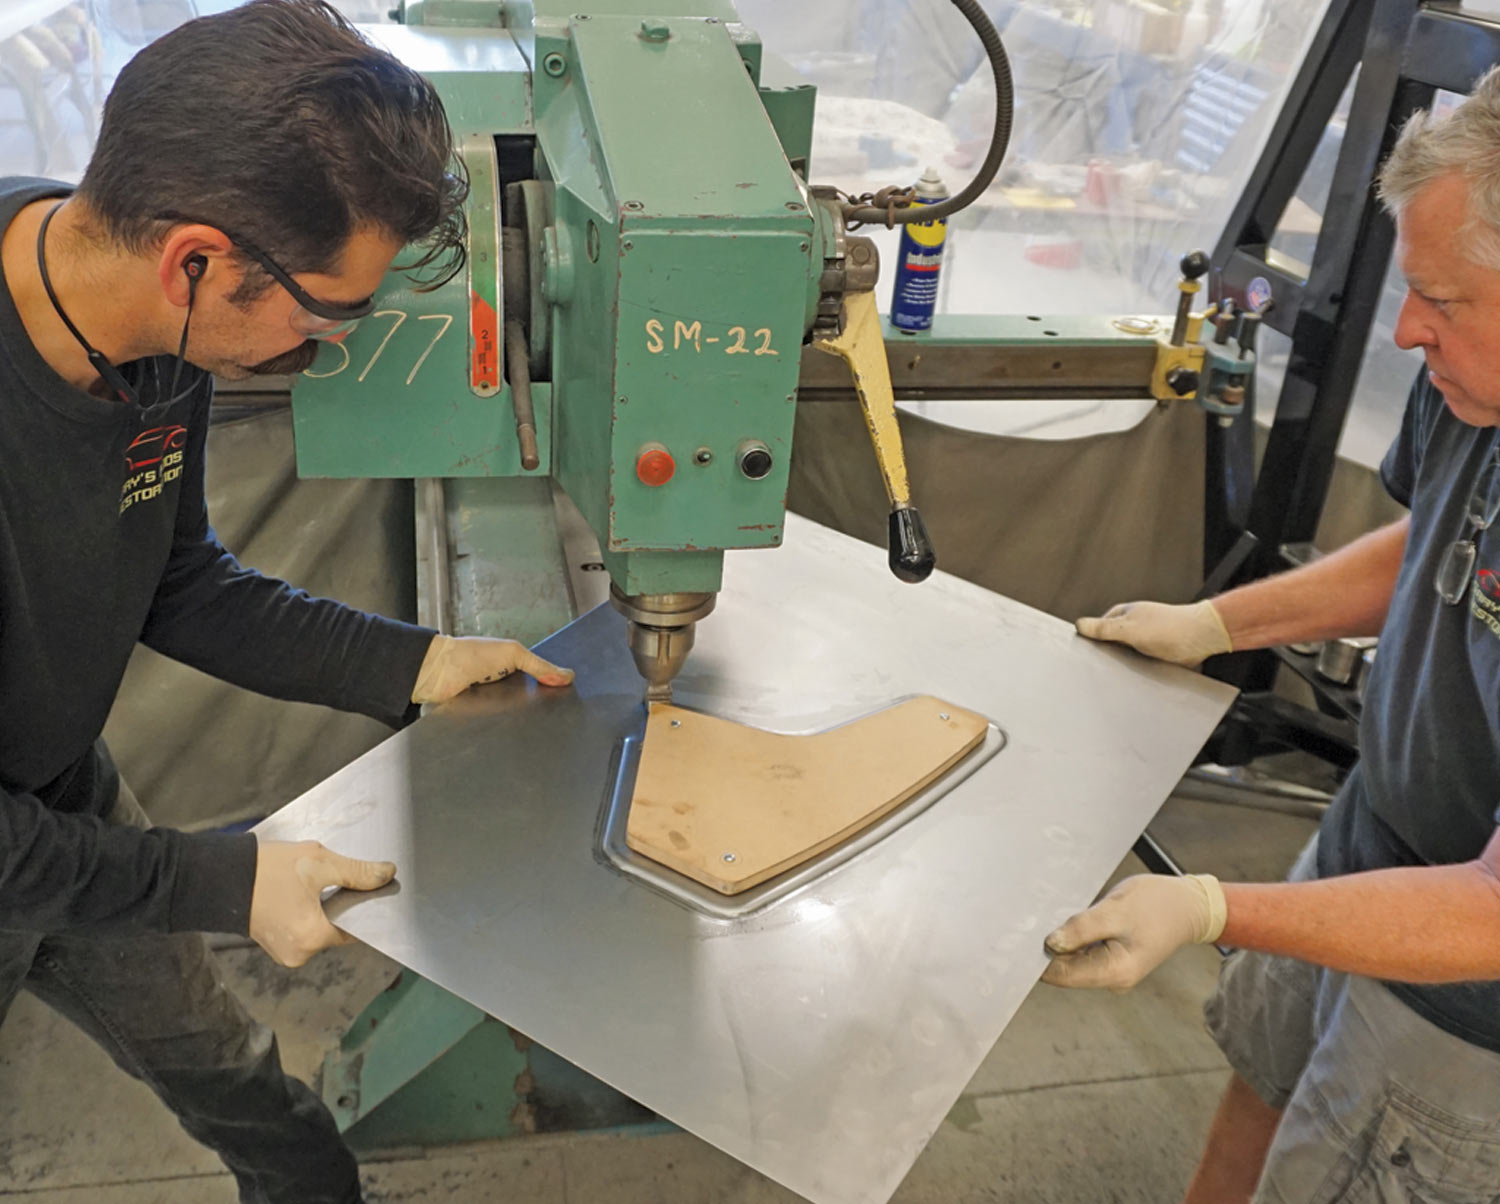
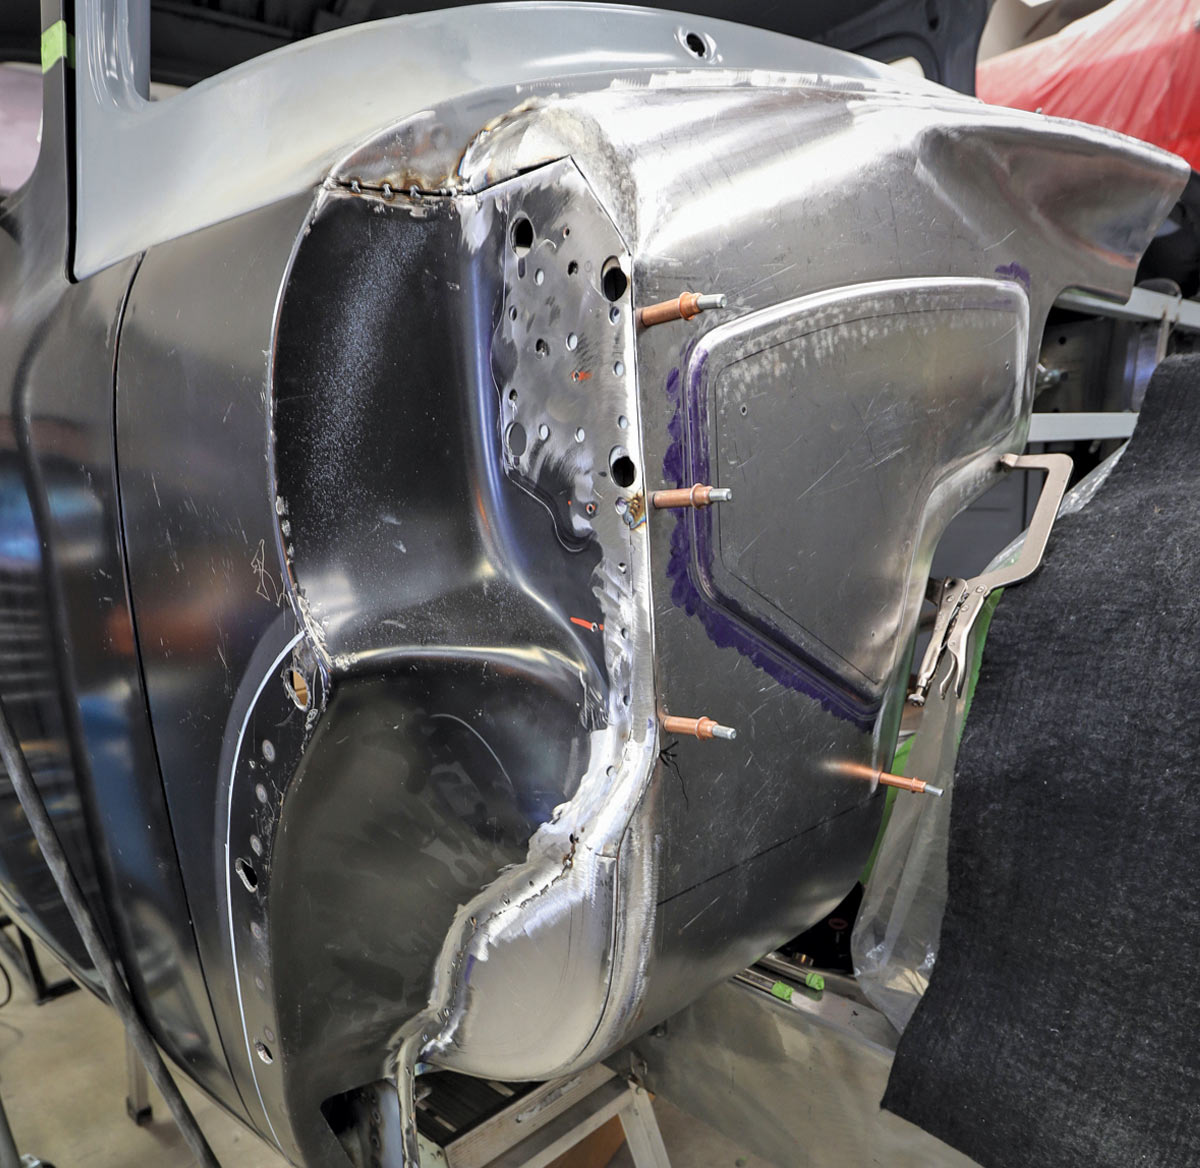
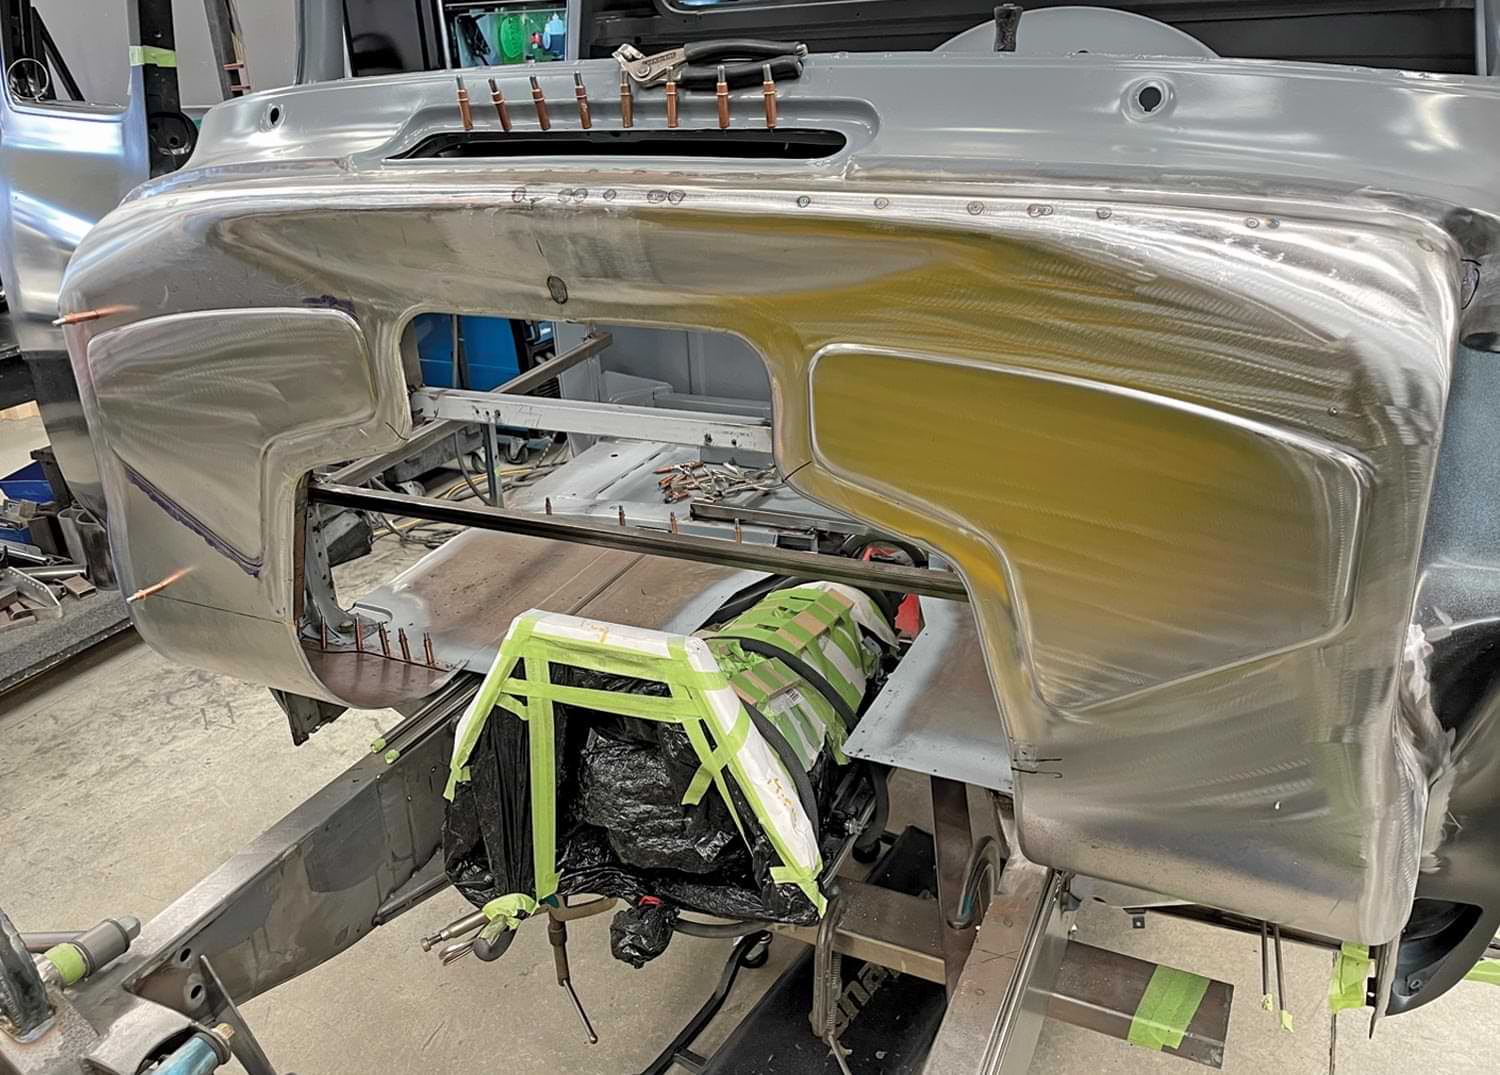
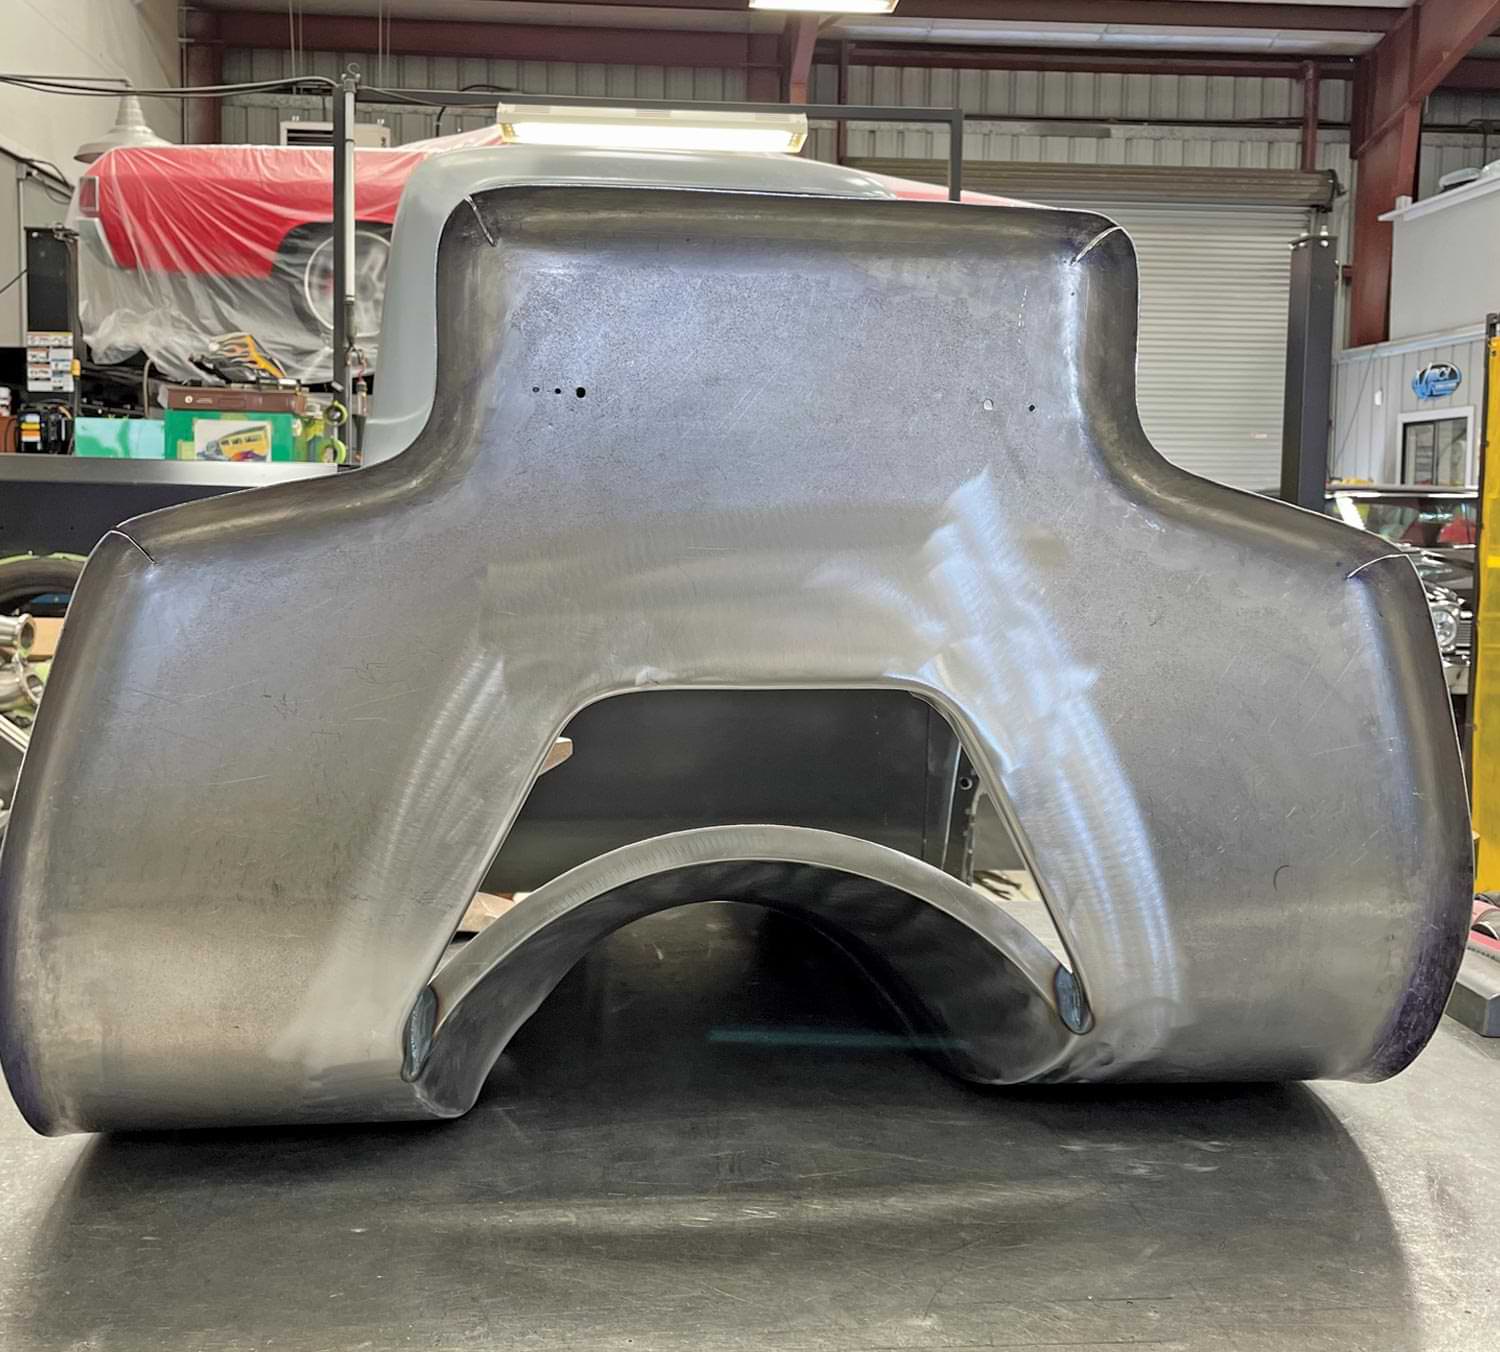
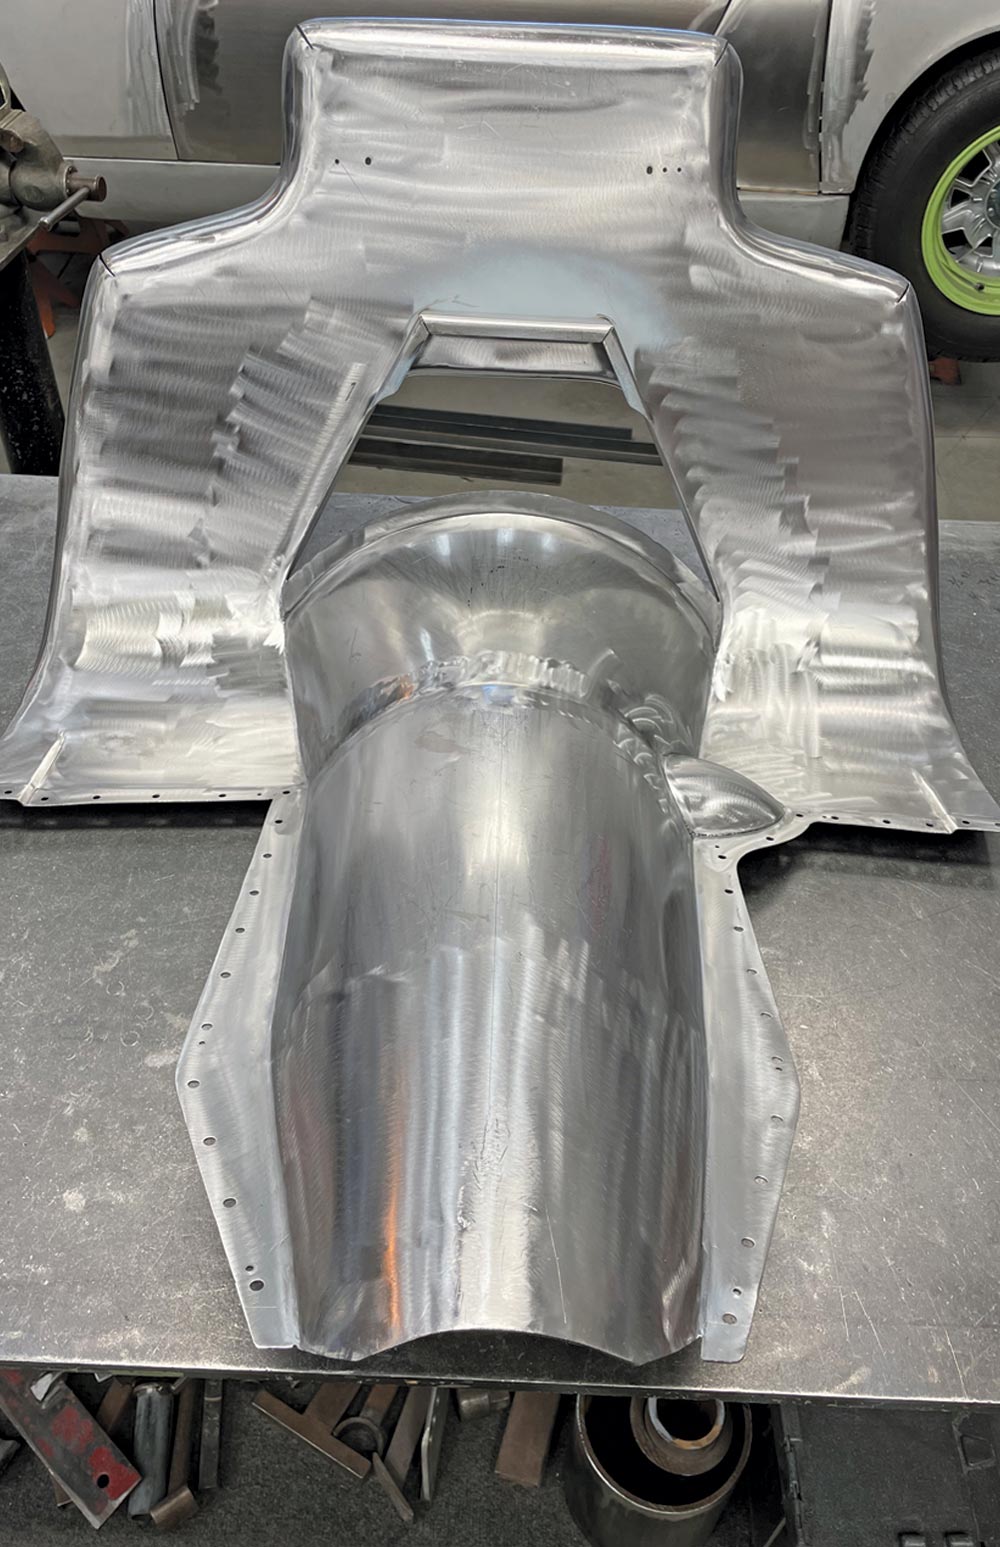
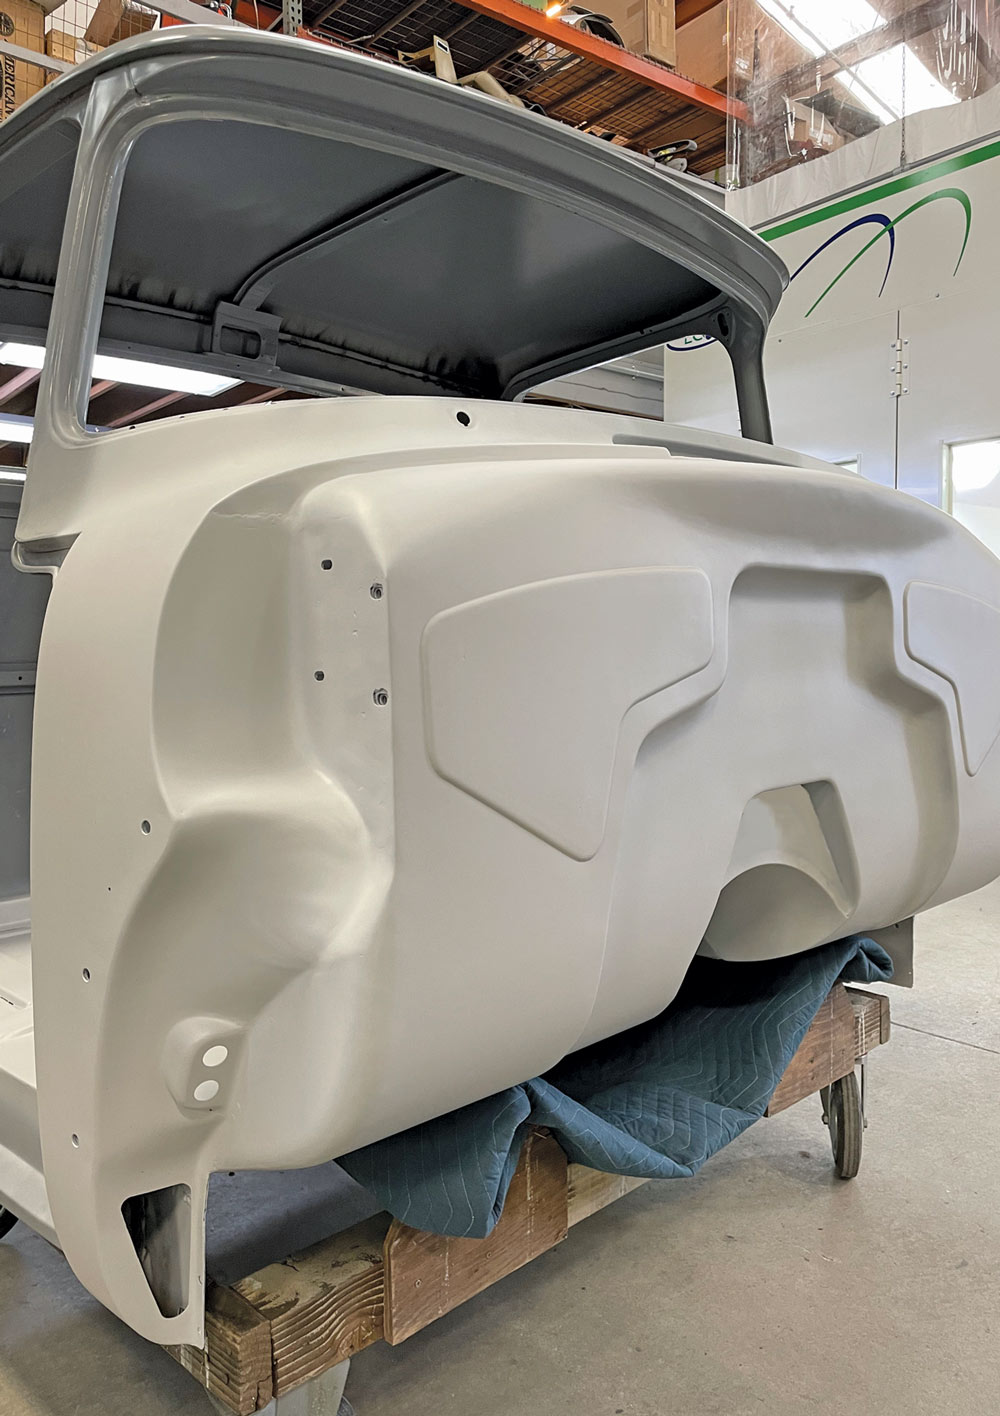
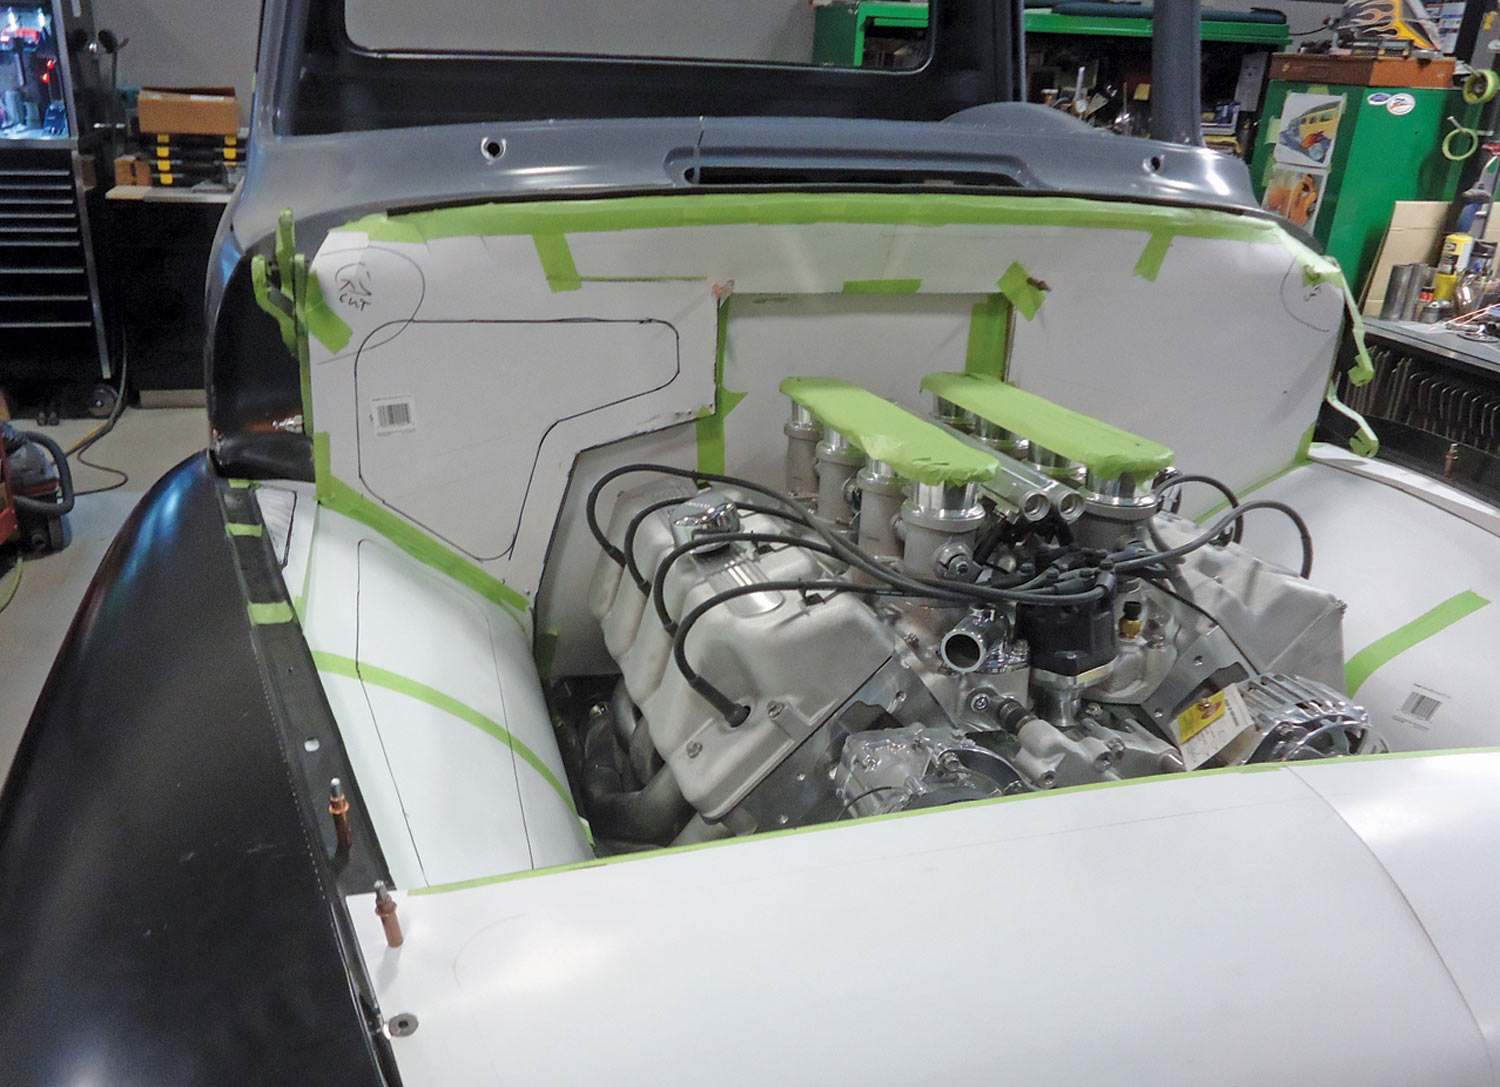
Emilio Belmonte is George’s sheetmetal expert. After the chassis work was completed one of his first tasks was to make a new firewall and floor for the cab. He used chip board to mock up the firewall, getting a close fit to the bellhousing but allowing adequate room for the powerful engine to flex on its mounts. There will be raised panels formed on the firewall, inner fender panels, and inner bed panels to provide stiffness and style. Belmonte uses a Pullmax machine to form these panels, as you’ll see in the photos.

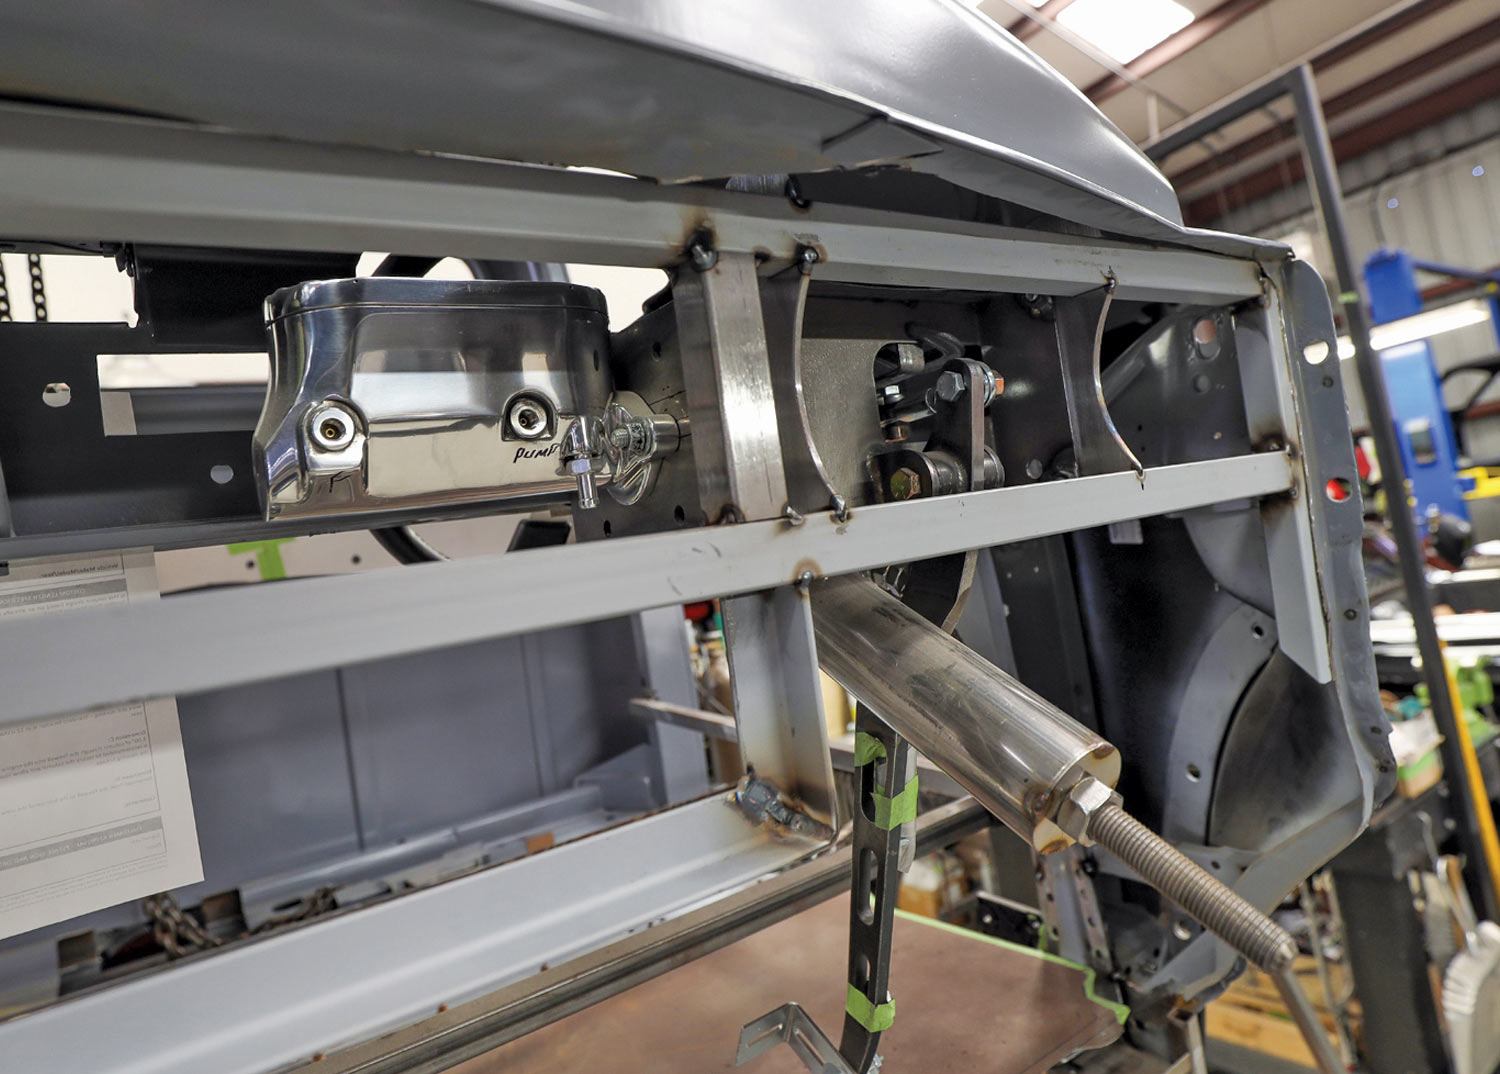
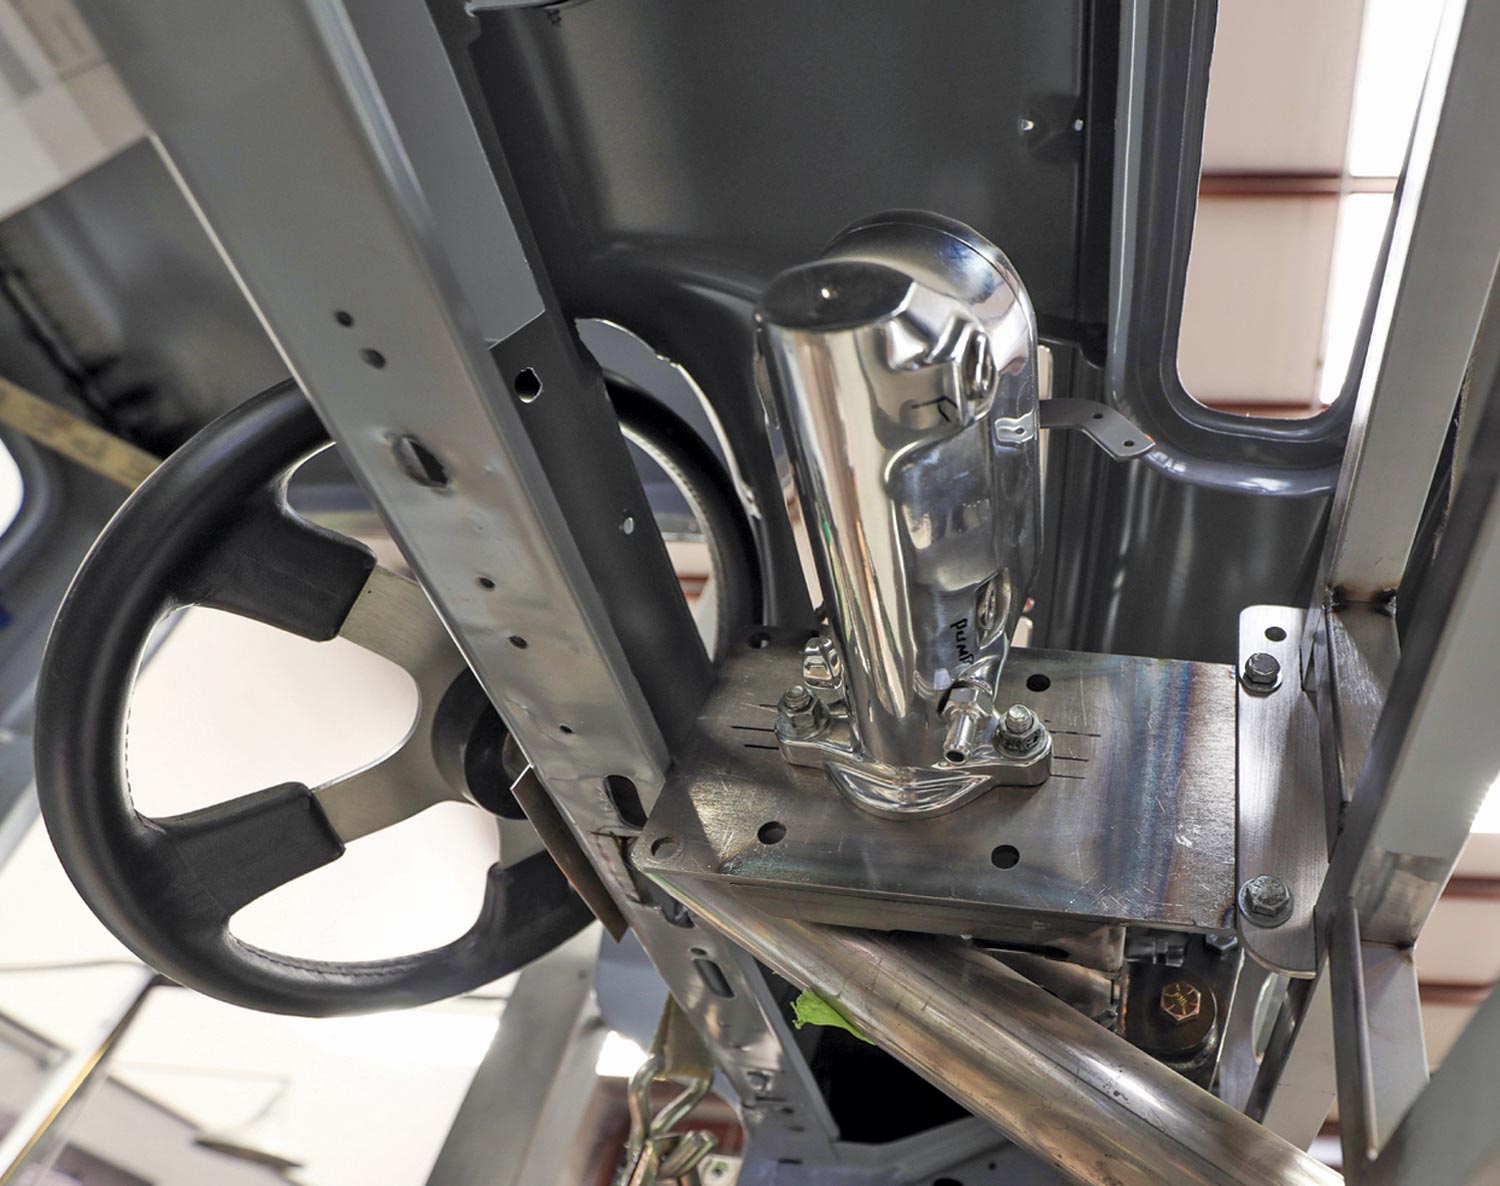
Once the design and patterns for the new firewall were completed, the original firewall was removed. This provided the perfect opportunity to install bracing for the Kugel Komponents pedal system, and to get the pedals and master cylinder properly located and mounted. This job is so much easier with the firewall out of the way.

The photos will show the “intimate details” of how this work was done, and you can look for more articles on each of the major body modifications to come. Hang on for the ride–not only will this be an outstanding truck, it could very well give you some ideas for your personal projects!
a chosen replacement panel in black waits for installation
2. The engine is a Ford Boss 572 fitted with Jon Kaase injection and accessories. It will definitely provide plenty of power!
mechanic adjusts the gap from the fender to the door and gap between the door and the rear of the ’jamb
3. The first step for modifying the cab was mocking up the new firewall with chip board.
mechanic measures gap adjustments
4. A new radiator core support and new inner fender panels will be made, too. We will cover these in a future installment.
view of the cab corner with rust holes appearing with blisters and bubbles in the paint
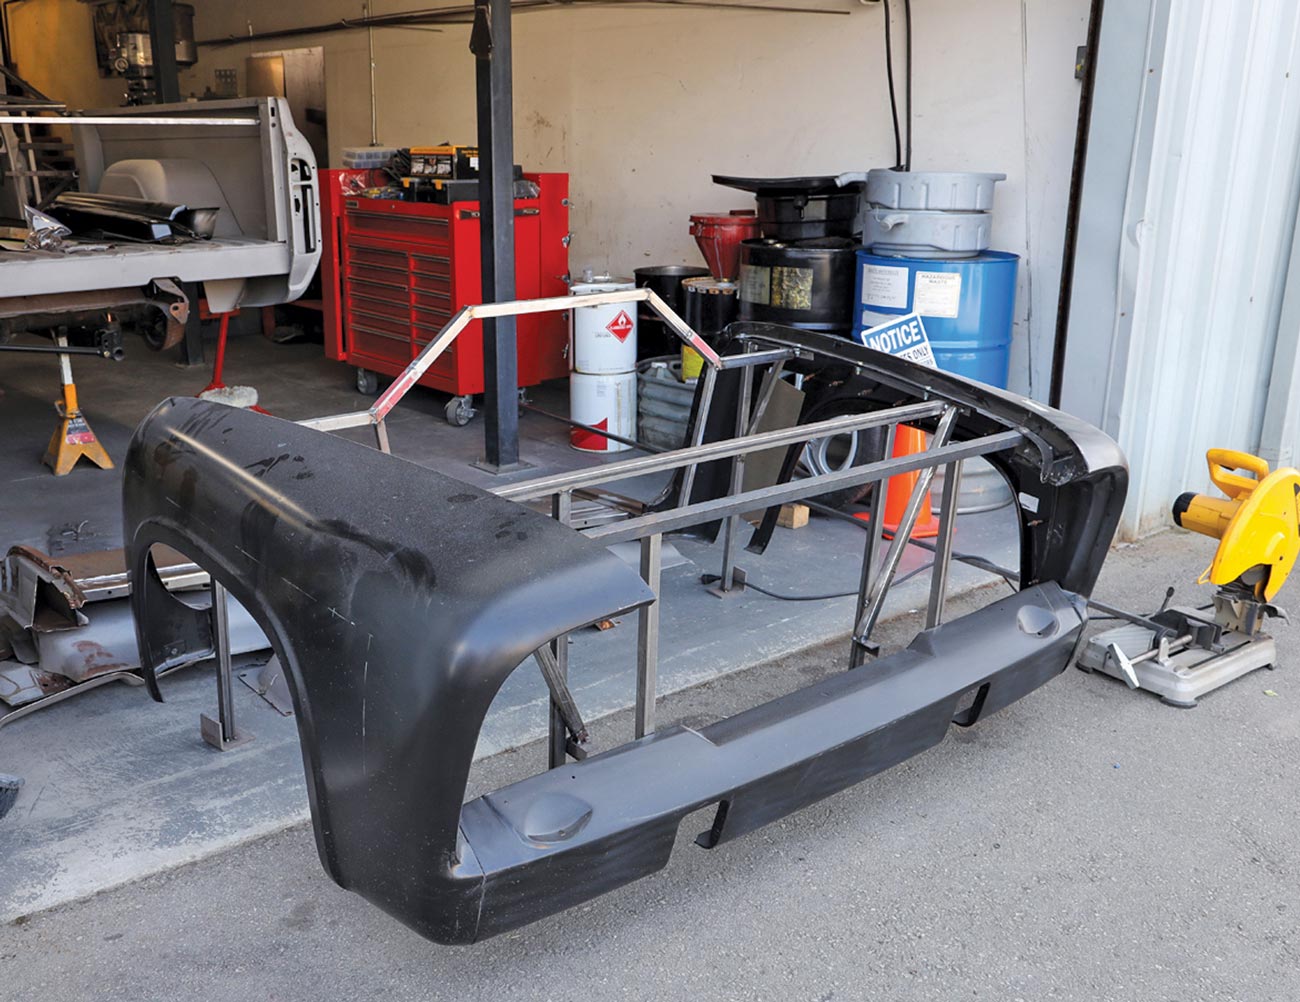
5. The front sheetmetal was tied together with a strong tubing framework, and the assembly was removed from the truck.
mechanic holds the replacement cab corner over the existing to test the fit
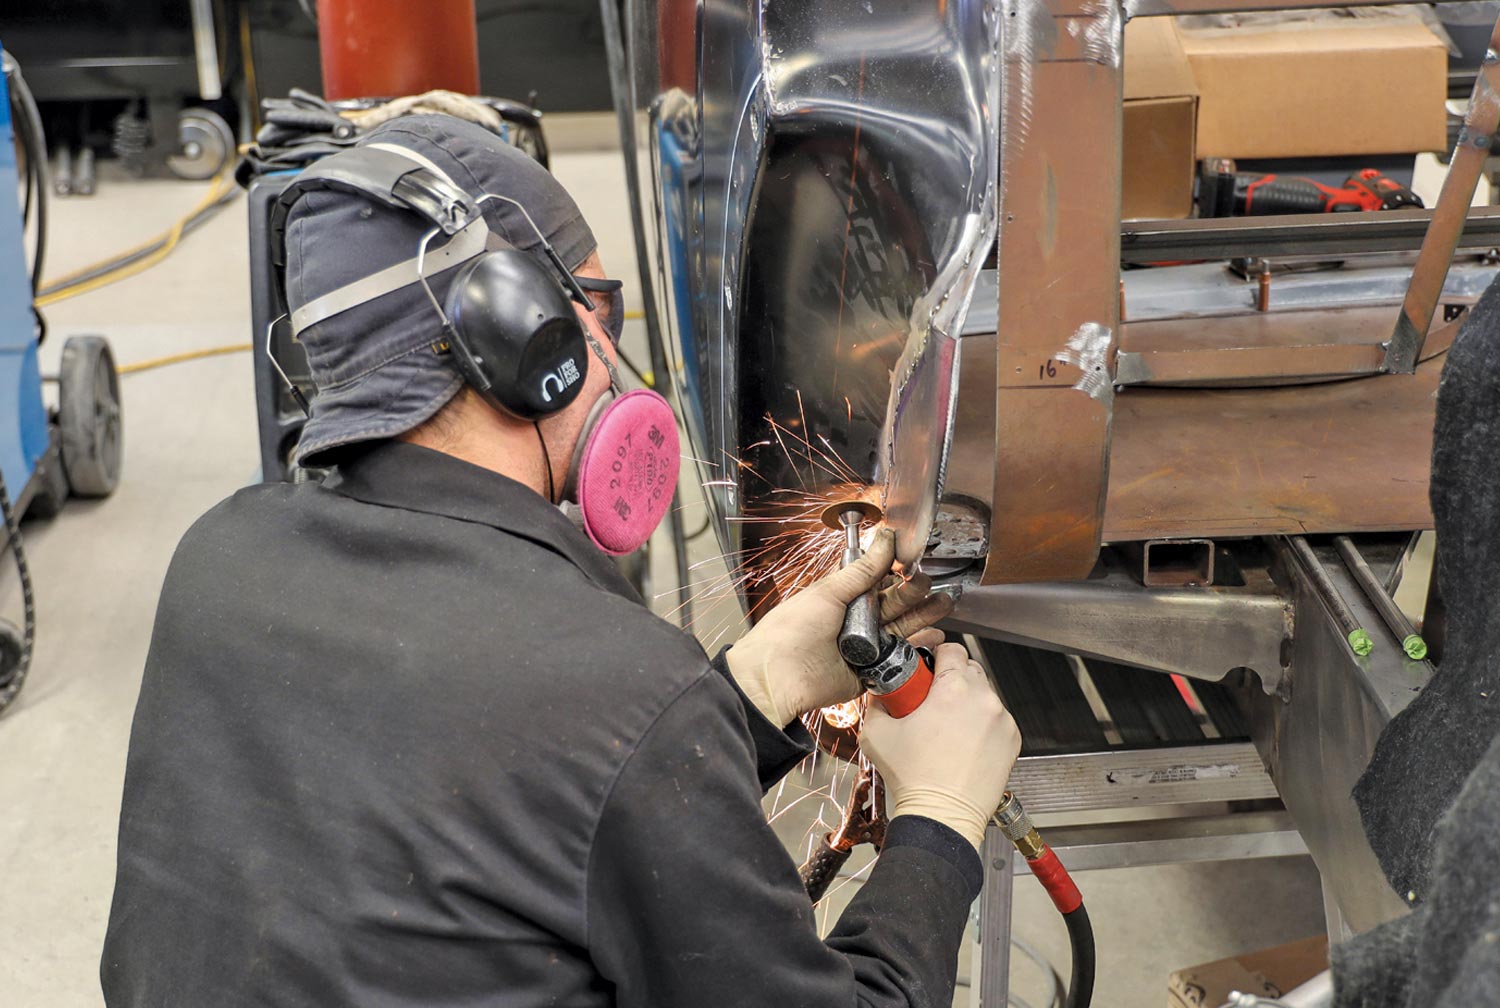
6. Next, the old firewall was cut away.
mechanic uses a tool to grind the paint from the existing cab corner
7. This provided the perfect opportunity to construct the bracing for the Kugel Komponents pedal assembly and to get the air conditioner unit properly located and mounted.
view of the previously installed replacement rocker panel beneath the cab
8. Extra reinforcement was added to stiffen the pedal assembly and steering column.
mechanic tapes off a cut line on the new cab corner to meet up with the strongest edge of the body line
9. An extension was added to the lower cab panel to meet the new firewall.
mechanic uses a body grinder with a 6-inch abrasive cutoff wheel on the previously installed replacement rocker panel
10. A Pullmax machine with special step tooling was used to form the raised details in the firewall panels.
the new black corner panel piece with arrows to indicate the side of the line to cut
11. The panel is guided by an MDF pattern temporarily fastened to the metal. This pattern is held tightly against the dies as the panel is moved through the reciprocating dies.
mechanic uses a 24-grit sanding disc to smooth the metal’s rough edge
12. The edges of the new firewall side were properly contoured and fitted into place for tack welding.
the mechanic holds the trimmed cab corner patch panel positioned exactly into place and marks a legible alignment line with a black Sharpie
13. Both outer firewall panels are installed and are being smoothed and adjusted.
for the cut line to remove the original cab corner 1-inch masking tape was placed 1 inch below the alignment line
14. Here is the inner firewall panel, nearly ready to be joined to the outer firewall.
using a die-grinder with a 3-inch cutoff disc, mechanic cut open the end seams
15. The transmission tunnel was fitted at this time.
mechanic cuts just behind the ’jamb, making removal of the remaining piece easier
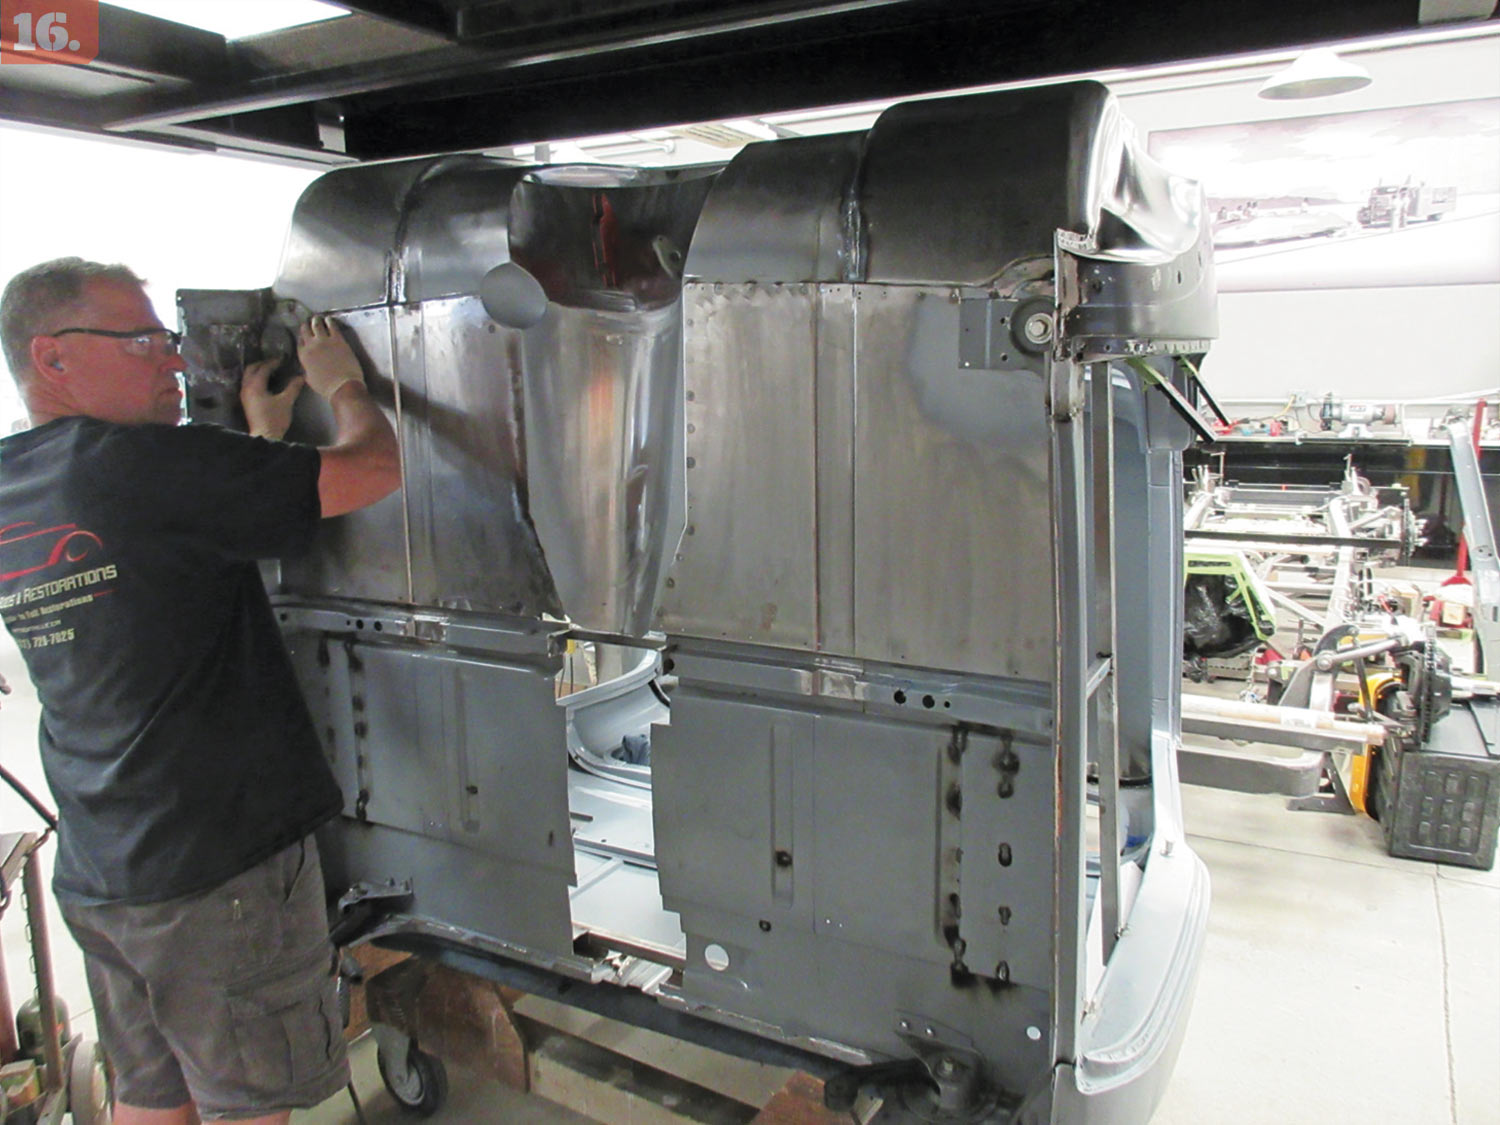
16. The cab was removed from the chassis and tipped upright to ease the fitting of the new floor panels.
cutting at the lower line leaves 1 inch of lip left to clamp the new cab corner in place to meet alignment marks
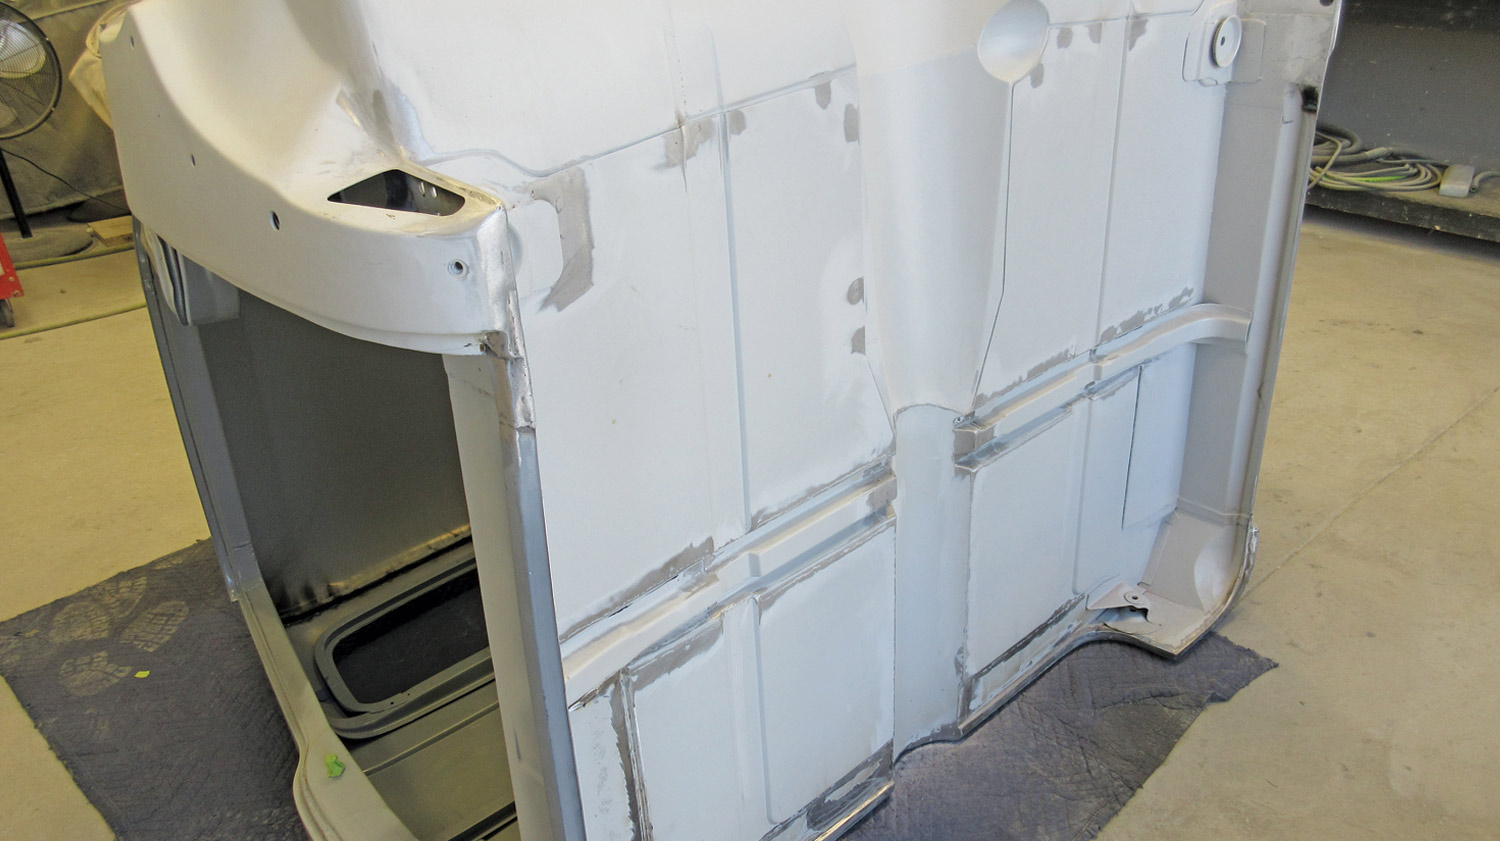
17. Here are the floor panels, smoothed and ready to be primed.
mechanic continues cutting the cab corner from within the car
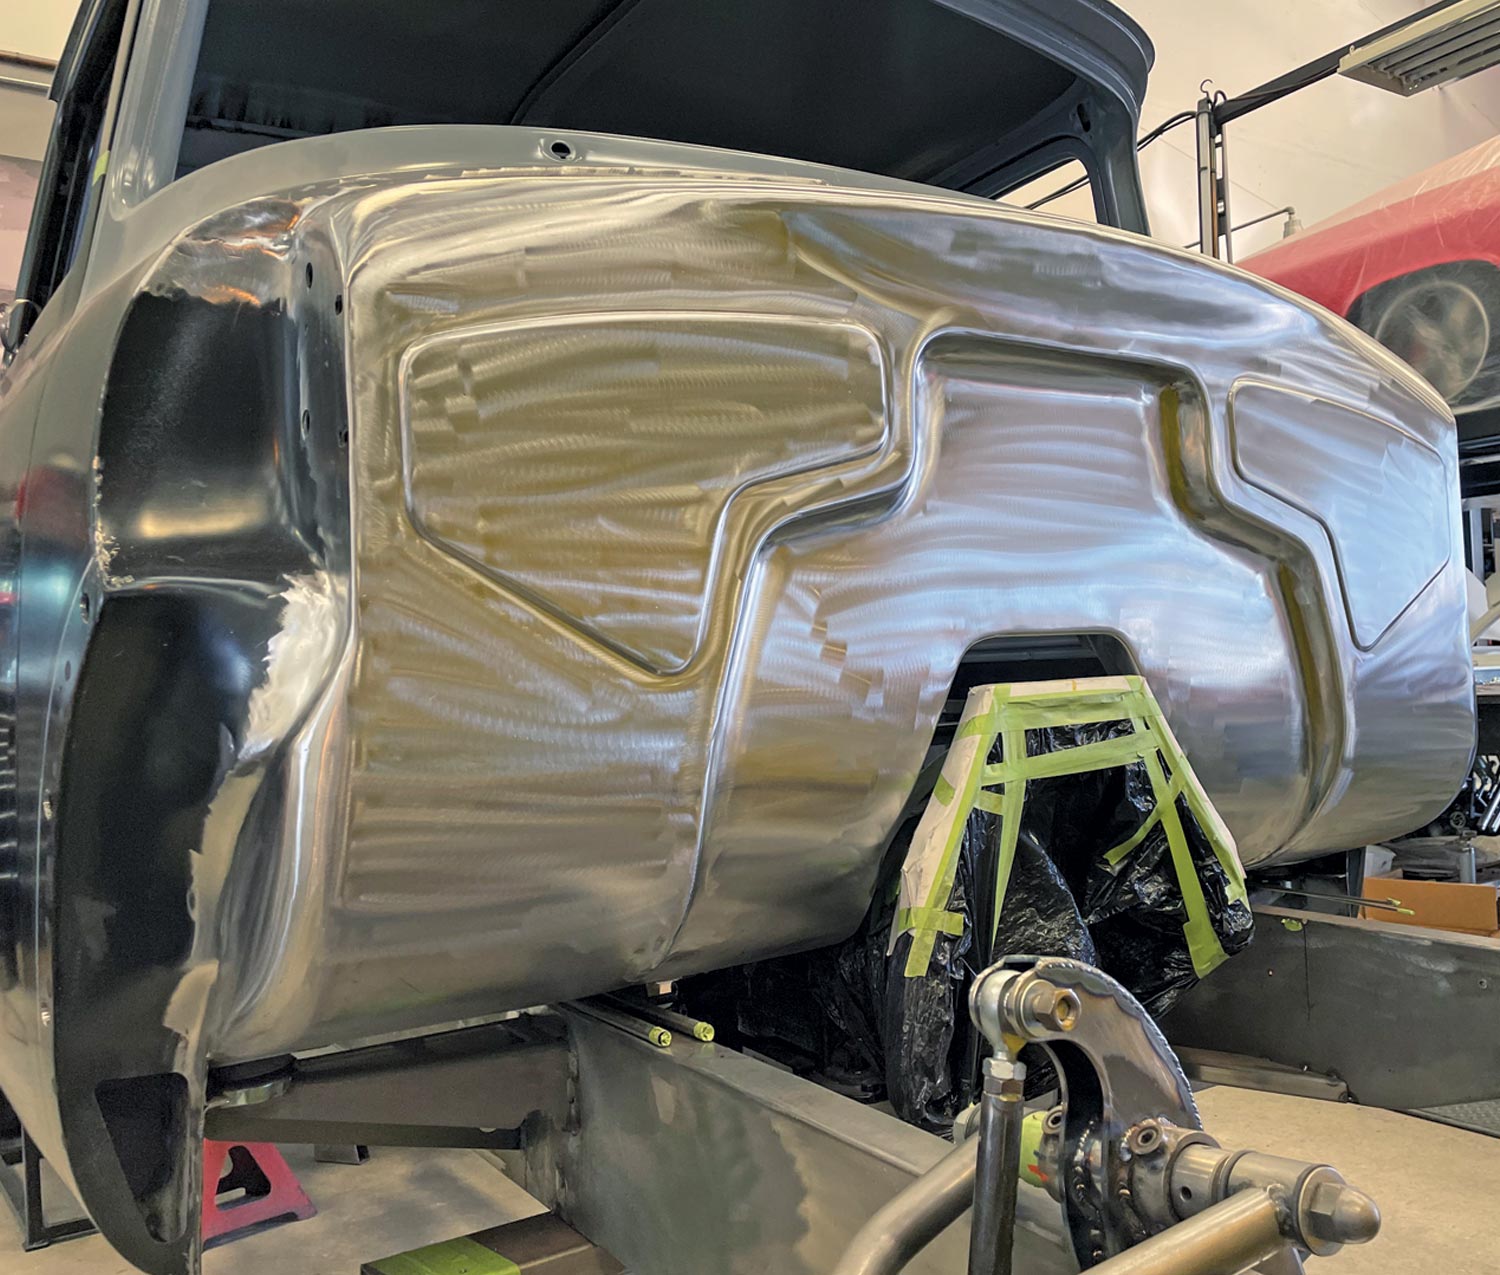
18. Here’s the firewall after the final smoothing. As you can see, the metalwork is superb.
the existing cab corner with factory spot welds
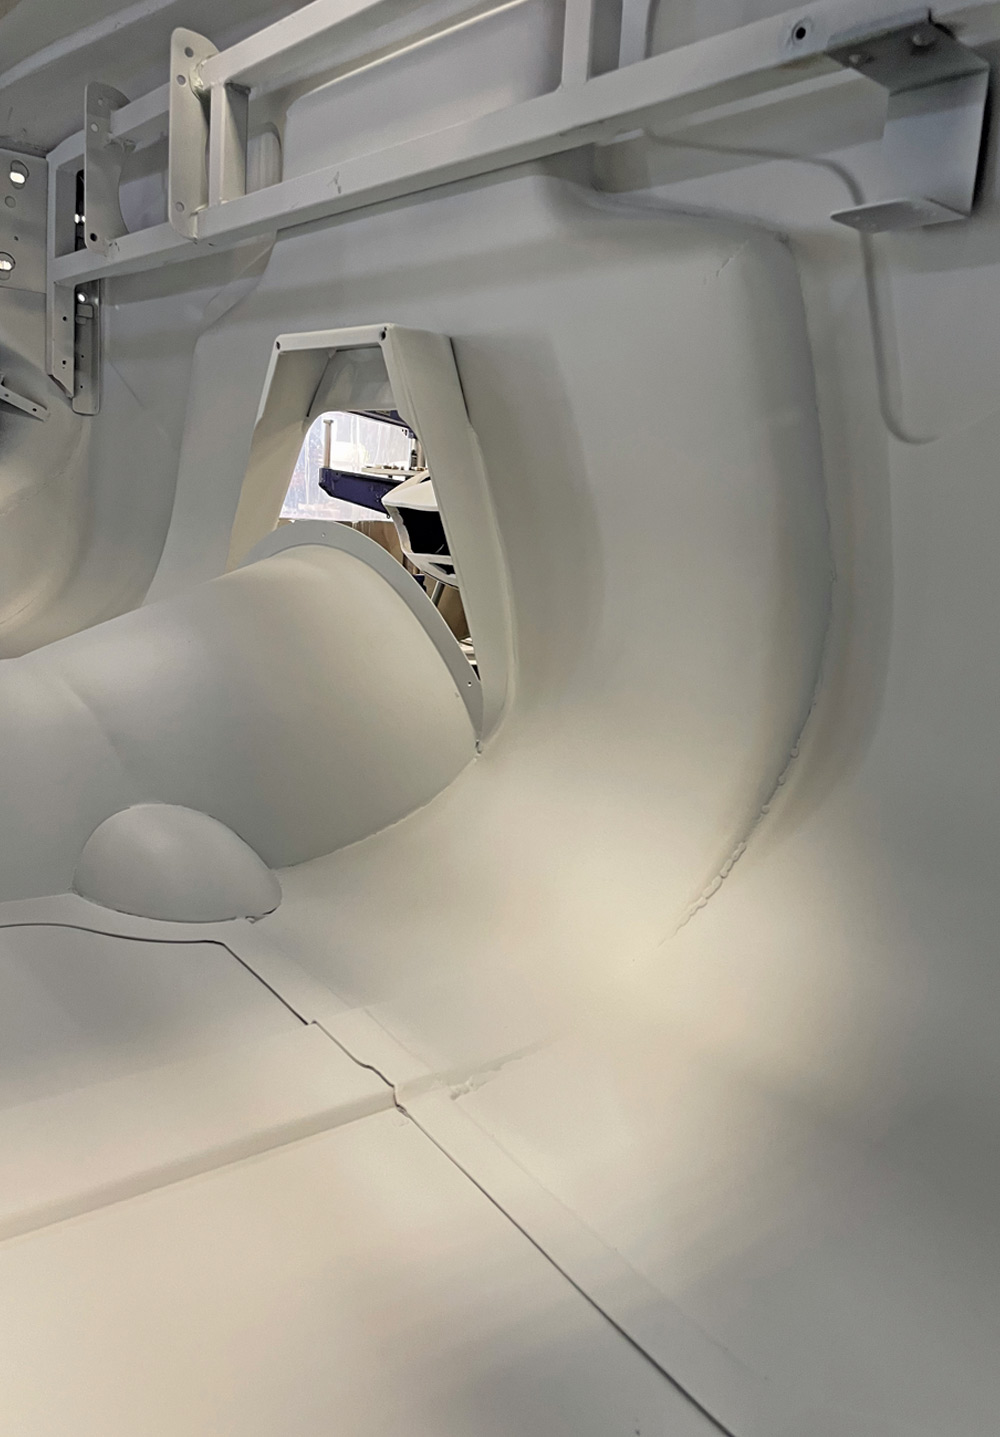
19. The firewall was sealed with primer, inside and out, to prevent rusting as the build progresses.
mechanic pulls back existing corner panel to reveal extensive rust damage

20. Here’s the face of the finished firewall. It will provide a perfect backdrop for the powerful engine.

 SOURCES
Gary’s Rods & Restorations
(831) 728-7025
garysrods.com
Art Morrison Enterprises
(800) 929-7188
artmorrison.com
Mittler Bros. (Hydroshox)
(800) 467-2464
mittlerbros.com
Total Cost Involved
(800) 984-6259
totalcostinvolved.com