
 Tech
Tech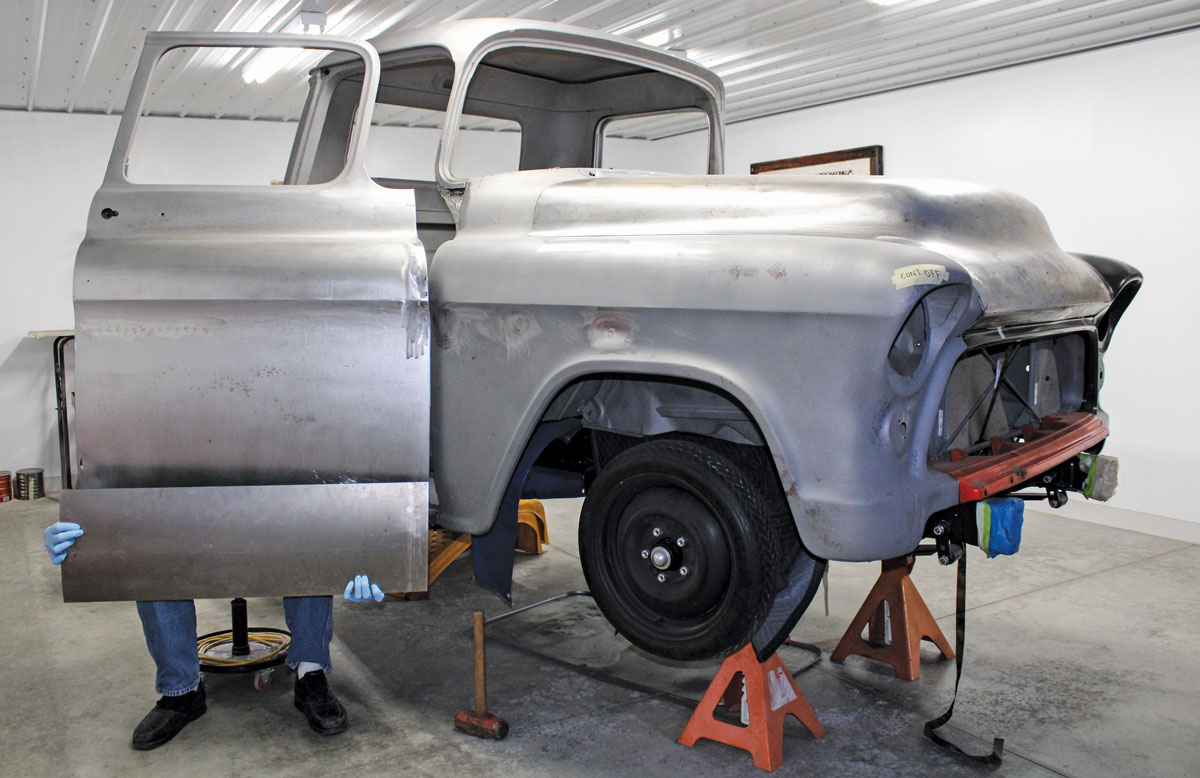
BY “Rotten” Rodney Bauman ![]() PHOTOGRAPHY BY The Author
PHOTOGRAPHY BY The Author
ou know that old familiar feeling we get sometimes, like we’ve been somewhere before? Well, here we go. It’s patch panel time—again.
When this particular 1955 second-series Chevy rolled off the line of the Oakland, California, assembly plant, no one imagined it wrecked ’n’ rusty. South of Oakland, a safe distance from the ocean, it spent its working years in Riverside. Despite the dry climate, this old truck’s twisted remains are partially decomposed. Even so, there’ll be no complaining here. We know that compared to yours, our rust might be minor. Where this one is from, the natural corrosion is pretty typical for an outdoorsy-type truck of the mid ’50s.
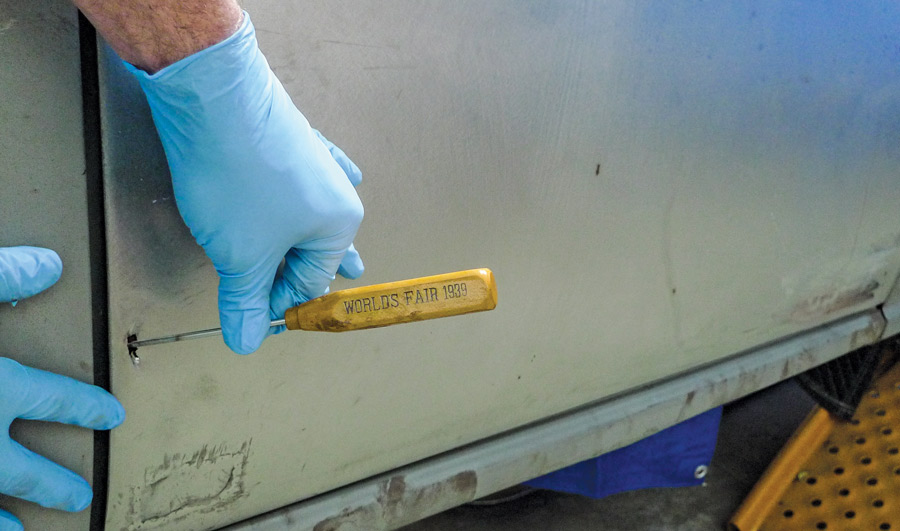
1. The icepick doesn’t lie. Down low in the corner areas, this doorskin is thin. We’d like to keep our patches as small as possible. We’ll at least begin with that notion in mind.
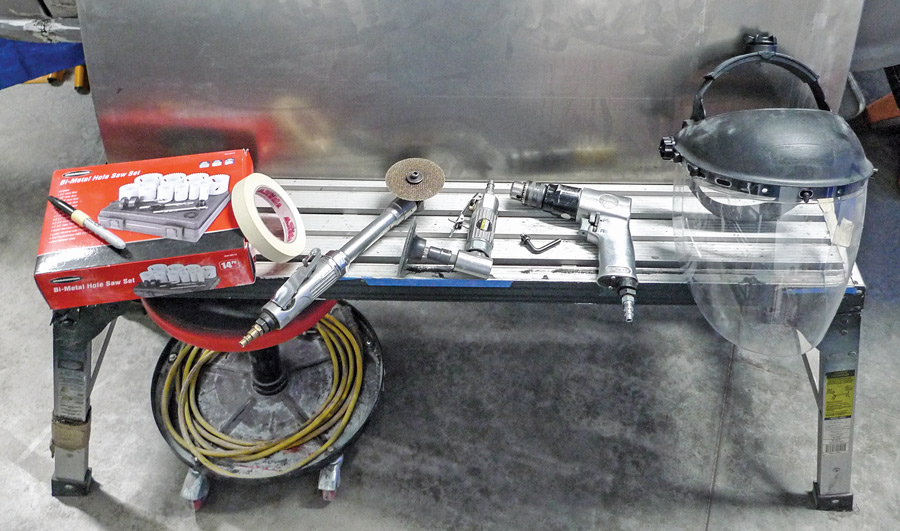
2. So, here’s our new patch panel from Brothers. In the foreground are a few implements of restoration: drill, new hole saws, grinding ’n’ cutting devices, with adequate eye protection, all from Harbor Freight. This’ll get us started.
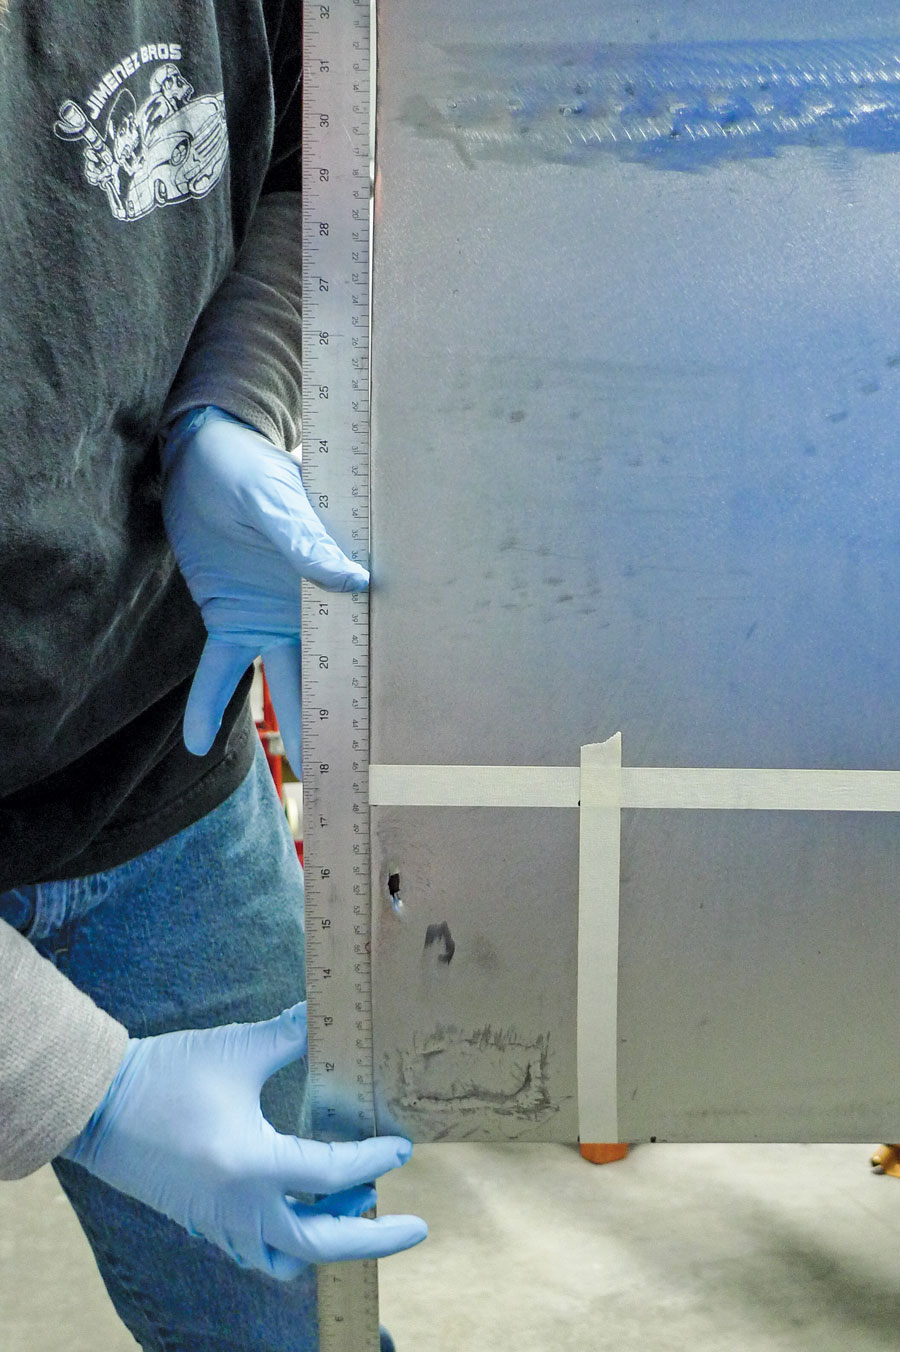
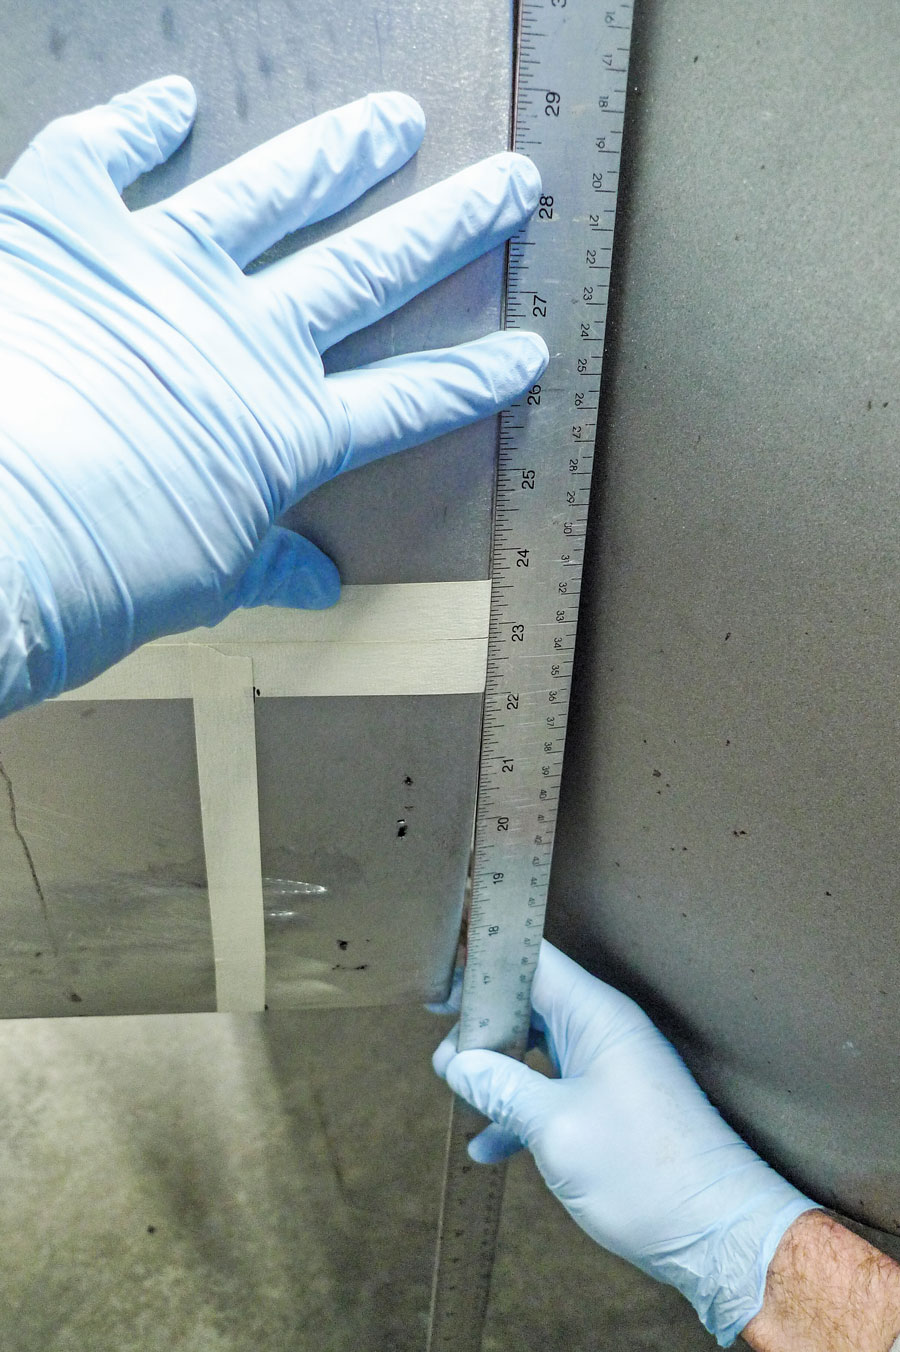
3. The rear door edge is straight up ’n’ down. This bit of patchwork wouldn’t be too difficult with the door left in place on the truck.
4. The front door edge is slightly curved. Our new Brothers patch panel is made to accommodate the curve, but for backside access here we’ll need to pull the door.
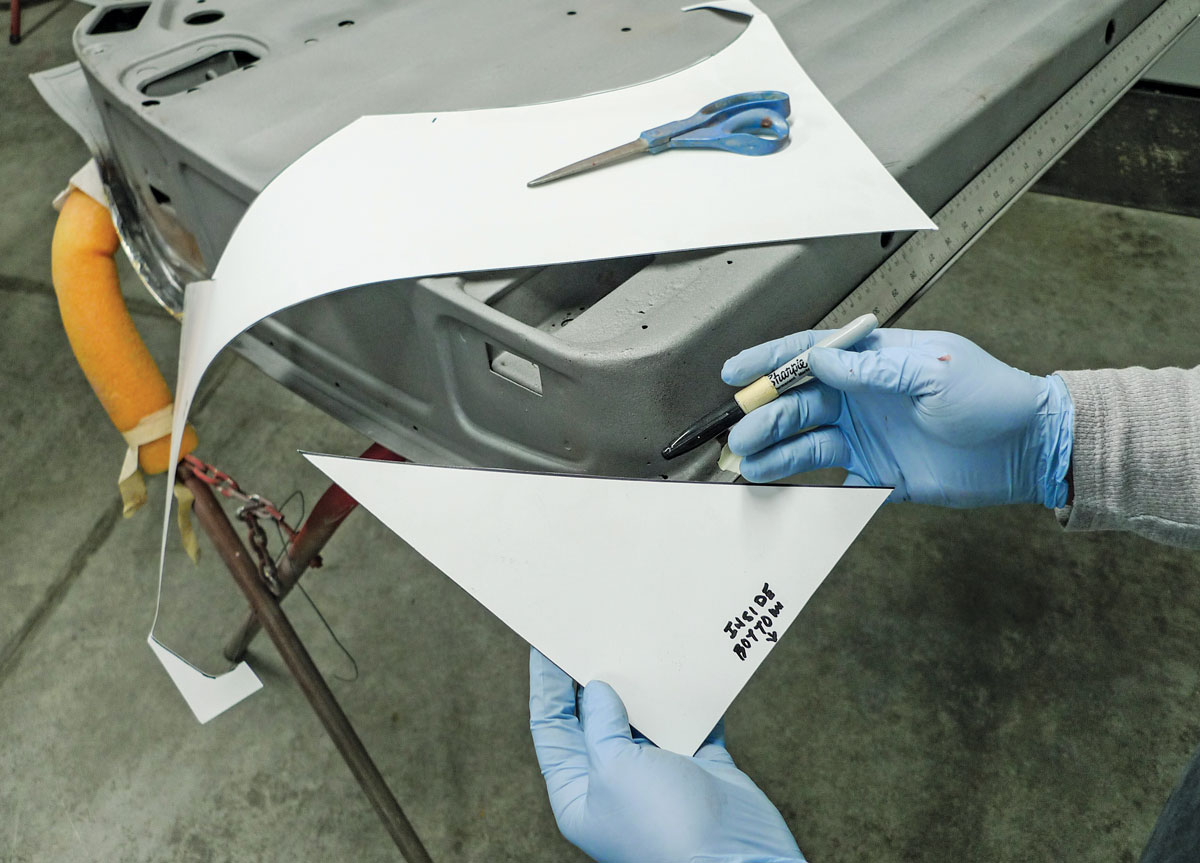
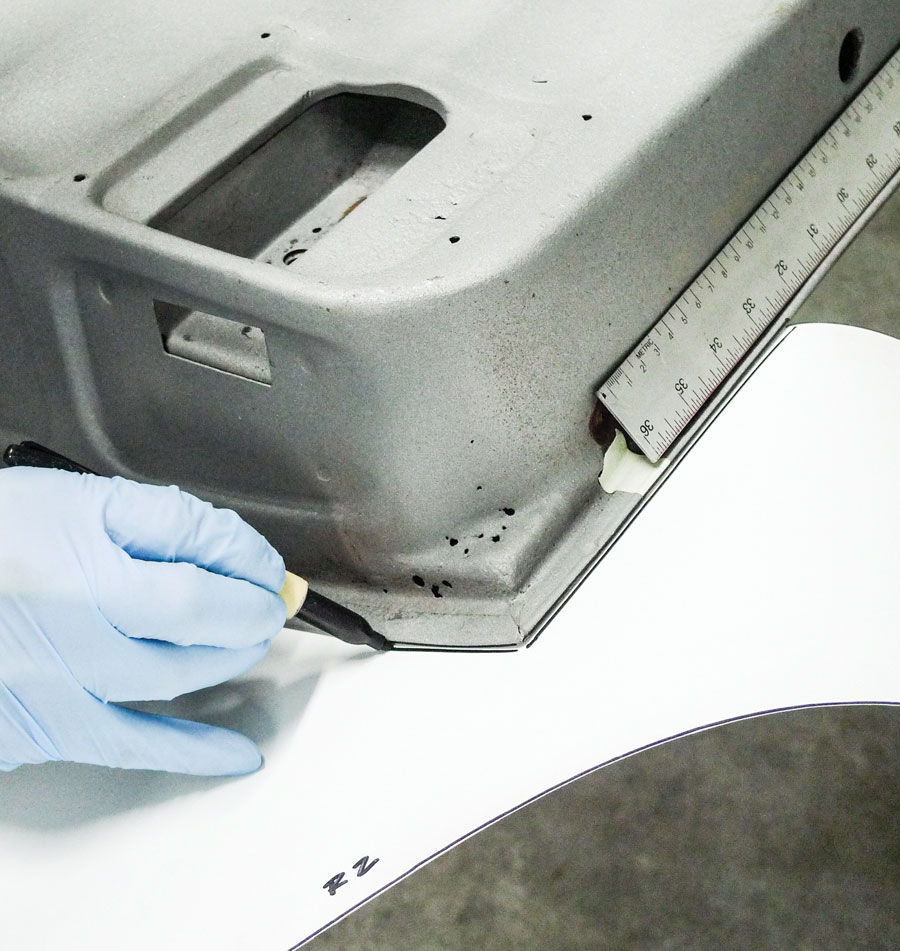
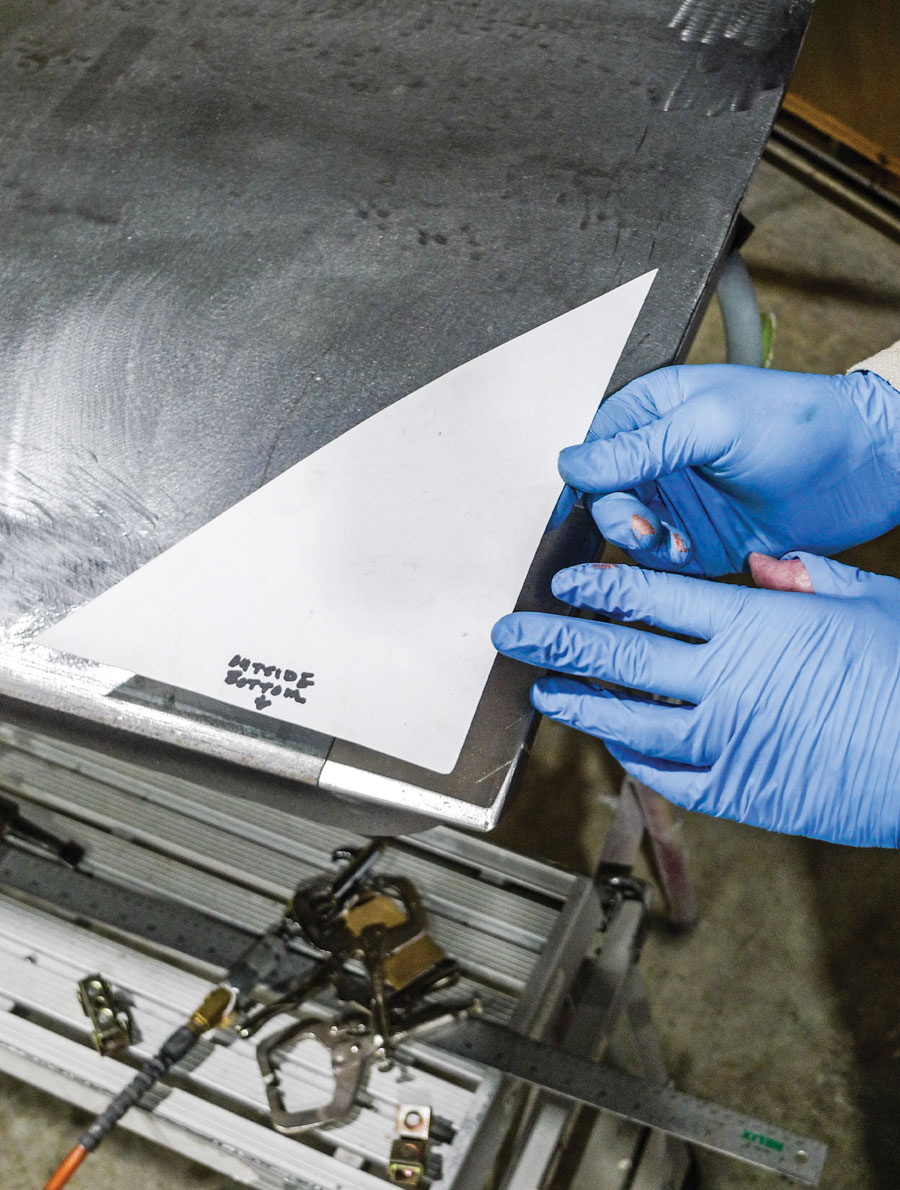
5. For the slightly curved front door edge, a reference template might be helpful. For this we’ve found a dull Sharpie, some leftover poster board, and three strong magnets.
6. We’ve already worked for acceptable gaps. Working now with the door off the truck, our reference template will ensure that our door-to-fender gap won’t change.
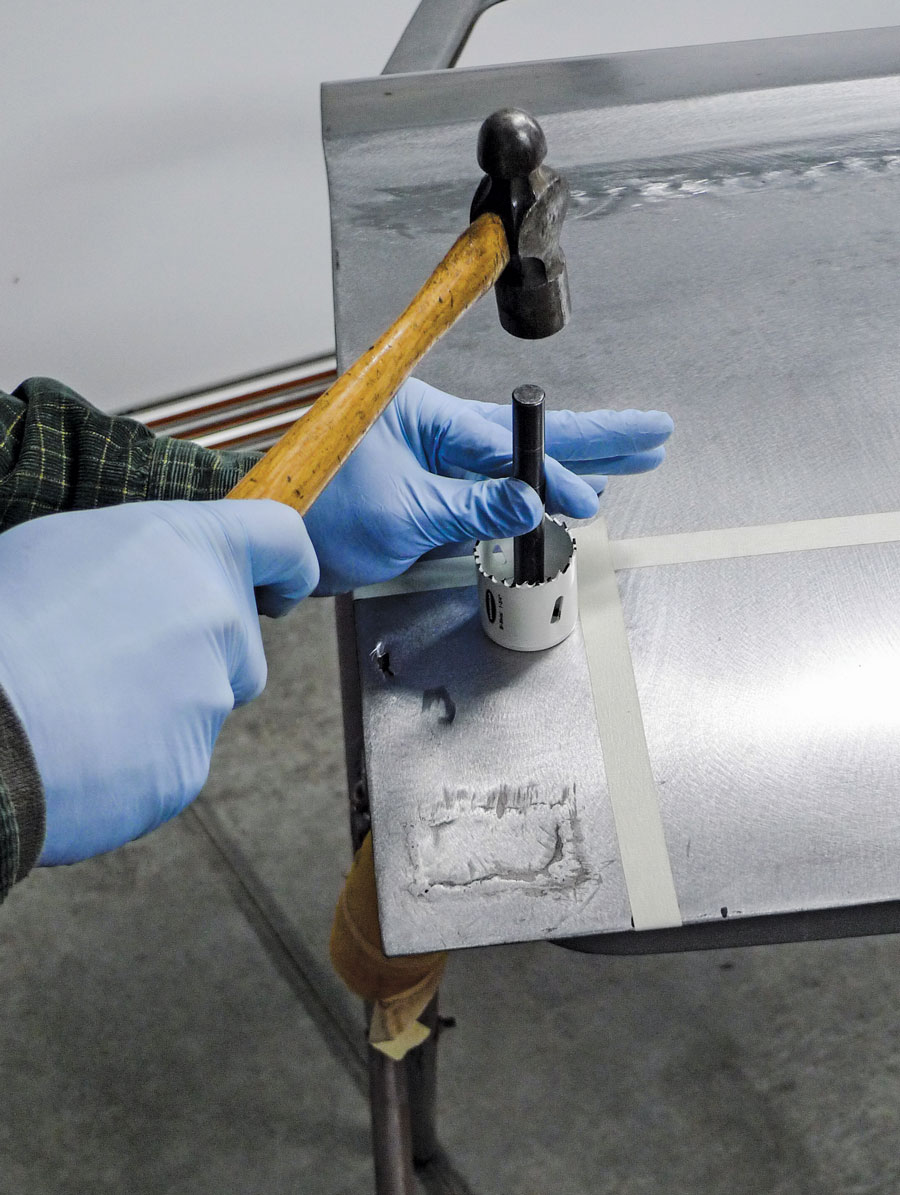
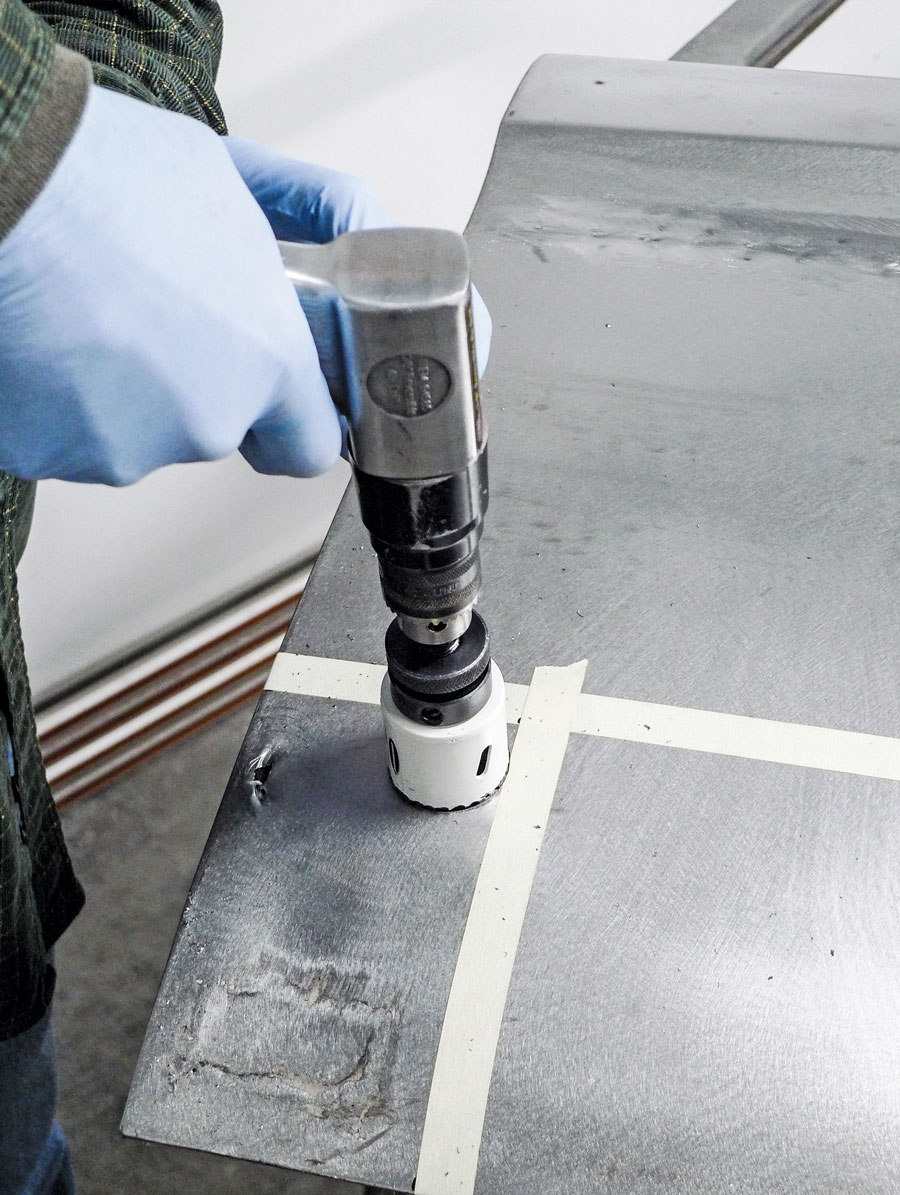
7. I’m a little hard of sight, but I can follow masking tape. Our cut lines are laid out. To locate rounded corners, let’s try a transfer punch through the center of the hole saw.
8. Well, how about that? Back-to-back bull’s-eyes! We were long-overdue for the sharp new hole saw set. As it turns out, the transfer punch beats a dull Sharpie, too.
As truck builds go, this one’s been long ongoing. Earlier we dealt with a fair amount of crash damage. The left door and fender were replaced in favor of new reproduction panels from Brothers. That’s like a huge head start for the impending rustectomy.
This time we’ll be patching the usual places on the passenger side only. With the mocked-up truck raised to a comfortable height on stands, we might as well begin with the original door. As we’d ordinarily expect, its outer skin is rusted through in each lower corner. The needed patches could be fabricated, but from Brothers, a properly shaped outside door bottom patch panel is a bargain, even if we use only the sections we need.
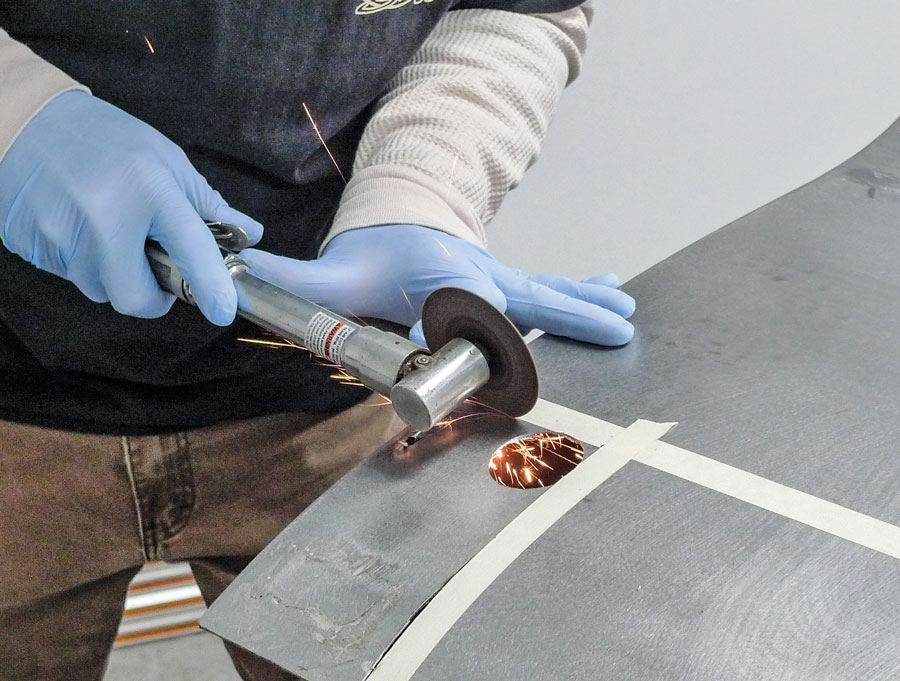
9. For our straighter cuts we’re using one of Harbor Freight’s 3-inch extended reach cutoff tools. With other layers just below, we’re cautiously cutting only skin deep.
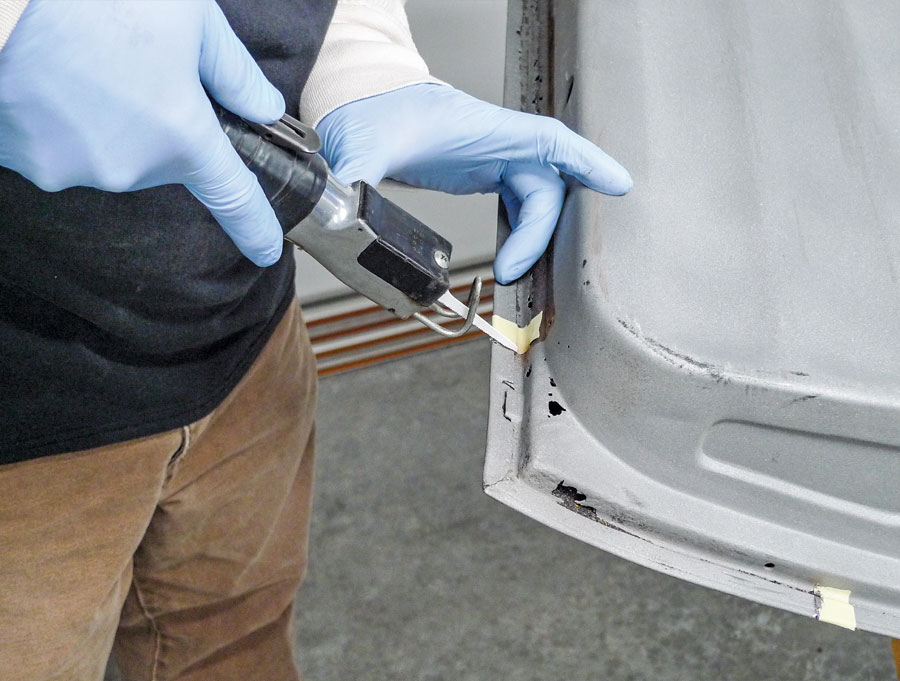
10. In the tight spots of the B-side, this little air saw fits right in to cut the doorskin’s folded edge. This was a shop liquidation score, but we know it came from Harbor Freight, too.
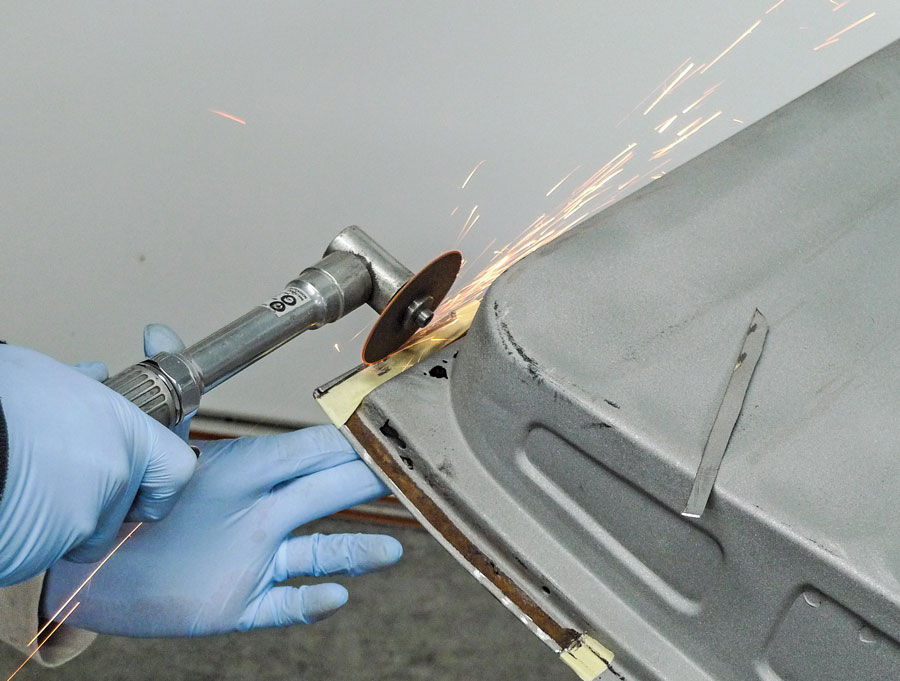
11. Quite fortunately, there’s more than one way to skin a door. For easy removal we could just grind the edge. Since we’d like to use the old sections as patterns for new patches, let’s try slicing away the folded part with a tool we’ve already seen.
12. Here with a hammer and small chisel, it only takes a few taps to peel away the unwanted strip of steel.
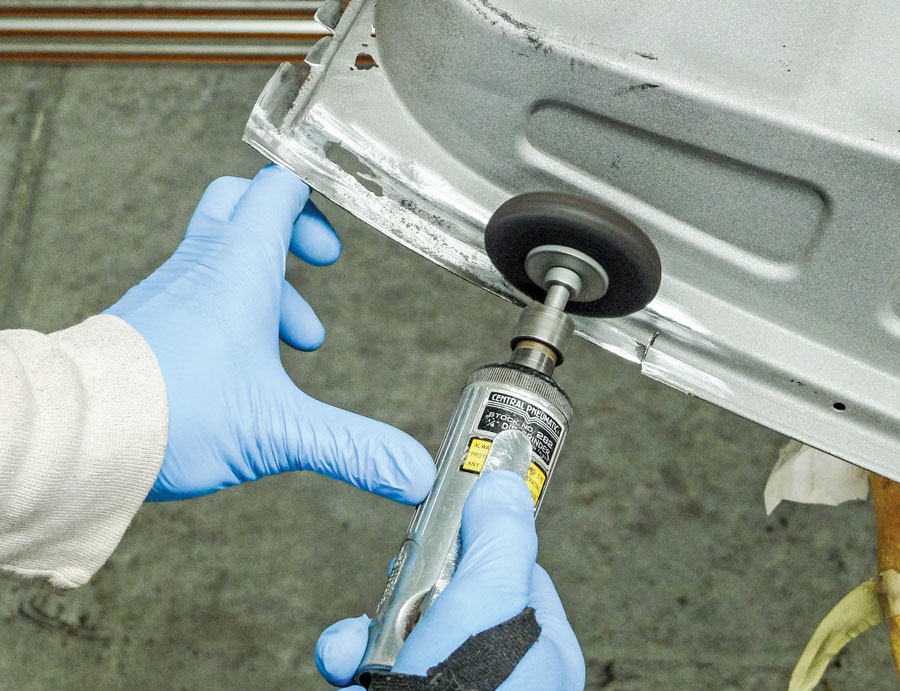
13. To level the raggedy edges, a 3-inch Roloc-type abrasive disc should do the trick. Let’s spin that with a handy little angle die grinder from Harbor Freight.
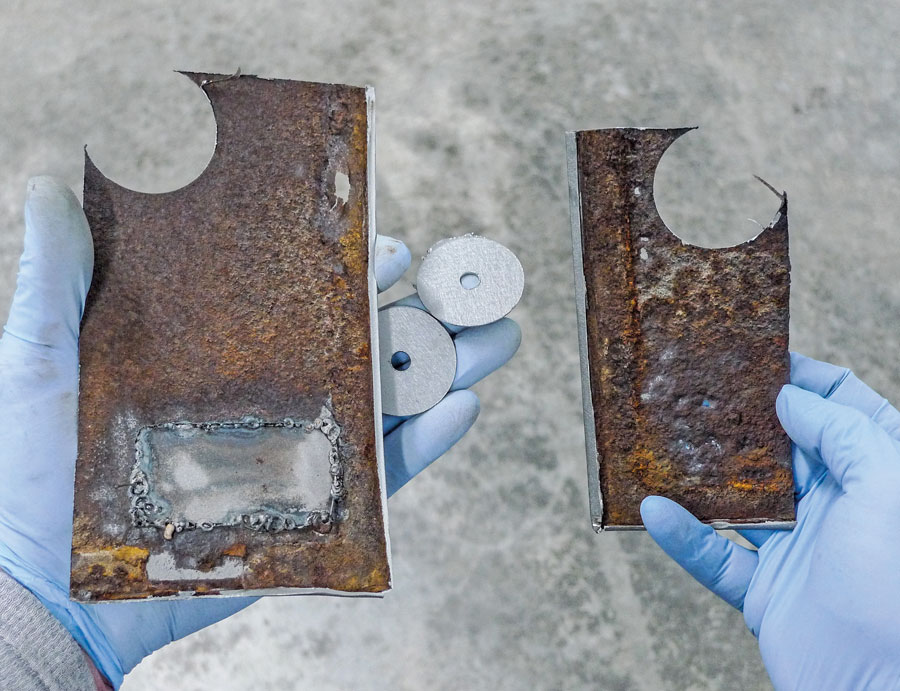
14. You know that sound a rusty chunk of steel makes when it hits a concrete floor? These with their circular slugs will indeed make good patterns, so they’re worth pickin’ up.
15. Before we cut our patches, let’s clean up this little stretch of rusty steel. For this we’ll use a clean ’n’ strip disc, on a more conventional die grinder, also from Harbor Freight.
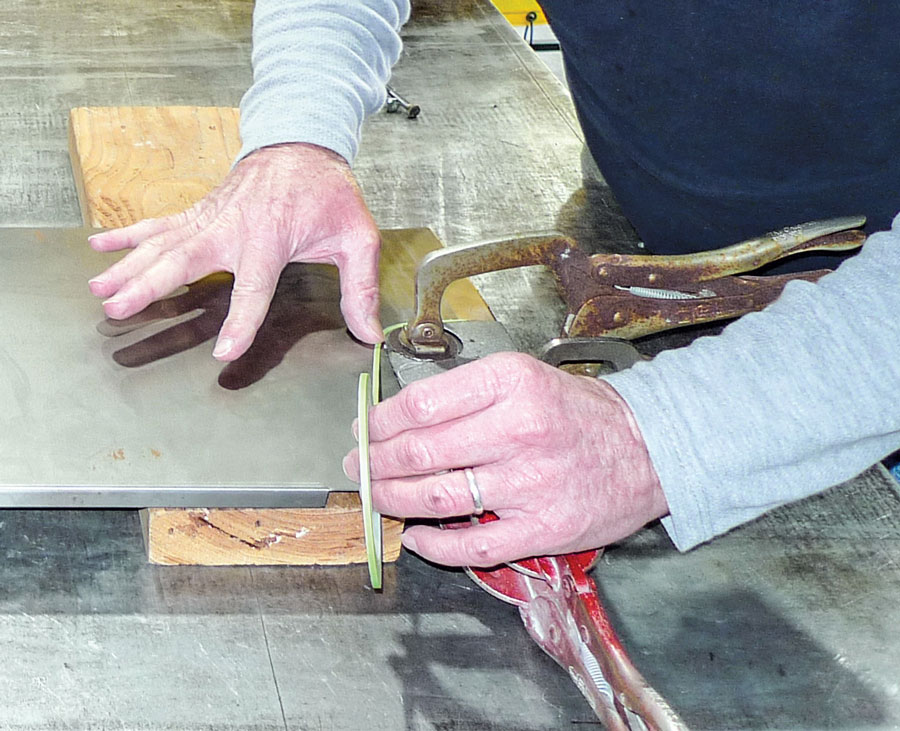
16. We’ll do each corner the same. Here the old piece and its slug are clamped to the new patch panel. Again, a masking tape guideline works for me. The better-sighted might prefer a scratch awl, or perhaps a dull Sharpie.
Way down below, where rubber door seals tend to trap moisture, we’ve also got a bit of corrosion affecting the door’s inner panel. In our catalogs we’ve seen that Brothers offers an inside door bottom patch panel as well. With small spots in each corner, ours is not so bad, so we’ll address those areas later, without an extra-large patch panel to cut tiny pieces from.
When sparks begin to fly we’ll uncover older patchwork from who-knows-how-many years ago. Whenever backside bare steel is left unprotected, you can bet that rust will return. Making good use of modern chemistry, we’ll do our best to ensure that our efforts will last. Inside the door where it’s difficult to reach, we’ll find a way to propel a rust-conversion product deep into the lowermost crooks ’n’ crannies. As required for lasting protection, we’ll recoat that with epoxy primer. Before outside filler work and paint, we’ll apply appropriate seam sealers as well.
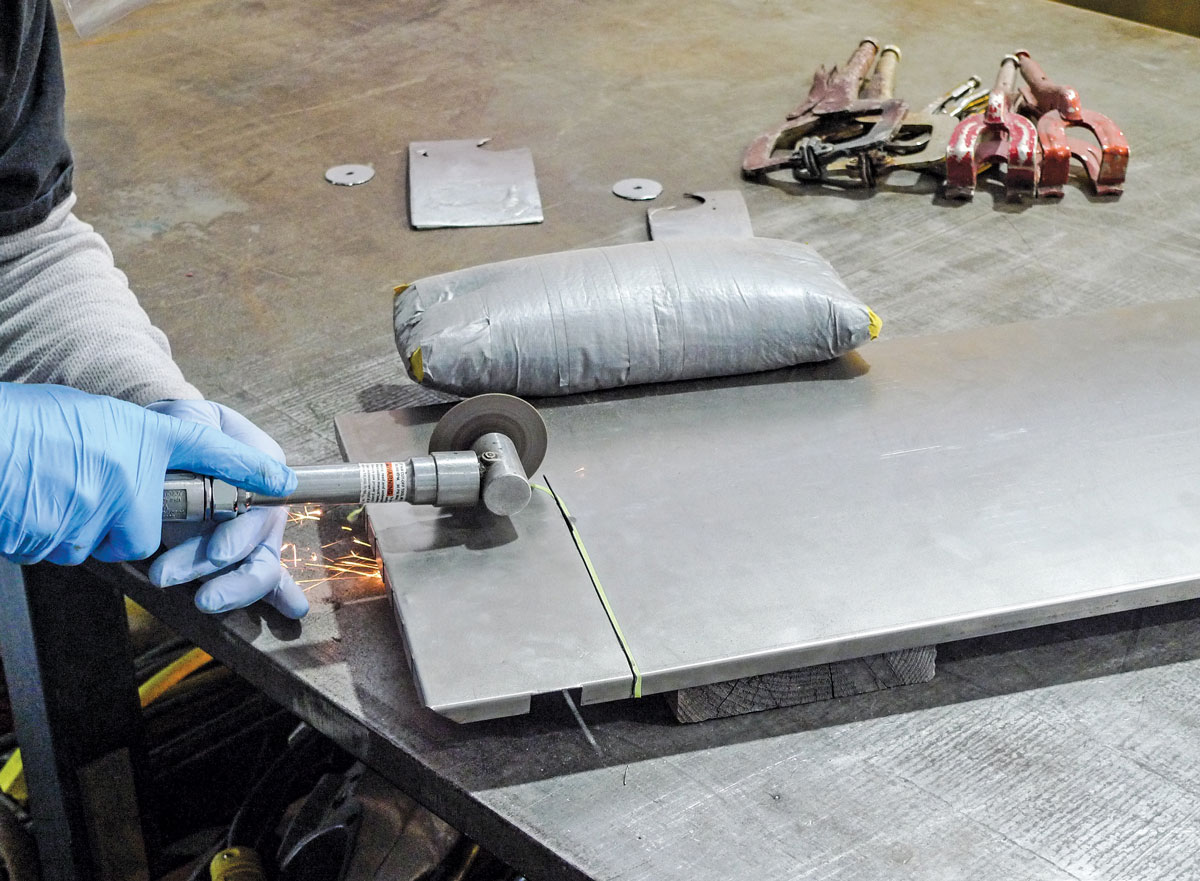
17. By now there’s some wear on our cutoff disc, but this tool steers it straight. Our disc is a thin one. Keepin’ it just inside the line should give us a nice flush fit for welding.
18. Still following what’s left of the tape line, a pair of left-turn tin snips rounds the corner. As always, we’ll expect a little fine-tune grinding later on.
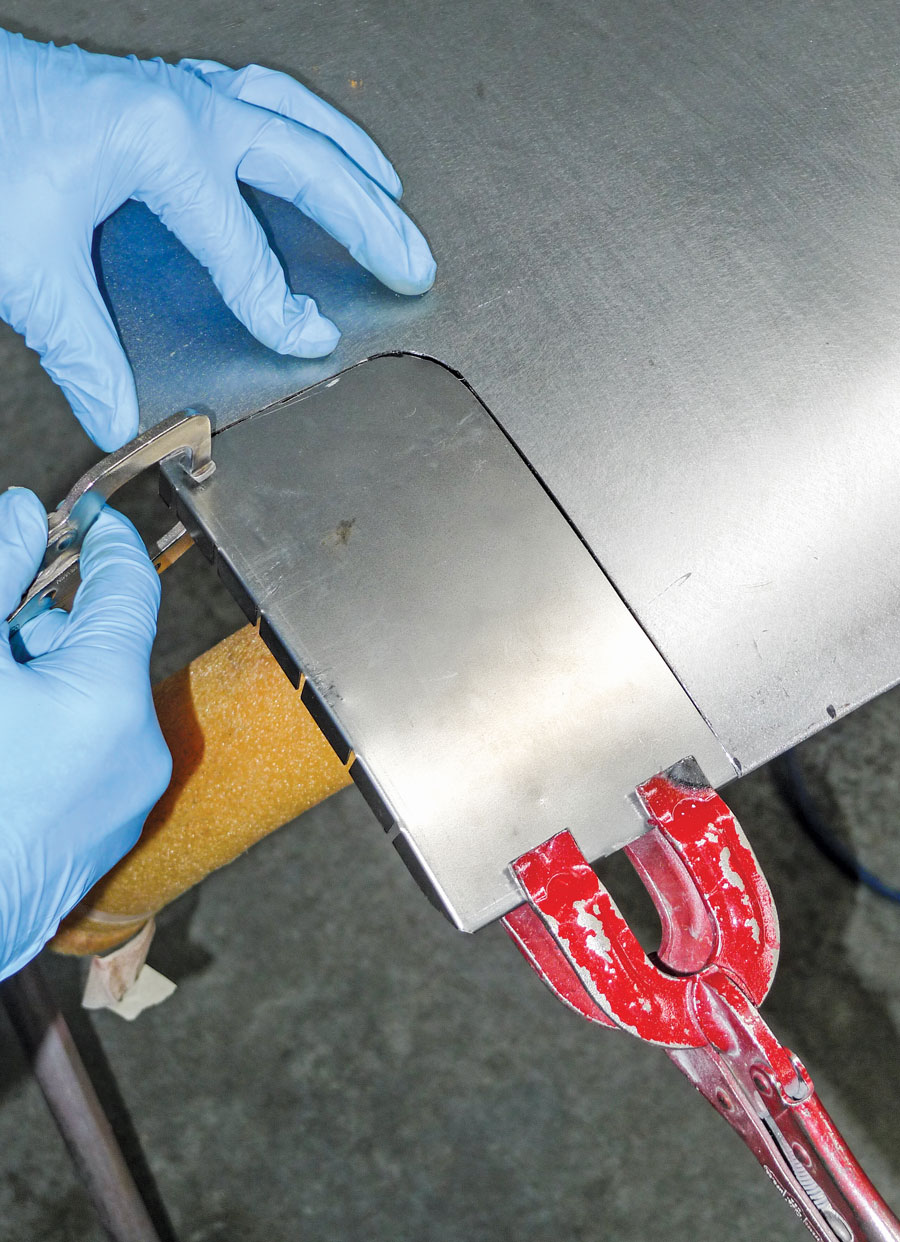
19. So, here’s our initial test-fit for the rear corner. Ideally for welding we’d like a tiny gap all around. The patch’s rounded corner could use a little outward bend, but we’re close.
20. Our front corner patch did require some relief. Again with our little angle die grinder, it didn’t take too much. We’re happy with this fit. Now let’s tend to the rusty inside.
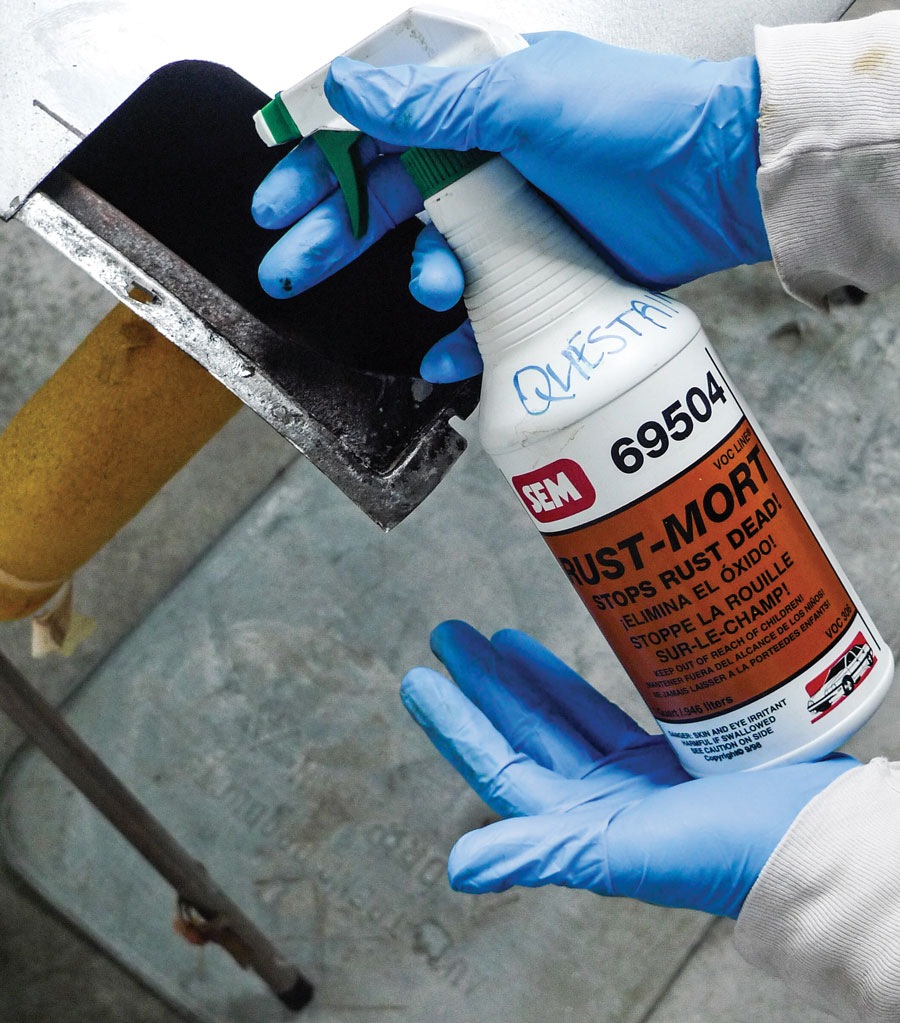
21. From Summit, we’re using Rust-Mort as our rust convertor. This didn’t come with a squirt gun. That’s just a little trick we use sometimes. We’ll do more inside the door, and follow up with epoxy and copper-rich weld-through primers as necessary.
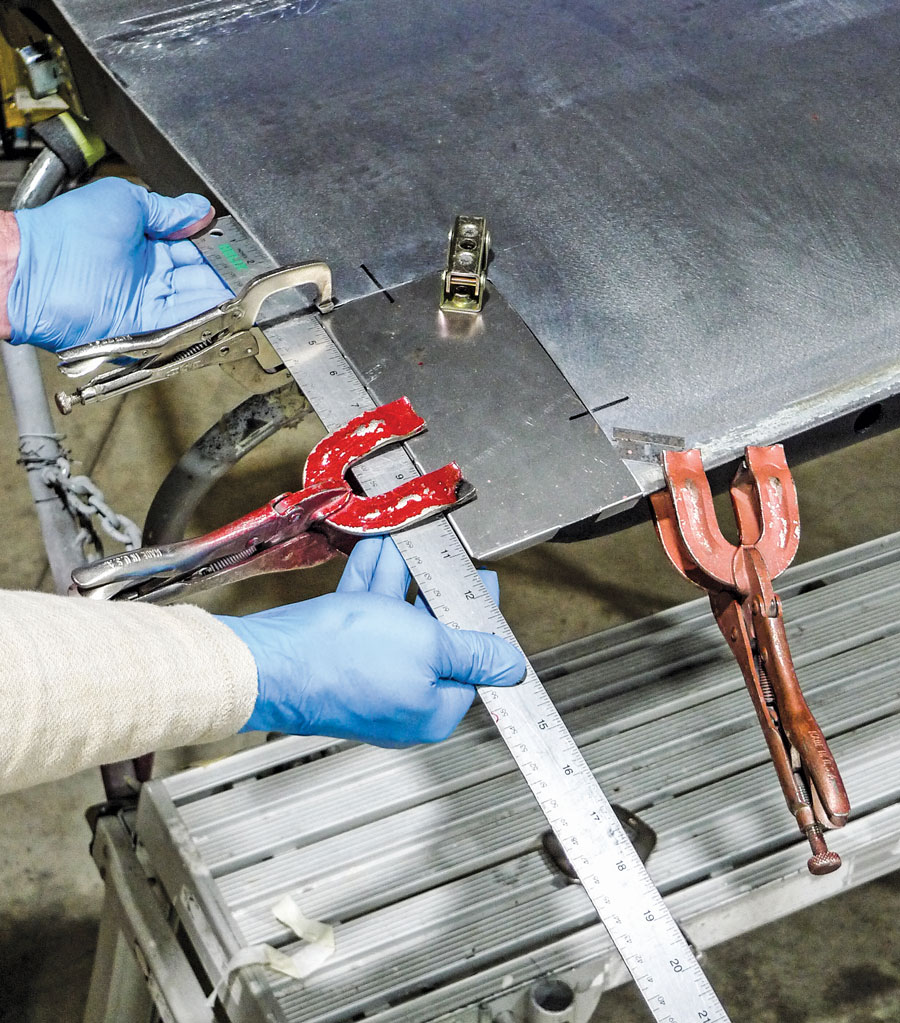
22. Now, with a flexible straightedge, let’s double-check our straight rear door edge before any welding takes place.
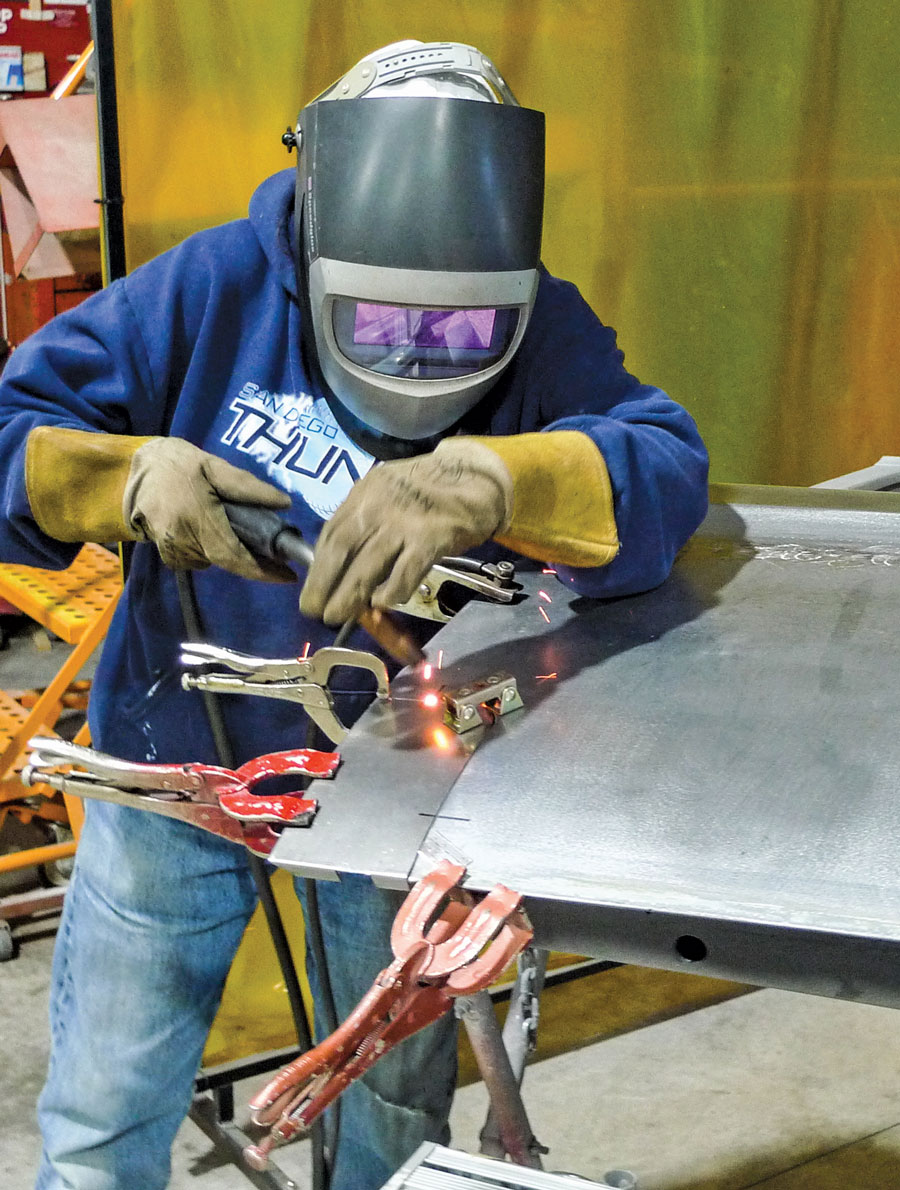
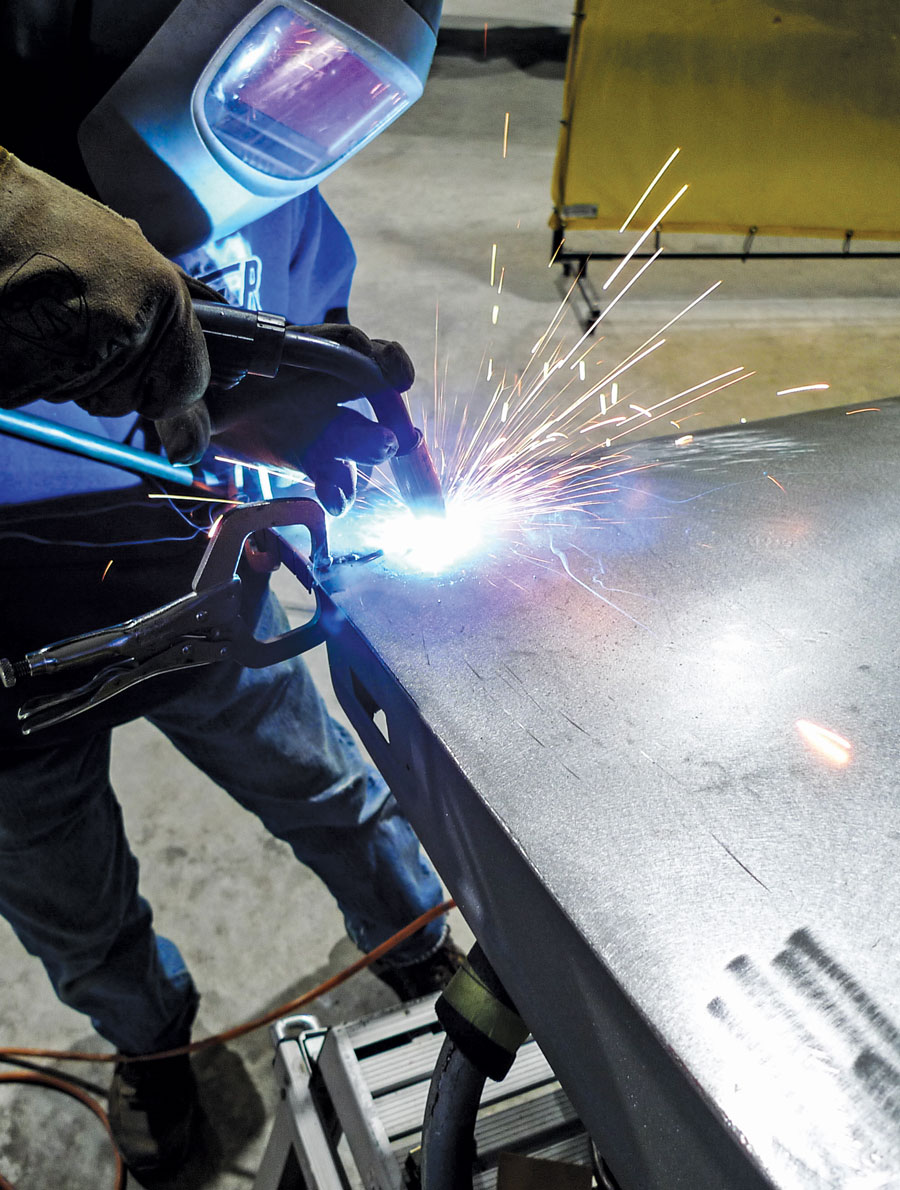
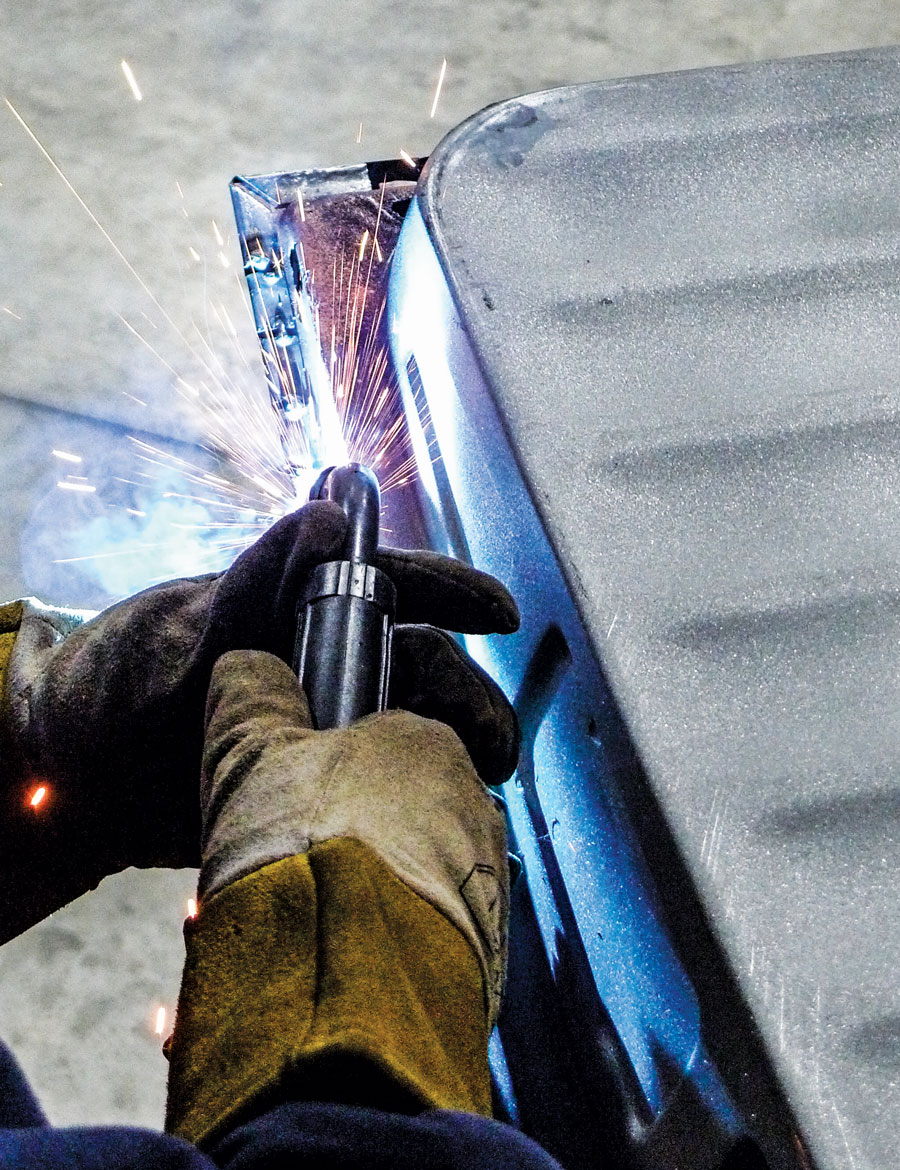
23. Once satisfied with the patch’s positioning, Mrs. Rotten fires up her MIG rig and commences stitch-welding the patch into place, allowing cool-down time as she goes.
24. At the front corner with the slightly curved frontal edge, let’s use our template to double-check our positioning again before much more welding.
25. And away she goes, again! She sees better than I do, so she welds better than I do; so as long as she’s around I’ll keep her involved.
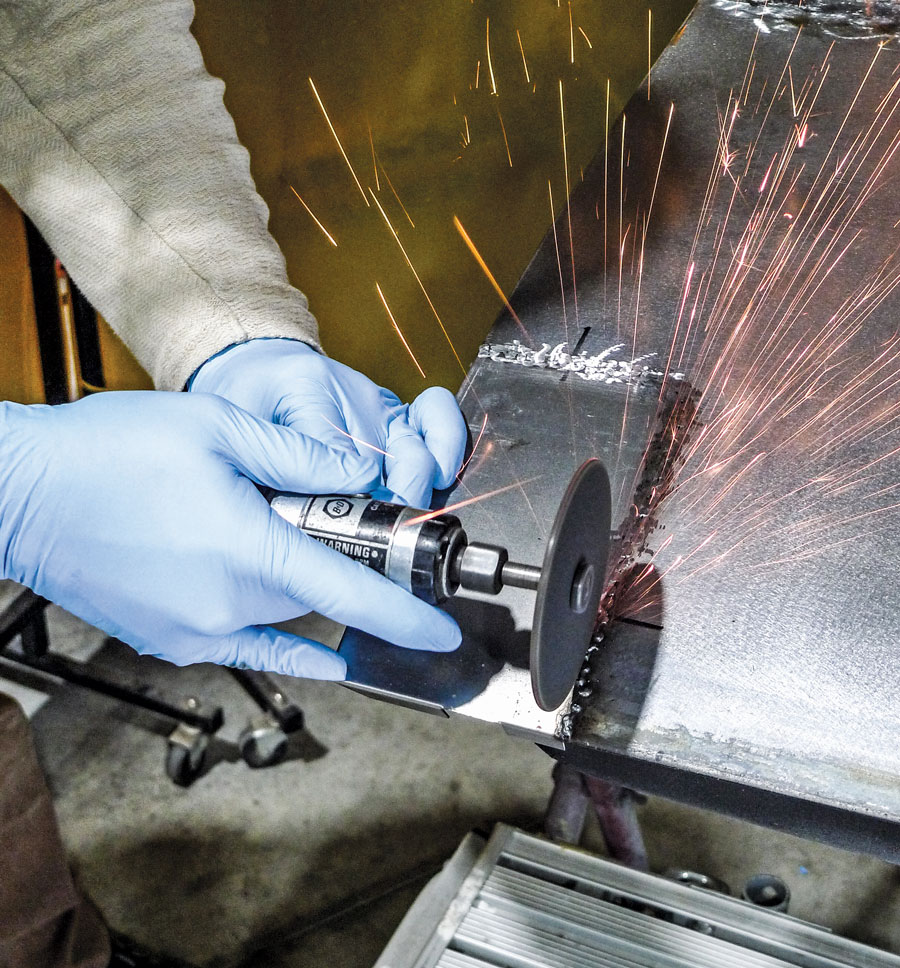
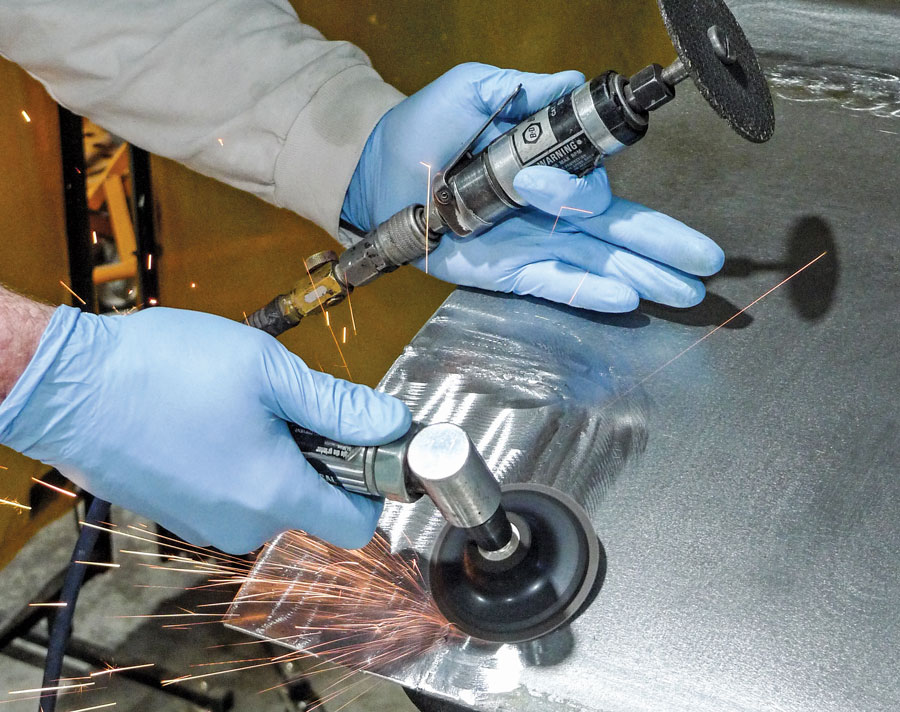
26. Then there’s the part where I get to grind the little MIG knots. There will be gaps between, so Mrs. Rotten will take another lap with her MIG rig later on.
27. For folding edges I tend to favor this particular hammer. For this curvature the right spring leaf makes a good form-fittin’ dolly.
For now, let’s focus on the immediate job at hand—the flush-fitting surgical replacement of our lower doorskin corners. This won’t be brain science. Armed with a MIG welder, autobody tools, and, of course, some basic knowledge of how those should be used, we’ll do what’s necessary to salvage an original door.
From this project’s beginning the idea has been to salvage as much original steel as possible. Just because it’s possible doesn’t mean it’s practical, however. Last time we checked, a brand-new Brothers door shell is just under $500. Shipping to our shop in Montana would run about as much. Even at our reasonable shop rate, our repair time could add up to all that or more. If it does, it’ll be on us. Not our patient customer. Now, on that note, let’s proceed. Let’s repair the corners of an ol’ door’s rusty skin.
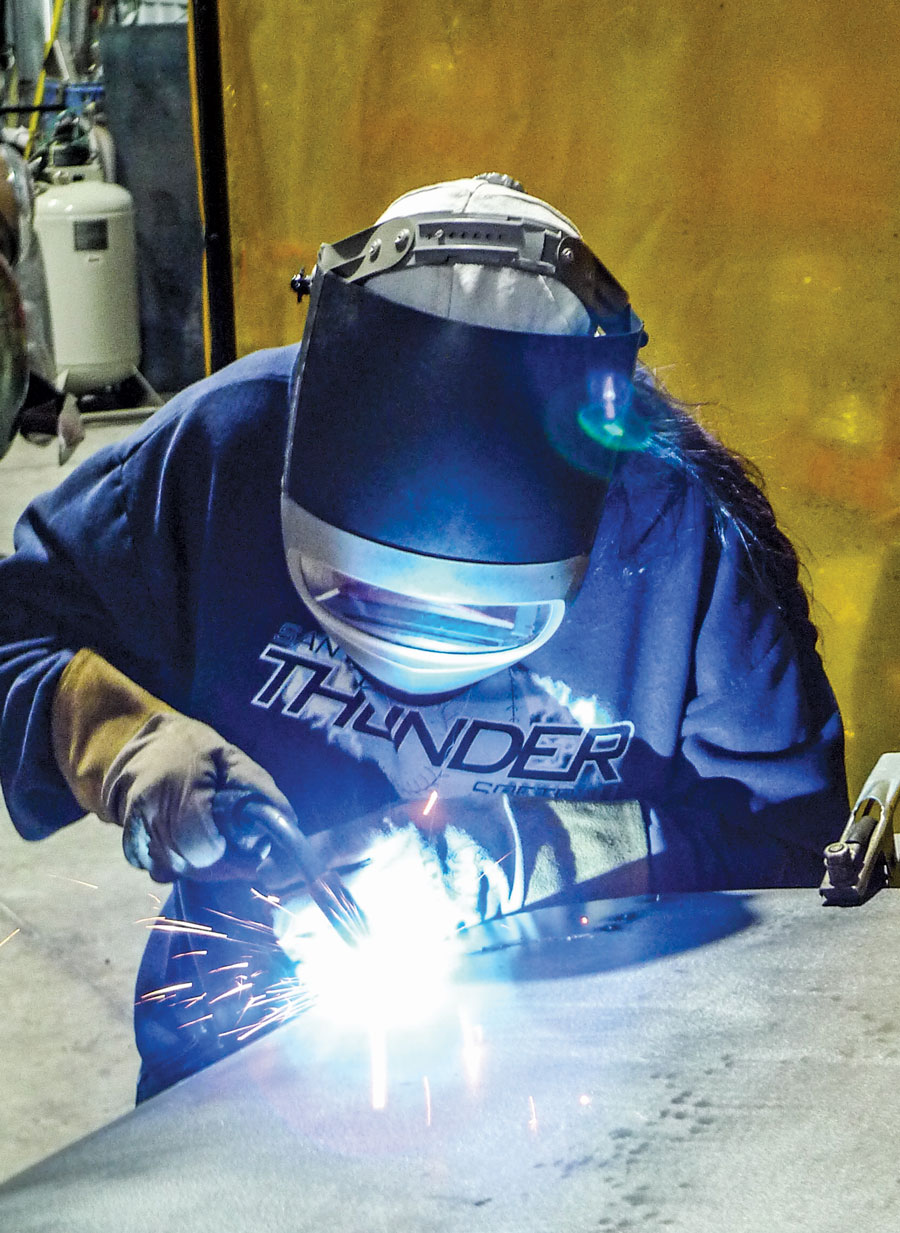
28. Here the designated welder steps in once again just to fill in the first-round stitch-weld gaps. By now we all know what comes next, right?
29. That’s right—it’s back to the old grind. This time after leveling the knots, I’m smoothing ’em further with a 36-grit Roloc-type disc on the same little angle die grinder.
30. Now let’s attach the folded edges. They come pre-sliced for easy folding; otherwise we’d drill for plug welds that would at least resemble factory spot welds. She’ll weld in the slices. I’ll grind some more and it’ll look about right.
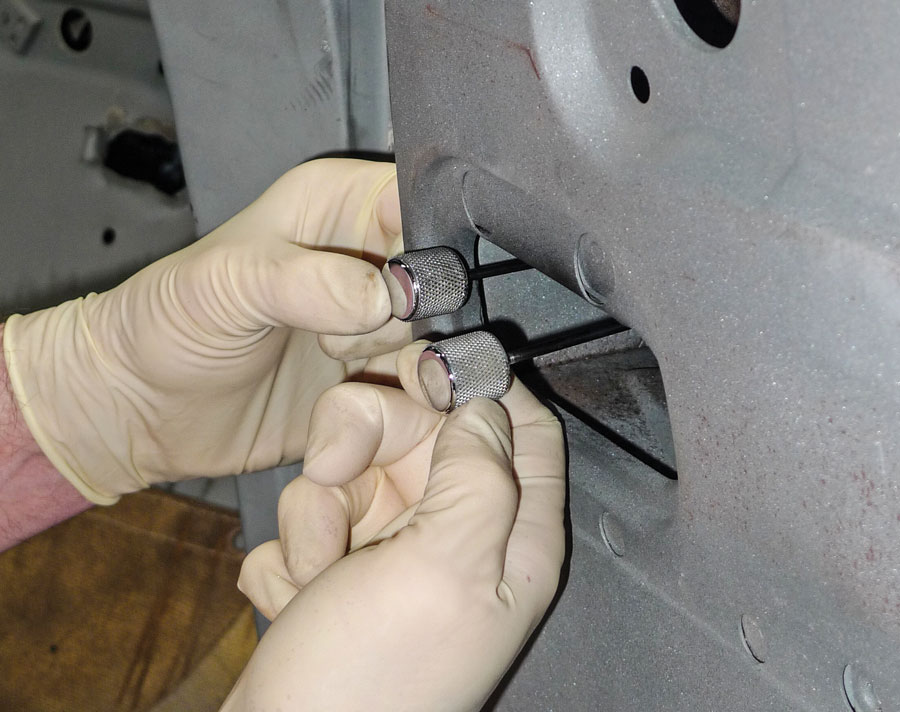
31. Earlier we’d drilled 1/8-inch locator holes as a realignment shortcut. Pointy things like icepicks would get us close again. Knobbed 1/8-inch drill bits will get us bull’s-eyes.
32. And there it is; the same exact fit that we’d worked for before. I’ll buy that. In fact, I’ll have to. Although this phase has turned out well, it’s taken us too long.
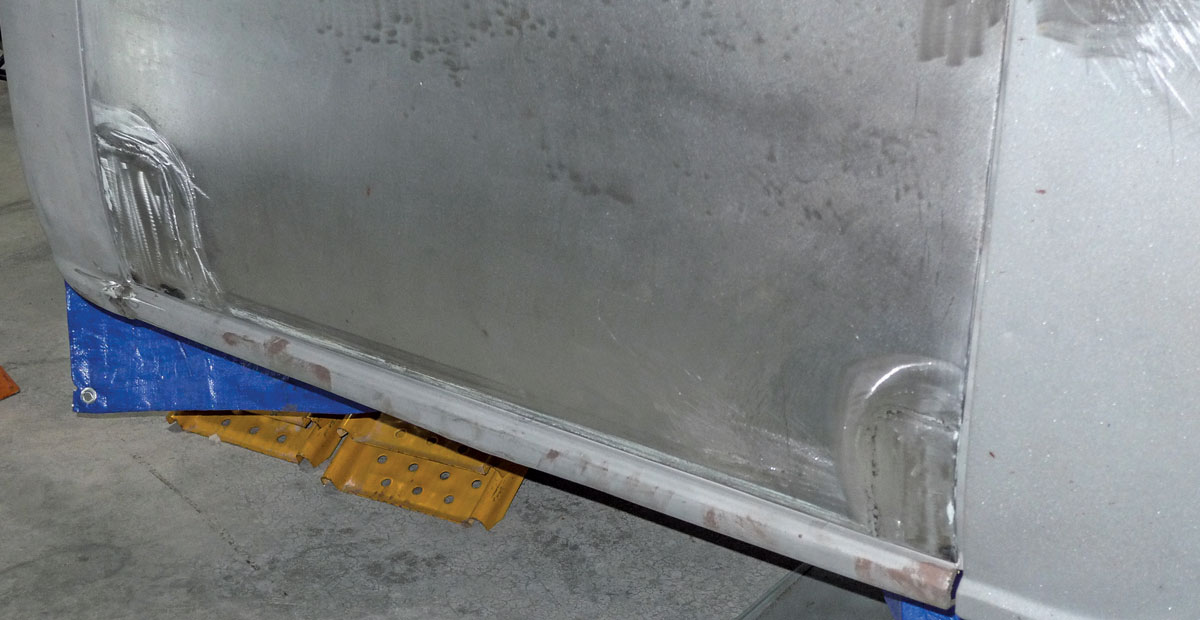
At this point, just to check our work, it’s time to reinstall the rust-repaired door. With our flexible straightedge and the template we made, we’ve done our best to maintain original corner shapes and angles. Ordinarily, realigning a door can gobble some shop time. Next up, we’ll share a little trick we use for speeding that process.
Toward the end of this day I’ll take a gander at my chicken-scratch labor log just to evaluate cost-effectiveness. At $499 plus shipping, a new door shell might seem a little spendy—’til you’ve worked this hard to salvage a used one. Since every job is different, it’s up to us to make the right decisions. To help us out with that, Brothers gives us options.
 SOURCE
Brothers Trucks
(800) 977-2767
www.brotherstrucks.com
Harbor Freight Tools
(800) 423-2567
www.harborfreight.com
Summit Racing Equipment
(800) 230-3030
www.summitracing.com

3. The rear door edge is straight up ’n’ down. This bit of patchwork wouldn’t be too difficult with the door left in place on the truck.

4. The front door edge is slightly curved. Our new Brothers patch panel is made to accommodate the curve, but for backside access here we’ll need to pull the door.

5. For the slightly curved front door edge, a reference template might be helpful. For this we’ve found a dull Sharpie, some leftover poster board, and three strong magnets.

6. We’ve already worked for acceptable gaps. Working now with the door off the truck, our reference template will ensure that our door-to-fender gap won’t change.

7. I’m a little hard of sight, but I can follow masking tape. Our cut lines are laid out. To locate rounded corners, let’s try a transfer punch through the center of the hole saw.

8. Well, how about that? Back-to-back bull’s-eyes! We were long-overdue for the sharp new hole saw set. As it turns out, the transfer punch beats a dull Sharpie, too.
As truck builds go, this one’s been long ongoing. Earlier we dealt with a fair amount of crash damage. The left door and fender were replaced in favor of new reproduction panels from Brothers. That’s like a huge head start for the impending rustectomy.
This time we’ll be patching the usual places on the passenger side only. With the mocked-up truck raised to a comfortable height on stands, we might as well begin with the original door. As we’d ordinarily expect, its outer skin is rusted through in each lower corner. The needed patches could be fabricated, but from Brothers, a properly shaped outside door bottom patch panel is a bargain, even if we use only the sections we need.

9. For our straighter cuts we’re using one of Harbor Freight’s 3-inch extended reach cutoff tools. With other layers just below, we’re cautiously cutting only skin deep.

10. In the tight spots of the B-side, this little air saw fits right in to cut the doorskin’s folded edge. This was a shop liquidation score, but we know it came from Harbor Freight, too.

11. Quite fortunately, there’s more than one way to skin a door. For easy removal we could just grind the edge. Since we’d like to use the old sections as patterns for new patches, let’s try slicing away the folded part with a tool we’ve already seen.
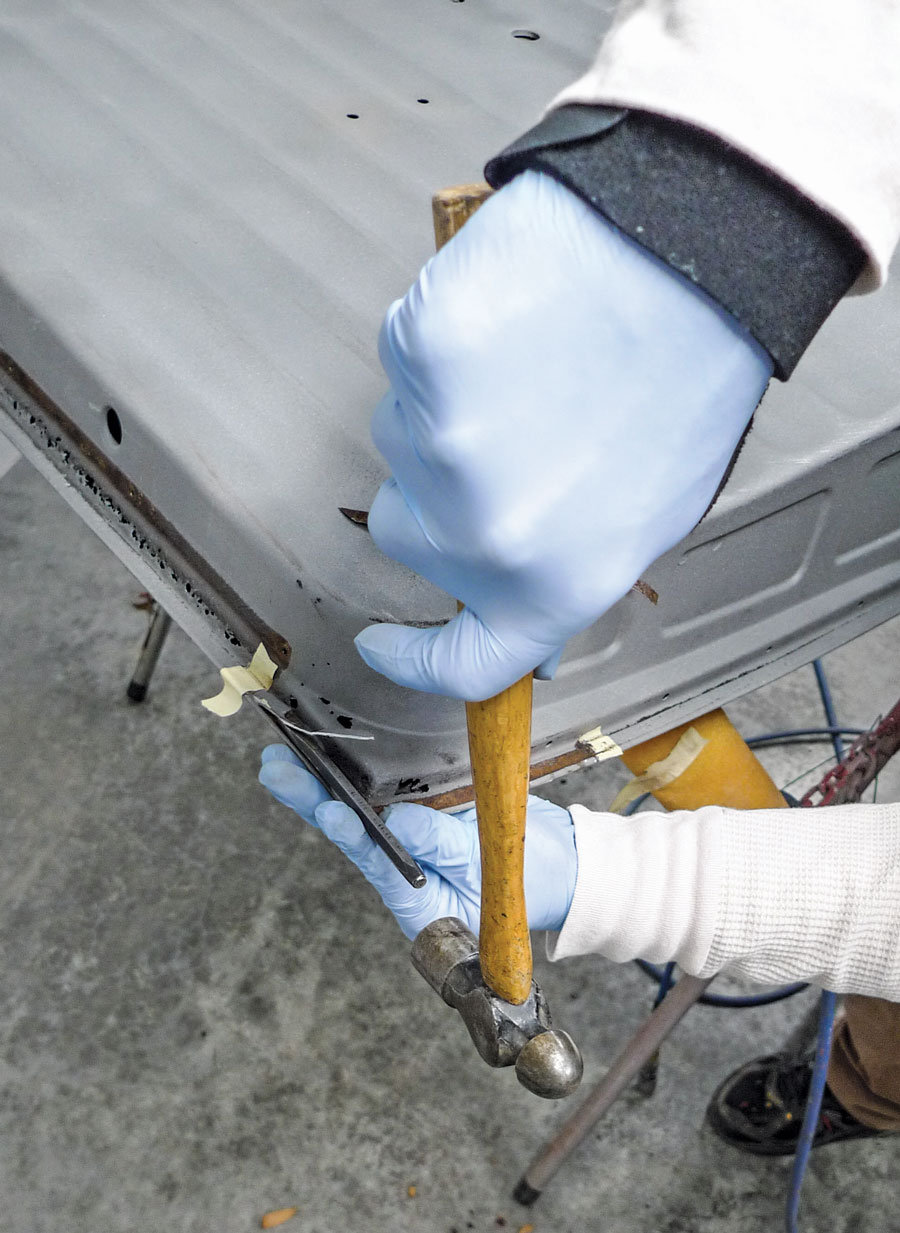
12. Here with a hammer and small chisel, it only takes a few taps to peel away the unwanted strip of steel.
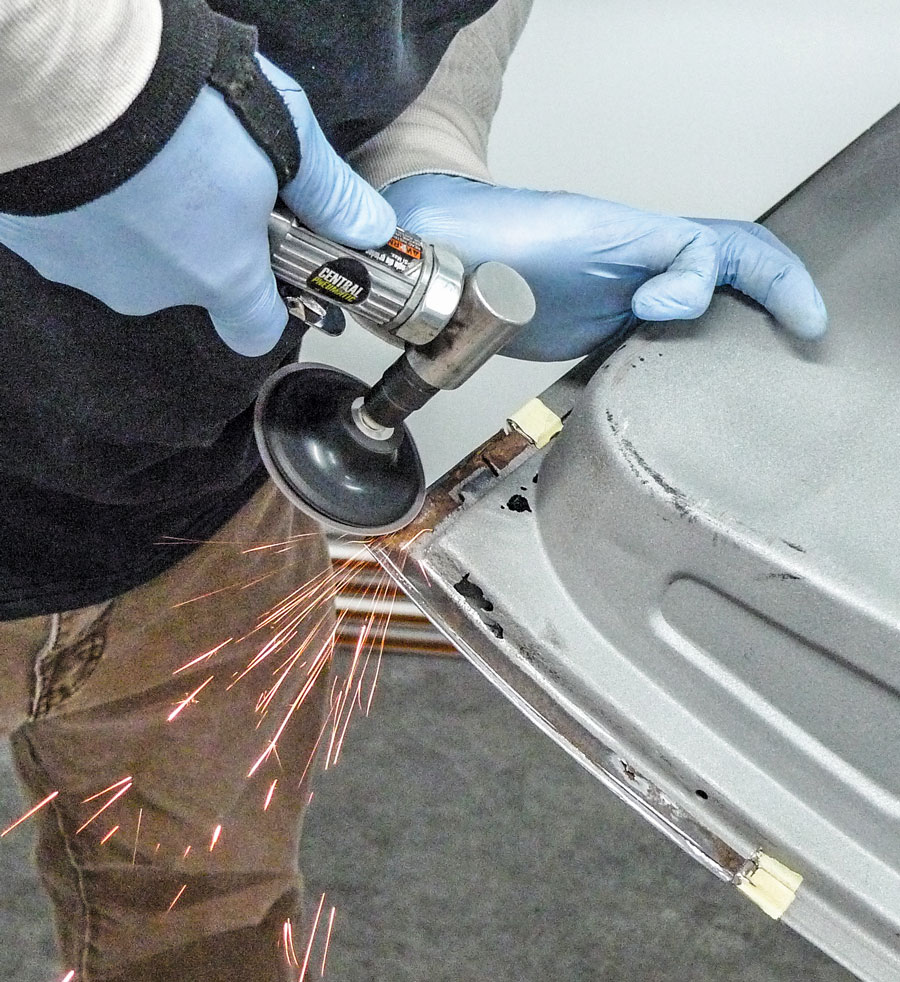
13. To level the raggedy edges, a 3-inch Roloc-type abrasive disc should do the trick. Let’s spin that with a handy little angle die grinder from Harbor Freight.

14. You know that sound a rusty chunk of steel makes when it hits a concrete floor? These with their circular slugs will indeed make good patterns, so they’re worth pickin’ up.

15. Before we cut our patches, let’s clean up this little stretch of rusty steel. For this we’ll use a clean ’n’ strip disc, on a more conventional die grinder, also from Harbor Freight.

16. We’ll do each corner the same. Here the old piece and its slug are clamped to the new patch panel. Again, a masking tape guideline works for me. The better-sighted might prefer a scratch awl, or perhaps a dull Sharpie.

17. By now there’s some wear on our cutoff disc, but this tool steers it straight. Our disc is a thin one. Keepin’ it just inside the line should give us a nice flush fit for welding.
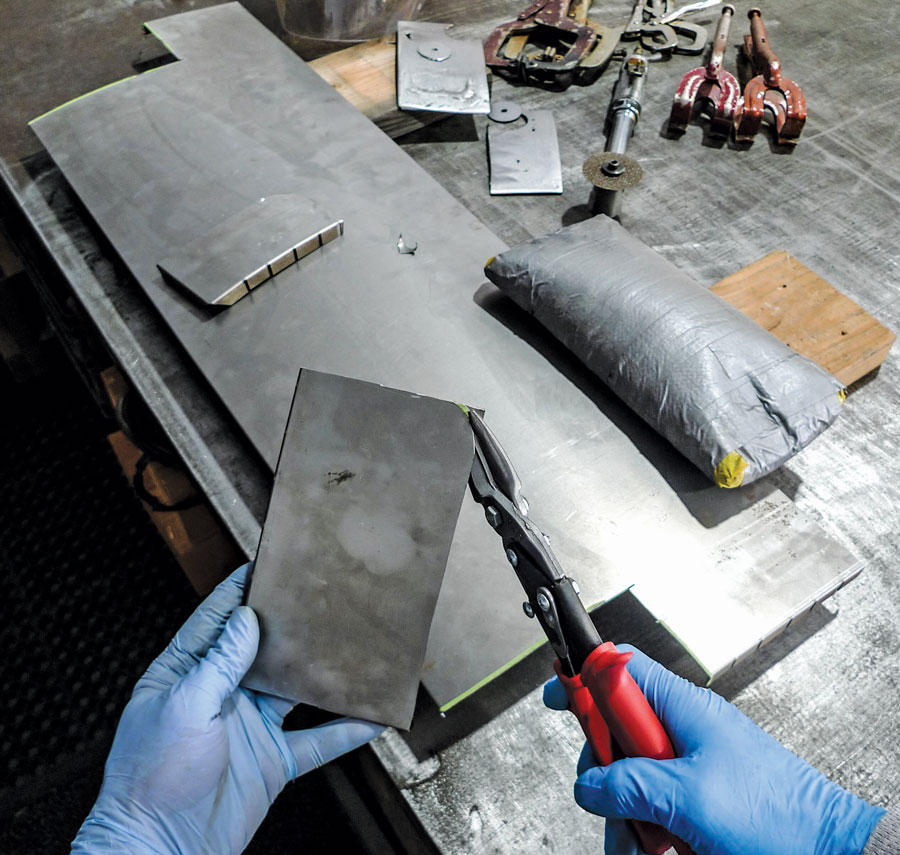
18. Still following what’s left of the tape line, a pair of left-turn tin snips rounds the corner. As always, we’ll expect a little fine-tune grinding later on.

19. So, here’s our initial test-fit for the rear corner. Ideally for welding we’d like a tiny gap all around. The patch’s rounded corner could use a little outward bend, but we’re close.
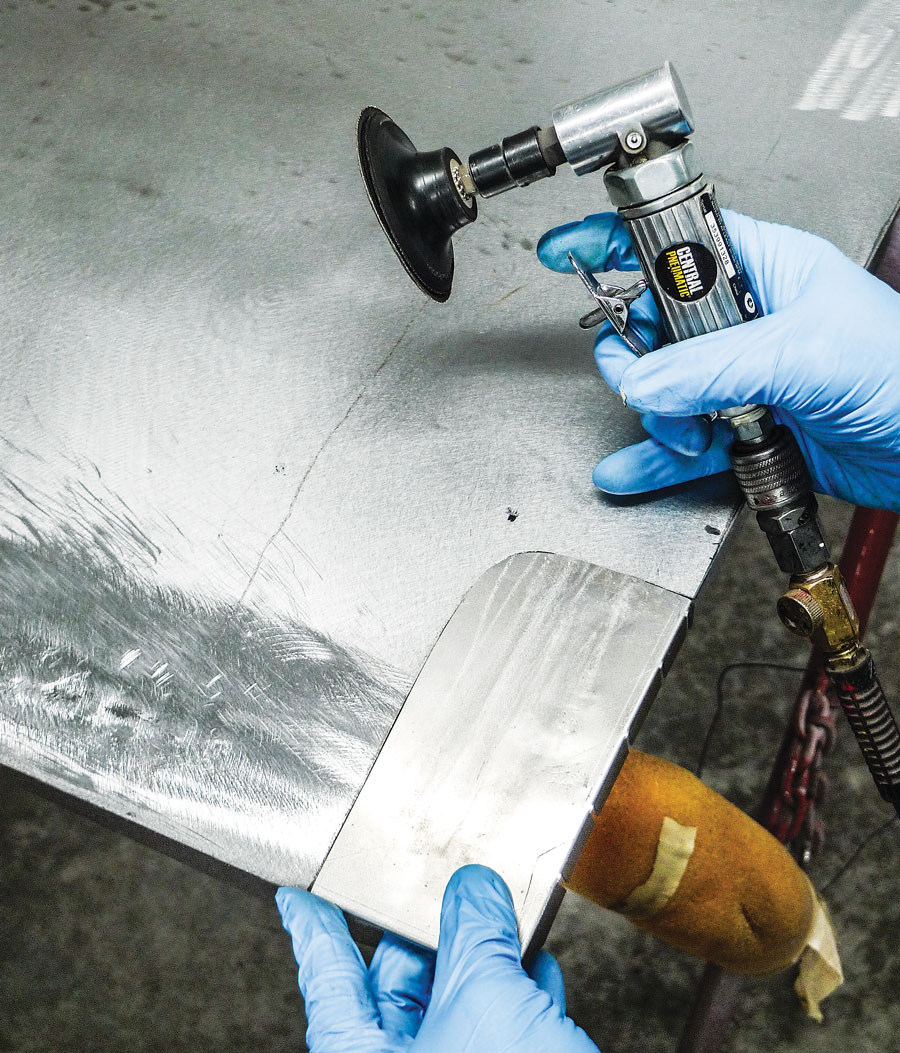
20. Our front corner patch did require some relief. Again with our little angle die grinder, it didn’t take too much. We’re happy with this fit. Now let’s tend to the rusty inside.

21. From Summit, we’re using Rust-Mort as our rust convertor. This didn’t come with a squirt gun. That’s just a little trick we use sometimes. We’ll do more inside the door, and follow up with epoxy and copper-rich weld-through primers as necessary.

22. Now, with a flexible straightedge, let’s double-check our straight rear door edge before any welding takes place.

23. Once satisfied with the patch’s positioning, Mrs. Rotten fires up her MIG rig and commences stitch-welding the patch into place, allowing cool-down time as she goes.

24. At the front corner with the slightly curved frontal edge, let’s use our template to double-check our positioning again before much more welding.

25. And away she goes, again! She sees better than I do, so she welds better than I do; so as long as she’s around I’ll keep her involved.

26. Then there’s the part where I get to grind the little MIG knots. There will be gaps between, so Mrs. Rotten will take another lap with her MIG rig later on.
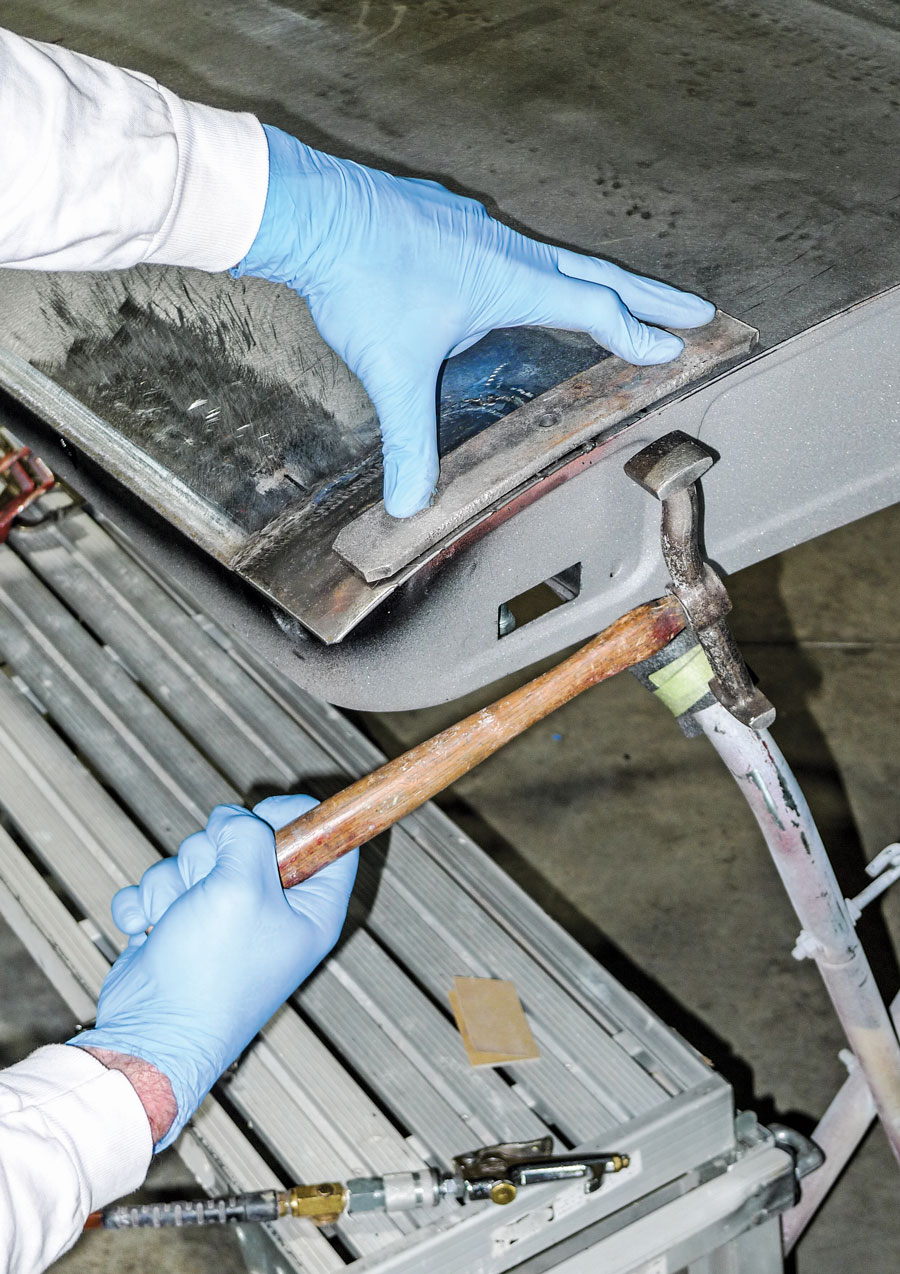
27. For folding edges I tend to favor this particular hammer. For this curvature the right spring leaf makes a good form-fittin’ dolly.
For now, let’s focus on the immediate job at hand—the flush-fitting surgical replacement of our lower doorskin corners. This won’t be brain science. Armed with a MIG welder, autobody tools, and, of course, some basic knowledge of how those should be used, we’ll do what’s necessary to salvage an original door.
From this project’s beginning the idea has been to salvage as much original steel as possible. Just because it’s possible doesn’t mean it’s practical, however. Last time we checked, a brand-new Brothers door shell is just under $500. Shipping to our shop in Montana would run about as much. Even at our reasonable shop rate, our repair time could add up to all that or more. If it does, it’ll be on us. Not our patient customer. Now, on that note, let’s proceed. Let’s repair the corners of an ol’ door’s rusty skin.

28. Here the designated welder steps in once again just to fill in the first-round stitch-weld gaps. By now we all know what comes next, right?

29. That’s right—it’s back to the old grind. This time after leveling the knots, I’m smoothing ’em further with a 36-grit Roloc-type disc on the same little angle die grinder.

30. Now let’s attach the folded edges. They come pre-sliced for easy folding; otherwise we’d drill for plug welds that would at least resemble factory spot welds. She’ll weld in the slices. I’ll grind some more and it’ll look about right.


32. And there it is; the same exact fit that we’d worked for before. I’ll buy that. In fact, I’ll have to. Although this phase has turned out well, it’s taken us too long.
At this point, just to check our work, it’s time to reinstall the rust-repaired door. With our flexible straightedge and the template we made, we’ve done our best to maintain original corner shapes and angles. Ordinarily, realigning a door can gobble some shop time. Next up, we’ll share a little trick we use for speeding that process.
Toward the end of this day I’ll take a gander at my chicken-scratch labor log just to evaluate cost-effectiveness. At $499 plus shipping, a new door shell might seem a little spendy—’til you’ve worked this hard to salvage a used one. Since every job is different, it’s up to us to make the right decisions. To help us out with that, Brothers gives us options.
 SOURCE
Brothers Trucks
(800) 977-2767
www.brotherstrucks.com
Harbor Freight Tools
(800) 423-2567
www.harborfreight.com
Summit Racing Equipment
(800) 230-3030
www.summitracing.com