
 Tech
Tech
 Images by CAMREN BEATTIE
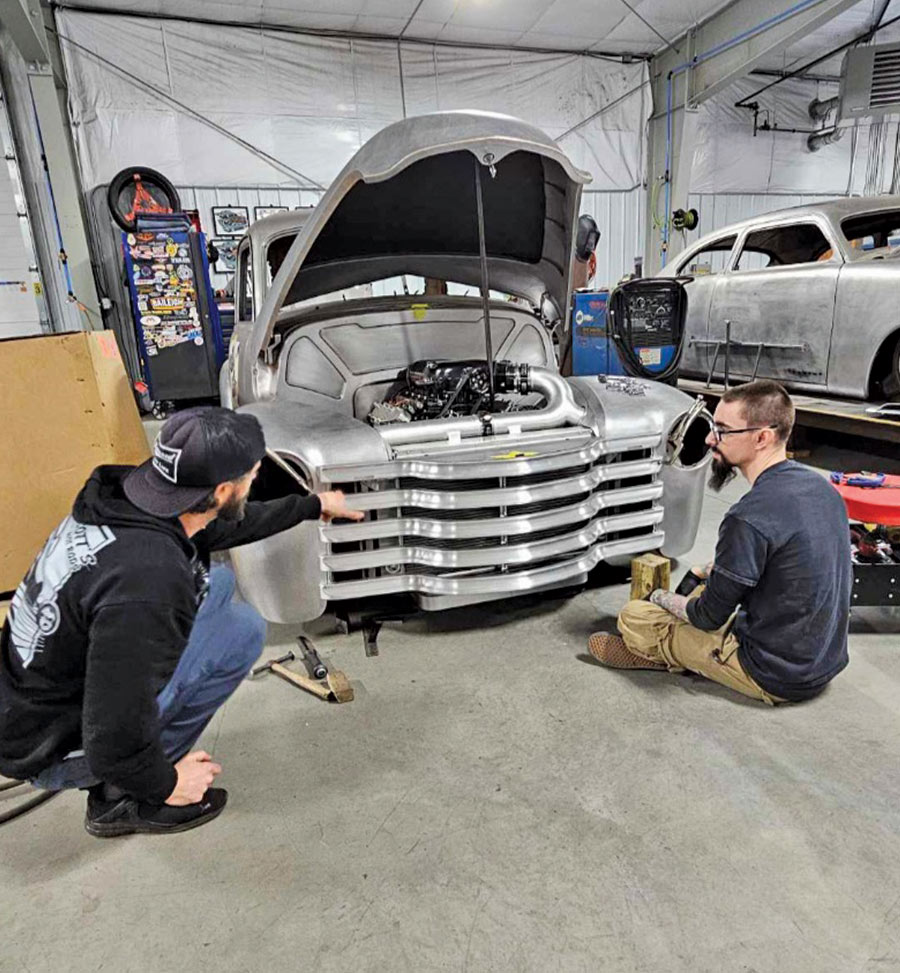
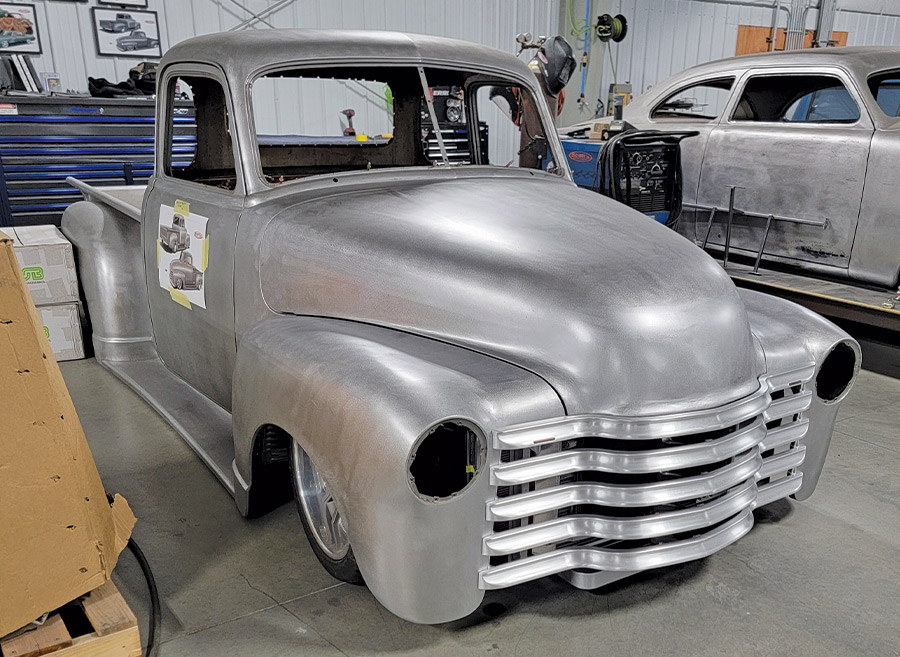
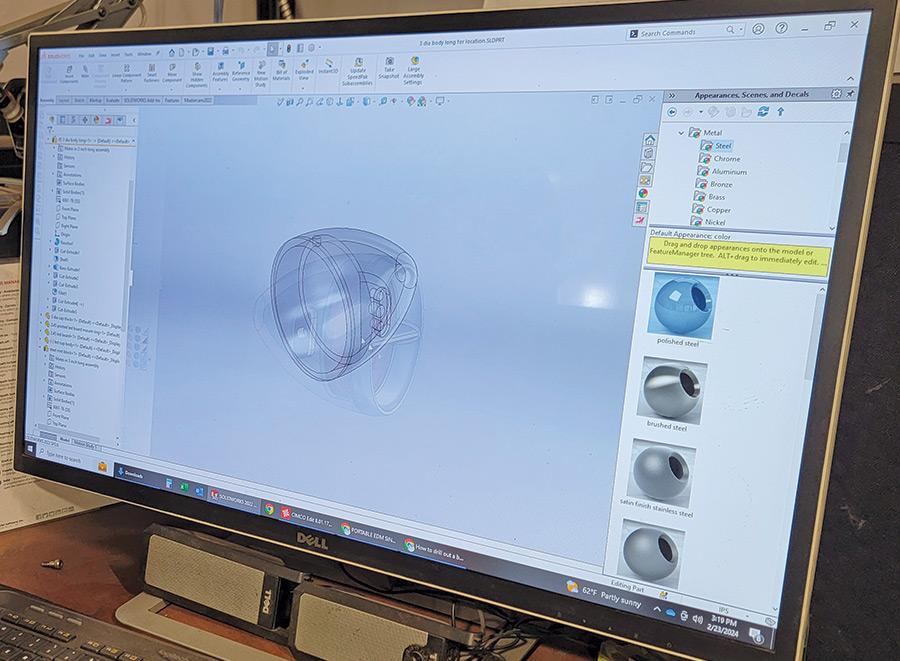
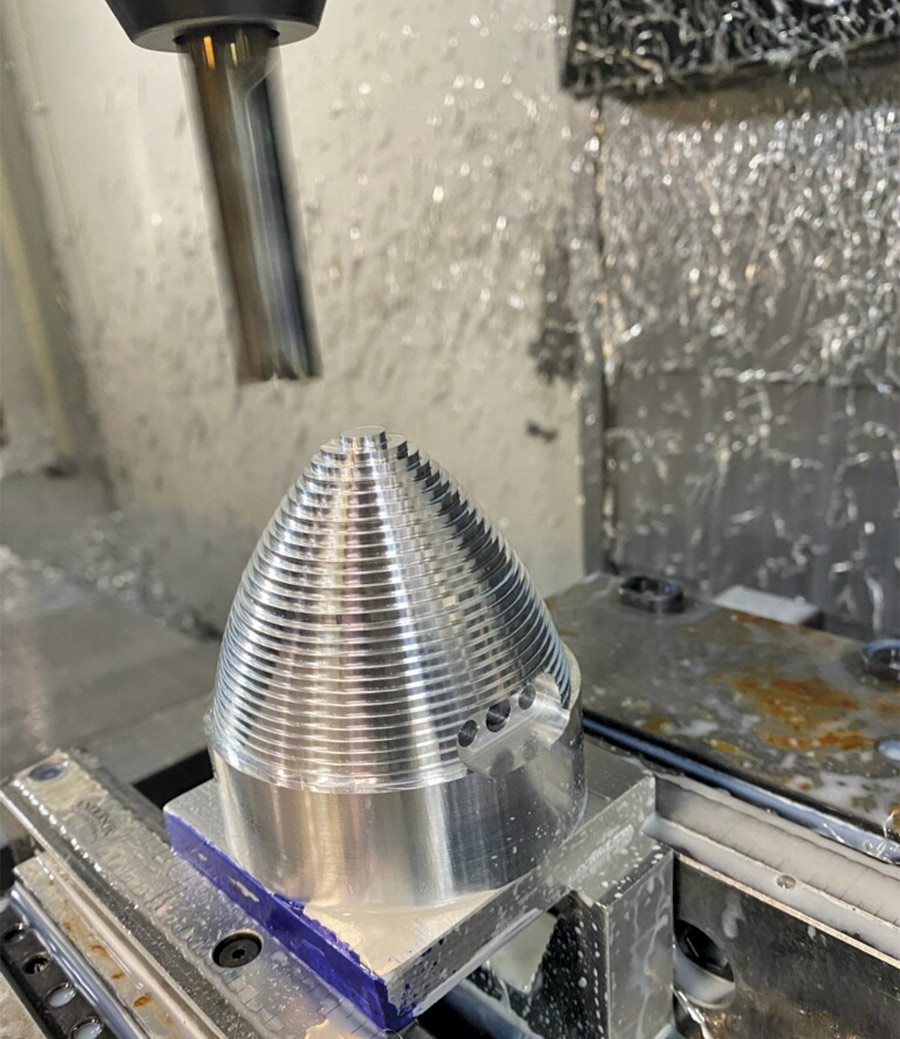
When I finally decided I needed a grille to continue doing work up front, Justin, Ian, and I talked about our options on whether to make one out of sheetmetal or if we should machine one out of billet aluminum. We decided on billet, and Ian (our lead machinist) brought the 3-D scanner over and scanned the front of the truck so he could design a new grille in SolidWorks.
During this time, I was taking care of some other small things on the truck, periodically working with Ian on both design cues and different ways to mount everything. Keeping the timeless theme on the exterior of the truck, we opted to keep the same factory look with the five horizontal bars but we wanted to radically change the overall profile of each of these grille bars. As Ian was working his magic on a new grille bar profile, I had an idea on incorporating the turn signal lights into the upper grille bar. I went to Ian with the idea of doing turn signals with flush lenses and he thought it was an awesome idea and quickly added the features to the already-existing design. Ian and I also wanted to give the grille bars a “floating” effect when the truck is finished, so he designed a center support bar that mounted to the chassis with arms that “reached out” to each of the horizontal bars and also doubled as a structural mount for the panel that the hood latch was bolted to.
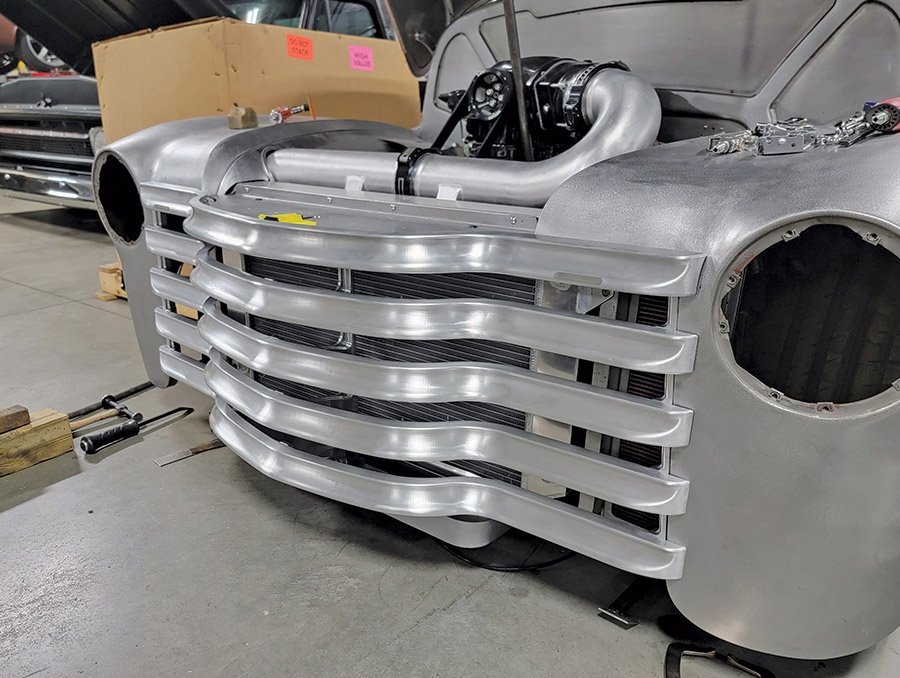
Four hundred pounds of aluminum later we had a finished, freshly machined, one-off billet grille for Schutte’s truck. When it came time to mount it to the truck, we purposely left extra material on each end of the horizontal bars and I spent a lot of time carefully sanding material away until it fit perfectly. When it came time to gap the top bar to the hood, the gap ended up being a little wide for reasons we honestly don’t know, but it’s only aluminum, so I had one of our parts welders, Mark, add extra material to the edge that I wanted to gap and I carefully gapped the top bar to the hood. Once all the gapping and sanding and fitting were finished, I metal finished every piece of the grille to eliminate the toolpath marks.
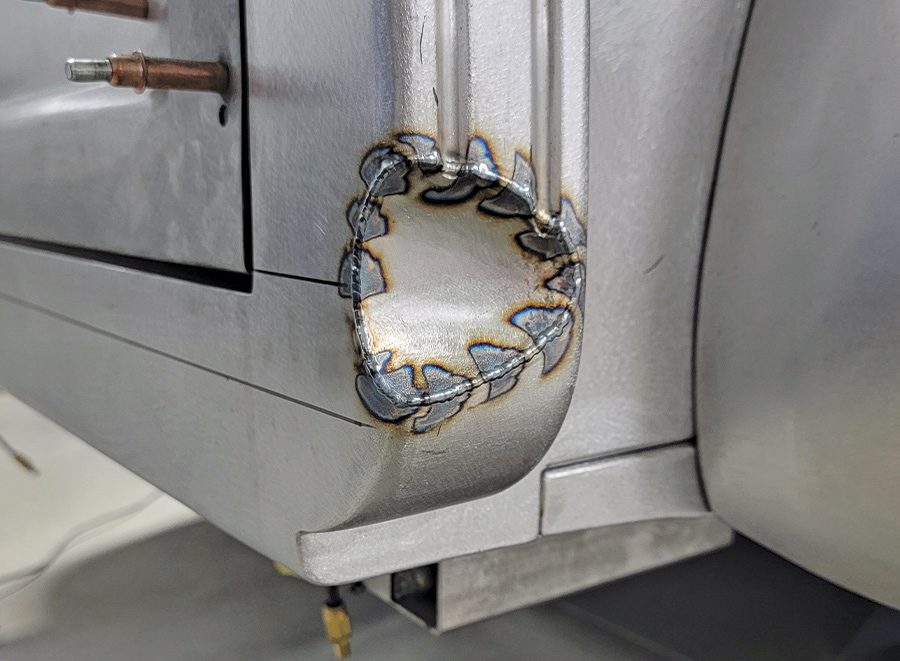
I knew that I wanted the taillights to look like they were “floating” just like the grille bars up front, so I decided to cut the rear bed stake pockets and recess them partially into the stake pocket. I didn’t want to cut them so far in that it would take away from the housing shape, but I also dictated just how far I could go on the passenger side because the dampener for the tailgate was inside the passenger stake pocket. Knowing this, I cut the passenger side first, and whatever I could get away with on this side I would duplicate on the driver side easily because there were no obstructions on that side. After I found a spot where I was happy with the placement of the taillight, I capped the cut hole in the pocket with a piece of 14g steel for strength and did a quick copy/paste job for the driver side.
Once I had both sides ready to accept a taillight, Ian and I talked again on how we would mount these lights into this recessed pocket. We eventually came up with a very small oval with a pass-through hole for wiring and a couple threaded holes to act as a small pedestal. We racked our brains for a second trying to figure out how to locate said pedestal bracket accurately and came up with a great idea of 3-D printing two oversized housings that were cut so I could both easily locate the pedestal but also gap the taillight to the stake pocket. After 3-D printing the locating tools, I got to work on getting the mounting pedestals cut into the recess pocket and welded in. Everything worked perfectly and we’re now working with an outside party on getting LED boards made for the lights that have animated program sequences for different operations (startup, shutdown, show mode, sequential turn signals). With the taillights finished up minus the lenses and LED boards, we can now get a better idea on what will happen with the rear lower valence and rear bumper.


 SOURCE