


CTP Tech
InTheGarageMedia.com
ford f100 chopped roof prep guide lines rust patina
1. The goal of this project was to add a series of grooves to the roof of a Ford F-100 pickup, inspired by the distinctive roof treatment of Chevrolet’s Nomad wagons. The first step was laying out the groove locations with 1/4-inch masking tape. Note how the front groove lines up perfectly with the A-pillar door gap.
A Nomadian Effort
A Unique Roof Filler Treatment for First-Gen F-100s
BY Ron CovellIMAGES BY Ron Covell & Ron Potts
E

very custom project has at least one moment where creativity, problem-solving, and craftsmanship all must come together—and often, that moment comes when a builder wants to blend design inspiration from one vehicle into another. That was exactly the case when Ron Potts reached out to me about a unique detail for his 1956 Ford F-100 build. He wanted to add a series of roof grooves reminiscent of the distinctive ribbed styling that Chevrolet used on its Nomad station wagons—a subtle but unmistakable touch that would give his truck a period-perfect custom look.

I teach private workshops in metalworking, and I always enjoy the unique challenges that each student brings. But I’ll admit, I’d never attempted this particular modification before. Still, I was confident we could make it happen—and that a bead-rolling machine might be the key to pulling it off.

If you’re not familiar with bead rollers, they use two parallel shafts fitted with dies to form a broad range of shapes and profiles in sheetmetal. Beading dies come in many sizes, and I figured my 7mm dies would be a good match for the Nomad-style grooves.

One limitation of most bead rollers, however, is the narrow space between the shafts—usually no more than 2 inches. That can limit the size and contour of the panels you can work with, and I knew right away that the roof panel’s shape at the front and rear would make it impossible to run as one piece. The solution? Cut the roof skin in half, roll the grooves in each section separately, then weld the panels back together afterward.

A guide is essential for rolling perfectly straight beads. Sometimes the edge of a panel can be run against a guide, but that wasn’t an option here. Instead, I decided to temporarily attach a guide with a standing flange directly to the panel and outfit the top die with a matching groove to keep everything aligned. The concept seemed promising, but I told Potts I wanted to run a small test piece first before committing to the full project.

The sample worked beautifully, so we set a date to tackle the real thing. Proper layout is critical on a job like this—and time-consuming—so Potts handled that step before arriving at my shop. He used a 4-foot ruler, a plumb bob, and a laser to lay out the groove pattern with precision.

On the day of the workshop, we double-checked all the measurements to make sure the roof would fit into my machine once it was cut in half. Everything checked out, so we marked a centerline down the roof. This would divide the panel into two manageable sections—the front with two grooves and the rear with three. Using 1-1/2-inch masking tape as a guide, we made the cut with a fine-tooth jigsaw.

After deburring the edges and covering them with gaffer’s tape for safety, we turned our attention to the guides. Two strips of 16-gauge steel were cut to size and bent with a 3/8-inch flange along their edges. The plan was to build the guides in two sections and weld them together in the center.

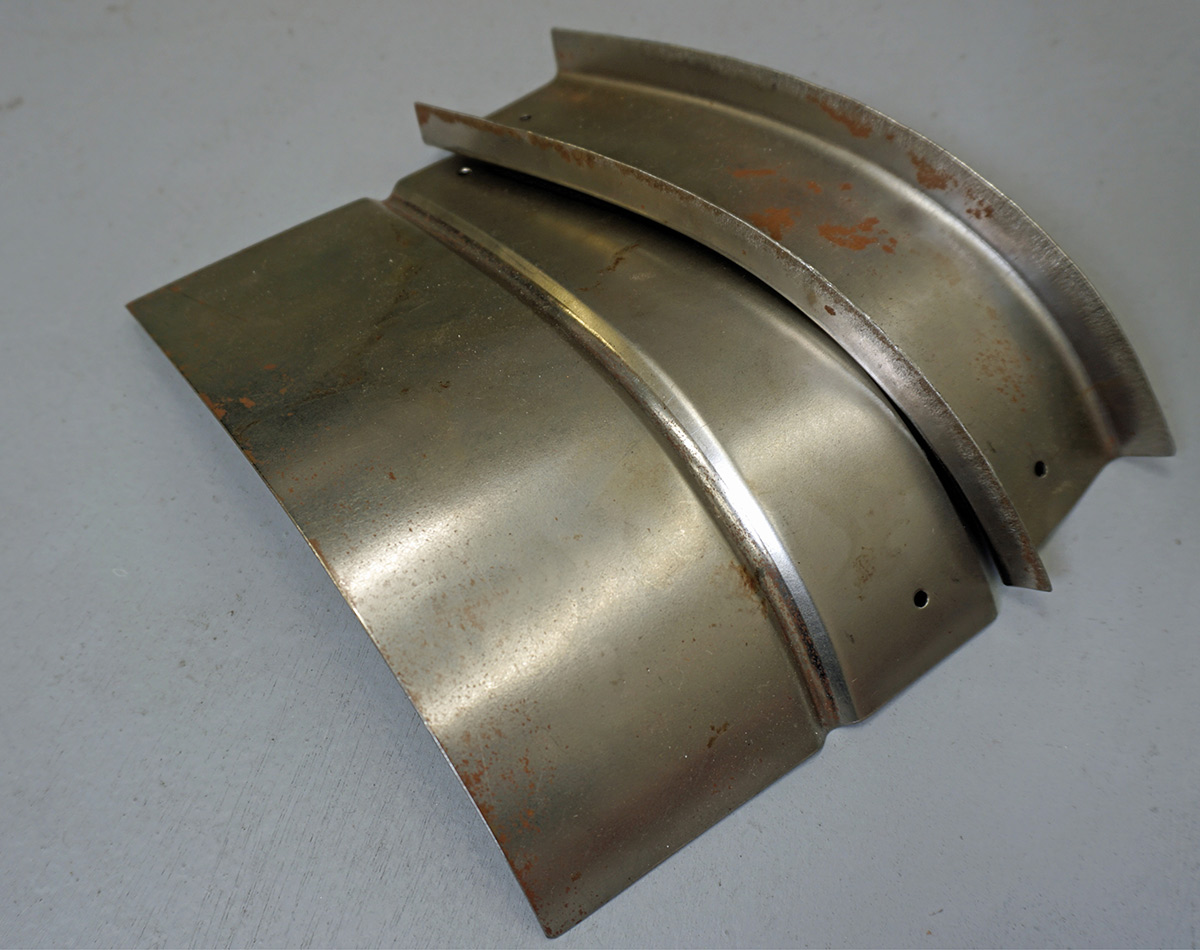
We created a chipboard pattern to capture the roof’s edge contour, then used a sheetmetal stretcher to shape the channels to match. Once both sides of the guide were formed, they were trimmed, tack-welded together, aligned with the tape line, and clamped in place. We drilled 1/8-inch holes so the guides could be temporarily attached with Clecos.

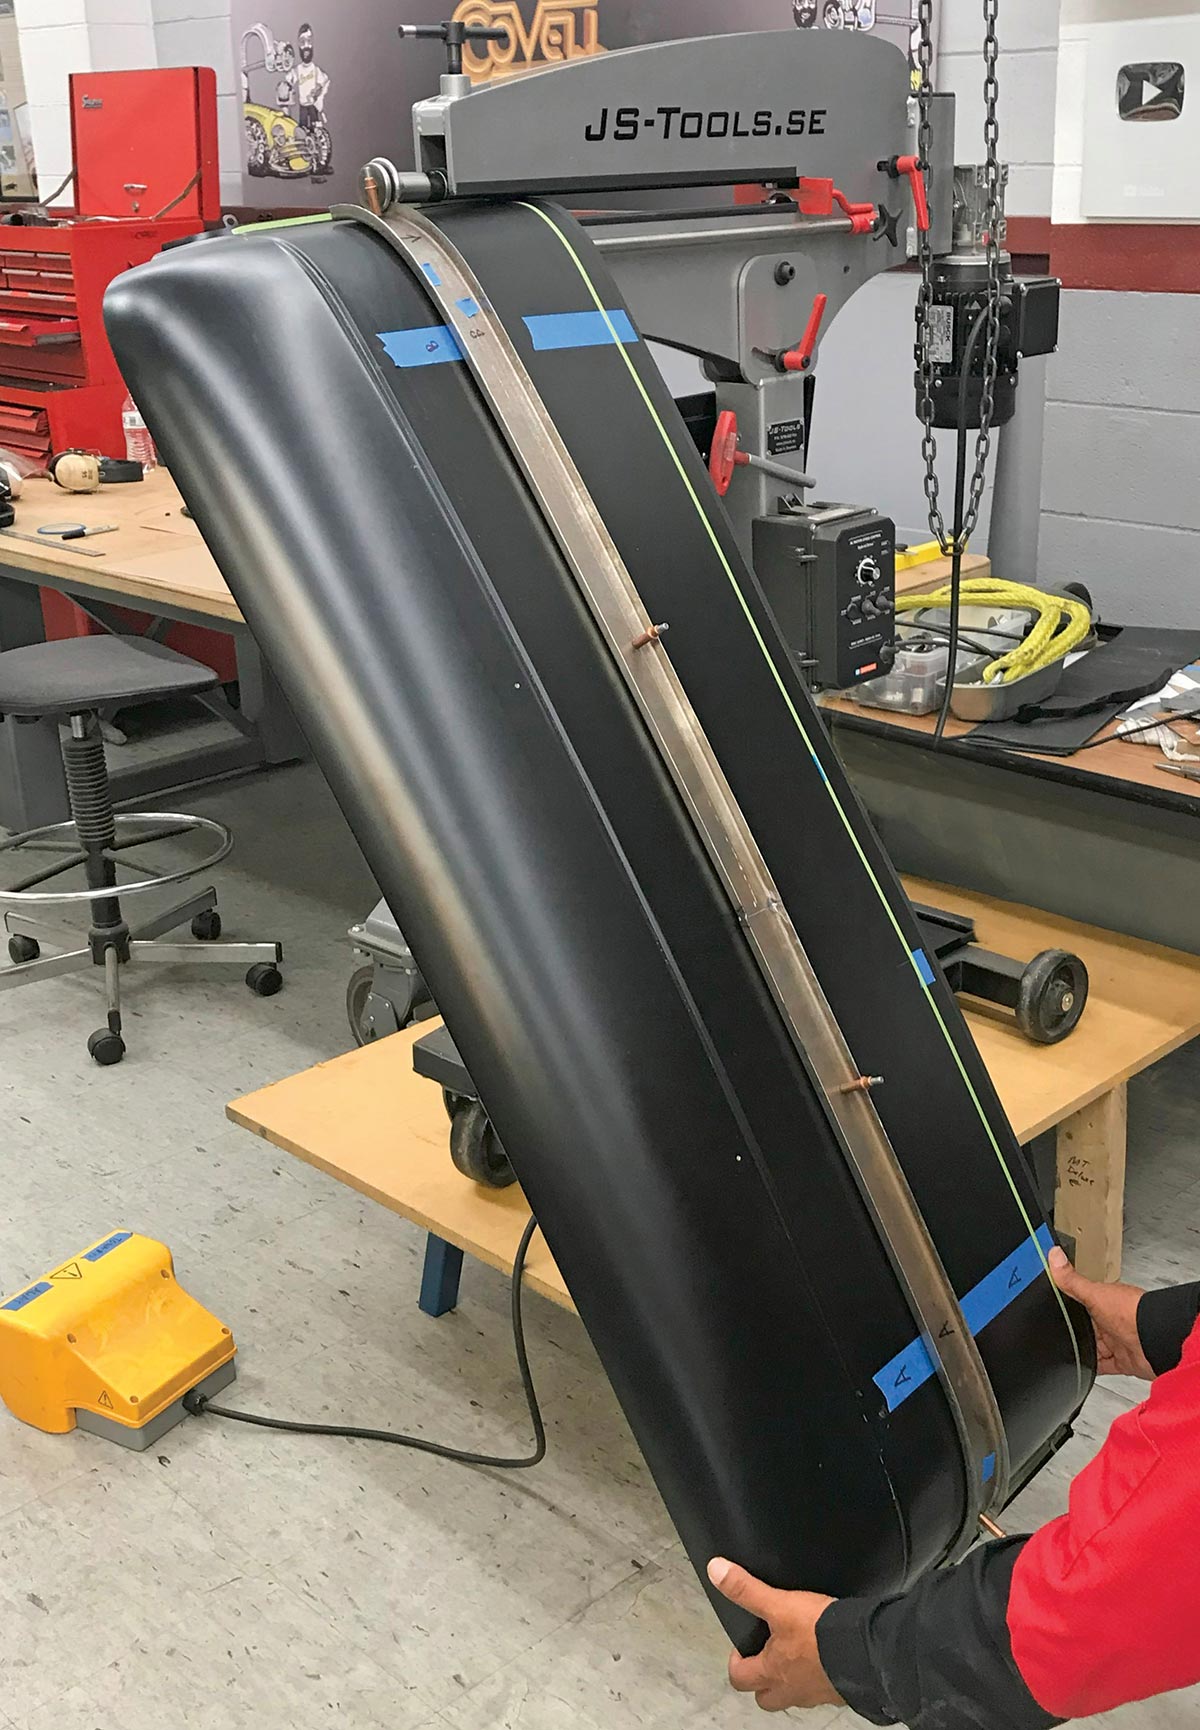
A dry run through the bead roller revealed one more obstacle: the panel was so wide that its edges would hit the floor before the beads reached their endpoints. The fix was straightforward—elevate the machine on a 12-inch platform.

Running such a large panel through the bead roller is definitely a two-person job. One person operates the foot pedal for the motor on the bead roller and steers the panel to keep the guide aligned in the die’s groove, while the other supports the weight on the outfeed side. Once we found our rhythm, we made five passes per bead, lowering the top die a half-turn on the adjustment handle with each pass.

After the first bead was complete, we removed the guide to check its straightness—and it came out beautifully. We repositioned the guide and continued on with the remaining grooves.

All told, the process took several hours, but the results were well worth it. As you look through the photos, you’ll see many of the small details that made this project a success. Both Ron and I were thrilled with the outcome—and he’s already moving forward with the next steps of his ambitious F-100 build.

ford f100 roof laser alignment tape mockup layout
2. Because the original roof skin had extensive rust damage, a reproduction panel was sourced from Classic Industries. A 4-foot ruler and a plumb bob were used to establish the precise spacing on the new panel for the grooves.
ford f100 roof string plumb line symmetry setup
3. The initial tape layout is complete, providing a clear visual reference for the final groove placement.
ford f100 roof tape layout metal shaping scribe lines
4. A laser ensured the tape lines were perfectly straight before any cutting or shaping began.
ford f100 roof panel layout square marking ruler
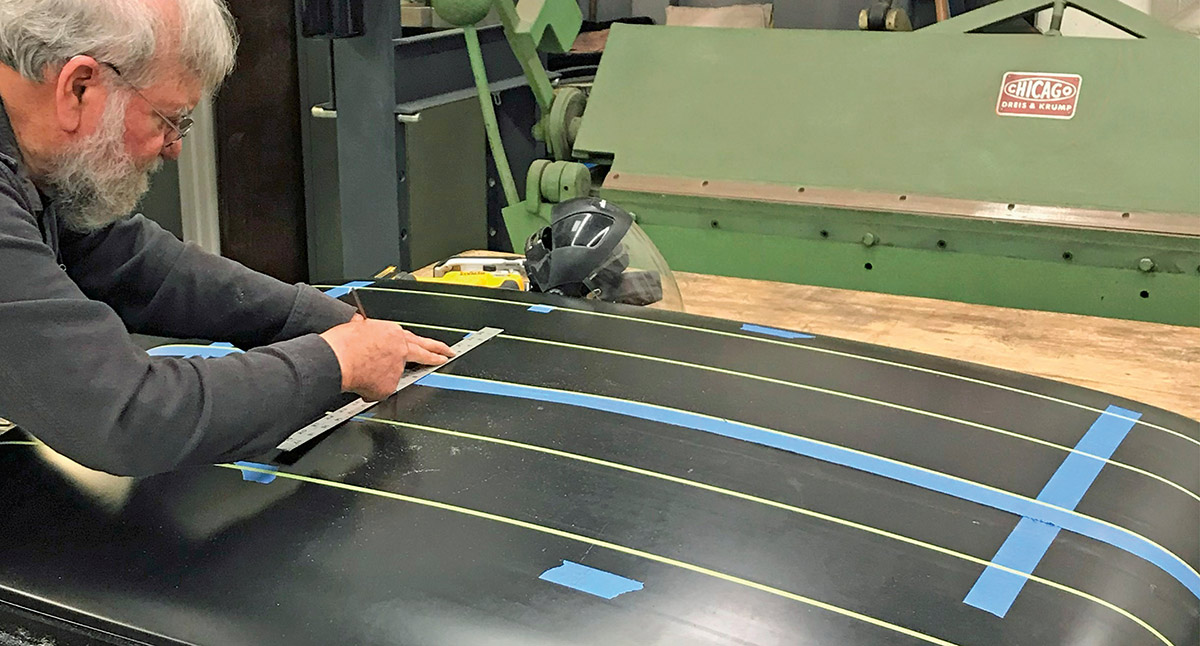
5. The roof skin was too large and too curved to fit into the bead roller as-is, so the plan was to cut it in half. Here, the cut line is being plotted near the center of the panel.
ford f100 roof fabrication jigsaw cut panel line
6. We used 1-1/2-inch masking tape to mark a clean, easy-to-follow cut line. A fine-toothed, jigsaw blade produced a smooth, uniform cut.
ford f100 roof tape trim scribe cut prep work
7. After cutting, the edges were deburred with a file and covered with gaffer’s tape for safe handling.
ford f100 bead roller die set panel shaping tools
8. Achieving straight, precise grooves requires a rigid guide attached to the panel, and bead roller dies that have a slot to capture the guide flange. We selected 7mm beading dies for this project—producing a groove just over 1/4-inch wide.
ford f100 bead roller test metal panel dimple dies
9. A test panel confirmed the setup. The guide’s flange is securely captured in the groove on the dies, ensuring accurate tracking.
ford f100 roof insert patch panels curved bead detail
10. Clecos temporarily held the guide to the panel during forming. Note the crisp, straight results the guide helped achieve.
ford f100 roof brace fabrication on chicago sheet metal brake
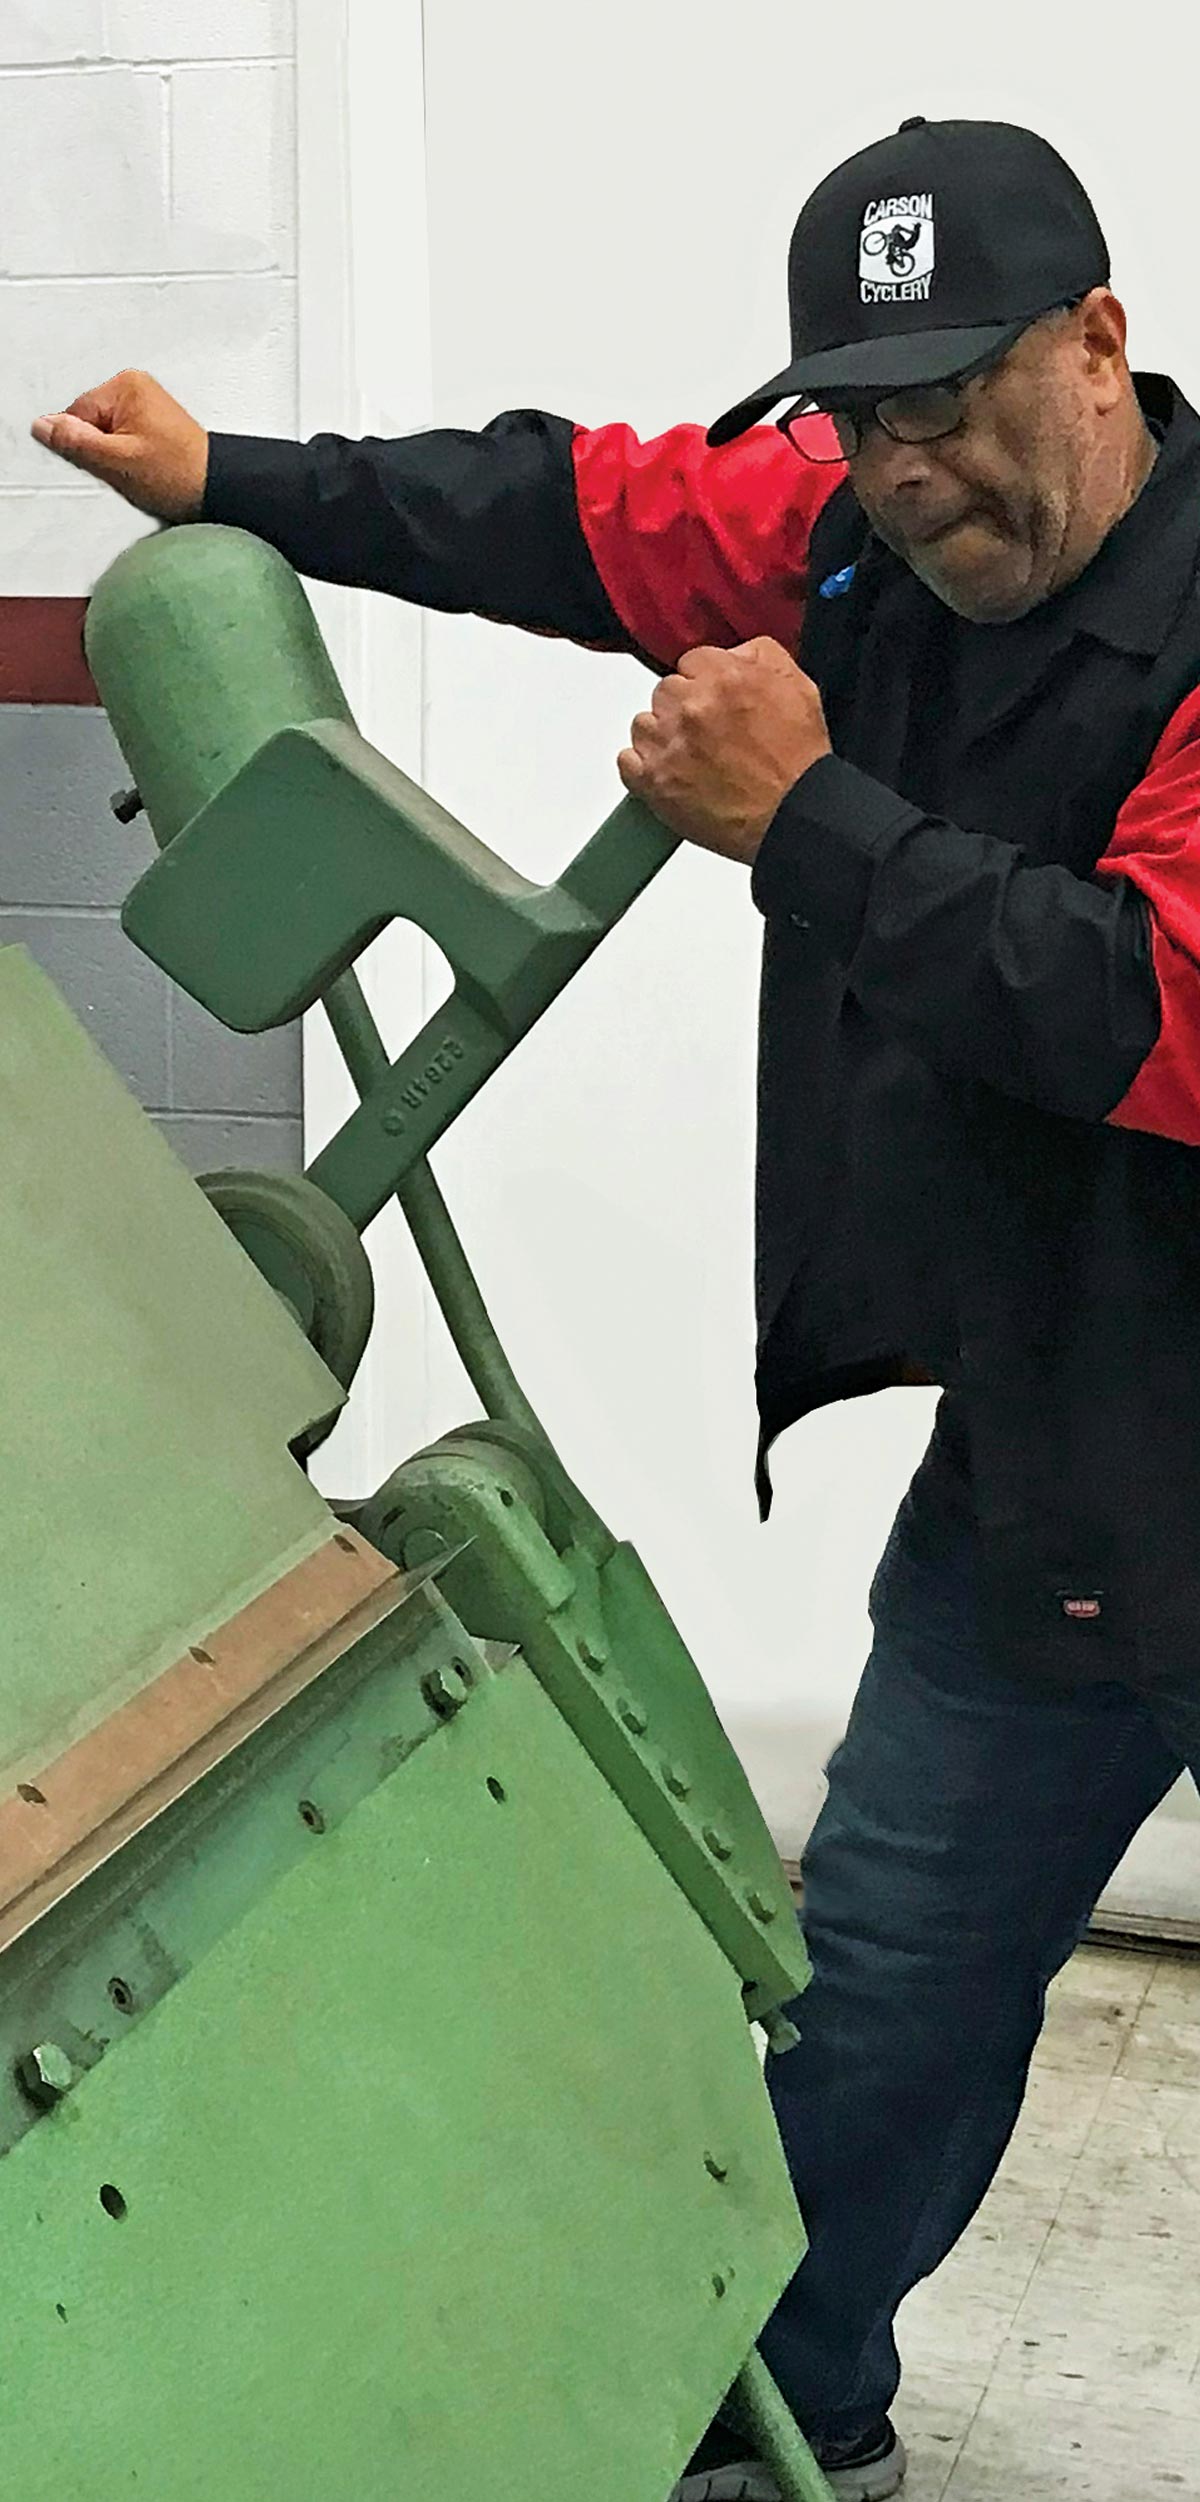
11. With the concept proven, the final guides were fabricated from 16-gauge steel. A sheetmetal brake is shown here forming 3/8-inch flanges along both edges.
ford f100 custom roof support channel freshly bent metal
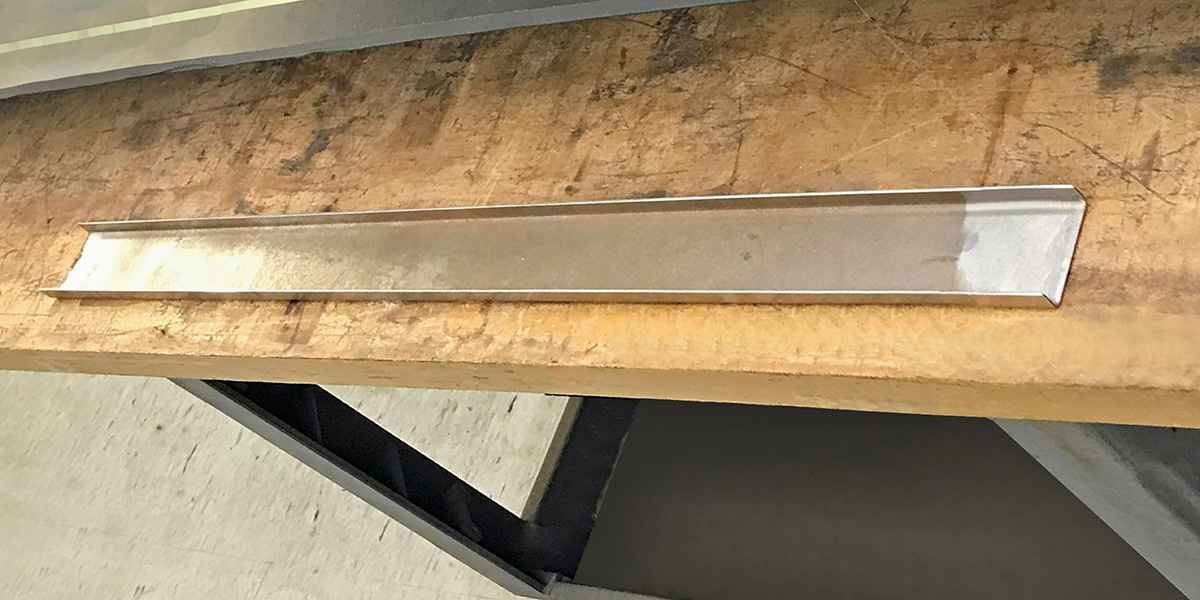
12. The first channel, fresh from the brake, is shown here. For ease of fitting, the guide was made in two pieces and tack-welded together at the center.
ford f100 roof fit test using cardboard profile template
13. A chipboard template was made to capture the roof panel’s edge contour accurately.
ford f100 panel edge flanging tool sheet metal forming
14. A mechanical sheetmetal stretcher was used to shape the guide flanges to match the roof’s curvature.
ford f100 roof channel profile test cardboard curve match
15. The guides were repeatedly checked against the chipboard template as they were formed to ensure a perfect fit.
ford f100 roof stiffener placement layout with tape and marks
16. With both sides of the guide shaped to fit the roof panel, they could be trimmed and tack-welded together.
ford f100 cleco fasteners install roof brace channel mockup
17. Once joined, the guide was clamped into position along the tape line, and 1/8-inch holes were drilled so Clecos could hold it securely during forming.
ford f100 roof bead shaping english wheel setup
18. A “dry run” confirmed the large panel would pass cleanly through the bead roller. Once verified, the first bead was carefully formed in multiple shallow passes.
ford f100 roof panel drill brace alignment final clamp
19. With the first bead complete, the guide was repositioned for the second.
ford f100 roof panel full channel mockup final shaping
20. The dry run revealed that the bead roller needed to be raised—otherwise, the panel’s edges would hit the floor as it was lowered at the end of each bead. Elevating the machine on a 12-inch platform solved the problem.
ford f100 roof insert bead rolled panel clamped for fit
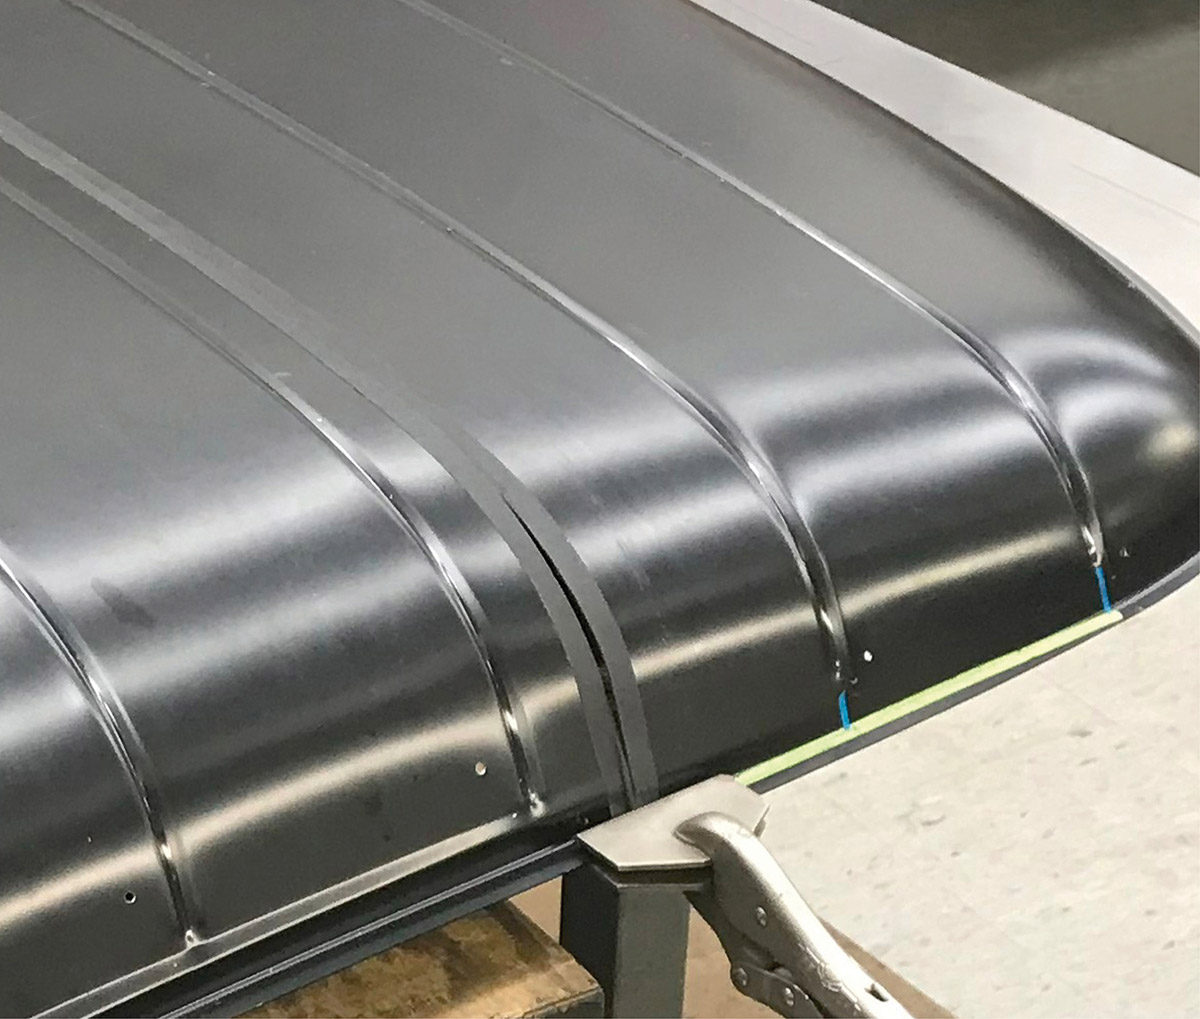
21. Care was taken to ensure the ending point of each bead was consistently spaced from the driprail flange.
ford f100 full custom roof insert hand formed steel
ford f100 roof panel final shaping bead roll pattern
22-23. With the two halves of the roof temporarily clamped together, the new grooves really accentuate the panel’s natural curves.
ford f100 custom bead rolled roof panel on bench
24. A bird’s-eye view highlights the straightness of the grooves and the uniform spacing between them.
ford f100 new roof insert test fit on cab
25. Finally, the grooved roof panel is shown in place on the cab—a custom touch that adds a distinctive Nomad-inspired character to the F-100.