CTP Tech
InTheGarageMedia.com
White '96 Chevy Tahoe on a lift with no wheels
1. This ’96 Chevy Tahoe has been equipped with tubular control arms and coilovers from Classic Performance Products (CPP). The next big improvement comes in the form of a CPP Big Brake Kit.
Better Binders for a New-Old Classic
Classic Performance Products Brake Update for OBS Chevys
BY RON CERIDONO
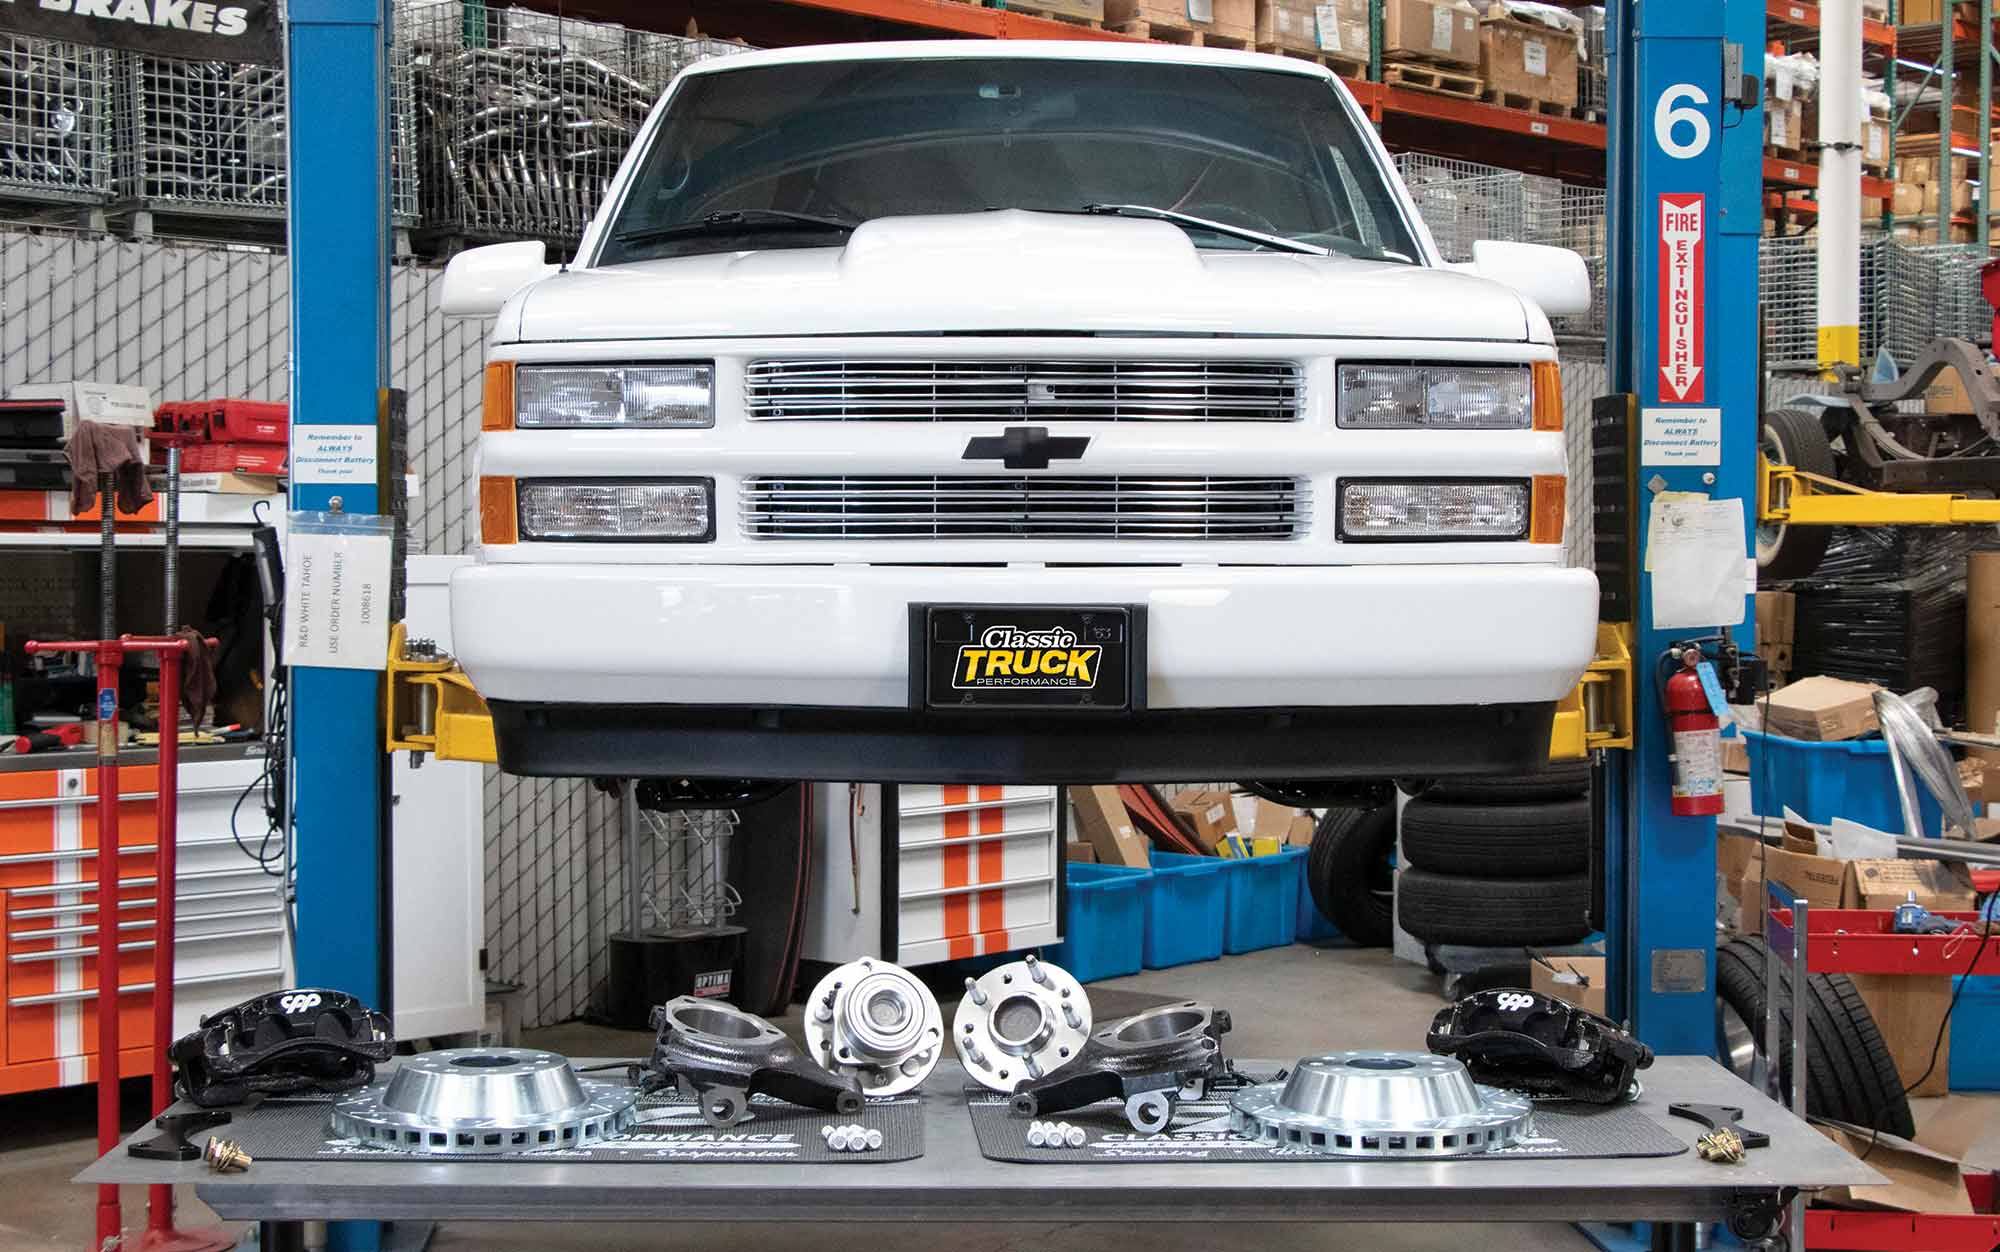
IMAGES BY TAYLOR KEMPKES
I

n the previous (Mar. ’24) issue of Classic Truck Performance we looked at the growing popularity of ’88-98 Chevy and GMC trucks and SUVs, like the Tahoe, Yukon, and Suburban. As we explained then, this series of vehicles has been labeled as the old body style (OBS) to distinguish them from the styling of those that would follow in 1999 (Tahoe, Yukon, and Suburban styling stayed the same through 2000). While we admit it seems like labeling anything from that era as a “classic” is pushing the envelope, when you consider they are in the 26- to 36-year-old range, it puts things in perspective. Like we said on the subject last month, time really does fly by.

Speaking of time flying, Jim Ries opened Classic Performance Products (CPP) in 1991. Initially working out of his garage, today the business has grown to occupy an 80,000-square-foot facility in Placentia, California. Included in the facility are CPP’s engineering and research and development departments that result in a steady stream of guaranteed-for-life steering, brake, and suspension parts, including new big brake kits for OBS Chevys and GMCs.

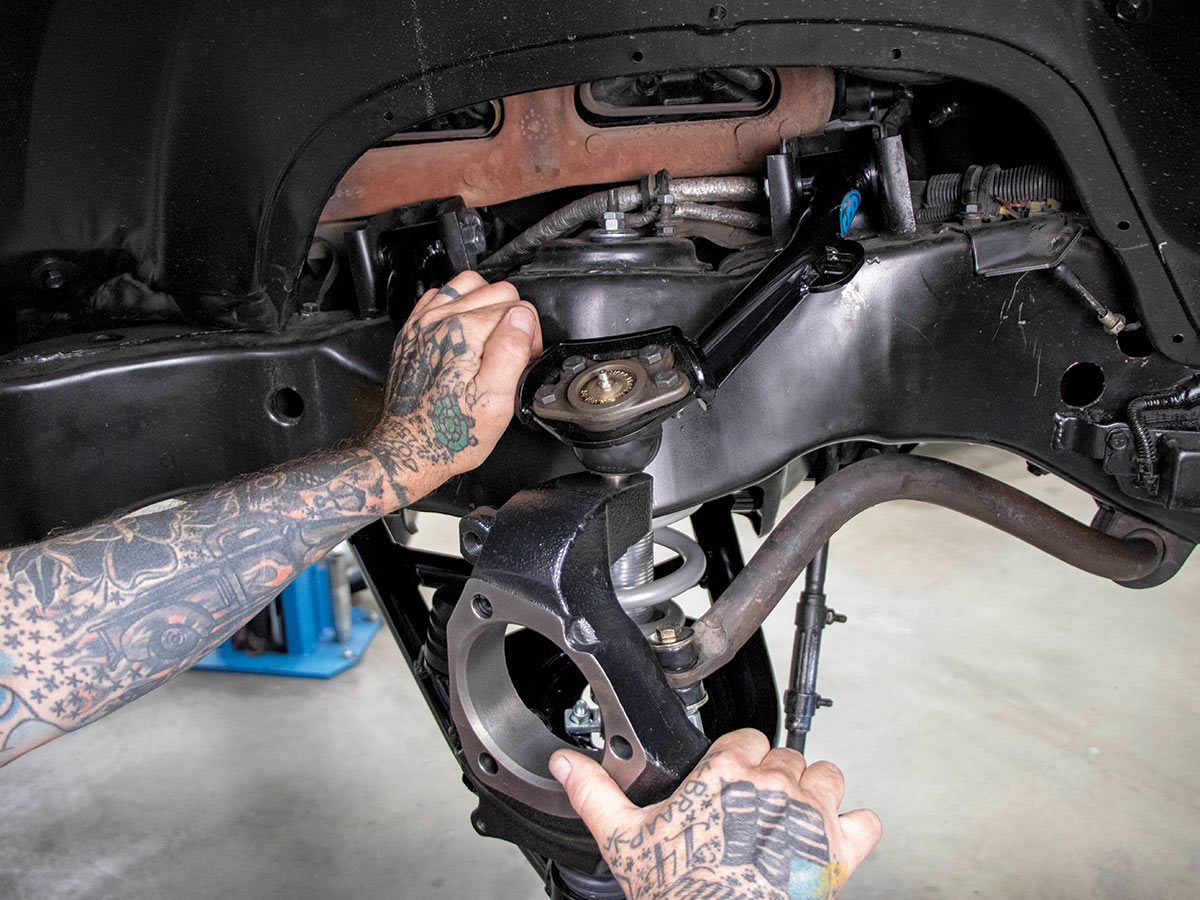
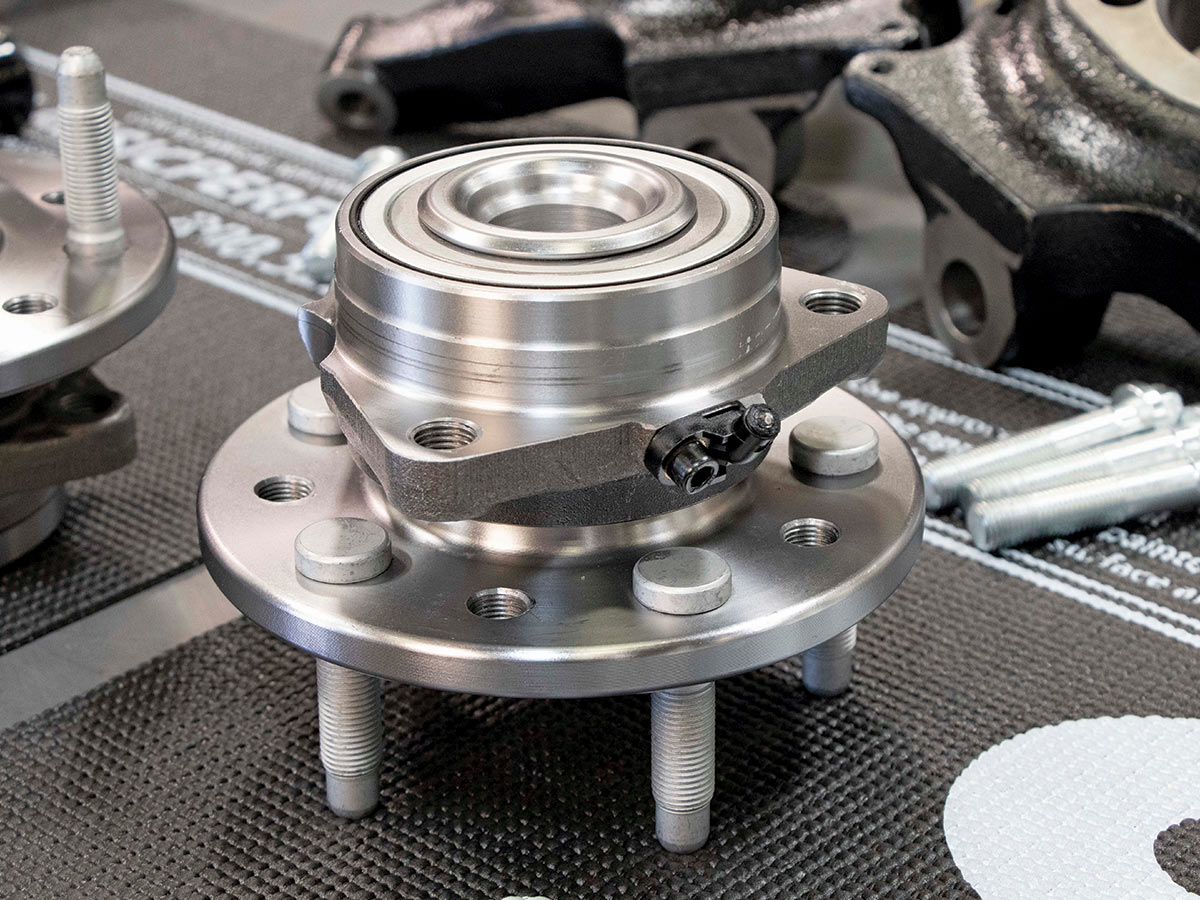
The ’96 Tahoe shown here has already been treated to CPP’s tubular control arm and coilover conversion (PN 8898FCO-K). These components narrow the tread width 1.5 inches per side for increased tire clearance while the coilovers with double-adjustable shocks allow the suspension to be tuned for optimum ride and handling characteristics. This time around we’re installing CPP’s new Big Brake assembly (PN 8898SWBK-X10-5). Included in the kit are CPP’s X10 Extreme Drop Modular Spindles that are similar in design to those found on late-model Corvettes. Cast from high-quality ductile iron, these spindles lower ride height by 2-1/2 inches and are designed to accept the big brake assemblies available from CPP. These spindles use the ultra-strong, bolt-on, Corvette-style sealed bearing and hub assemblies that eliminate the hassle of packing the bearings with grease and adjusting them.

Included in the front brake kit are 13-inch, cross-drilled, gas-slotted, zinc-washed rotors that mount to sealed bearing hub assemblies. Putting the squeeze on the rotors are PBR C15 calipers with twin 52mm pistons that significantly increase the clamping force on the rotors when compared to the stock GM calipers. The calipers attach to the spindles with the included custom brackets.

At this point we should point out that this Tahoe, like many other vehicles of this vintage, is equipped with ABS (anti-lock brake system). Basically, what this system does is monitor the speed of each wheel with a sensor. If the sensor sends a signal indicating a wheel has locked up, the controller “pulses” the hydraulic pressure to that brake, eliminating the skid. The CPP hubs come with an ABS sensor that simply plugs into the existing wiring harness, keeping the factory system operational.

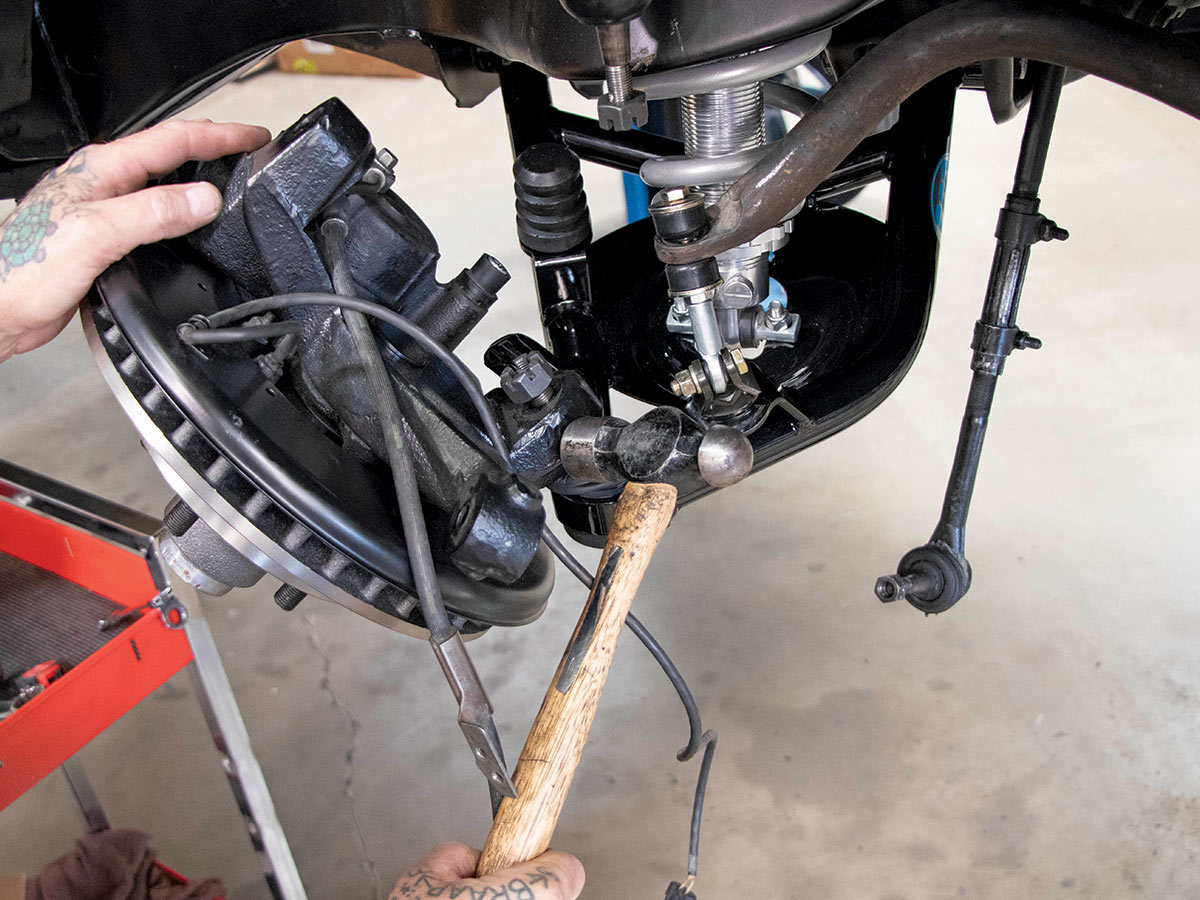
Installing CPP’s Big Brake Kit involves removing the entire stock spindle and brake assembly as none of it will be reused. Installing the new components is simply a matter of bolting them in place as no modifications to the vehicle are necessary. Keep in mind once the installation is completed it will be necessary to bleed the brakes and whenever suspension components are replaced a trip to an alignment shop is required. Then it’s time to drive and enjoy your updated new classic.

Close up of a rotor and single-piston brake caliper
2. In stock form the Tahoe was equipped with 11.6-inch rotors and single-piston brake calipers.
Hand holding an unplugged lead
3. The first step in removing the factory brake components is unplugging the lead from the ABS sensor.
Hands securing a brake hose to the control arm
4. Due to the length of the brake hoses they are secured to the upper control arms. The stock hoses will be discarded.
Close up of a cap over the steel line
5. To prevent contaminating the hydraulic system with the brake hoses removed, Jason Scudellari slipped a vacuum cap over the disconnected steel line.
Hand holding a drill, removing the outer tie-rod
6. The outer tie-rod ends are removed from the spindles. Even though they go back in place with altering the adjustment sleeves, the frontend must be aligned after the new components are in place.
Hand holding a hammer, shocking the steering arm
7. Shocking the steering arm with a hammer by giving it a whack on the side will often dislodge a tapered pin on a tie-rod end or ball joint.
hand holding a wrench, removing a nut
8. With the cotter pin removed the nut securing the upper ball joint is taken off.
Hand holding a hammer, loosening the upper ball joint
9. Scudellari used the same hammer technique to loosen the upper ball joint. Smacking the spindle is fine, but never hammer on the threaded ends of the ball joints or tie-rod ends.
Hand holding a hammer, separating the lower ball joint
10. One more hammer blow to the spindle and the lower ball joint is separated. Note the nut is loose but in place to keep the spindle from falling off unexpectedly.
Man removing the spindle, rotor, and caliper as an assembly
11. With the ball joints and tie-rod end disconnected Scudellari removed the spindle, rotor, and caliper as an assembly.
CPP Big Brake kit: spindles, hubs, rotors, calipers, and hardware laying on a table
12. Here are all the components of the CPP Big Brake kit: spindles, hubs, rotors, calipers, and hardware.
Two CPP spindles sitting on a table
13. The CPP X10 spindles accept bolt-on hubs like those on late Corvettes. The steering arms are part of the casting.
Hands installing a CPP spindle at the lower ball joint
14. Installation of the CPP spindle begins with attaching it to the lower ball joint.
Close up of cotter pin and ball joint nut
15. The ball joint nut is torqued to the included specifications, then it’s secured with a cotter pin. Note how the cotter pin fits vertically in the slot of the castle nut.
Hands attaching the upper control arm
16. With the bottom of the spindle secured, the upper control arm is attached.
Close up of a CPP hub sitting on a table
17. CPP’s hubs come with sealed bearings that don’t require any additional grease or adjustment.
Close up of ABS plug connected to the hub
18. The original wiring harness for the factory ABS plugs into the speed sensor in the hub.
Hands tightening the bolts that are connecting the hub and spindles
19. Three bolts that come from the back side of the spindles hold the hub in place.
Hands attaching custom caliper brackets
20. Included in the CPP Big Brake kit are custom caliper brackets. They attach to the spindles with the supplied hardware.
Hands attaching 13 inch CPP rotors
21. CPP’s rotors are 13 inches in diameter. They slip over the studs and are held in place by the wheels.
Close up of hand checking the tie-rod
22. The tie-rod ends are installed. Note they use mechanical-style lock nuts rather than cotter pins to secure them.
Hands installing a CPP brake
23. CPP’s calipers have a larger brake pad surface than the popular C5 caliper at half the cost.
Close up of a hand applying a washer and nut
24. The new brake hoses come with “banjo” fittings and bolts. Copper washers are used on both sides of the fitting to prevent leaks.
Close up of brake hose connected to upper control arm
25. To protect the brake hoses from damage they are attached to brackets on the upper control arms (the Tahoe has been equipped with CPP tubular control arms).
Close up of 17 inch disc brake-type wheel
26. CPP’s Big Brake kits requires a 17-inch-diameter disc brake–type wheels (an easy-to-use wheel template available to check wheel fitment).
SOURCE