CTP  Tech

InTheGarageMedia.com

1. Gary of J&S Gear rebuilt and updated our tired ’64 Chevy C10 12-bolt rearend.
12-Bolt Tune-Up
New Life for an Old Rearend
BY Ron CeridonoPhotography BY Tim Foss
O

ne of the common and most beneficial upgrades on ’63-70 Chevrolet C10 pickups is the addition of disc brakes (disc brakes became standard equipment in 1971). The good news is, the increased stopping power converting to later model disc brakes allows the use of a variety of custom wheels with a 5-on-5 bolt circle as opposed to the original six-bolt pattern. The bad news is you’ll still be stuck with six-bolt wheels on the rearend. However, for every problem there is a solution, and in our case the solution came from Classic Performance Products (CPP) and J&S Gear Company.

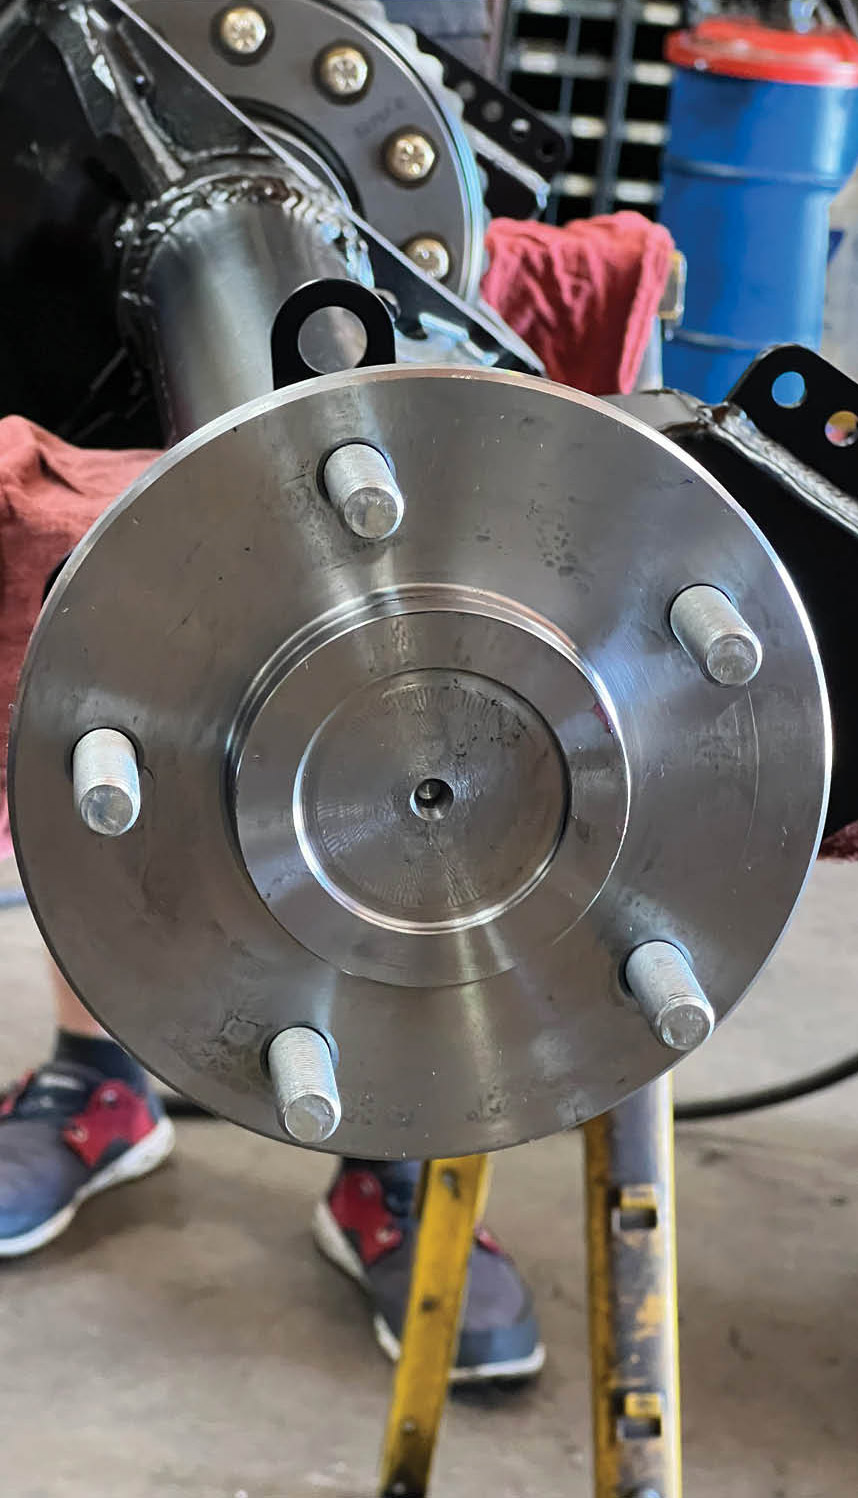
To convert to late-style wheels, CPP offers new axles that come predrilled with the five-lug on 5-inch Chevrolet truck bolt circle that ’63-70 12-bolt rearends (these axles won’t work on ’60-62 trucks or ’63-64 trucks with factory Positraction). These axles accept ’71-72 truck drums and use the existing brake hardware. While the necessary additional parts for the conversion are available separately, CPP makes things simple by offering a complete kit (PN 6369RAC-5) that comes with axles, wheel studs, and new brake drums. For those with ’63-64 trucks it should be noted that due to the 17-spline axles these trucks were equipped with, the differential side gears have to be changed to 30-spline to match the new axles (CPP can supply these as well).

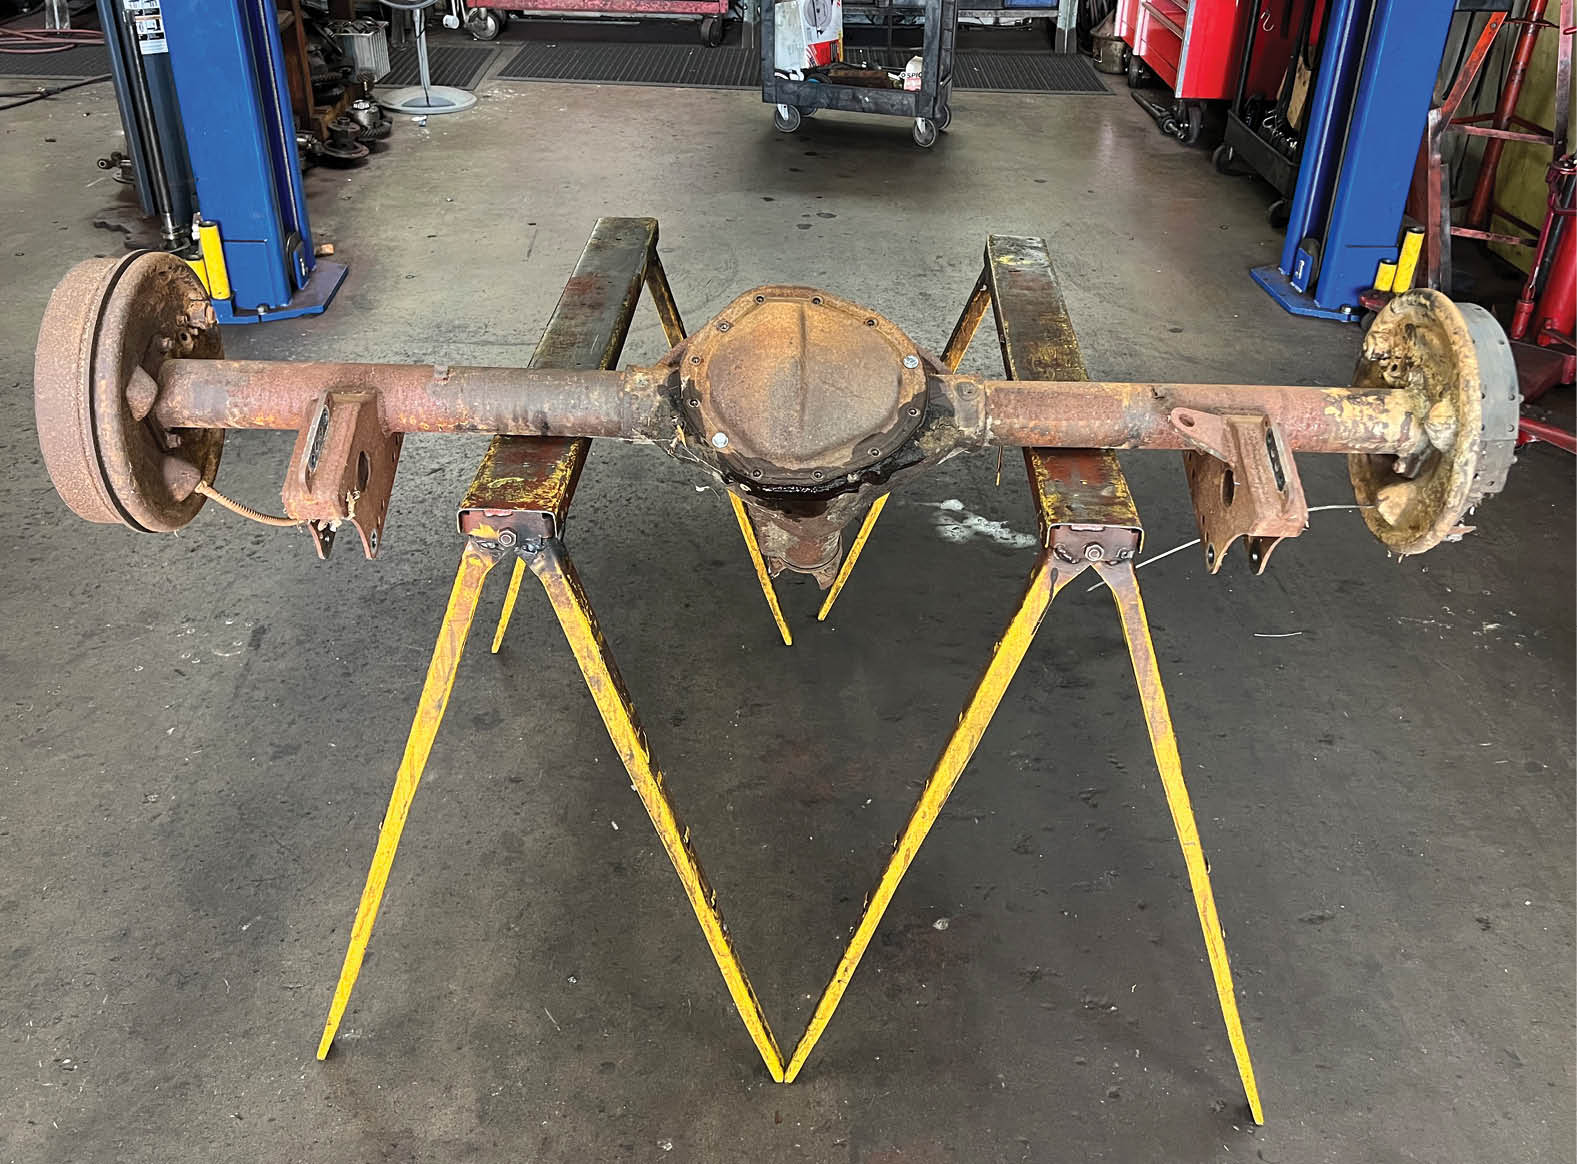
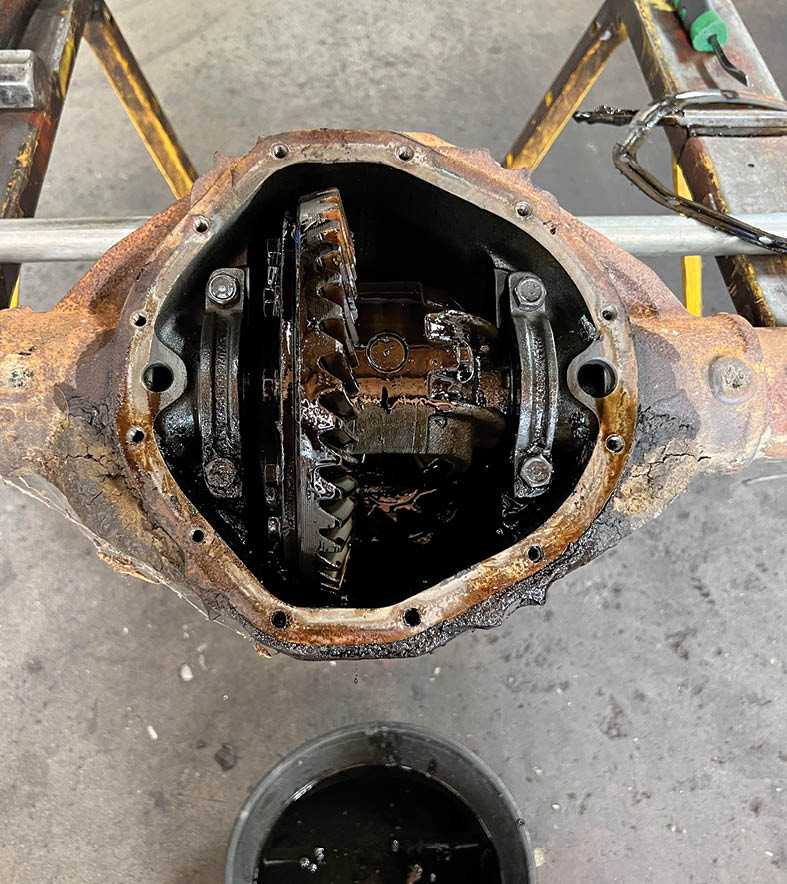
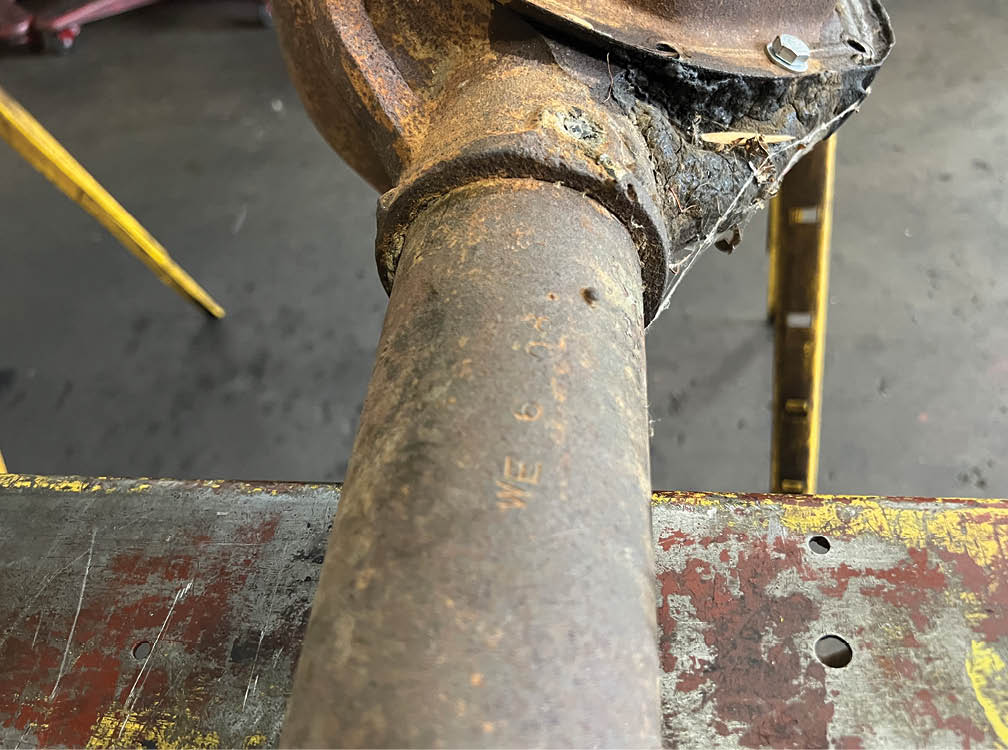
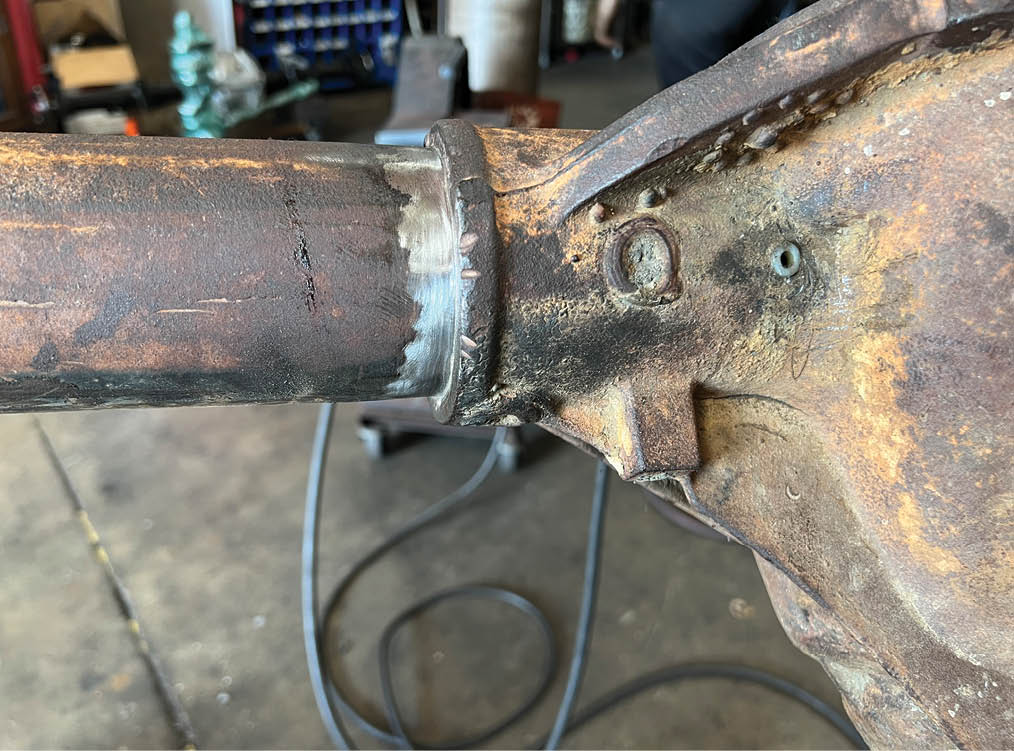
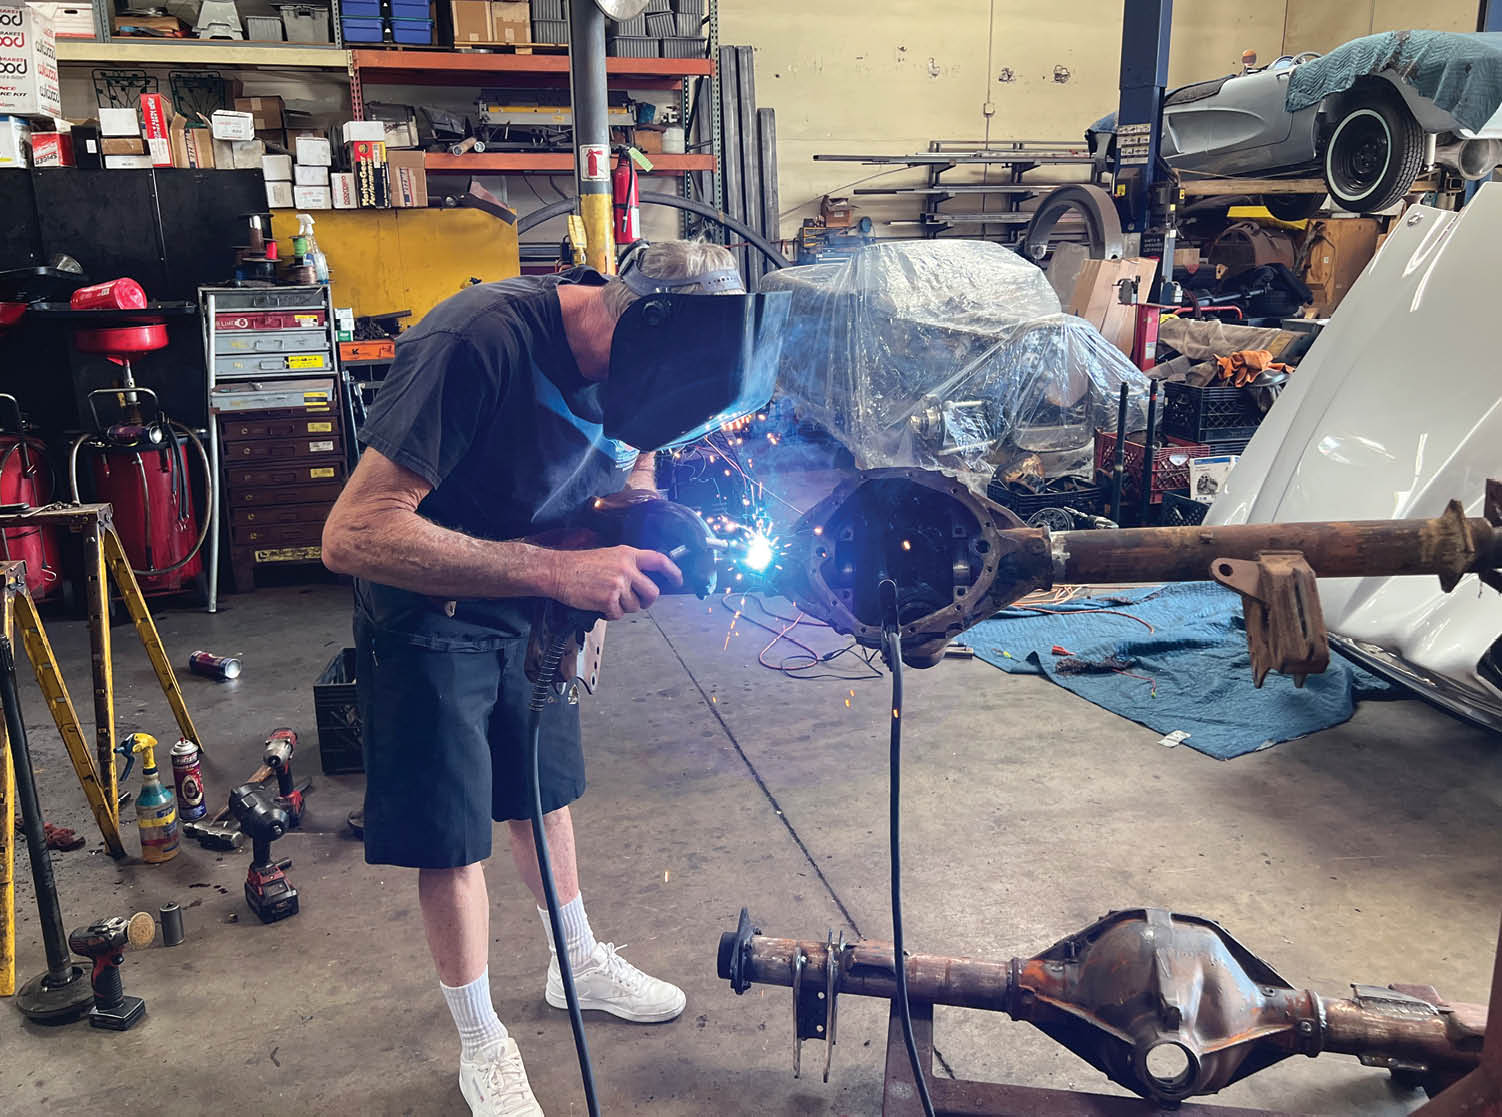
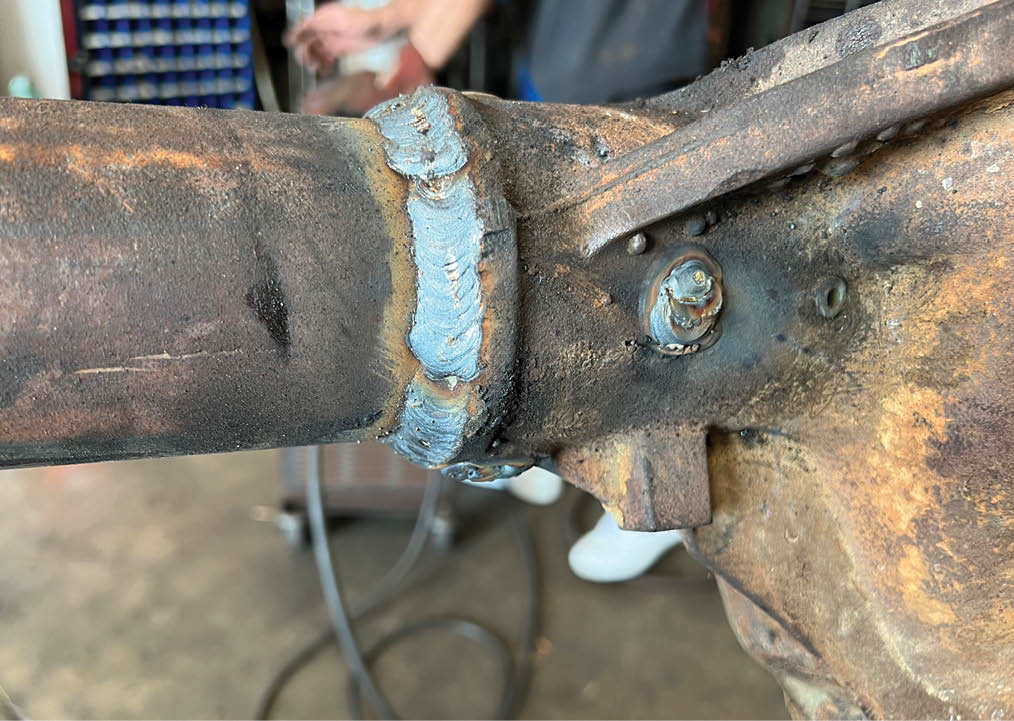
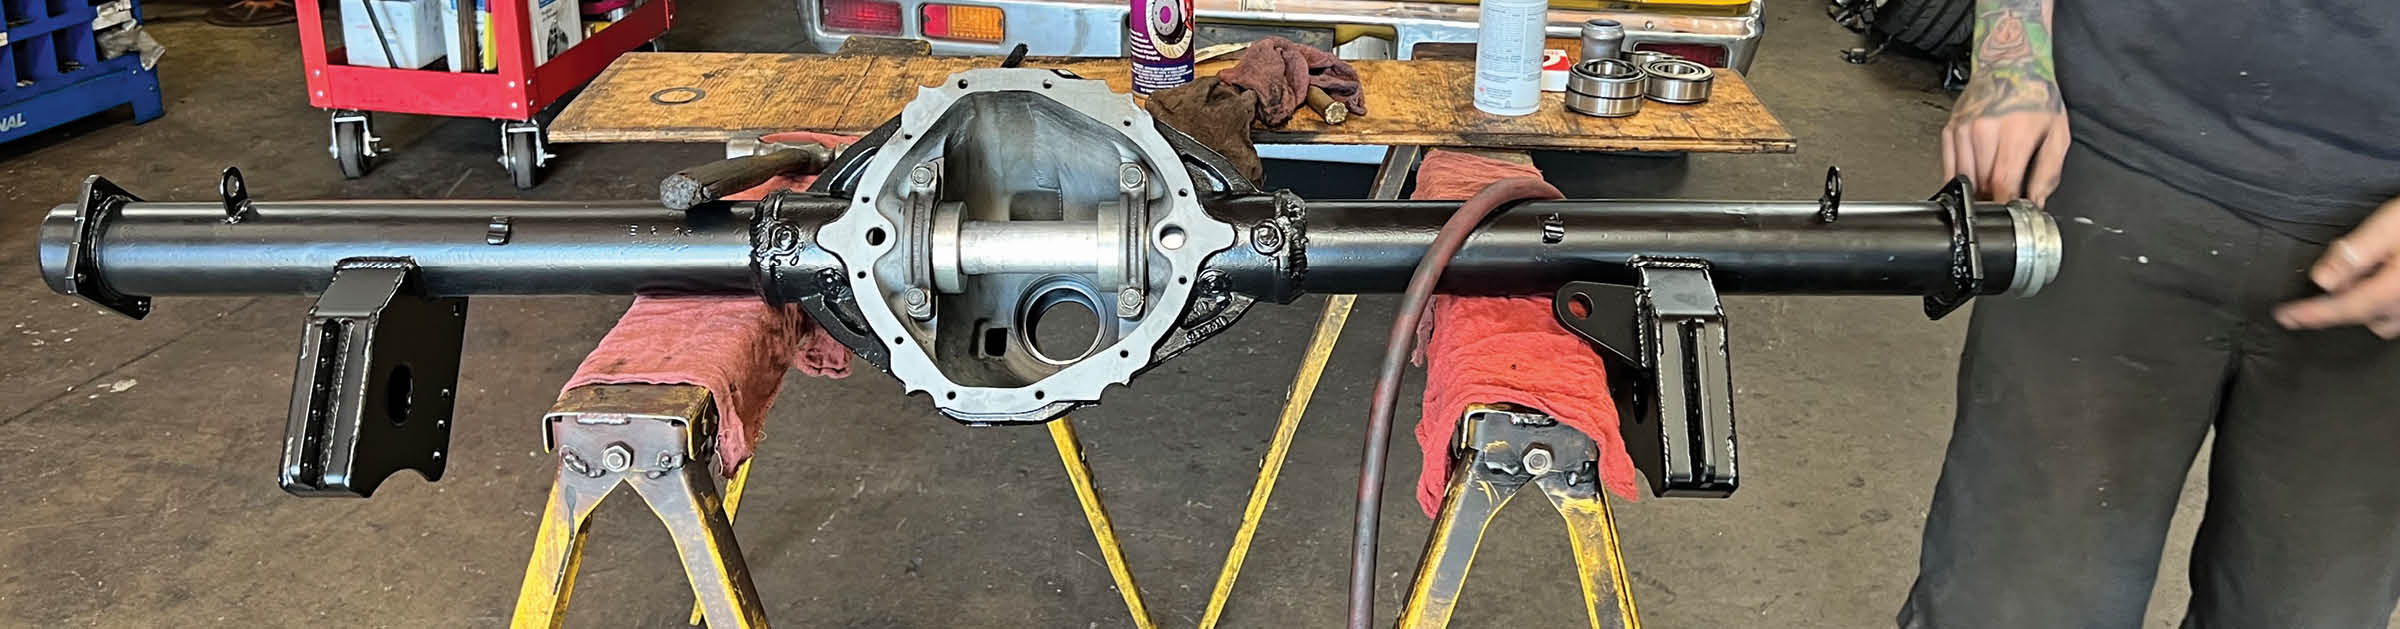
The well-used rearend that is the subject of our update was delivered to John’s J&S Gear Company in Huntington Beach, California, for a much-needed overhaul and update. The original 17-spline axles were unceremoniously tossed in the trash, followed shortly after by the mileage-weary differential assembly, ring gear, pinion, and all the bearings. A close inspection revealed that all eight of the spot-welds holding the axle tubes to the centersection had been leaking gear oil, so all the factory welds were rewelded. To further secure the axle tubes they were welded all the way around where they were pressed into the centersection. Once the welding was completed, the housing was thoroughly cleaned and then sent out to be sandblasted and powdercoated.

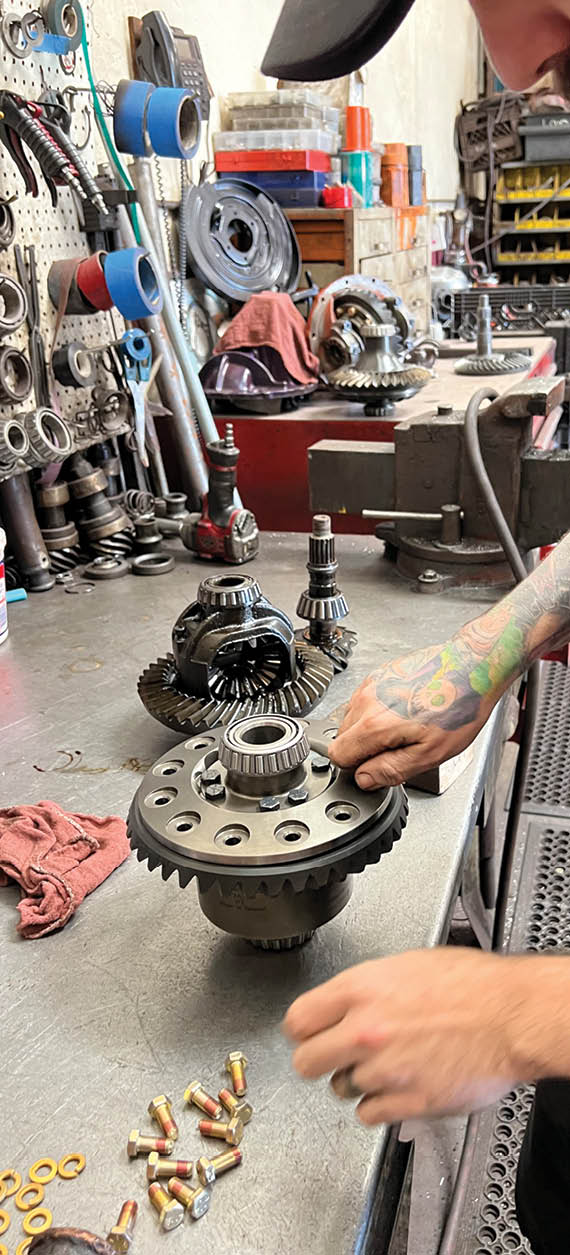
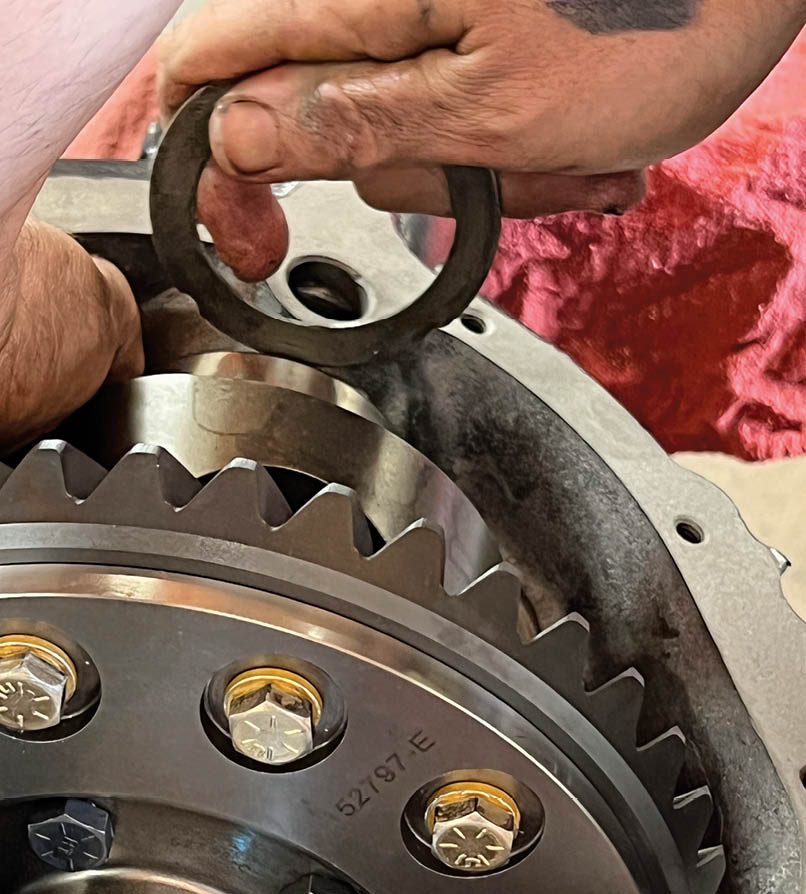
To replace the original open-drive differential, J&S ordered an Eaton Detroit Truetrac unit (PN DTL-913A315) from Summit Racing Equipment. The Truetrac accepts 30-spline axles and 3.73 and numerically higher ring gears. Truetrac differentials are unique in that they use what are described as parallel-axis planetary helix gears to provide seamless, automatic splitting of torque when the situation demands. What that means is that in normal driving conditions the Truetrac performs like a standard differential, but if one tire starts to spin torque is transferred to the tire with better traction. To complete the rejuvenation of the centersection, a new ring-and-pinion would be required so J&S again turned to Summit for a Richmond 3.73:1 gearset (PN RMG-4902801).

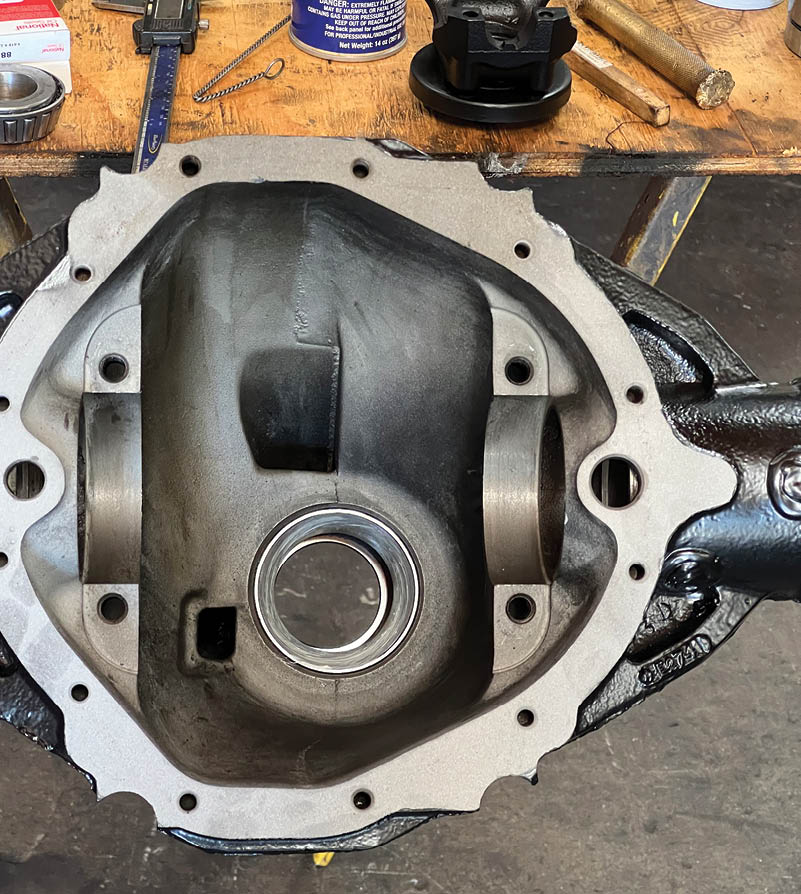
When the housing came back from sandblasting and powdercoating it was time to clean it once with a brush attached to a drill. Gary, who was responsible for assembling the rearend, points out the quickest ways to destroy a new gearset is to powdercoat the housing with sand stuck to the internal surfaces. Due to the heat generated in the housing during operation it will cause the sand and debris to come loose, which will quickly wear out the gears.

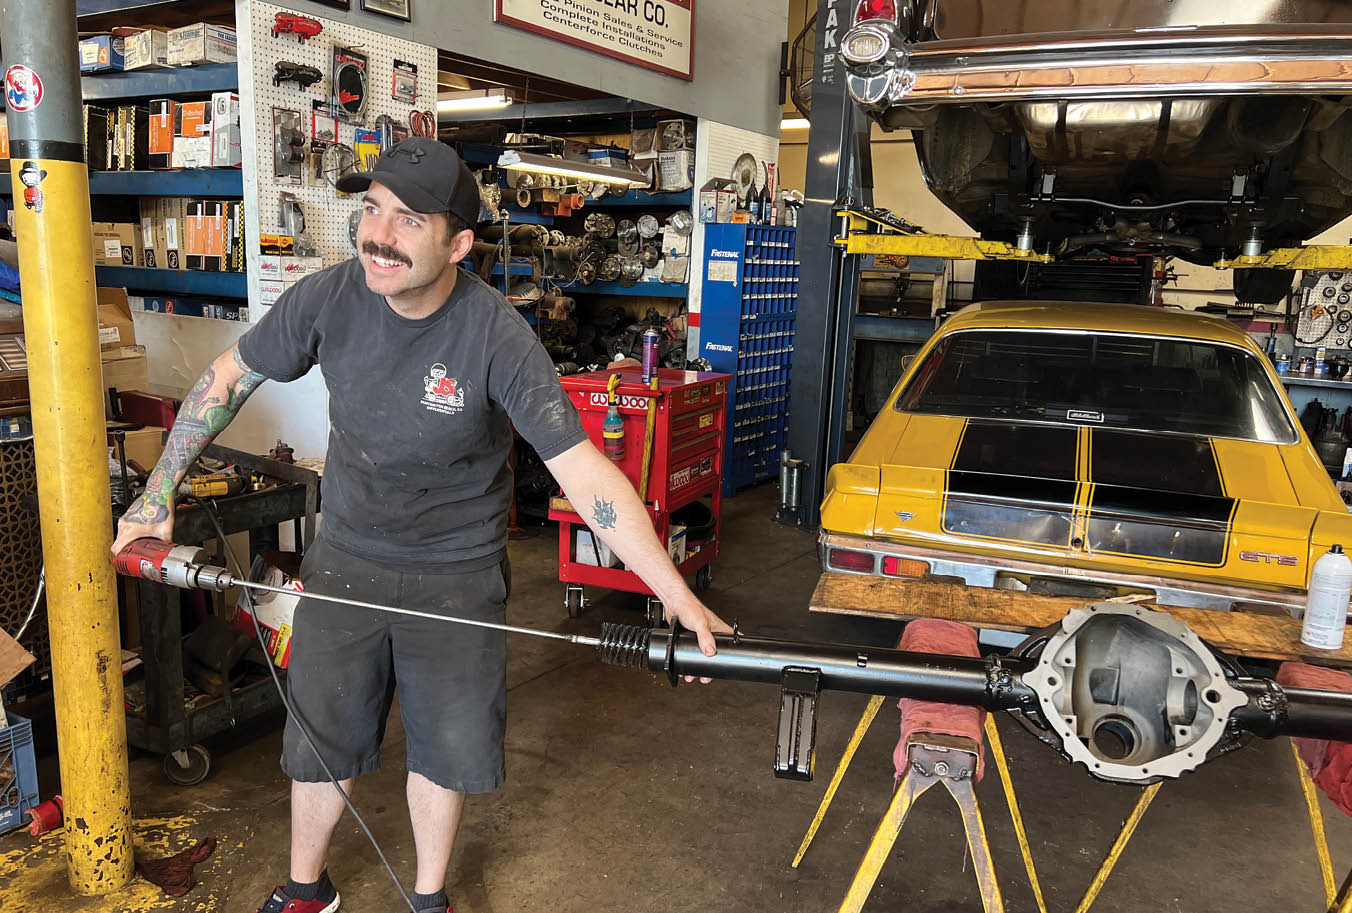
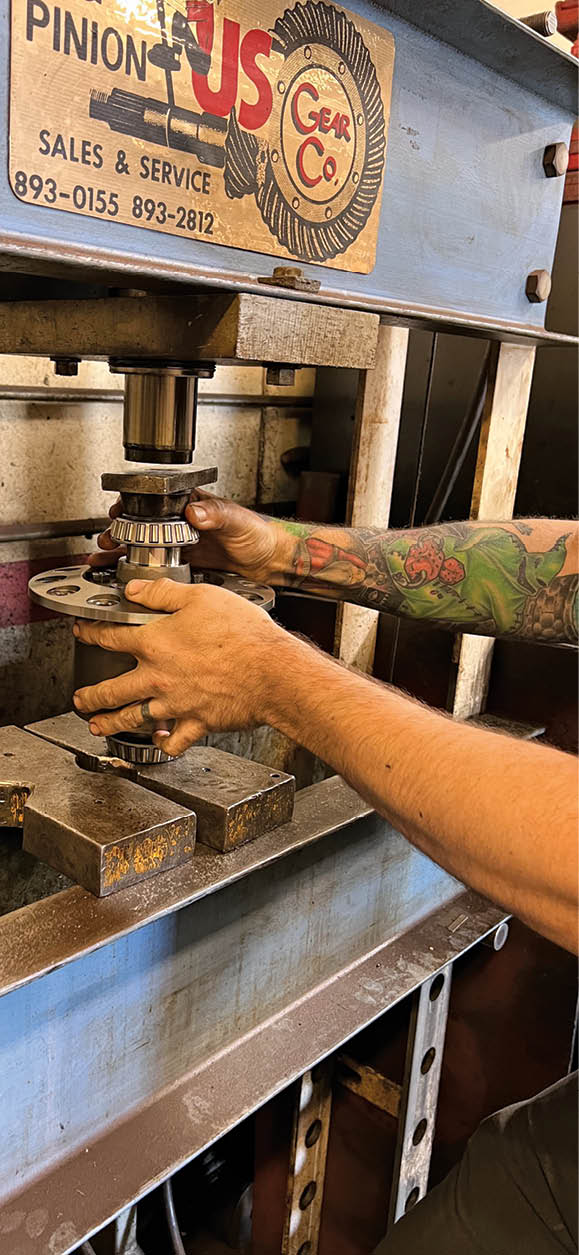
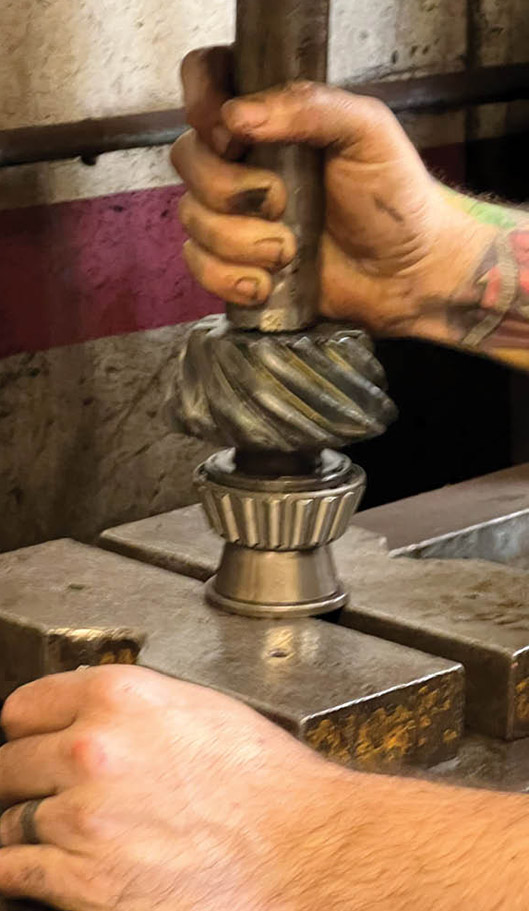
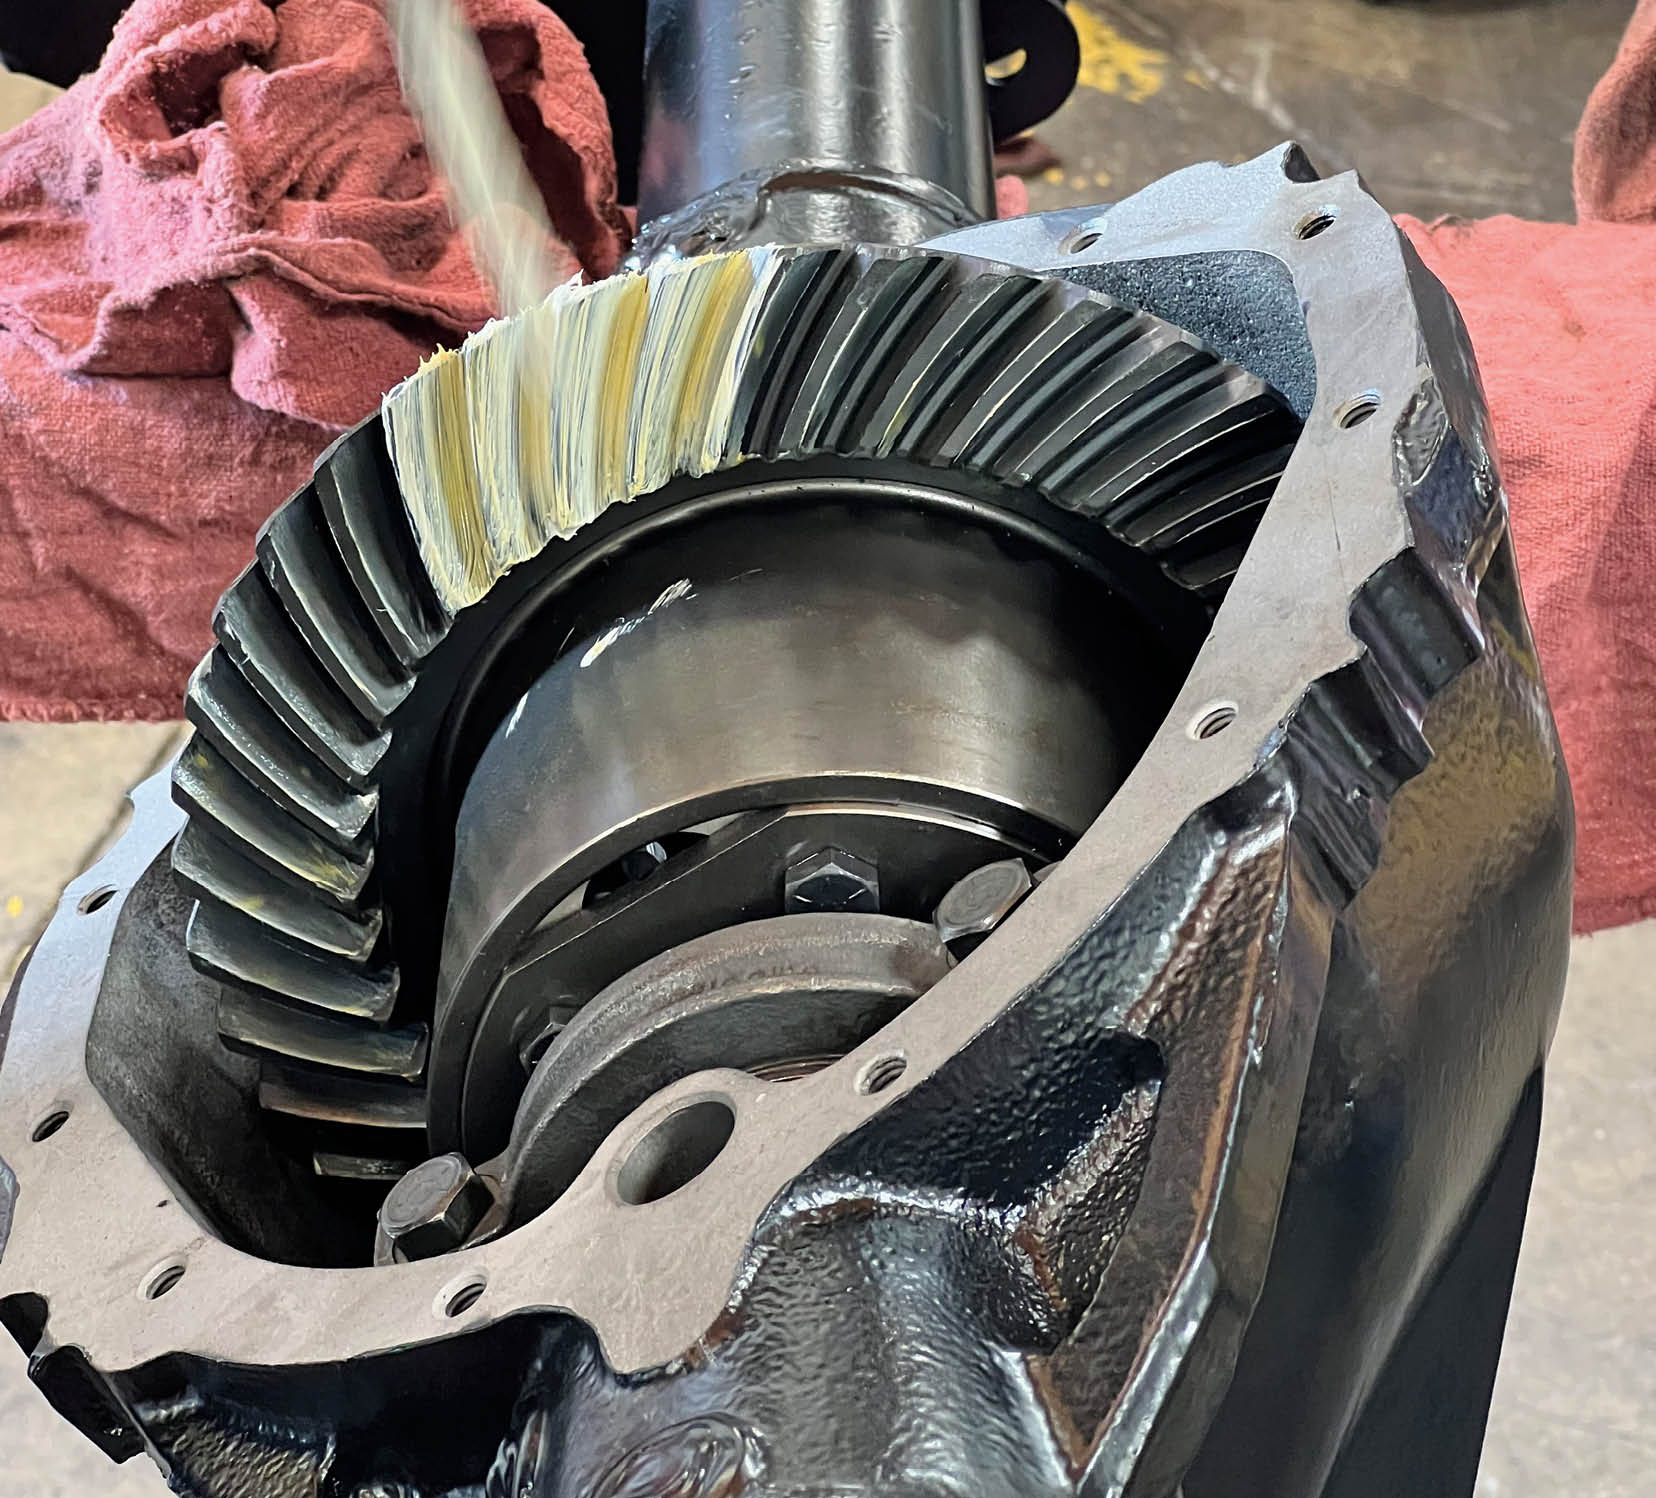
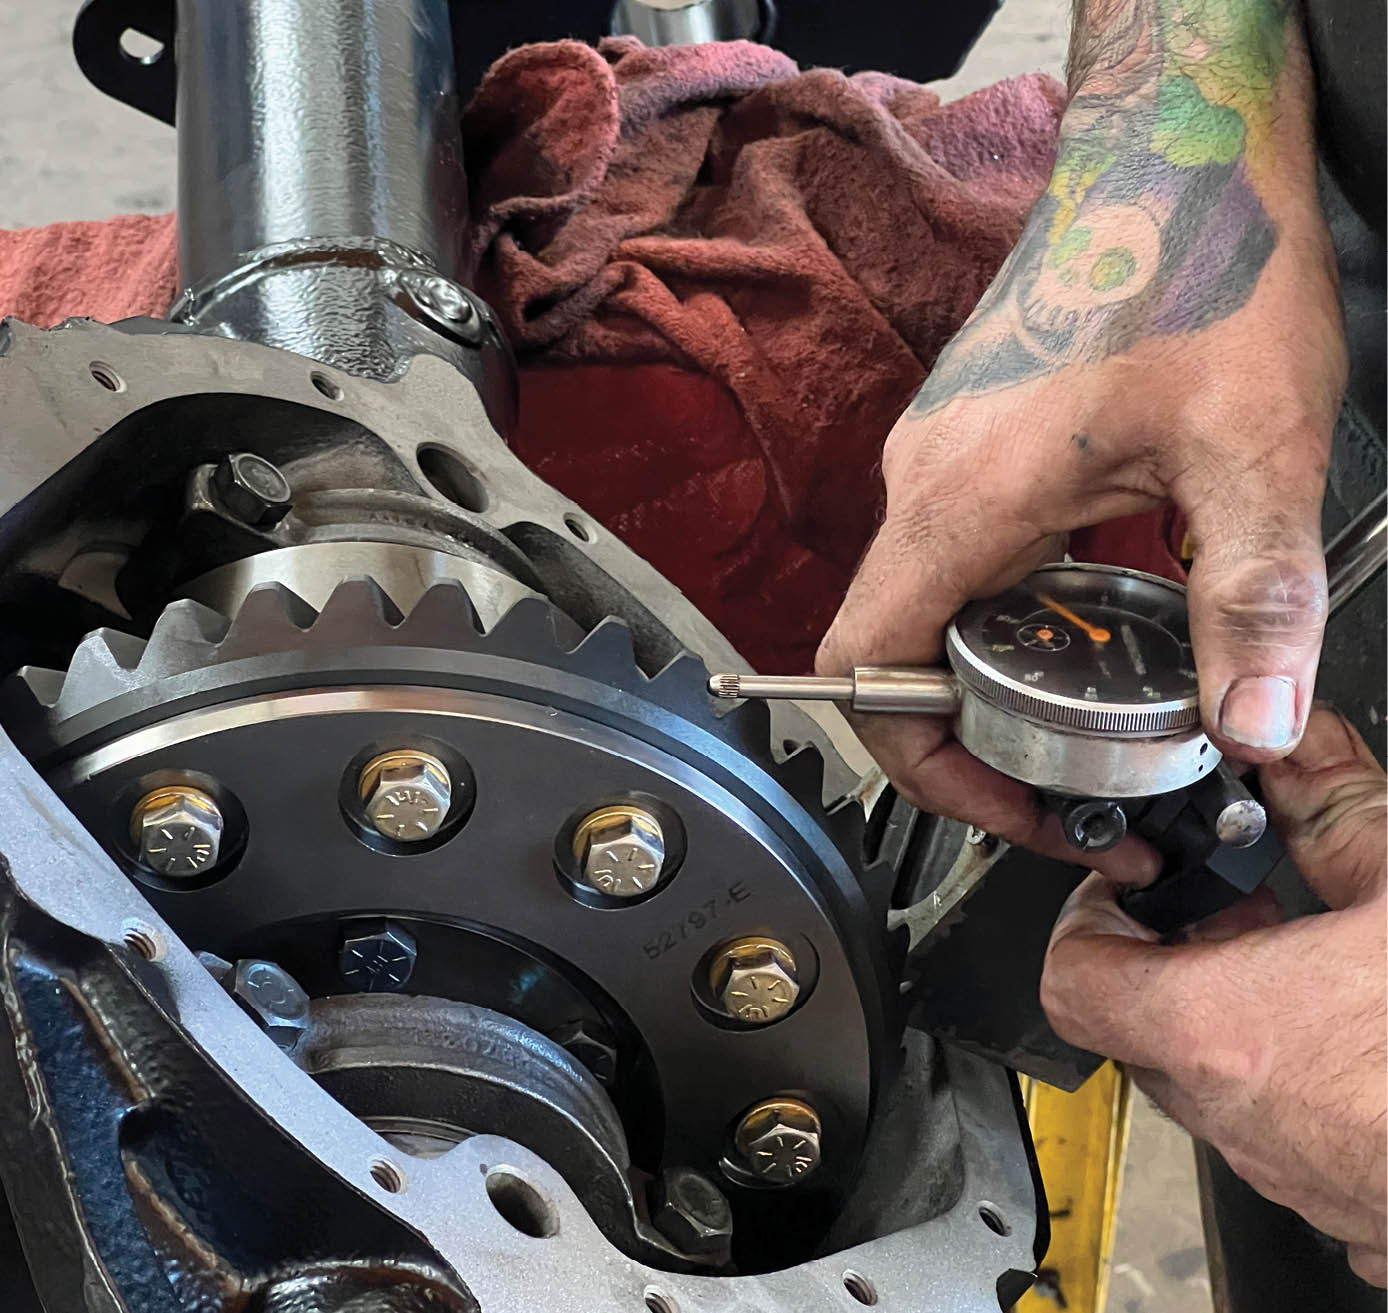
With the new Richmond gears and Eaton Detroit Truetrac in place, Gary went about adjusting the preload on the pinion and side bearing and then checked the gear pattern and backlash. Satisfied that all was as it should be, new wheel bearings, seals, and 5-on-5 bolt circle axles from CPP were slipped in place. When all was said and done our Chevy’s 12-bolt rearend was as good as new—in fact it was even better.

This Chevy 12-bolt rearend is easily identifiable by the dozen bolts holding on the rear cover; the ring gear is also secured with the same number of fasteners.
2. This Chevy 12-bolt rearend is easily identifiable by the dozen bolts holding on the rear cover; the ring gear is also secured with the same number of fasteners.
Although it’s impossible to see in this oily mess, there is a retainer bolt that holds the shaft for the pinion gears in place.
3. Although it’s impossible to see in this oily mess, there is a retainer bolt that holds the shaft for the pinion gears in place.
 Once the retainer bolt is removed the pinion shaft will slide out of the differential case.
4. Once the retainer bolt is removed the pinion shaft will slide out of the differential case.
With the pin (arrow) removed, the axles can be pushed into the housing to remove the clips that hold them in place.

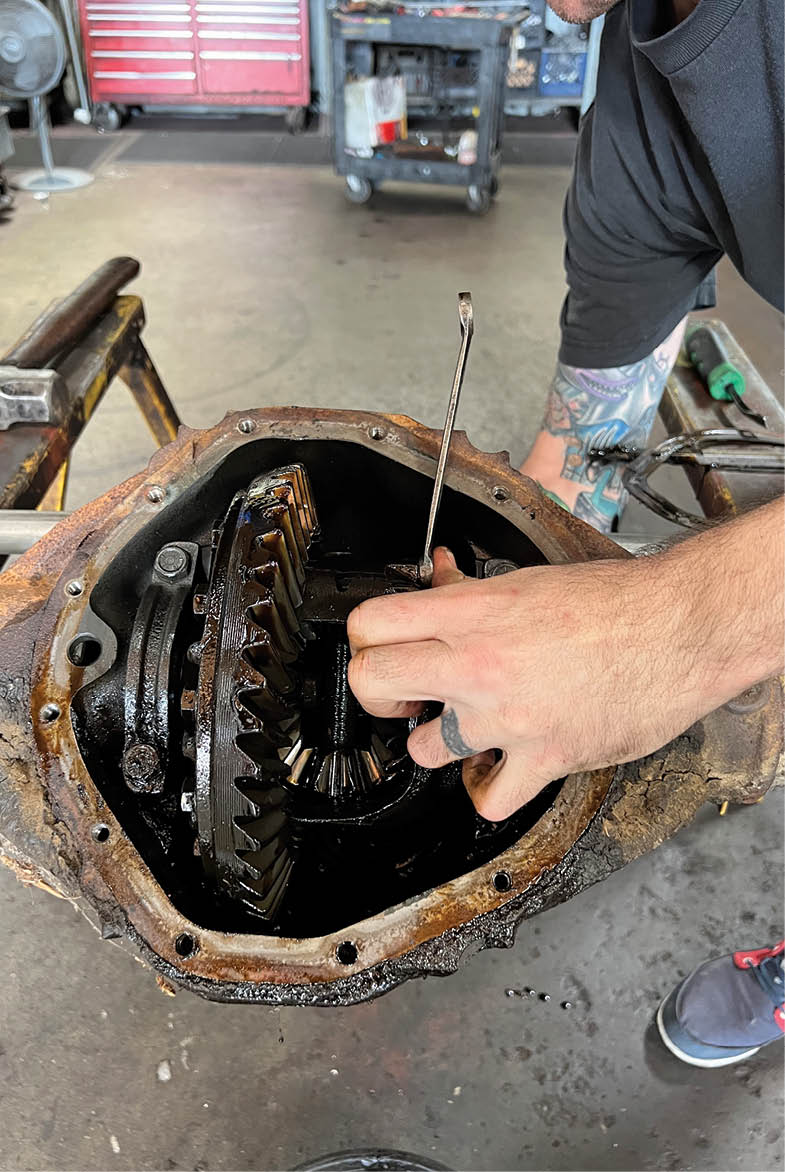
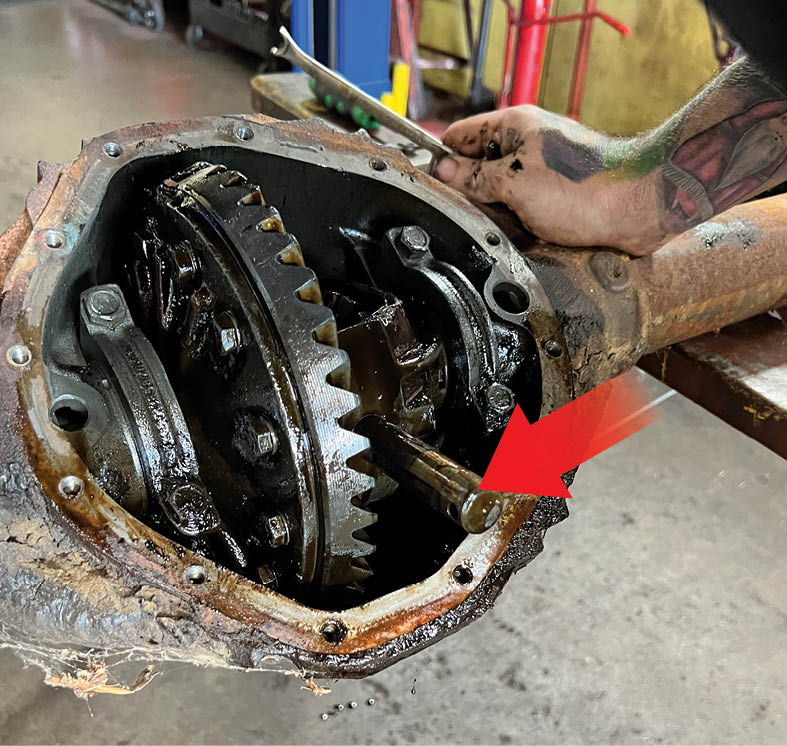
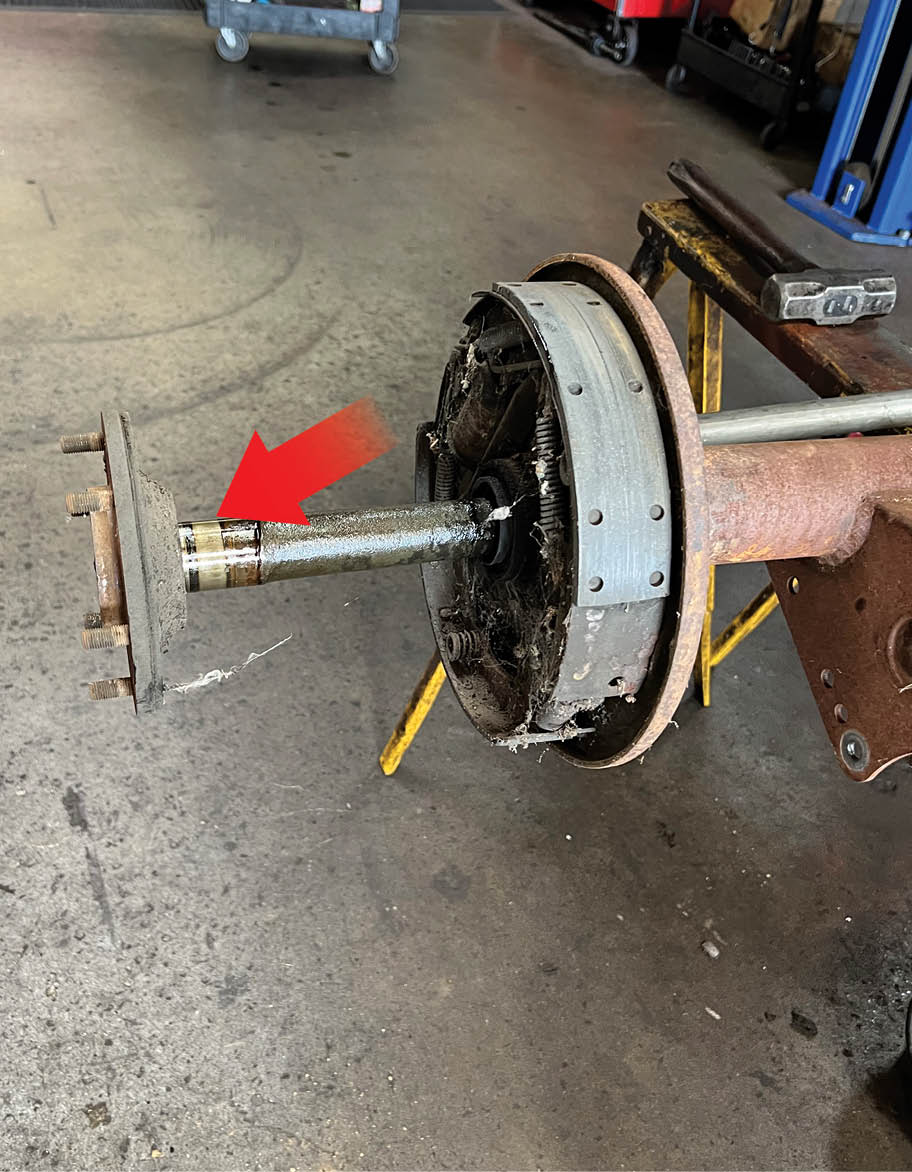
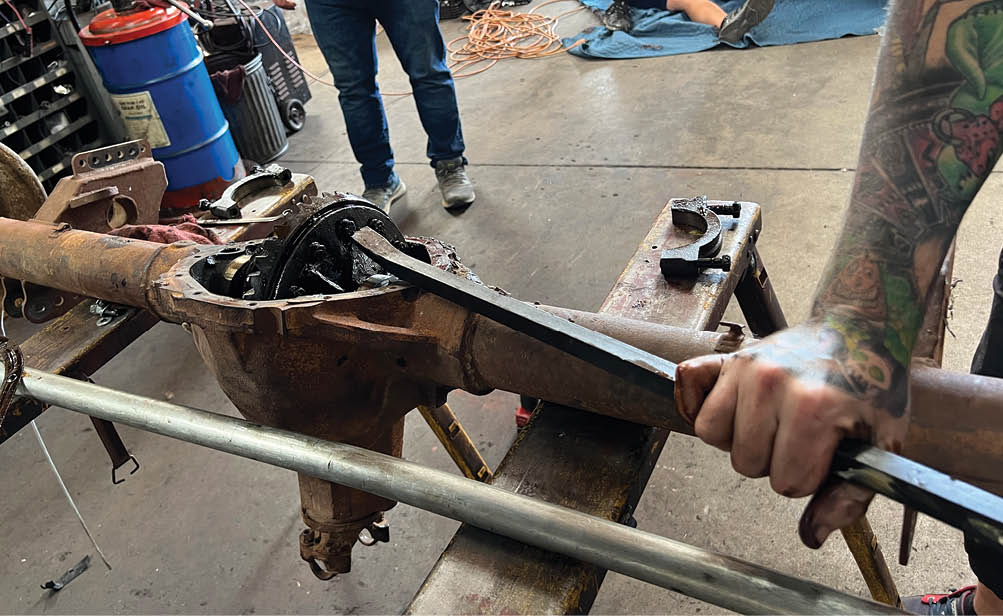
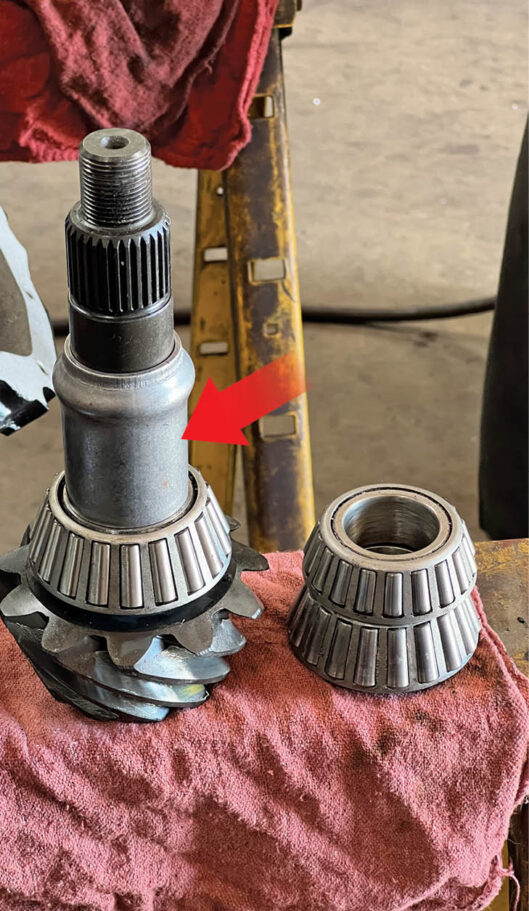
5. With the pin (arrow) removed, the axles can be pushed into the housing to remove the clips that hold them in place.

Here one of the six-lug axles is being removed. These rearends use roller bearings that ride directly on the axle (arrow) as there is no inner bearing race.
6. Here one of the six-lug axles is being removed. These rearends use roller bearings that ride directly on the axle (arrow) as there is no inner bearing race.
This is a typical ’63-64 axle with 17 splines. The groove on the end (arrow) is for the clip that holds the axle into the differential housing.
7. This is a typical ’63-64 axle with 17 splines. The groove on the end (arrow) is for the clip that holds the axle into the differential housing.
Before removing the bearing caps they were marked left and right to identify their location in the housing.
8. Before removing the bearing caps they were marked left and right to identify their location in the housing.
With the bearing caps removed, the differential assembly was pried out of the case. Gary kept track of the bearing shims used on each side of the differential so they could be used during reassembly.
9. With the bearing caps removed, the differential assembly was pried out of the case. Gary kept track of the bearing shims used on each side of the differential so they could be used during reassembly.
The pinion is removed by taking o  the nut that retains the driveshaft yoke. Somewhat surprisingly the pinion seal did not appear to be leaking, which is a common condition.
10. The pinion is removed by taking o  the nut that retains the driveshaft yoke. Somewhat surprisingly the pinion seal did not appear to be leaking, which is a common condition.
During disassembly Gary spent a considerable amount of time to make sure all the gear oil and debris were out of the housing prior to sending it to powdercoat.
11. During disassembly Gary spent a considerable amount of time to make sure all the gear oil and debris were out of the housing prior to sending it to powdercoat.
From the factory, the axle tubes are pressed into the centersection and secured with rosette welds, all of which showed signs of leaking.
12. From the factory, the axle tubes are pressed into the centersection and secured with rosette welds, all of which showed signs of leaking.
In order to prevent leaks and to enhance strength, J&S routinely welds the axle tubes to the centersection. Before any welding is done the tubes and axles are ground to expose clean metal.
13. In order to prevent leaks and to enhance strength, J&S routinely welds the axle tubes to the centersection. Before any welding is done the tubes and axles are ground to expose clean metal.
To prevent warping, the axle tube’s welding is done with short beads while skipping around the circumference and going from one side to the other.
14. To prevent warping, the axle tube’s welding is done with short beads while skipping around the circumference and going from one side to the other.
Here the tubes have been welded to the centersection and all the rosette welds have been gone over.
15. Here the tubes have been welded to the centersection and all the rosette welds have been gone over.
When the housing was returned from powdercoating more time was spent cleaning inside the axle tubes using a brush attached to a drill. An amazing amount of debris was removed.
16. When the housing was returned from powdercoating more time was spent cleaning inside the axle tubes using a brush attached to a drill. An amazing amount of debris was removed.
To ensure that the housing was not warped during welding, the alignment is checked with a fixture that has a large-diameter bar that fits through precision collars in the axle ends and the differential bearing caps.
17. To ensure that the housing was not warped during welding, the alignment is checked with a fixture that has a large-diameter bar that fits through precision collars in the axle ends and the differential bearing caps.
Gary used a hydraulic press to install new bearings on the Eaton Detroit limited-slip housing. This unit will accept the CPP 30-spline axles.
18. Gary used a hydraulic press to install new bearings on the Eaton Detroit limited-slip housing. This unit will accept the CPP 30-spline axles.
After the bearings were pressed onto the differential the Richmond 3.73 ring gear was bolted in place using Loctite. Eaton recommends a petroleum/mineral-based GL-5 80W90 gear oil for all Truetrac differentials.
19. After the bearings were pressed onto the differential the Richmond 3.73 ring gear was bolted in place using Loctite. Eaton recommends a petroleum/mineral-based GL-5 80W90 gear oil for all Truetrac differentials.
Here the press is again being used to install a new bearing on the Richmond pinion gear.
20. Here the press is again being used to install a new bearing on the Richmond pinion gear.
Between the two pinion bearings is a crush sleeve (arrow). It is used to establish the preload on the bearing.
21. Between the two pinion bearings is a crush sleeve (arrow). It is used to establish the preload on the bearing.
During installation of the U-joint flange the pinion nut is tightened, crushing the sleeve until the proper bearing preload is established.
22. During installation of the U-joint flange the pinion nut is tightened, crushing the sleeve until the proper bearing preload is established.
When Gary installed the carrier and the pinion, he used the shims he took off the original locations for a starting point.
23. When Gary installed the carrier and the pinion, he used the shims he took off the original locations for a starting point.
To ensure the gears had the proper backlash Gary used grease to see the gear pattern. In order to get things perfect he changed shims multiple times.
24. To ensure the gears had the proper backlash Gary used grease to see the gear pattern. In order to get things perfect he changed shims multiple times.
To check backlash or the clearance between the ring-and-pinion, a dial indicator is used.
25. To check backlash or the clearance between the ring-and-pinion, a dial indicator is used.
The new CPP 30-spline axles accept ’71-72 five-lug brake drums. This lug bolt pattern offers many more custom wheel alternatives than the earlier sixbolt axles.
26. The new CPP 30-spline axles accept ’71-72 five-lug brake drums. This lug bolt pattern offers many more custom wheel alternatives than the earlier sixbolt axles.
 SOURCES
CLASSIC PERFORMANCE PRODUCTS
(800) 760-7438
classicperform.com
J&S GEAR
(714) 841-4545
jandsgears.com
Summit Racing EQUIPMENT
(800) 230-3030
summitracing.com