CTP Tech
InTheGarageMedia.com
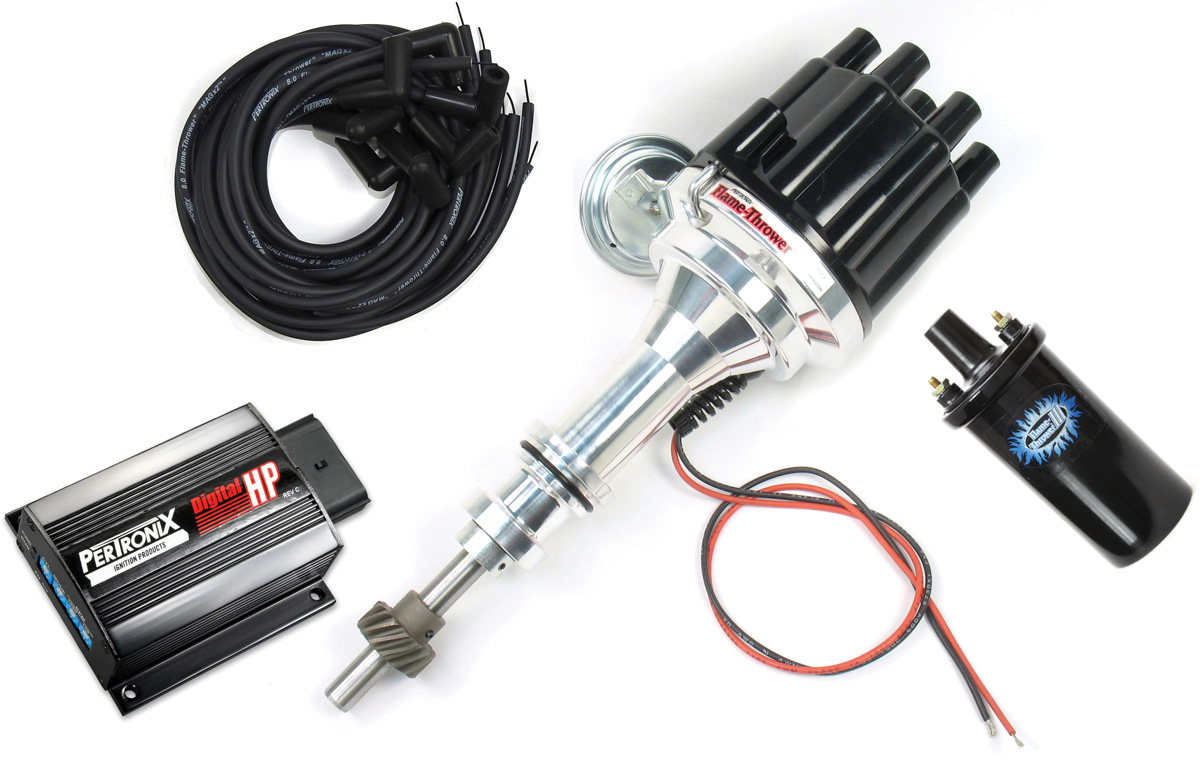
components for installing in a Ford
These are the components we are installing in our Ford; the same products are available for Mopar and GM trucks as well.
Modern Technology for an Old Ignition
Updating Ford’s Duraspark with a PerTronix Flamer-Thrower
BY Don Lindfors Photography by THE AUTHOR
B

ack in the early 1900s, Charles Kettering invented what we now commonly call the Points Distributor Ignition System. It was a pretty good design that served the automotive industry well for over 60 years. But by the ’70s, engine performance gains and tightening emissions standards were revealing the shortcomings of the points ignition system. Higher rpm caused point bounce, which messed with timing, leaner combustion mixtures required more voltage to fire, and point wear was a constant source of maintenance, particularly in these newer cars where degradation of the points caused misfires. The Big Three in Detroit were all busy reinventing the basic system with electronic ignition replacements. Mopar and Ford both introduced their solutions in 1972, with GM’s ubiquitous HEI following in 1974. All three work on a similar principle of replacing the points, which are essentially a mechanical switch with a reluctor and a pickup that senses the reluctors poles and an electronic module. The familiar parts from the points system are the distributor itself (although in a different configuration) and the ignition coil. The advantage of the electronics is much more accurate timing, hotter spark, and, of course, no maintenance, except for the cap and rotor.

A few years later, the engineers at what would become PerTronix, launched the first commercially successful conversion kit to upgrade points distributors to electronic. The Ignitor system gained popularity and they have made many improvements to the original version with three module options available now and over 4 million units in use. As these old distributors became worn and unserviceable, PerTronix saw the need for new replacement distributors with the electronics included ready to drop in your motor. These Flame-Thrower distributors have been very popular with classic truck owners and are offered in Billet versions as well as their Cast, Stock Look series.

Lately these Plug n’ Play distributors have found favor in another part of the market as replacements for the factory electronic systems of the ’70s and later. Although all three brands had good systems, they are now up to 50 years old and are not as reliable as they once were. In addition, PerTronix has taken advantage of advancements in electronics for better spark through adaptive dwell and options like Multi Spark and built-in rev limiters.

Our ’76 F-100 project has a 302 with the Duraspark II system. The distributor is original to the truck and at 45 years old was showing some wear. The ignition box (or module) was a Chinese version with a suspect spare that was tossed under the seat. On top of that, the wiring that runs along the intake manifold was getting quite brittle. After talking to Garrett at PerTronix we decided to go all-out with a replacement ignition system. The distributor is a billet Flame-Thrower with the Ignitor II module. This module uses newer technology than the original Ignitor but does not include the Multi Spark or rev limiter that the Ignitor III offers. PerTronix had recently released their Digital HP ignition box and Garrett recommended this for the ultimate upgrade. This unit is a CD box that increases the voltage output capability of the coil and has the Multi Spark and digital rev limiter functions. The digital rev limiter is more accurate than older analog versions and has adjustment dials instead of needing chips. It is a three-step limiter that can be programmed for Launch Control, Burn Out Limit, and Fatal Over Rev Protection. This versatile little box also has other features, including a programmable output that can be used for a shift light, Nitrous activation, or other rpm-activated devices. The adjustable start retard is perfect for high-compression or hard-starting motors.

The PerTronix systems will work in all classic trucks that use a distributor and you can choose from a simple distributor and coil replacement (the coil needs to be matched to the Ignitor) up through the add-on Digital HP like we are installing here. While we were at it, we added a set of 8mm Flame-Thrower spark plug wires to round out the system. With three different levels of modules, two styles of distributors, and the optional CD box, there is something for every classic truck owner. This is an easy couple-hour conversion that will add power and reliability to your hauler with Mopar and GM truck installations being very similar to the Ford shown here.
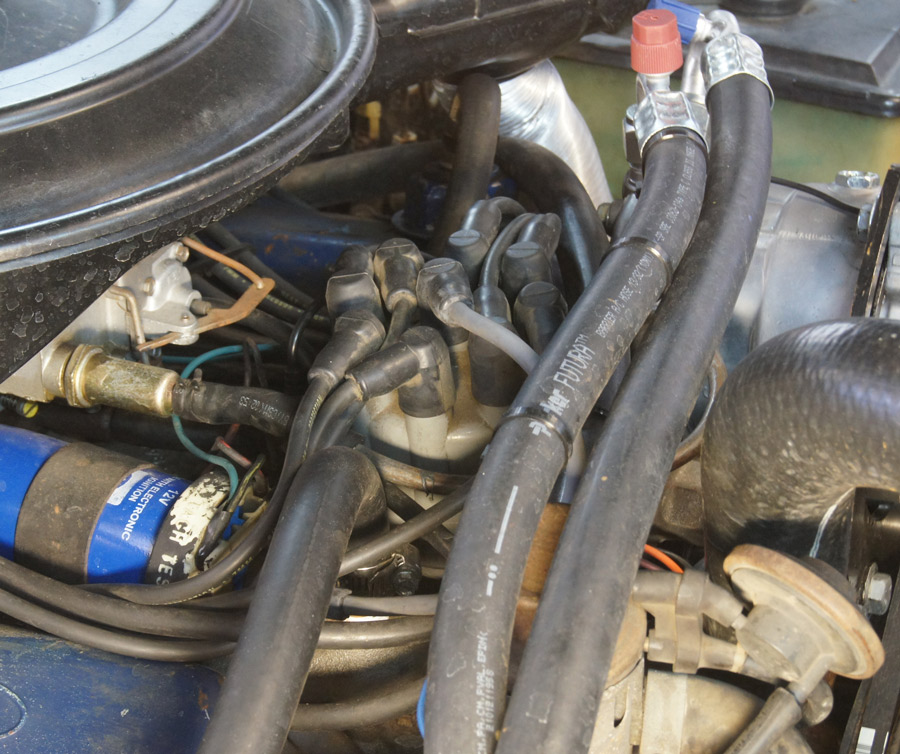
old Duraspark distributor is buried between the A/C lines, water hoses, carburetor, and smog devices
1. Our old Duraspark distributor is buried between the A/C lines, water hoses, carburetor, and smog devices. You can also see the ignition coil mounted to the intake manifold.
marking the number one plug wire location on the distributor body
2. After marking the number one plug wire location on the distributor body we removed the distributor cap and rotated the engine to align the rotor with the mark so that the new distributor could be dropped in with the proper timing. We then removed the old distributor.
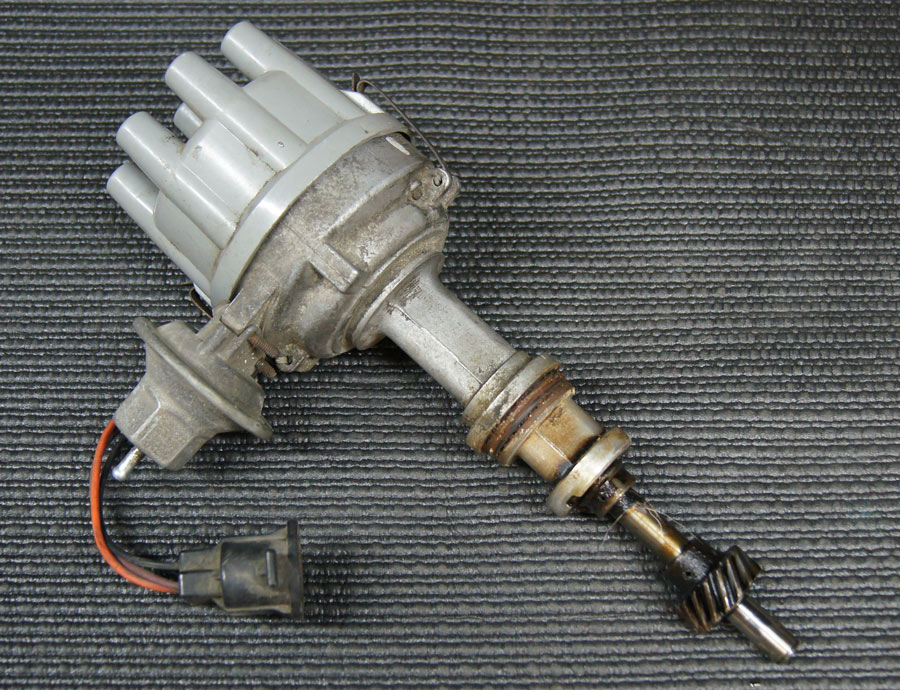
Duraspark distributor is a bit crusty after 45 years
3. The Duraspark distributor is a bit crusty after 45 years and had some play in the shaft. We could have used the Duraspark distributor to trigger the CDI box, but the wear made it time for a replacement.
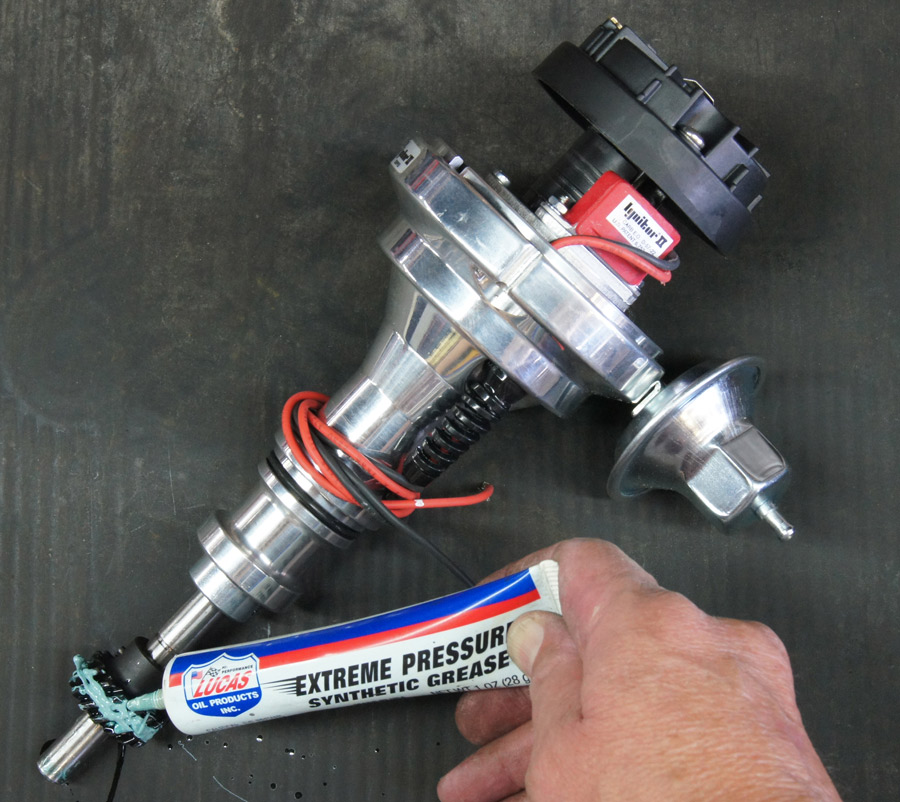
PerTronix Flame-Thrower distributor
4. Before installing the new PerTronix Flame-Thrower distributor we lubed the gear with Lucas extreme pressure grease to ensure safe break-in. The PerTronix gears are compatible with both flat-tappet and factory-style roller cams.
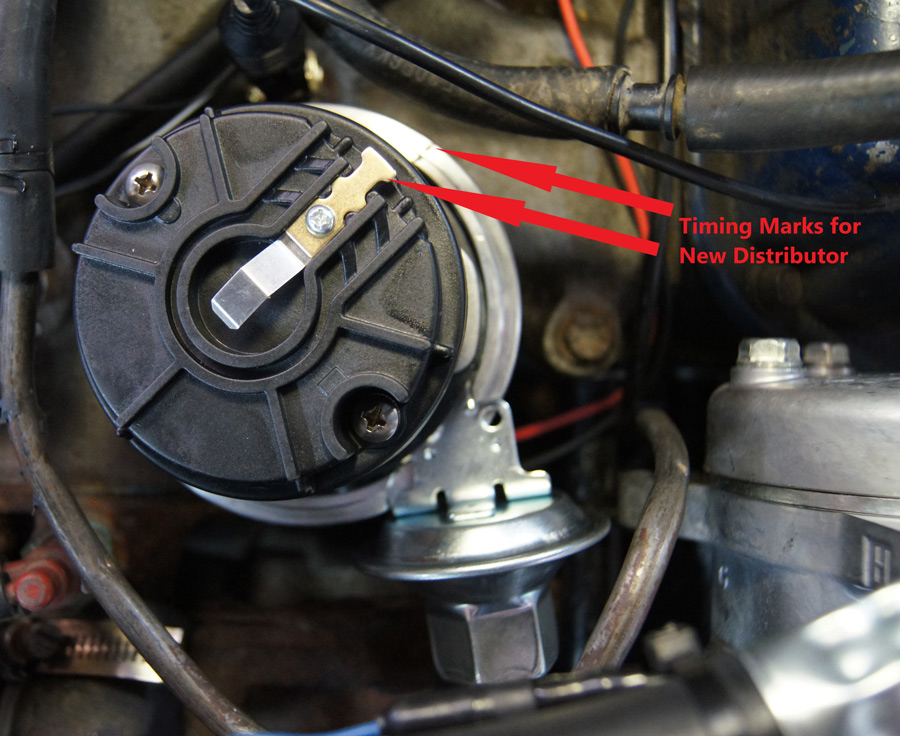
pre-marked the new distributor for rotor alignment
5. We pre-marked the new distributor for rotor alignment based off the old distributor and dropped it in the hole, making sure it engaged the oil pump driveshaft. The shaft will turn a bit as it engages the cam gear and it most likely will not drop quite all the way in due to oil pump shaft engagement. A little rotation of the motor and it should drop the rest of the way in.
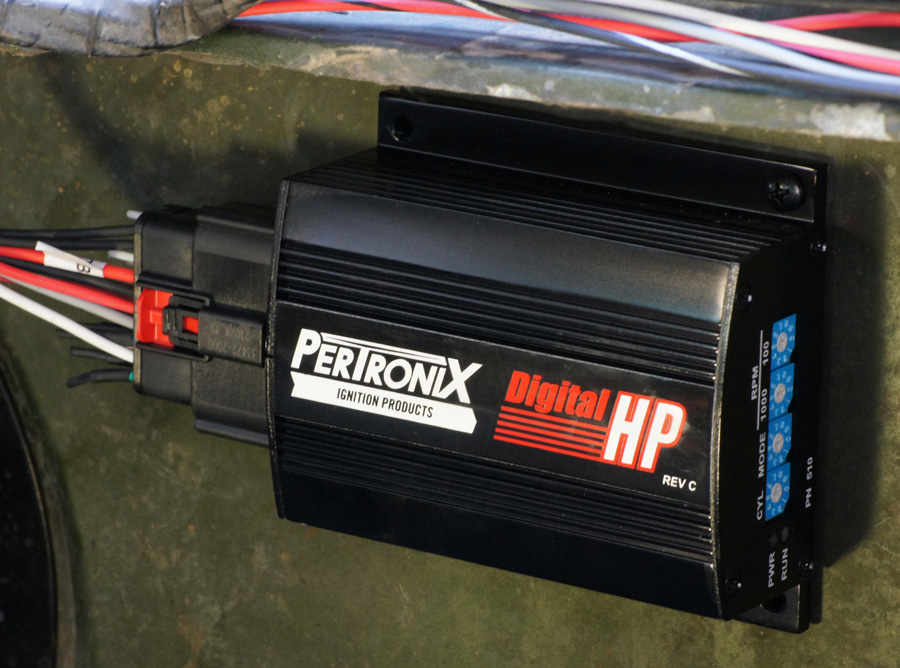
convenient spot on the firewall for the Digital HP CDI box and mounted it with the included screws
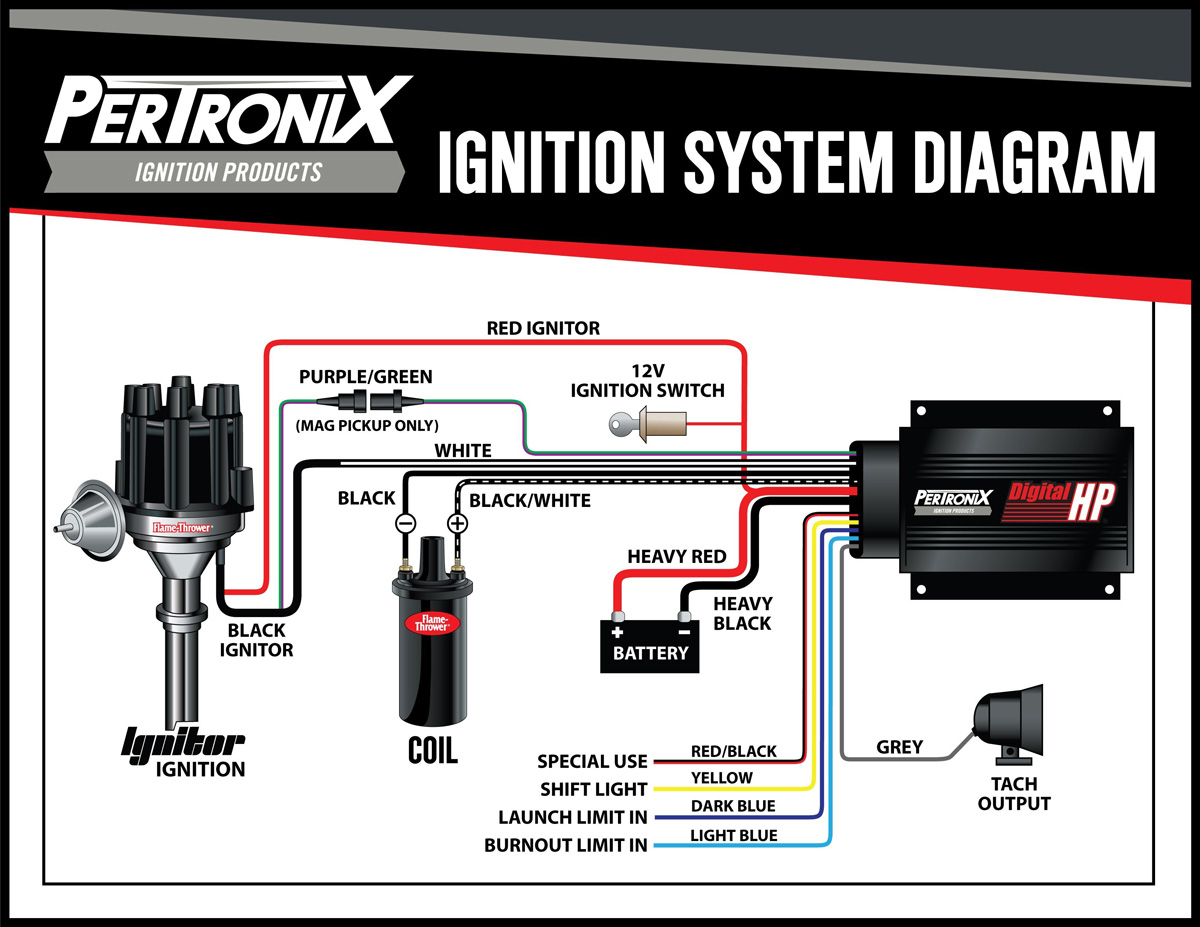
6. We found a convenient spot on the firewall for the Digital HP CDI box and mounted it with the included screws. Make sure you pick a spot where you can see and reach the adjustment dials. The wiring harness snaps in and has a lock tab to keep it from coming loose. There are only a few wires needed to make the system work. Positive and negative wires that go directly to the battery, two wires to the coil, and two to the distributor (one of which gets tied to keyed power), and in our case a lead to the tachometer.
PerTronix wiring diagram
7. PerTronix includes this wiring diagram with the kit and it is also available at pertronixbrands.com.
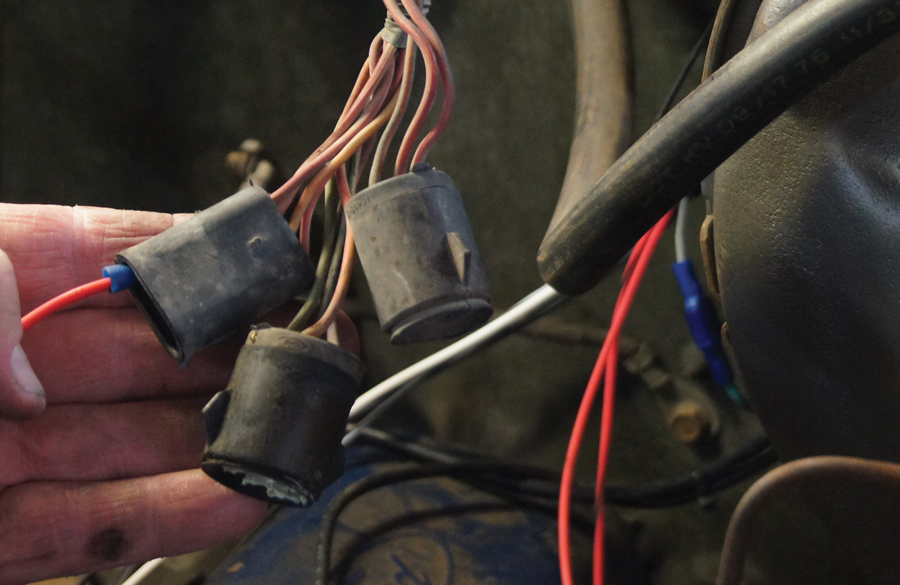
three plugs went to a harness that laid on the intake manifold and went to the distributor, coil, and water/oil gauge senders
8. These three plugs went to a harness that laid on the intake manifold and went to the distributor, coil, and water/oil gauge senders. Since we installed Dakota Digital gauges in a previous story that has its own wiring, we removed all three plugs and the harness. Power for the new ignition is the single bullet connector in the flat, three-wire OE plug seen here.
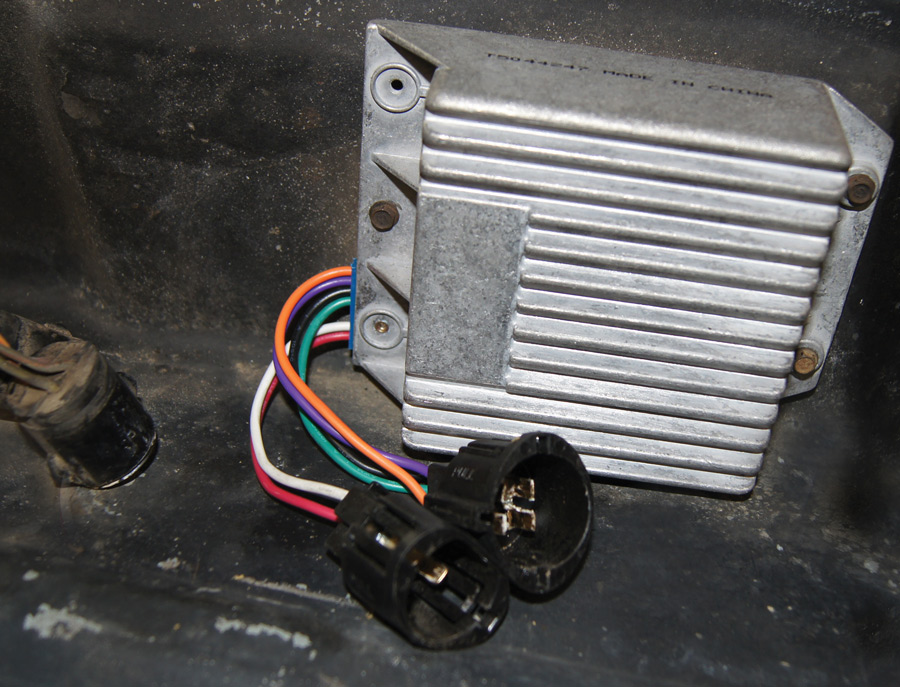
suspect Duraspark box on the inner fender
9. This is the suspect Duraspark box on the inner fender. All we had to do was unplug it and later remove it from the truck; the plugs are no longer used.
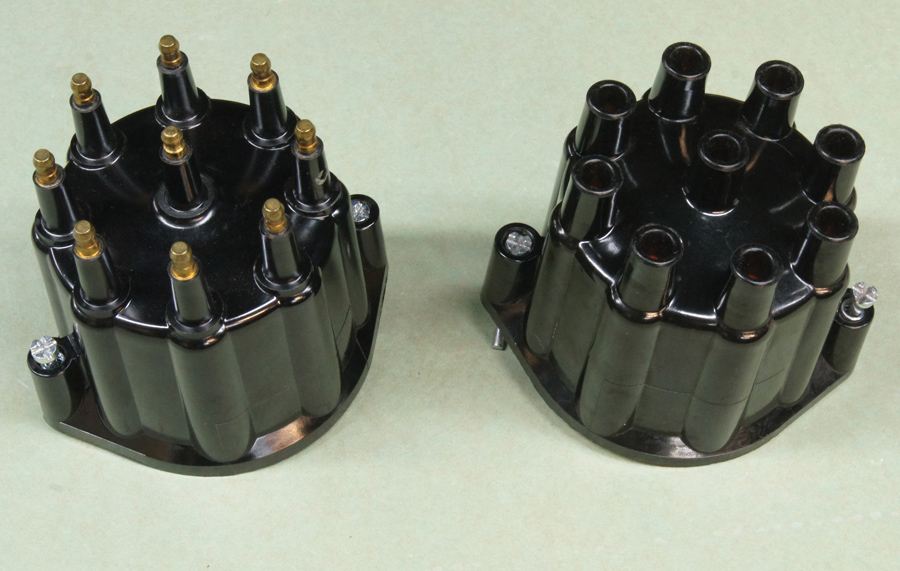
Flame-Thrower distributors
10. The Flame-Thrower distributors are available with the old-style female plug wire terminals or the newer male-style terminals, which offer more positive engagement. We went with the male style since we were doing new plug wires as well.
plug wire
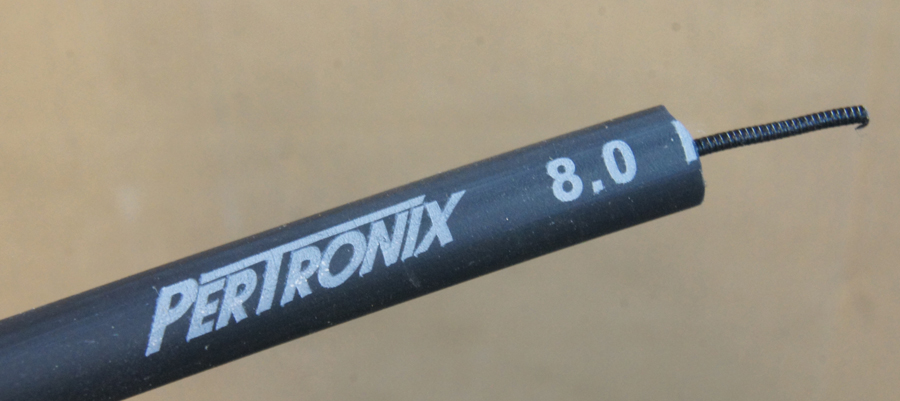
11. The first step on the plug wires is to figure the length that is appropriate for each wire, cut it, and then strip the outer insulation, leaving about an inch of the center core.
wire cutter being used
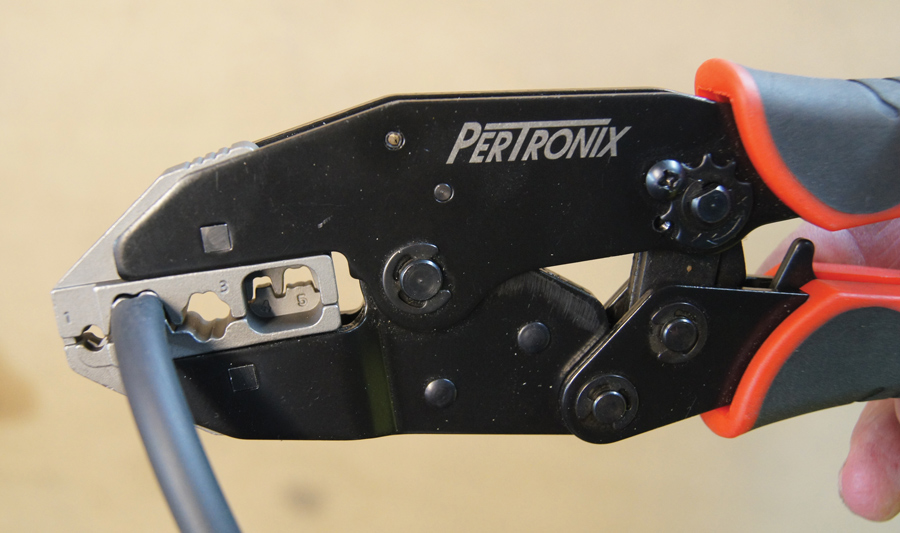
12. PerTronix offers these positive latching wire crimpers. After folding the exposed inner core between the insulation and the terminal the end is then crimped on.
proper professional-grade crimp
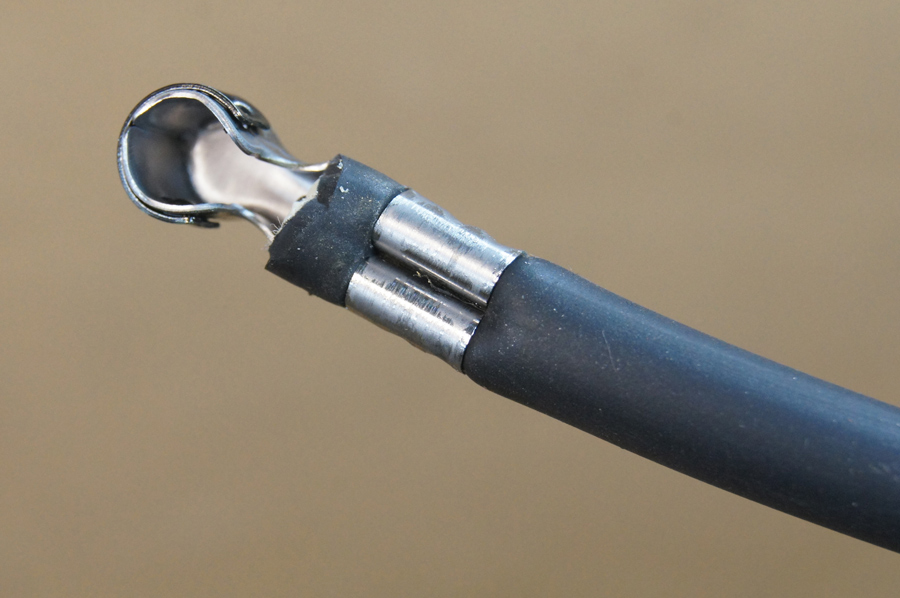
13. This is what a proper professional-grade crimp will look like—seven more to go.
boot is then slipped over the terminal end
14. The boot is then slipped over the terminal end using a little dielectric grease to make it easier to slip on.
all the plug wires are installed
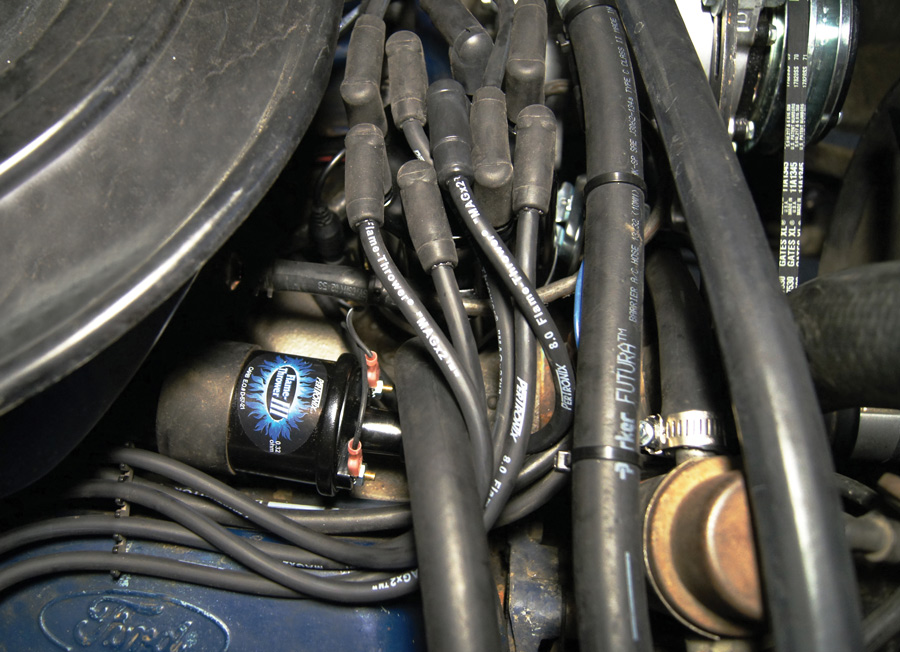
15. Here all the plug wires are installed in the cap and the Flame-Thrower coil is mounted and wired to the CD box.
spark plug end of the wires are offered in straight, 90-, or 45-degree ends
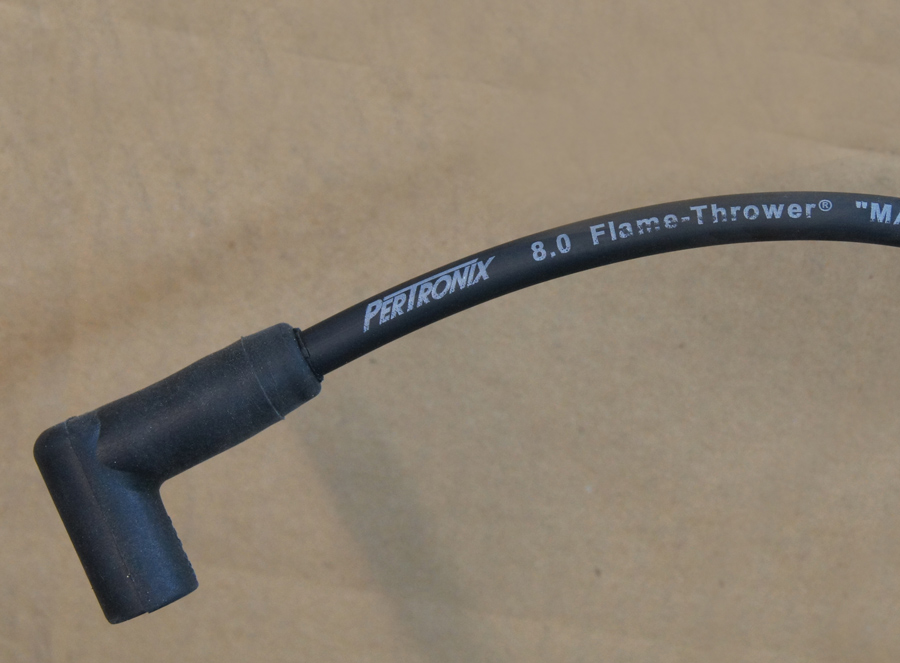
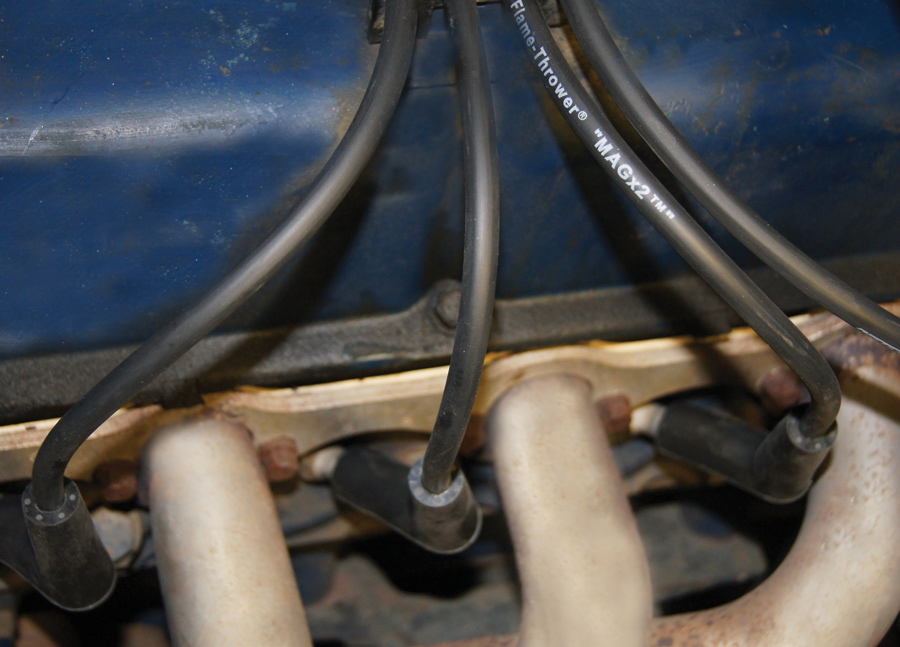
16. The spark plug end of the wires are offered in straight, 90-, or 45-degree ends. We used the 45-degree to clear our headers (that desperately need to be re-ceramic coated). We were now ready to start it up, set the timing, and go for a drive. It started quicker than before and idled and ran better than ever—a great improvement for an afternoon’s work.
PerTronix Performance Brands
(909) 599-5955
pertronixbrands.com